To get started with adding the Skillate theme with your WordPress site, you need to follow the below step by step instructions.
How to Install
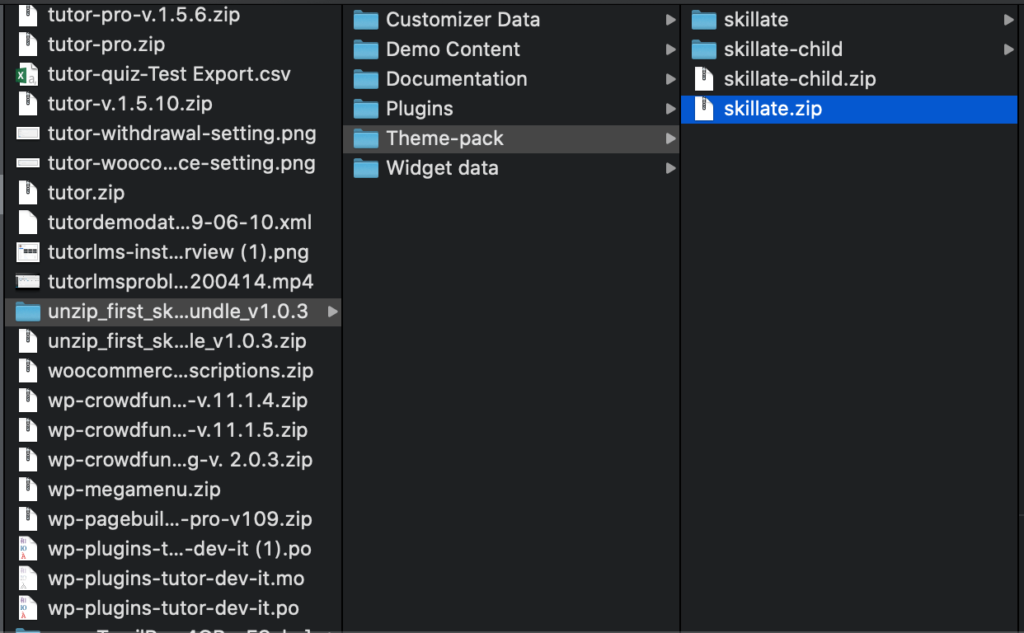
- Download the theme file from themeum.com/dashboard
- Unzip the downloaded file.
- You will find the theme inside the Theme Pack Folder. You have to upload the skillate.zip file to your WordPress installation.
After the successful installation of the theme click on the Activate button and enjoy the theme features. After activating, this theme will be used for the whole site instead of the default WordPress theme.
Adding License
Upon purchasing the theme from Themeum website you were given a license key to use with this theme. Check out this forum post if you can’t find the license key. To insert the key, go to Dashboard > Skillate Options > License.
Essential Plugins and Installation
For using all features of Skillate, you need to install and activate all required plugins. All essential plugins are included in the Skillate theme. Just after activating the theme you would see a notification that asks you to install required plugins for this theme. Click on “Begin installing plugins” and wait until all required plugins are installed.
Essential plugins are the following:
- Tutor LMS
- Qubely
- Skillate Core
- Skillate Demo Importer
- WooCommerce / EDD
You can also install the above essential plugins in 2 easy steps.
Step 1: Go to Dashboard > Appearance > Skillate Setup
The setup wizard will automatically install all the necessary plugins. Along with the other components.
Note: In case any of the plugins fail to install automatically, you can manually install them. The plugin zip files are in the “unzip_first_skillate > Plugin” folder.
Step 2: Then click on the Activate link under each plugin title and enjoy these plugins.
Recommended Plugins
Tutor LMS: Skillate theme is powered by the most advanced WordPress LMS plugin Tutor LMS, all features related to building an education platform is powered by the plugin.
Qubely: You also need to download the Qubely, a full-fledged Gutenberg block toolkit. You can find it from the official WordPress plugin directory.
Skillate Demo Importer: It is advised to import the demo content to understand the theme functionalities properly. Please note: demo content is there only for demonstration purposes.
WooCommerce: It is required to use the WooCommerce plugin in order to provide purchase and order management functionality.
Skillate Core: The Skillate Core is a required plugin. It has all the core features and settings of the theme, like the post type, all custom shortcodes, widgets, etc.
Easy Setup Wizard Option
Installing the essential components, setting up your theme, and importing the demo content is all done by a simple step by step guided setup wizard.
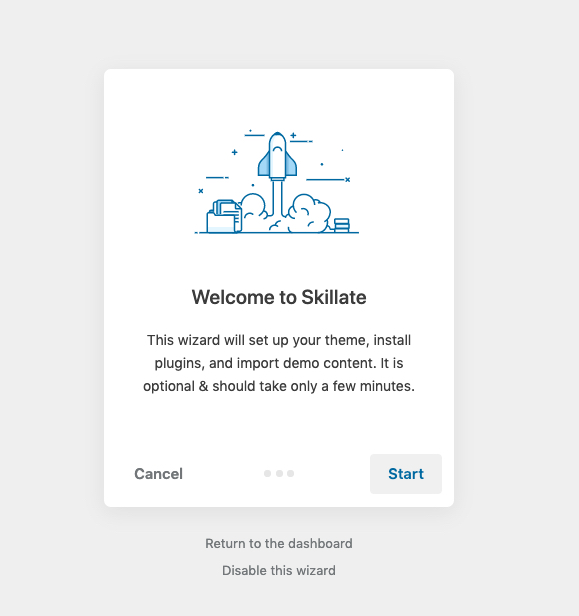
The setup wizard will automatically install the necessary plugins in the first step, in the next step it will import the demo content to your site and when you are finally done your site will be ready.
If you want to go to the setup wizard, later on, you will find it in the
wp-admin → Appearance → Skillate Setup
You can go through the setup wizard again or go to the necessary steps that you need.
If you’ve already used the setup wizard, then you no longer need to import the demo manually. In case you don’t like to use the setup wizard demo importer, then you can follow the next section to import data manually.
Import Demo Manually
Import Sample Data: If you want to go with the demo data which is available on the theme, then you’d need to import the sample data. To import the sample data manually first, go to the left sidebar (Dashboard), then choose Tools > Import > WordPress > “Install Now” (from the list), once you’ve clicked “Install Now” you’ll see the button changed to “Run Importer” click on it now. Then you will see the “Import WordPress” option which allows you to upload a .xml file from the Demo Content folder (file name: demo-content.xml) found inside the extracted folder that you get from the download theme package (a zip file).
Once you imported the demo content, you’ll be presented with another screen where you’d need to select the user and checkmark download attachment, then finally click “Submit”. Check out the following screenshot.
N.B: Upon importing demo manually you need to set up the following things.
Menu Settings: It’s an important part of the Skillate theme Installation process. First, you need to set your menu for the Primary Menu location. Go to Dashboard > Appearance > Menus, then click on Manage Locations and select/create your menu for the Primary Menu location. You can follow the below screenshot.
Set Static Home Page (Required)
WordPress shows the latest blog posts by default on the front page. If you want to make it look like the demo Skillate site, then you need to set a static Home Page. To do so, navigate to Dashboard > Settings > Reading. On that page, choose “A static page” from the “Your homepage displays” section. From the drop-down menu, select the page Home for Homepage and the page Blog for the Posts page.
Setup Permalink (Required)
Make sure to configure the permalink structure. By default, WordPress generates web URLs having question marks and lots of numbers in them; however, WordPress offers you the ability to create a custom URL structure for your permalinks and archives. This can improve the readability, usability, and forward-compatibility of your links.
From the WP admin panel go to the following path Settings > Permalink then select “Post name” (or any other depending on your choice) as the permalink structure for your WordPress site.