The core features of WP Page Builder comes from the free plugin. It is the heart of the plugin and contains all the major functionalities. So, even if you have purchased the Pro version, you have to install the free version first. Because the Pro version only adds some extra features on top of the free one.
Installing the Free Version
- Go to your WordPress site dashboard
- Navigate to Plugins > Add New and search for “WP Page Builder”
- Now, install and activate the WP Page Builder plugin
Installing the Pro Version
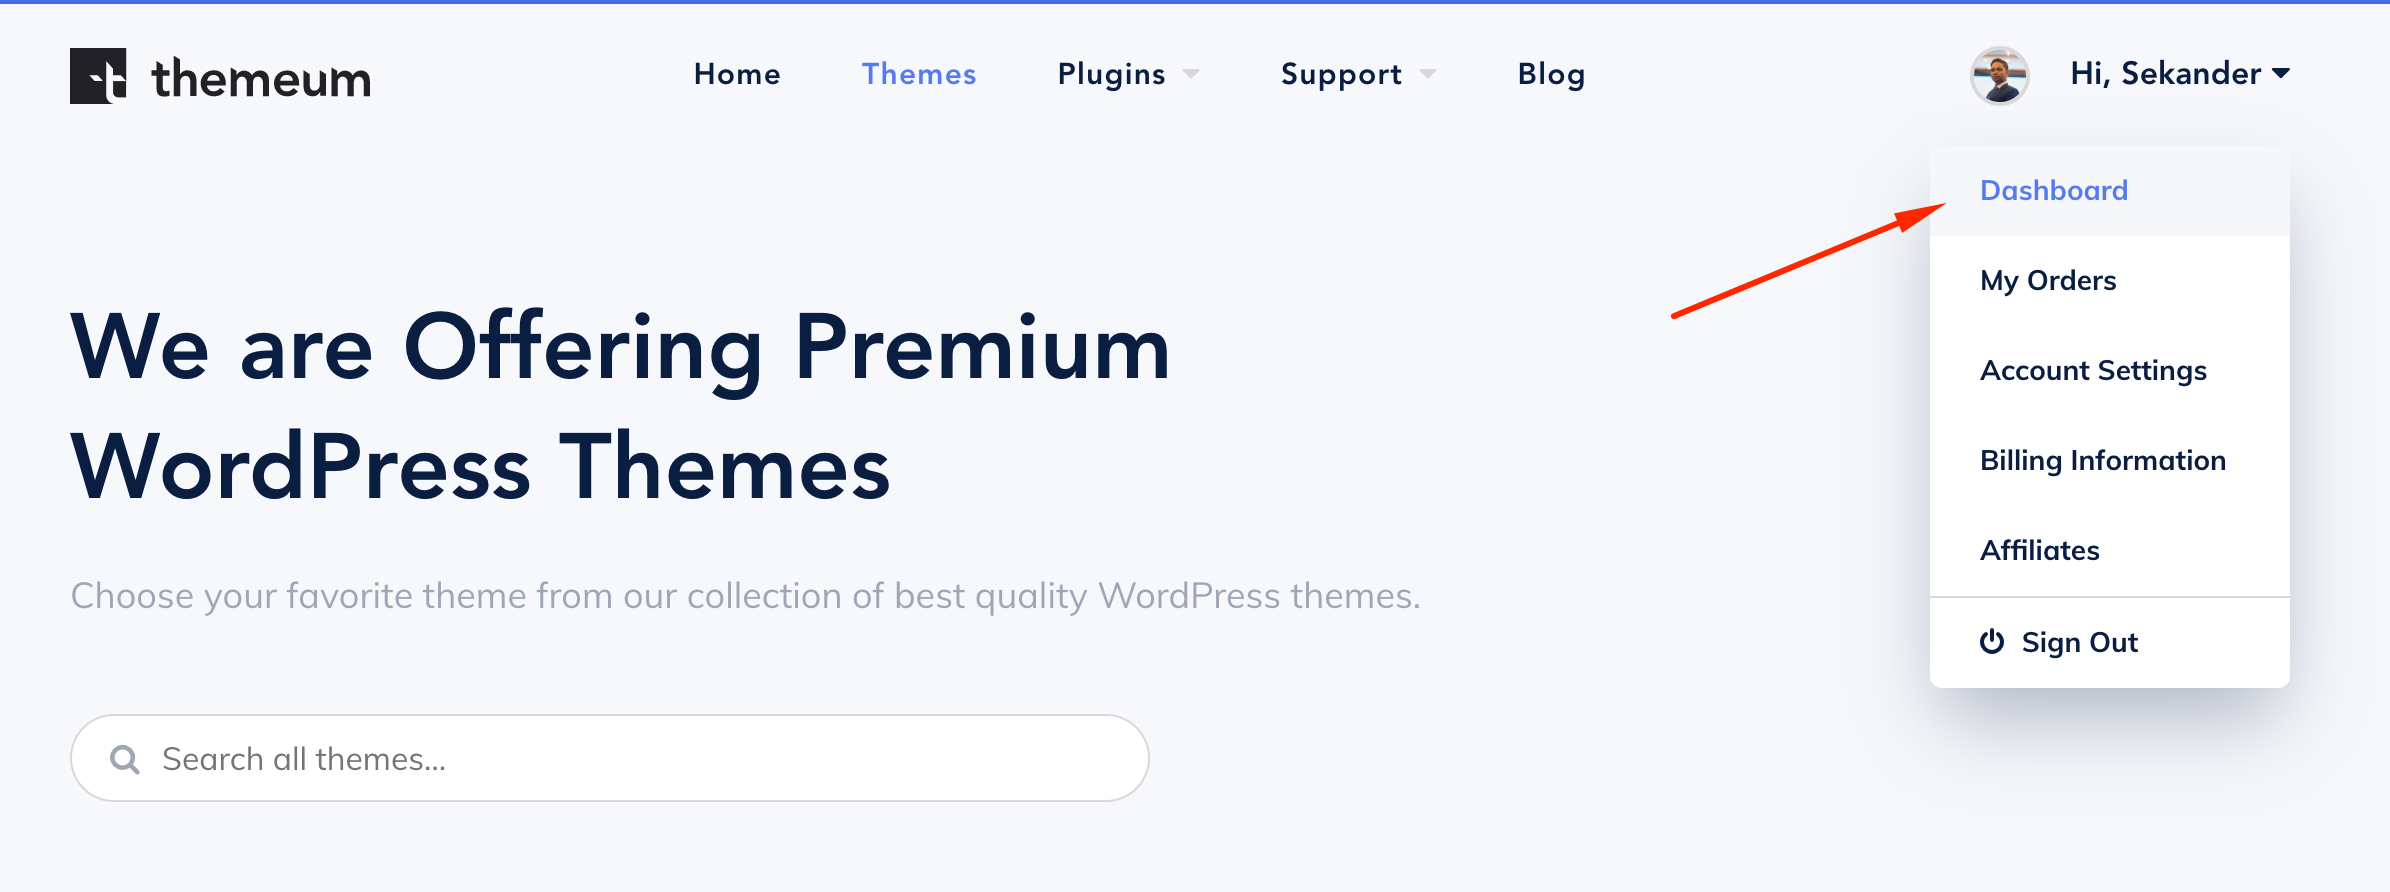
- Go to the Dashboard of Themeum.com. You can see your profile picture or initial on the top right corner of the site. Hover there and you will see the dashboard link on a dropdown. Click on that and you will find a list of all the purchased products.
- On the right side, there is a button to download the product. Click on that.
- Now go back to your WordPress Dashboard.
- Navigate to Plugins > Add New.
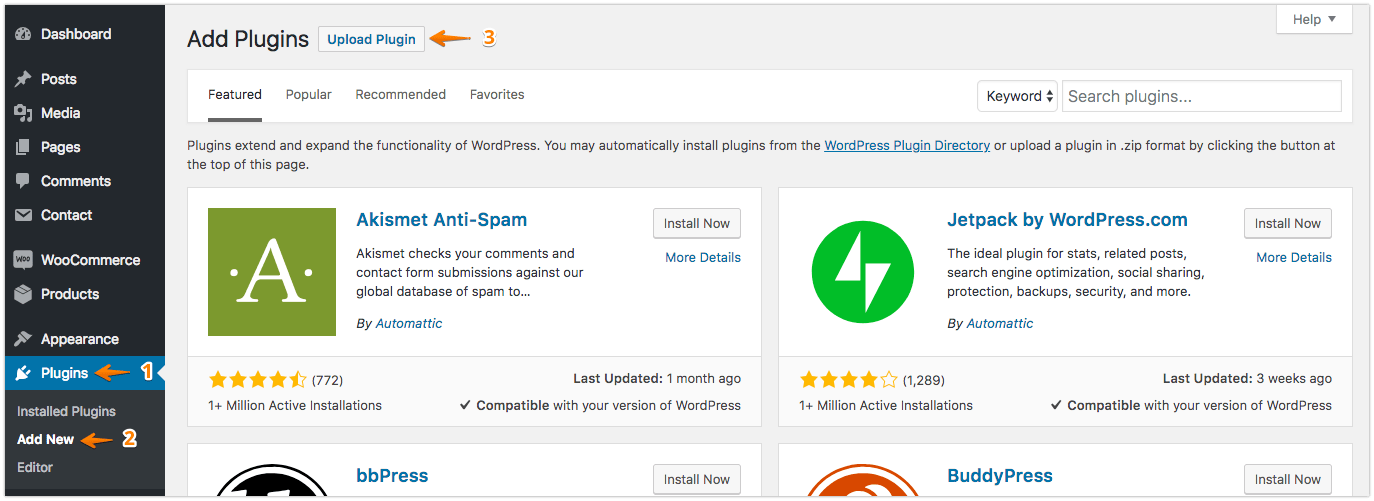
- On the top left corner, you will see a button named “Upload. Click on that.
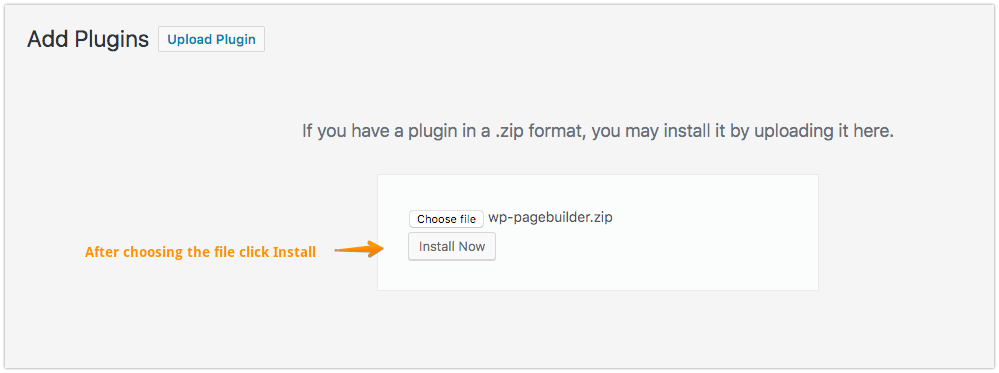
- Now you’ll get an upload form. Choose the ZIP file from your computer by clicking on “Browse” or just drag and drop it, then click on “Install Now”.
Update
If you are a paid user and have an active license key, you will get the update notification and will be able to update right from your WordPress dashboard. Or, you can manually download the update from the Themeum website.
If you are a free user, you can update WP Page Builder from the WordPress plugin directory.
Activating License
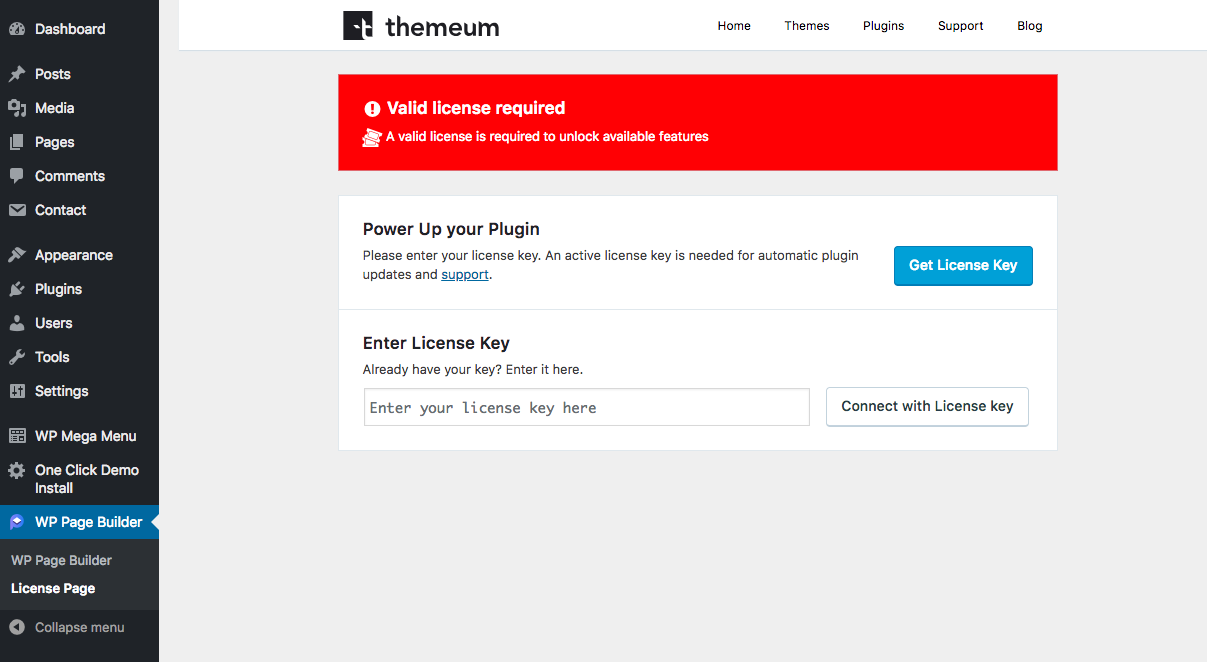
Navigate to WP Page Builder > License Page, enter the license key in the text field and click on “Connect with License key”.
Your installation process for the premium version is complete.