After successfully installing WP Page Builder, the first thing you need to do is, configure the settings. To do that go to WordPress dashboard > WP Page Builder. Following is the explanation of all the functions.
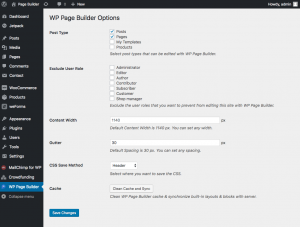
Post Type: You need to choose which type of content you will be editing with WP Page Builder. The types you’ll be selecting from here will allow the WP Page Builder to have editing accessibility.
Exclude User Role: This list shows all the user roles of your website. If you don’t want to give WP Page Builder editing permission to a particular user role type you can select it from here. You can select multiple role types as well.
Content Width: You can set the default content width from here. Current default content width is 1140 px.
Gutter: You can set the space length between columns from this setting. The default column spacing is 30 px.
CSS Save Method: You can define the CSS saving method from here. Selecting Header will save CSS in the header and selecting File System will save CSS in a separate file.
Cache: This option requires only a single click to clean WP Page Builder cache and synchronize the built-in blocks with server.
And don’t forget to hit “Save Changes” if you ever made any change to the settings unless it will not work.