Once you’ve installed the Edumax theme on your site, you’ll get a ready-made theme for your website. But, you can customize it further to match the color and vibe of your website. You can customize the theme by navigating to WP Dashboard > Appearance > Customize. You can update the design of your theme from there.
You are free to customize every aspect of the Edumax theme to your liking. Below you will find what options you will be able to use.
Edumax Options
From updating the header footer to changing the layout and theme color, you can customize lots of other things on the Edumax theme. We’ll explain all of these sections here:
Header Settings

The header settings section lets you update your website header’s appearance. The available options are:
- Header Background Color: If you want to use a solid-colored header, choose the background color using this option.
- Header Top Padding: Specifies the space between the top of the header.
- Header Bottom Padding: Set the bottom padding of the header.
- Header Bottom Margin: Set the bottom margin for the header.
- Sticky Header: Enabling this option will make the header remain fixed at the top of the page as the user scrolls down.
- Sticky Background Color: Set the background color of the sticky header.
- Header Transparent: Make your header transparent using this feature.
- Header Category Menu: Displays a menu of categories in the header section of the theme. By default, the button text of this menu is ‘Browse Course’. You can change it from the ‘Category Menu Label Text’ option below.
- Category Menu Label Text: Write text displayed in the header category menu label.
- Header Search: Displays a search bar in the header section of the theme. But, this search bar is available only for the desktop screen.
- Header Login/Signup Button: Displays a button in the header section of the theme that allows users to log in or signup.
- Header Get Started: Show or hide the get started button on the header.
- Header login button text: Specifies the text displayed on the login button.
- Header signup button text: Specifies the text displayed on the signup button.
- Enable Header Shopping Cart: Enables or disables the display of a shopping cart icon in the header section of the theme.
Course Settings

This section will help you to customize the course list page. Here are the available options on this page:
- Archive Sidebar filter: Turn on or off the sidebar filter on the archive page.
- Sidebar Position: Choose to display the sidebar on the left or right side of the screen.
- Course Sorting Bar: Display a sorting bar for courses on the course archive page.
- Course Count: Display the total number of courses on the course list page.
- Archive Course Per Page: Set the number of courses displayed per page on the archive page.
- Archive Course Pagination: Turn on or off the pagination for the archive page.
- Archive Course Column Count: Set the number of columns to display courses on the archive page. You can choose from one column to four columns here.
- Level Filter: Turn on or off the course level filter on the archive page.
- Category Filter: Turn on or off the course category filter on the archive page.
- Topic Filter: Turn on or off the course topic filter on the archive page.
- Single Course Reverse: Reverse the order of content sections on the single course page.
Social Login
With the Edumax theme, you can get your users to sign up for your website with their social media accounts. You can access the social login options from WP Dashboard > Appearance > Customize > Edumax options.
- Enable Social Login: Allows users to log in using their social media accounts.
- Google Login Client ID: Input the Google client ID required for enabling Google login. At first, generate a client ID then paste it in the input box. If you want to disable Google login, just leave the box empty.
- Facebook Login App ID: Set the Facebook app ID required for enabling Facebook login. Generate a Facebook APP ID first, then paste it in the input box. If you want to disable Facebook login, just leave the box empty.
- Twitter Login Consumer Key: Specifies the Twitter consumer key required for enabling Twitter login. If you want to disable the Twitter login option, just leave the box empty.
- Twitter Login Consumer Secret: Specifies the Twitter consumer secret required for enabling Twitter login.
- Twitter Login Auth Redirect URL: Specifies the URL where the user will be redirected after successful Twitter login authentication.
- Login Text Color: Set the text color of the login window.
- Login bg Color: Choose the background color of the login window.
- Login btn bg color: Set the background color for the login button.
- Login btn bg hover: Set the background color when hovering over the login button.
- Login btn text color: Set the text color for the login button.
- Login btn text hover: Set the text color when hovering over the login button.
All Logo
You can upload your website logo and customize it from here. The available customization options are
- Upload Logo: Upload an image file to use as the logo.
- Select Logo Style: Choose whether you want to display the logo image or text in the banner.
- Logo Width: Set the width of the logo in pixels. Enter 0 for automatic width.
- Logo Height: Set the height of the logo in pixels. Enter 0 for automatic height.
- Custom Logo Text: Use custom text instead of an image file for the logo.
- Coming Soon Logo: Upload an image file to use as the logo on the coming soon page.
Sub Header Banner
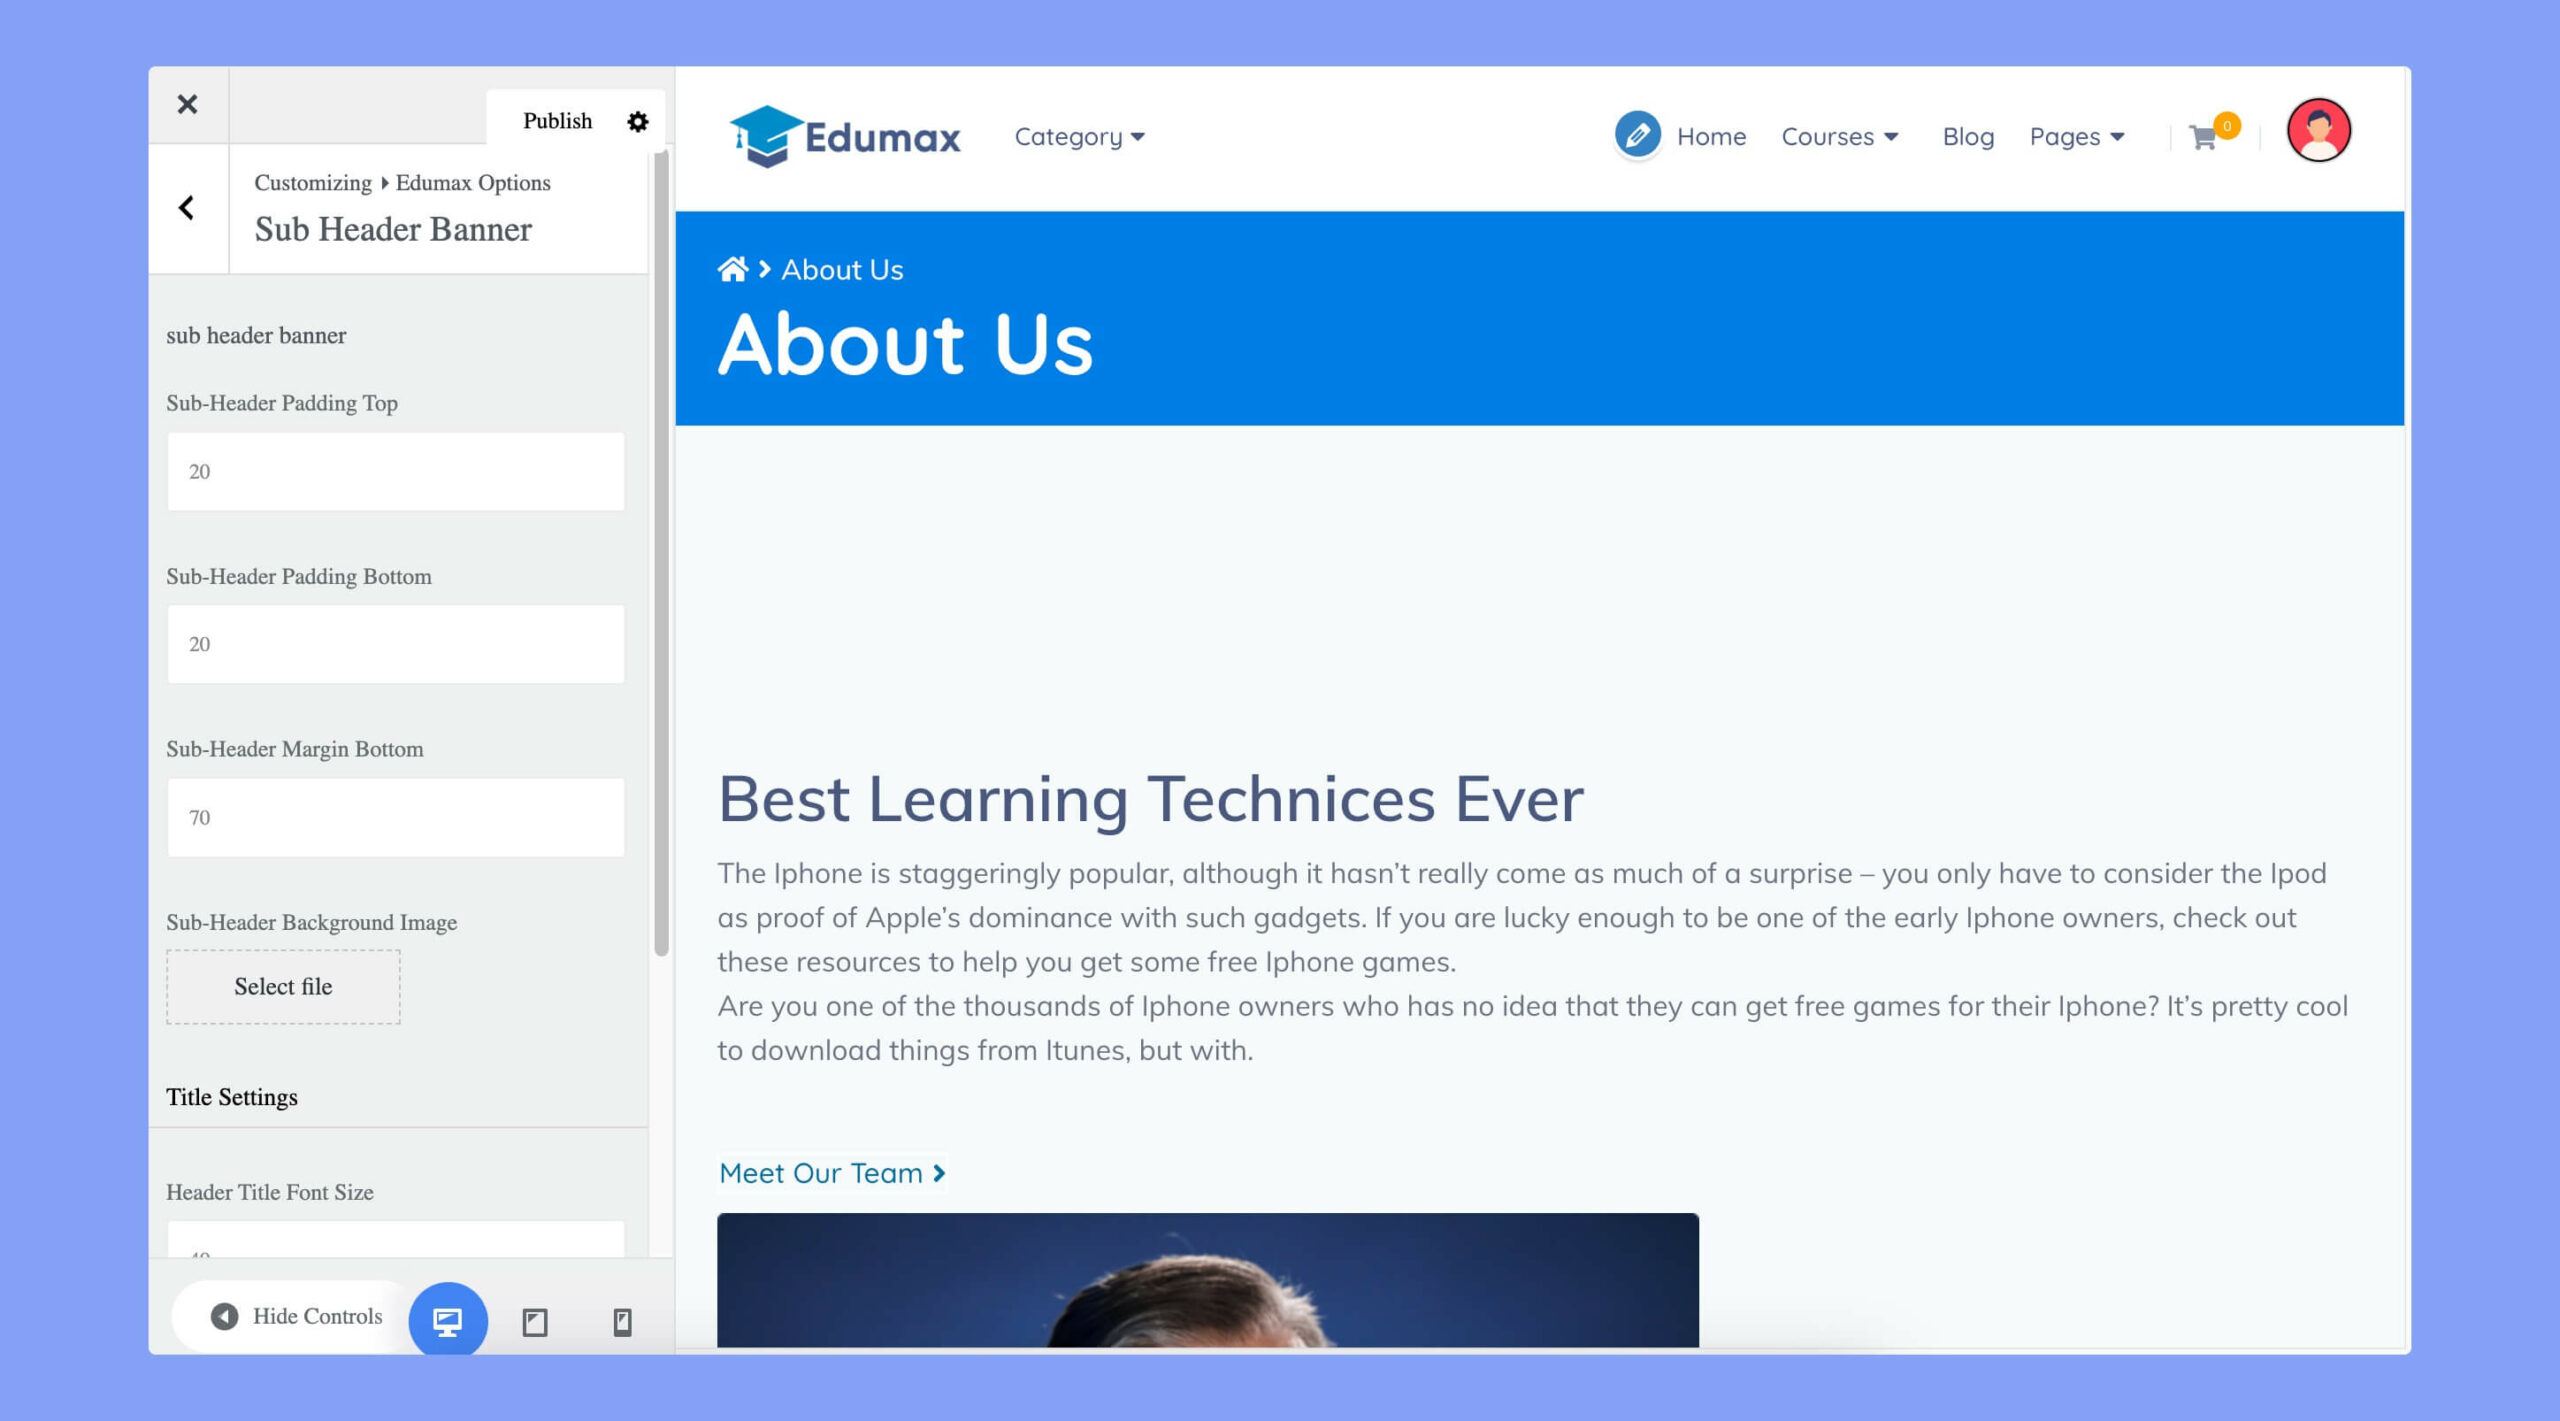
You can control the sub-header banner settings from this section. The available options for the subheader banner are:
- Sub-Header Padding Top: Set the amount of padding (in pixels) to apply to the top of the sub-header section.
- Sub-Header Padding Bottom: Set the amount of padding (in pixels) to apply to the bottom of the sub-header section.
- Sub-Header Margin Bottom: Set the amount of margin (in pixels) to apply to the bottom of the sub-header section.
- Sub-Header BG Image: Choose a custom background image for the sub-header section to match your branding or style preferences.
In the second phase, you can customize the title of sub headers. Here, the available options are:
- Header Title Font Size: Set the font size for the header title.
- Header Title Color: Set the font color for the header title.
- Breadcrumb Link Color: Set the font color for the breadcrumb links.
- Breadcrumb Link Hover Color: Set the font color for the breadcrumb links when hovering over them.
Typography Settings
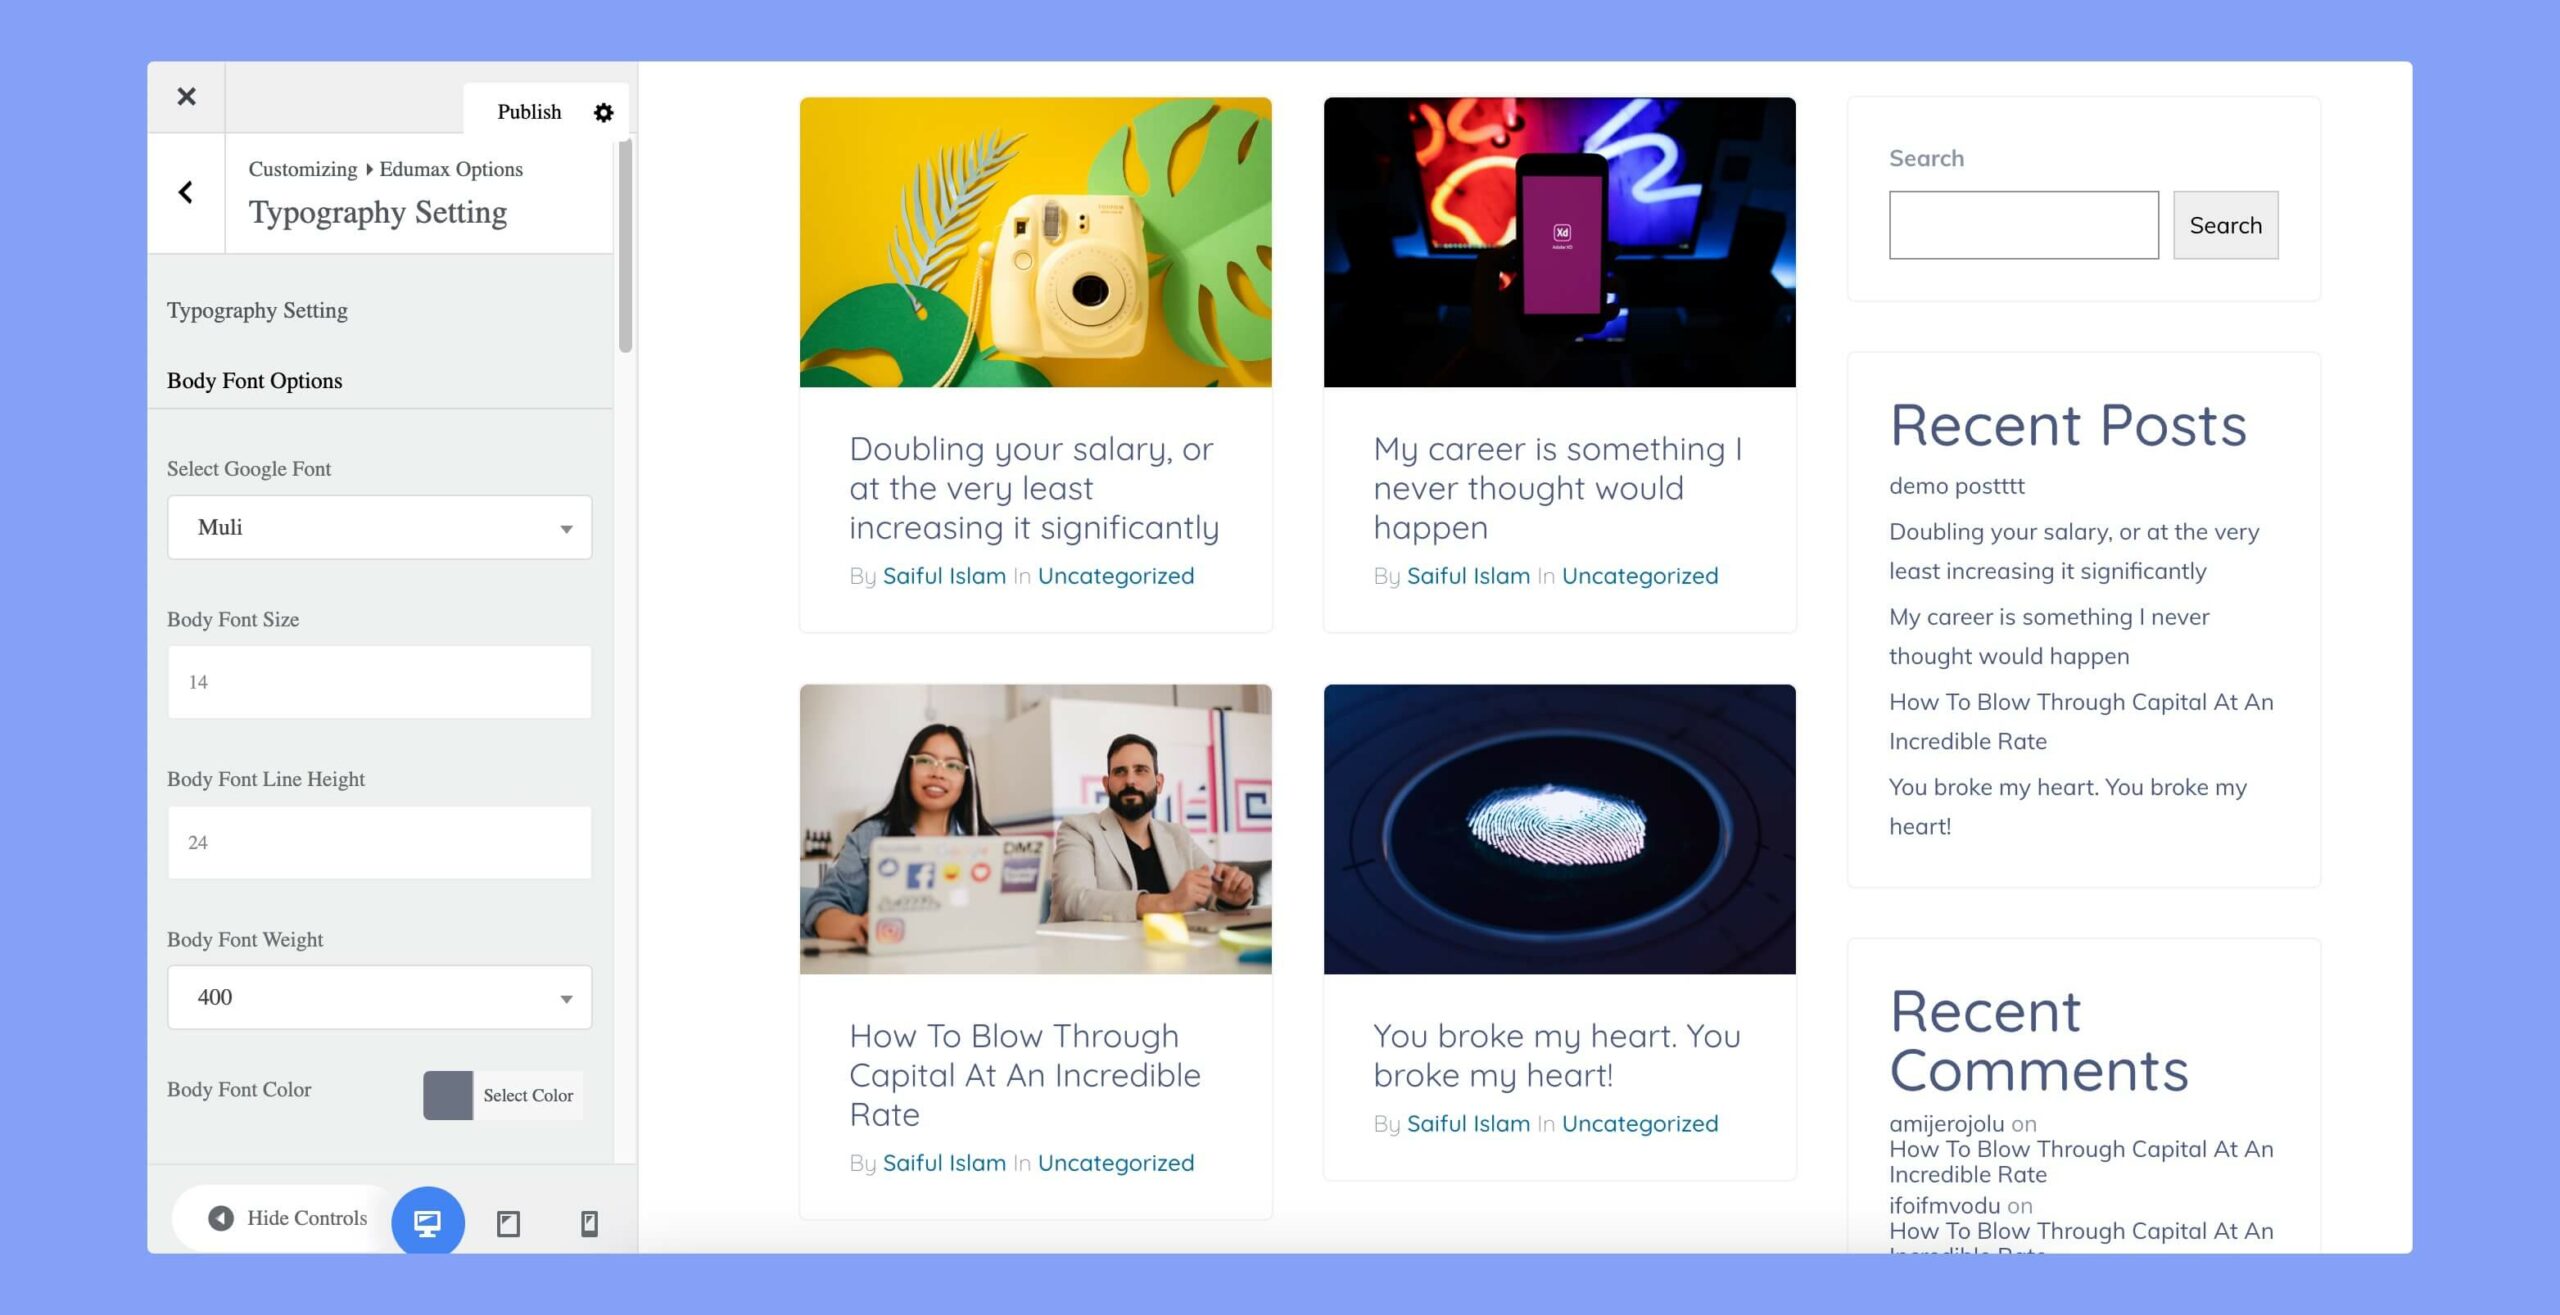
You can control the font settings of your website from this section. The settings you’ve specified here will be applicable to the website body font, menu font, and headings.
- Select Google Font: Choose a custom Google font to use for the body text, headings, and other text elements throughout the theme.
- Font Size: Set the text’s font size (in pixels) to ensure it is legible and matches your style preferences.
- Font Line Height: Choose the line height (in pixels) for the text to ensure it is easy to read and visually appealing.
- Font Weight: Choose the font weight (e.g. light, regular, bold) for the body text to match your branding or style preferences.
- Font Color: Select a custom color for the body text to complement your chosen color scheme and ensure it is legible against the background color. This option is available only for the body font.
Layout & Styling
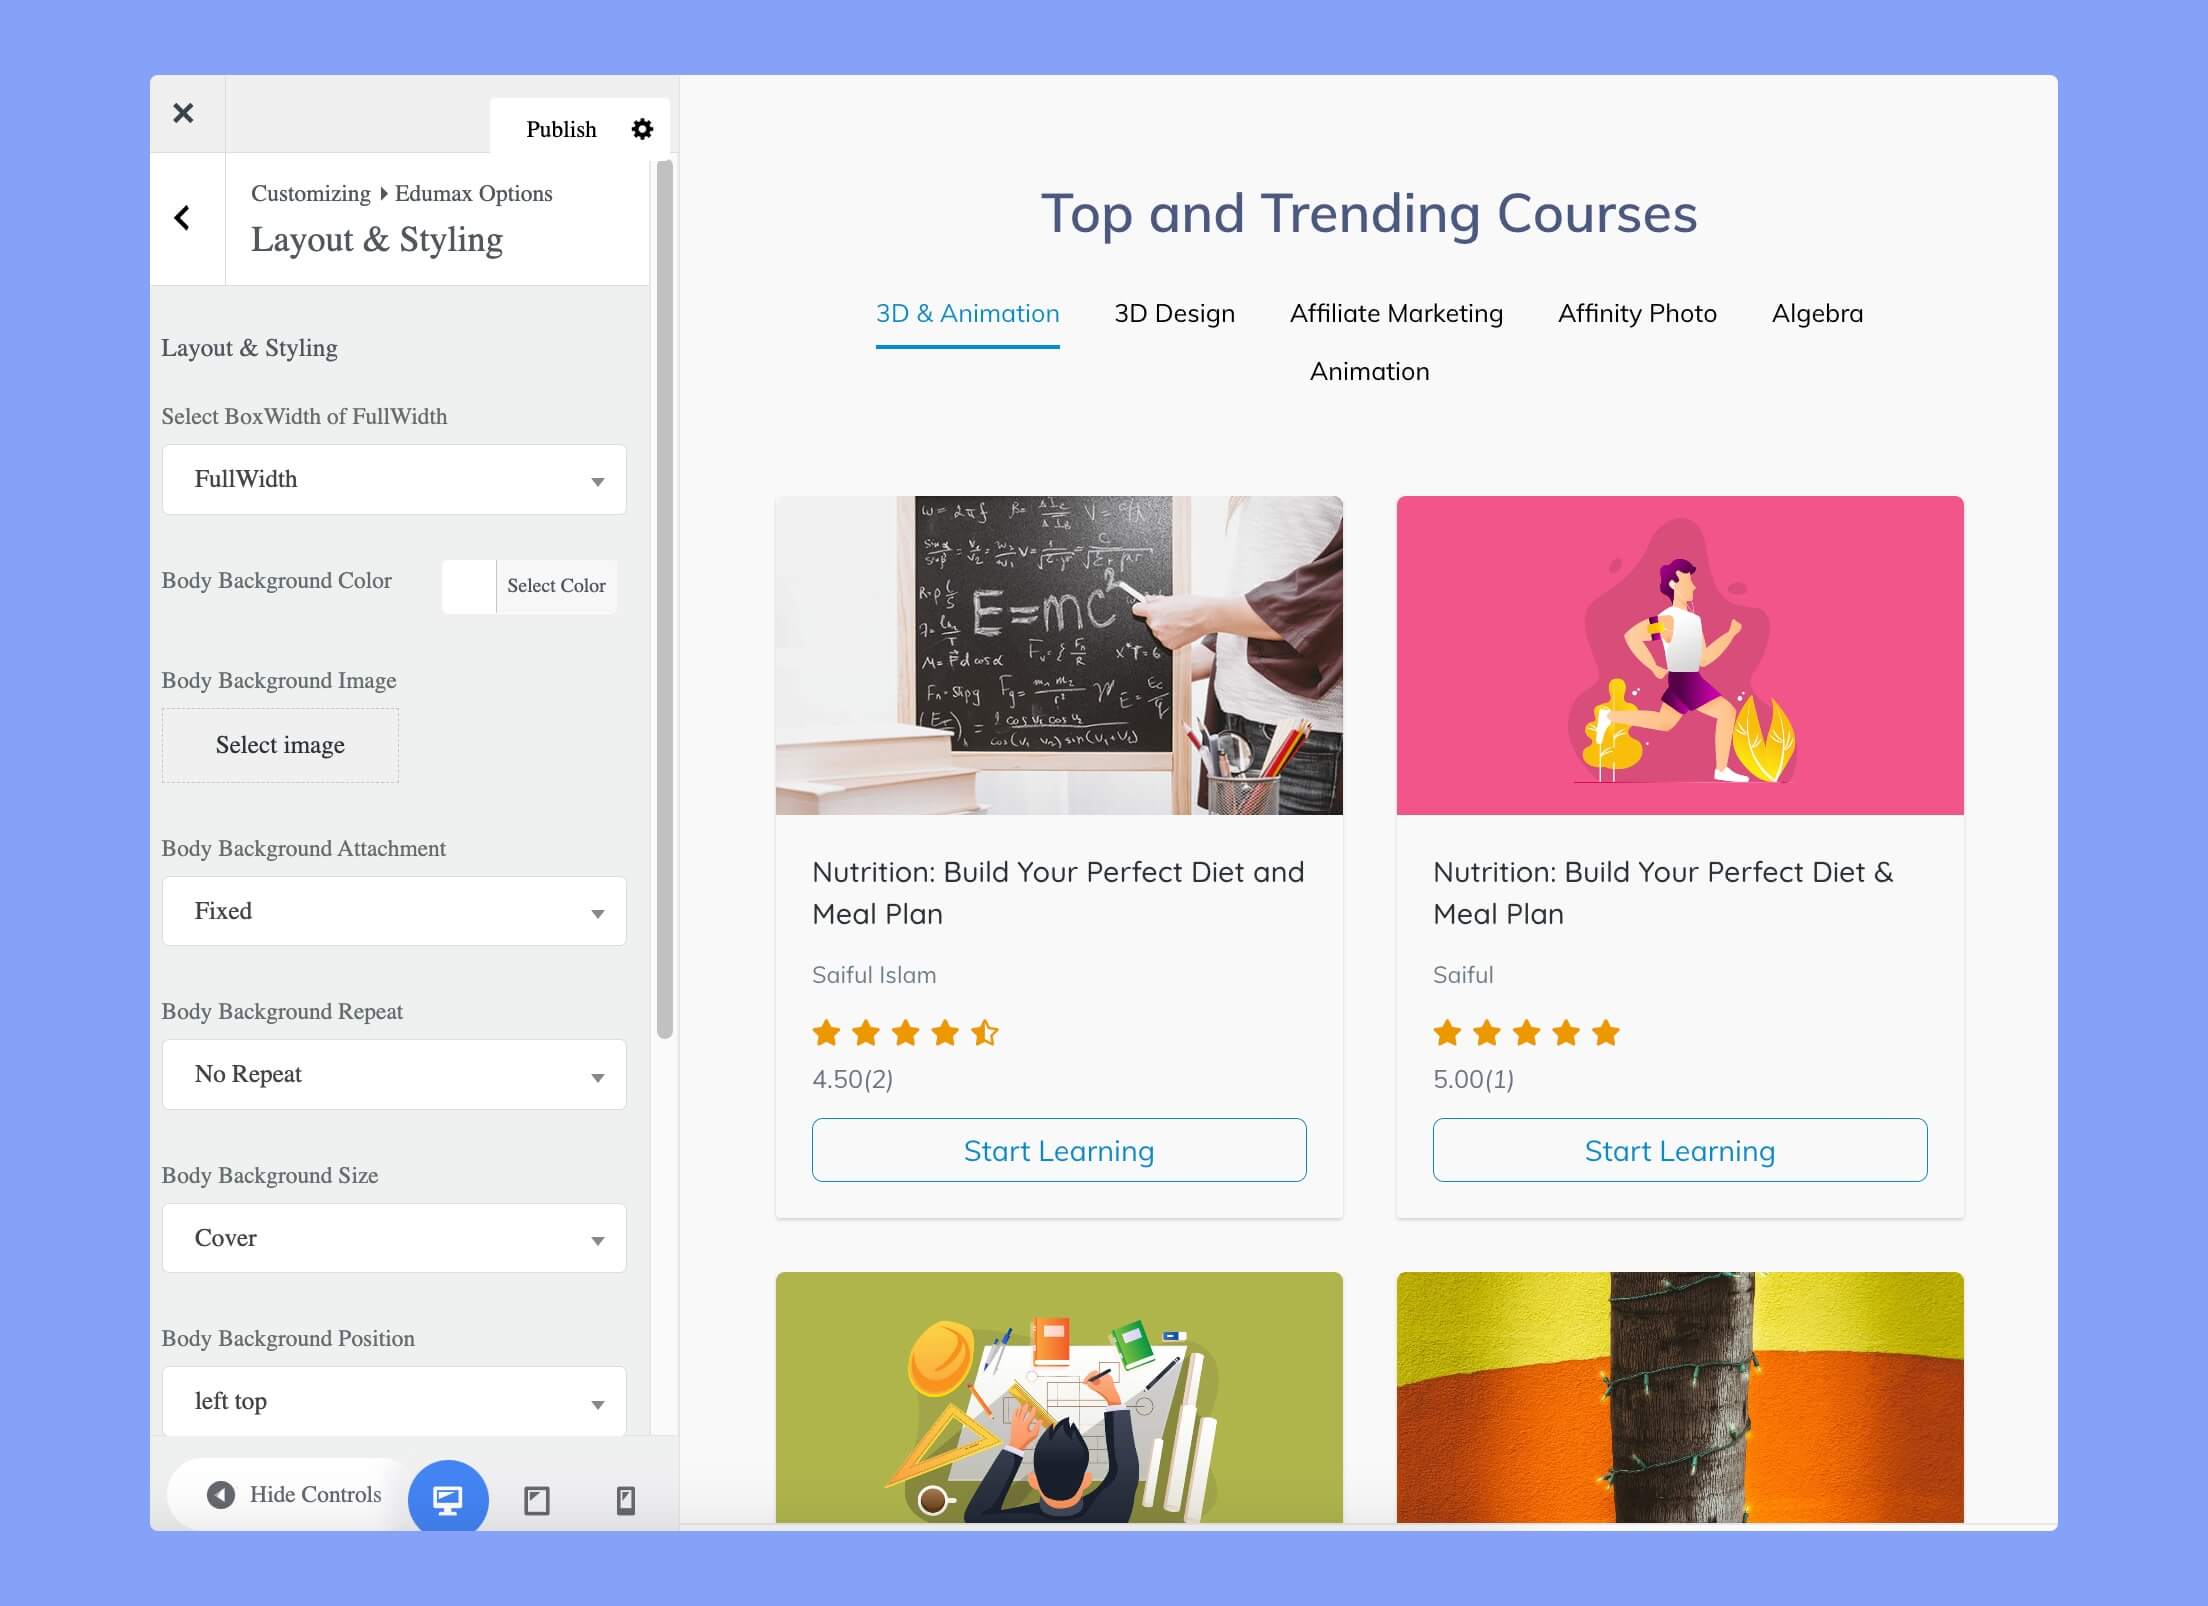
The available options under the Layout & Styling sections are:
- Select BoxWidth of FullWidth: Set the width of the page to full width or boxed width.
- Body Background Color: Set the background color for the body of the page.
- Body Background Image: Set an image to use as the background for the body of the page.
- Body Background Attachment: Set whether the background image should be fixed or scroll with the page.
- Body Background Repeat: Set how the background image should be repeated.
- Body Background Size: Set the size of the background image.
- Body Background Position: Set the position of the background image.
- Set Custom Color: Choose a custom color to use for various elements.
- Major Color: Set the major color to be used throughout the theme.
- Hover Color: Set the color for elements when hovering over them.
- Heading Color: Set the color for headings on the page.
- Text Color: Set the color for regular text on the page.
Social Media
If you want to share your social media profiles with visitors, you can share the links in this section. Right now, the available social media sections are Facebook, Twitter, Pinterest, YouTube, LinkedIn, Instagram, Dribbble, Behance, Flickr, VK, and Skype.
Coming Soon

We’ve provided a coming soon page template with a few customization options. The options are:
- Enable Coming Soon: Enable or disable the coming soon page.
- Add Coming Soon Title: Add a title to display on the coming soon page.
- Coming Soon Date: Set the date and time for launching the website.
- Add Mailchimp Form Shortcode Here: Add the shortcode for the Mailchimp form to display on the coming soon page.
- Coming Soon Description: Add a description to display on the coming soon page.
- Add Social Media Link: Add links to social media profiles to display on the coming soon page.
404 Page
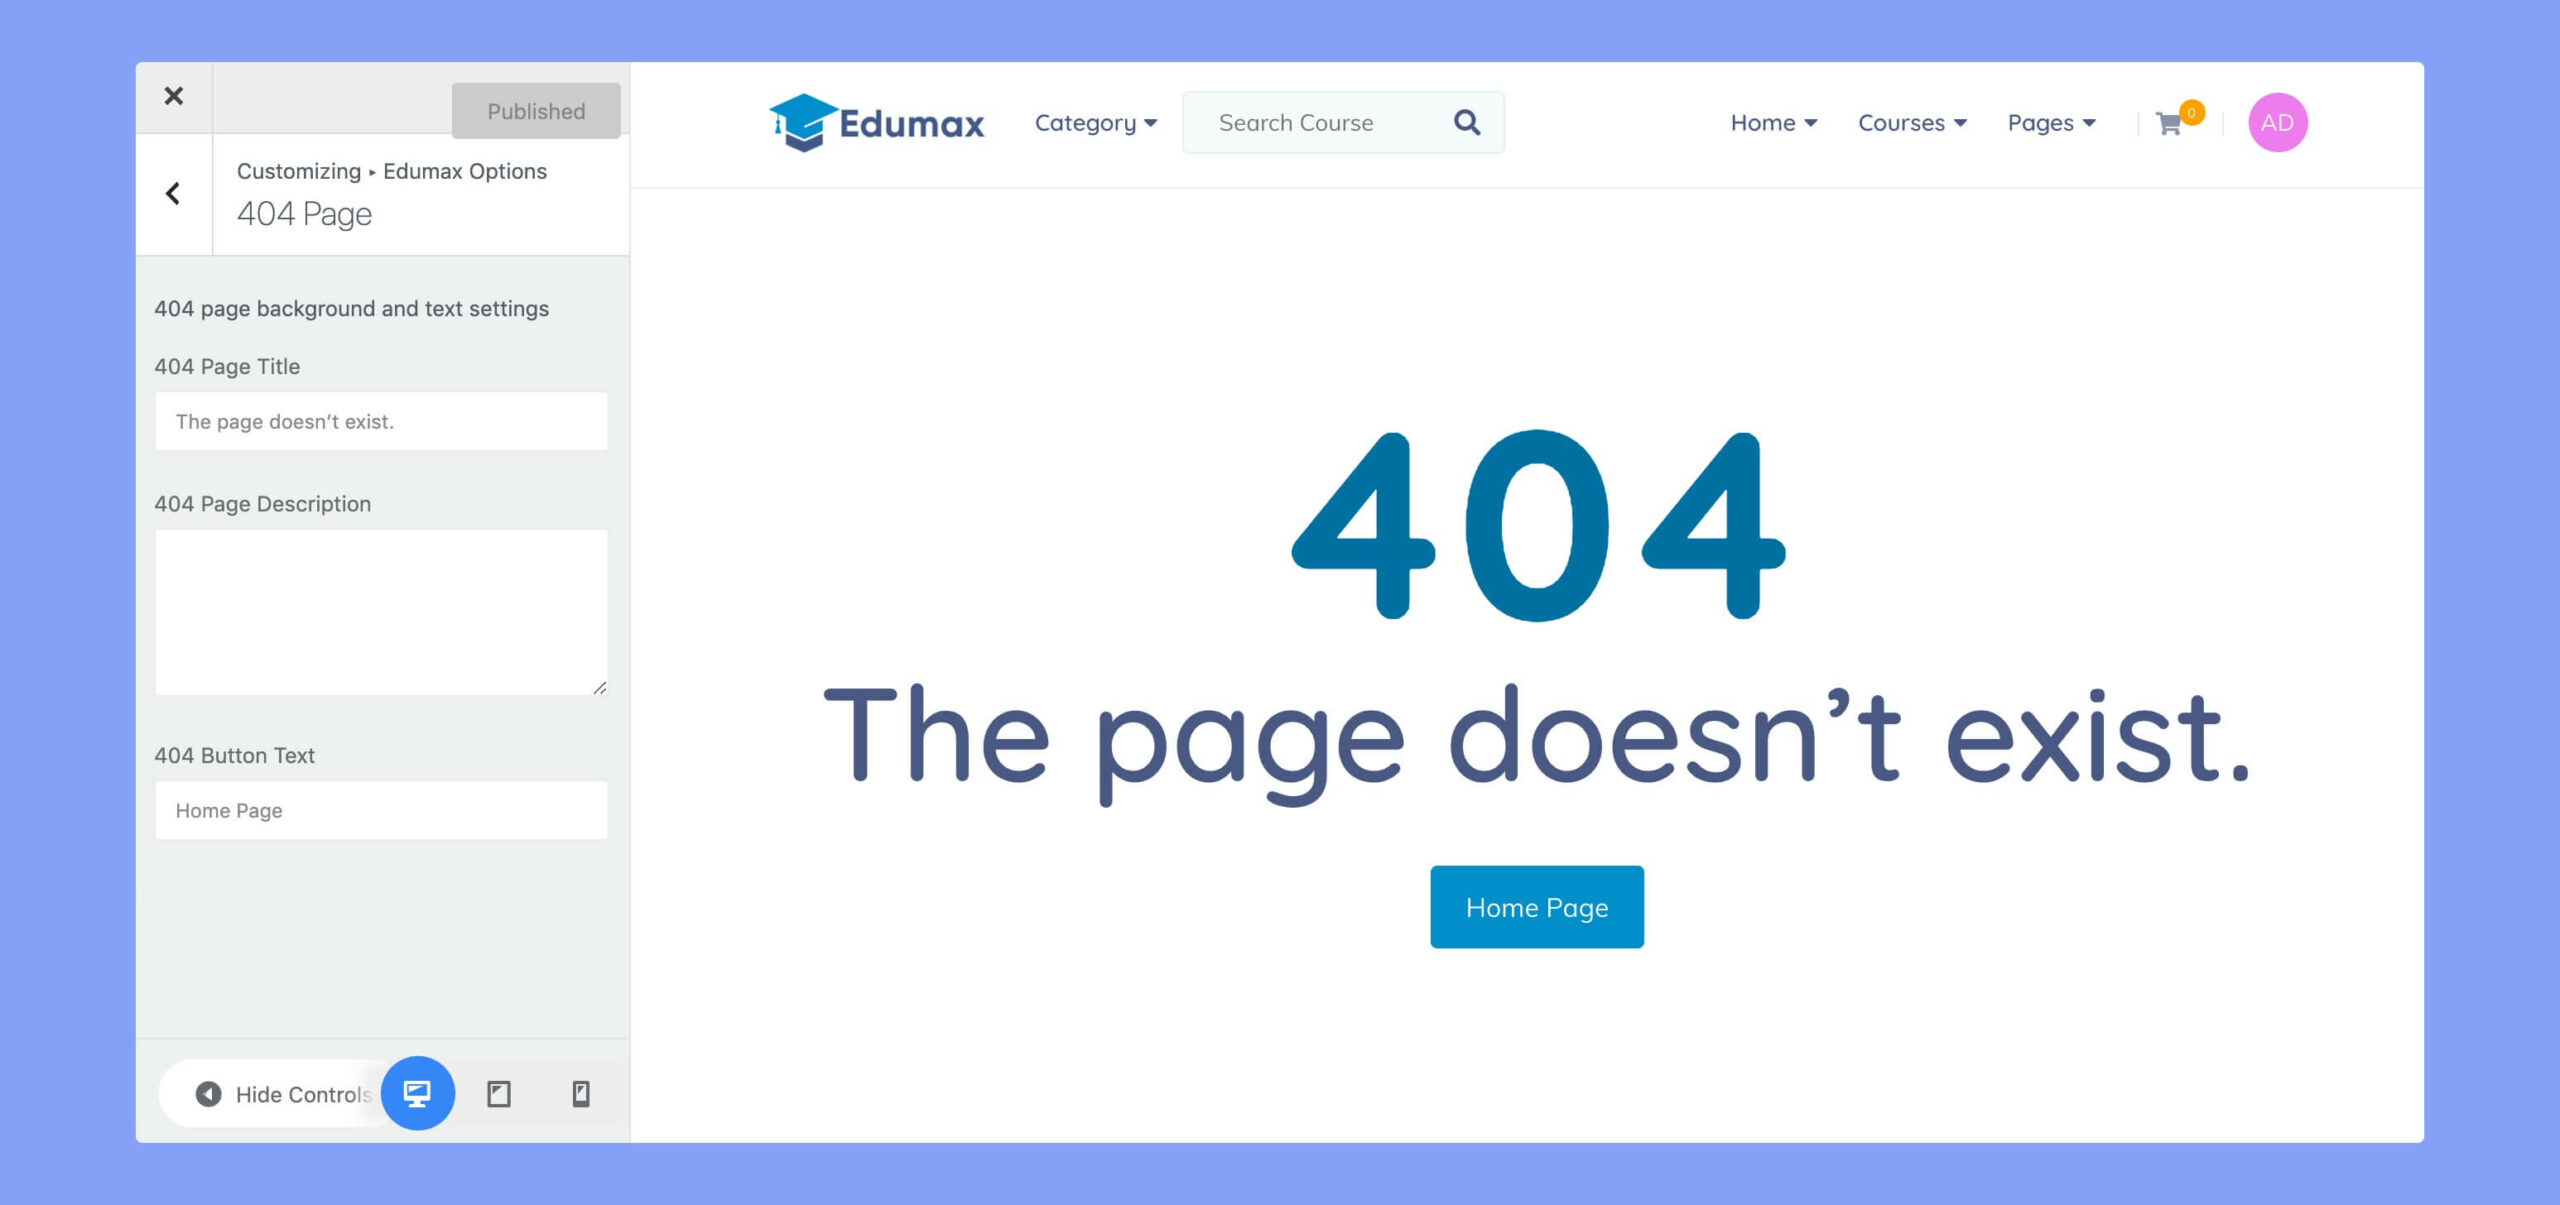
We’ve provided a preset 404 page in the template. This template consists of the following options:
- 404 Page Title: Set the title for the 404 page.
- 404 Page Description: Set the description for the 404 page.
- 404 Button Text: Set the text for the button on the 404 page.
Blog Settings
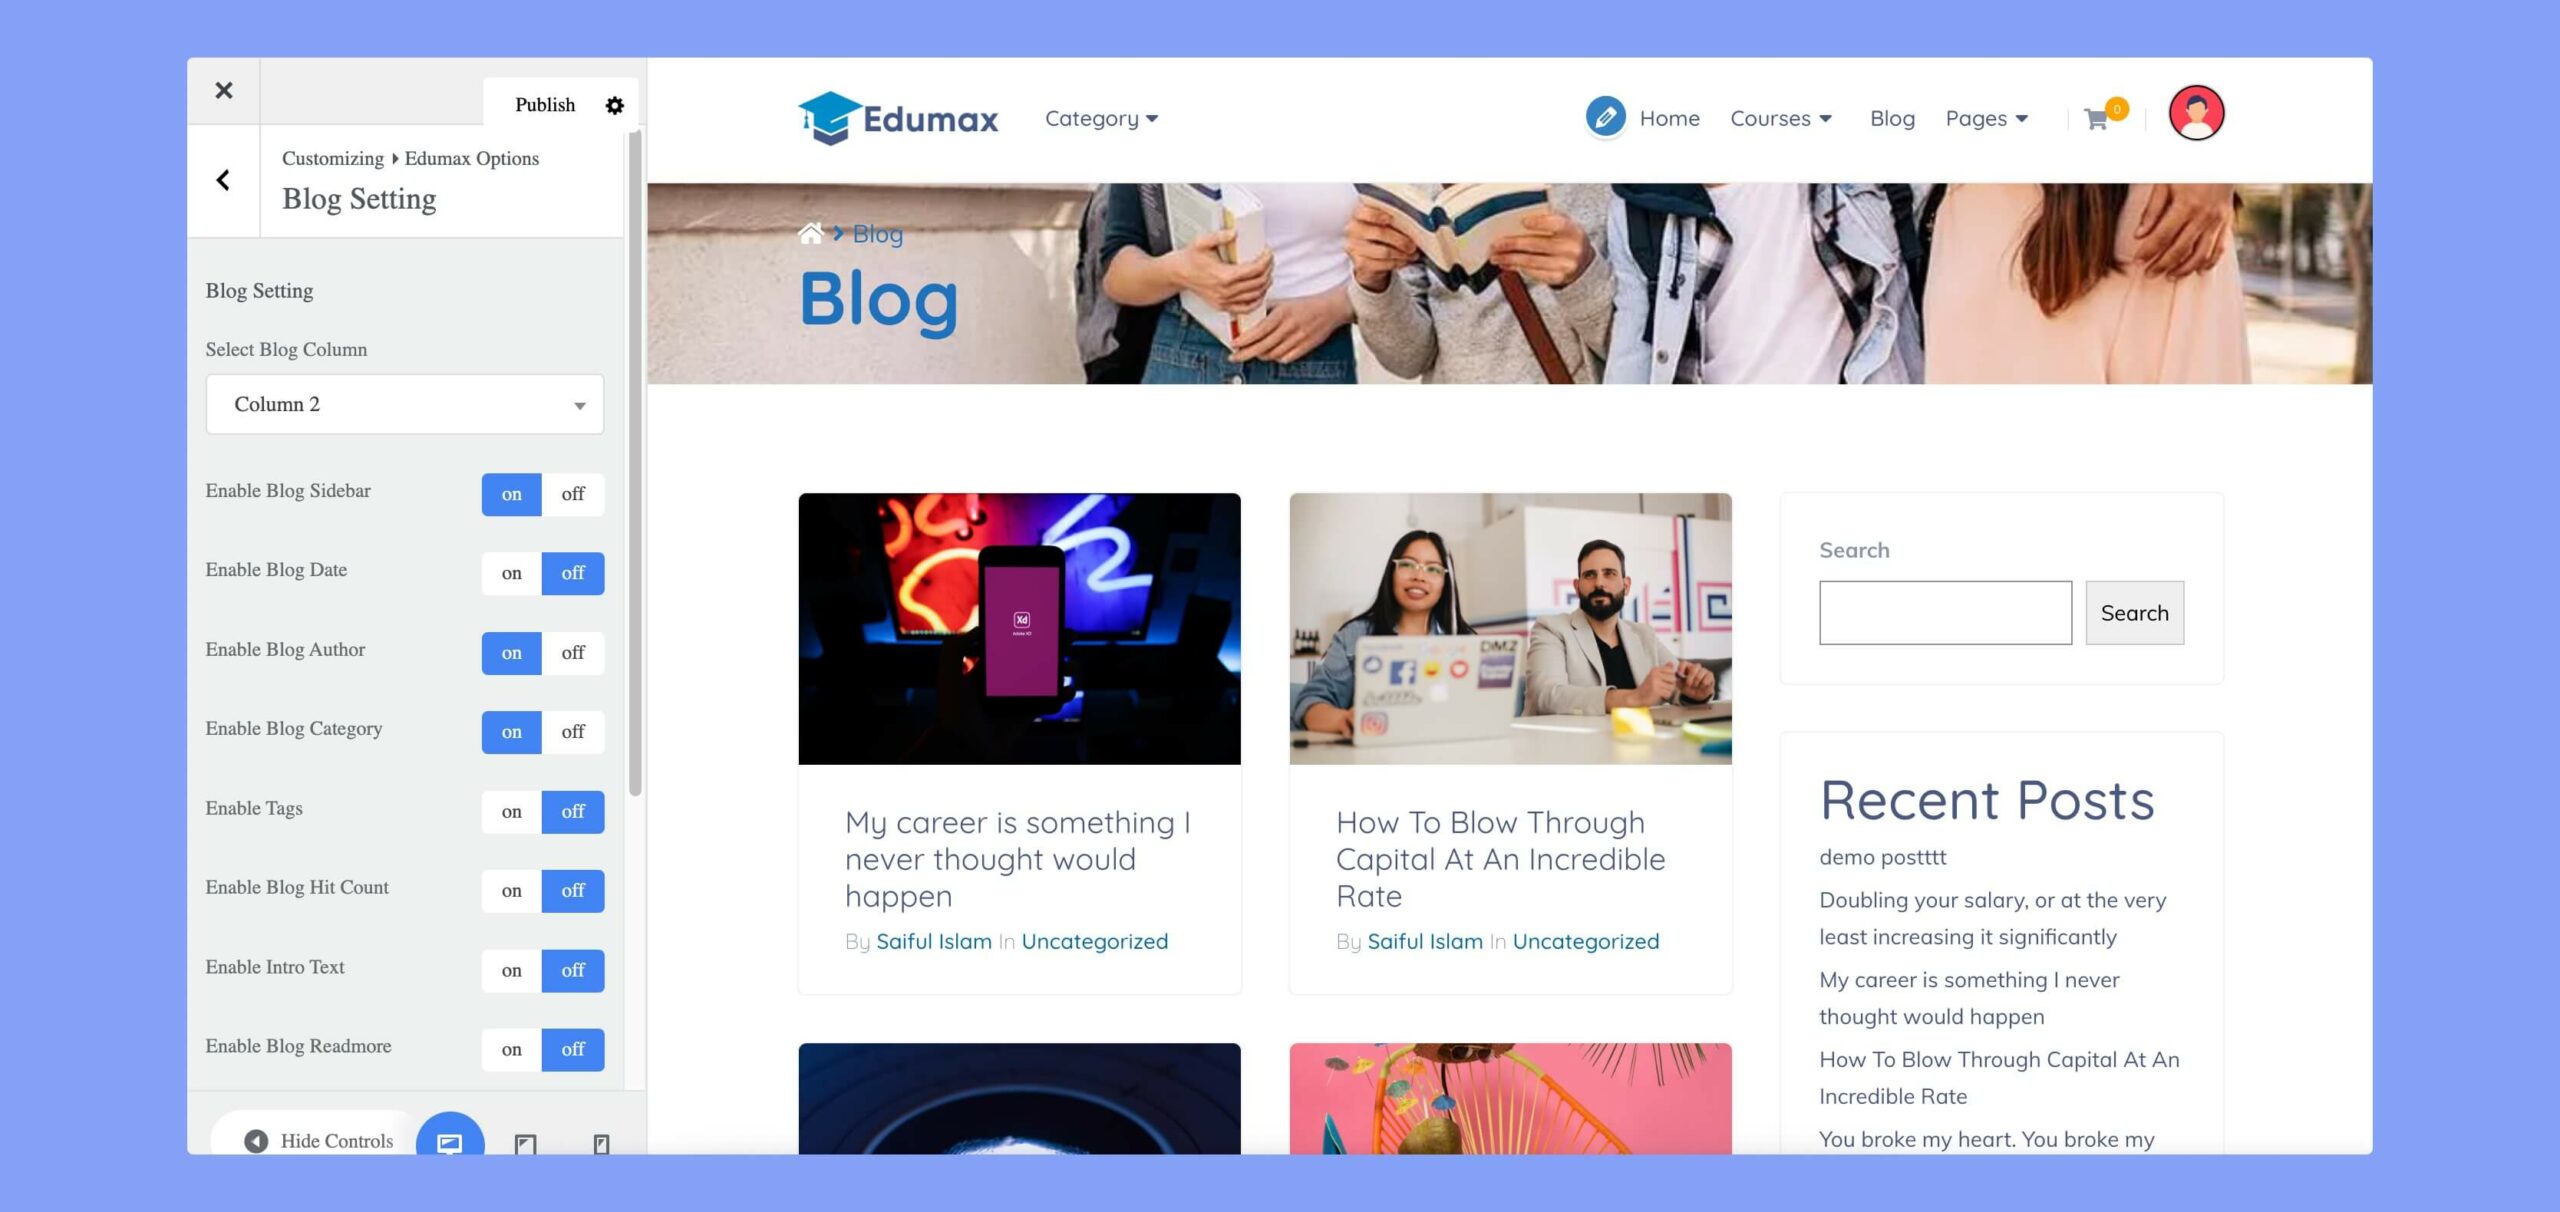
This section controls the look and feel of your website’s blog. The options are:
- Select Blog Column: Set the number of columns for the blog page.
- Enable Blog Sidebar: Turn on the sidebar for the blog page.
- Enable Blog Date: Display the date on each blog post.
- Enable Blog Author: Display the author name on each blog post.
- Enable Blog Category: Display the category on each blog post.
- Enable Tags: Display tags on each blog post.
- Enable Blog Hit Count: Display the number of hits for each blog post.
- Enable Intro Text: Display an introductory text on each blog post.
- Enable Blog Readmore: Display a “Read More” link on each blog post.
- Enable Comment: Allow comments on each blog post.
- Post character Limit: Set the number of characters to limit the blog post content to.
- Continue Reading: Set the text to display for the “Read More” link.
Blog Single Page Setting

This section helps you customize attributes to your blog single pages. The customization options are:
- Enable Blog Sidebar: Turn on the sidebar for the blog page.
- Enable Blog Date: Display the date on each blog post.
- Enable Blog Author: Display the author’s name on each blog post.
- Enable Blog Category: Display the category on each blog post.
- Enable Tags: Display tags on each blog post.
- Enable Blog Hit Count: Display the number of visitors for each blog post.
- Enable Comment: Allow comments on each blog post.
- Enable Post Navigation: Display navigation links to move between blog posts.
Widget Area Settings
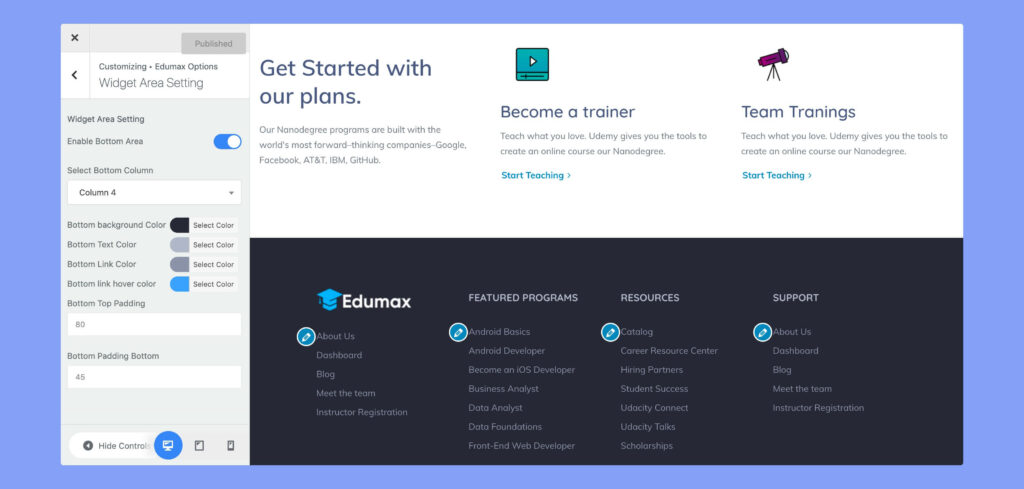
Edumax options allow you to personalize the widget area settings of your website that go perfectly with your design. The available options are:
- Enable Bottom Area: Turn on the bottom area of the website.
- Select Bottom Column: Set the number of columns for the bottom area.
- Bottom Background Color: Set the background color for the bottom area.
- Bottom Text Color: Set the text color for the bottom area.
- Bottom Link Color: Set the link color for the bottom area.
- Bottom Link Hover Color: Set the link hover color for the bottom area.
- Bottom Top Padding: Set the top padding for the bottom area.
- Bottom Padding Bottom: Set the bottom padding for the bottom area.
Footer Settings
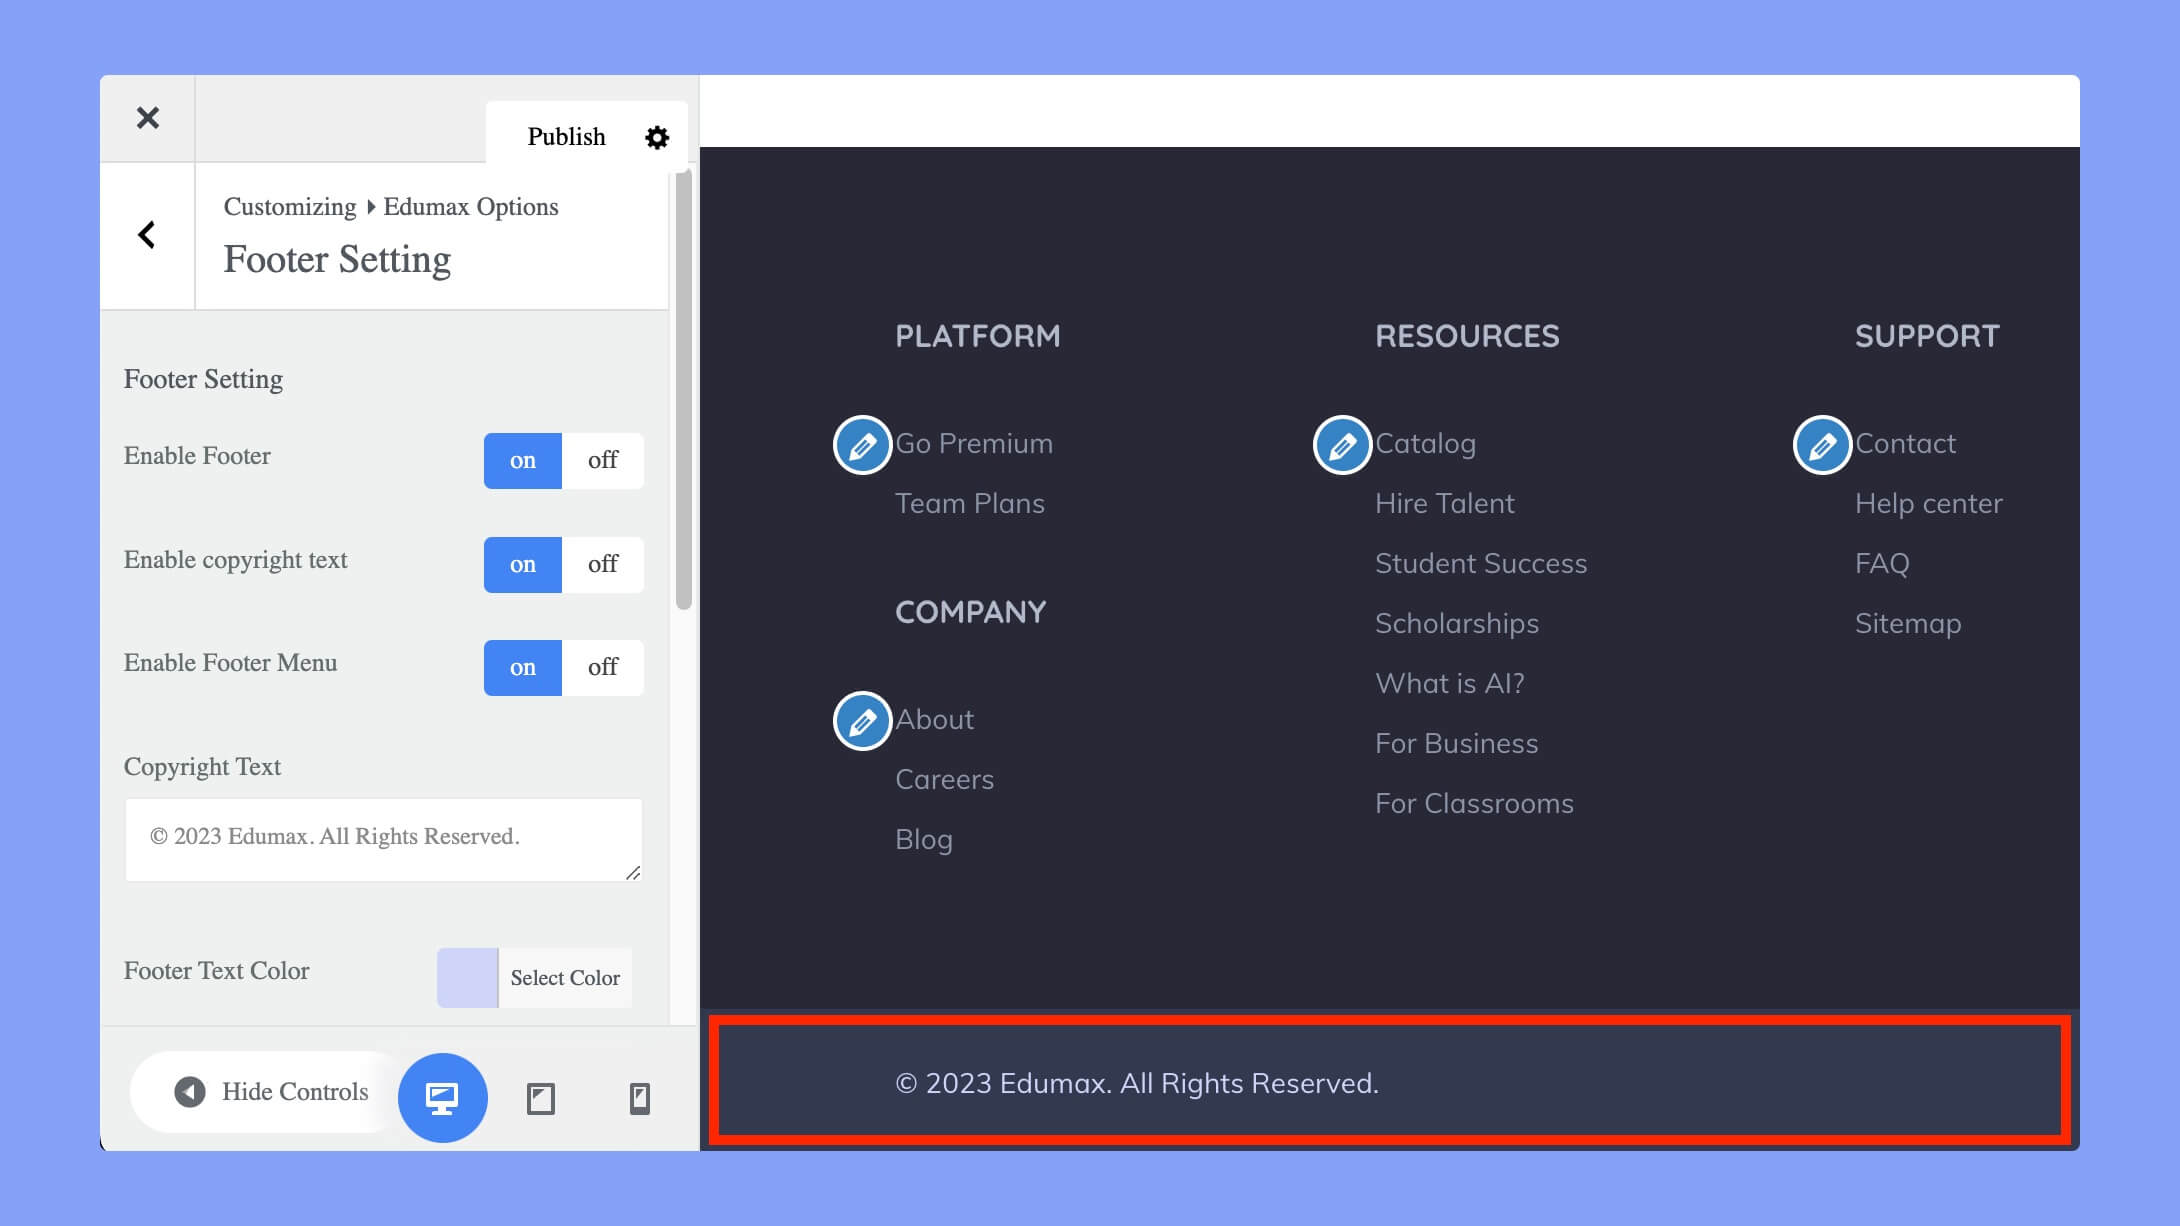
Display the copyright notice and relevant information on the footer of your website. The available options are:
- Enable Footer: Turn on the footer of the website.
- Enable copyright text: Turn on the copyright text for the footer.
- Enable Footer Menu: Turn on the footer menu.
- Copyright Text: Set the text to be displayed as the copyright notice in the footer.
- Footer Text Color: Set the text color for the footer.
- Footer Link Color: Set the link color for the footer.
- Footer Link Hover Color: Set the link hover color for the footer.
- Footer Background Color: Set the background color for the footer.
- Footer Top Padding: Set the top padding for the footer.
- Footer Bottom Padding: Set the bottom padding for the footer.