You can access the Backer Customizer options by clicking on the Customize link on the top bar. Alternatively, you can also access the customization options by navigating to WP Dashboard > Appearances > Customize.
On the navigation page, you’ll come across the following options.
Header Settings
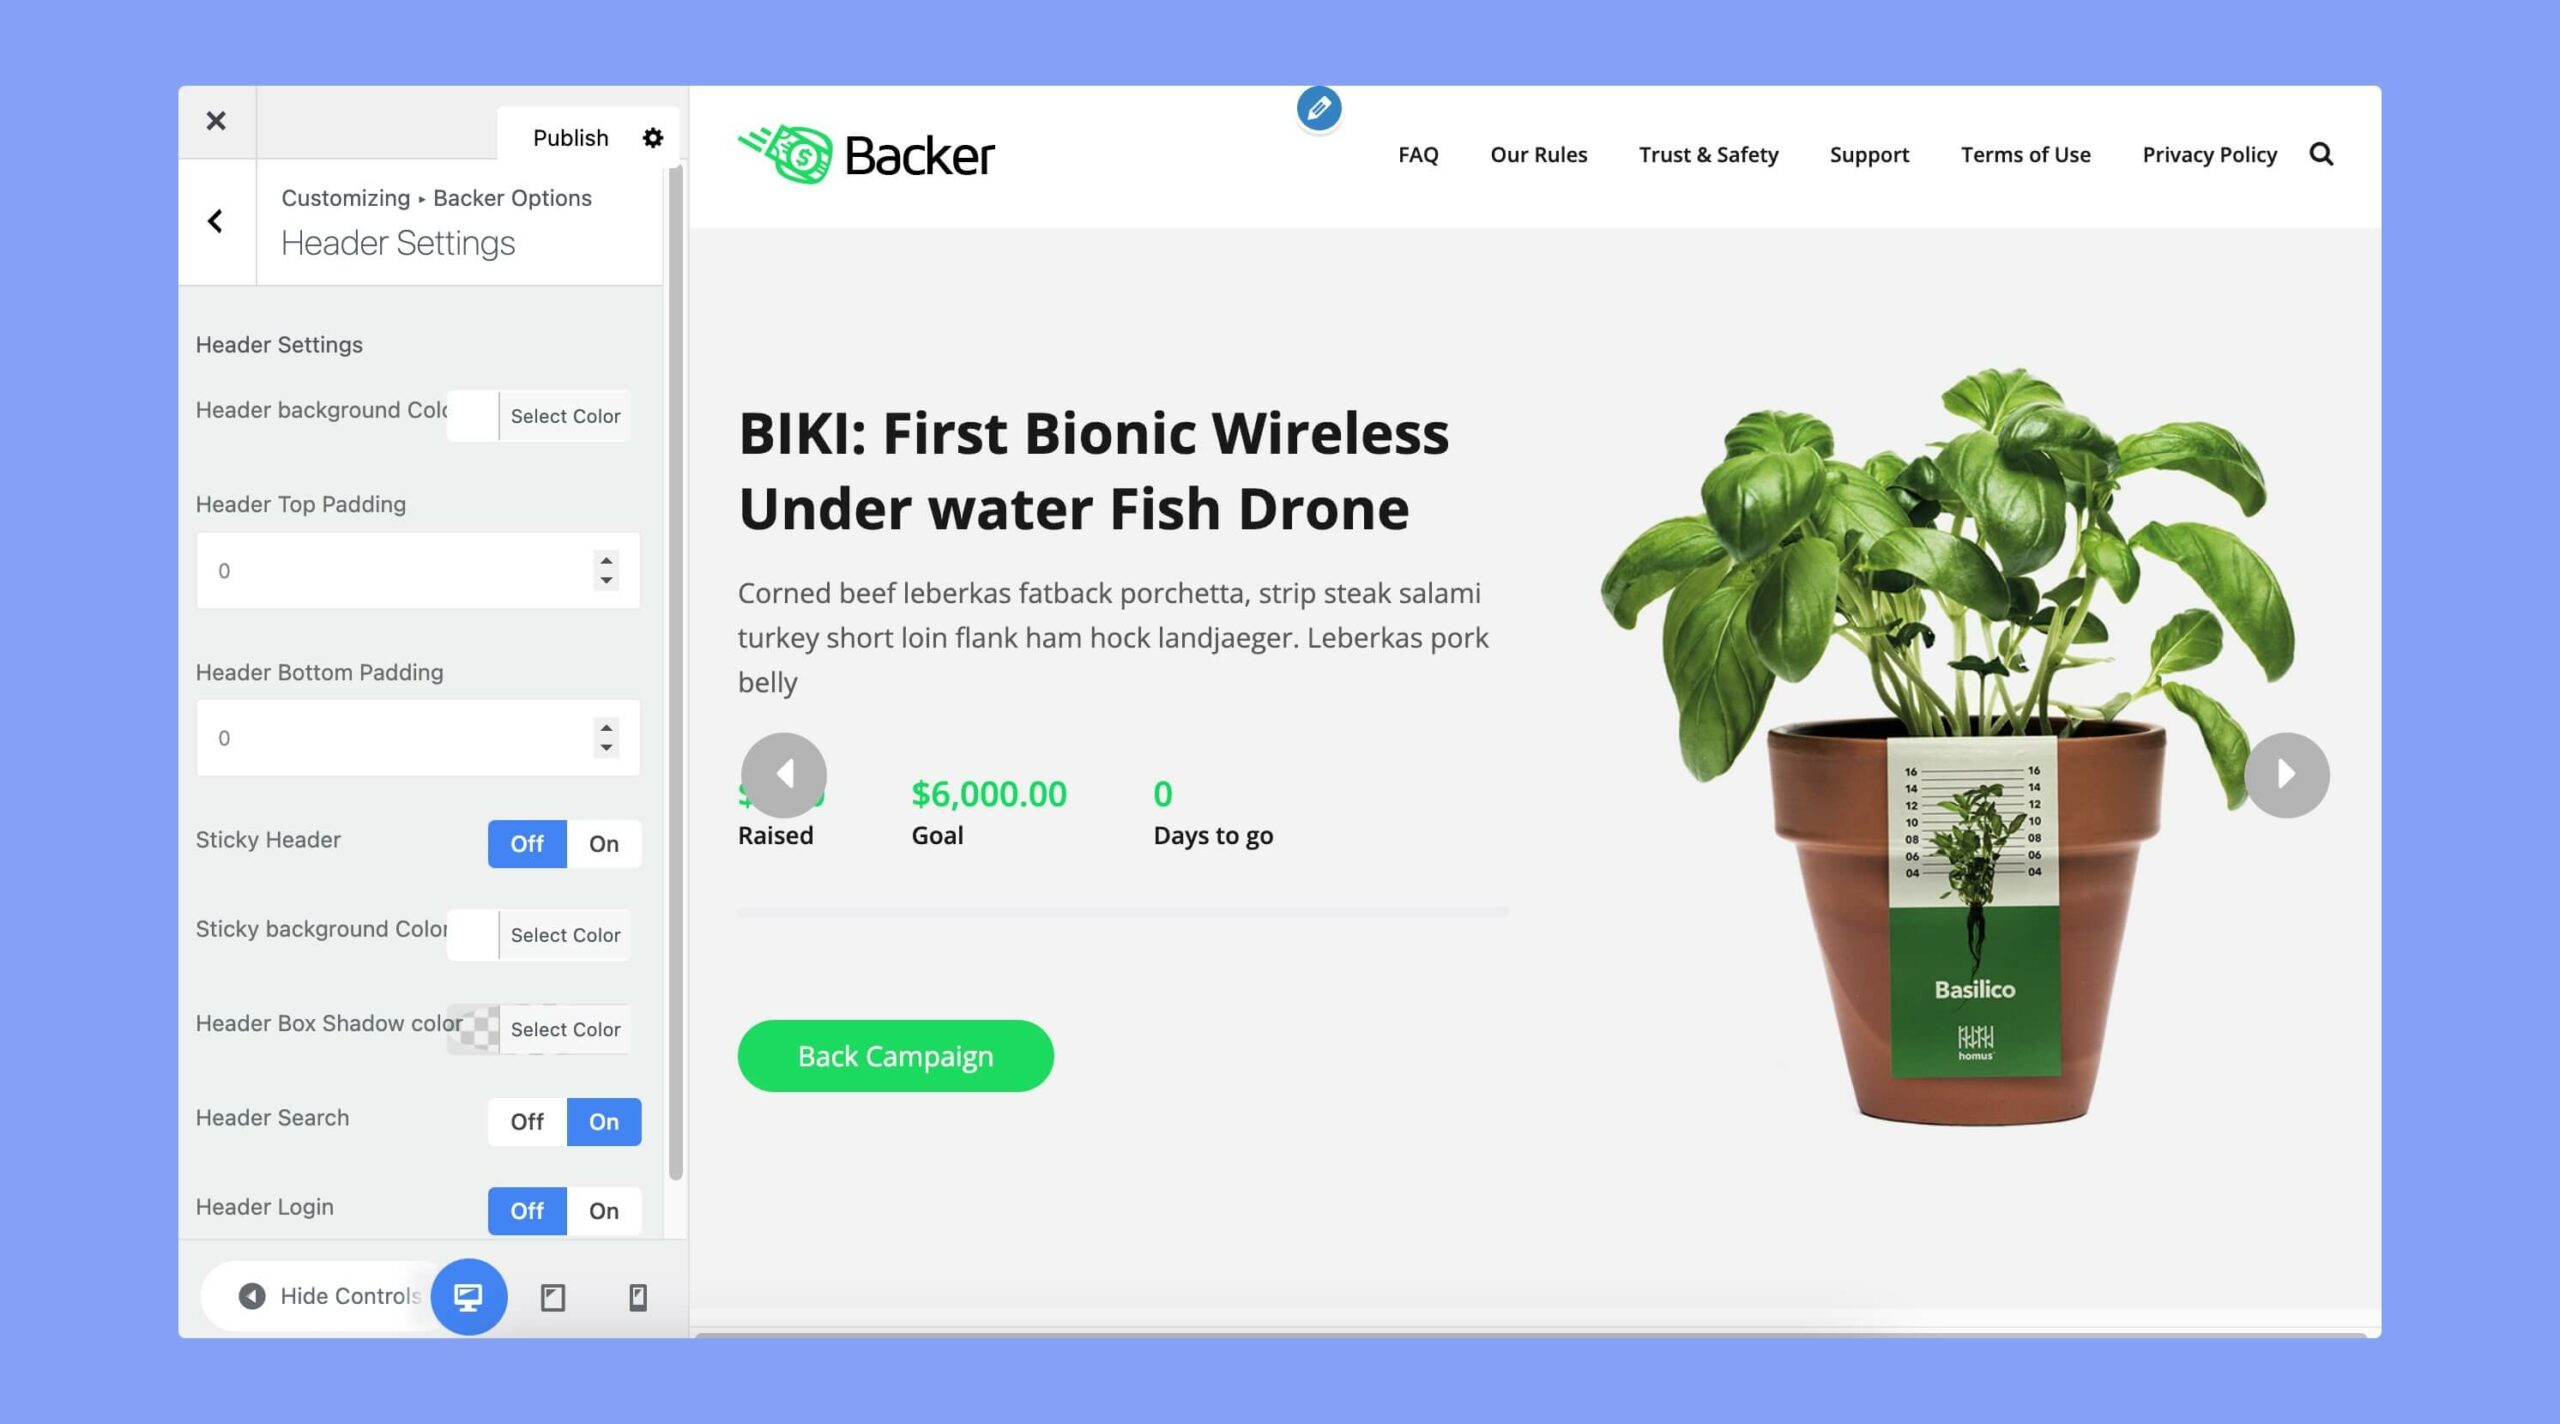
The header settings options let you customize the top header of your website. You can customize the following settings from here:
- Header Background Color: Set a custom background color for the header area of your website.
- Header Top Padding: Adjust the spacing between the top of the header and the content below it.
- Header Bottom Padding: Adjust the spacing between the bottom of the header and the content above it.
- Sticky Header: Enable or disable a sticky header that stays fixed at the top of the page as users scroll.
- Sticky Background Color: Set a custom background color for the sticky header.
- Header Box Shadow Color: Add a box shadow effect to the header and customize the color of the shadow.
- Header Search: Add a search form to the header area to allow users to search your website.
- Header Login: Add a login form to the header area to allow users to log in to your website.
Shop Style
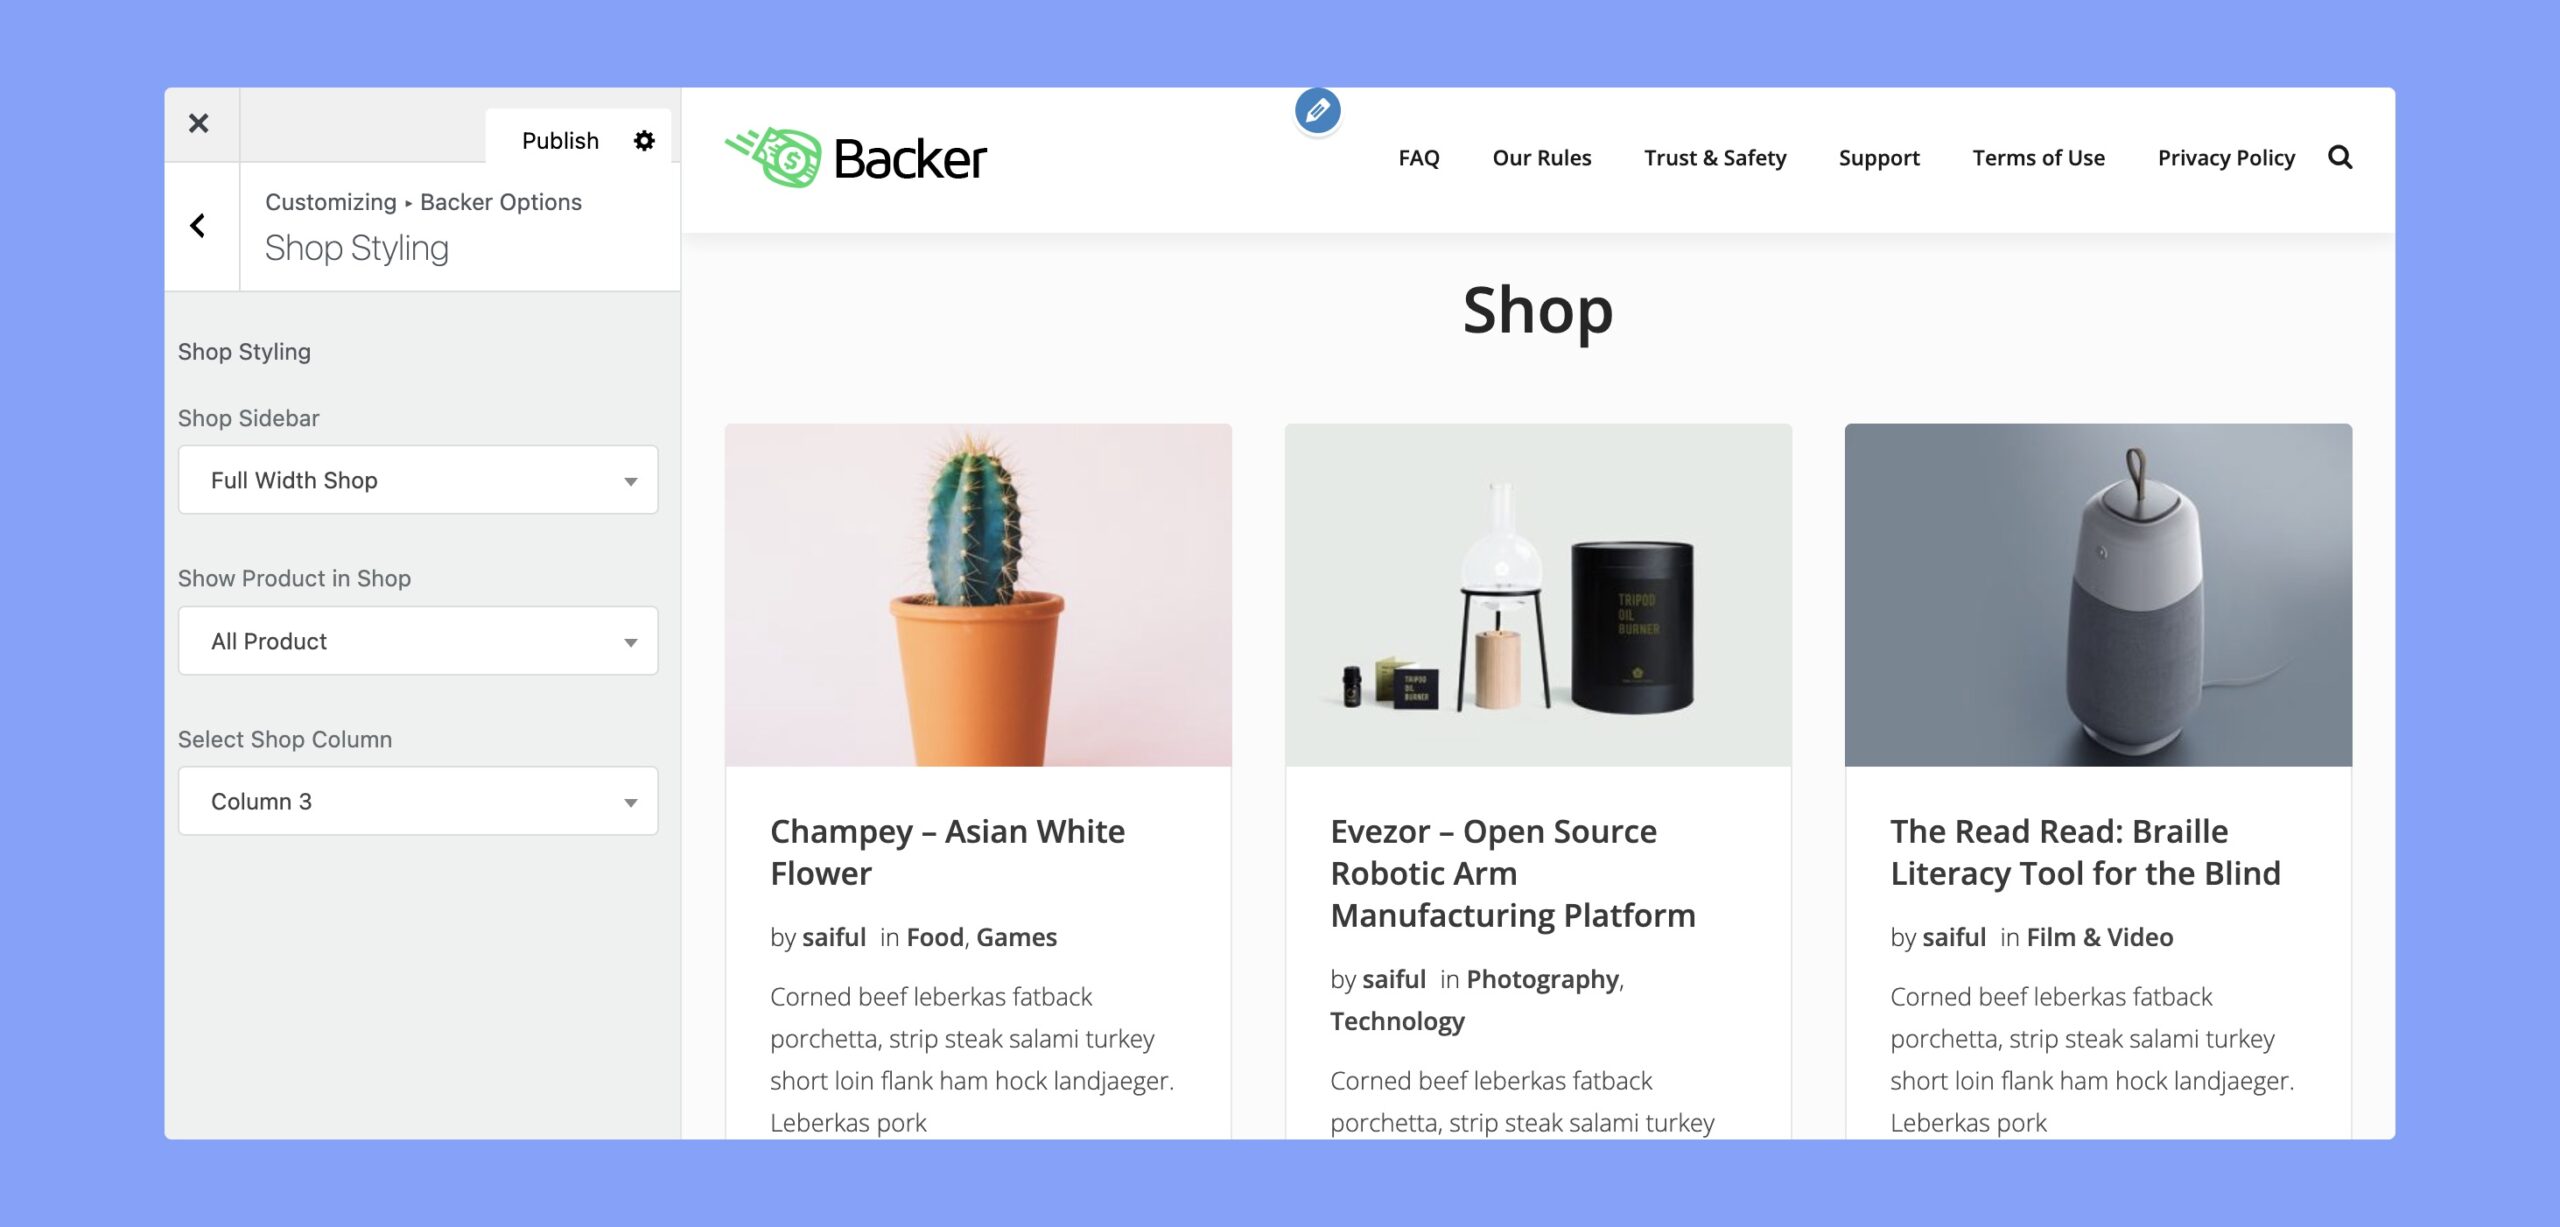
You can customize the appearance of your products on the Shop page. The available customization options on this page are:
- Shop Sidebar: Choose whether you want to display products in full-width or showcase products on the left or right sidebar.
- Show Product in Shop: Choose whether you want to display only the crowdfunding products or other products on the shop page.
- Select Shop Column: Choose the number of columns to display products in on the shop page, including 2, 3, or 4 columns.
All Logo
Use this option to update and customize your website’s logo.
- Select Header Style: Choose whether you want to use an image or text as your official logo.
- Upload Logo: Upload a custom logo image to replace the default site title and tagline in the header.
- Logo Width: Adjust the width of the logo image to fit the header area of your website.
- Logo Height: Adjust the height of the logo image to fit the header area of your website.
- Use your Custom logo text: Instead of uploading a logo image, enter custom text to display as your website’s logo in the header.
Sub Header Banner
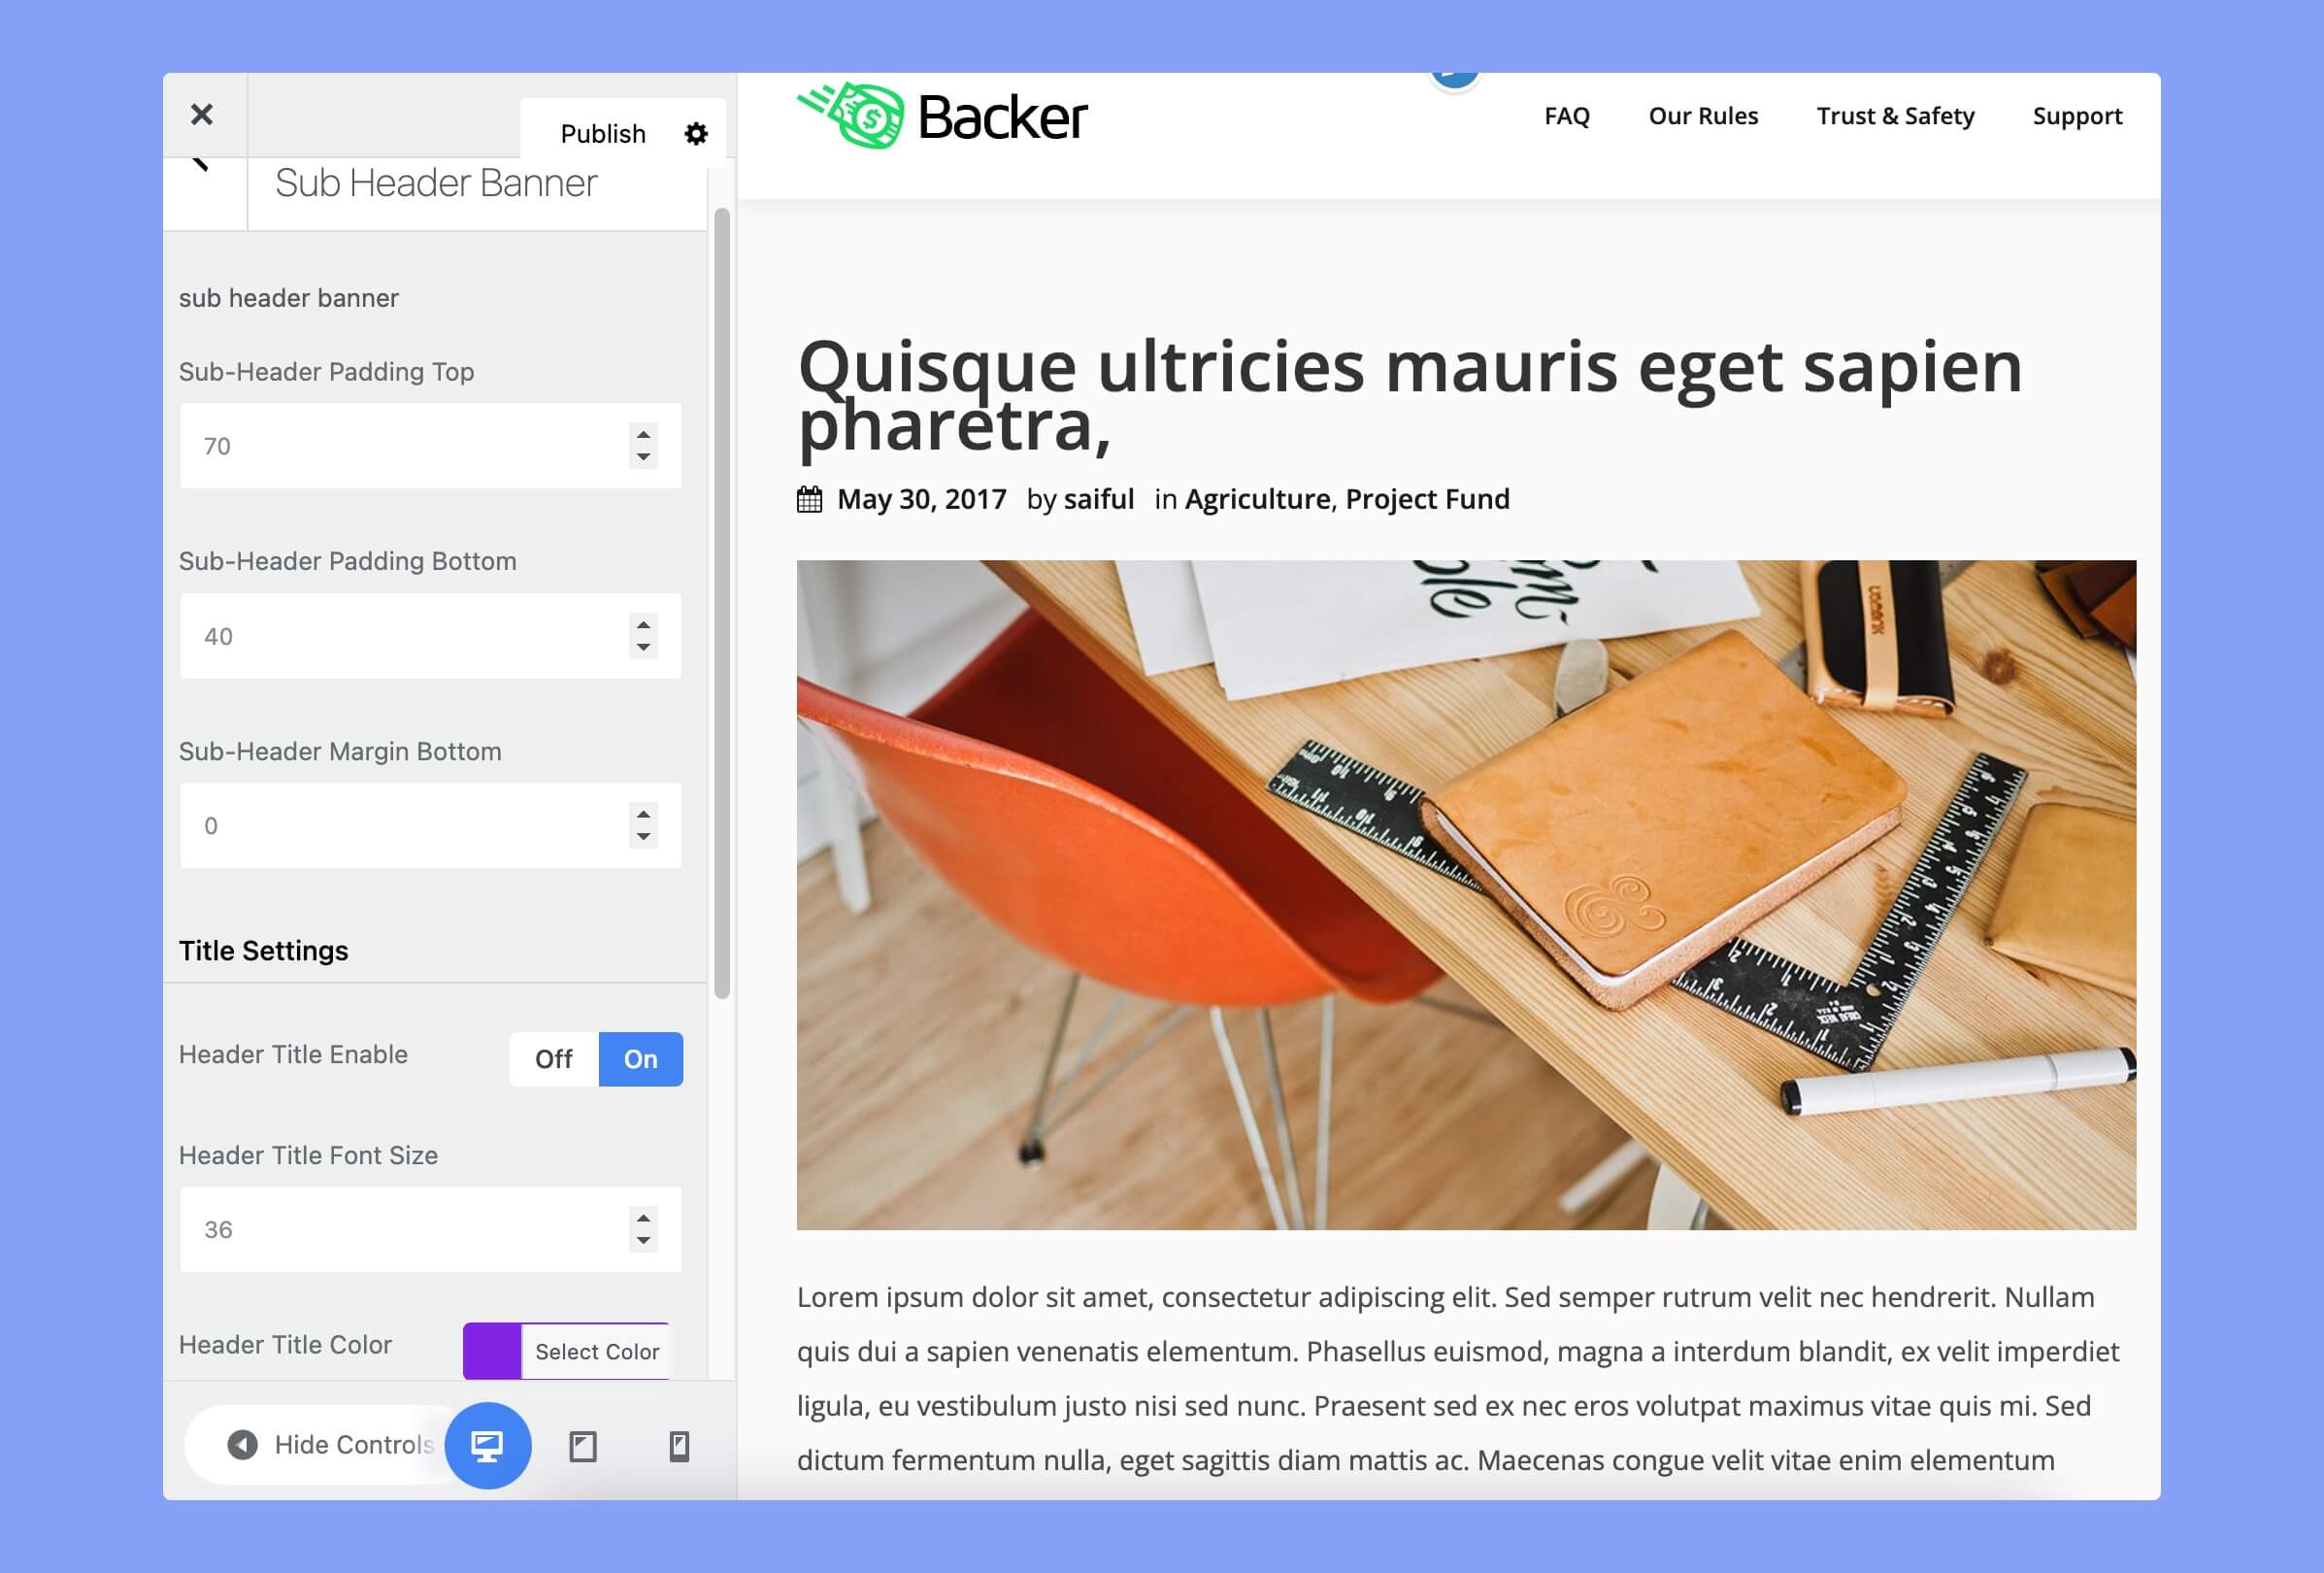
Customize the sub-headers specifying their padding, margin, etc from this page.
- Sub-Header Padding Top: Adjust the spacing between the top of the sub-header and the content above it.
- Sub-Header Padding Bottom: Adjust the spacing between the bottom of the sub-header and the content below it.
- Sub-Header Margin Bottom: Adjust the spacing between the bottom of the sub-header and the content below it, including the main header.
- Header Title Enable: Enable or disable the display of a title in the header area of your website.
- Header Title Font Size: Adjust the title’s font size displayed in the header area.
- Header Title Color: Set a custom color for the title displayed in the header area.
Typography Settings
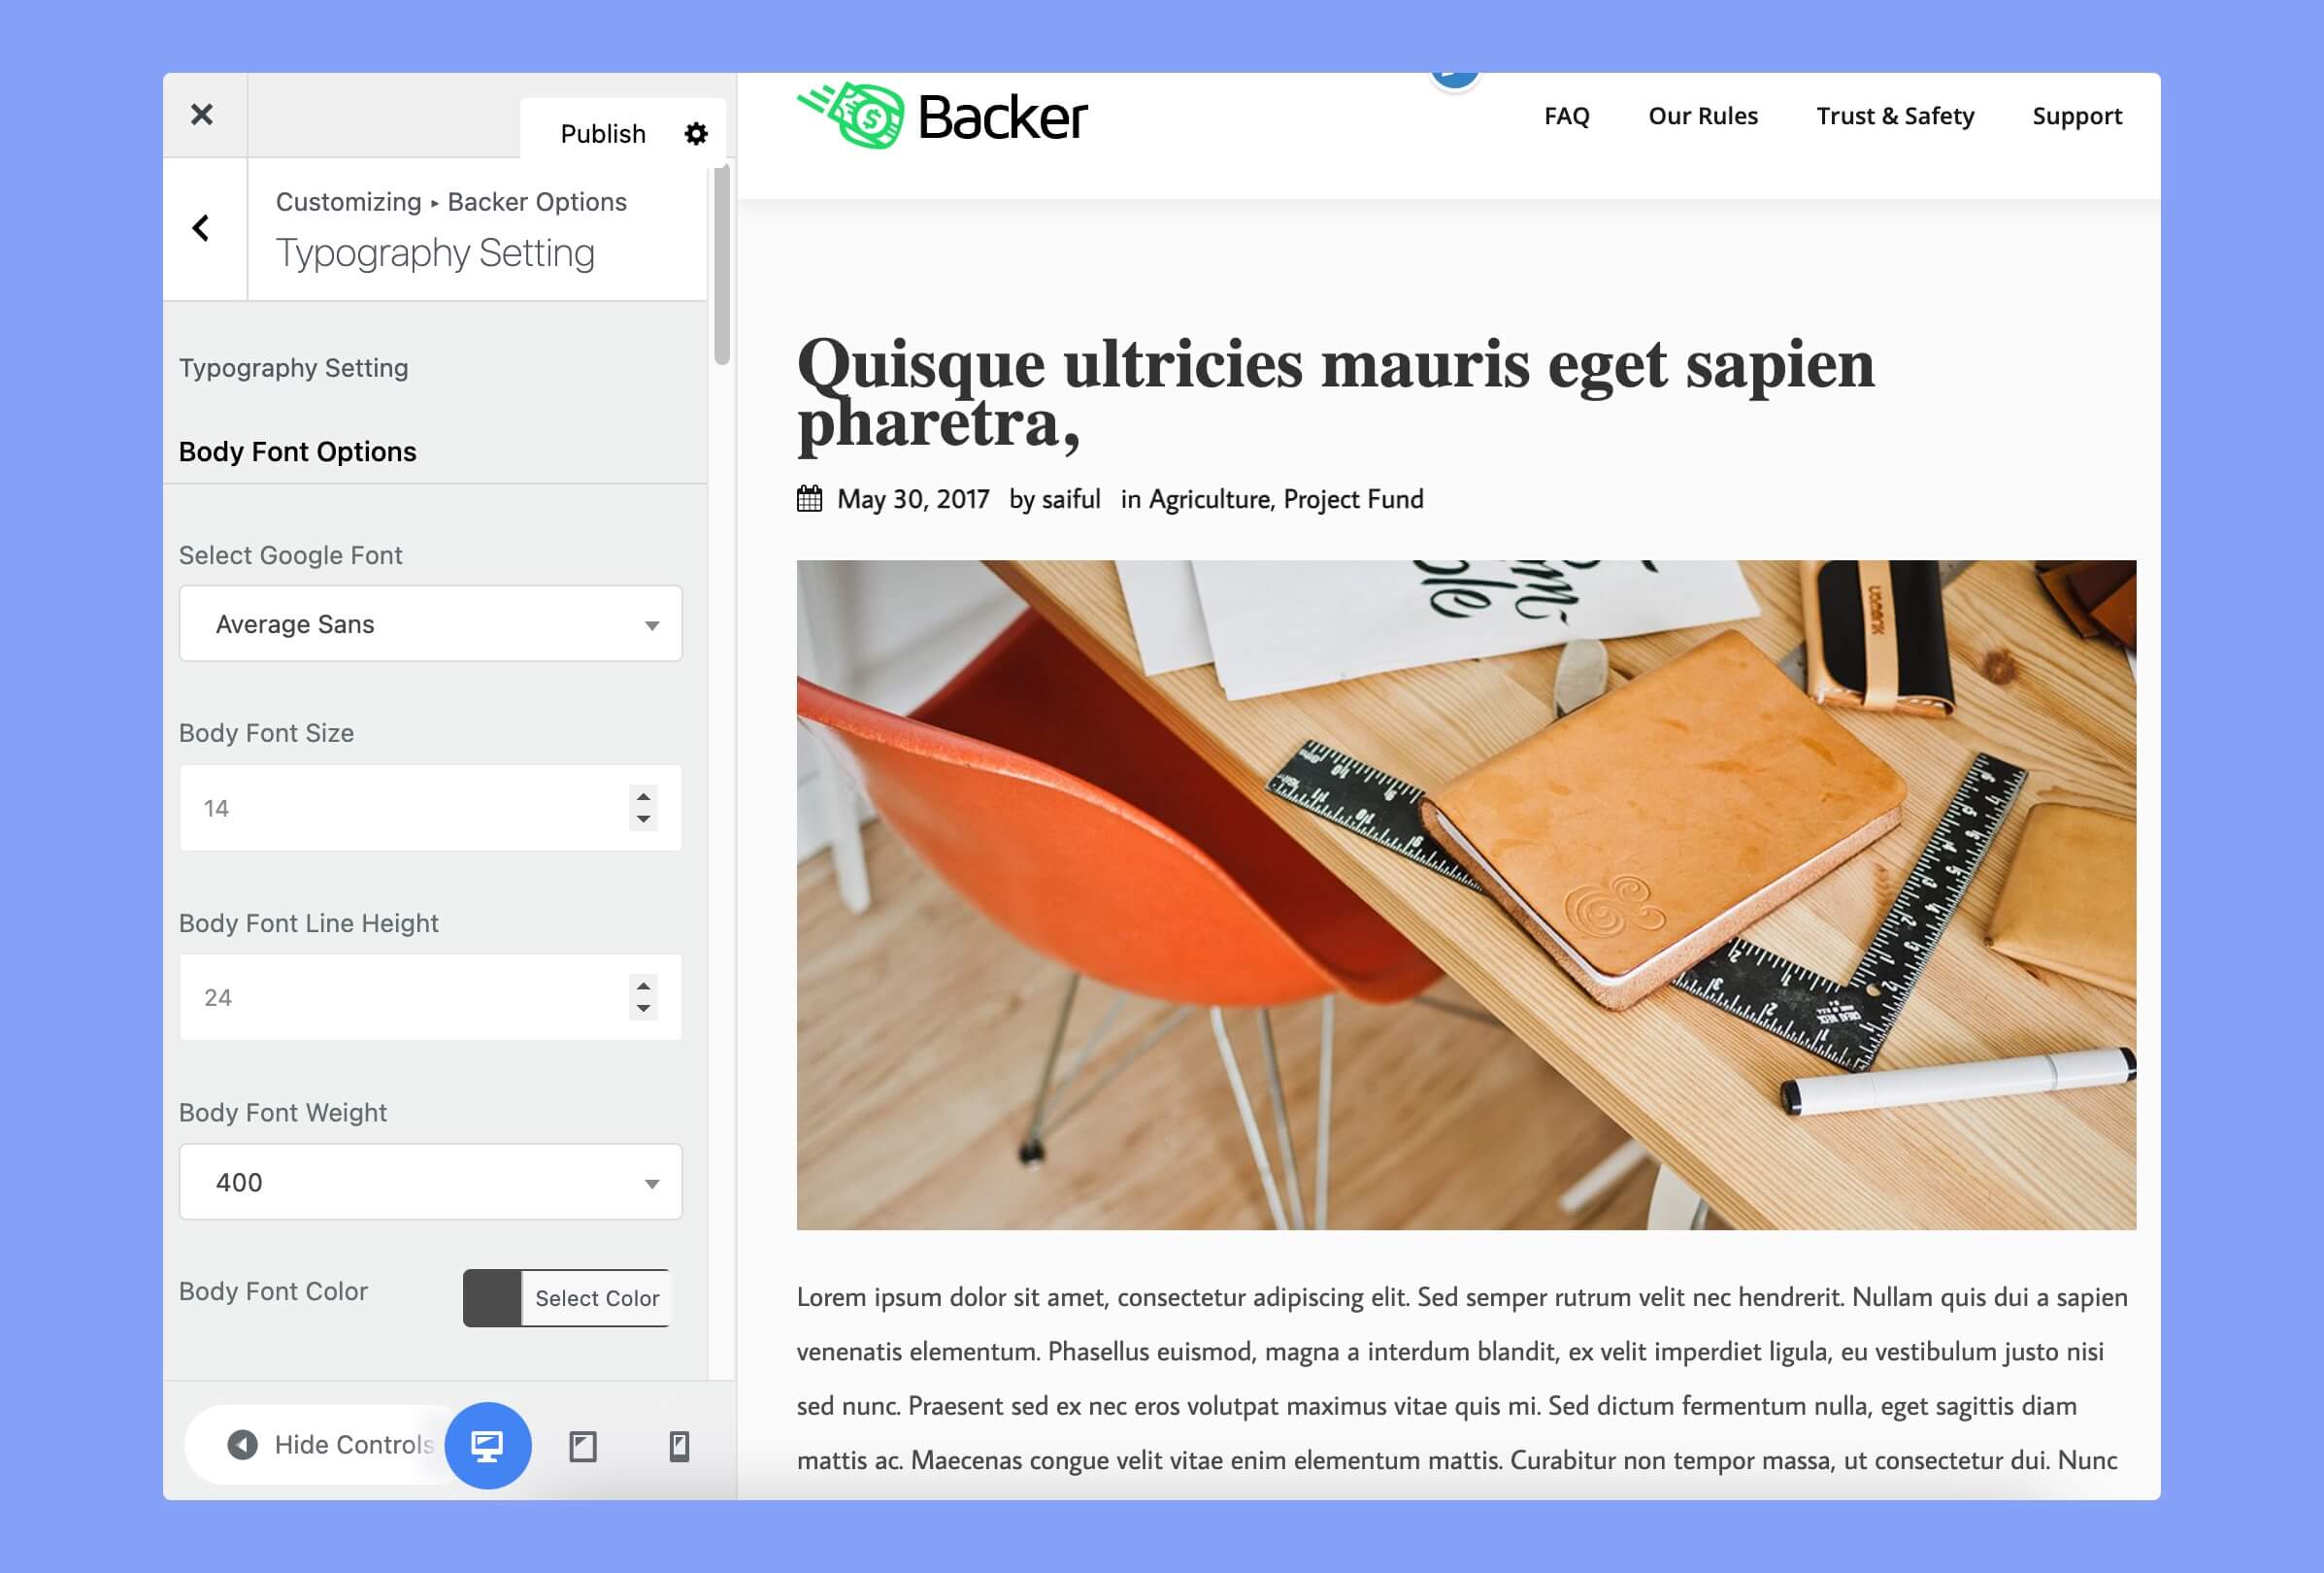
The typography options will allow you to set the font size, color, etc to design your website. Here the available customization options are:
- Select Google Font: Choose from a variety of Google fonts to apply to your website’s text.
- Font Size: Adjust the size of the font used throughout your website’s content.
- Font Line Height: Adjust the spacing between lines of text throughout your website’s content.
- Font Weight: Adjust the thickness or weight of the font used throughout your website’s content.
- Font Color: Set a custom color for the font used throughout your website’s content.
Layout & Styling
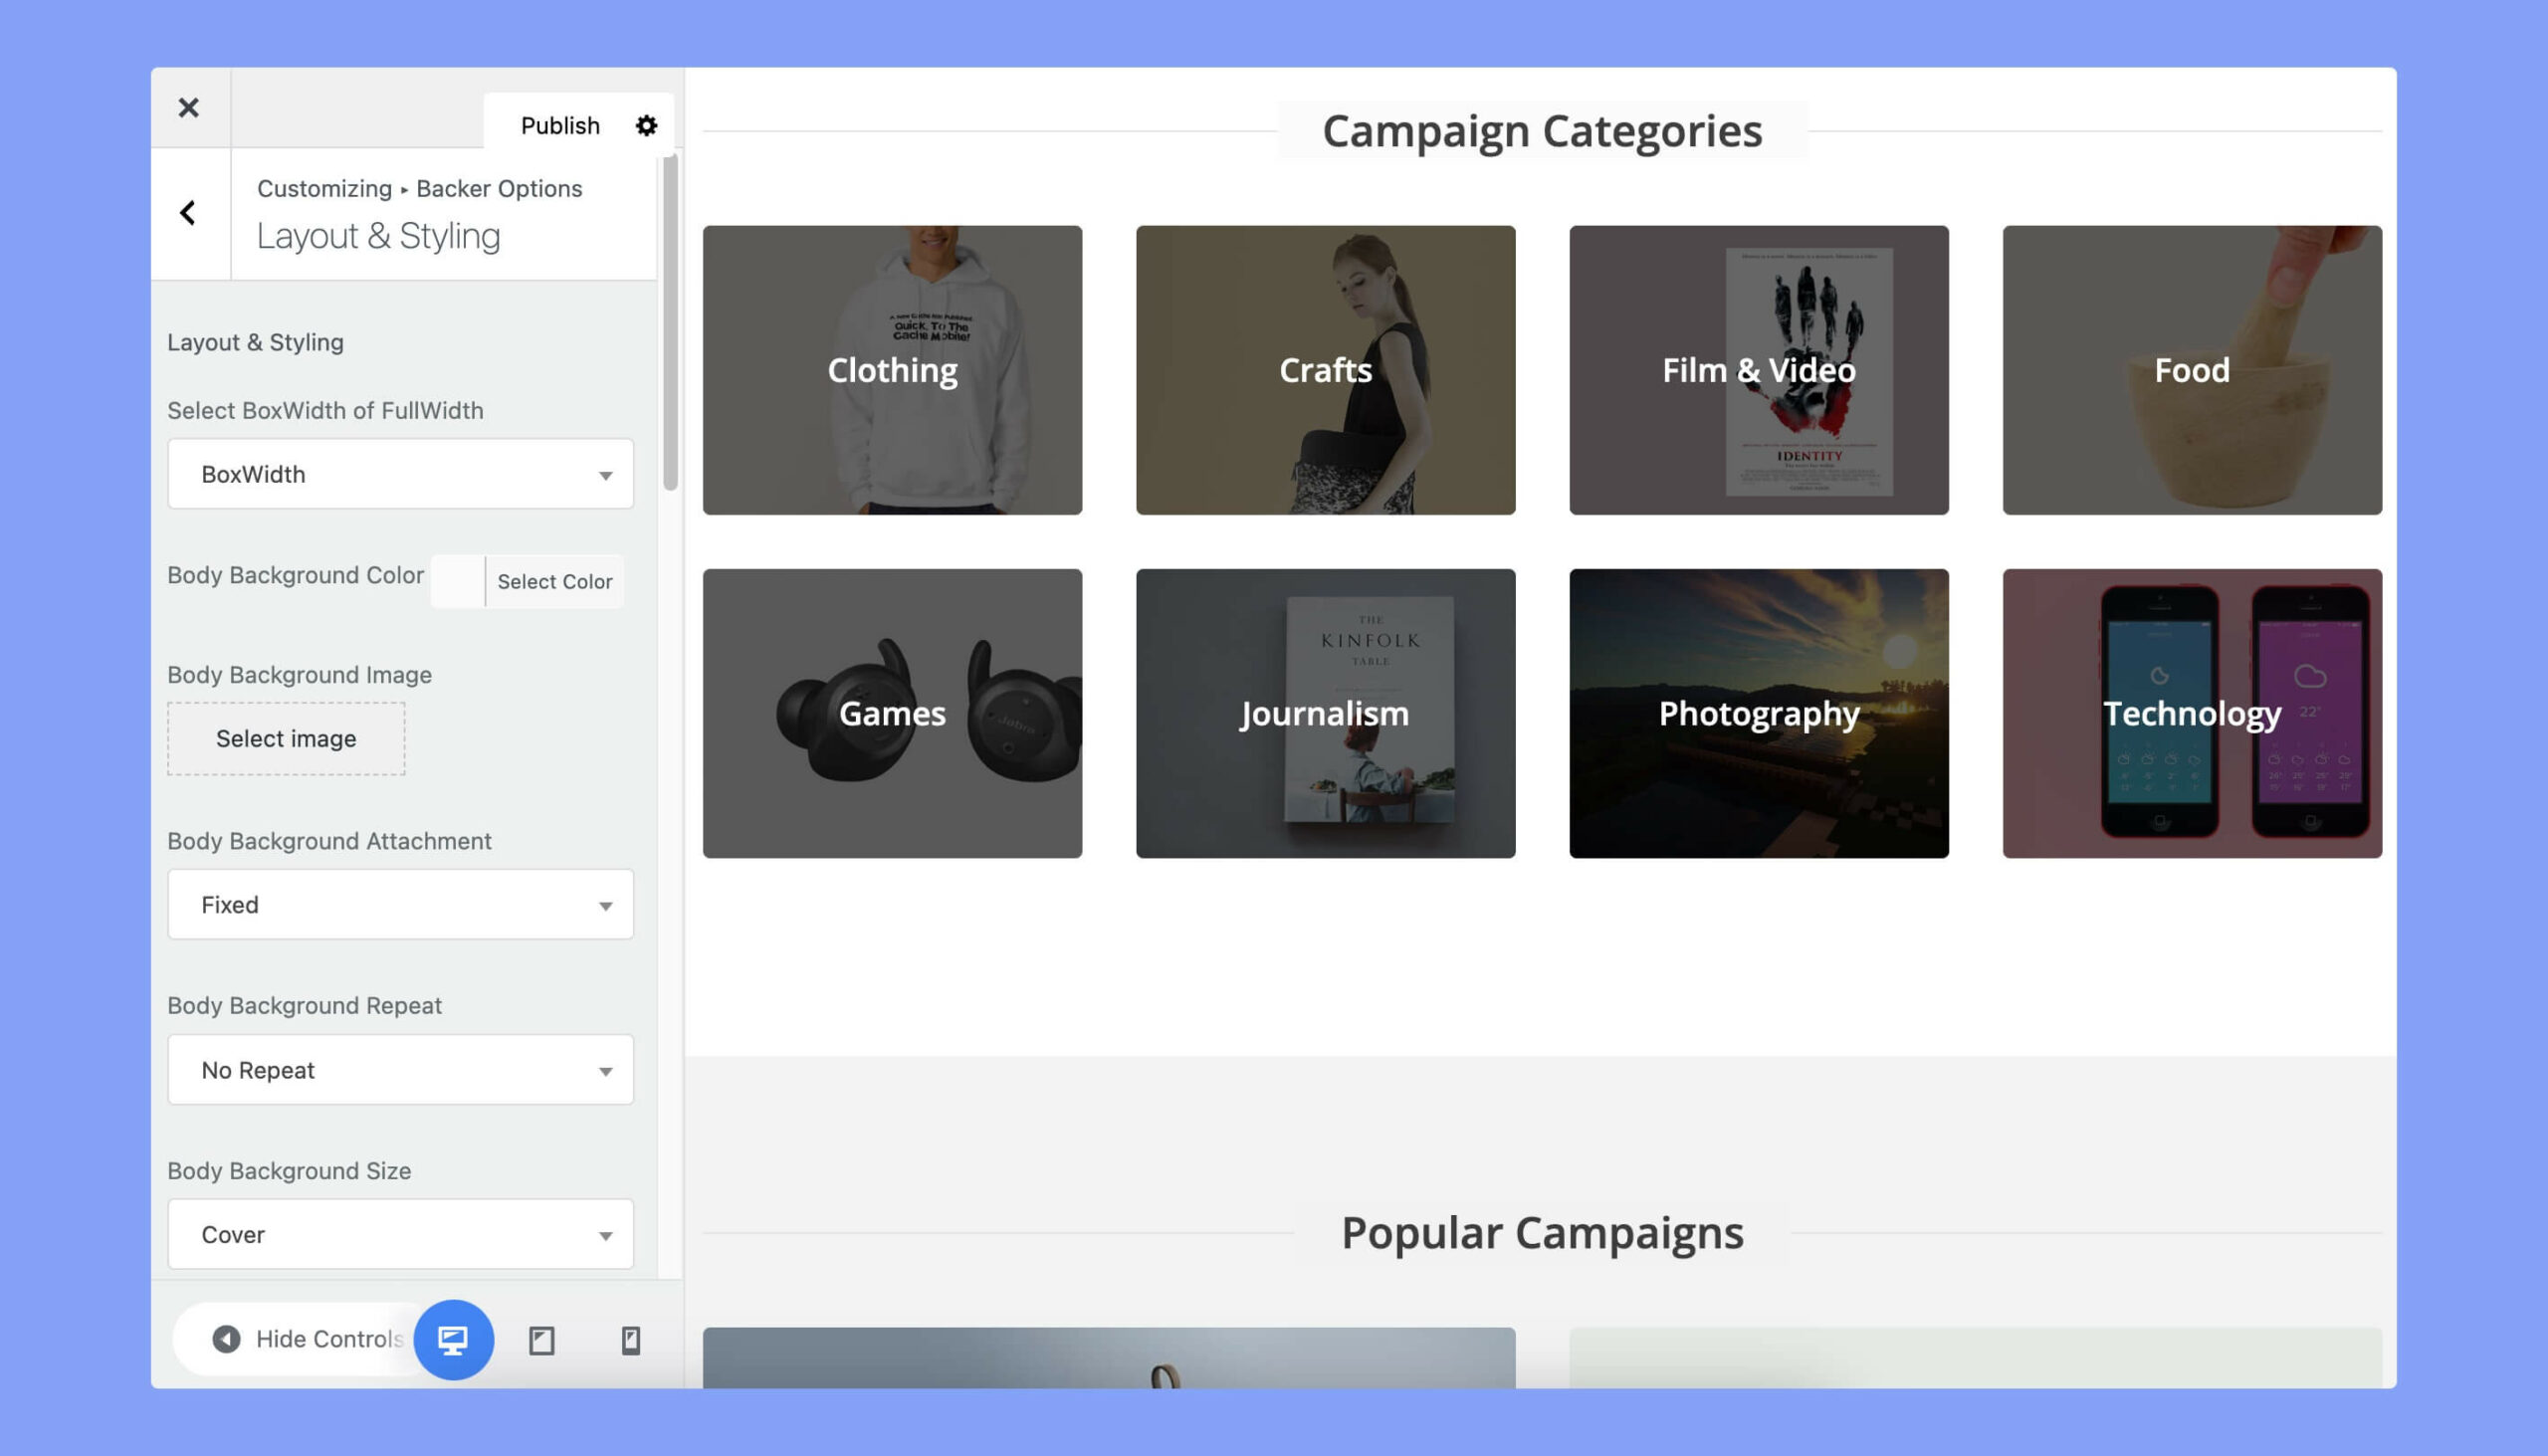
This section allows you to control the styling and layout of your website.
- Select BoxWidth of FullWidth: Choose whether to set the width of your website to a fixed box width or to use the full width of the browser window.
- Body Background Color: Set a custom color for the background of your website’s body area.
- Body Background Image: Upload a custom background image for the body area of your website.
- Body Background Attachment: Choose whether the background image of the body area should scroll with the content or remain fixed.
- Body Background Repeat: Choose whether the background image of the body area should repeat horizontally, vertically, or not at all.
- Body Background Size: Adjust the size of the background image used in the body area of your website.
- Body Background Position: Adjust the position of the background image used in the body area of your website.
- Preset Color: Choose a preset color from here. The available colors are green, blue, aqua, and yellow.
- Set Custom Color: If you don’t want to use the preset colors, you can use custom colors by turning it on.
- Major Color: Set a custom color to use for major design elements such as headings and buttons.
- Hover Color: Set a custom color to use for hover effects on links and buttons.
- Bottom Background Color: Set a custom color for the background of the footer area.
- Bottom Text Color: Set a custom color for the text displayed in the footer area.
- Footer Background Color: Set a custom color for the background of the footer area.
- Footer Text Color: Set a custom color for the text displayed in the footer area.
On the following, you’ll get the options for choosing colors for different options like buttons, menu, or sub-menu.
- Button Background Color: Set a custom background color for buttons used throughout your website.
- Button Hover Background Color: Set a custom background color for buttons when they are hovered over by users.
- Button Text Color: Set a custom text color for buttons used throughout your website.
- Button Hover Text Color: Set a custom text color for buttons when they are hovered over by users.
- Button Border Radius: Adjust the corner radius of buttons used throughout your website.
- Menu Text Color: Set a custom text color for the main navigation menu on your website.
- Menu Hover Text Color: Set a custom text color for menu items when they are hovered over by users.
- Menu Active Text Color: Set a custom text color for the currently active menu item.
- Sub-menu Background Color: Set a custom background color for the sub-menus on your website.
- Sub-menu Text Color: Set a custom text color for the sub-menus on your website.
- Sub-menu Hover Text Color: Set a custom text color for sub-menu items when they are hovered over by users.
Social Media
You can add multiple social media platforms on the footer from here. The available social media platforms are Facebook, Twitter, Pinterest, YouTube, LinkedIn, Instagram, Dribbble, Behance, Flickr, VK, and Skype.
Coming Soon
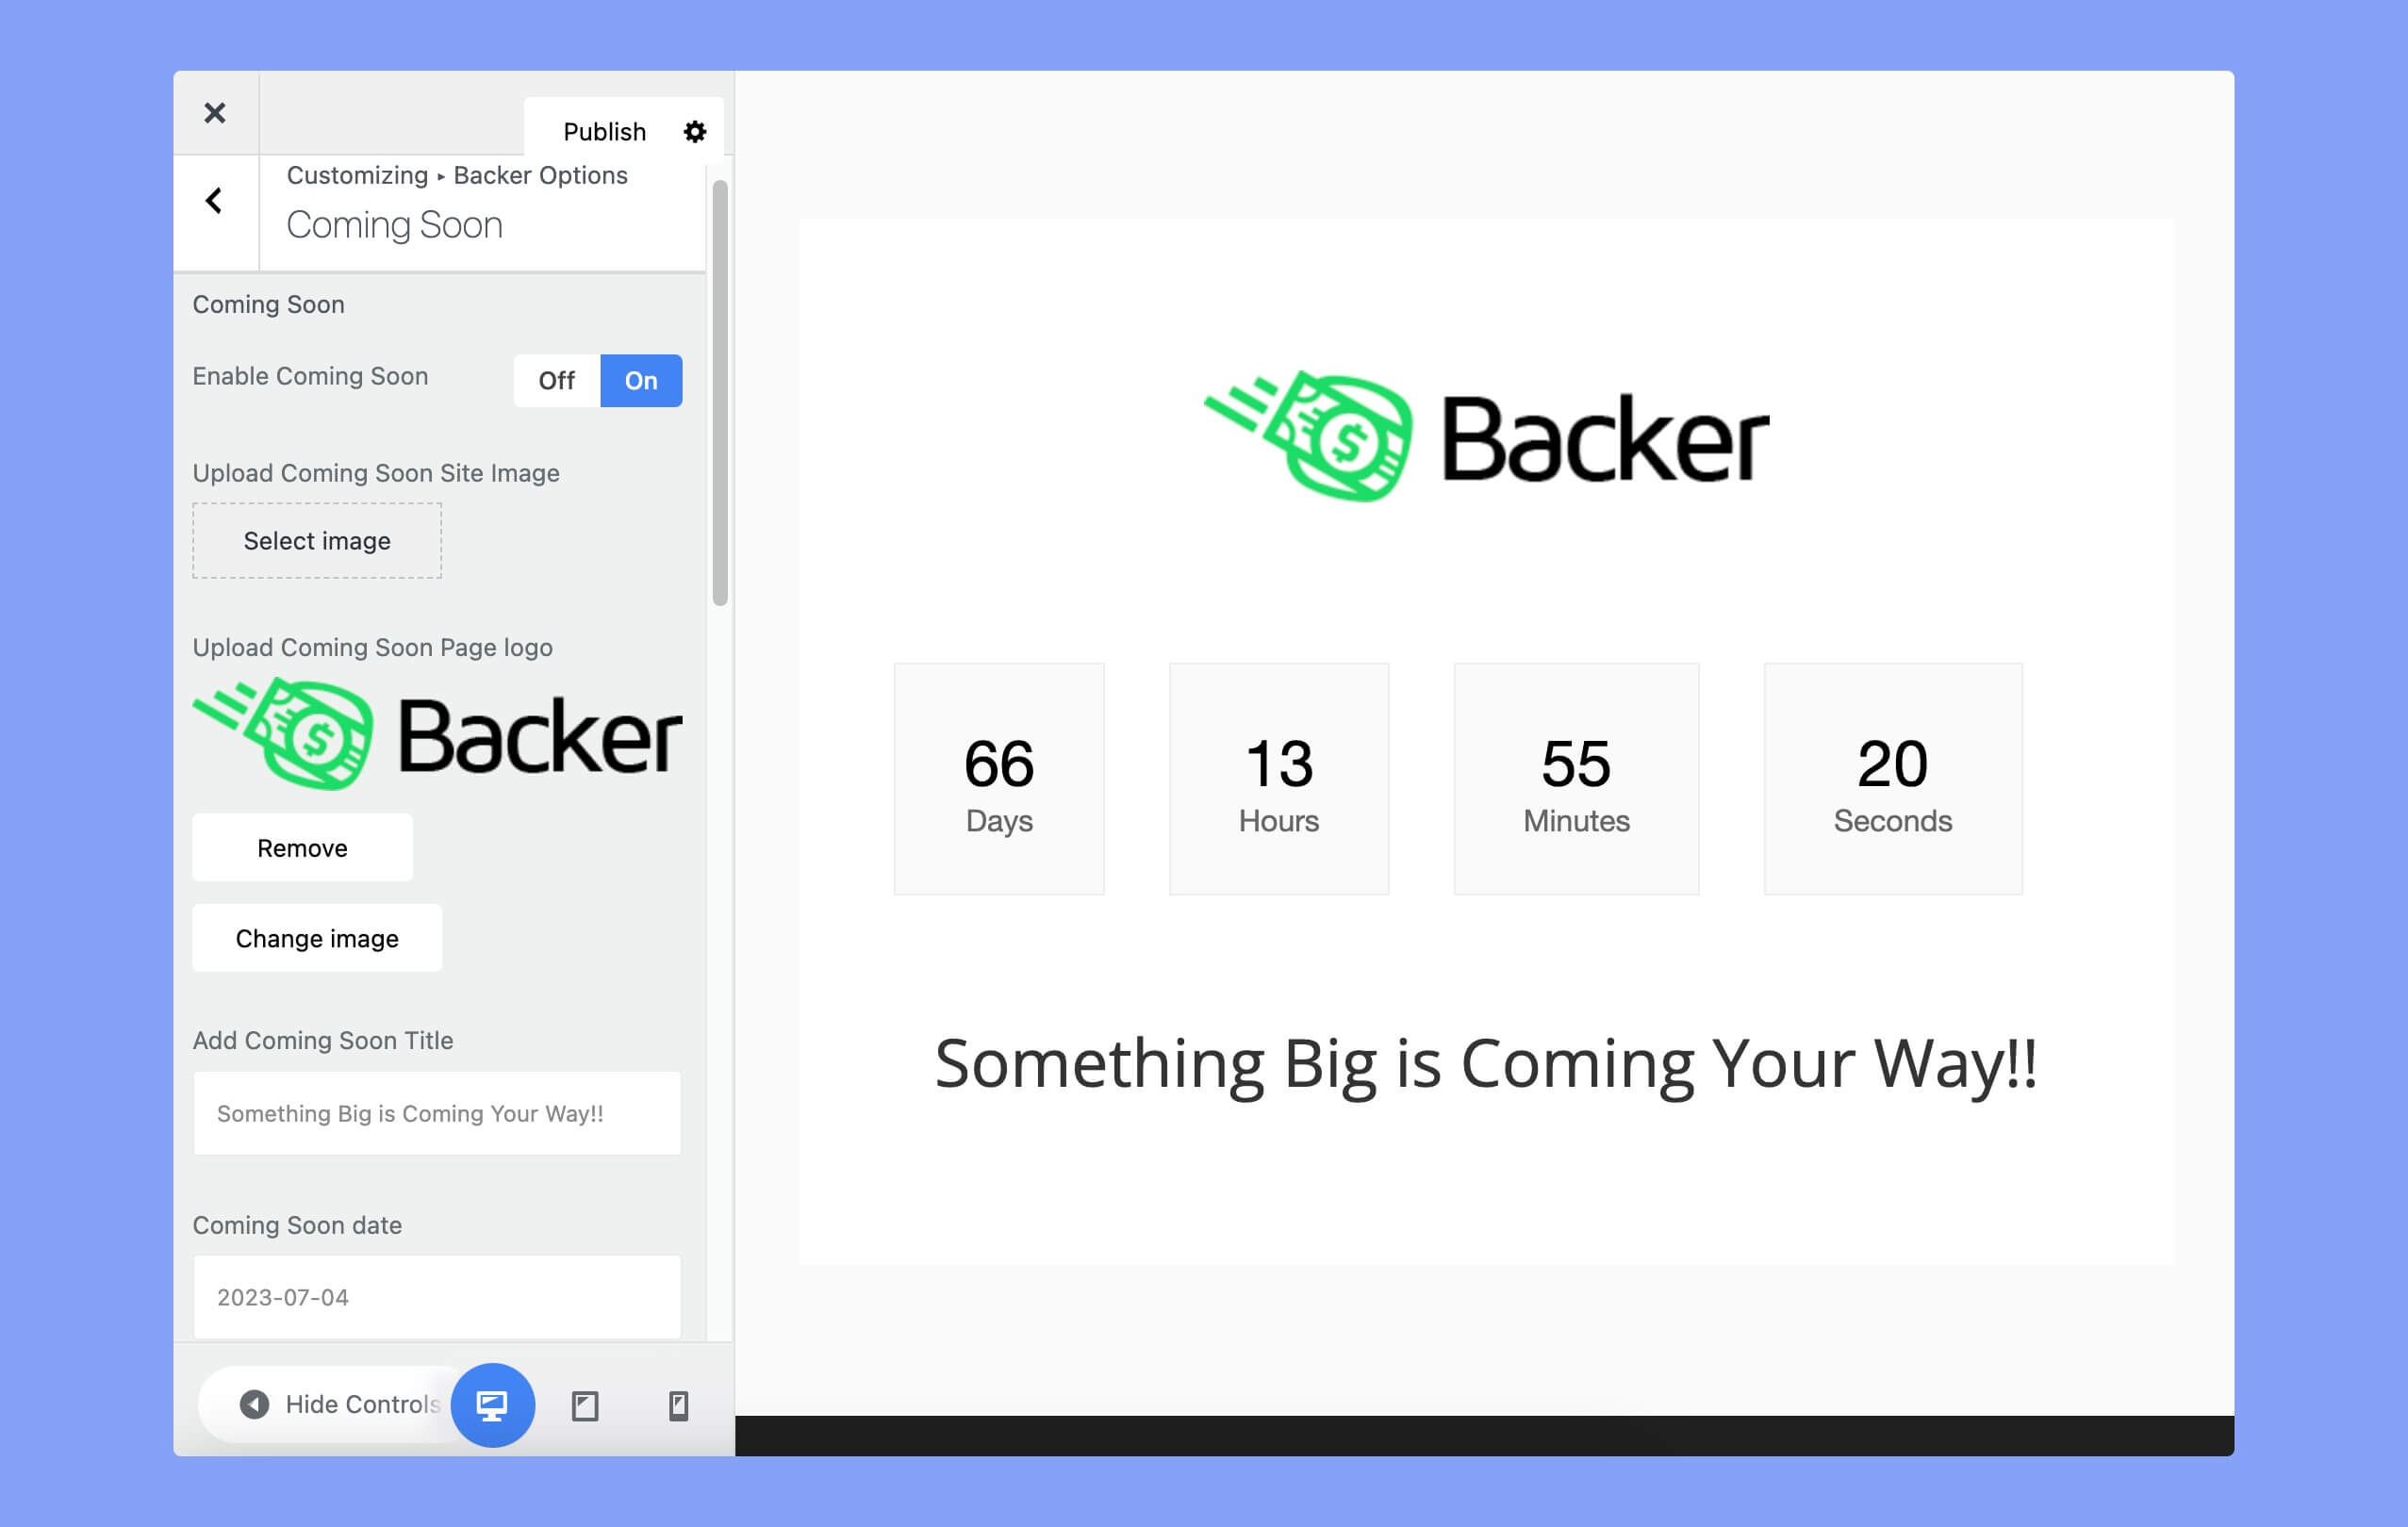
You can customize the coming soon page of your website from this section.
- Enable Coming Soon: Enable or disable the “Coming Soon” page for your website.
- Upload Coming Soon Site Image: Upload a custom image to display on the “Coming Soon” page.
- Upload Coming Soon Page Logo: Upload a custom logo to display on the “Coming Soon” page.
- Add Coming Soon Title: Add a custom title for the “Coming Soon” page.
- Coming Soon date: Set a launch date for your website and display a countdown timer on the “Coming Soon” page.
- Add Mailchimp Form Shortcode Here: Add a shortcode for a Mailchimp form to allow visitors to subscribe to your mailing list on the “Coming Soon” page.
- Coming Soon Description: Add a custom description for the “Coming Soon” page.
- Add Social Media URL: Add links to your social media profiles to display on the “Coming Soon” page.
404 Page
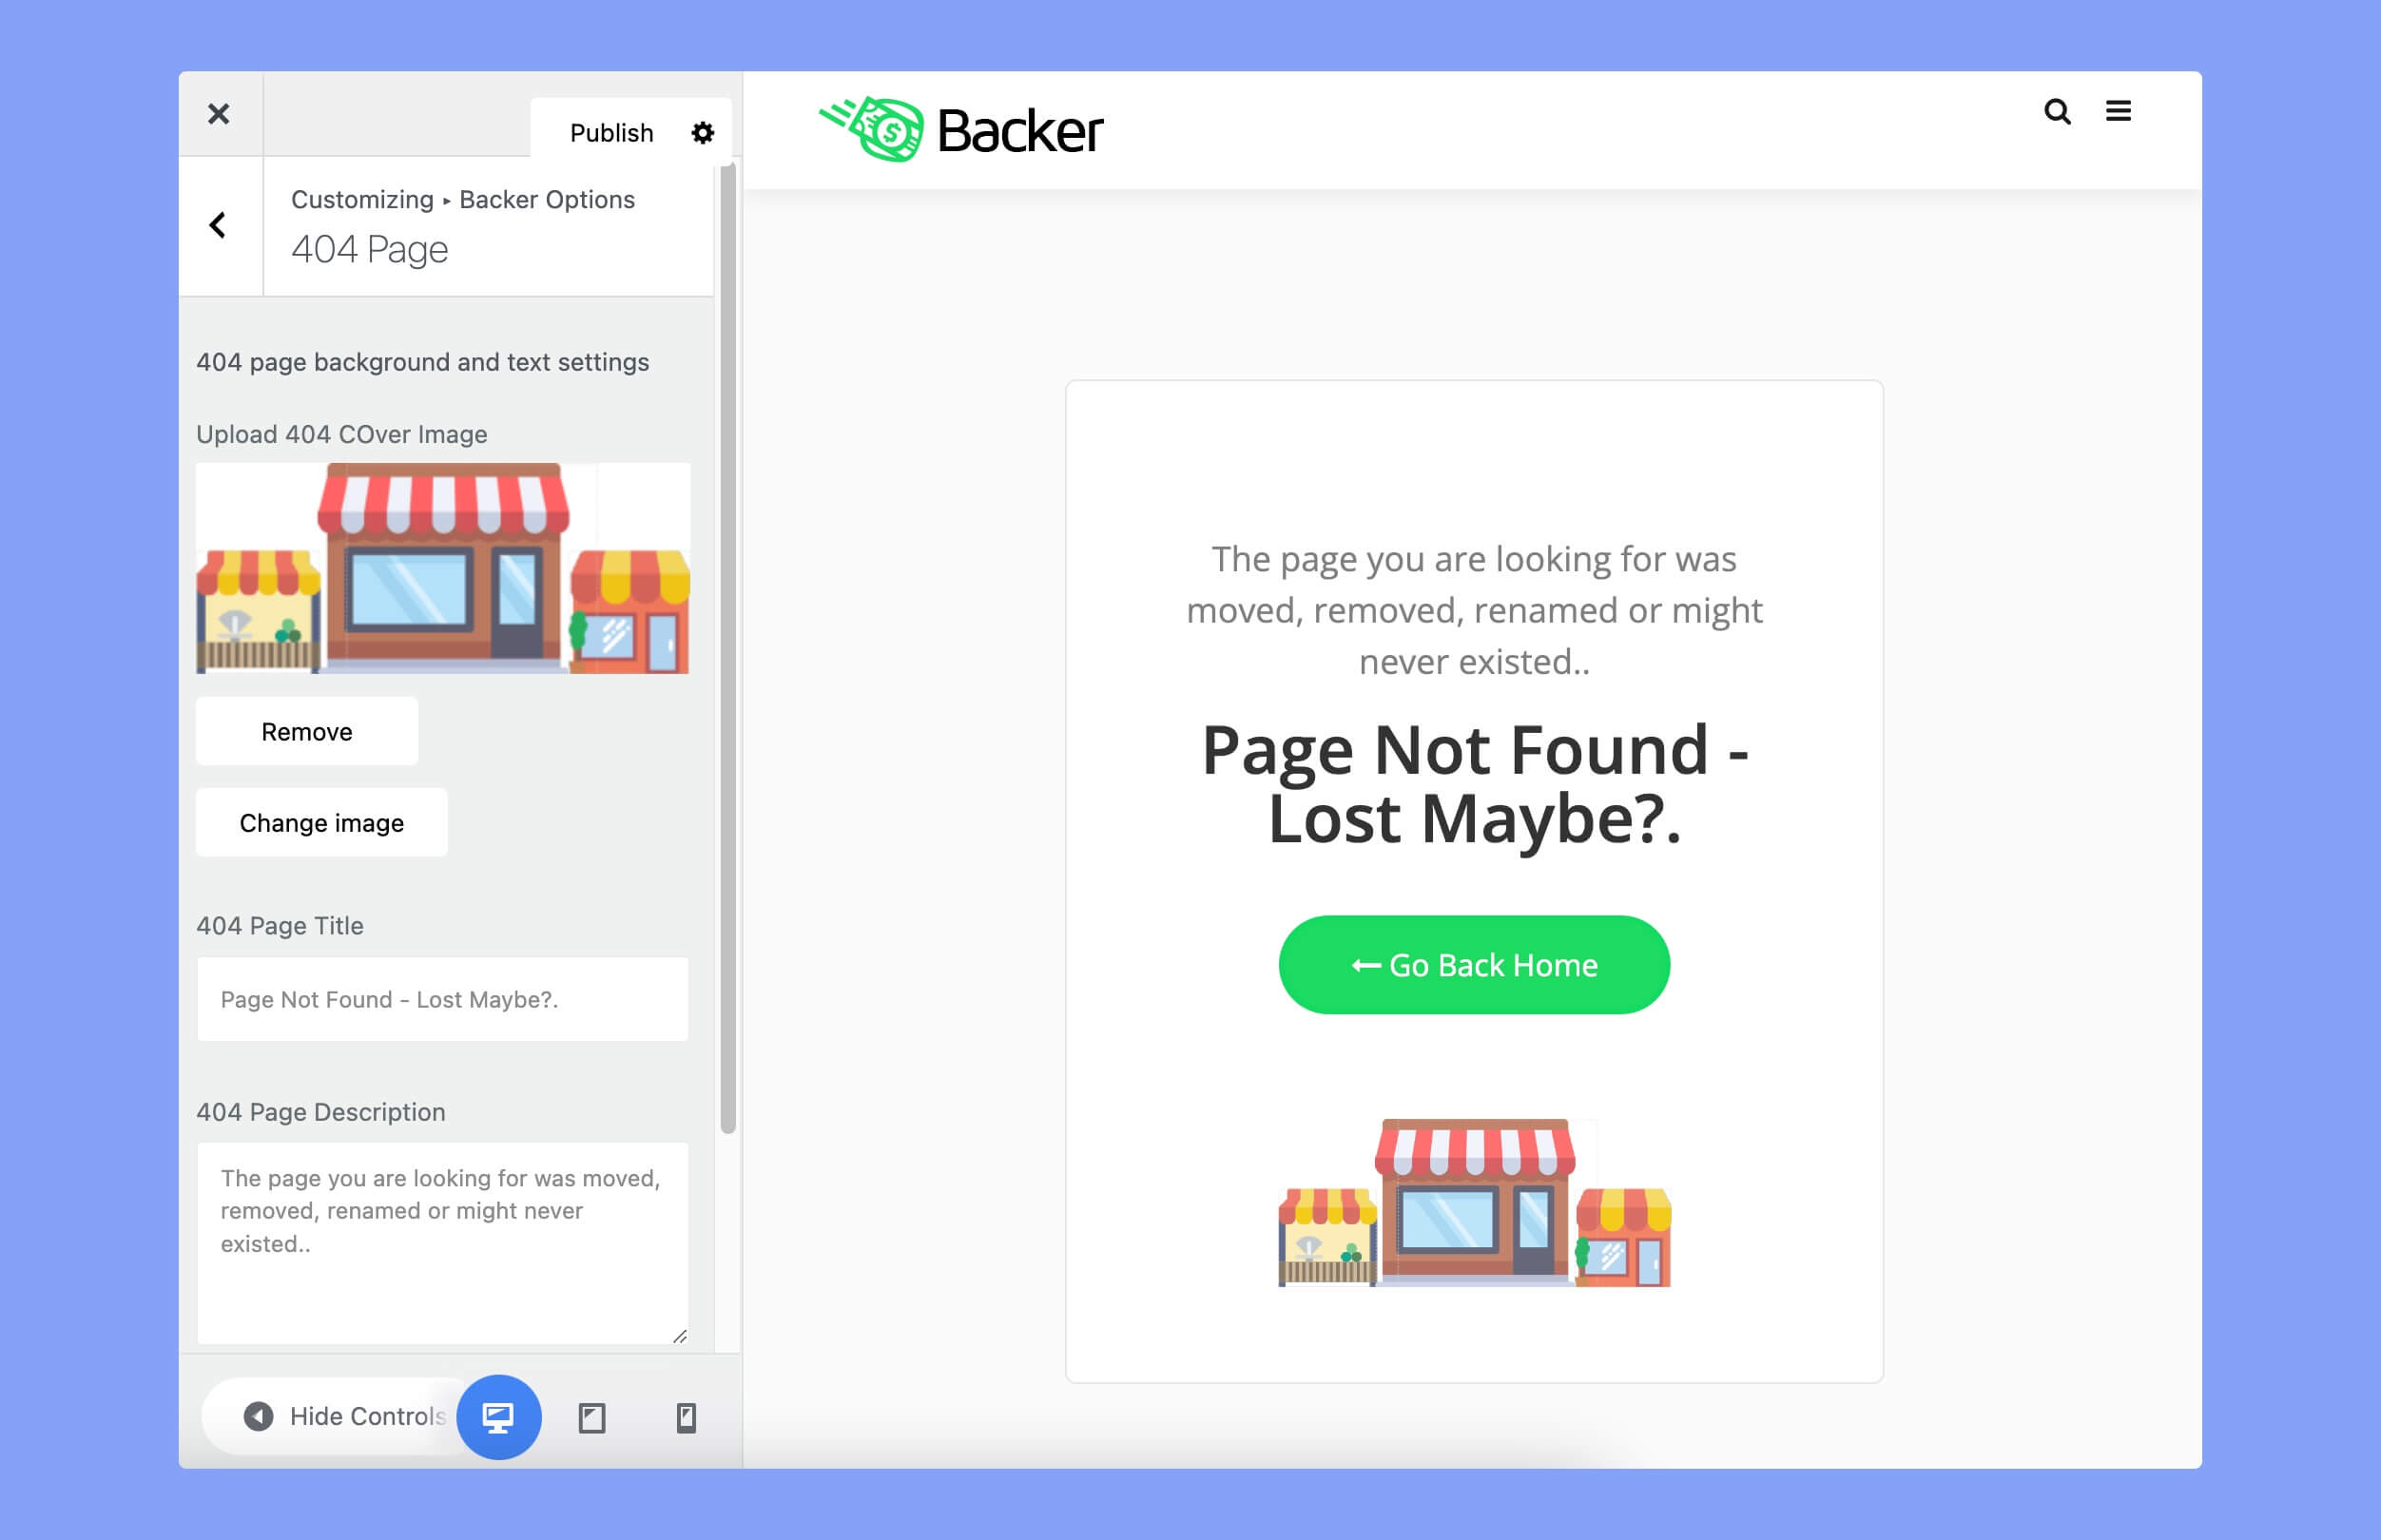
The available options to design a 404 page are listed below:
- Upload 404 Cover Image: Add a cover photo that will be displayed on your 404 page.
- 404 Page Title: Set a title for your page.
- 404 Page Description: Add a simple description on your 404 page.
- 404 Button Text: Update the text of that big green button on your 404 page.
Blog Settings
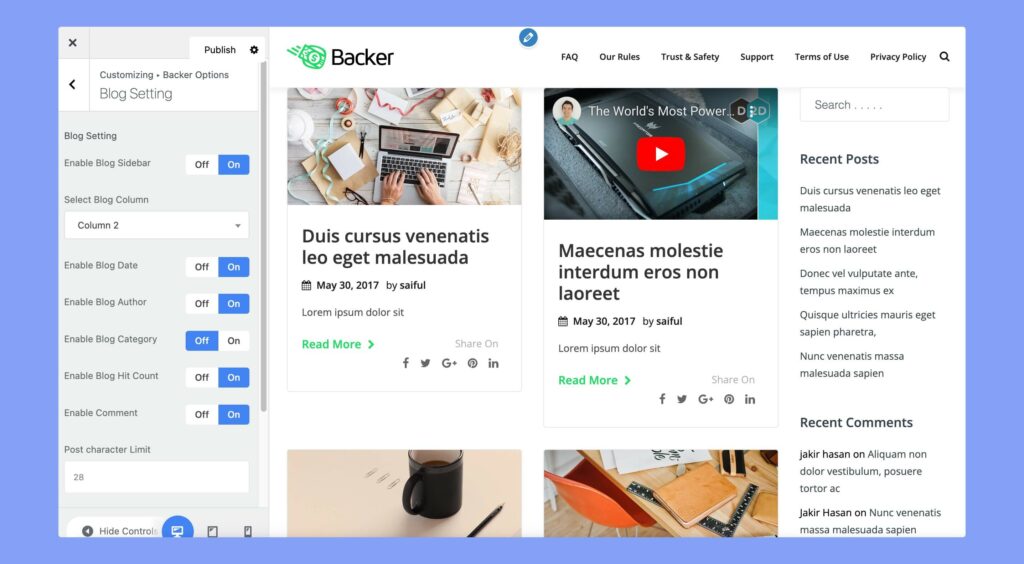
Here are the available options to customize the blog page of your website.
- Enable Blog Sidebar: Enable or disable the right sidebar on your blog page.
- Select Blog Column: Choose how many columns of blog posts you want to display on the blog page. The available options are 1,2,3 and 4 columns.
- Enable Blog Date: Enable this option to display the date of each blog post.
- Enable Blog Author: Display the author of each blog post.
- Enable Blog Category: Display the blog category of each post.
- Enable Blog Hit Count: Display the number of views each blog post has received.
- Enable Comment: Enable or disable comments on your blog posts.
- Post character Limit: Set a character limit for the excerpt displayed on the blog page.
- Enable Blog Readmore: Display a “Read More” button on the blog page to allow visitors to read the full blog post.
- Continue Reading: Customize the text displayed on the “Read More” button.
Bottom Settings
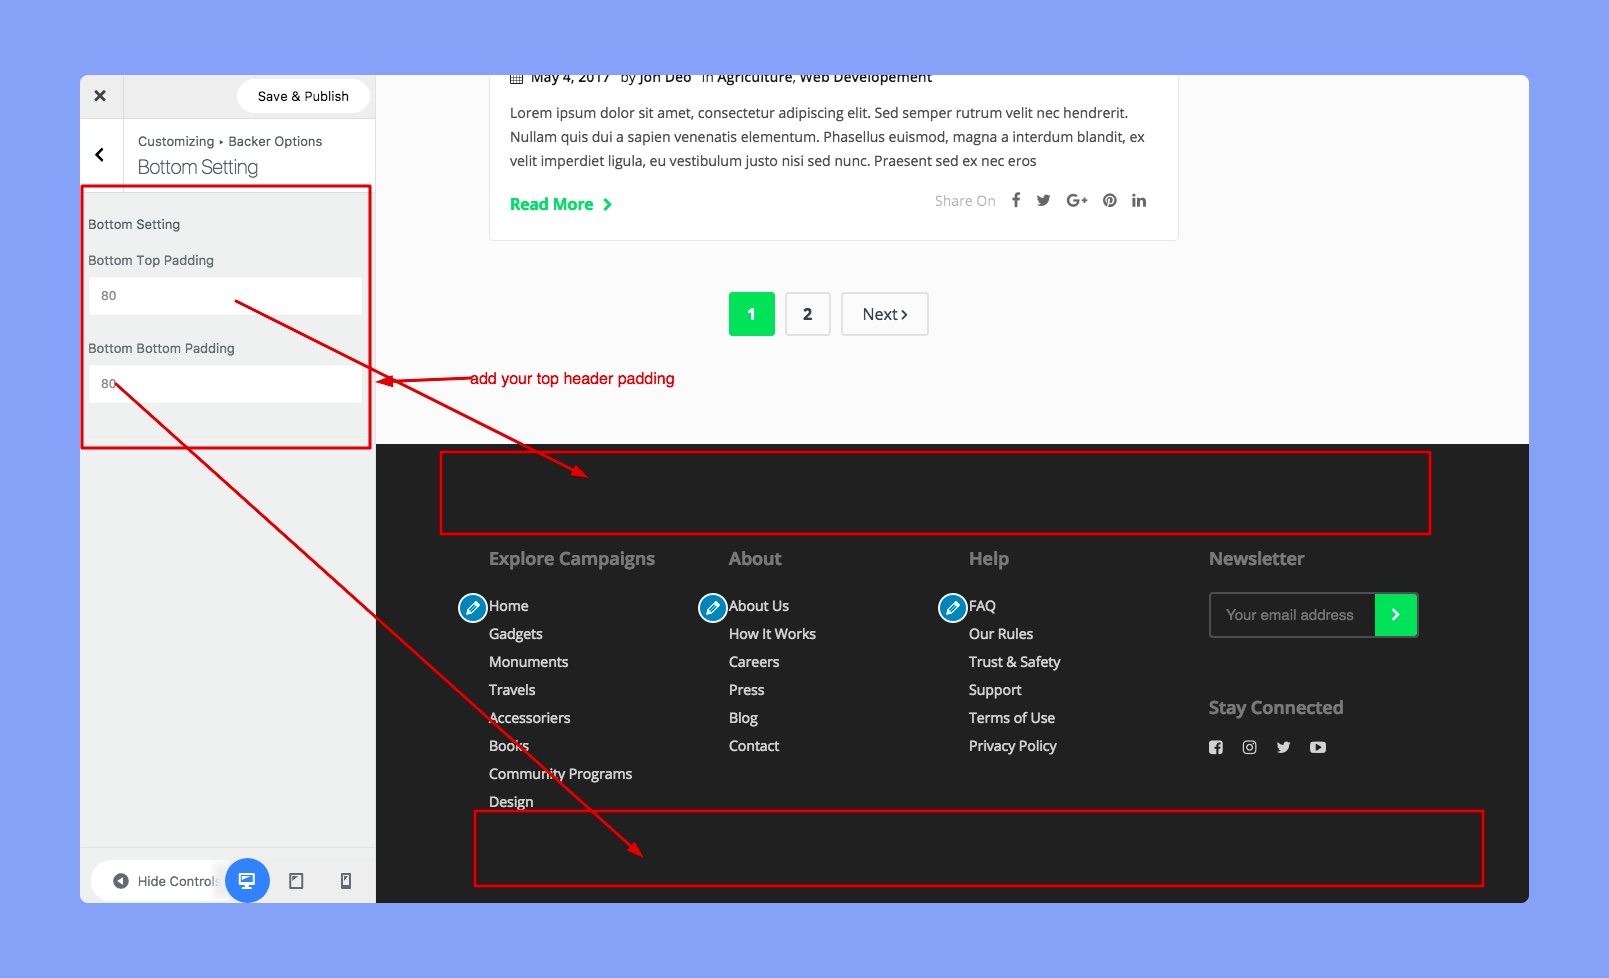
You can update the spacing of your website bottom from here.
- Bottom Top Padding: Set the top padding for the bottom section of your website.
- Bottom Bottom Padding: Set the bottom padding for the bottom section of your website.
Footer Settings
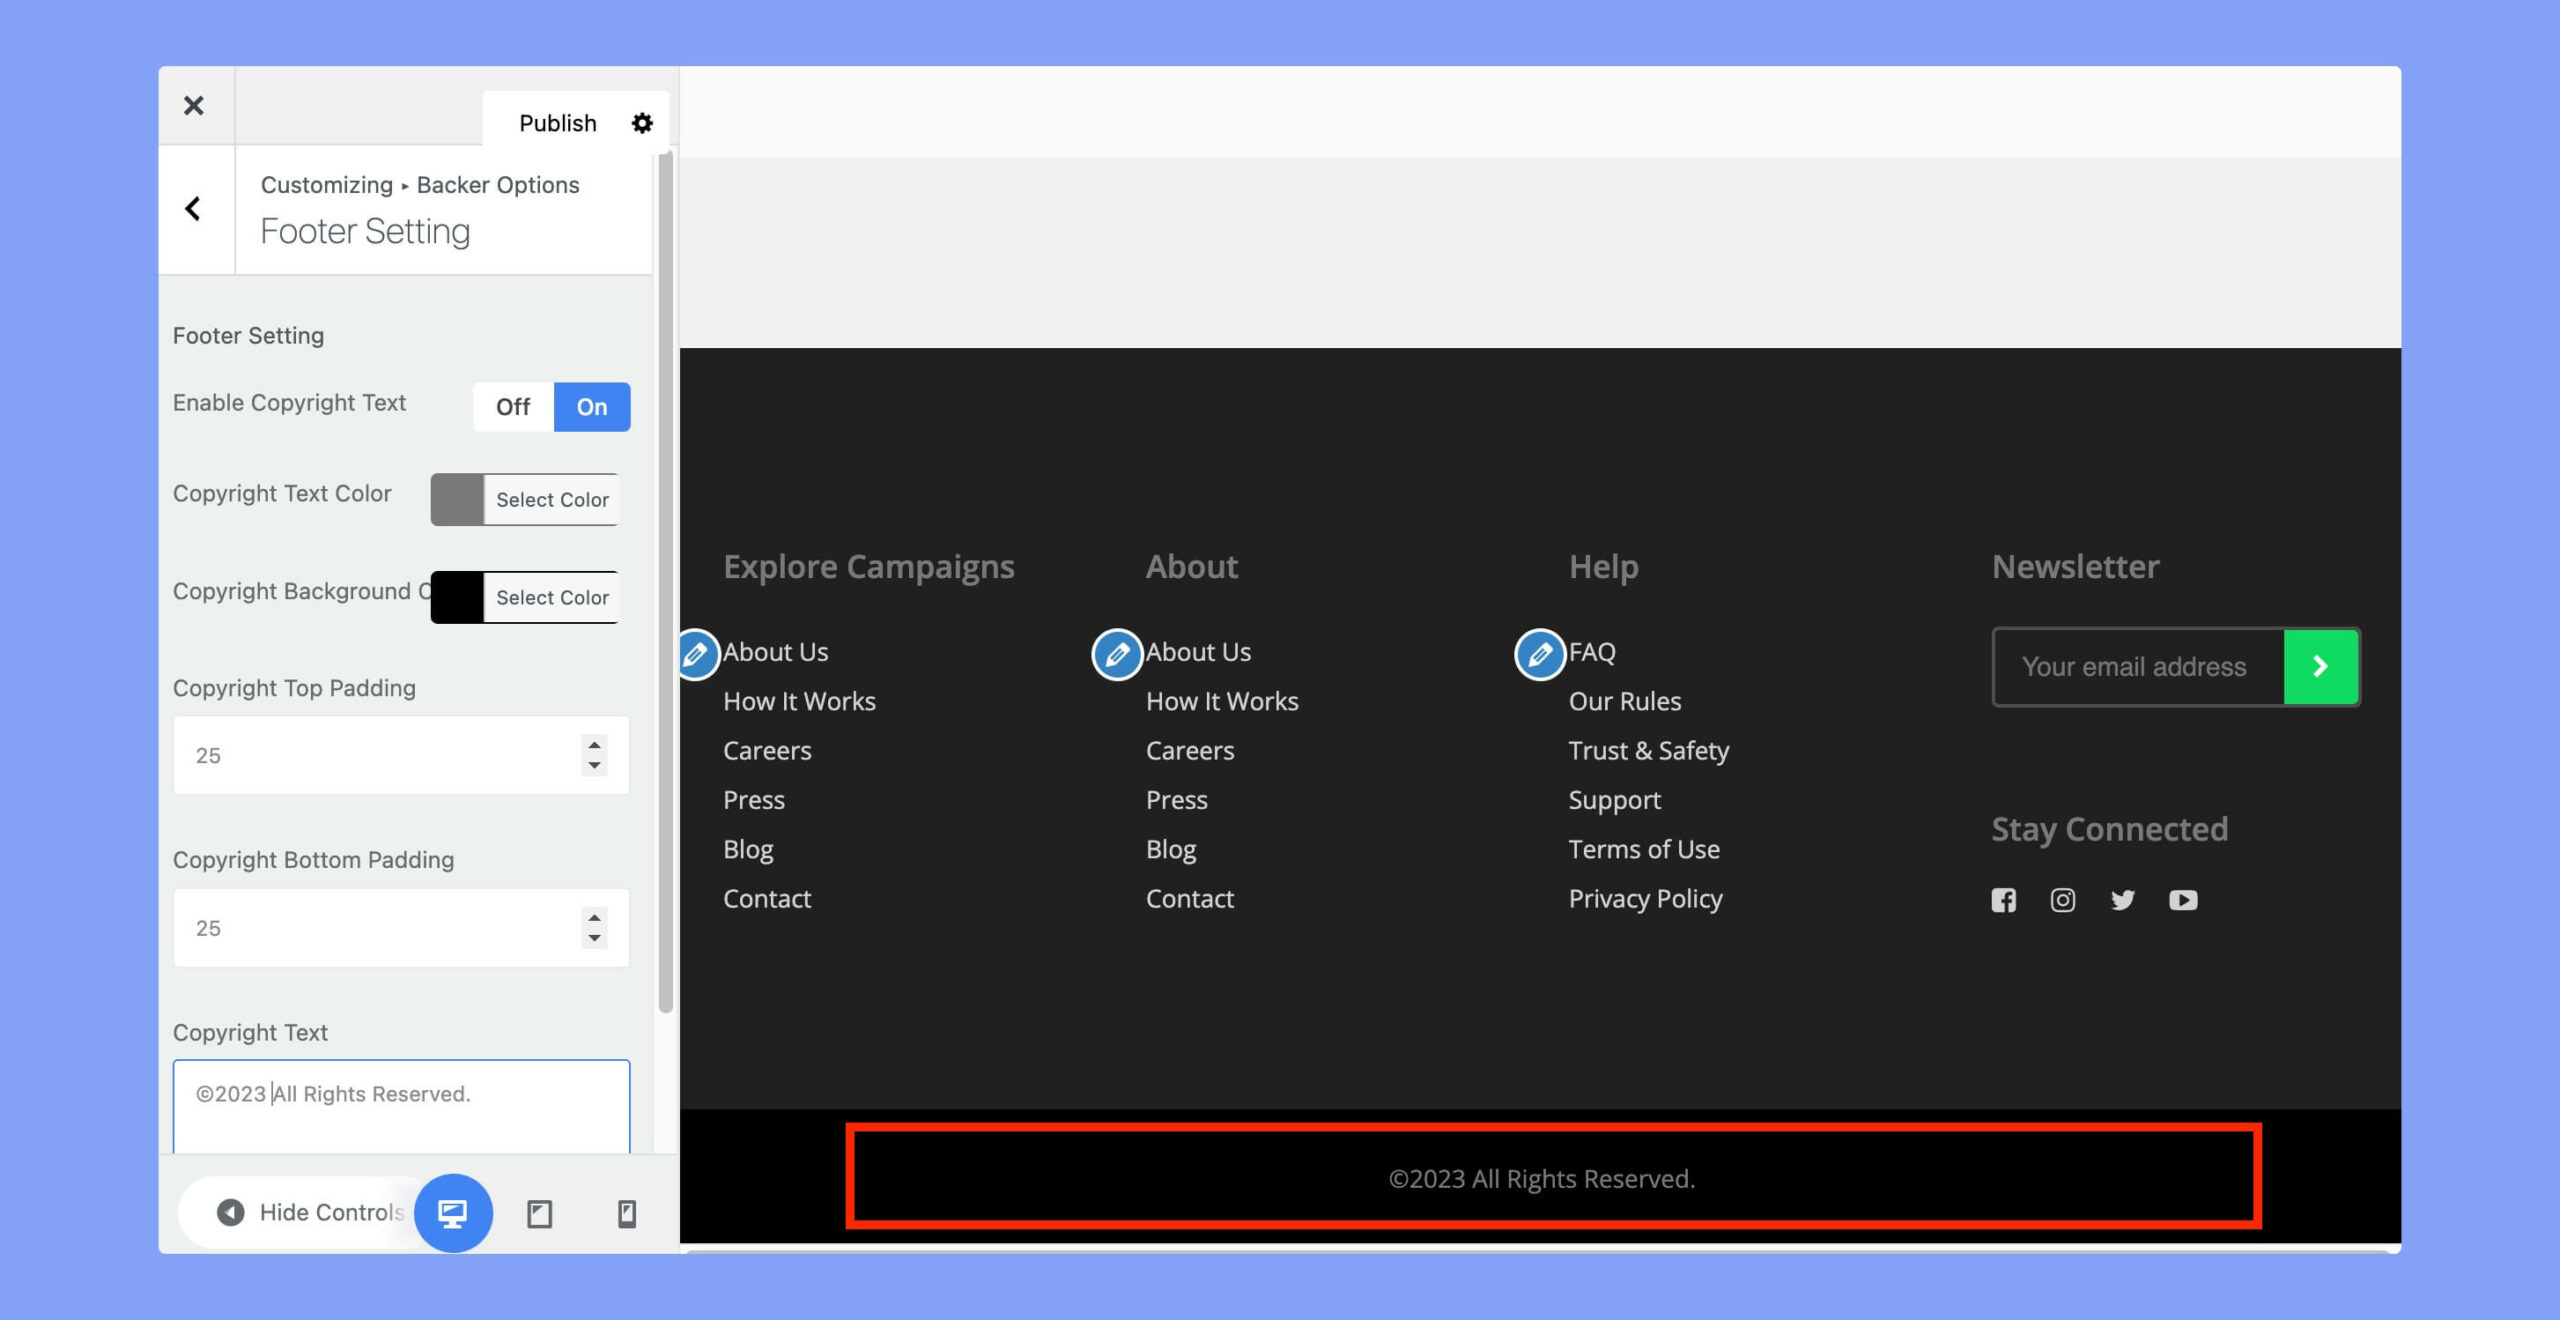
Here are the options for footer settings:
- Enable Copyright Text: Enable or disable the display of a copyright message on your website.
- Copyright Text Color: Choose the color for the copyright text.
- Copyright Background Color: Choose the color for the copyright message background.
- Copyright Top Padding: Set the top padding for the copyright message.
- Copyright Bottom Padding: Set the bottom padding for the copyright message.
- Copyright Text: Customize the text of the copyright message to display on your website.
Google Map Settings

You can use Google Map on your site by using the Google Map API key. Just get the Google Map API key and place it here.