Once you’ve installed the Skillate theme on your site, you’ll get a readymade theme for your website. But, you can customize it further to match the color and vibe of your website. You can customize the theme by navigating to WP Dashboard > Appearance > Customize. You can update the design of your theme from there.
You are free to customize every aspect of the Skillate theme to your liking. Below you will find what options you will be able to use.
Skillate Options
From updating the header footer to changing the layout and theme color, you can customize lots of other things on the Skillate theme. We’ll explain all of these sections here:
Header Settings
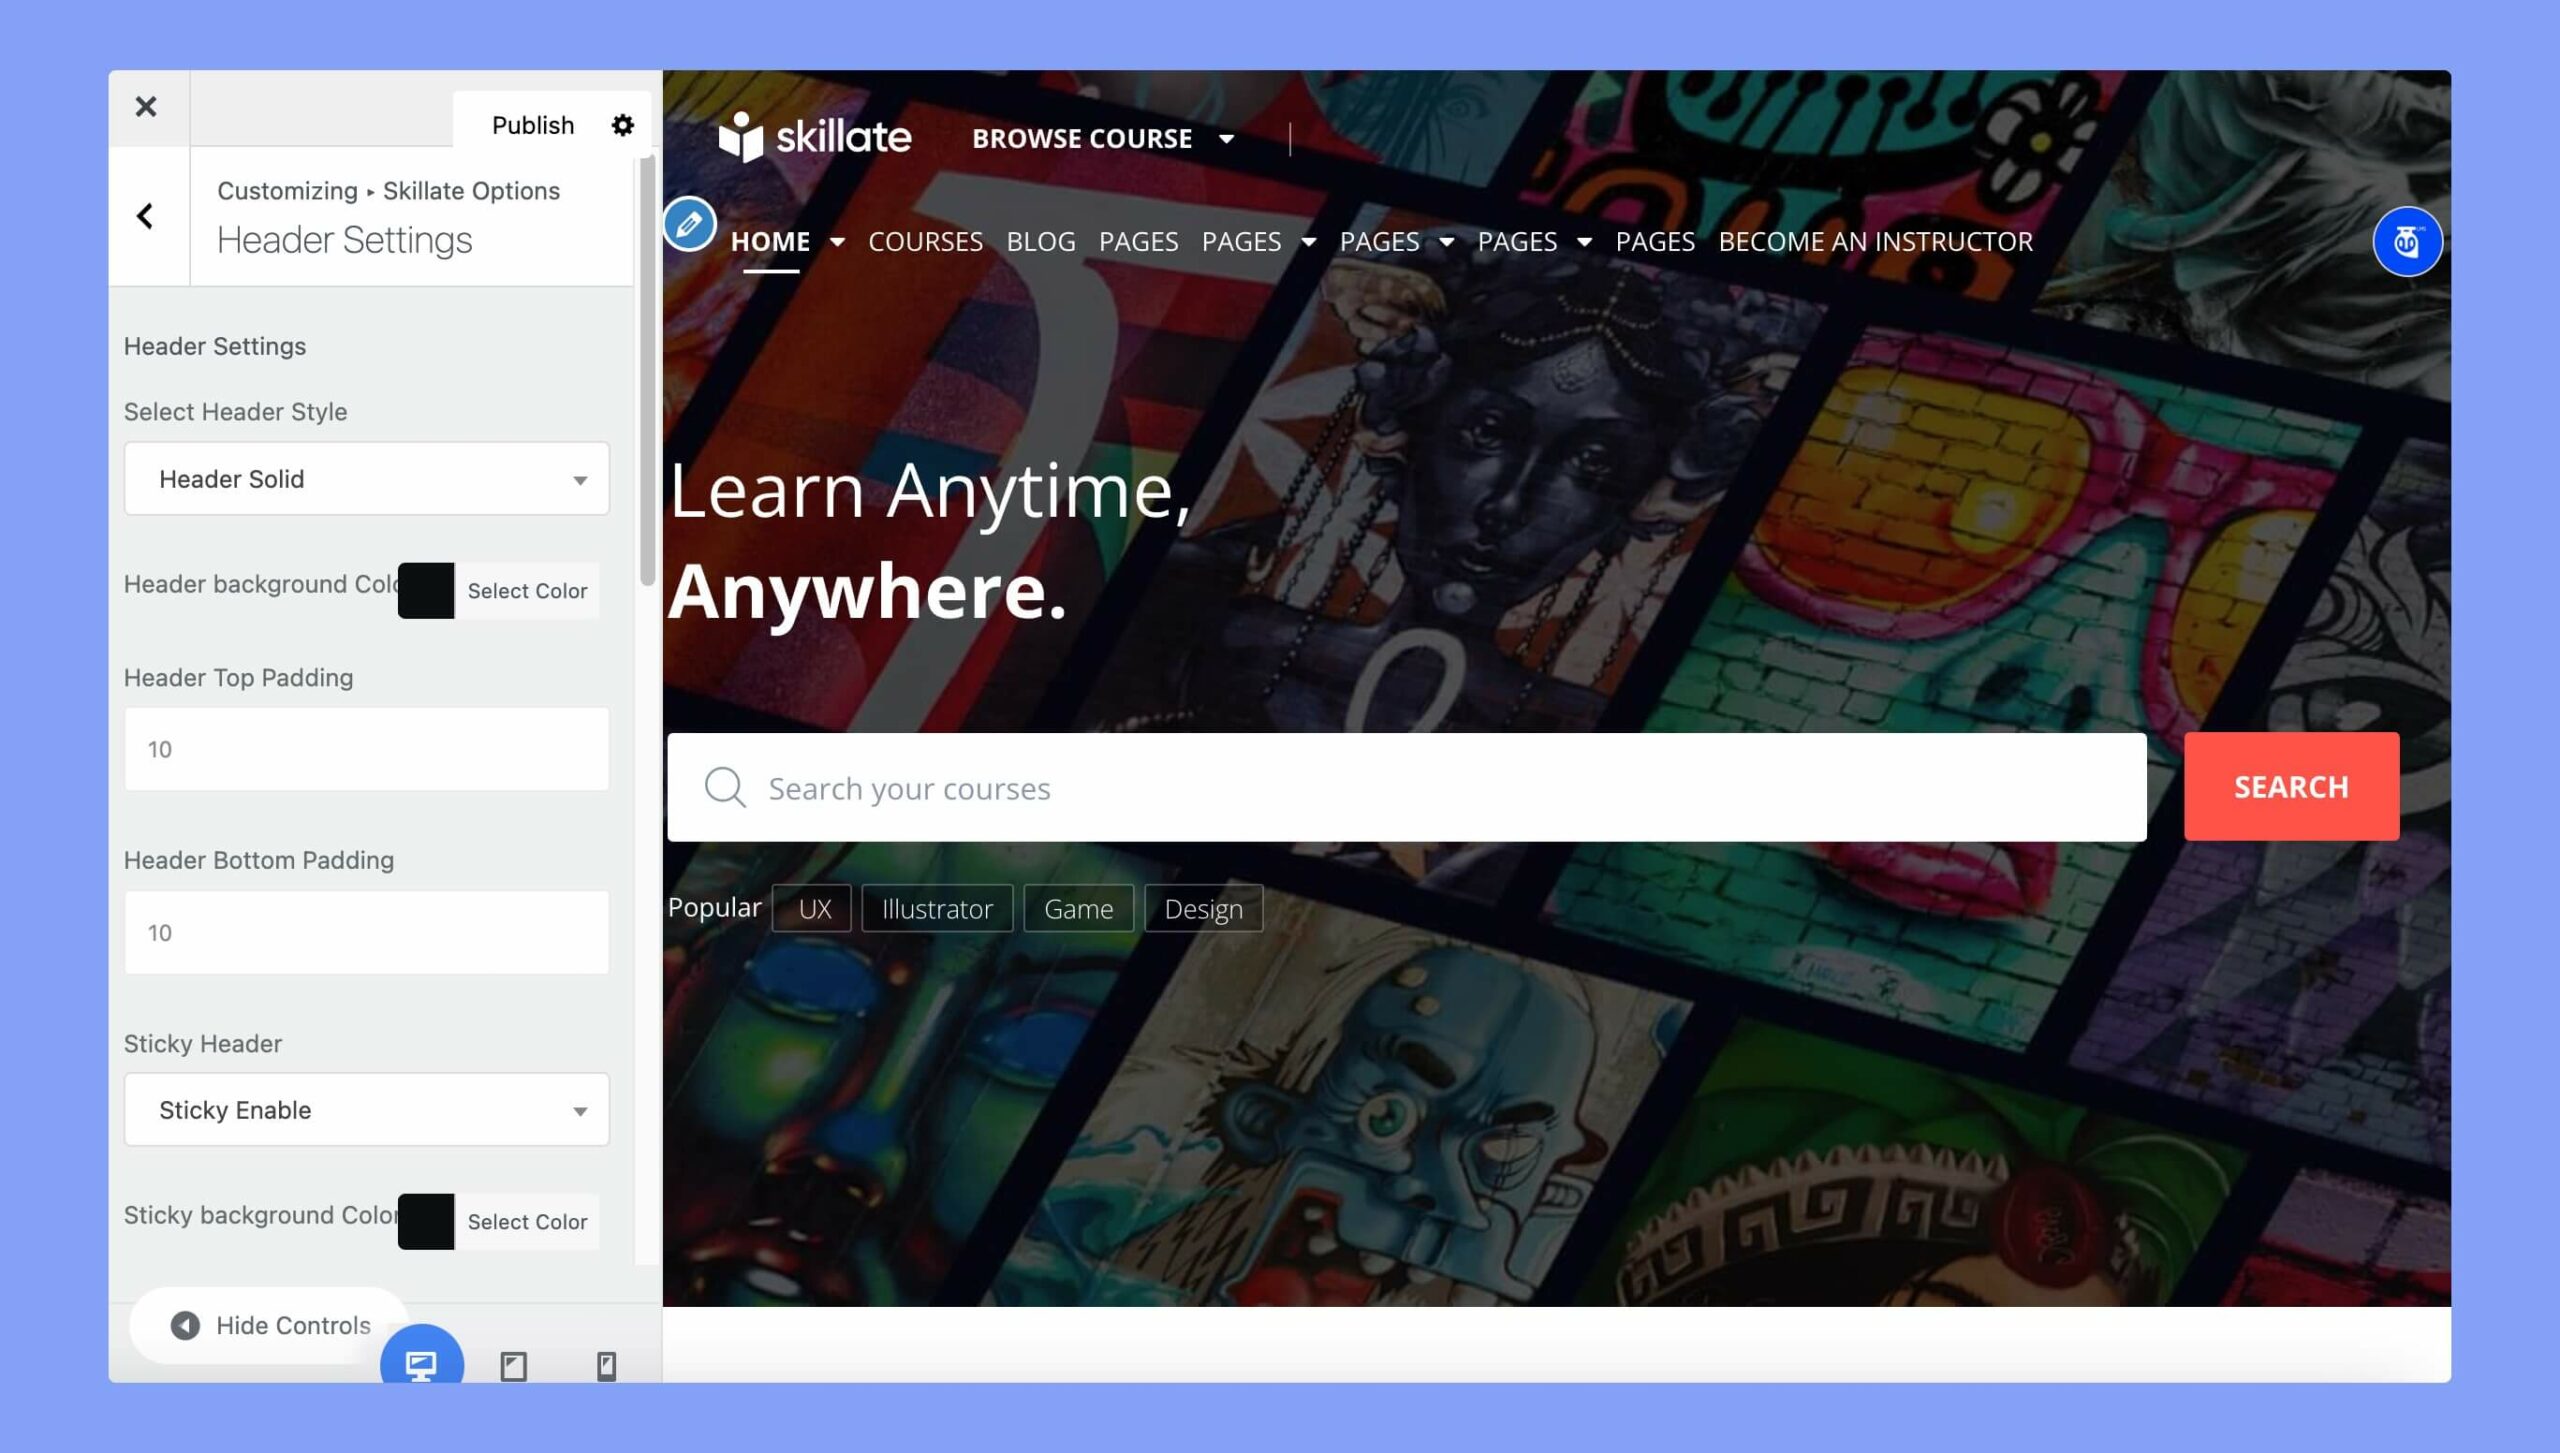
The header settings section lets you update your website header’s appearance. The available options are:
- Select Header Style: Choose whether you want a solid-colored or transparent header on your website.
- Header Background Color: If you want to use a solid-colored header, choose the background color using this option.
- Header Top Padding: Specifies the space between the top of the header.
- Header Bottom Padding: Set the bottom padding of the header.
- Sticky Header: Enabling this option will make the header remain fixed at the top of the page as the user scrolls down.
- Sticky Background Color: Set the background color of the sticky header.
- Header Category Menu: Displays a menu of categories in the header section of the theme. By default, the button text of this menu is ‘Browse Course’. You can change it from the ‘Category Menu Label Text’ option below.
- Number of Category: Determines the number of categories you want to display in the header category menu.
- Order By: Specifies the order in which the categories are displayed in the category menu. The available orders are name, ID, and slug.
- Order: Specifies whether the categories are displayed in ascending or descending order.
- Category Menu Label Text: Write text displayed in the header category menu label.
- Category Triangle Position: Specifies the position of the triangle indicator next to the category menu label.
- Header Search: Displays a search bar in the header section of the theme. But, this search bar is available only for the desktop screen.
- Enable Header Shopping Cart: Enables or disables the display of a shopping cart icon in the header section of the theme.
- Header Login/Signup Button: Displays a button in the header section of the theme that allows users to log in or signup.
- Header login button text: Specifies the text displayed on the login button.
- Header signup button text: Specifies the text displayed on the signup button.
Social Login
With the Skillate theme, you can get your users to sign up for your website with their social media accounts. You can access the social login options from WP Dashboard > Appearance > Customize > Skillate options.
- Enable Social Login: Allows users to log in using their social media accounts.
- Google Login Client ID: Input the Google client ID required for enabling Google login. At first, generate a client ID and then paste it in the input box. If you want to disable Google login, just leave the box empty.
- Facebook Login App ID: Set the Facebook app ID required for enabling Facebook login. Generate a Facebook APP ID first, then paste it in the input box. If you want to disable Facebook login, just leave the box empty.
- Twitter Login Consumer Key: Specifies the Twitter consumer key required for enabling Twitter login. If you want to disable the Twitter login option, just leave the box empty.
- Twitter Login Consumer Secret: Specifies the Twitter consumer secret required for enabling Twitter login.
- Twitter Login Auth Redirect URL: Specifies the URL where the user will be redirected after successful Twitter login authentication.
- Login reg screen bg color: Specifies the background color of the login and registration screen.
- Login reg screen text color: Specifies the text color of the login and registration screen.
Course Listing
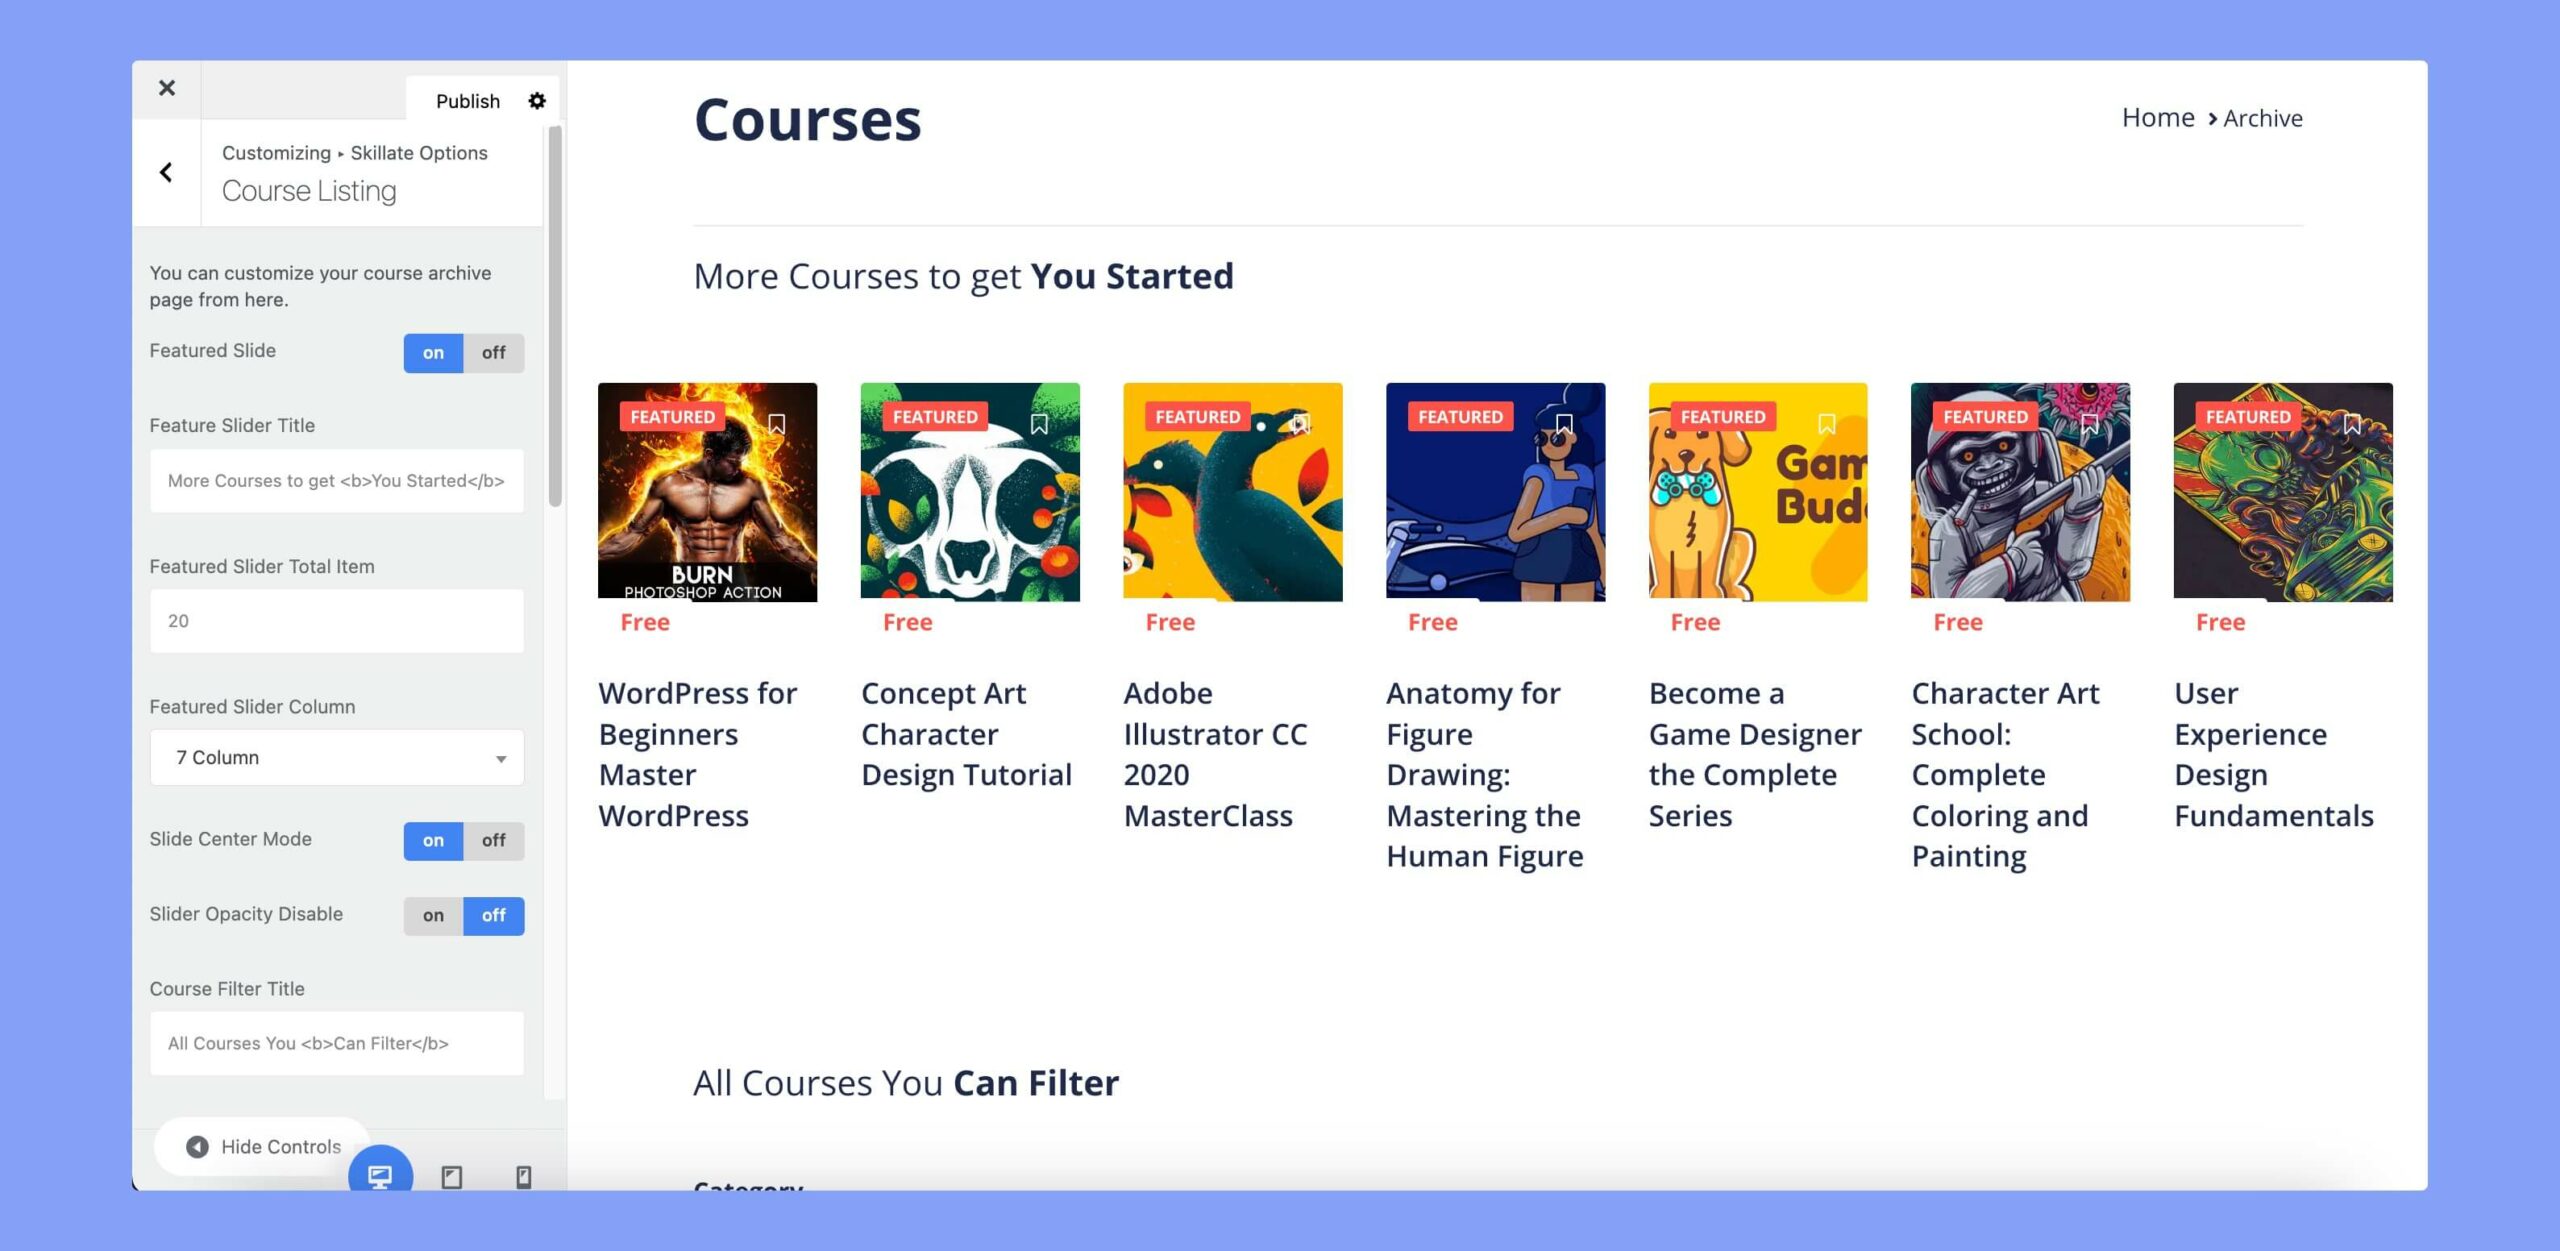
You can customize your course archive page from this section. The available customization options are:
- Featured Slider: Enable/disable the featured courses’ slider section.
- Featured Slider Title: Set the featured course’s slider section title with your own text.
- Featured Slider Total Items: Set the total number of courses you want to display on the features slider section.
- Featured Slider Column: Select the number of columns you want to show. You can choose from 4 to 7 columns for your courses.
- Slide Center Mode: Enable/disable if you want to show the slider in the center.
- Slider Opacity Disable: Enable/disable the slider opacity using this toggle button.
- Course Filter Title: Set the course filter option title using this text box.
- Sidebar Filter Enable: Choose if you want to enable/disable the sidebar filtering option for your users for the courses.
- Course Sorting Bar: The course sorting bar allows the user to sort the courses by Newest, oldest, title, and so on. You can use this option to enable/disable it.
- Category Filter: Enable or disable the category filtering option for the user.
- Level Filter: This option will allow you to enable/disable the course level filtering option that is found on the sidebar.
- Enable Price Filter: This option will allow you to enable/disable the price filtering option that is found on the sidebar.
- Language Filter: Use this option to filter the courses based on language.
- Latest item with the “New” tag: Set the number of courses you want to show with the new tag once you add them to your site.
- Course Per Page: Select how many courses you want to show on the course listing page.
- Course Pagination: You can turn on or off pagination for the course listing page.
- Instructor Slider: Enable/disable the slider showing the instructors depending on your requirements.
- Instructor Slider Title: Set the title of the instructor slider section from this text box.
- Instructor Slider Title Link Text: Add a link to the title of the instructor title text from this box.
- Instructor page link: Add the instructor’s page link here.
- Instructor Slide Query: Select whether you want to display courses from all users or only from your favorite instructors.
Course Details

You can customize your course archive page from here. You will find the following settings in this section:
- Best Selling Tag: You can enable/disable the option to show the best-selling course tag.
- Course Details Rating: Enable/disable if you want to show the course ratings given by the students in the related course slider.
- Single Course Sticky Menu: Enable/disable the single course sticky menu depending upon your requirements using this setting.
- Related Course Slider: Enable or disable the related course slider depending on your needs.
- Related Course Slider Total Item: Set the number of related courses you want to show in the slider.
- Related Course Title: Set the title of the suggested courses with your own texts.
Instructor Single
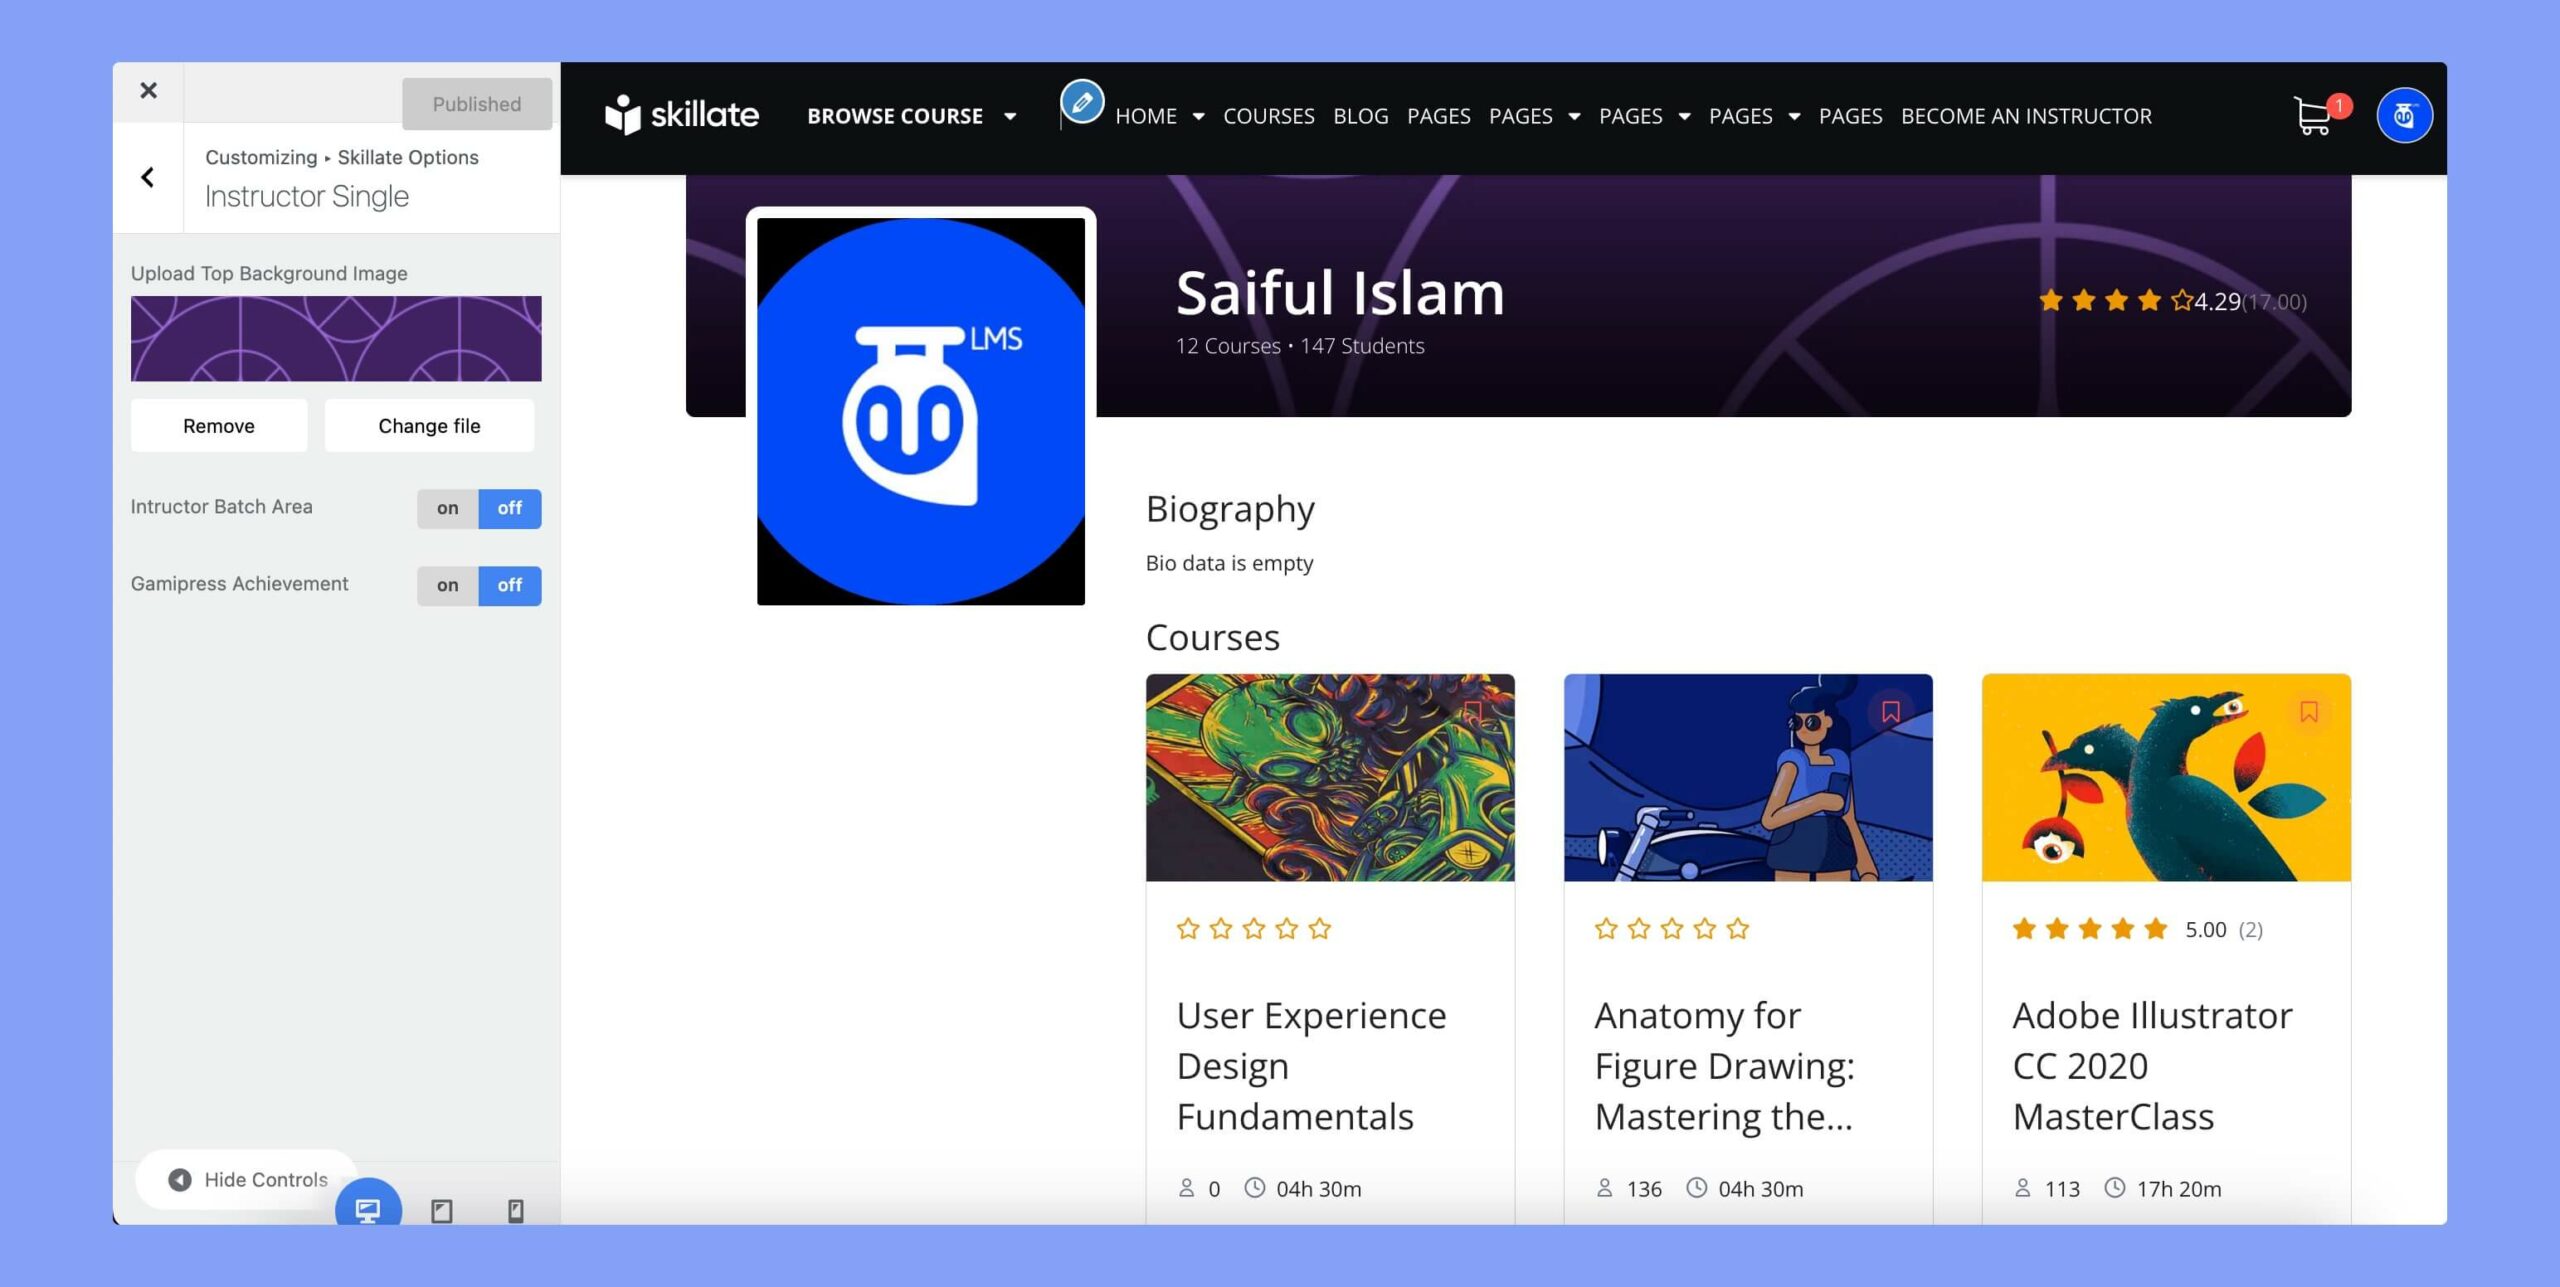
Here are the available options to customize the instructor single page.
- Upload Logo: You can set the top background or banner image that you want to show on the single instructor page. You can remove the banner or replace it using an image from the media library.
- Instructor Batch Area: Enable this if you want to show the instructor batch area.
- GamiPress Achievement: Enable this to show the GamiPress achievements on the single instructor page.
Mobile Splash Screen
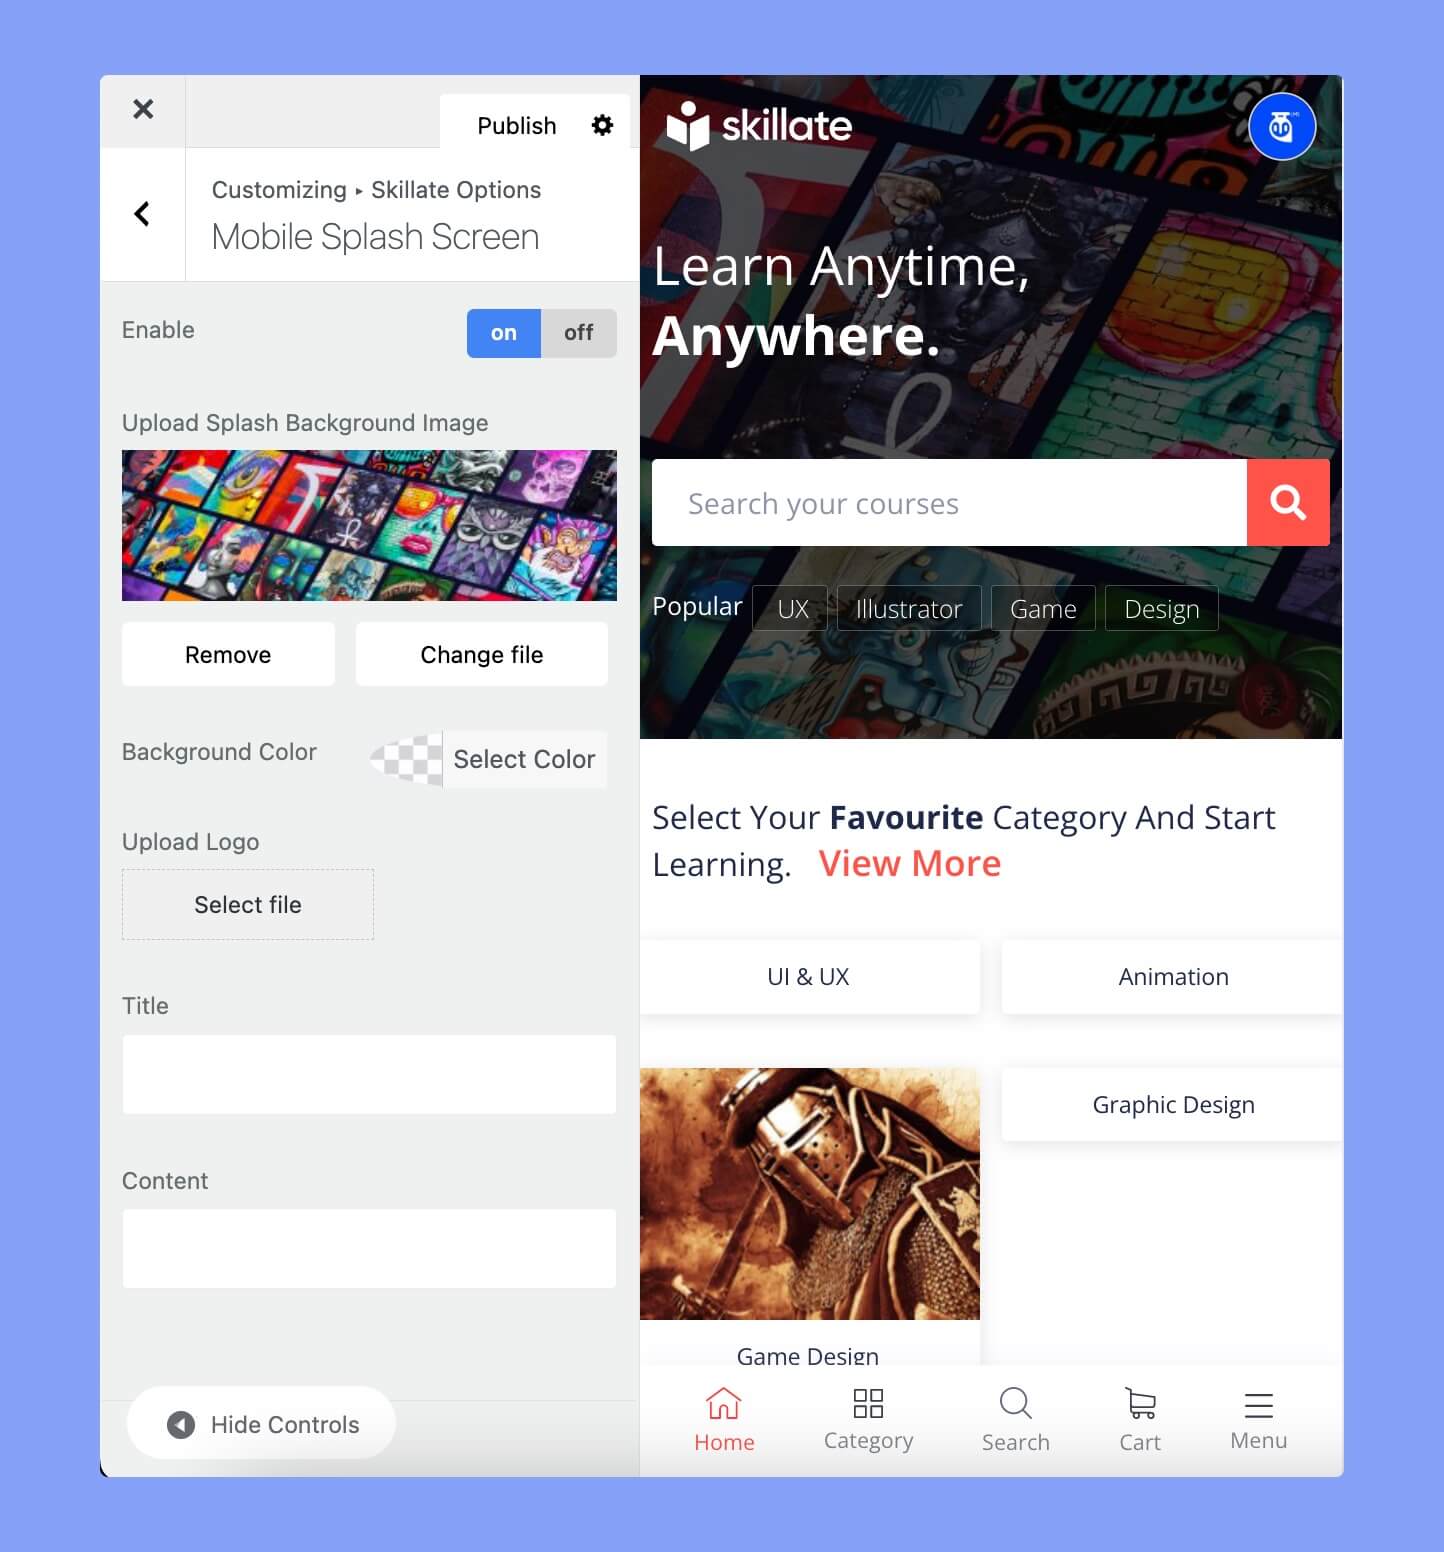
You can customize the mobile splash settings aka the launch screen, from this section. The available options are:
- Enable splash screen: Use this toggle button to turn on/off the splash screen.
- Upload Splash Background Image: Set the background image for the mobile splash screen from here.
- Background Color: Set a background color for the splash screen. This color will be visible throughout the whole screen.
- Upload logo: Upload the logo you want to show up on your mobile splash screen.
- Title: Set the write of the splash screen pop-up.
- Content: Write the content you want to show up after the title of the splash screen.
Mobile Menu Settings
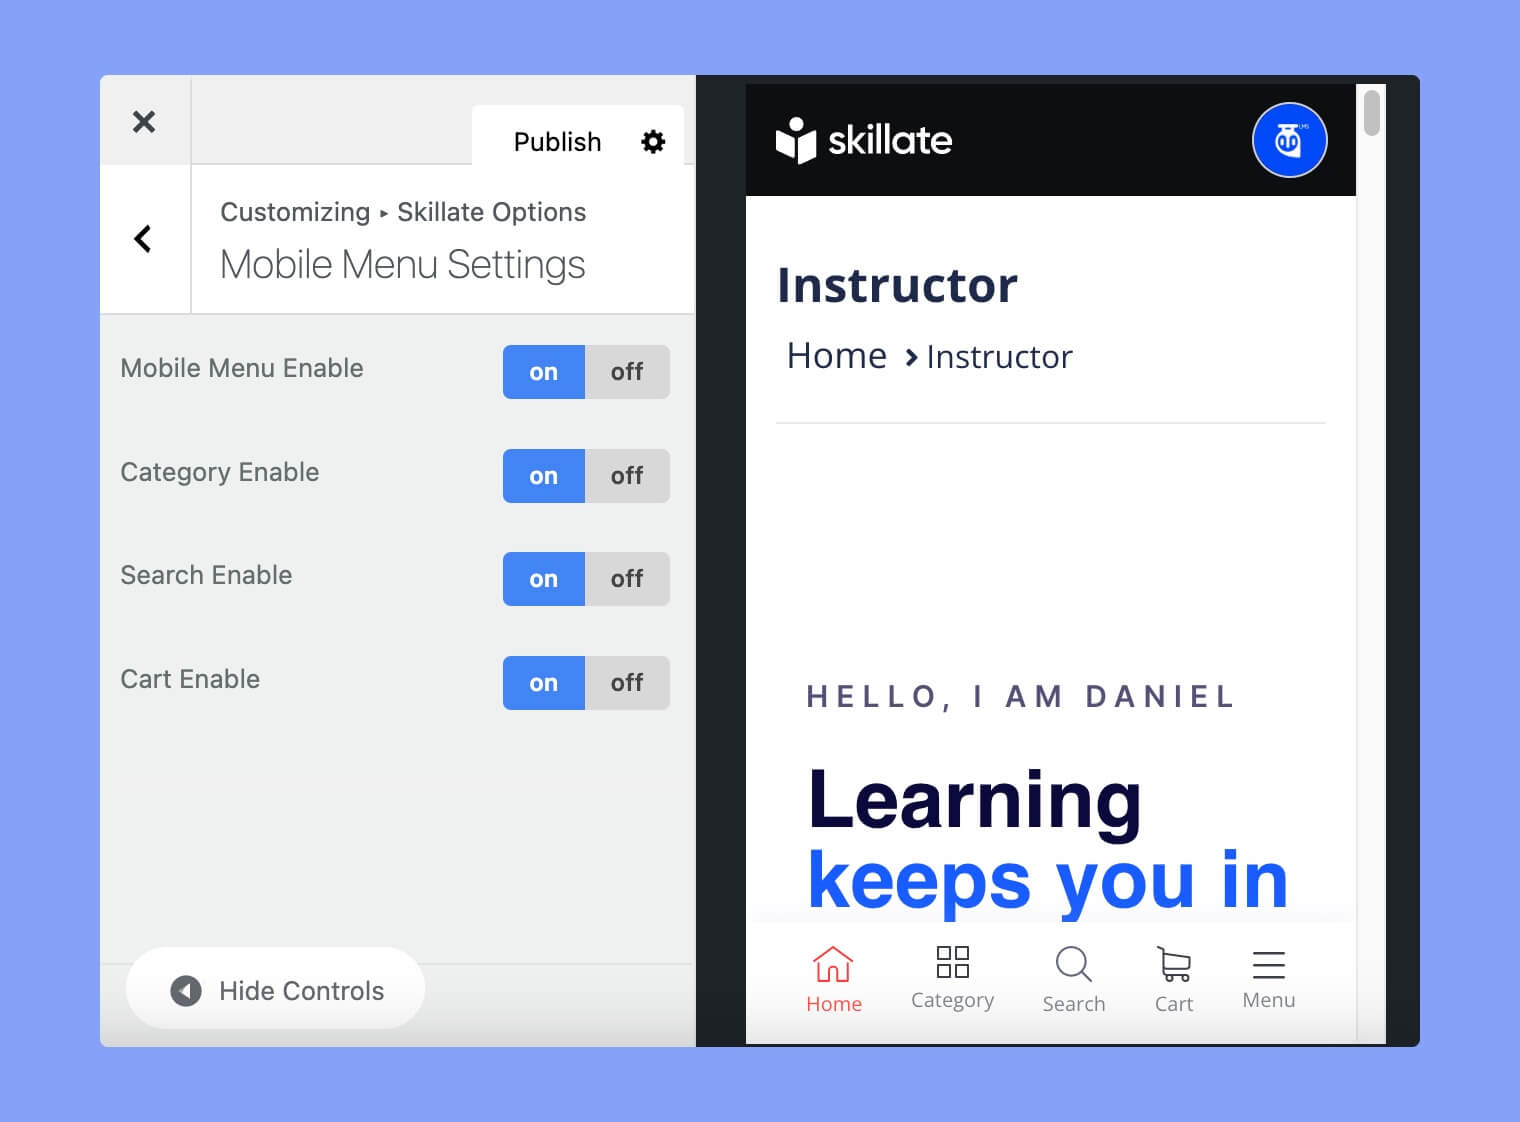
Skillate theme has a special menu that is designed only for mobile and tablets. This menu will be displayed at the bottom of the screen. After enabling this mobile menu, you can enable category, search option, and cart.
To know more about this option, please check our details customized mobile menu documentation.
Logo Settings
The logo settings section lets you set your website logo. Here the available options are:
- Upload Logo: Upload your own custom logo image to replace the default Skillate logo in the header.
- Select Logo Style: Choose whether you want to display the logo image or just the logo text.
- Custom Logo Text: If you don’t have a logo image, you can use custom text instead by entering it into this option.
- Logo Width: Set the width of your logo image in pixels to ensure it fits within the header section.
- Logo Height: Set the height of your logo image in pixels to ensure it fits within the header section.
Sub Header Banner
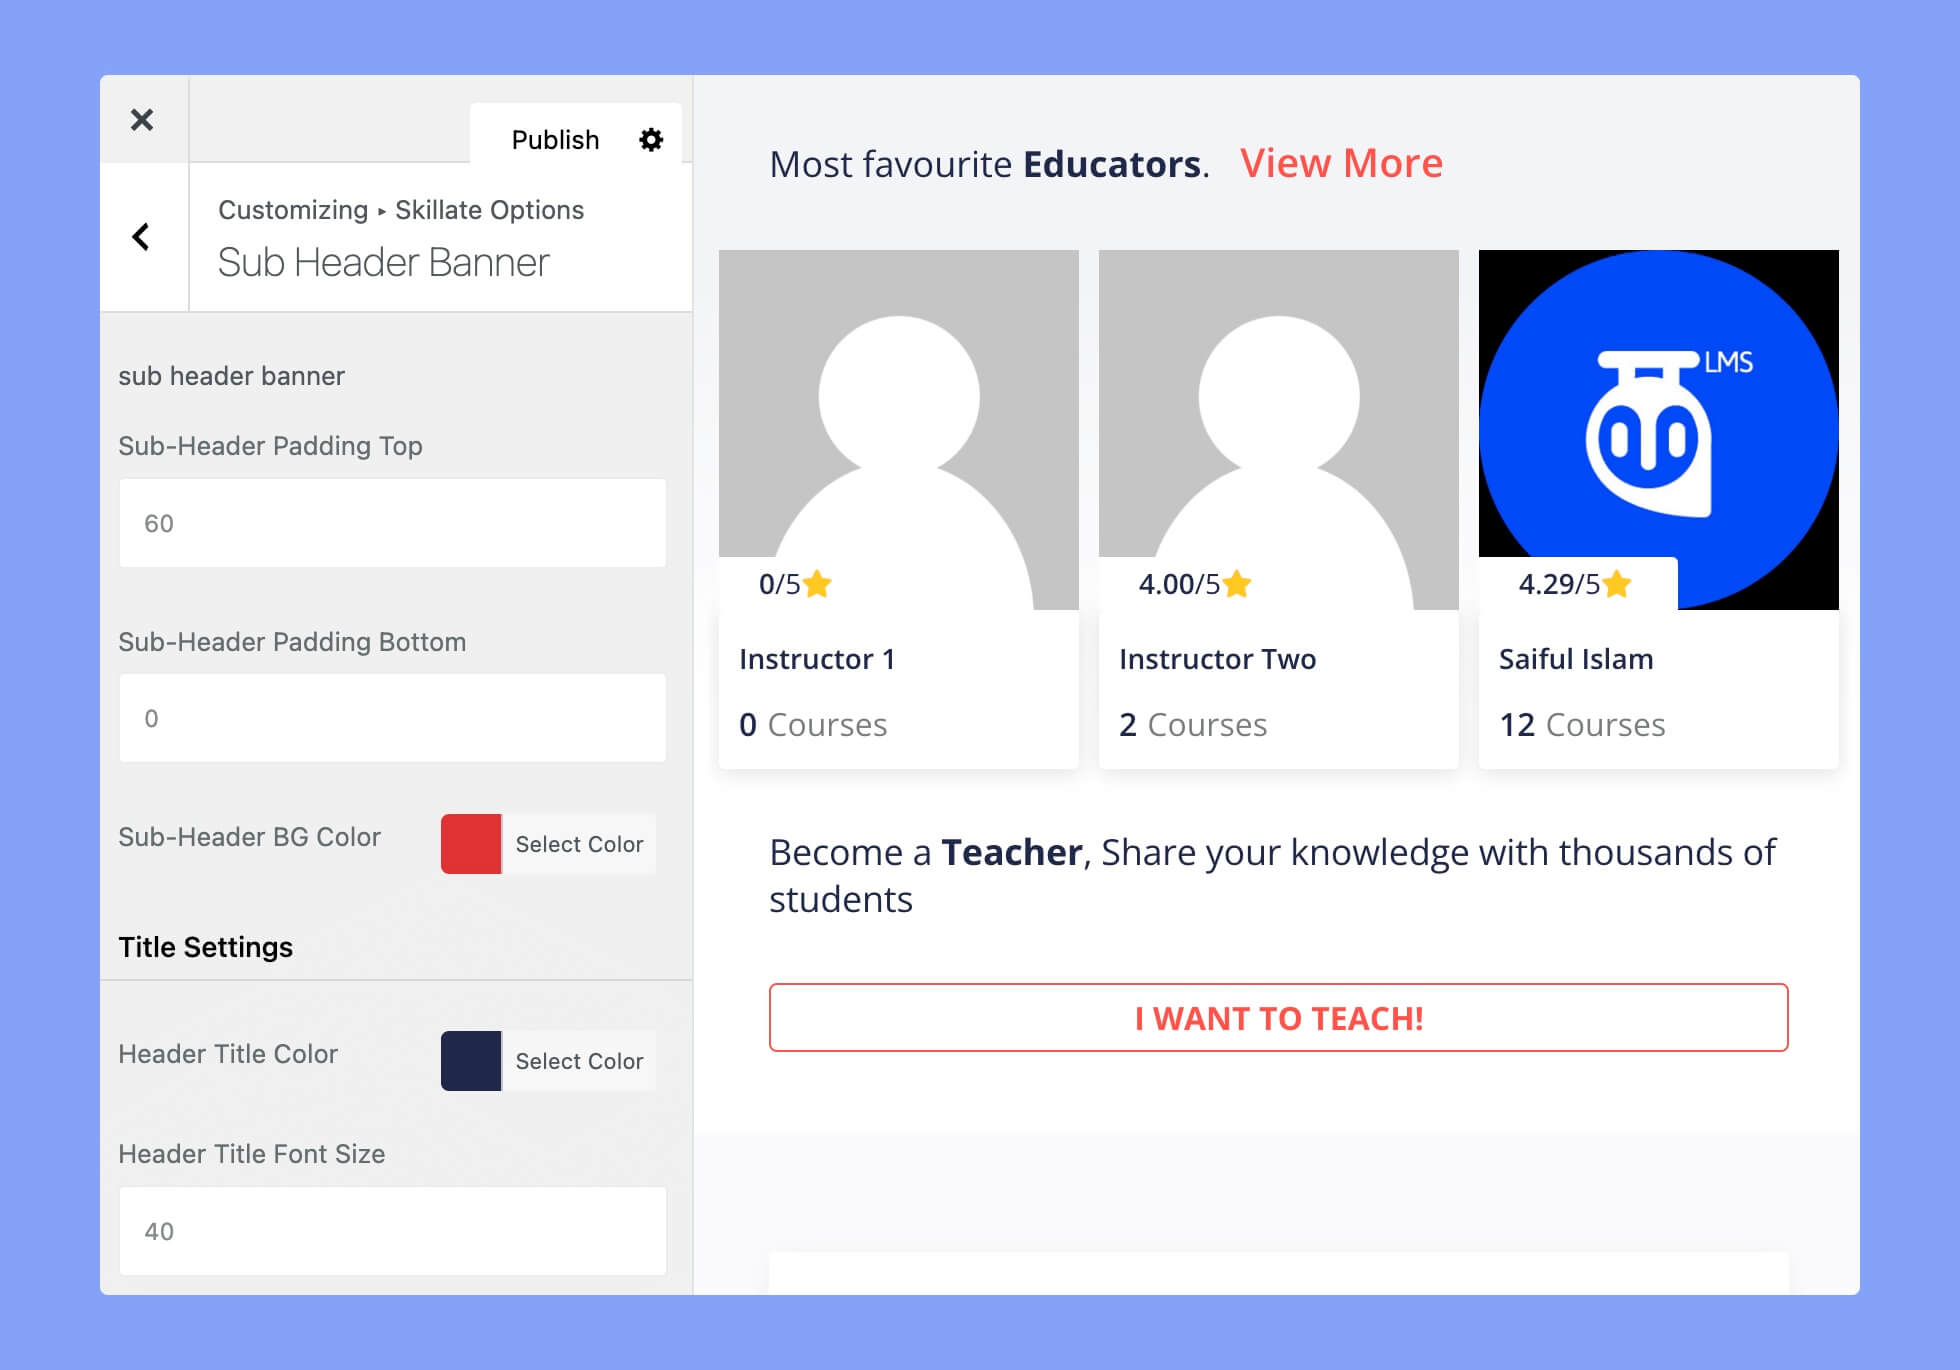
Sub-headers are the internal headers of your webpage. You can control the sub-header banner settings from this section. The available options for the subheader banner are:
- Sub-Header Padding Top: Set the amount of padding (in pixels) to apply to the top of the sub-header section.
- Sub-Header Padding Bottom: Set the amount of padding (in pixels) to apply to the bottom of the sub-header section.
- Sub-Header BG Color: Choose a custom background color for the sub-header section to match your branding or style preferences.
- Header Title Color: Set the color of the header title text to complement your chosen color scheme.
- Header Title Font Size: Choose the font size (in pixels) for the header title text to ensure it is legible and fits within the header section.
Typography Settings
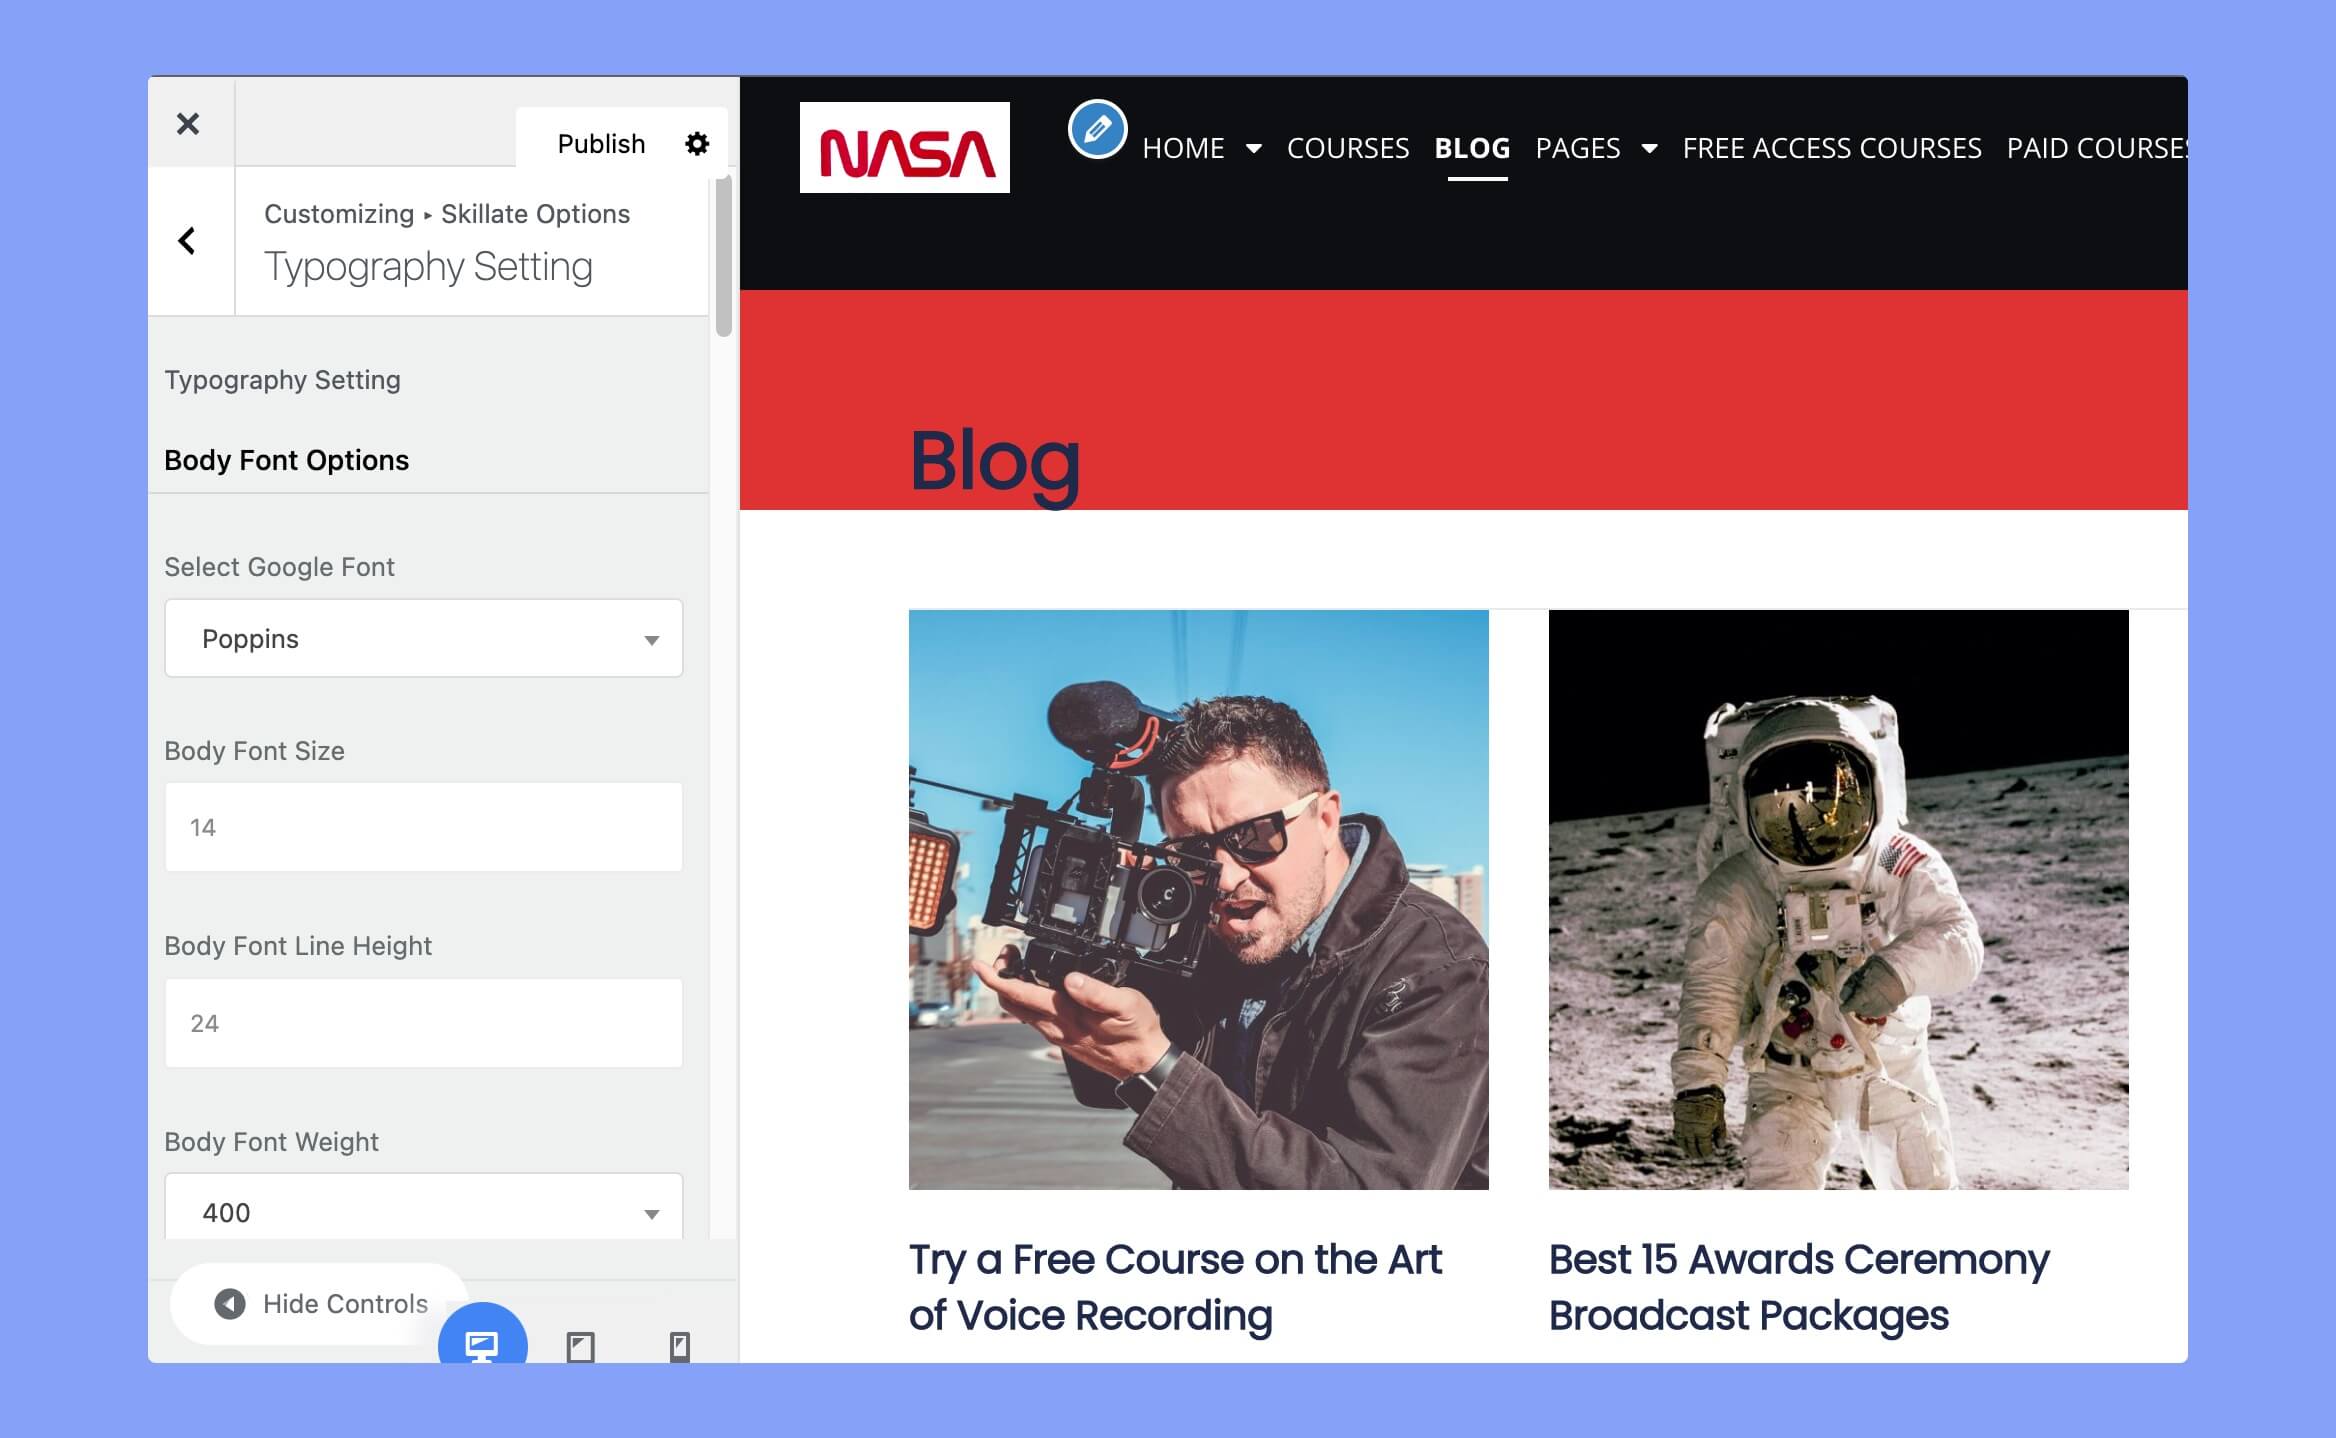
You can control the font settings of your website from this section. The settings you’ve specified here will be applicable to the website body font, menu font, and headings.
- Select Google Font: Choose a custom Google font to use for the body text, headings, and other text elements throughout the theme.
- Font Size: Set the text’s font size (in pixels) to ensure it is legible and matches your style preferences.
- Font Line Height: Choose the line height (in pixels) for the text to ensure it is easy to read and visually appealing.
- Font Weight: Choose the font weight (e.g. light, regular, bold) for the body text to match your branding or style preferences.
- Font Color: Select a custom color for the body text to complement your chosen color scheme and ensure it is legible against the background color. This option is available only for the body font.
Layout & Styling
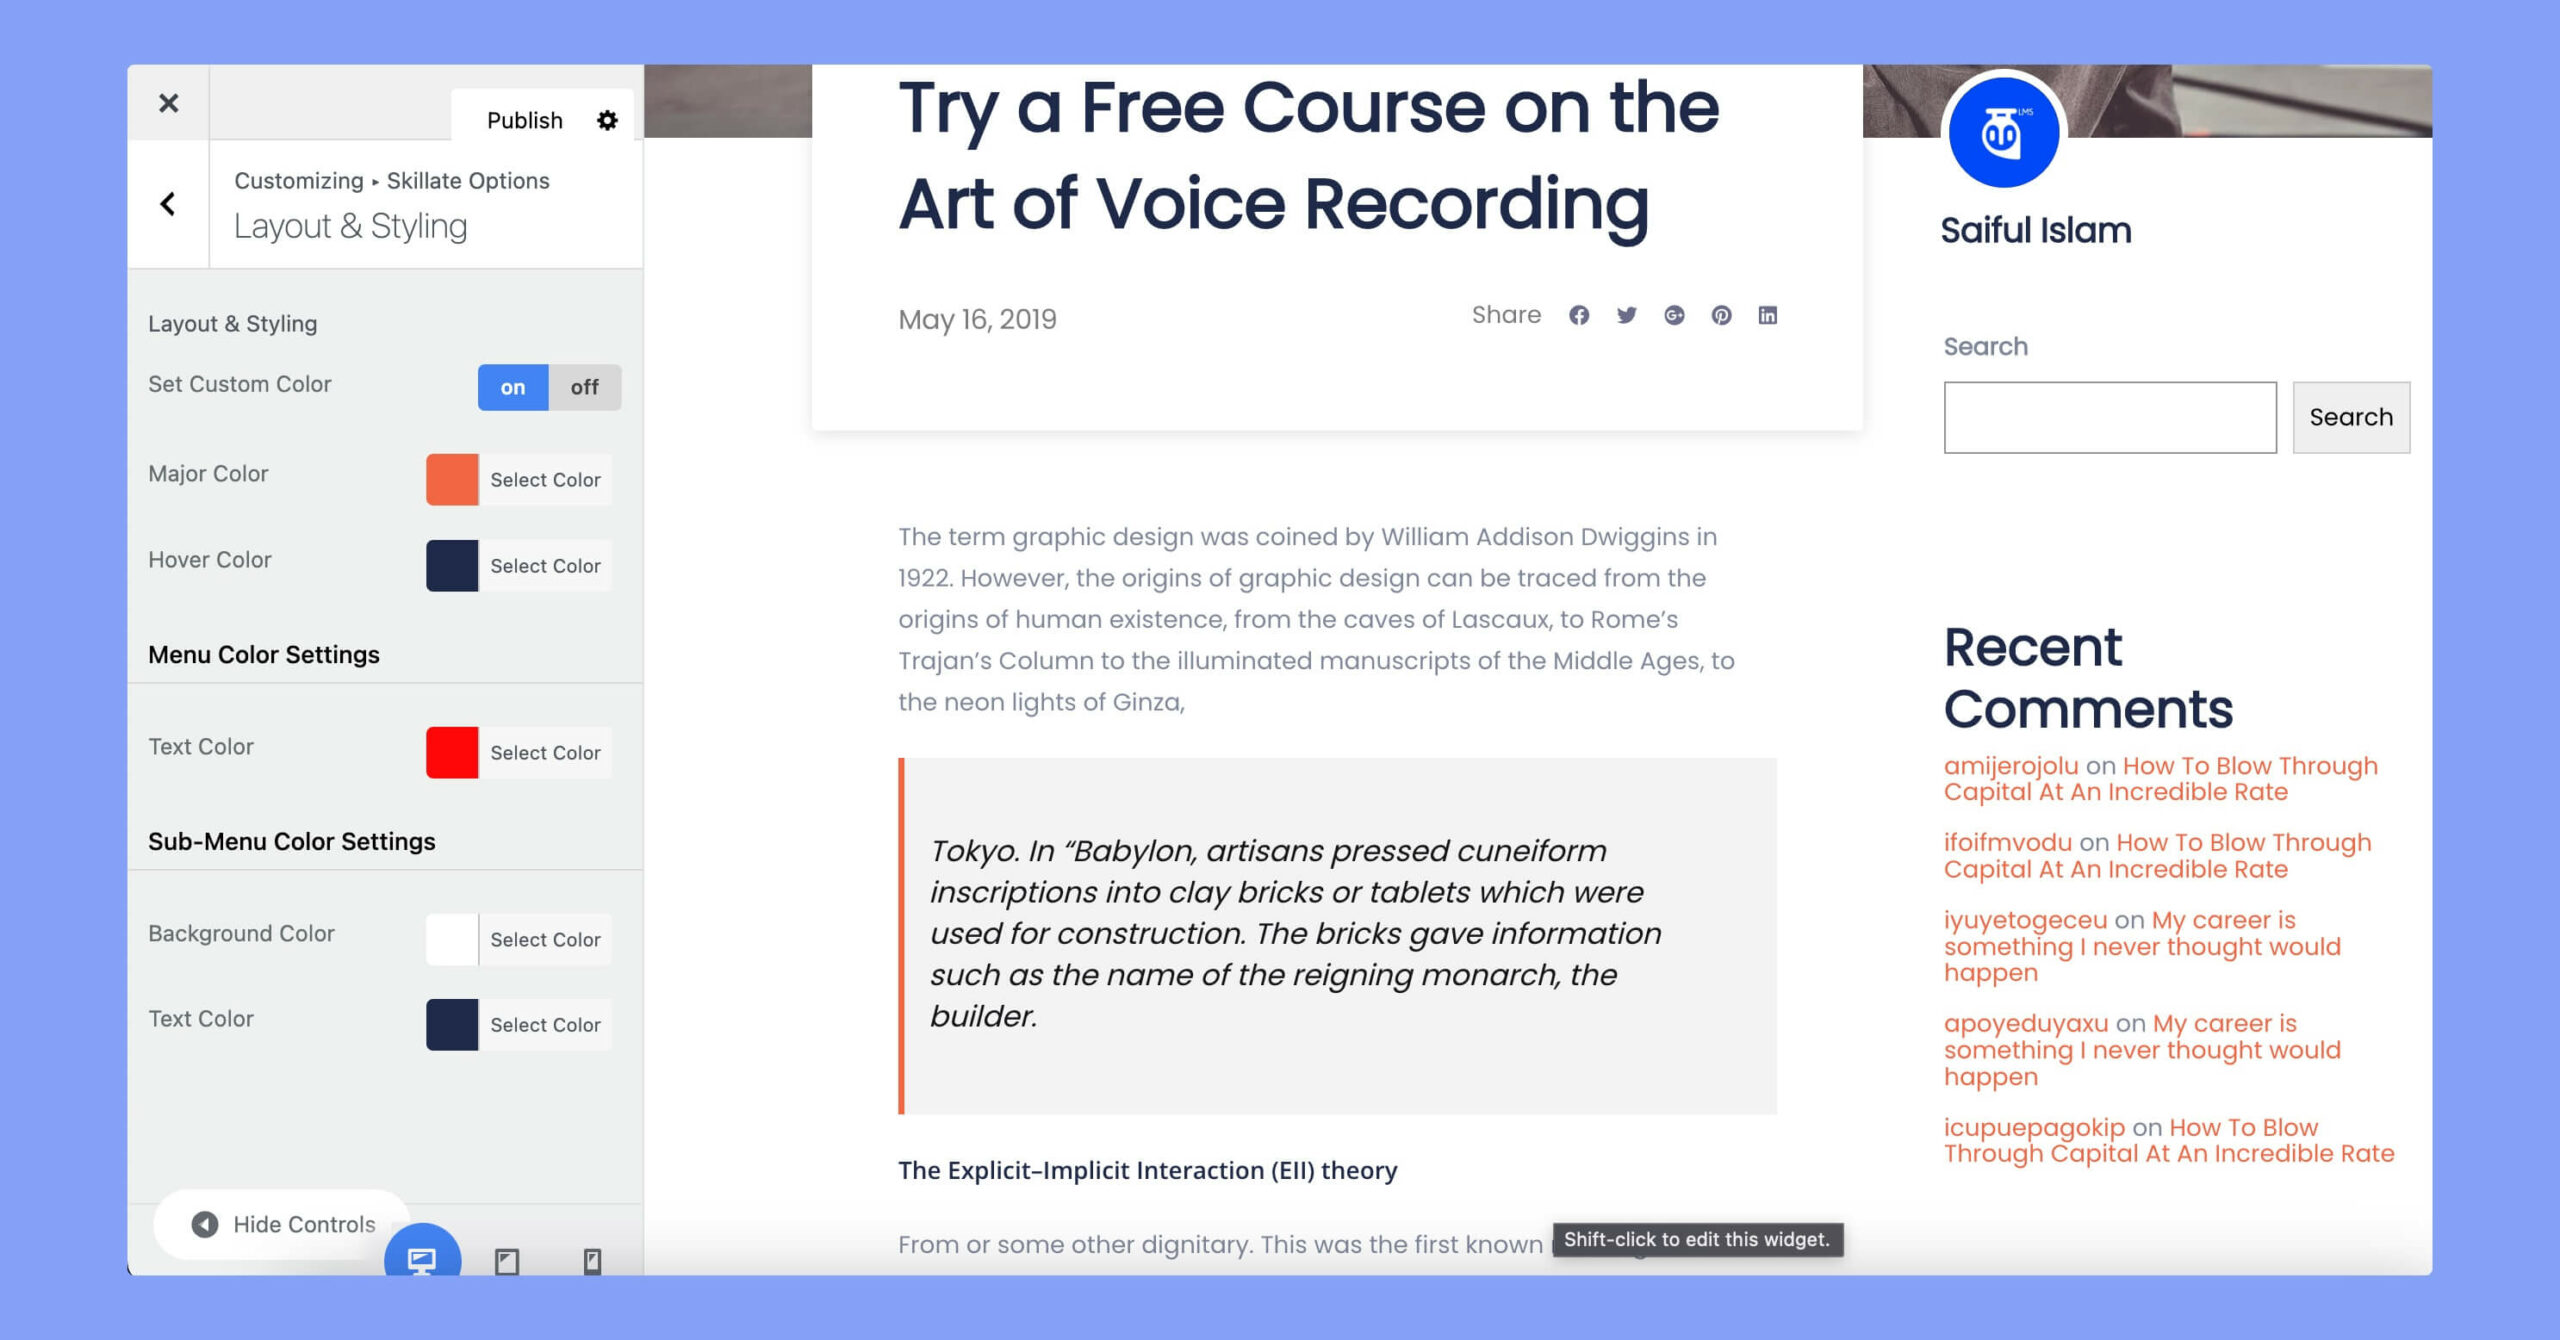
The options here manage your theme’s layouts and color variations. The available options in this section are:
- Set Custom Color: Choose a custom color to use throughout the theme for various elements such as buttons, links, and backgrounds.
- Major Color: Set the primary color for the theme to match your branding or style preferences.
- Hover Color: Choose a custom color to use when hovering over links or buttons to provide visual feedback to users.
- Menu Text Color: Select a custom color for the main navigation menu text to complement your chosen color scheme and ensure it is legible against the background color.
- Background Color: Choose a custom background color for the website to match your branding or style preferences.
- Sub-menu Text Color: Select a custom color for the sub-menu text to complement your chosen color scheme and ensure it is legible against the background color.
404 Page
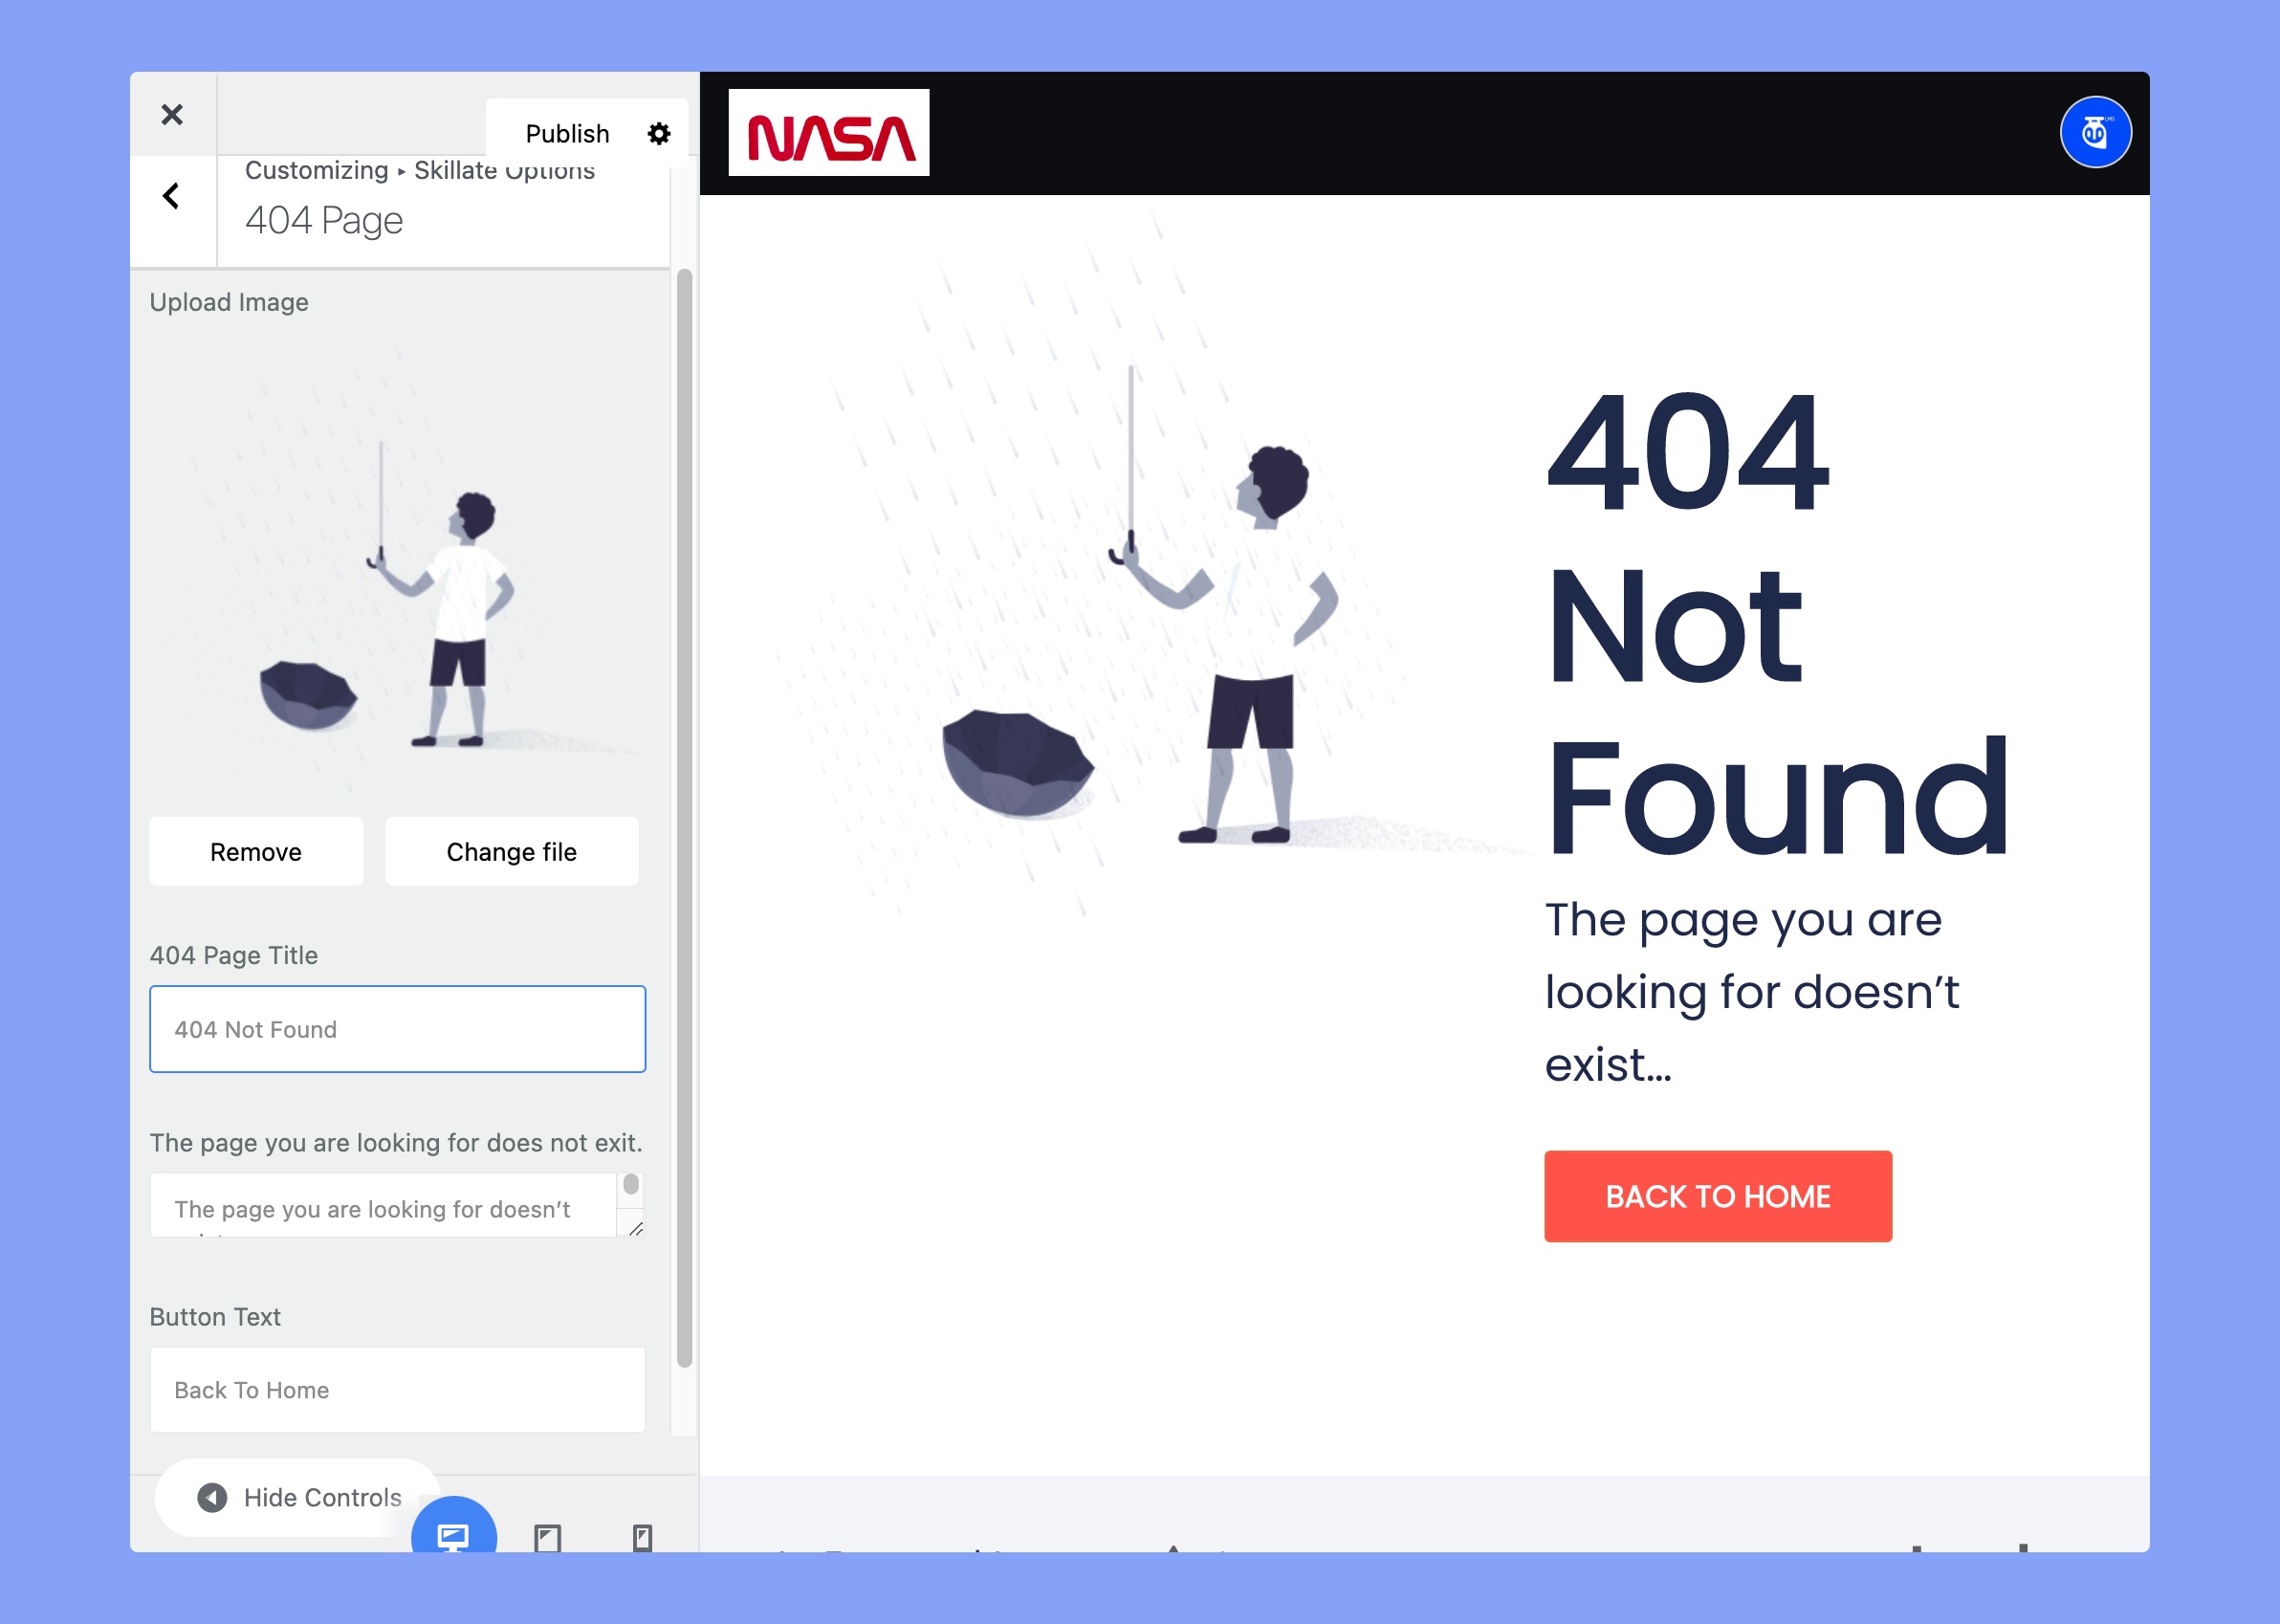
We’ve provided a preset 404 page in the template. You can set an image for the 404 page, the page title, a description, and the button text.
Blog Setting
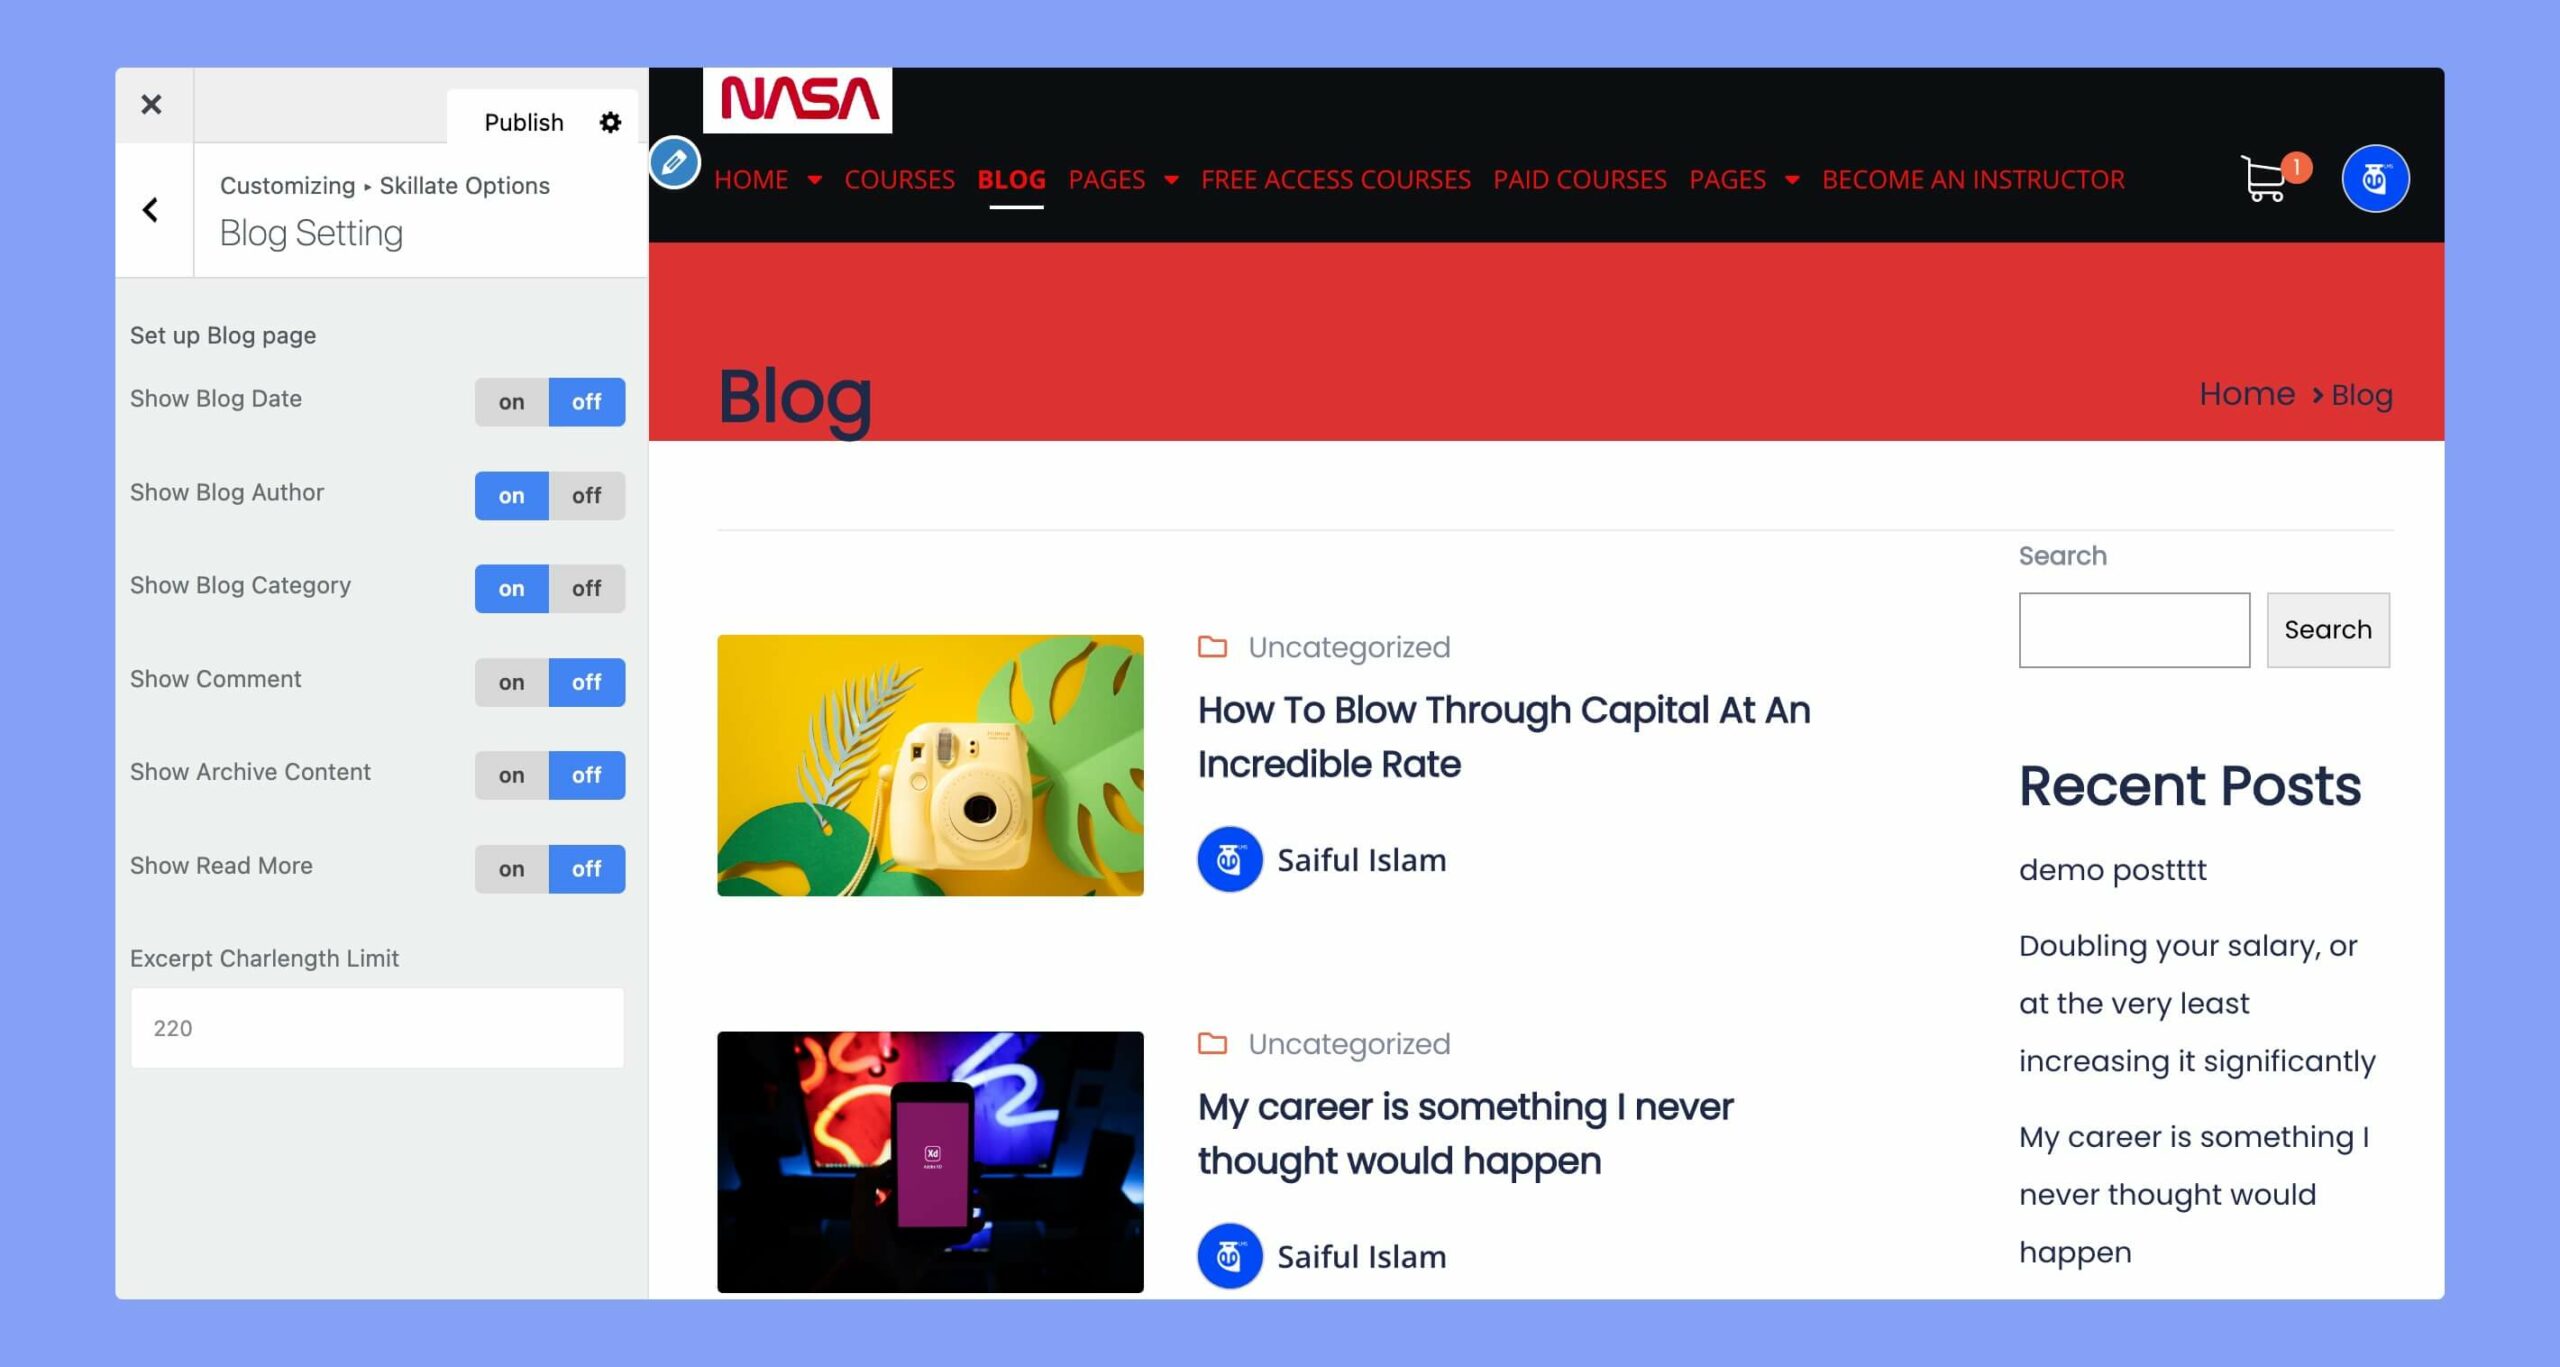
You can use these settings to customize the blog. The available options on this page are:
- Show Blog Date: Enable this to display the blog publishing date within the blog card.
- Show Blog Author: Turn this option ON only if you want to show the author’s name on the archive page.
- Show Blog Category: Show the category of the courses on your page.
- Show Comment: Allow to show comments from your enrolls.
- Show Archive Content: Enabling this option will display the archive content on the blog page.
- Show Read More: Enable this to show the Read More button.
- Excerpt Charlength Limit: Set the character limit of the excerpt.
Blog Single Page Setting
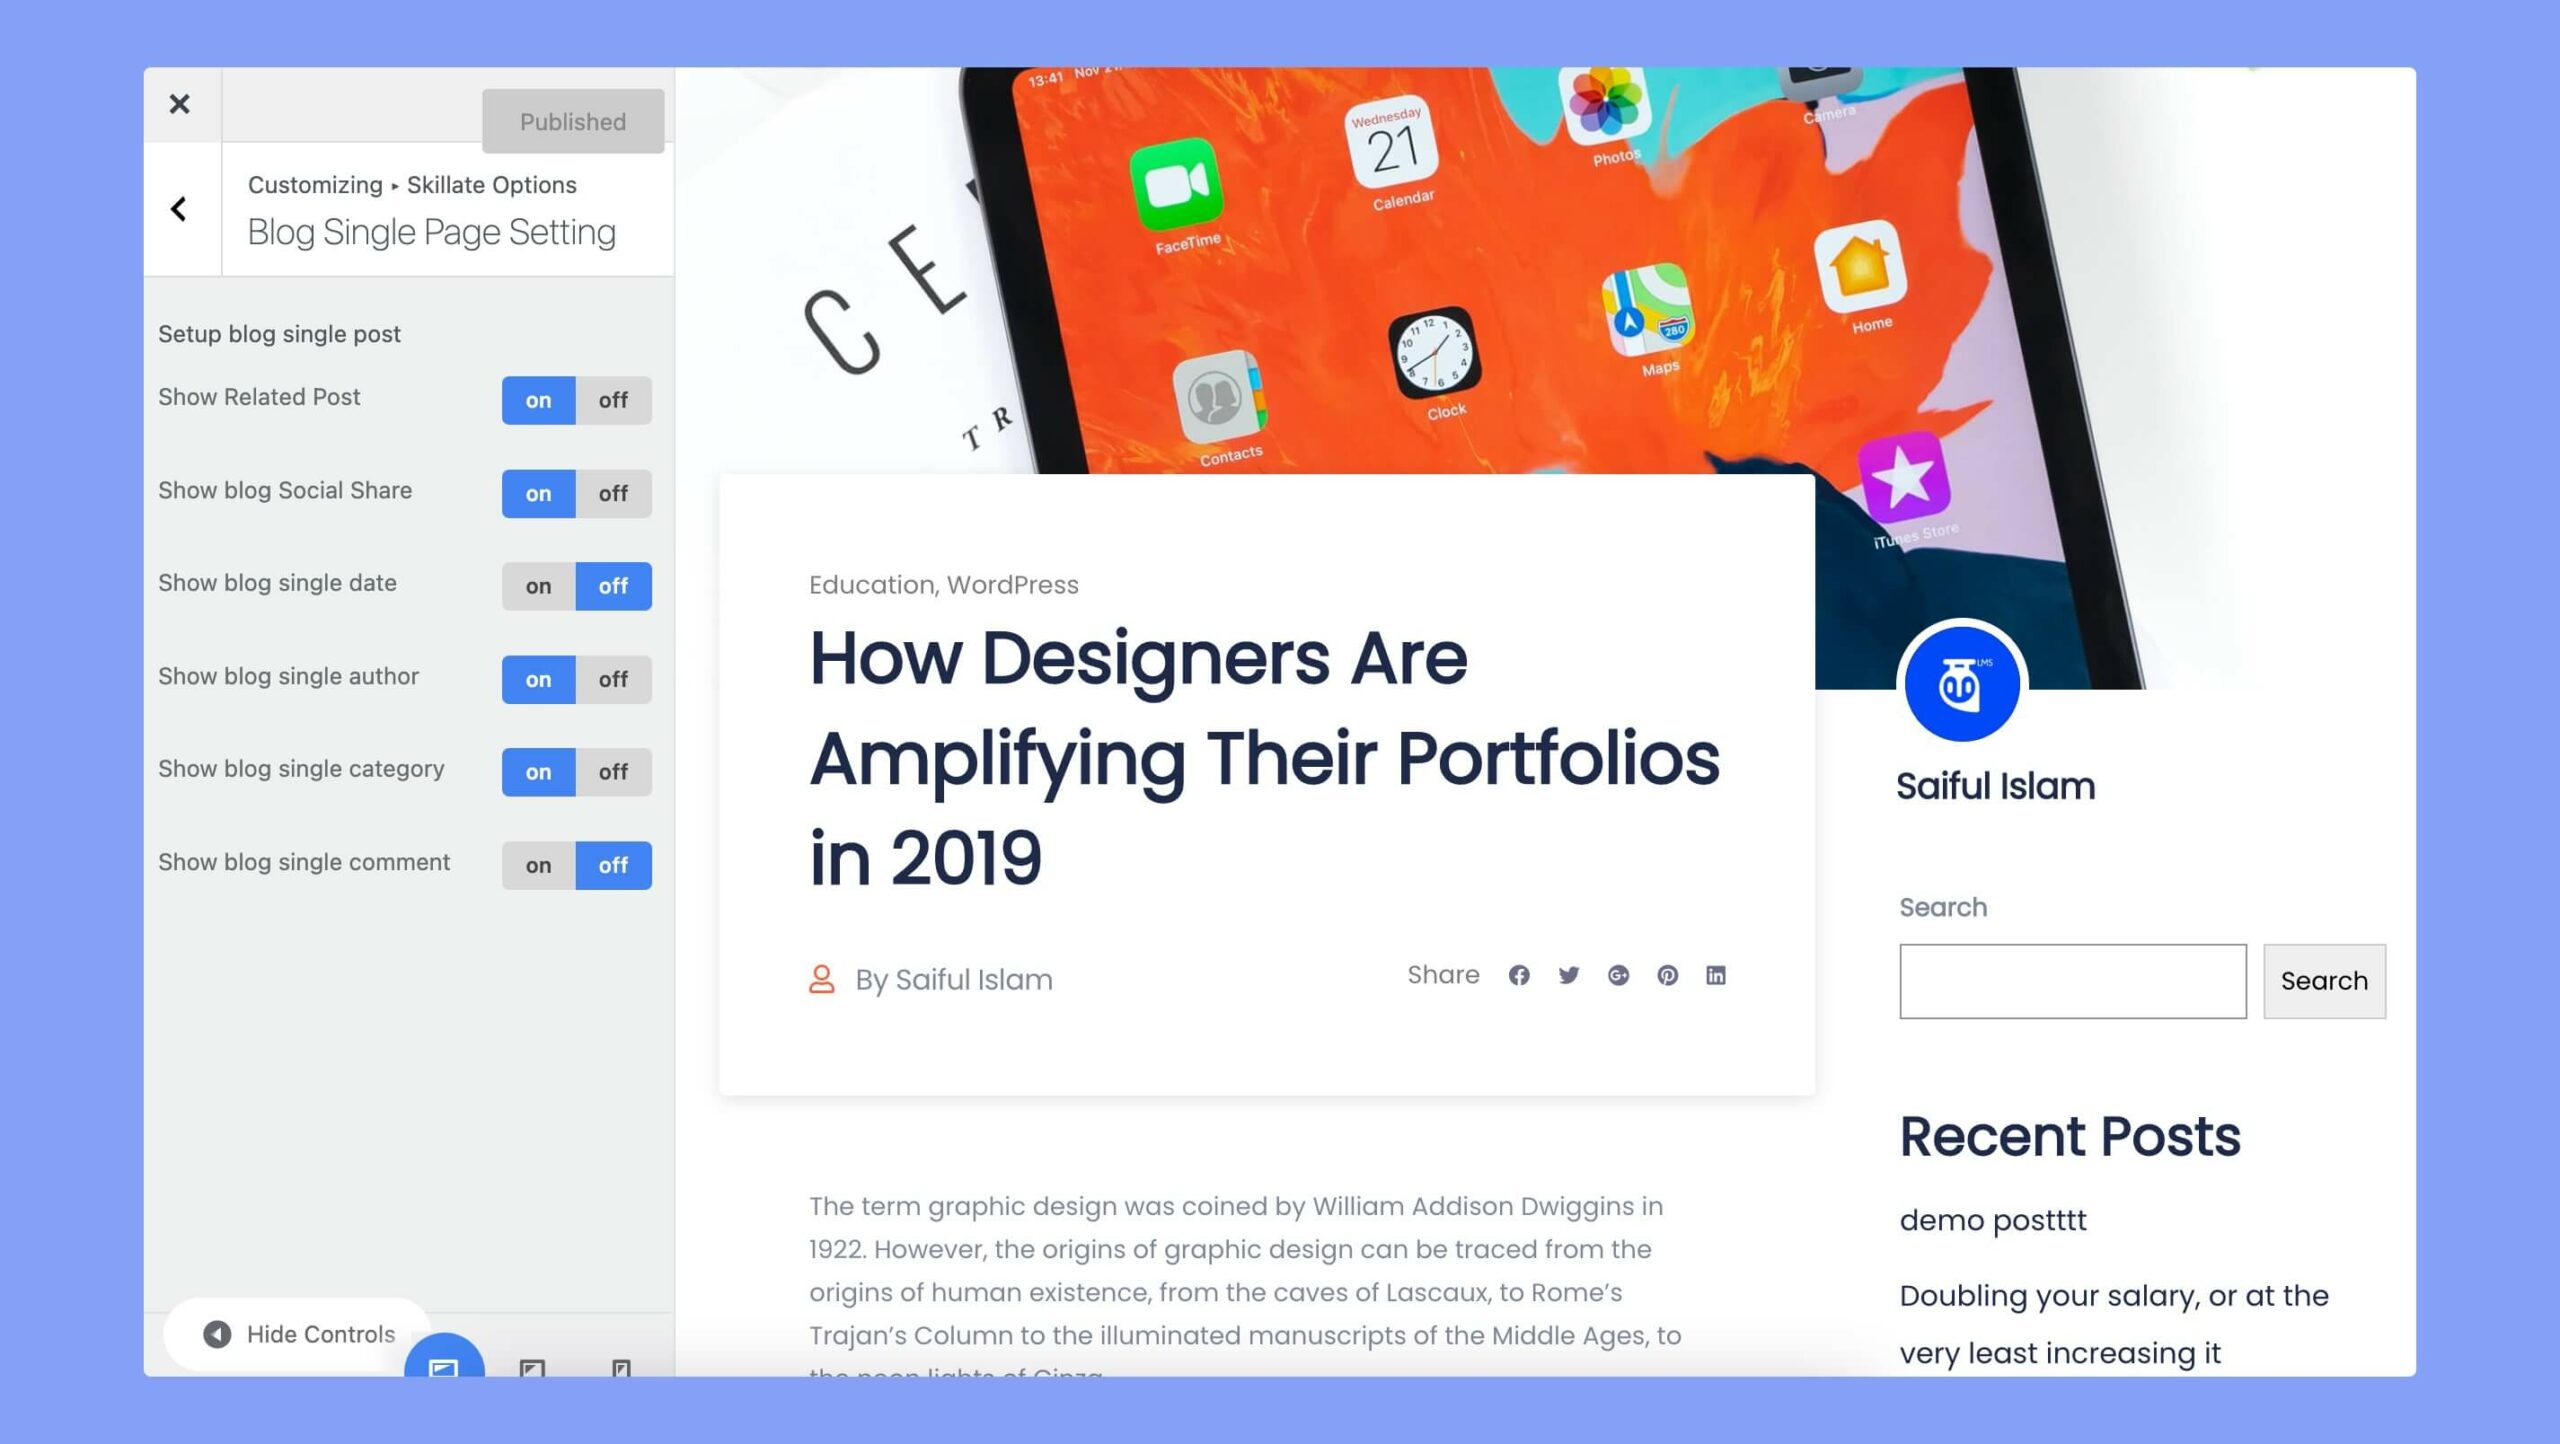
This section helps you customize attributes to your blog single pages. You can customize the following attributes of the blog page:
- Show Related Post: Enable or disable the display of related posts at the end of each blog post to help users discover other relevant content.
- Show Blog Social Share: Enable or disable the social share buttons on each blog post to encourage users to share your content on their social networks.
- Show Blog Single Date: Choose whether to display the date of each blog post on the single post page.
- Show Blog Single Author: Choose whether to display the author name of each blog post on the single post page.
- Show Blog Single Category: Choose whether to display the category of each blog post on the single post page.
- Show Blog Single Comment: Choose whether to enable or disable comments on each blog post to allow users to engage in discussion about the post.
Client Logo Option
The client logo option lets you choose the text of the featured area, and enable the slide autoplay features.
Bottom Setting
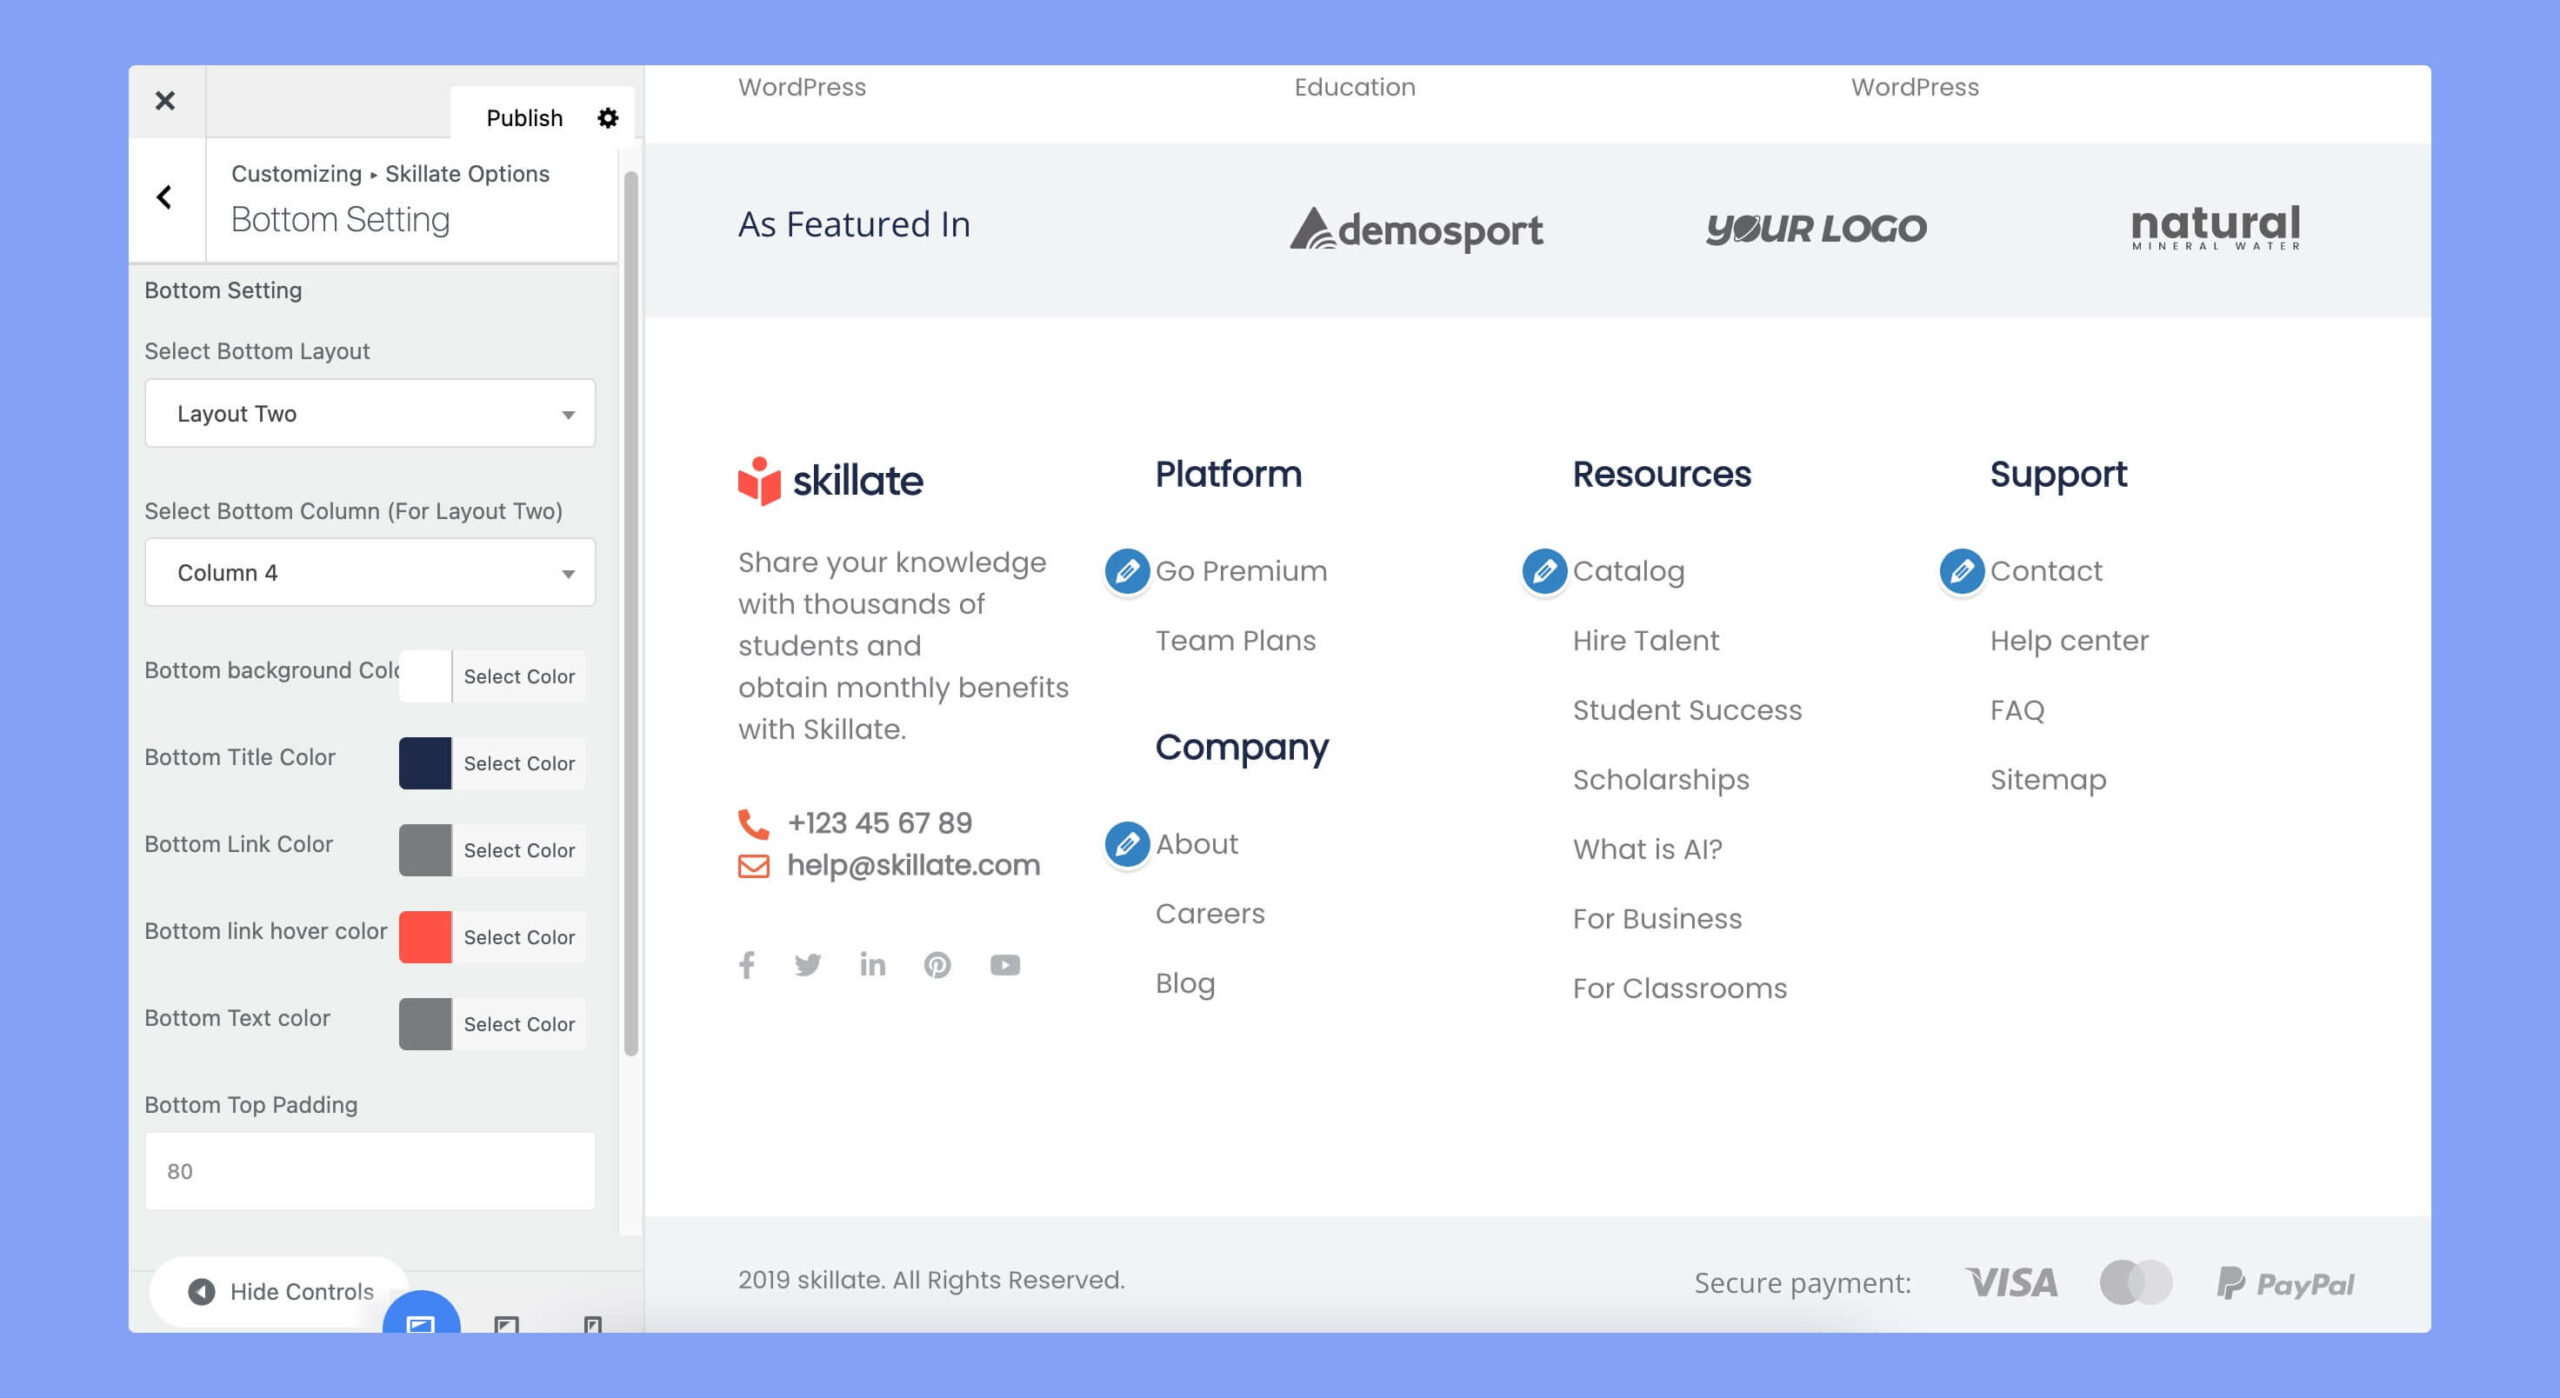
Skillate allows you to personalize the bottom settings of your website that go perfectly with your design. Here the available options are:
- Select Bottom Layout: Choose from two available layout options for the bottom section of the website.
- Select Bottom Column (For Layout Two): For the second layout option, choose the number of columns to display in the bottom section. The available options are column 1 to column 4.
- Bottom Background Color: Set a custom background color for the bottom section of the website to match your branding or style preferences.
- Bottom Title Color: Choose a custom color for the titles displayed in the bottom section of the website.
- Bottom Link Color: Set the color of links displayed in the bottom section of the website.
- Bottom Link Hover Color: Choose a custom color for links when they are hovered over by a user.
- Bottom Text Color: Set the color of any text displayed in the bottom section of the website.
- Bottom Top Padding: Set the amount of padding (in pixels) to apply to the top of the bottom section.
- Bottom Padding Bottom: Set the amount of padding (in pixels) to apply to the bottom of the bottom section.
Footer Setting
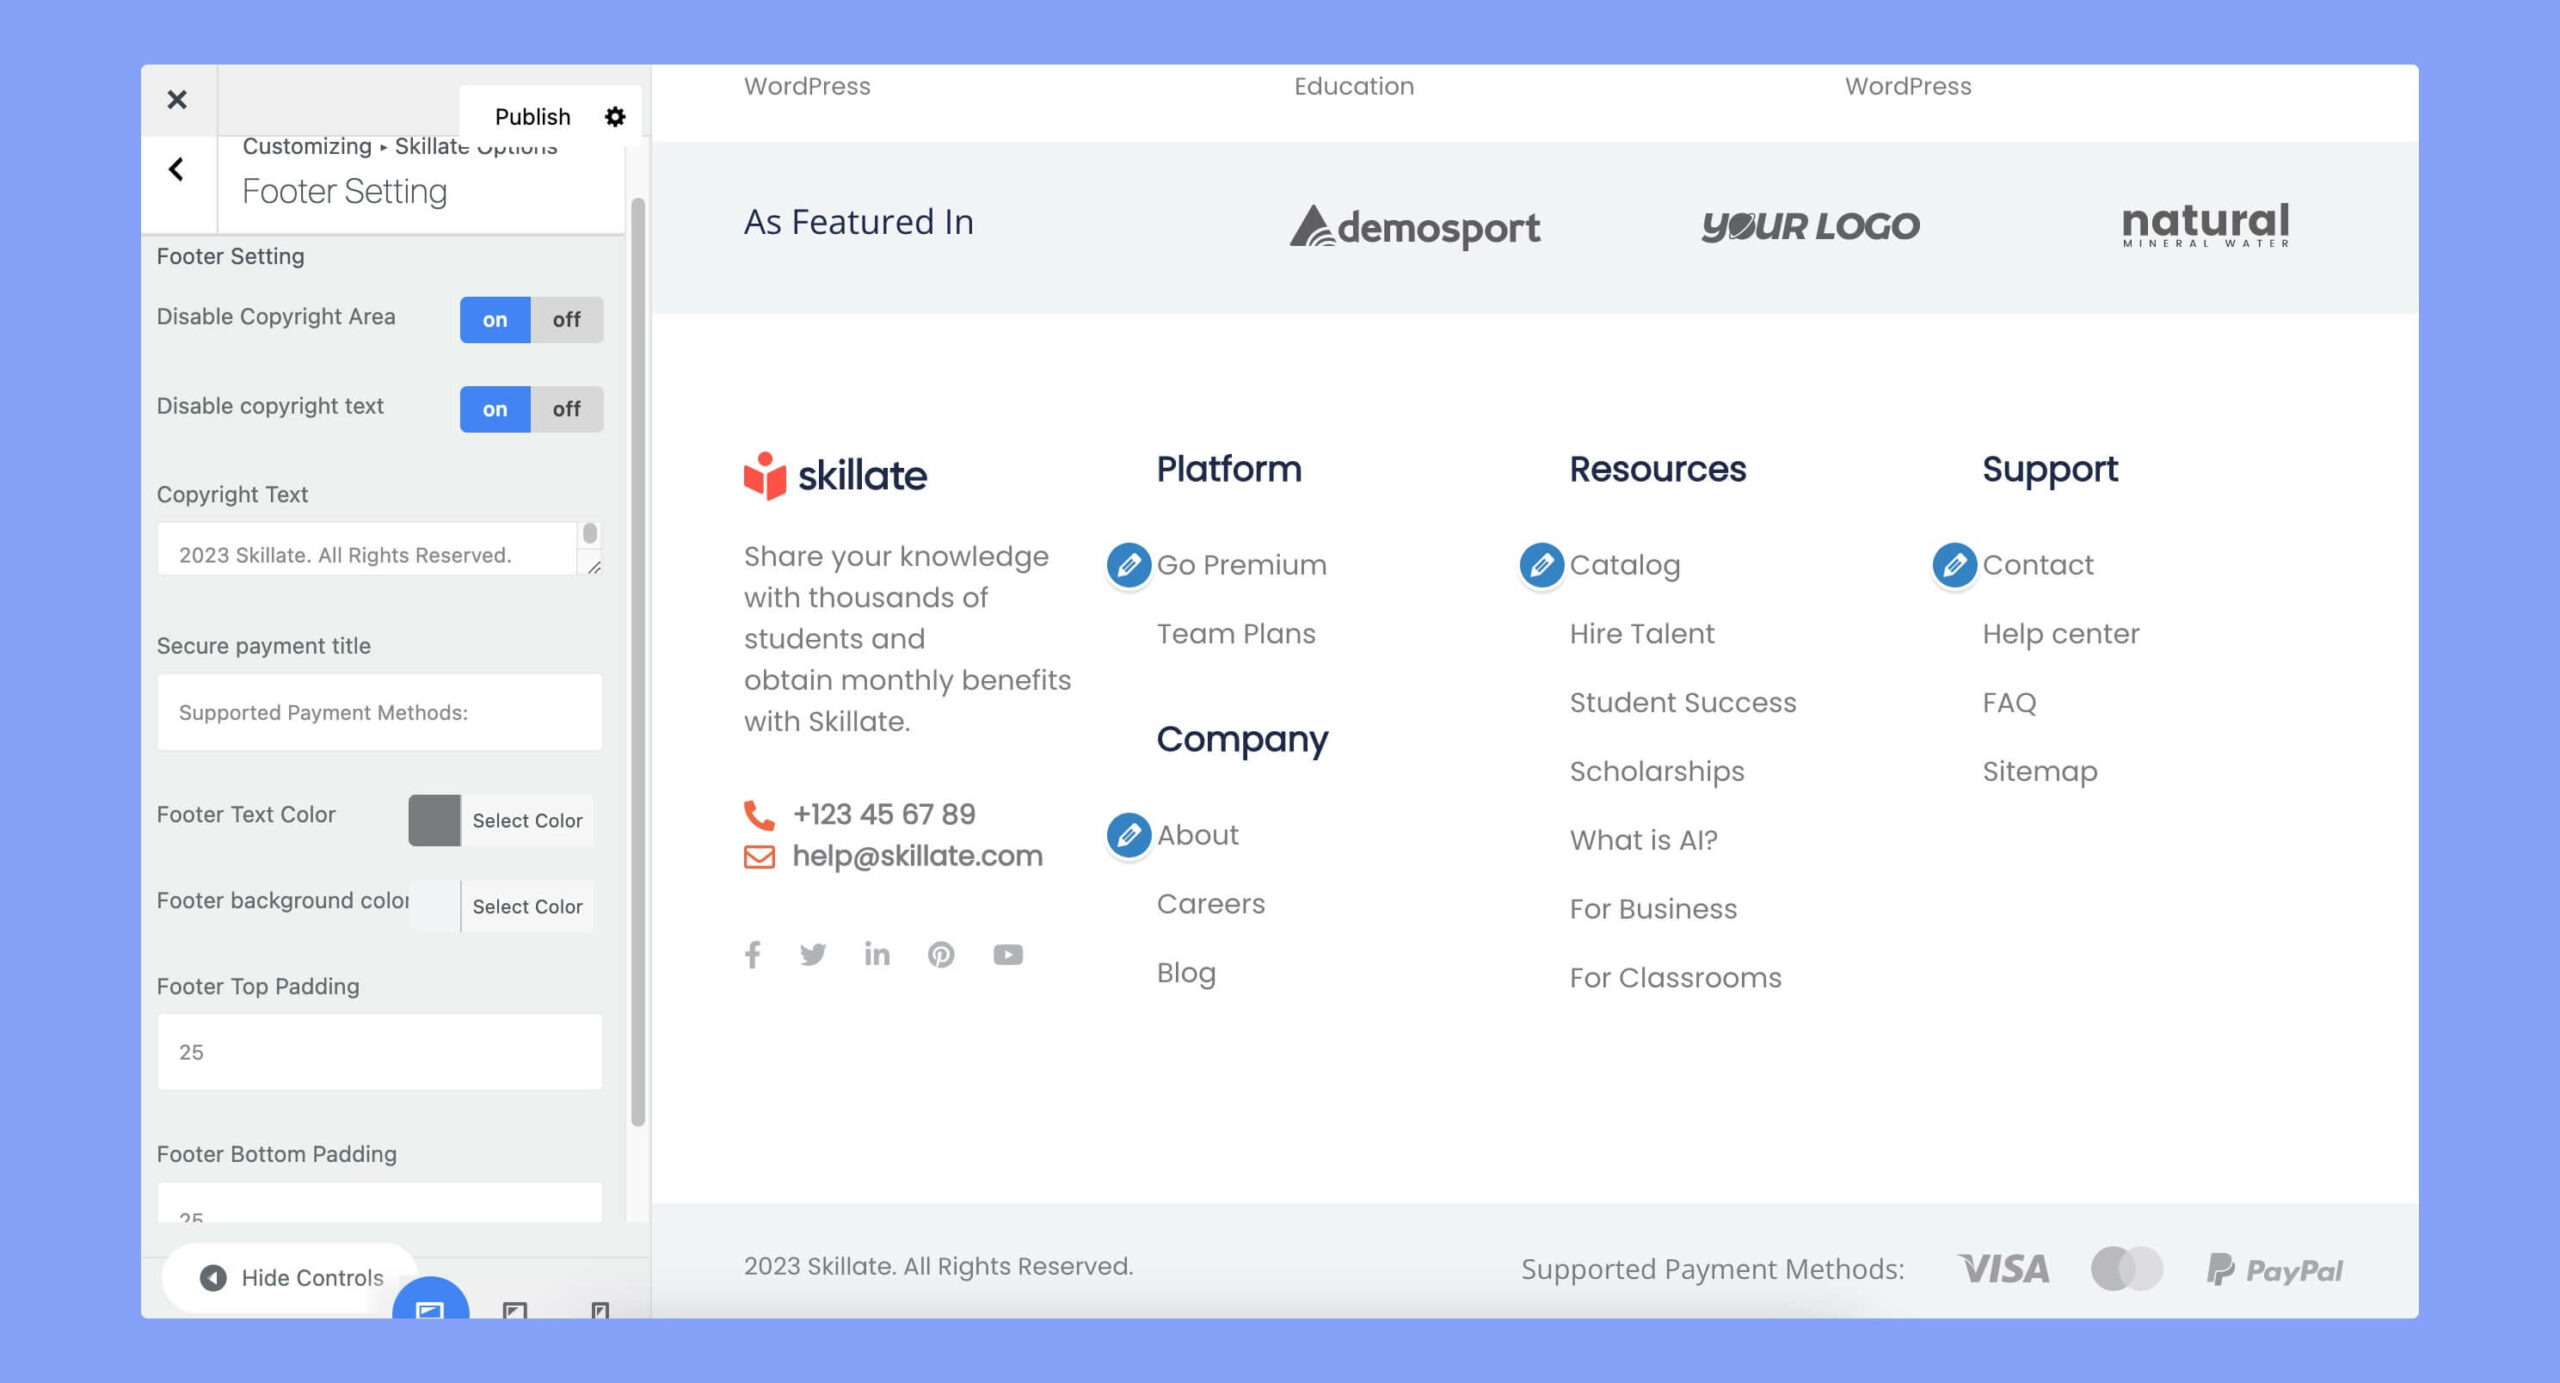
The available footer settings are:
- Disable Copyright Area: Choose whether to enable or disable the copyright area in the footer of the website.
- Disable Copyright Text: Choose whether to enable or disable the copyright text in the footer of the website.
- Copyright Text: Enter custom text to display as the copyright notice in the footer of the website.
- Secure Payment Title: Enter a custom title for the section displaying secure payment icons in the footer of the website.
- Footer Text Color: Set a custom color for the text displayed in the footer of the website.
- Footer Background Color: Set a custom background color for the footer of the website.
- Footer Top Padding: Set the amount of padding (in pixels) to apply to the top of the footer.
- Footer Bottom Padding: Set the amount of padding (in pixels) to apply to the bottom of the footer.