Integrating the Google sign-in facility allows your site visitors to login using their Gmail account in one click. This is done using the Social Login feature of Tutor LMS. To be able to login using Google through the social login you first need to get a Google Client ID.
Here are the steps for creating a Google Client ID from scratch:
Step 1: Sign in to Your Google Account
You must sign-in to your Google account to generate a Google Client ID. Go to the Google Sign-in page and sign in using your credentials.
Step 2: Create a New Project
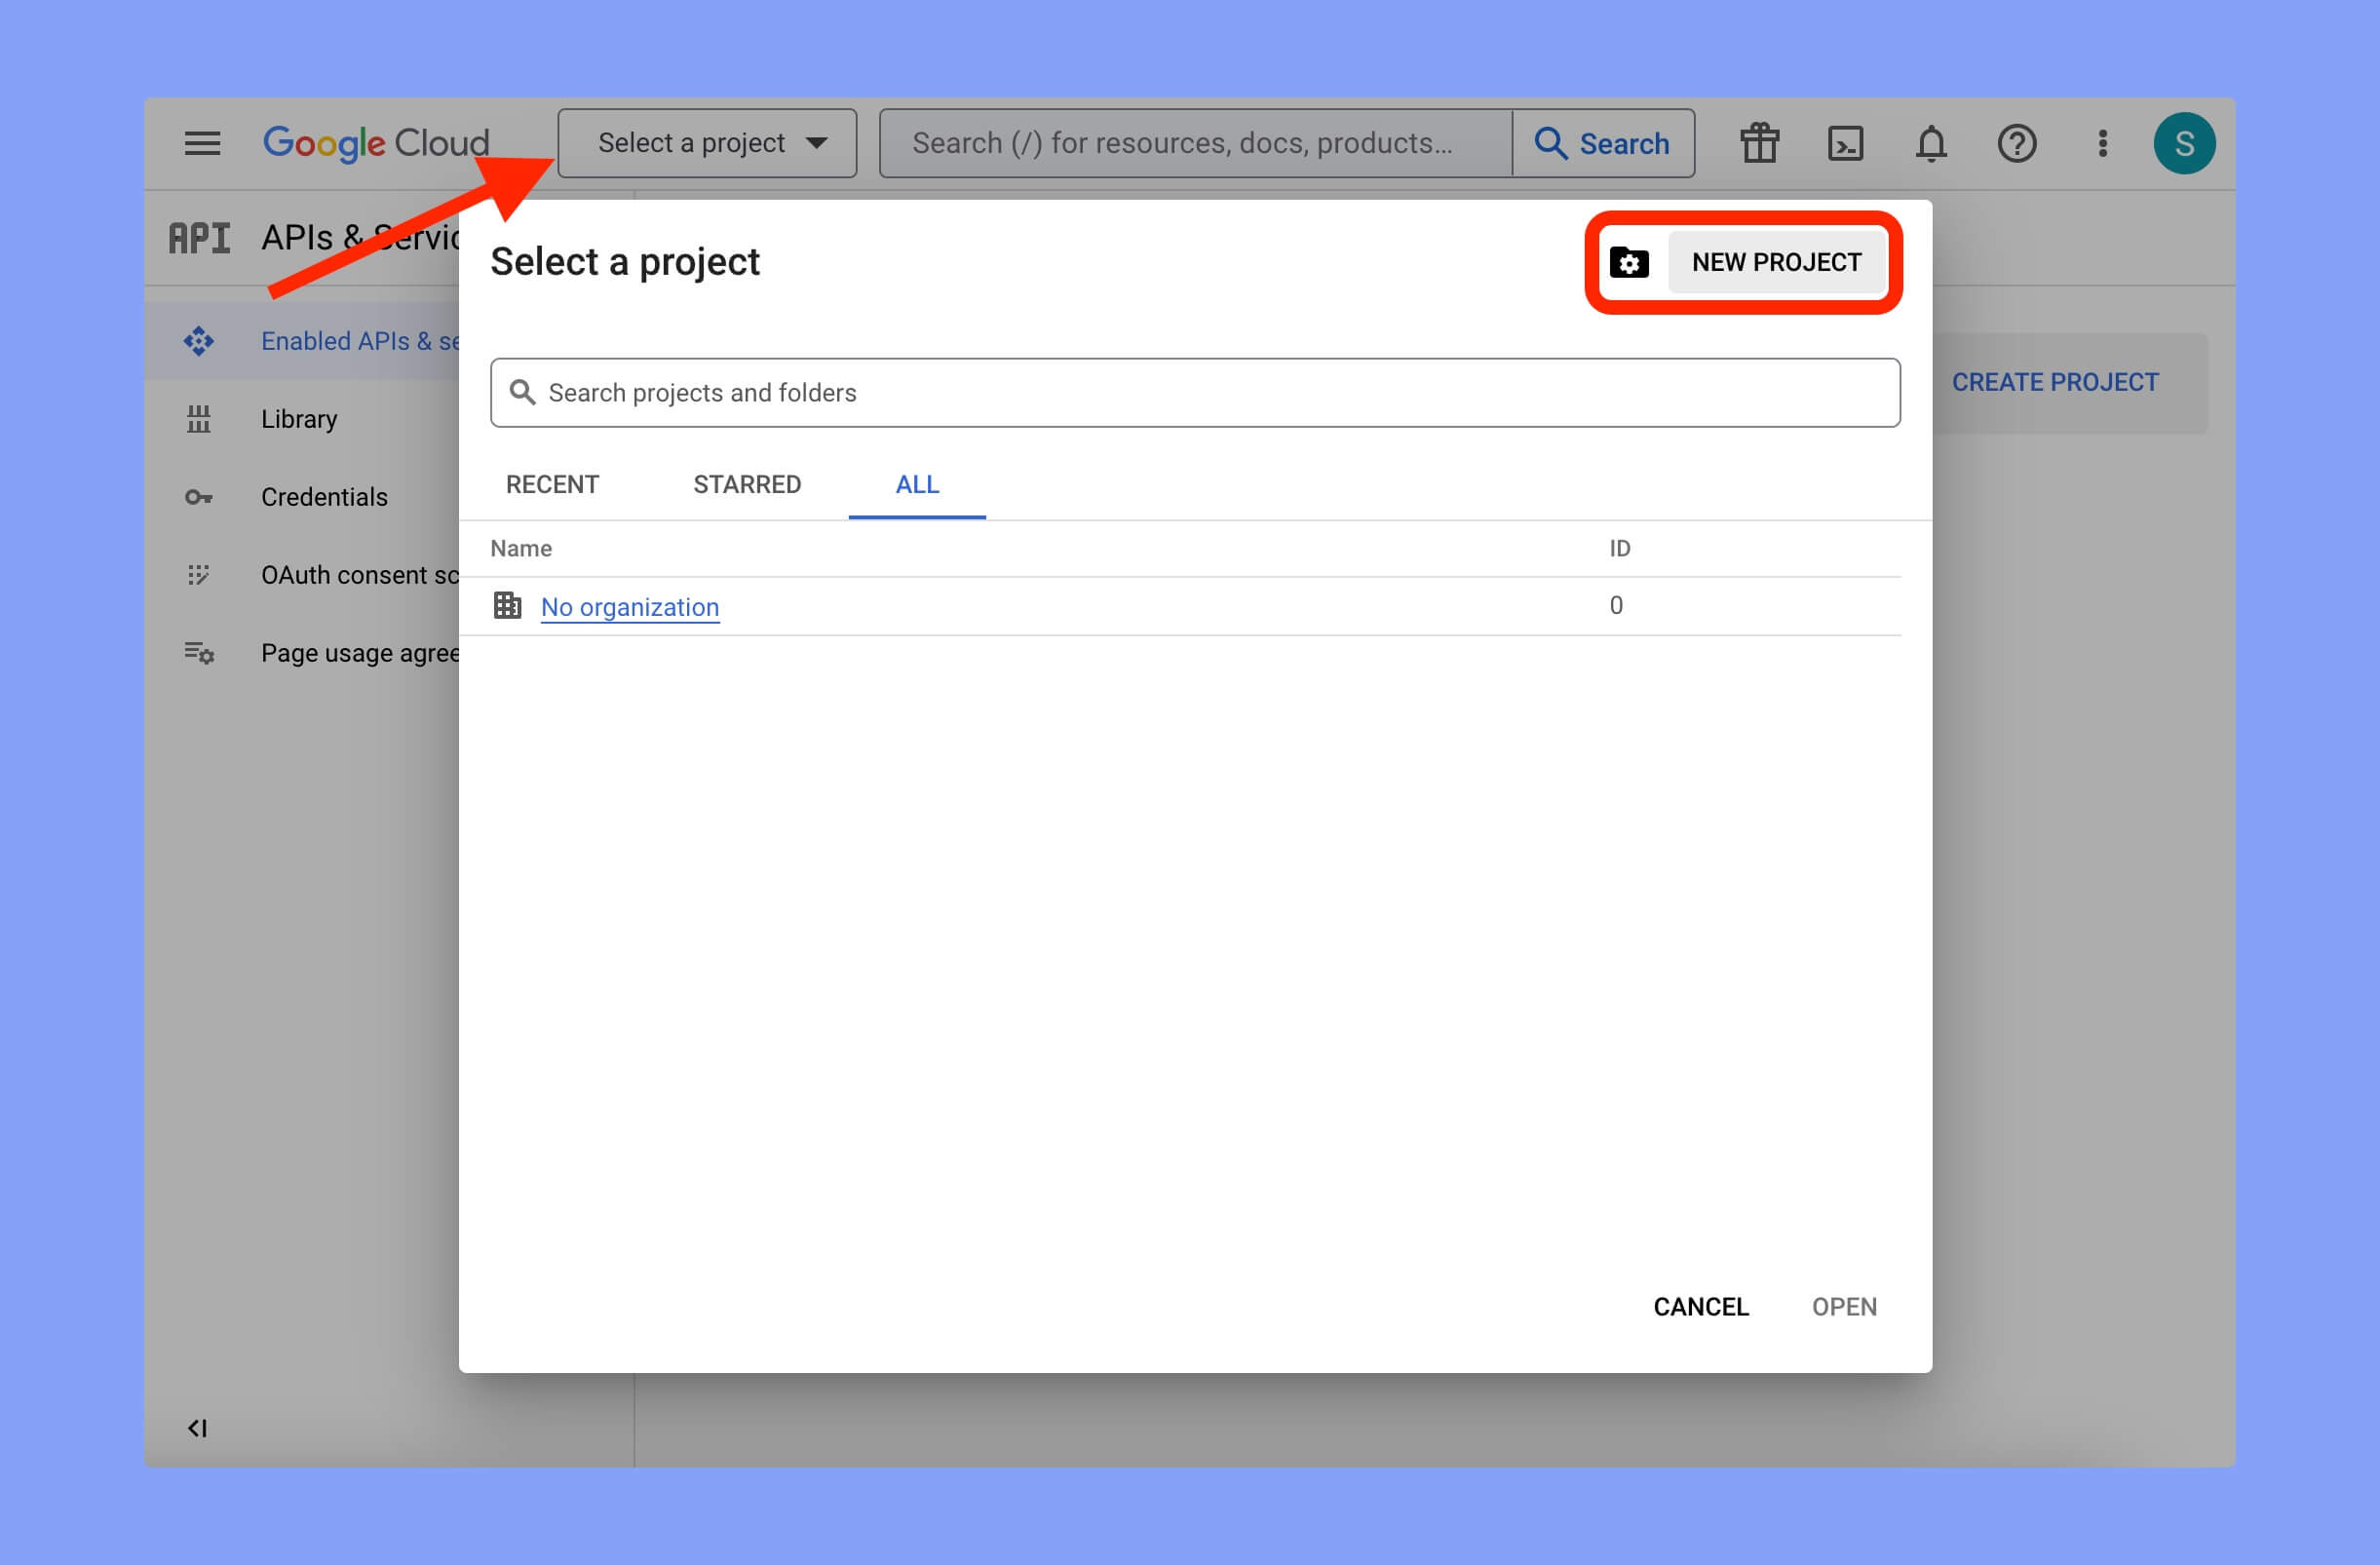
You can create a new project from the Google Developer Console. So, go to Google Developer Console and choose the Select a project option there. Clicking here will open a new window, and click on the NEW PROJECT button in the top right corner.
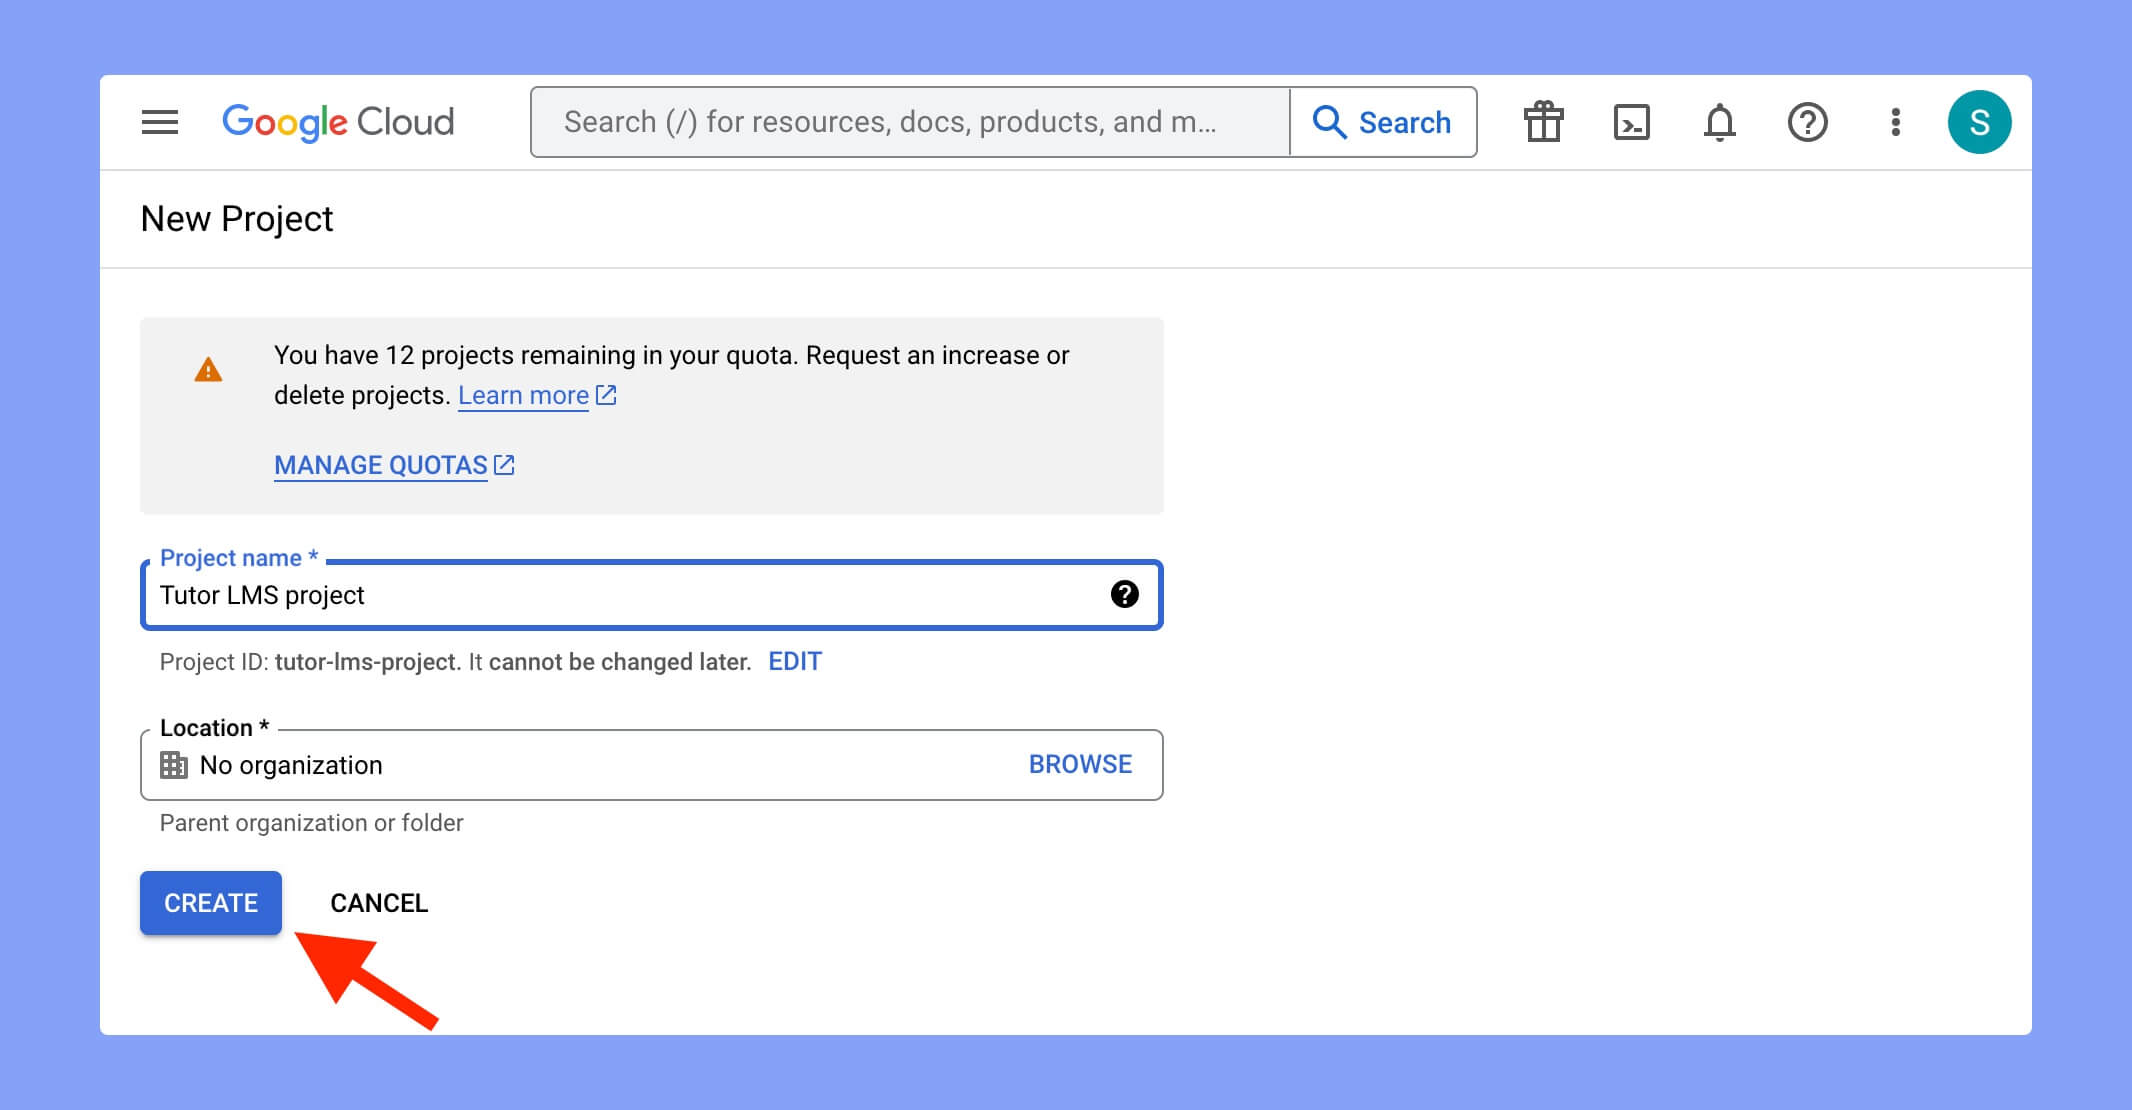
There, you have to input the project name and click on the CREATE button. You may choose the organization name if you are connected with an organization.
Once the project is created successfully, it will display the traffic, errors, and median latency there.
Step 3: Setup OAuth consent screen
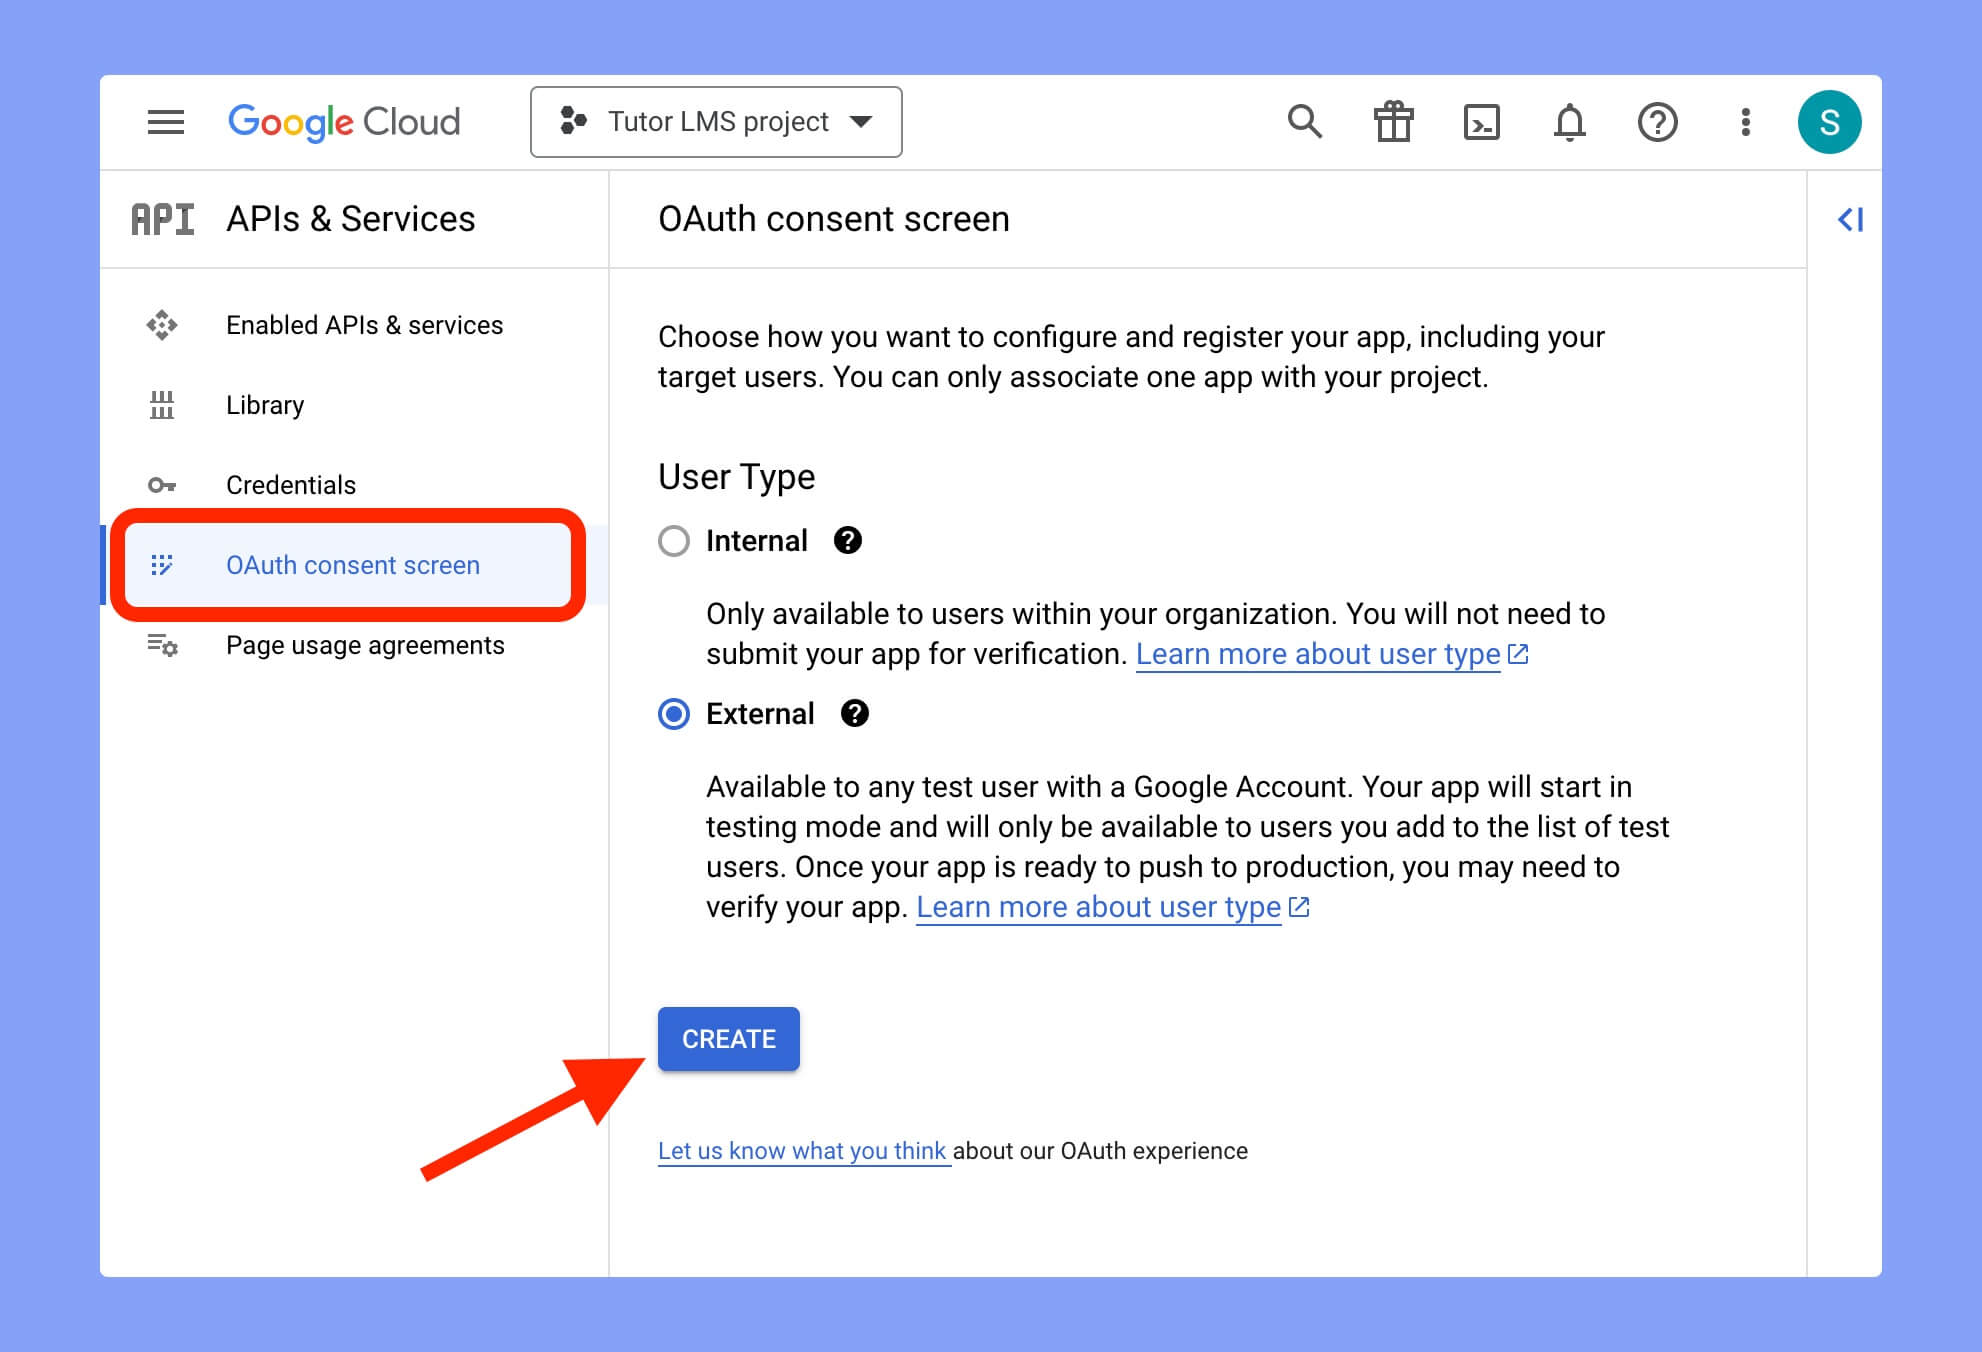
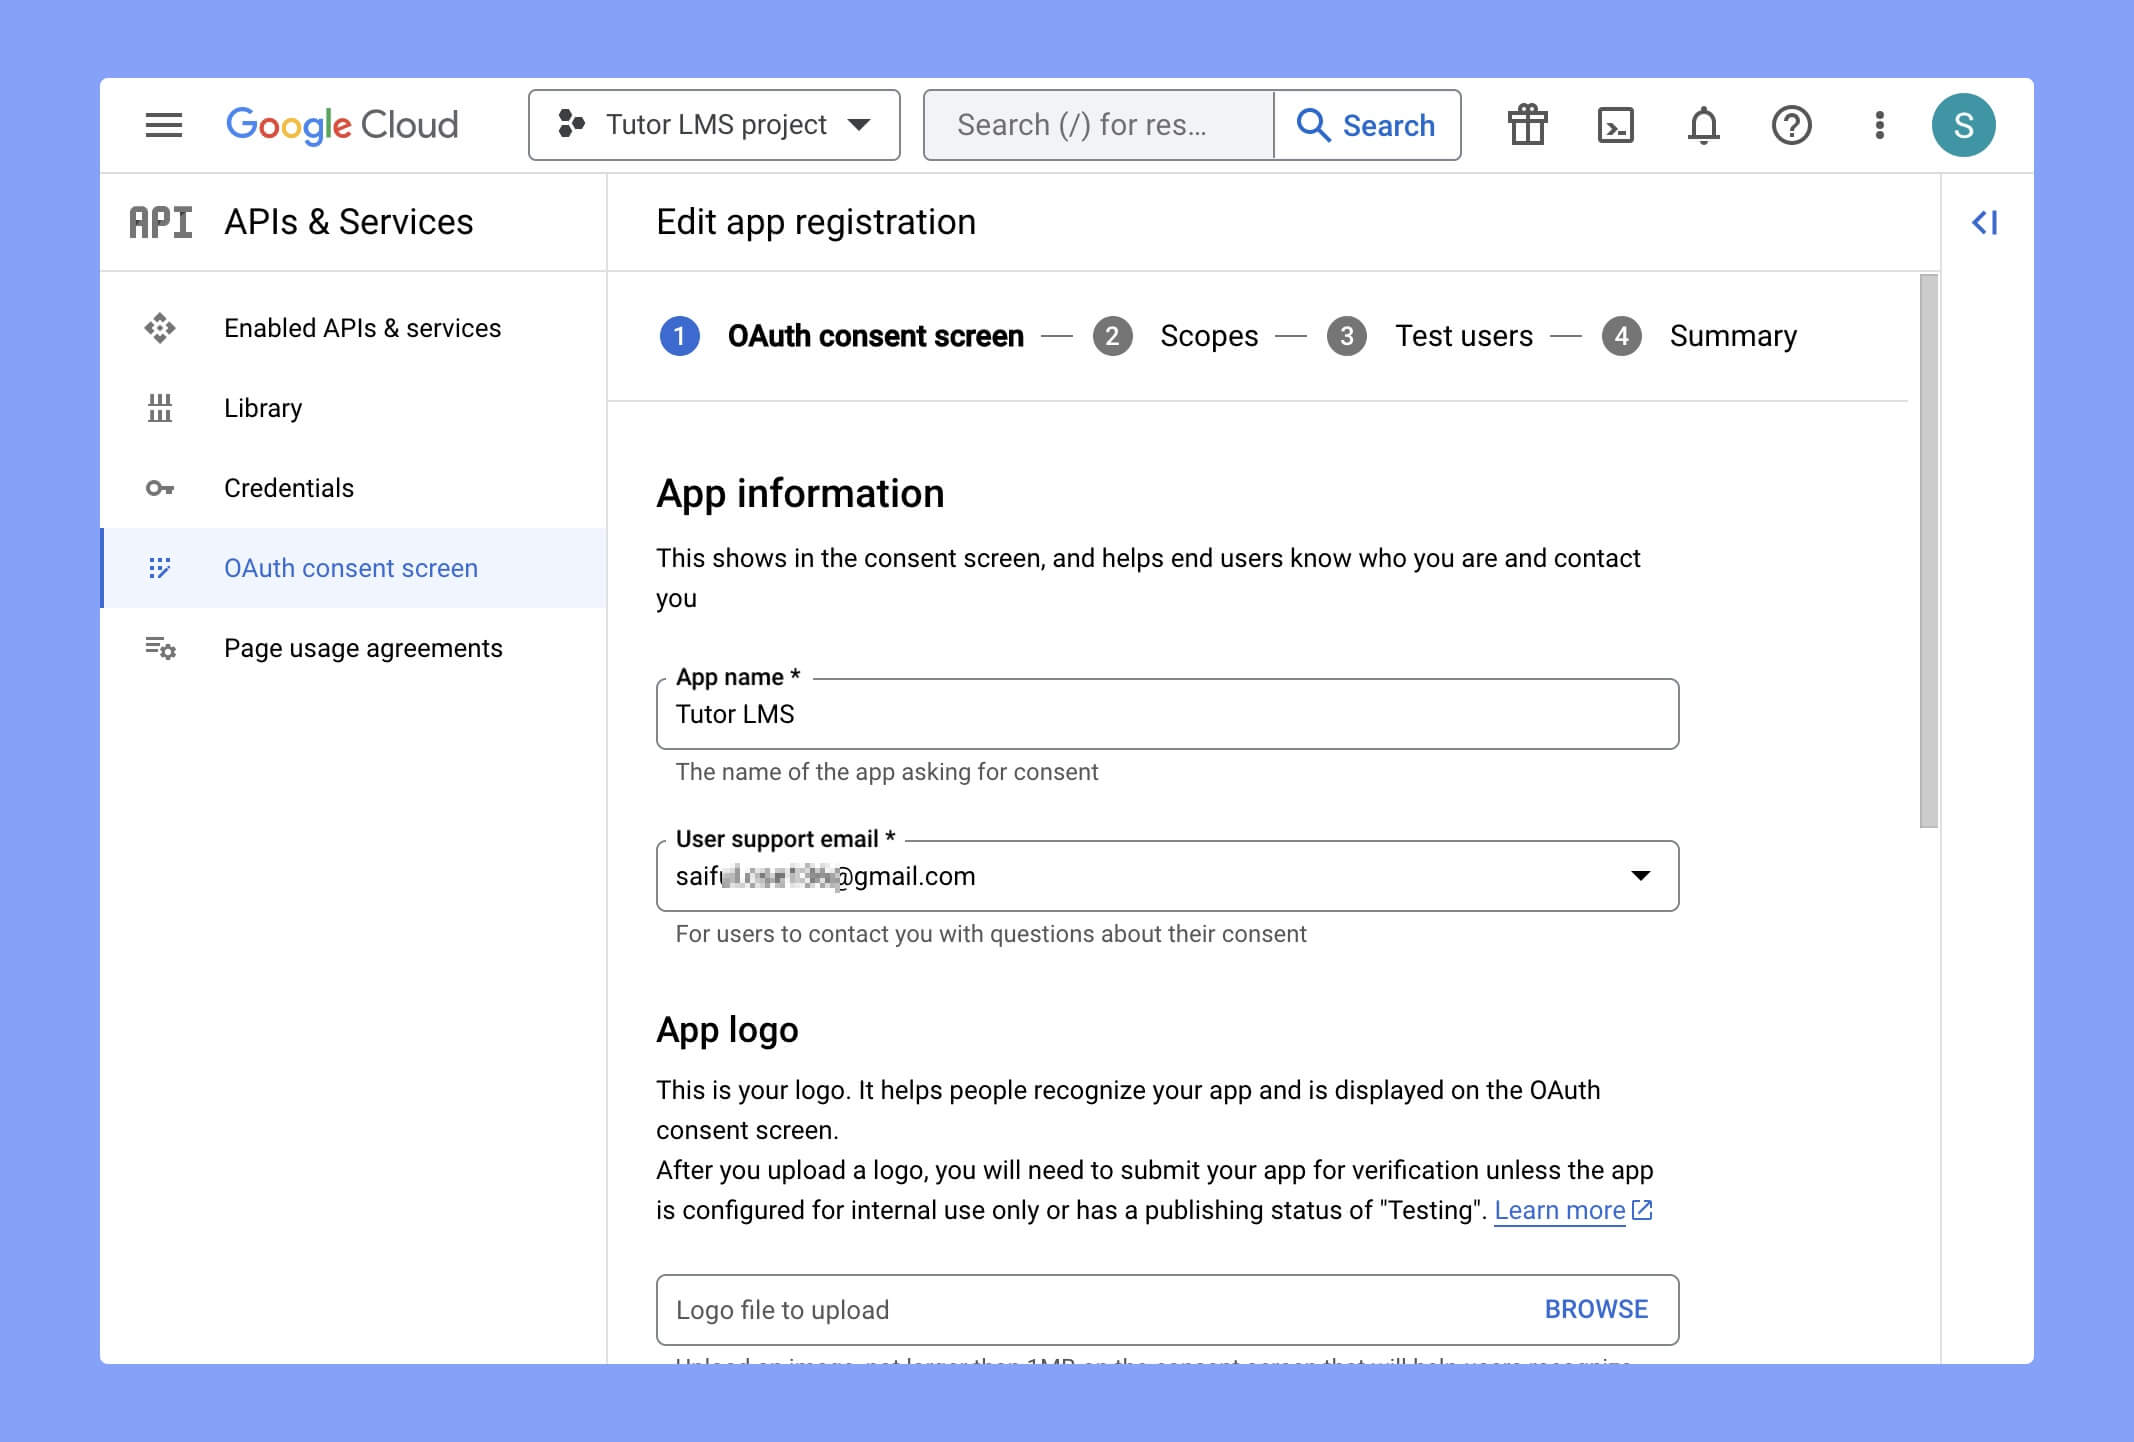
Up next, you have to setup the OAuth consent screen. Choose the OAuth consent screen from the left sidebar, choose External as the User Type, and click on the CREATE button below.
However, you have to choose Internal if you want to make this project available within your organization only.
After that, you have to input the basic contact information about the developer and the project. To be more specific, you have to input the following information:
- App name
- User support email
- App logo
- App homepage link
- App privacy policy link
- App terms & condition link
- Authorized domain names and
- Developer’s contact email
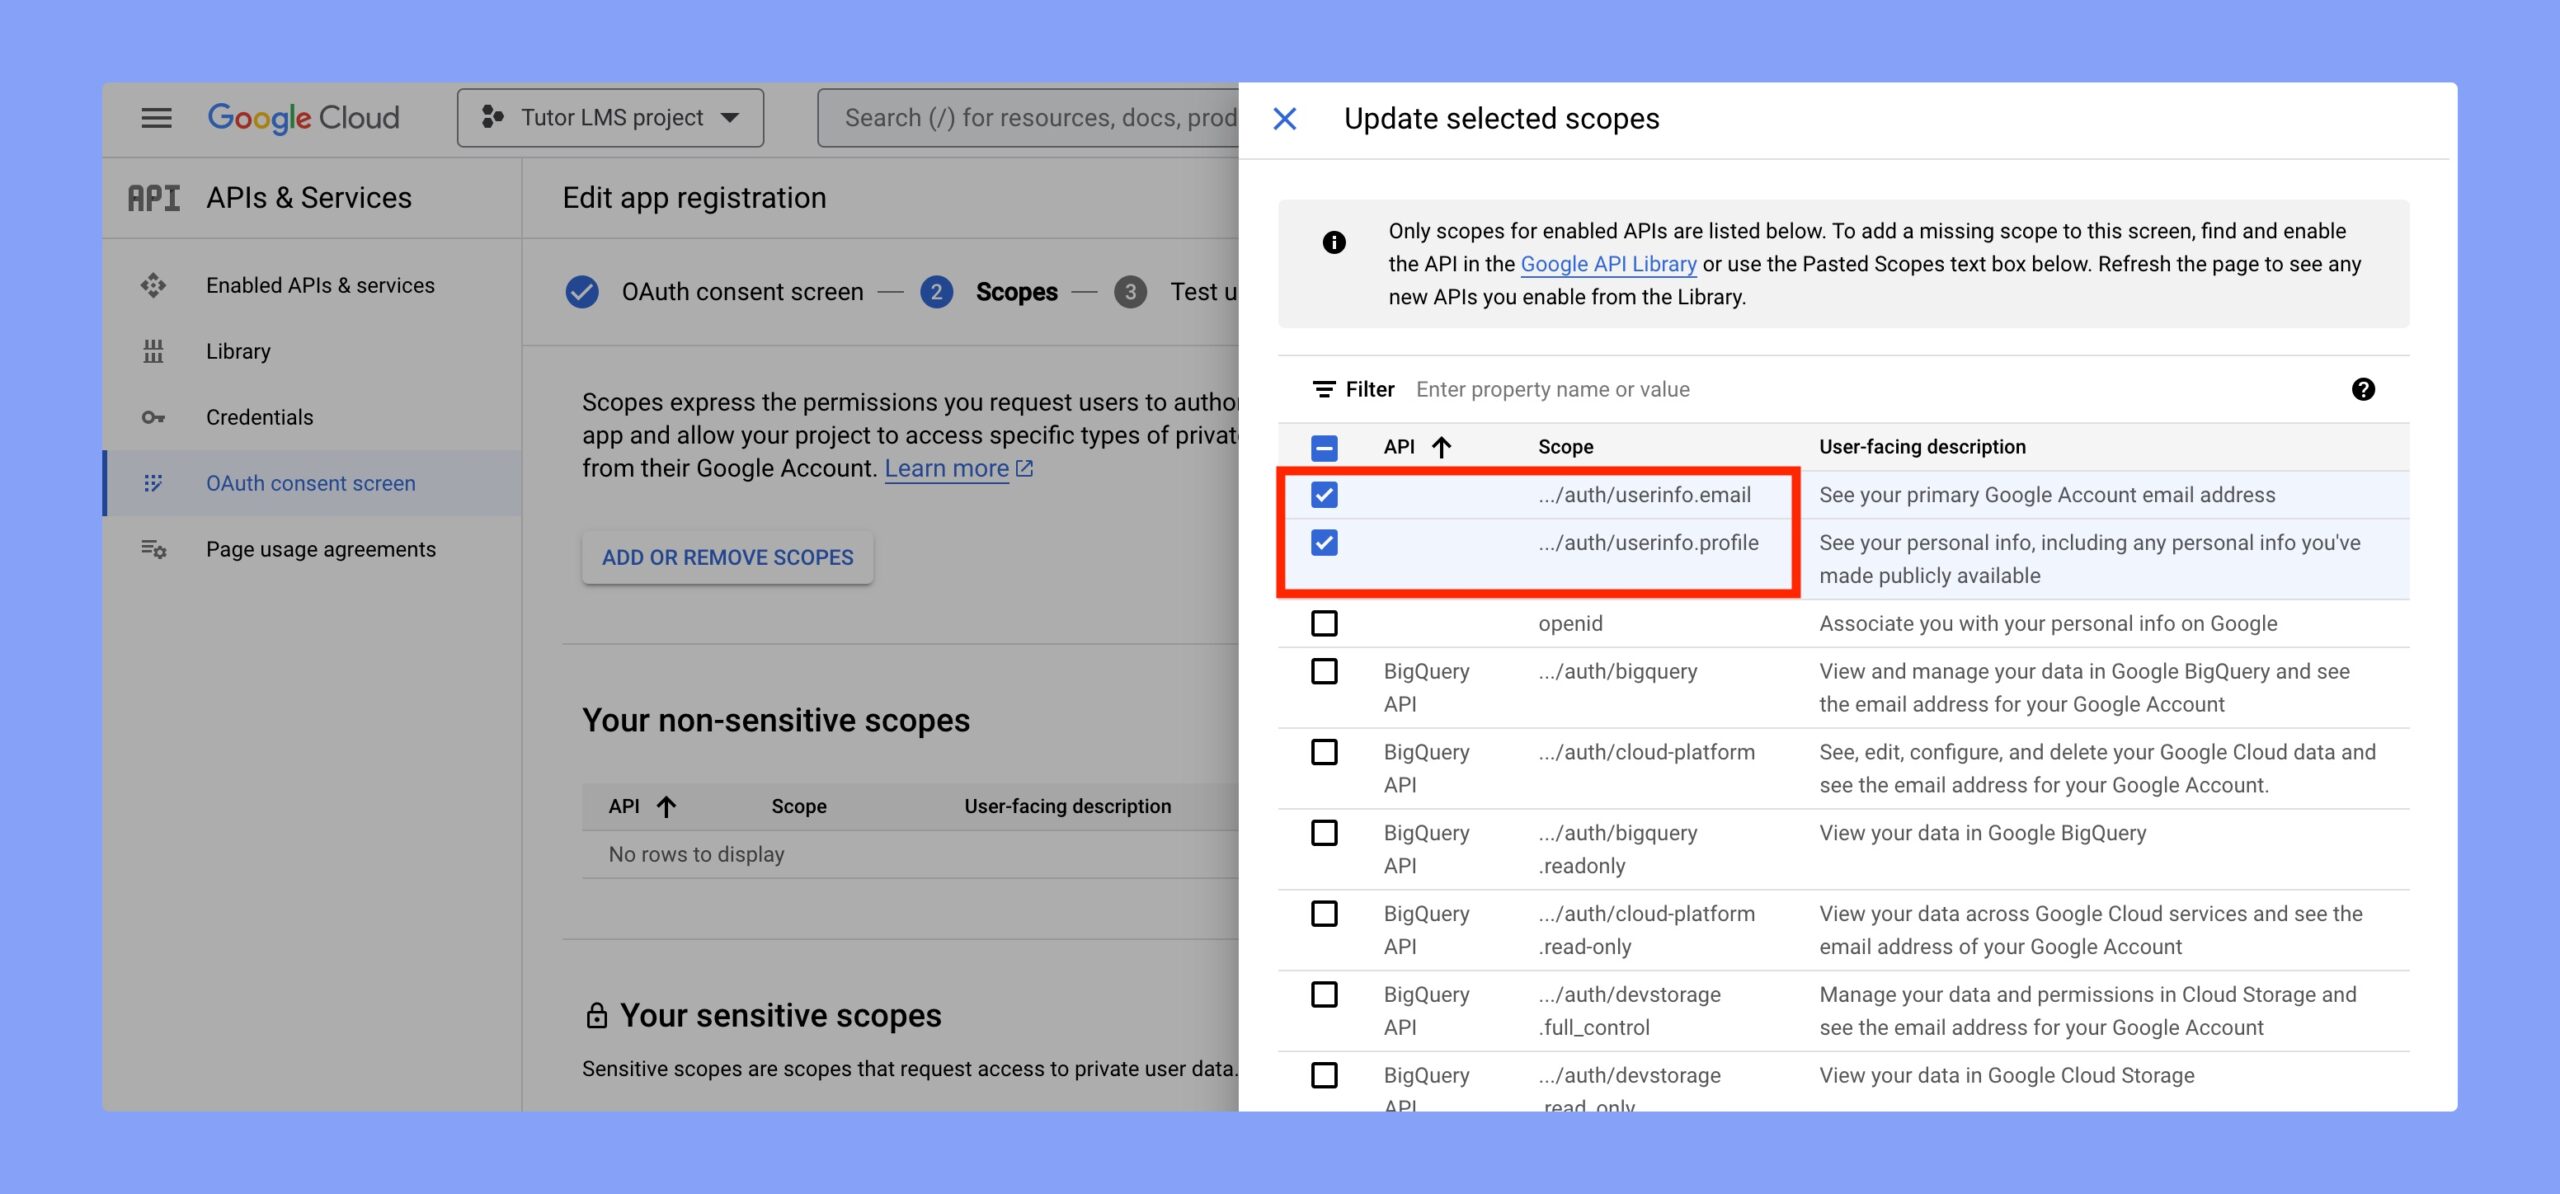
After that, you have to add some scopes here. Click on Add or Remove Scopes button to add the scopes. Tutor LMS requires to add the following scopes:
- Userinfo.email
- Userinfo.profile
So, make sure that you’ve ticked the checkbox beside the email and profile scope. After choosing all of those scopes, click on Save and Continue button.
On the following screen, you can add users who can test your app. Make sure that you have entered the right Email of the test users. Remember, you can initially invite up to 100 users to test your app. To add more users, you have to verify your app.
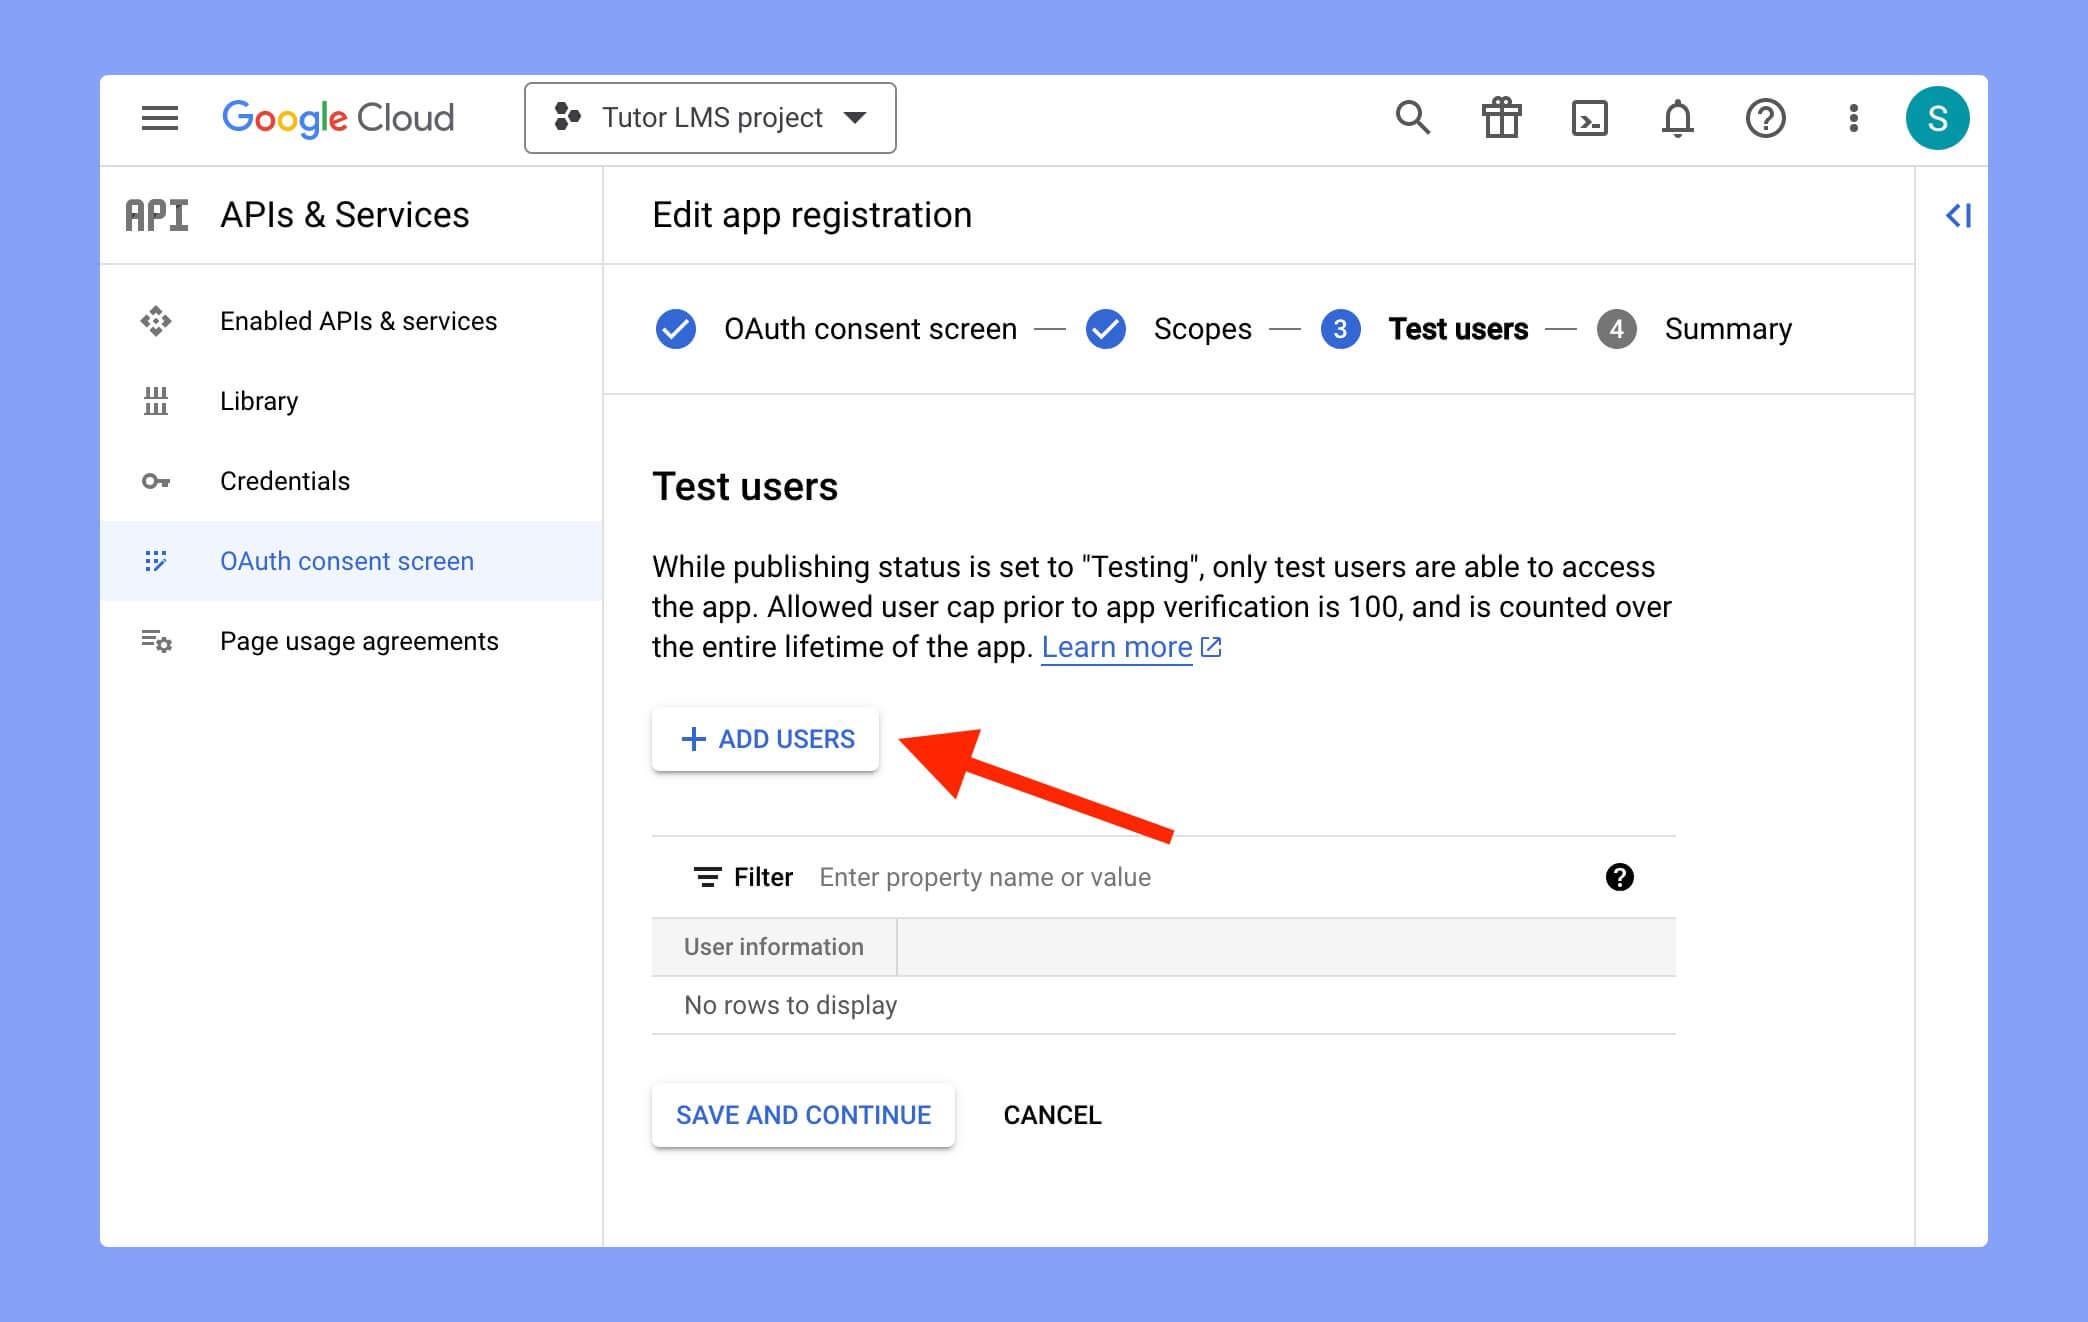
After adding the user’s email accounts, click on the SAVE AND CONTINUE button. On the following screen, you’ll get the summary of your app. However, if you notice any typo or misinformation, you can update that by using the EDIT option in the top right section.
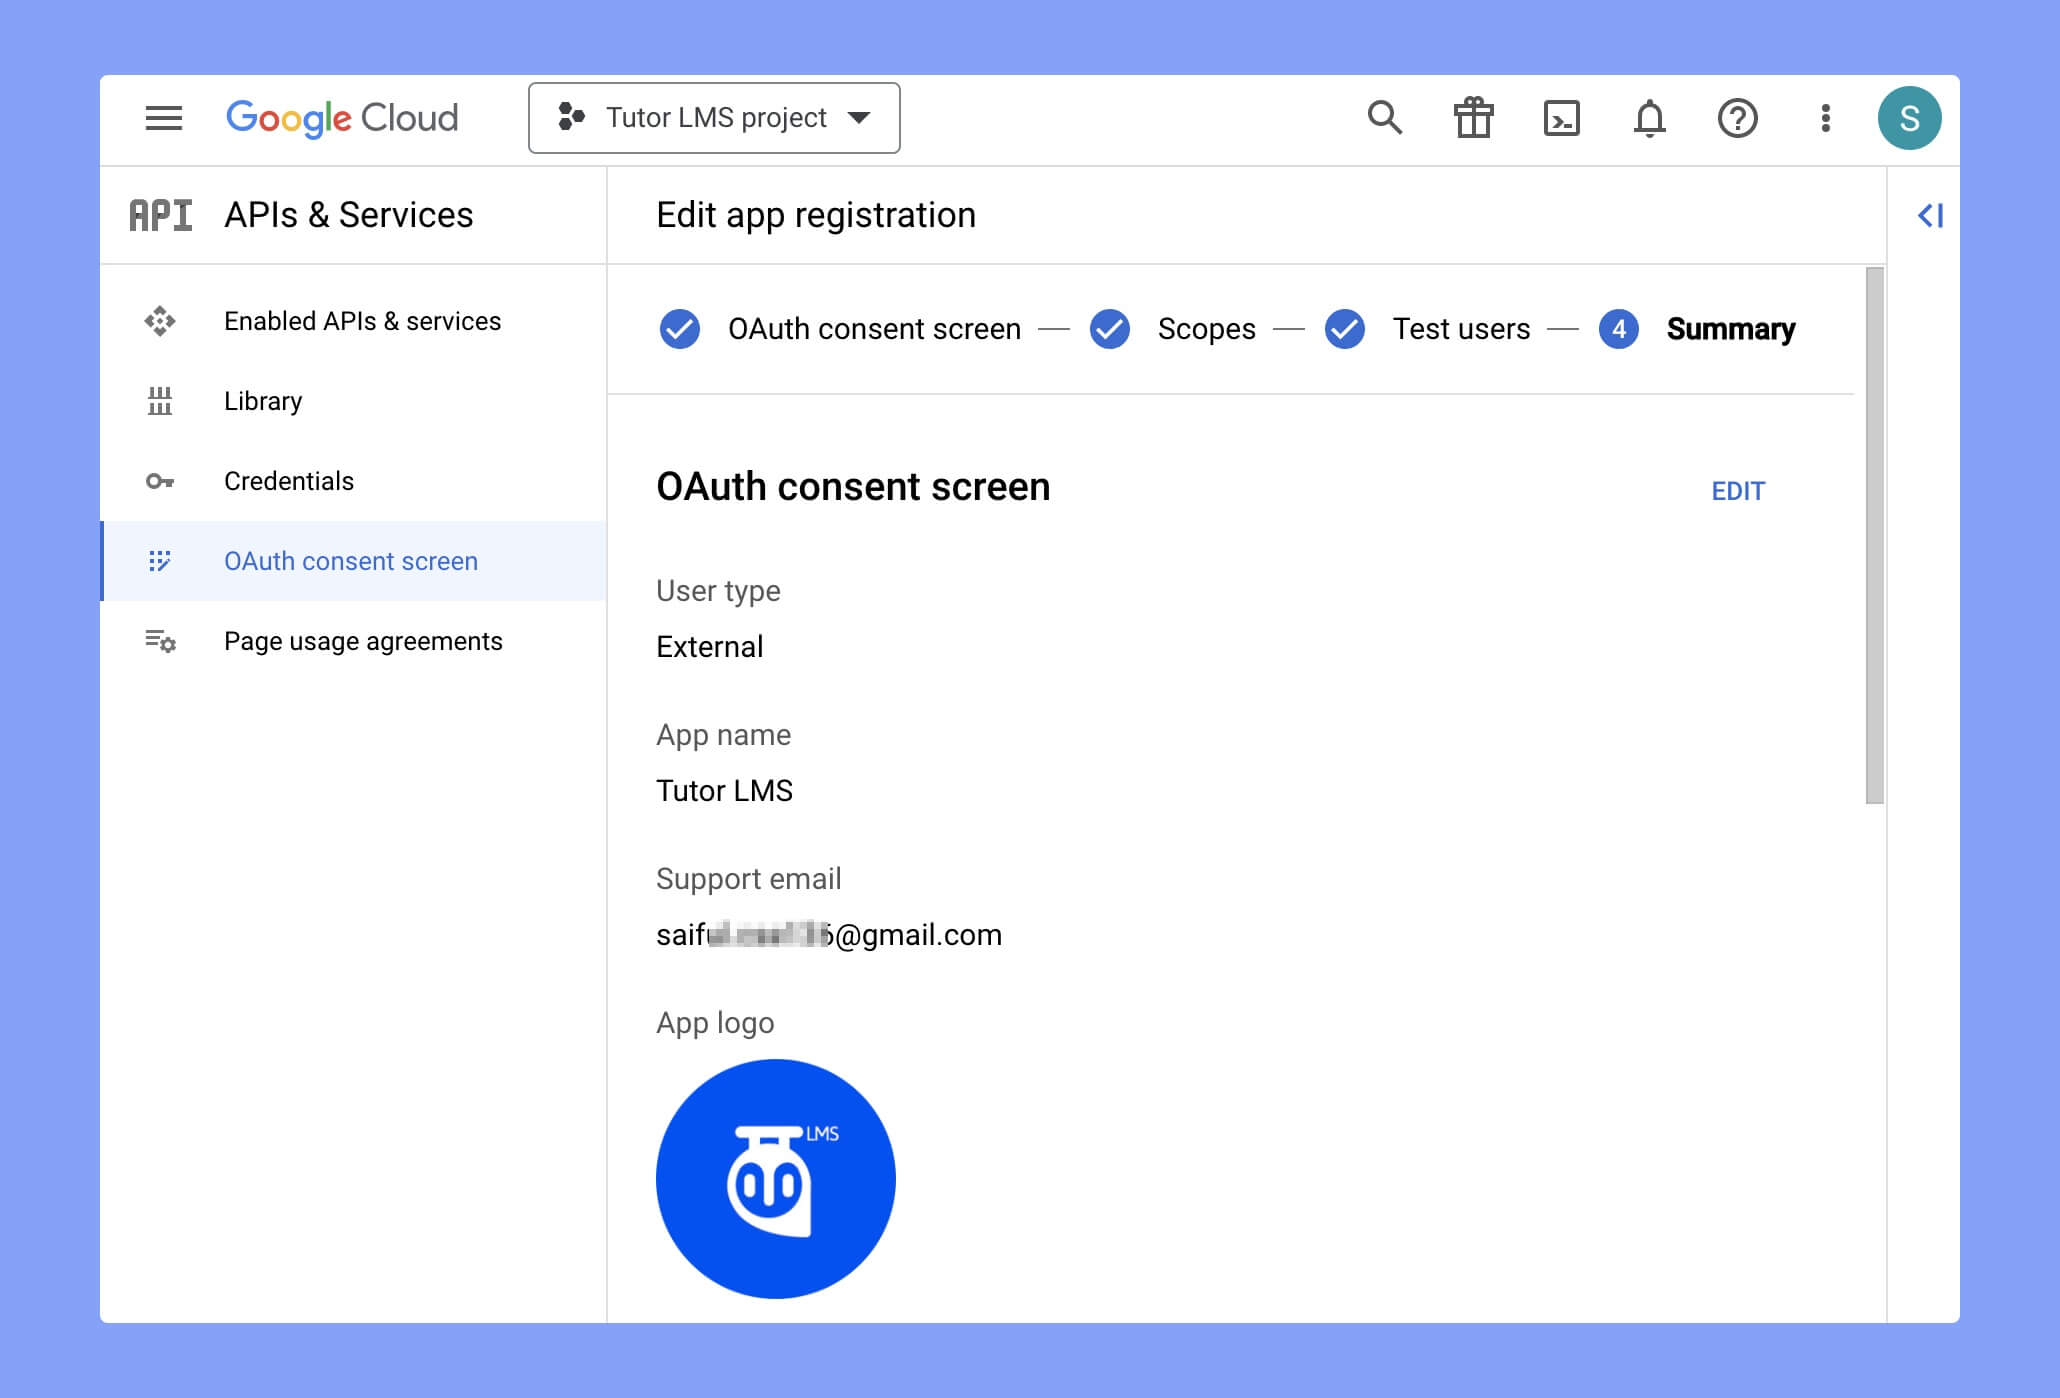
If everything looks fine, return to the dashboard by clicking the BACK TO DASHBOARD button below.
Step 4: Create OAuth Client ID
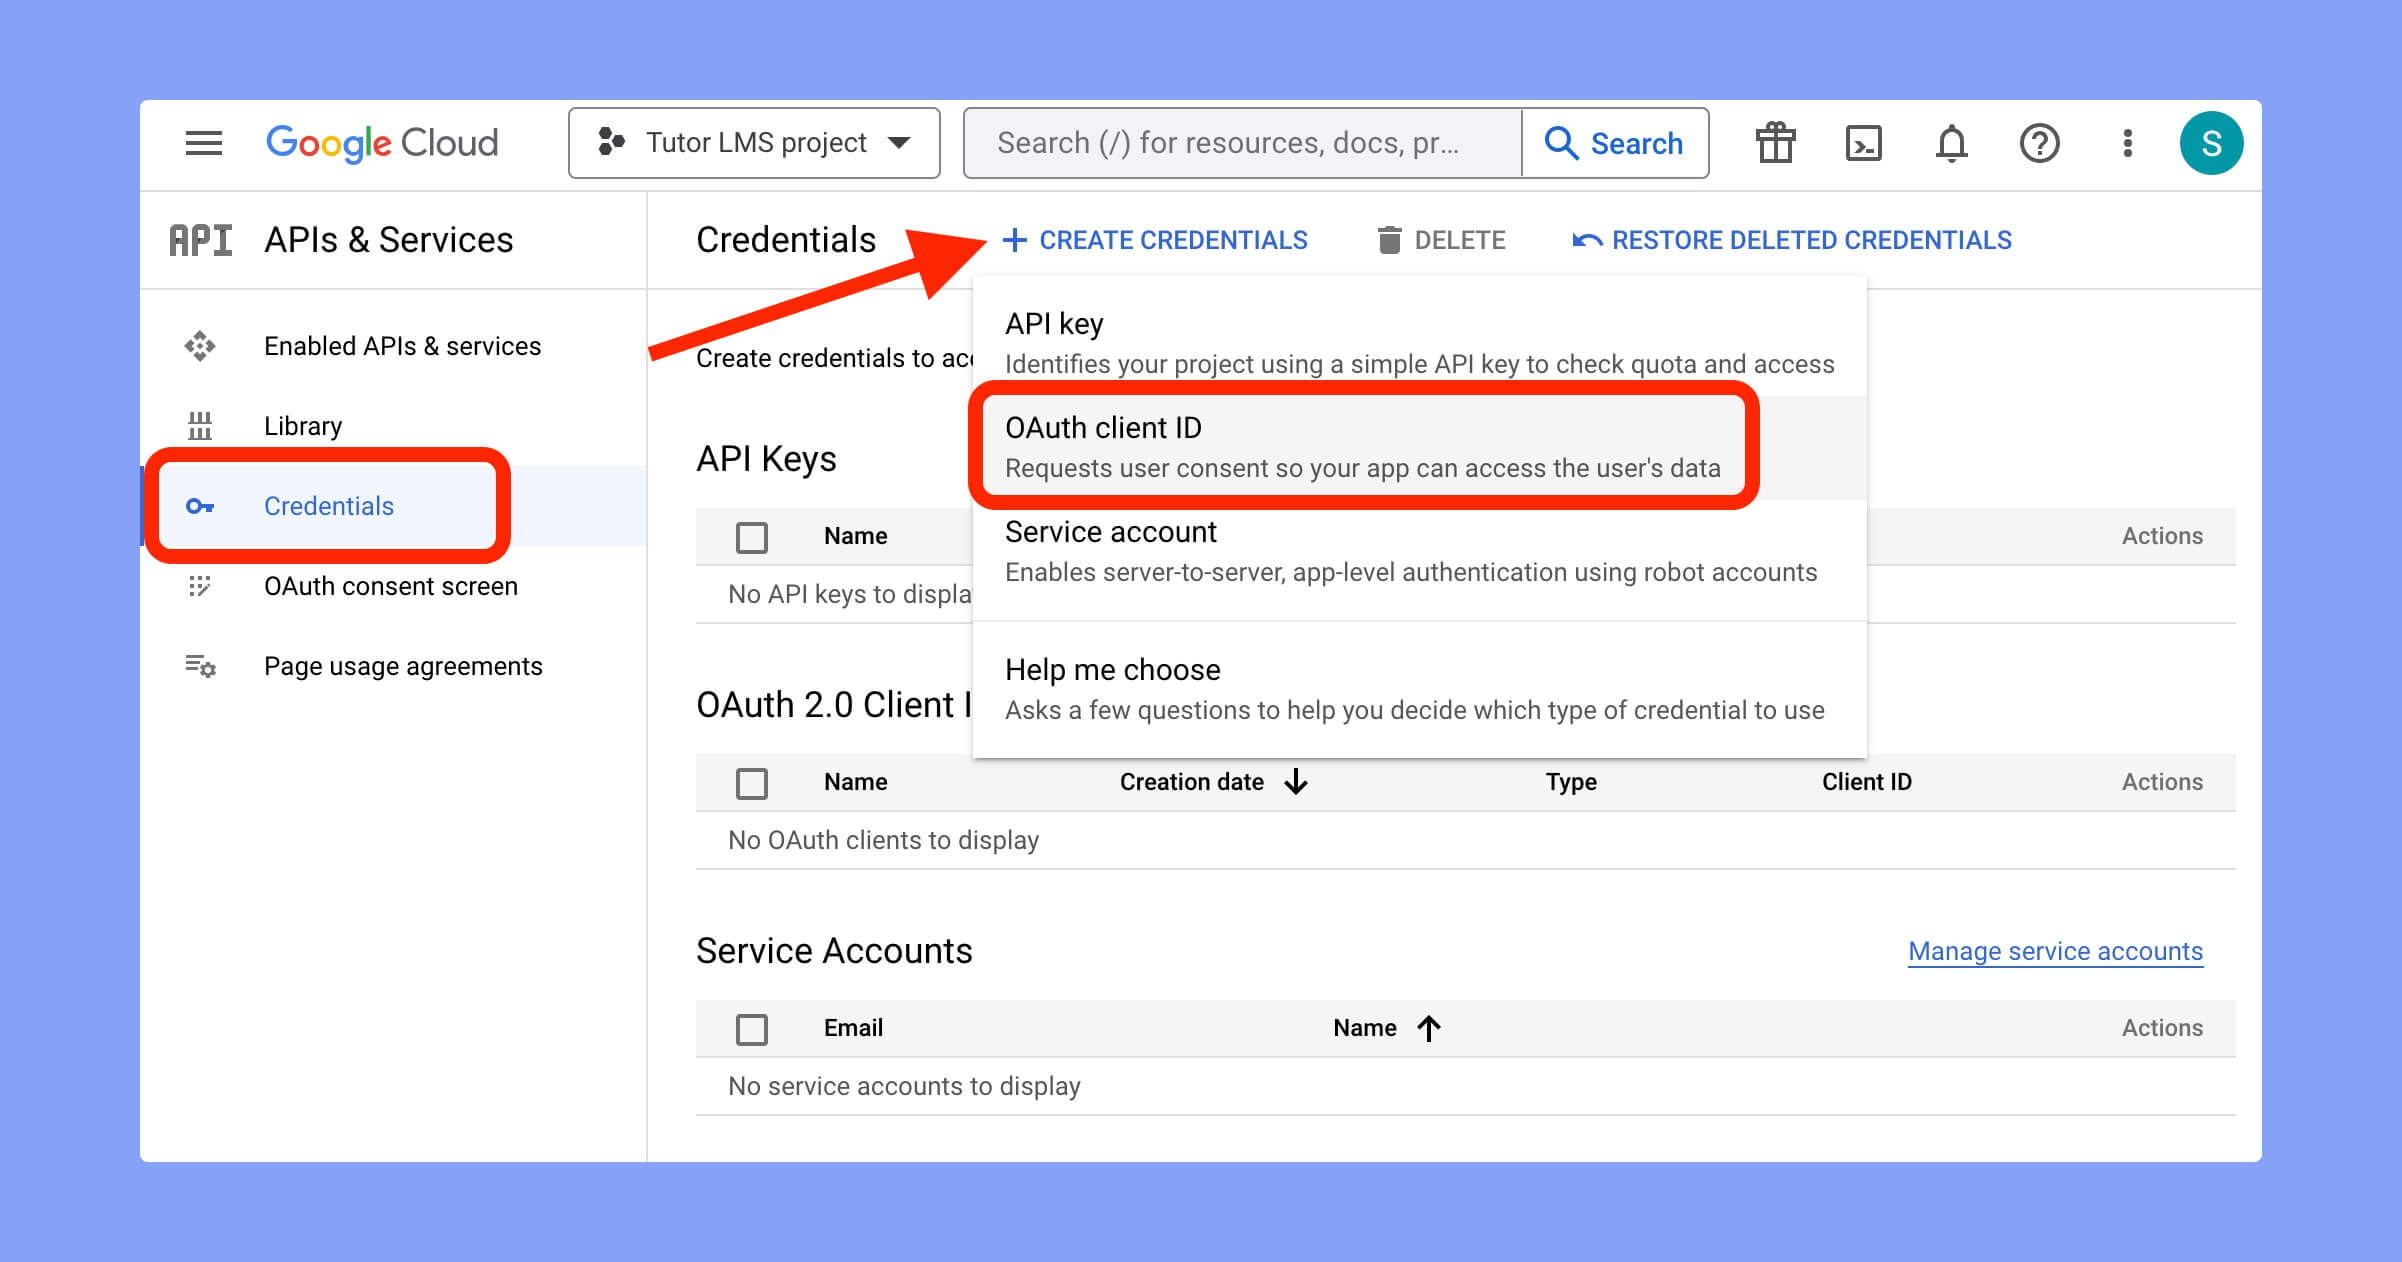
It’s time to create your OAuth Client ID. To do so, select the Credentials tab from the left sidebar and click on the + CREATE CREDENTIALS button. It will open a dropdown with four options. Choose OAuth client ID from that dropdown menu.
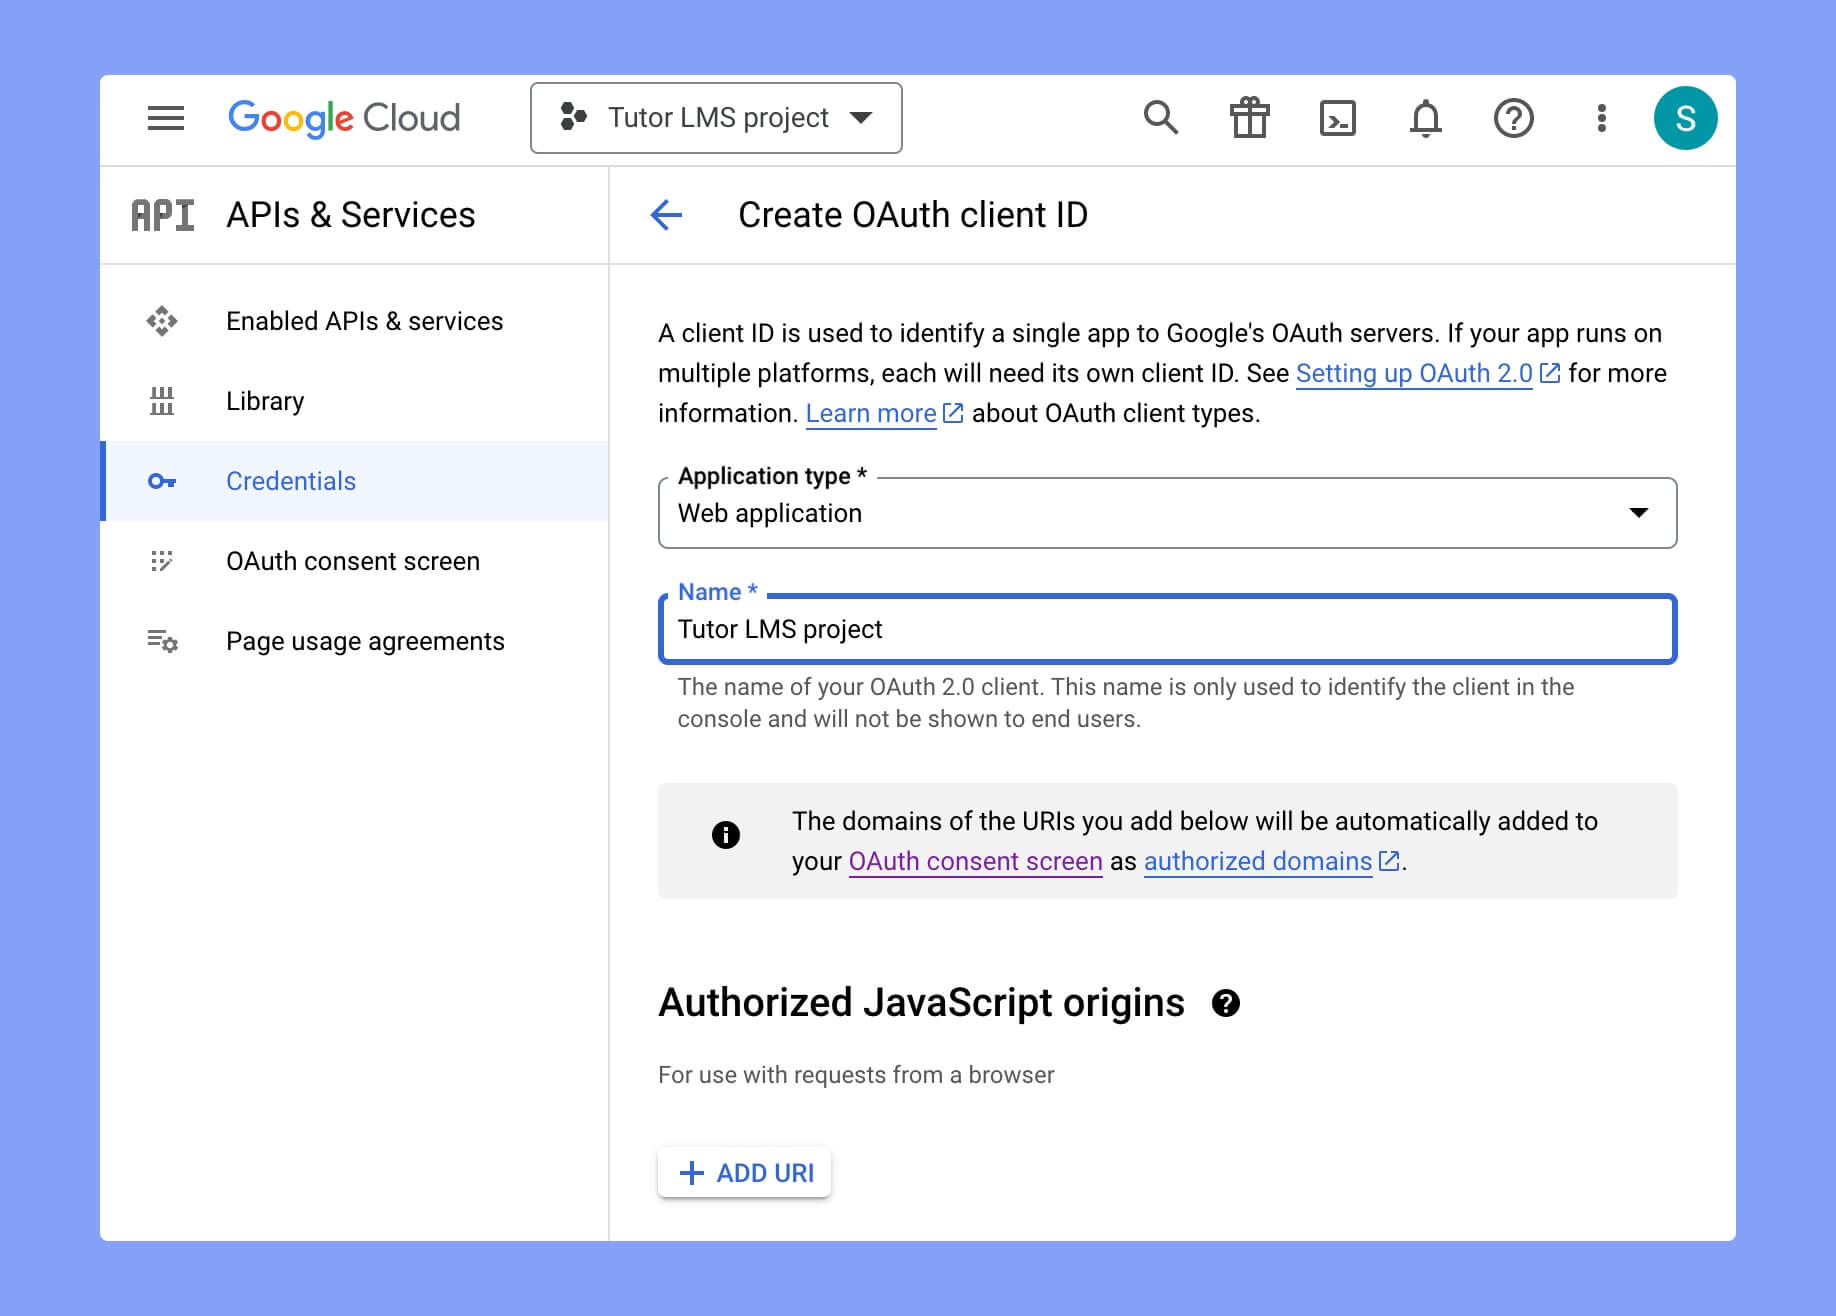
On the following screen, you have to enter your application type, name, JavaScript origins, and redirect URIs. Here, you have to select Web application as the application type, write your application name, and enter your web URL.
Up next, you have to enter your domain URL as the Authorized JavaScript origins and redirect URI in the Authorized redirect URIs section. Then click on the ‘Save’ button and wait a little bit for settings to take effect.
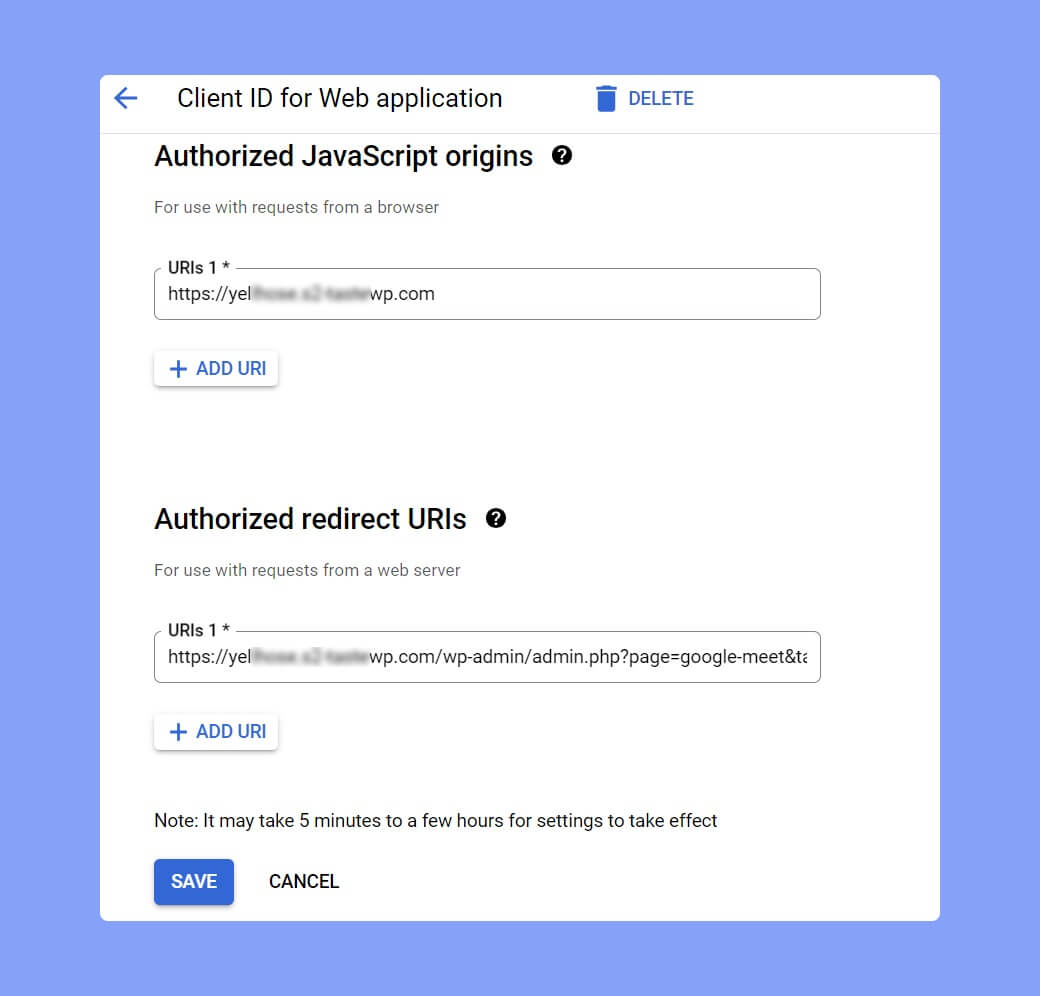
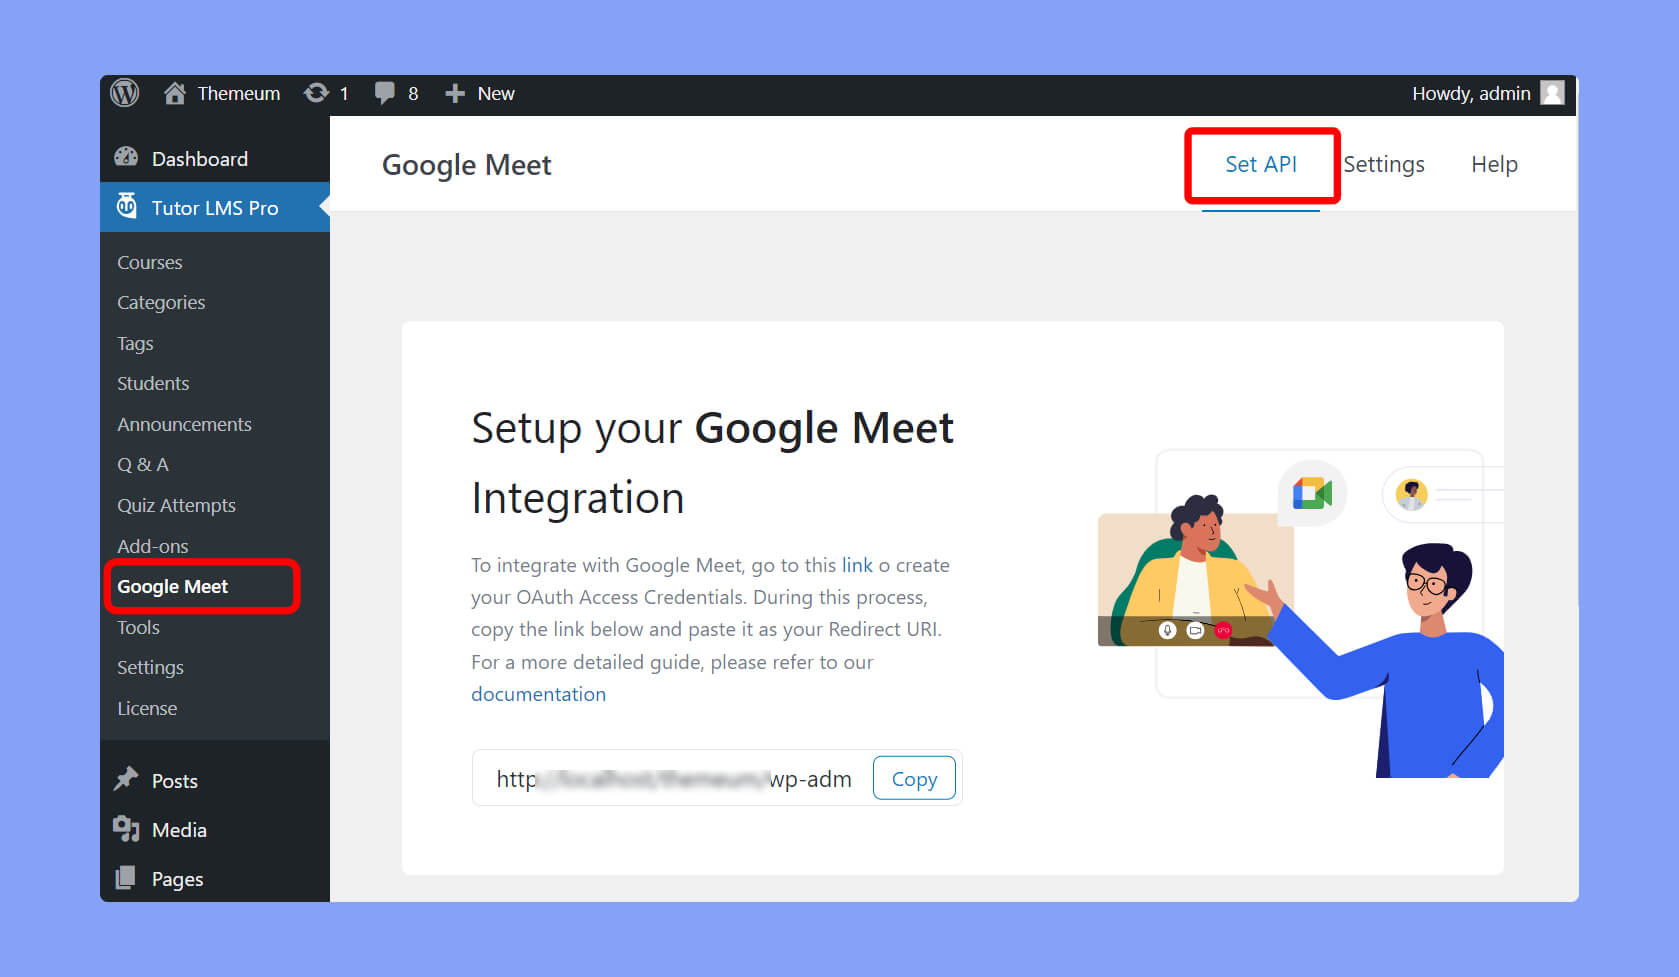
Note: You’ll get the redirect URI from WP Admin > Google Meet > Set API tab. Copy that redirect URI from here and paste it in the Google console. If you don’t have the Google Meet option in the dashbord, enable the Google Meet addon and refresh the page.
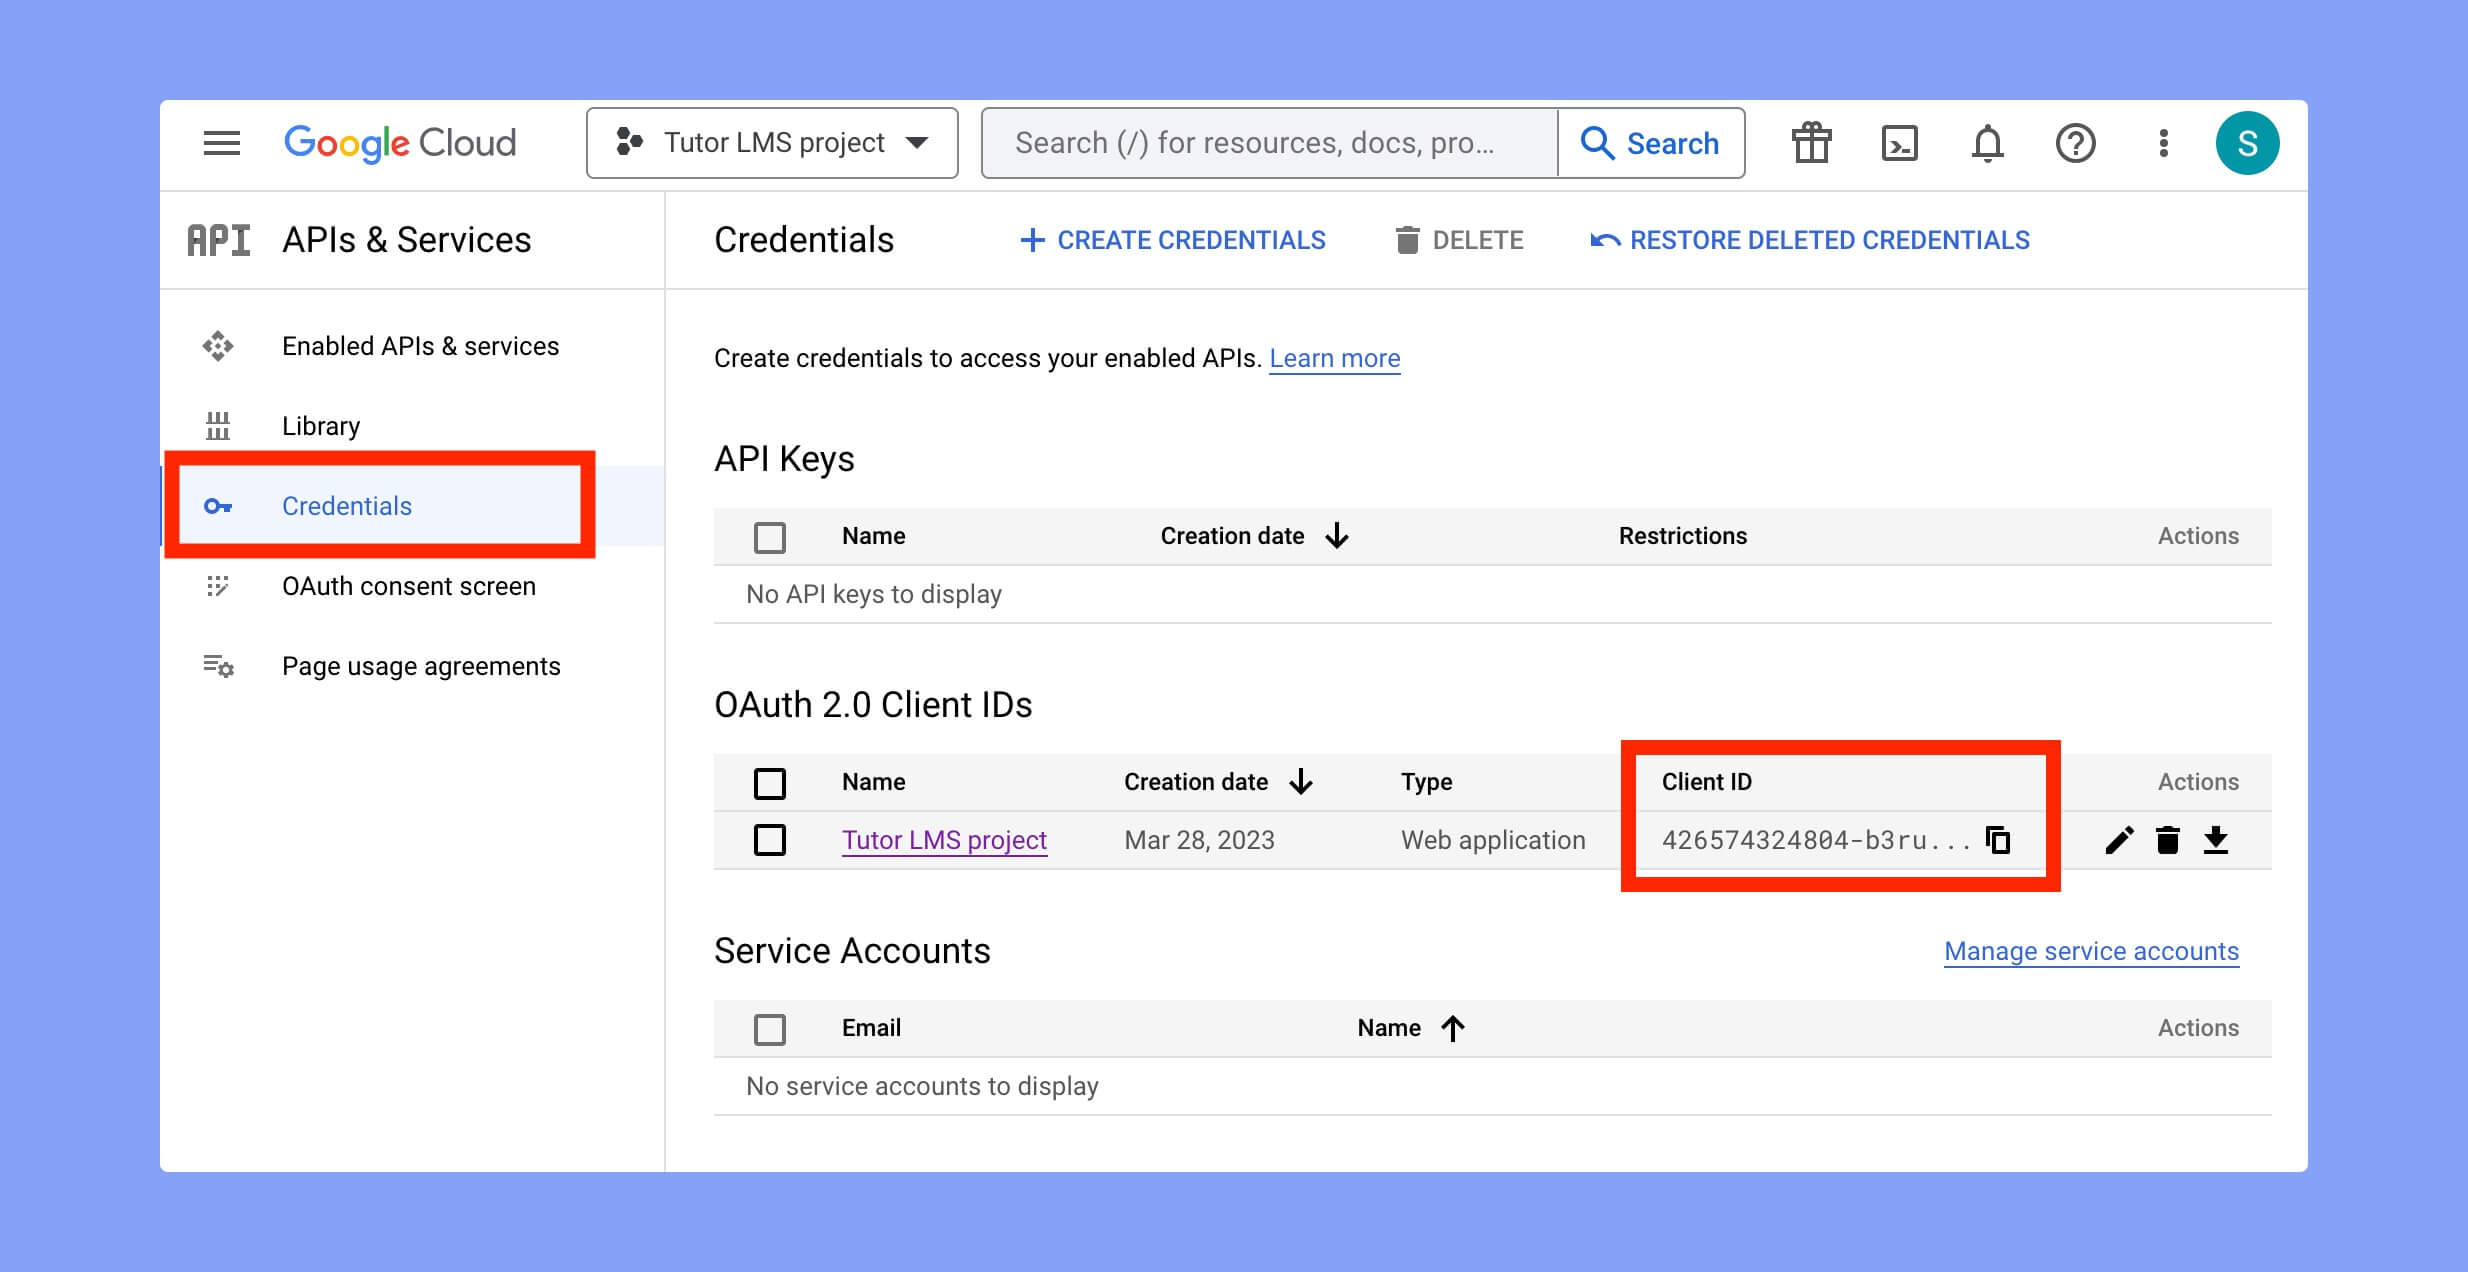
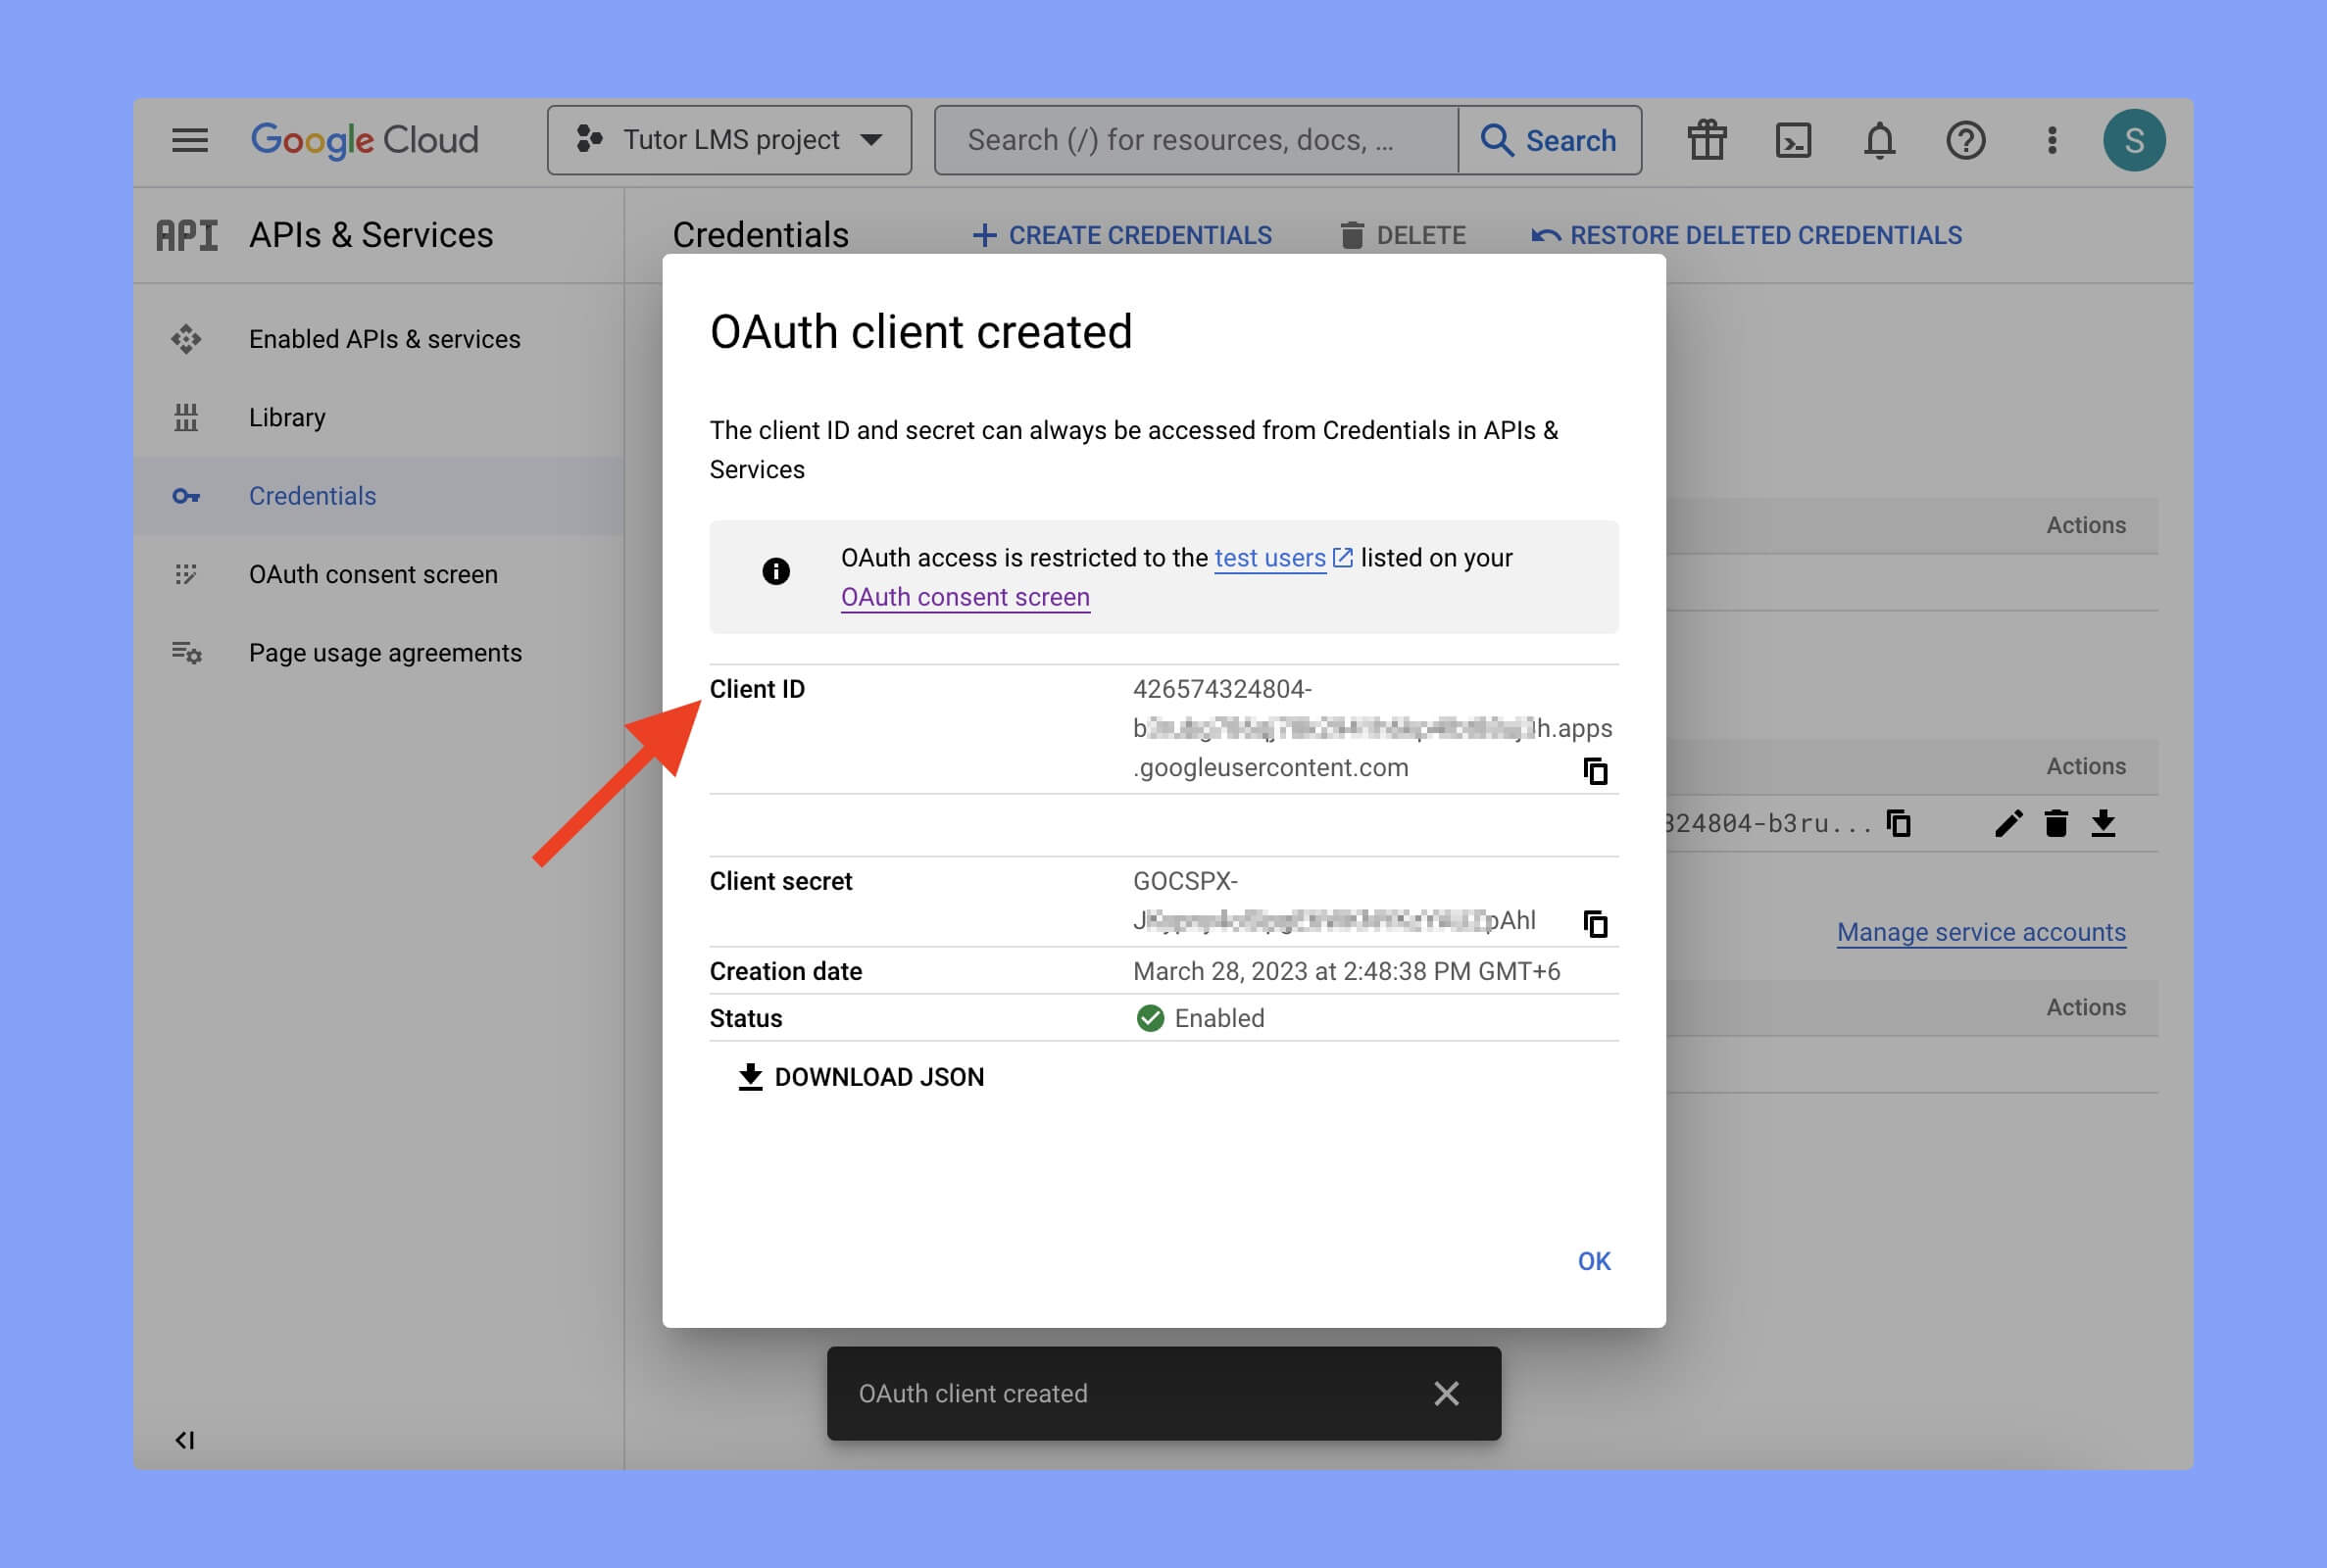
Once you’ve filled up everything properly, click on the CREATE button. Then your OAuth client will be created, and you’ll get the Client ID along with a few other relevant information. Simply copy the Client ID from there and use it wherever needed.
However, you can also collect this Client ID later if needed. Go to the Google Cloud Credentials tab and you’ll find all of your projects there. Look for your preferred project and copy the client ID.