Google Meet integration lets you conduct Google Meet meetings with Tutor LMS. You can set up and start meetings for Tutor LMS courses and individual lessons as well. You also have the feature to send Google Meeting invitations to enrolled students in Tutor LMS.
To make use of Google Meet integration, you will need these two plugins installed and enabled:
- Tutor LMS v3.0.1
- Tutor LMS Pro v3.0.1
Now remember that the Google Meet integration is only for the pro users of Tutor LMS, so you will need to have Tutor LMS pro plugin installed and activated.
Enabling Google Meet
First, you have to enable the Google Meet Integration Addon. From the WordPress backend navigate to Tutor LMS > Addons and activate the Google Meet addon using the toggle button.
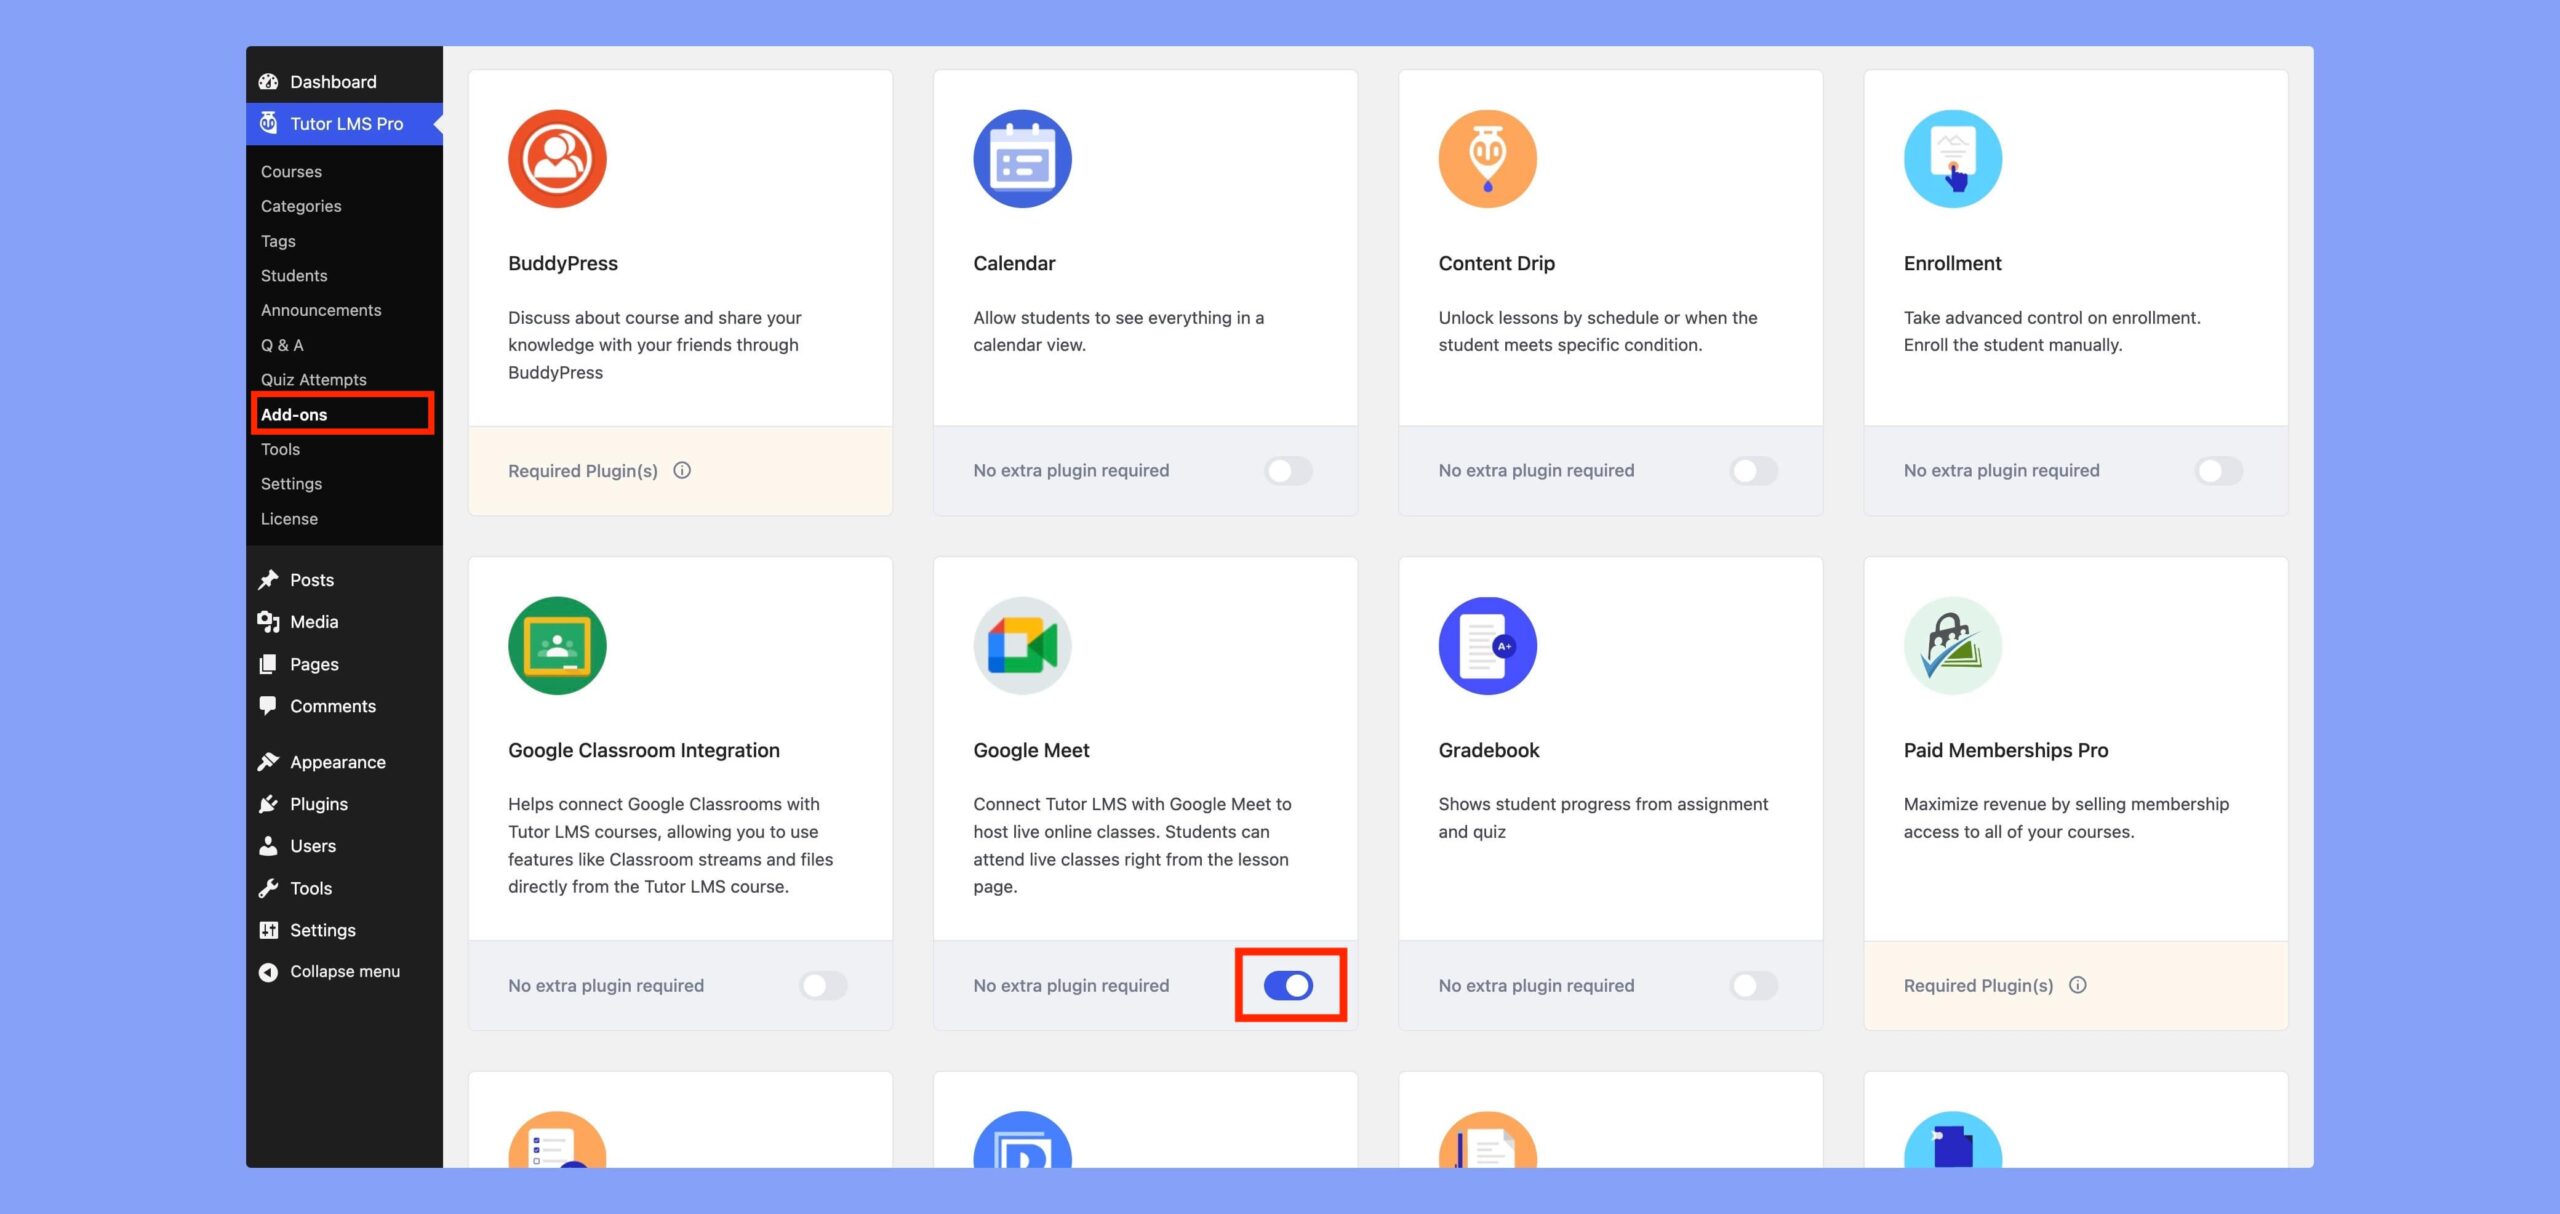
Scroll to find Google Meet and toggle to turn on the addon. After that, you will find a new Google Meet tab under Tutor LMS.
Click on that tab and now you can start with the integration process. After this step, you need to configure the Google App Credentials.
Configuring App Credentials
To connect with Google Meet, you need to first create Google Credentials. You can do that by visiting Google Developer Console.
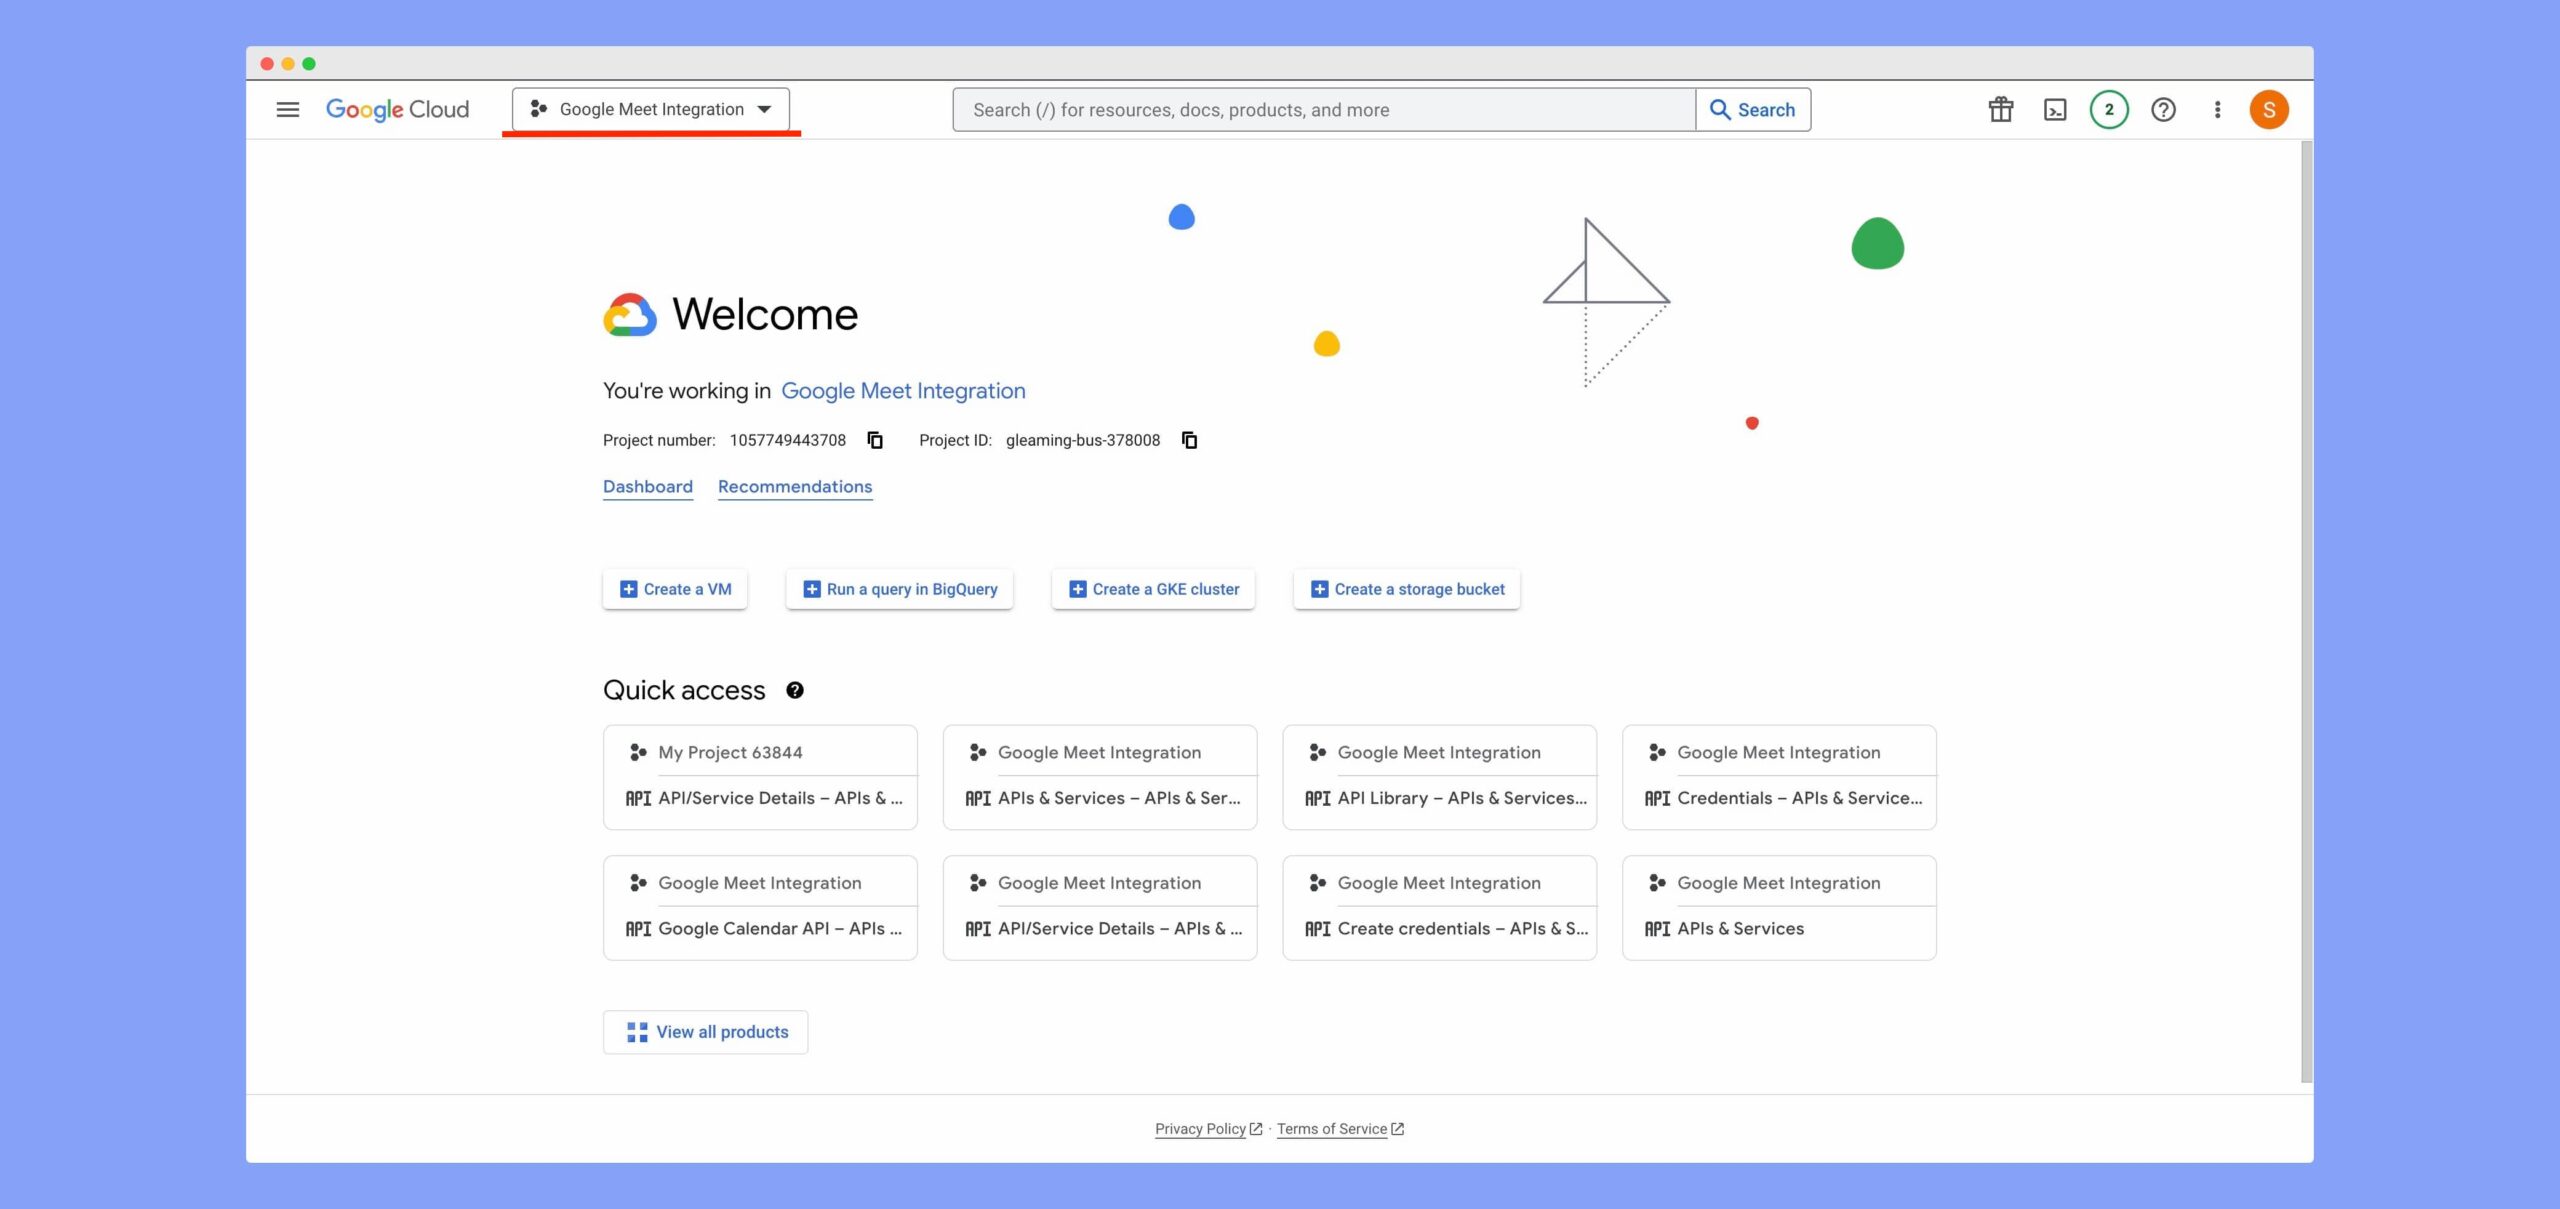
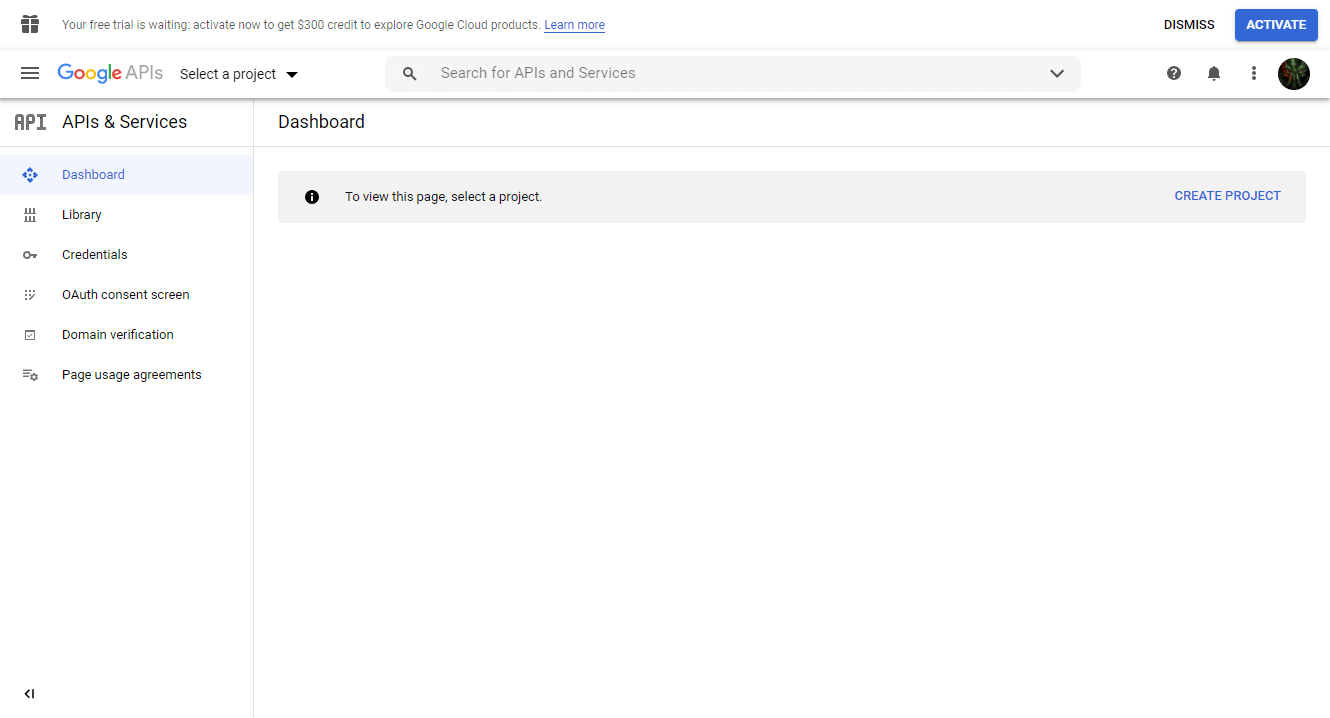
Step 1: From the top left corner, select a project to use for credentials. If you do not have a project created, please follow along. If you have created a project already, please skip to Step 3.
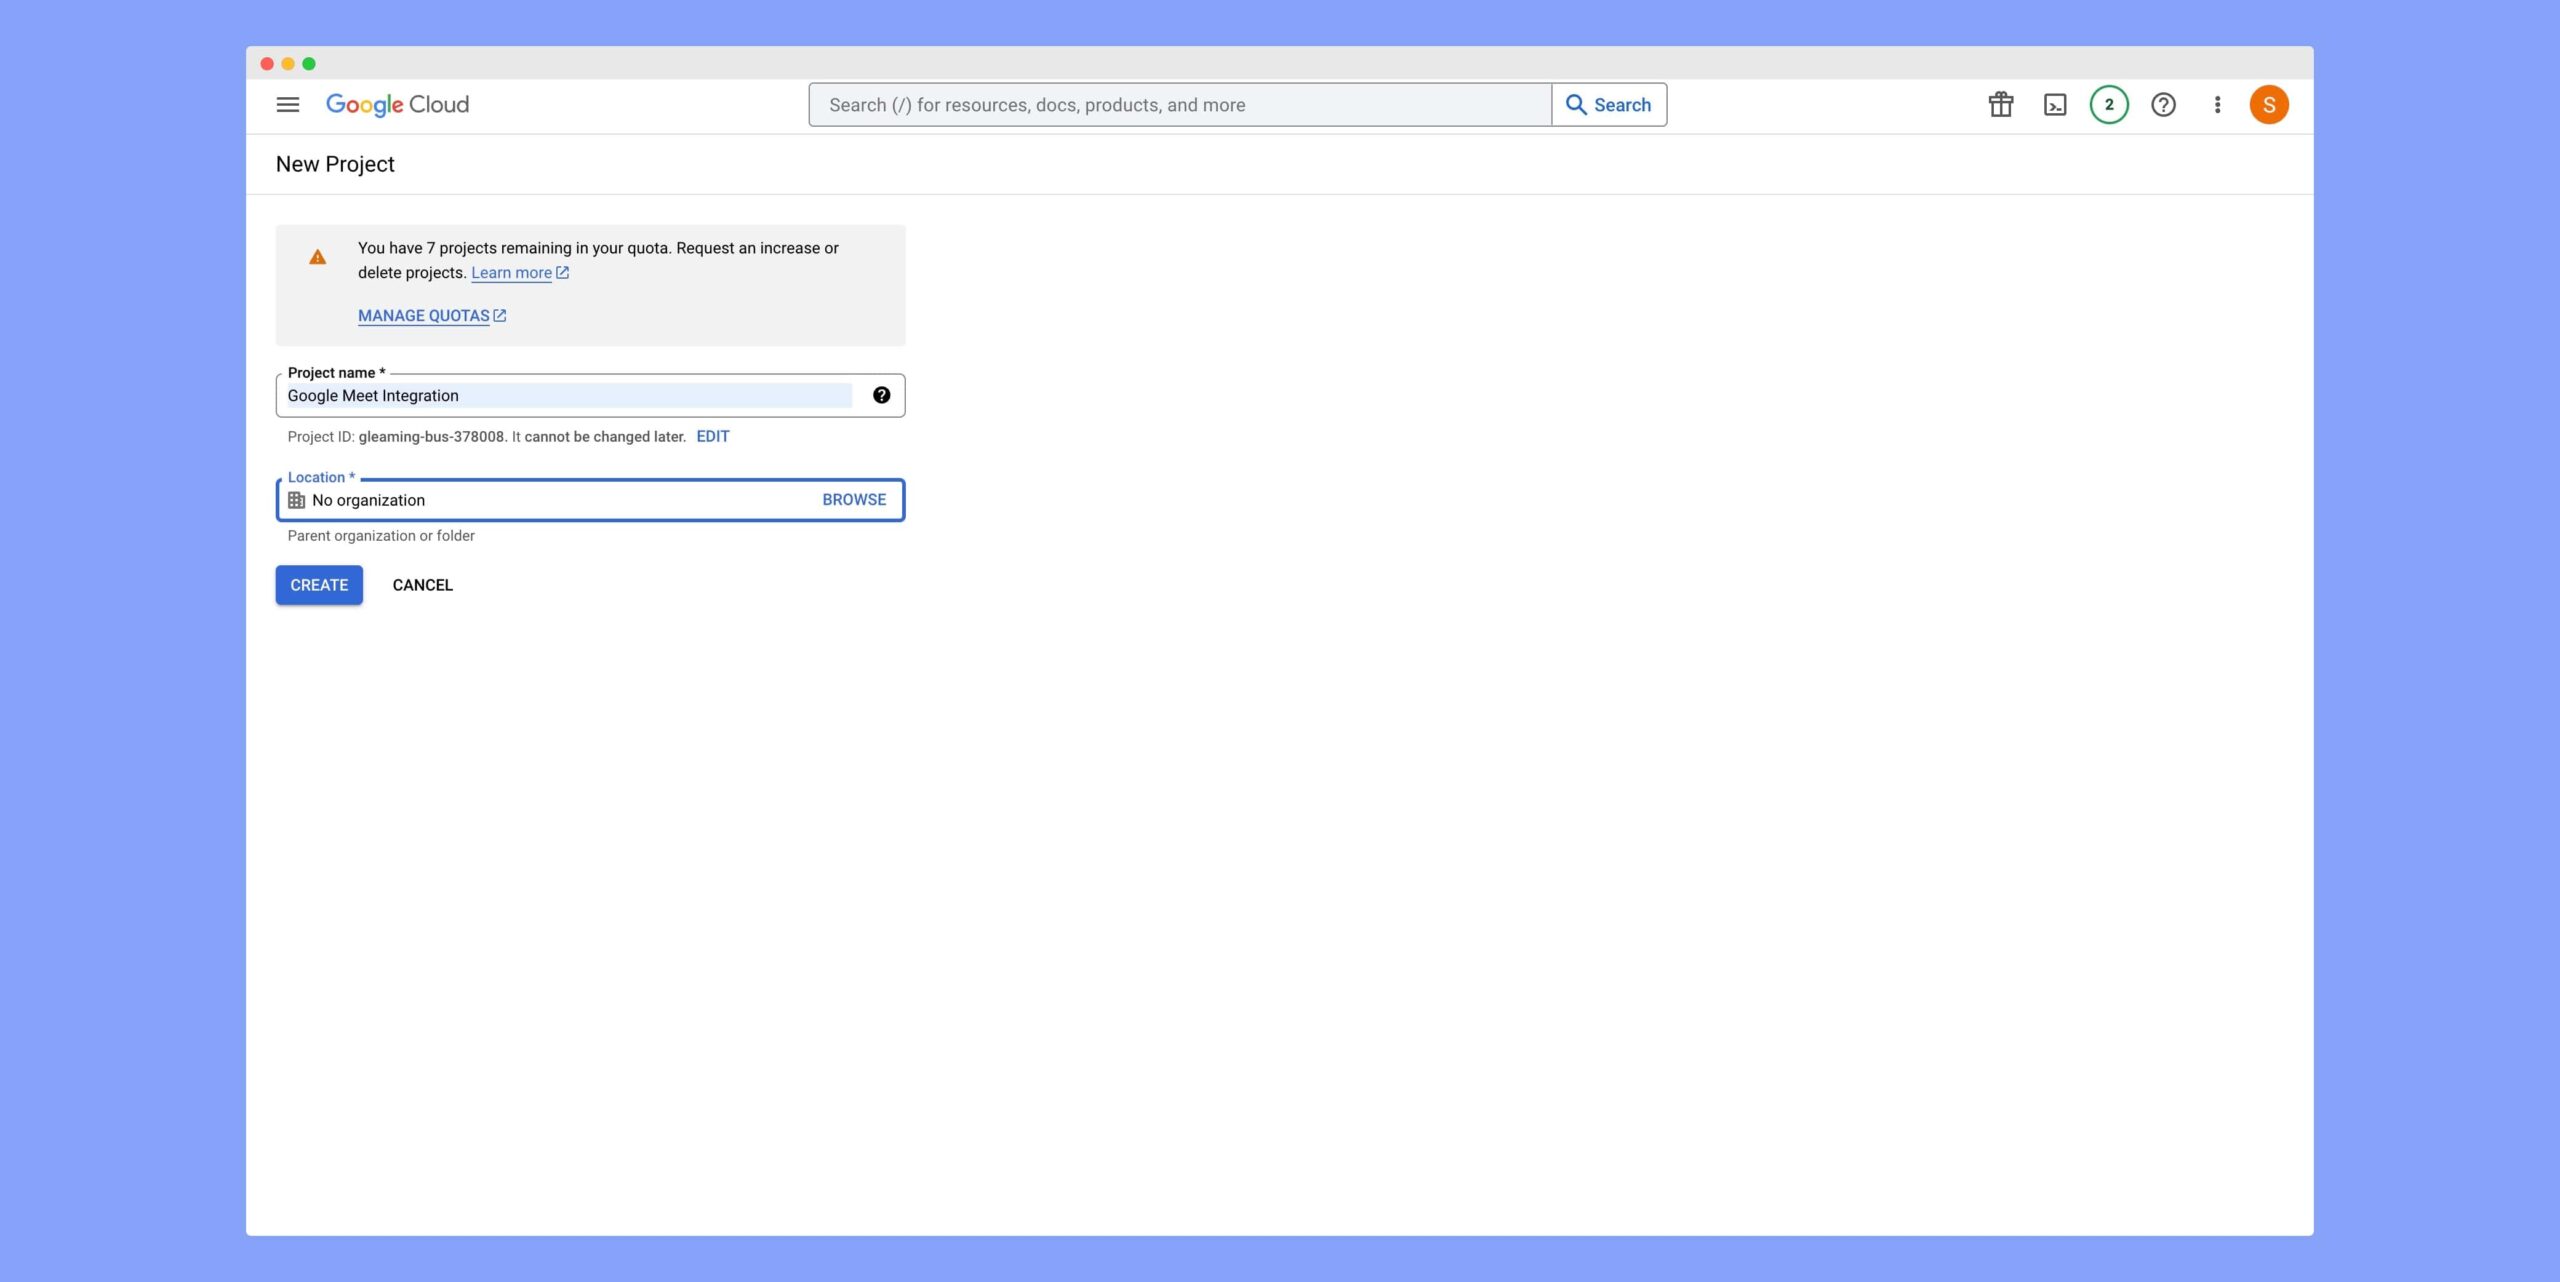
Step 2: Give the project a name, and if applicable, select an organization. After creating it, it will be selected as your project.
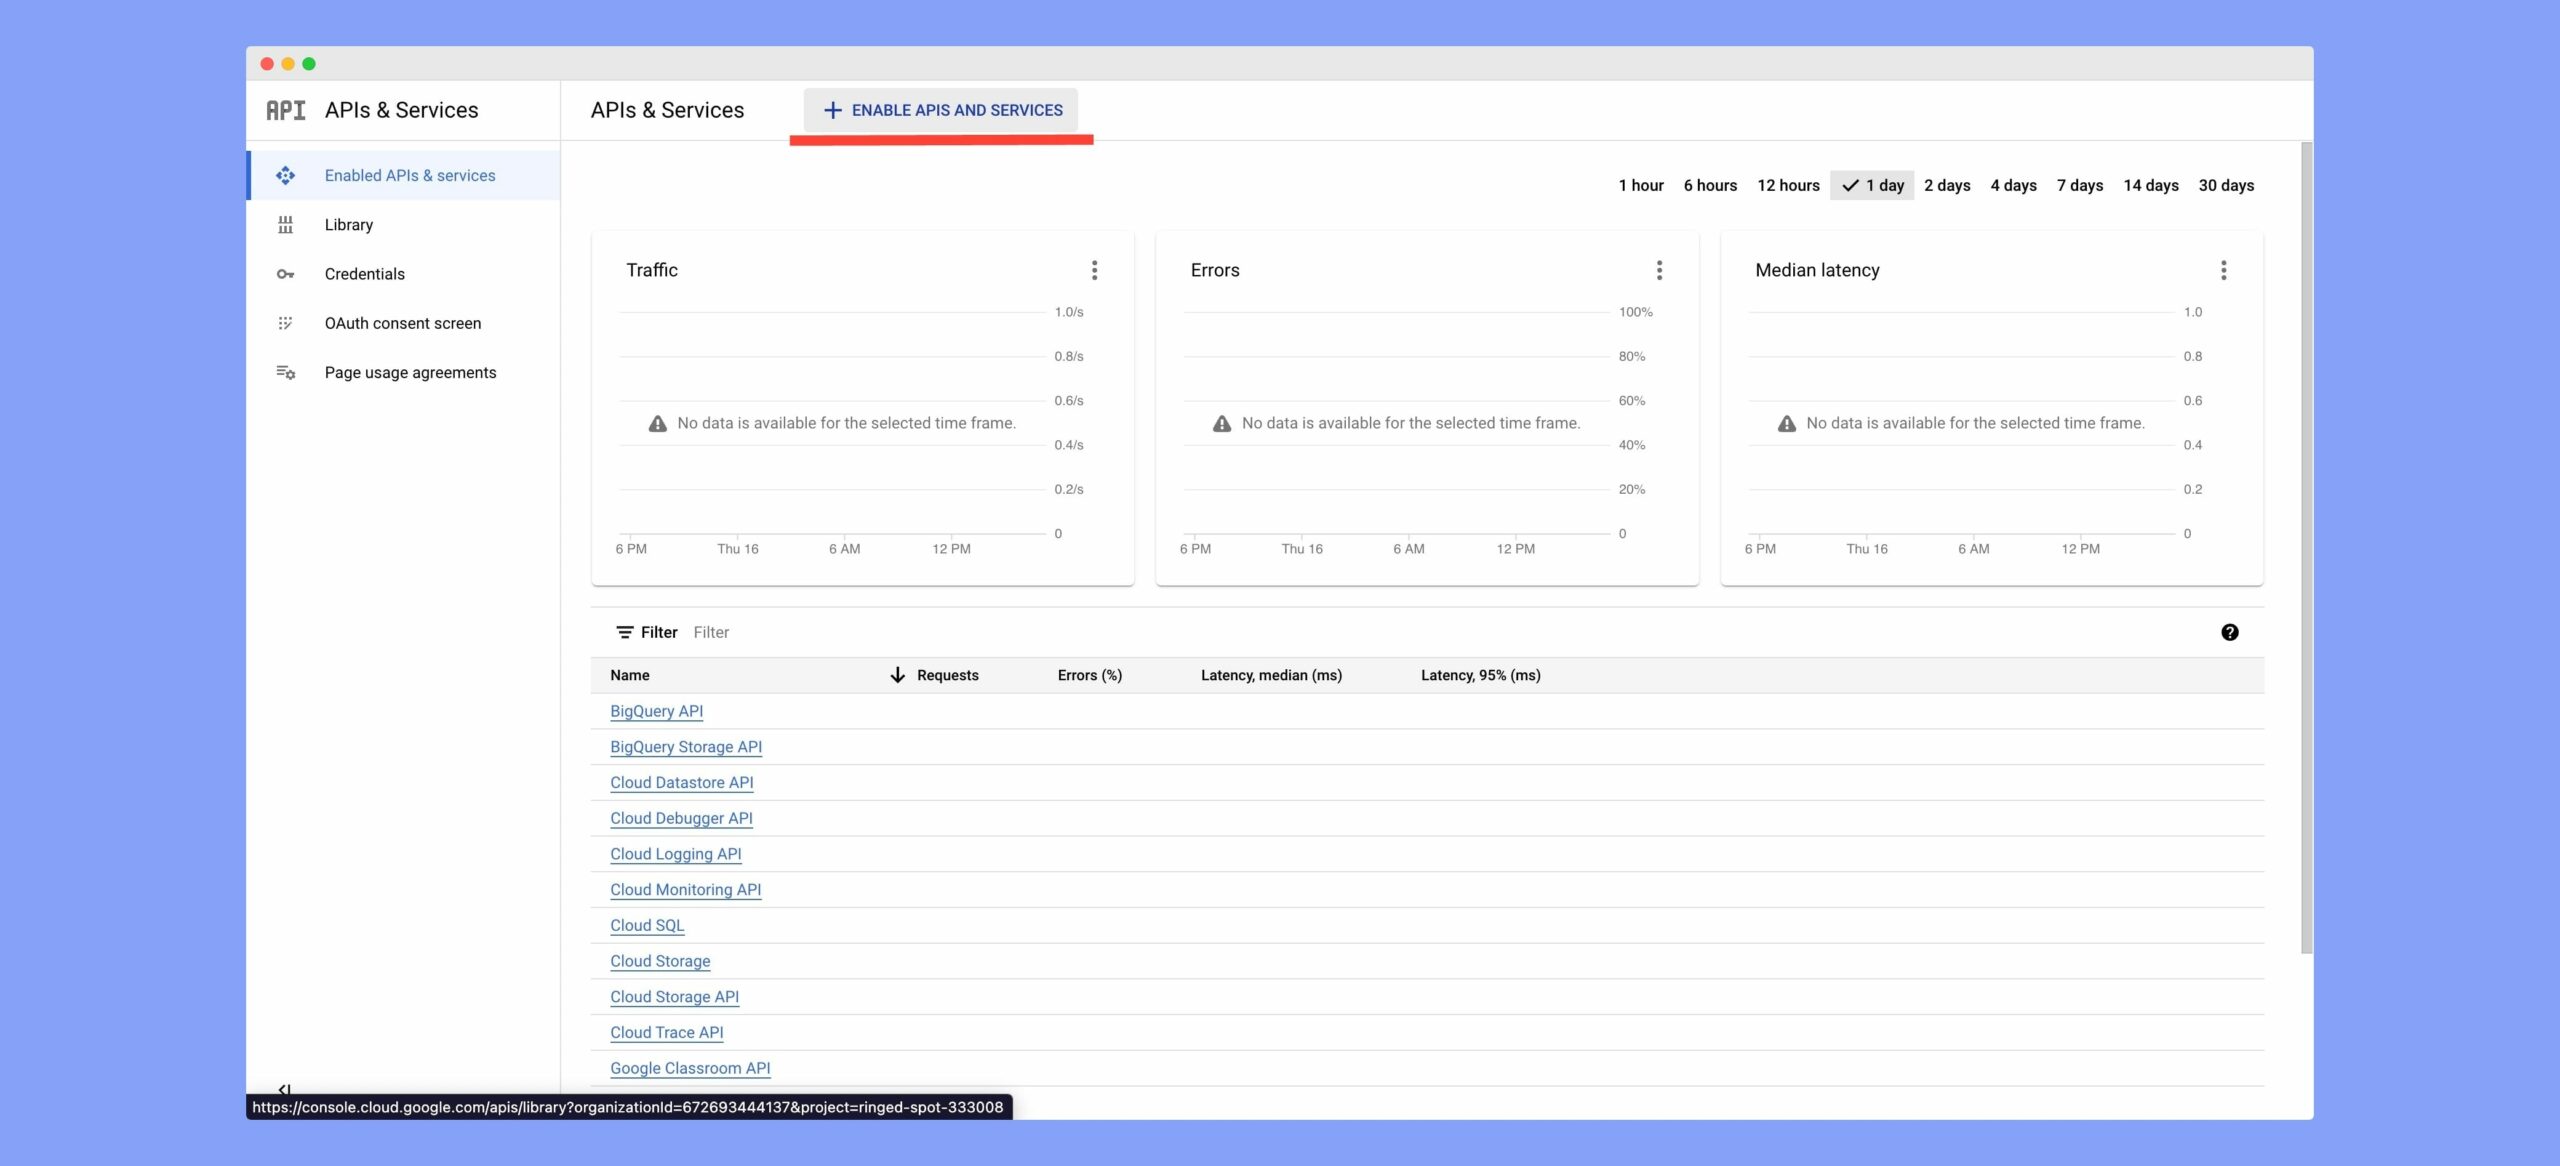
Step 3: From the Dashboards, click Enable APIs and Services.
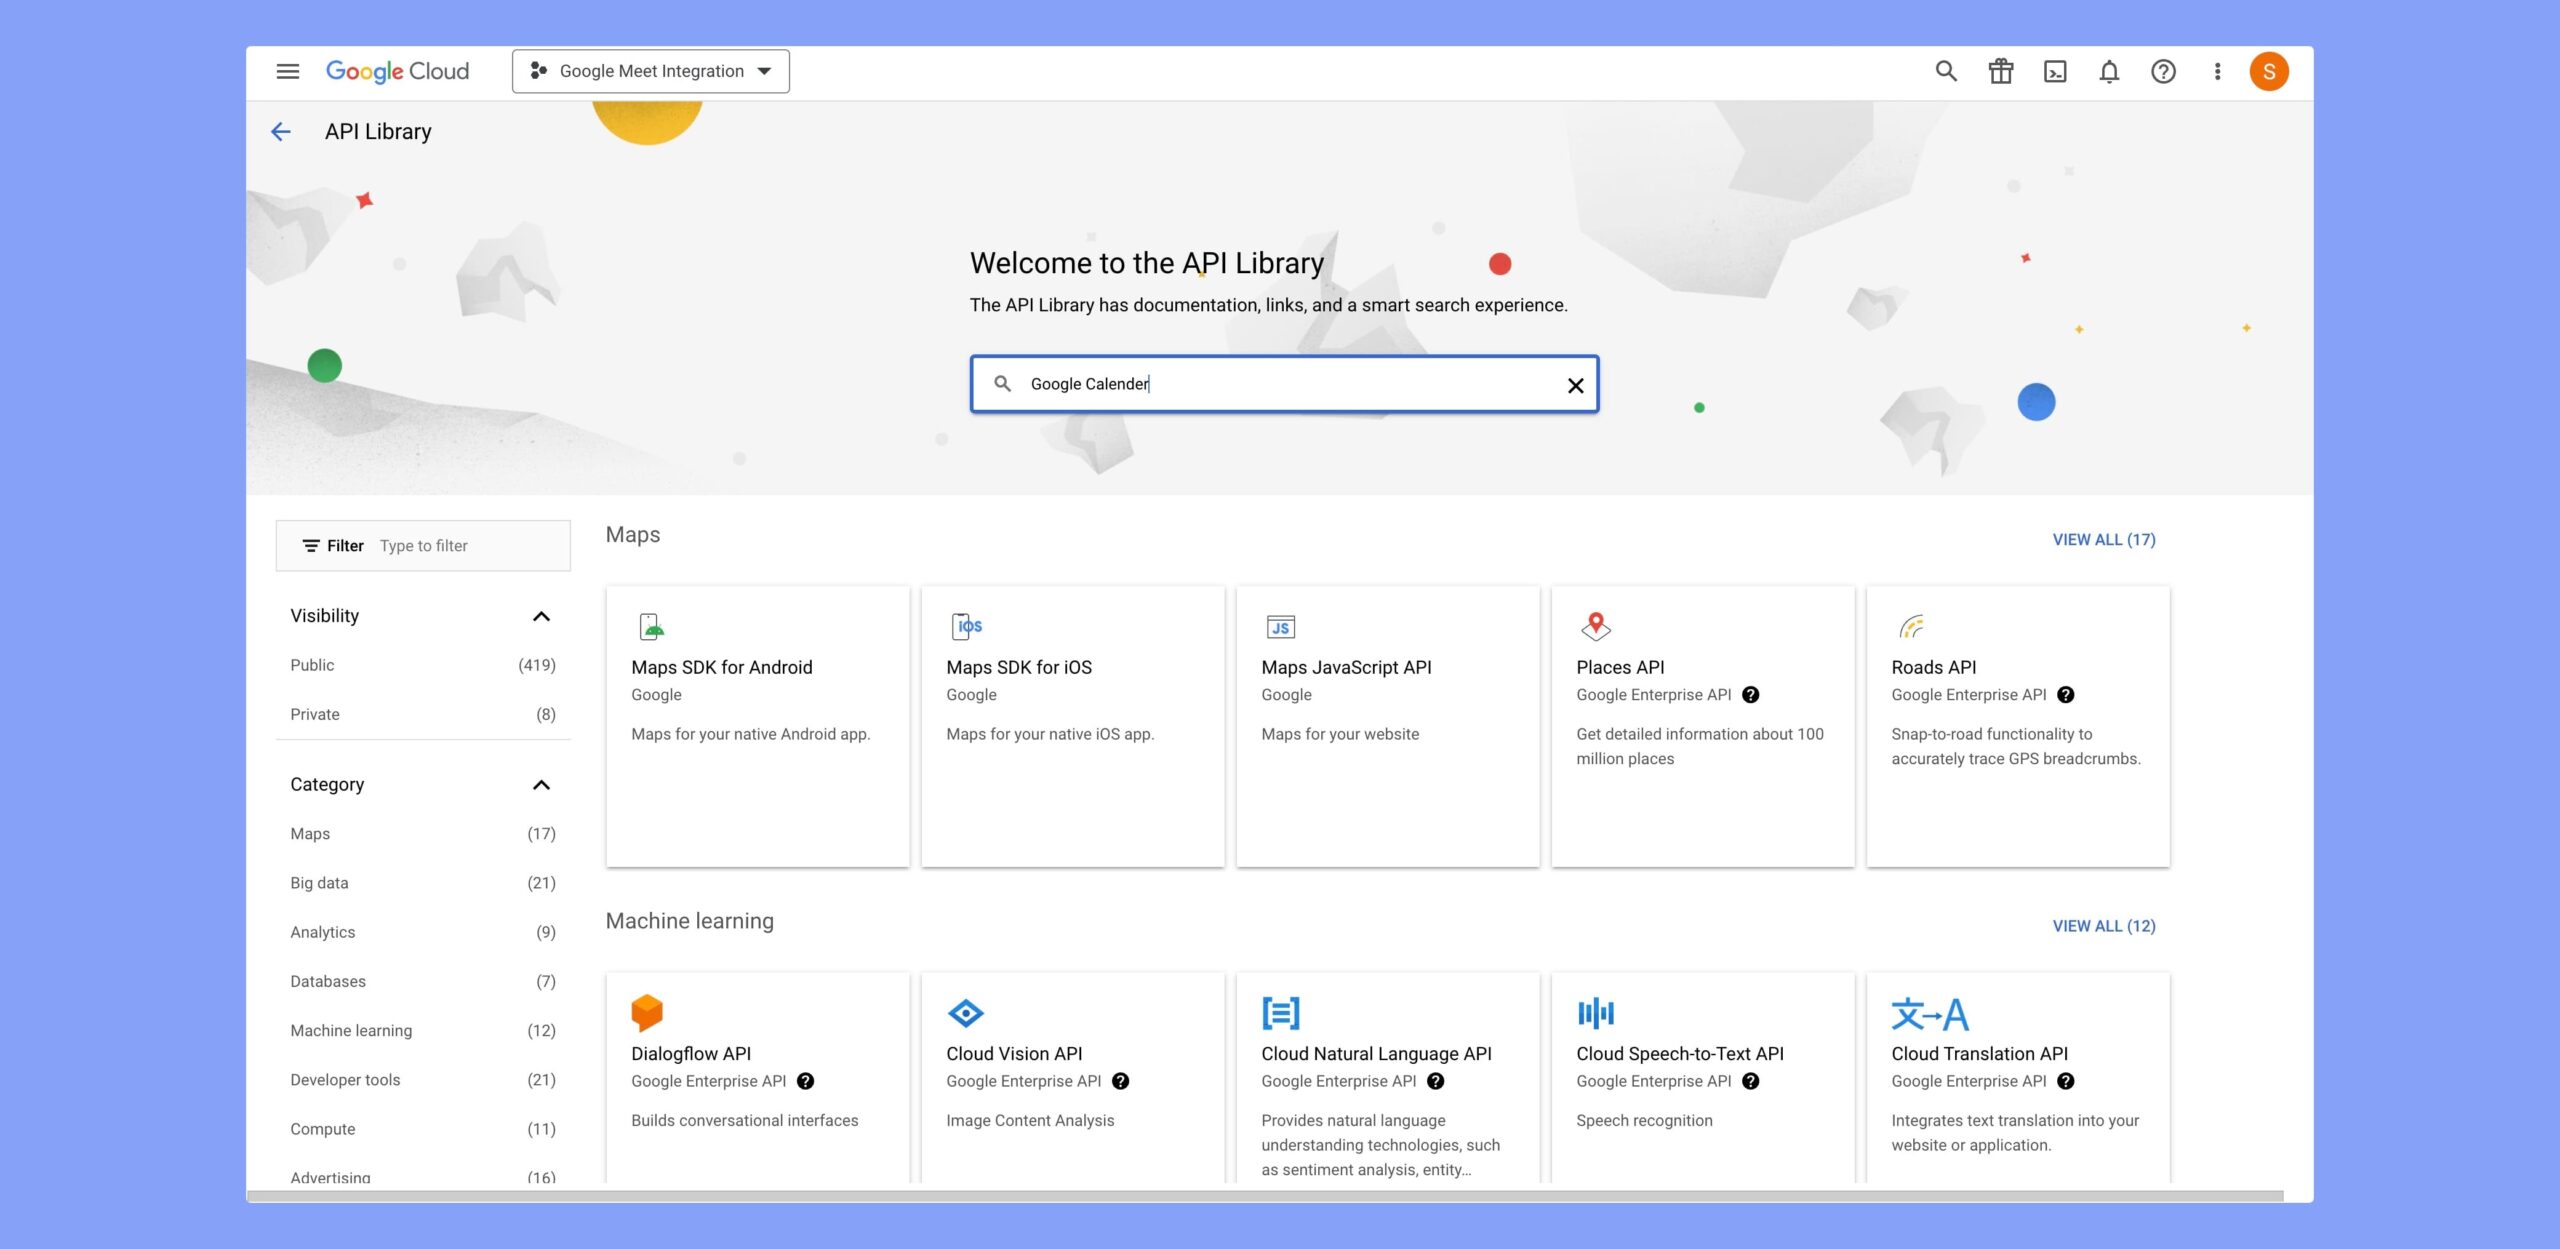
Step 4: Search for Google Calendar in the search box.
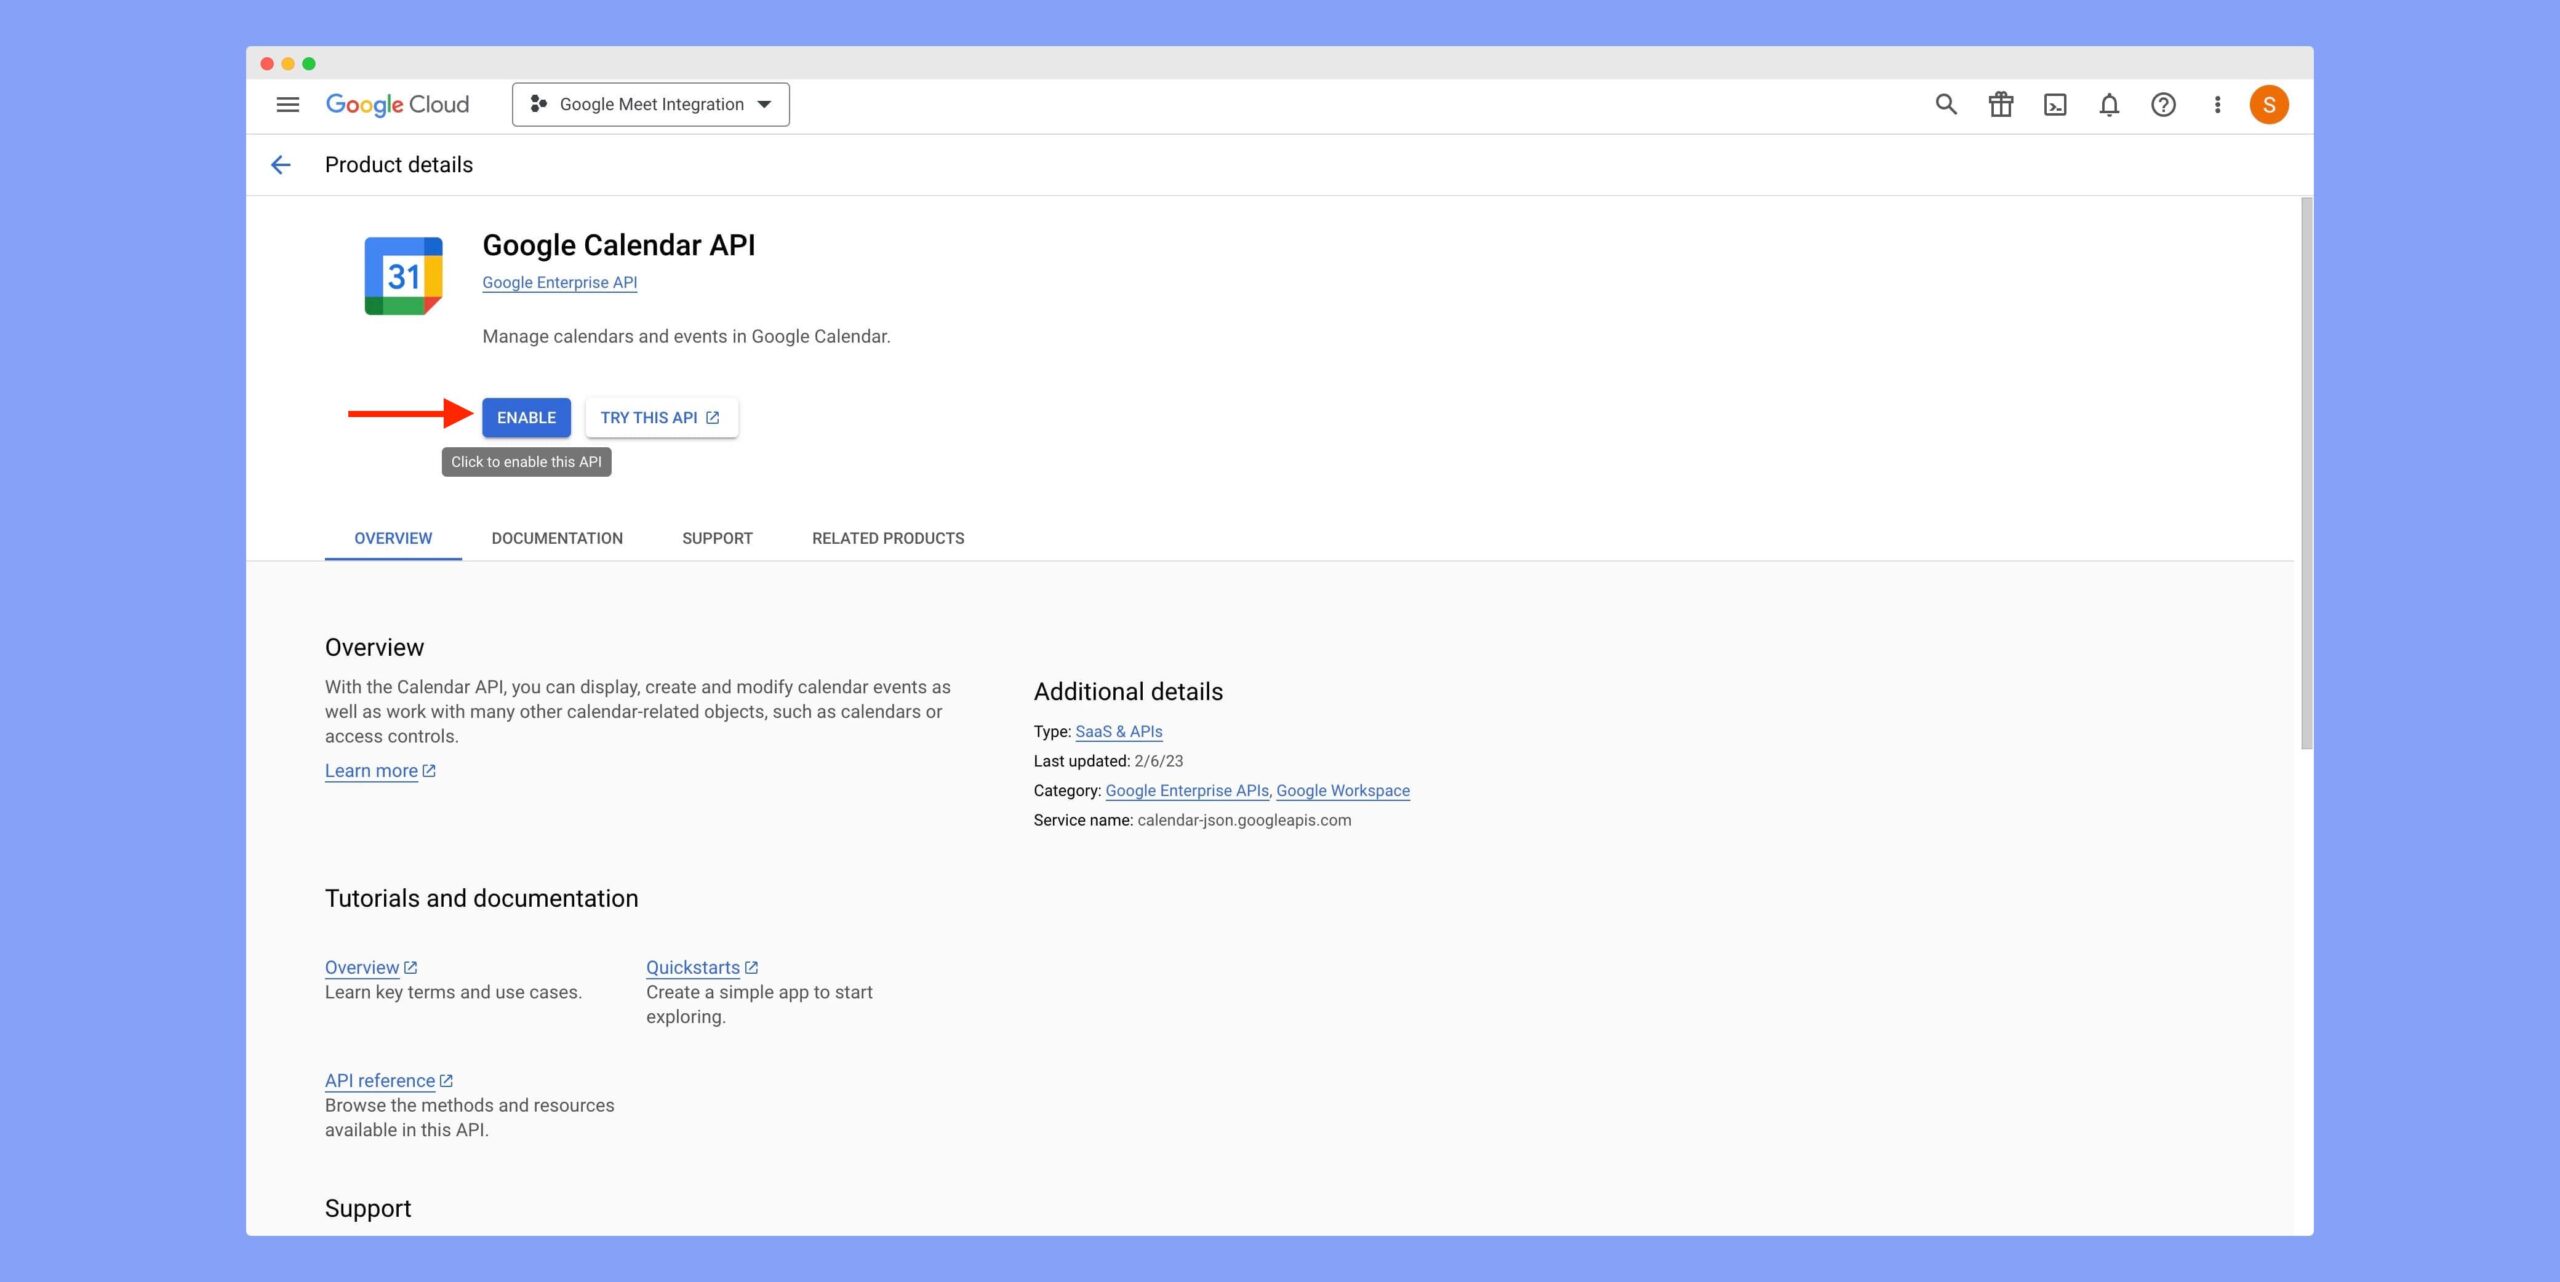
Step 5: Click Enable to activate Google Calendar API for this project.
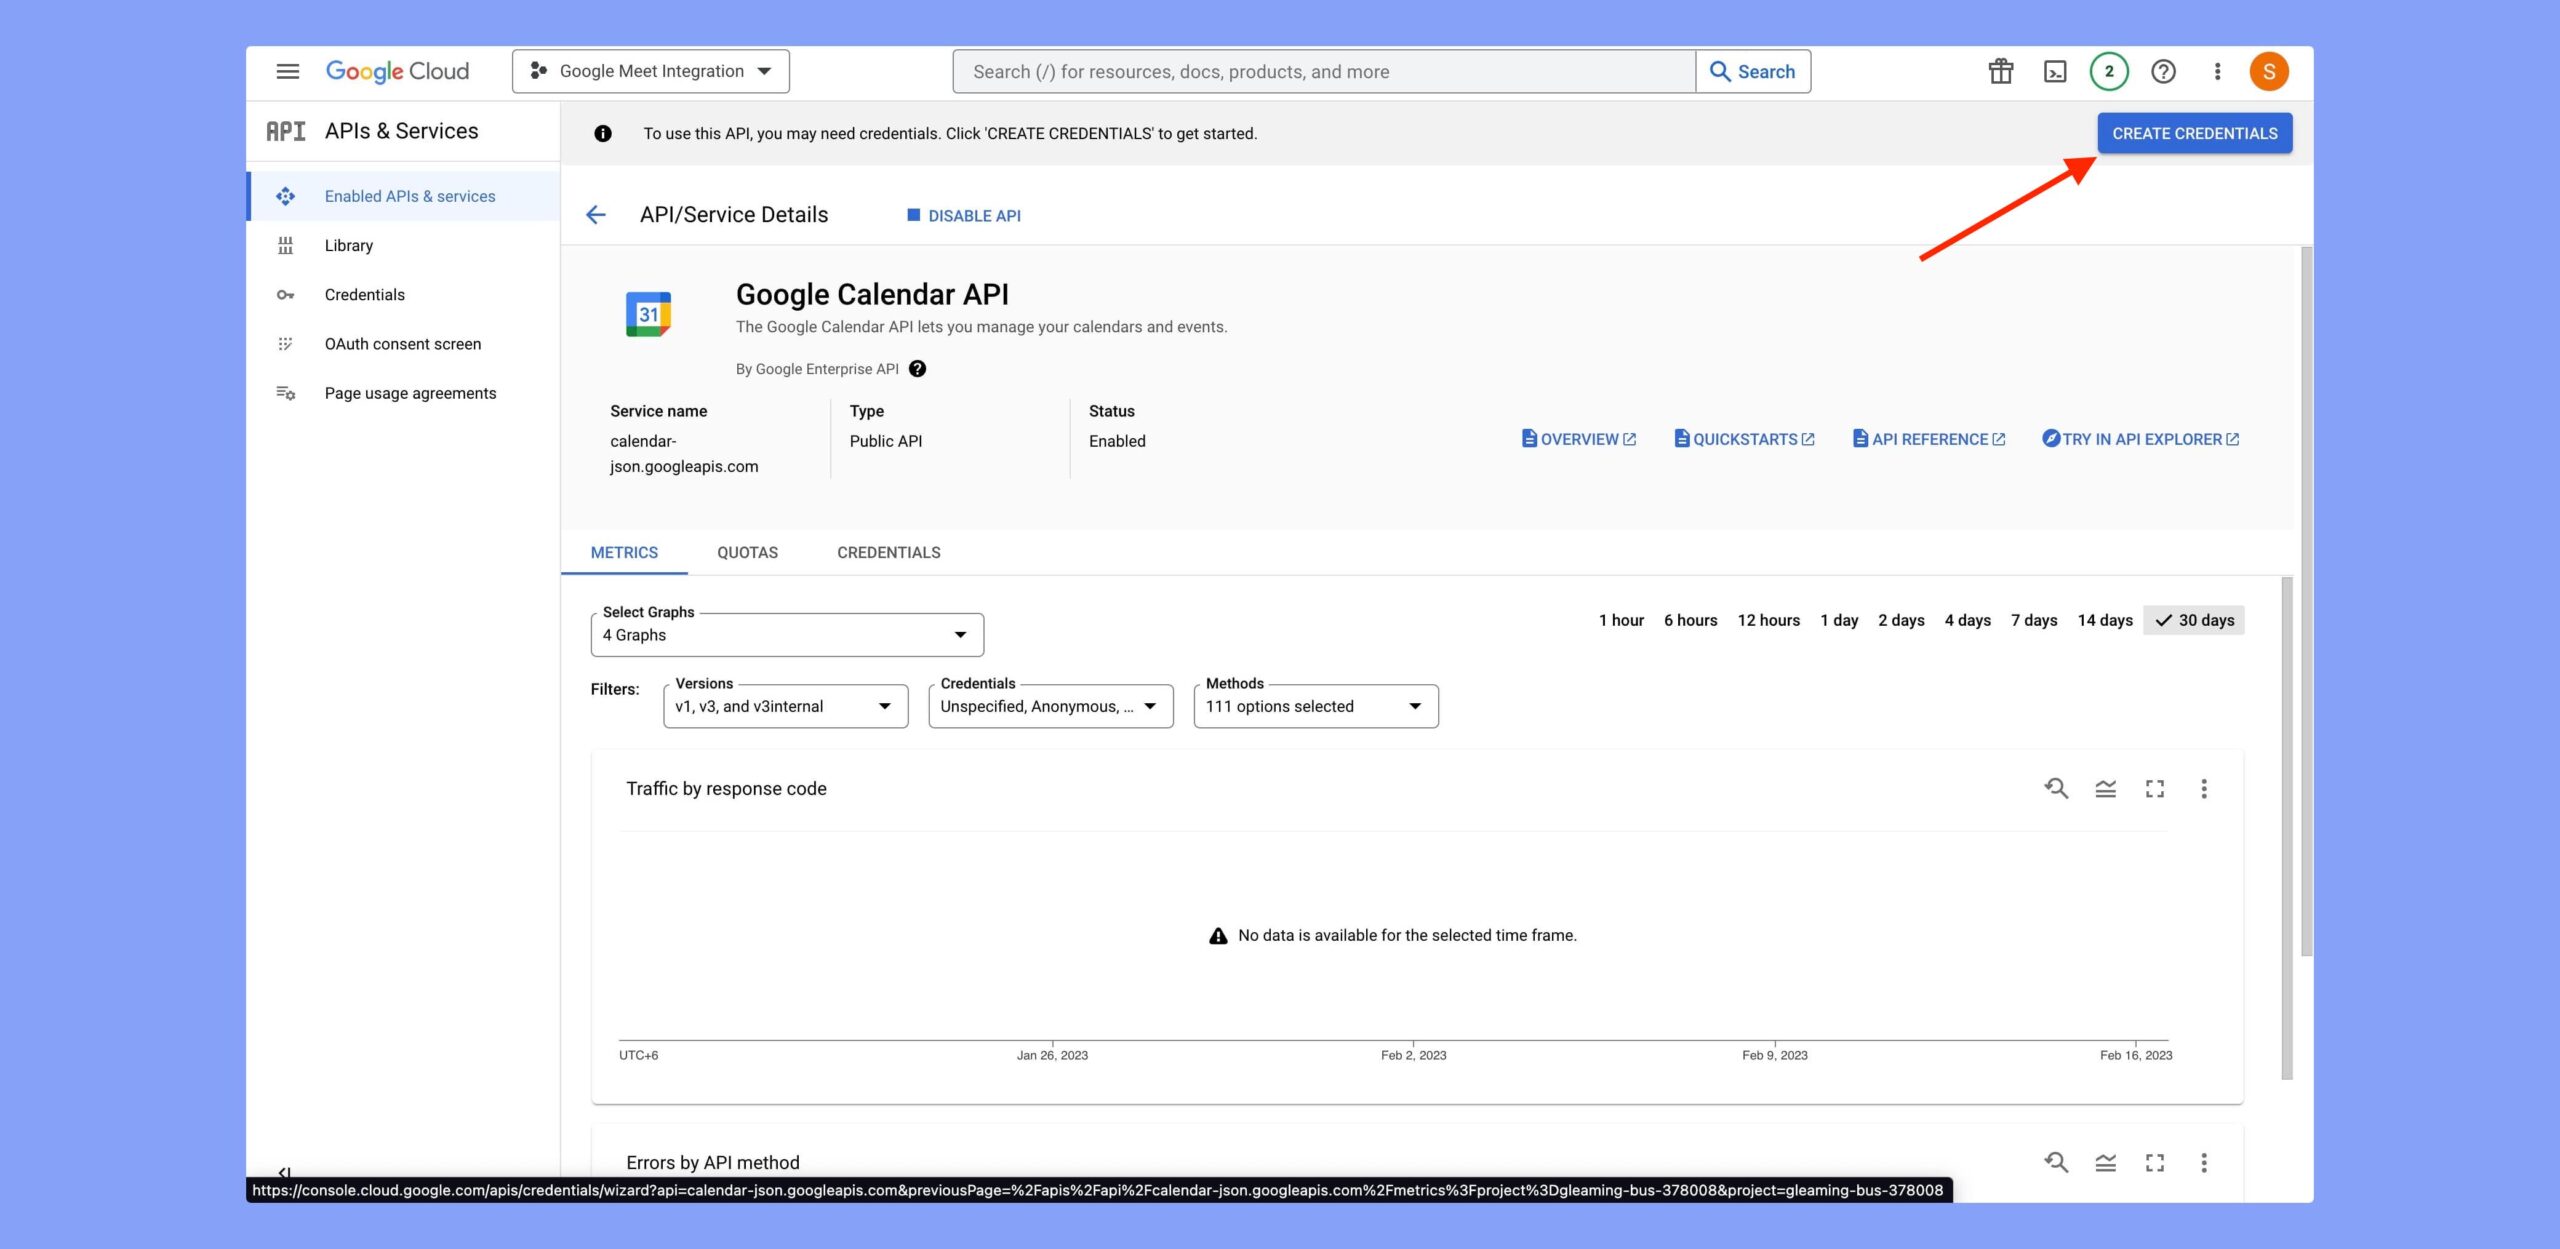
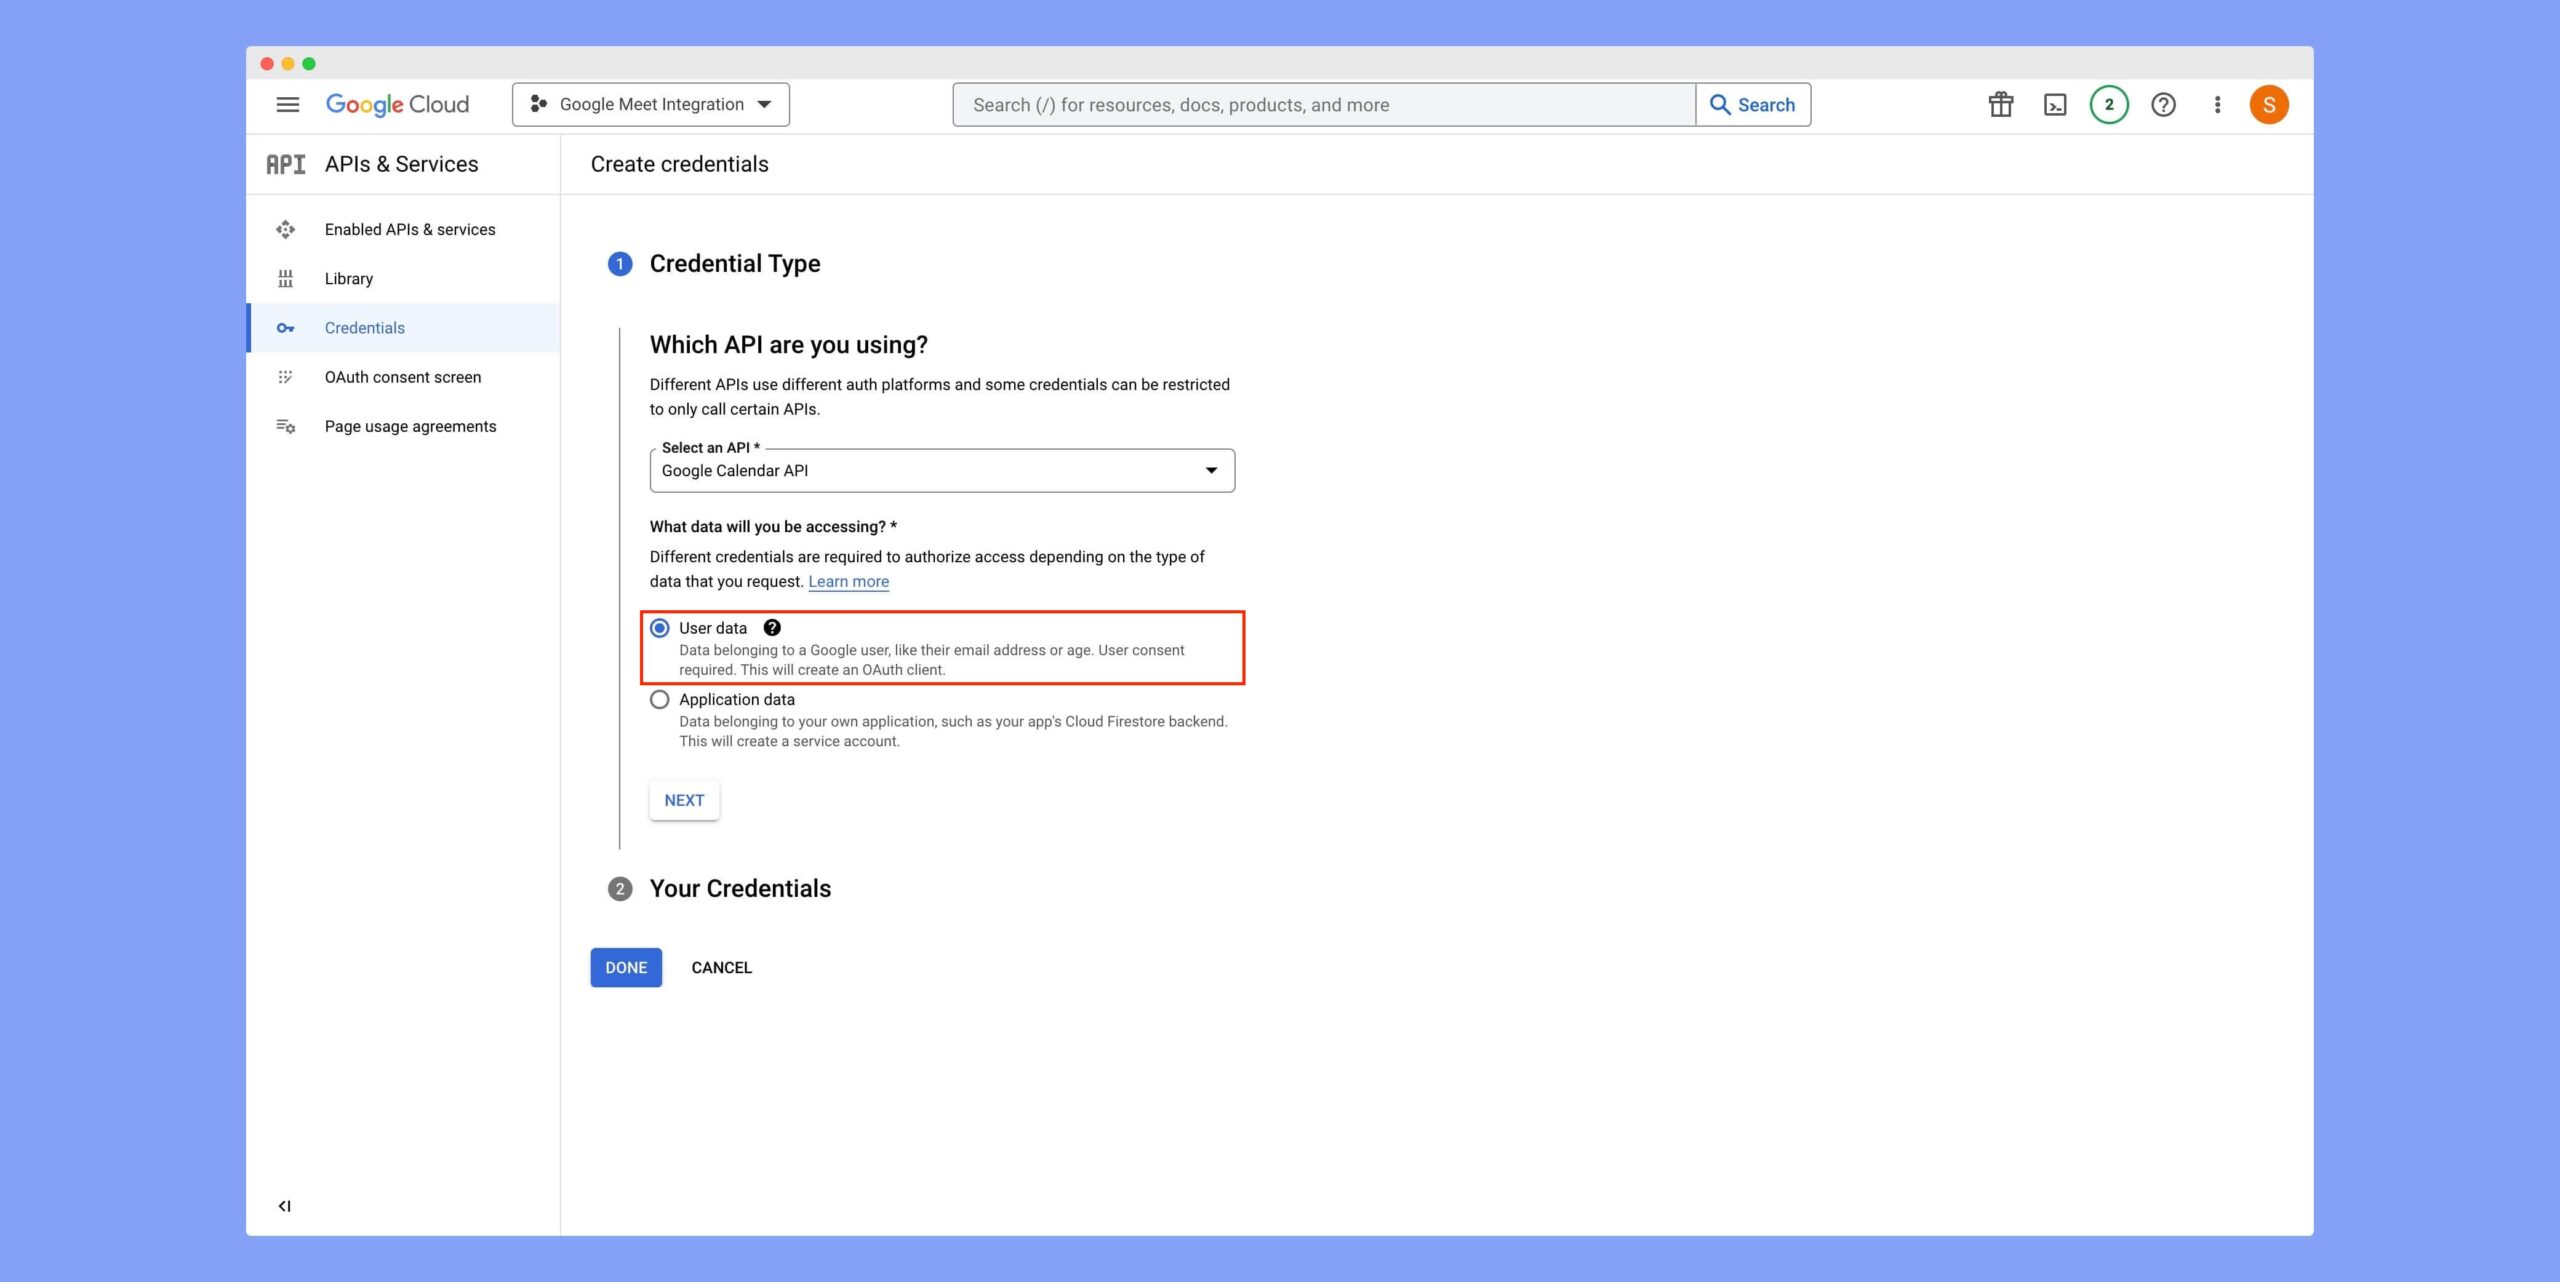
Step 6: Then, from the Google Calendar API dashboard, click on Create Credentials.
Step 7: From data type, select User data, and then click Next.
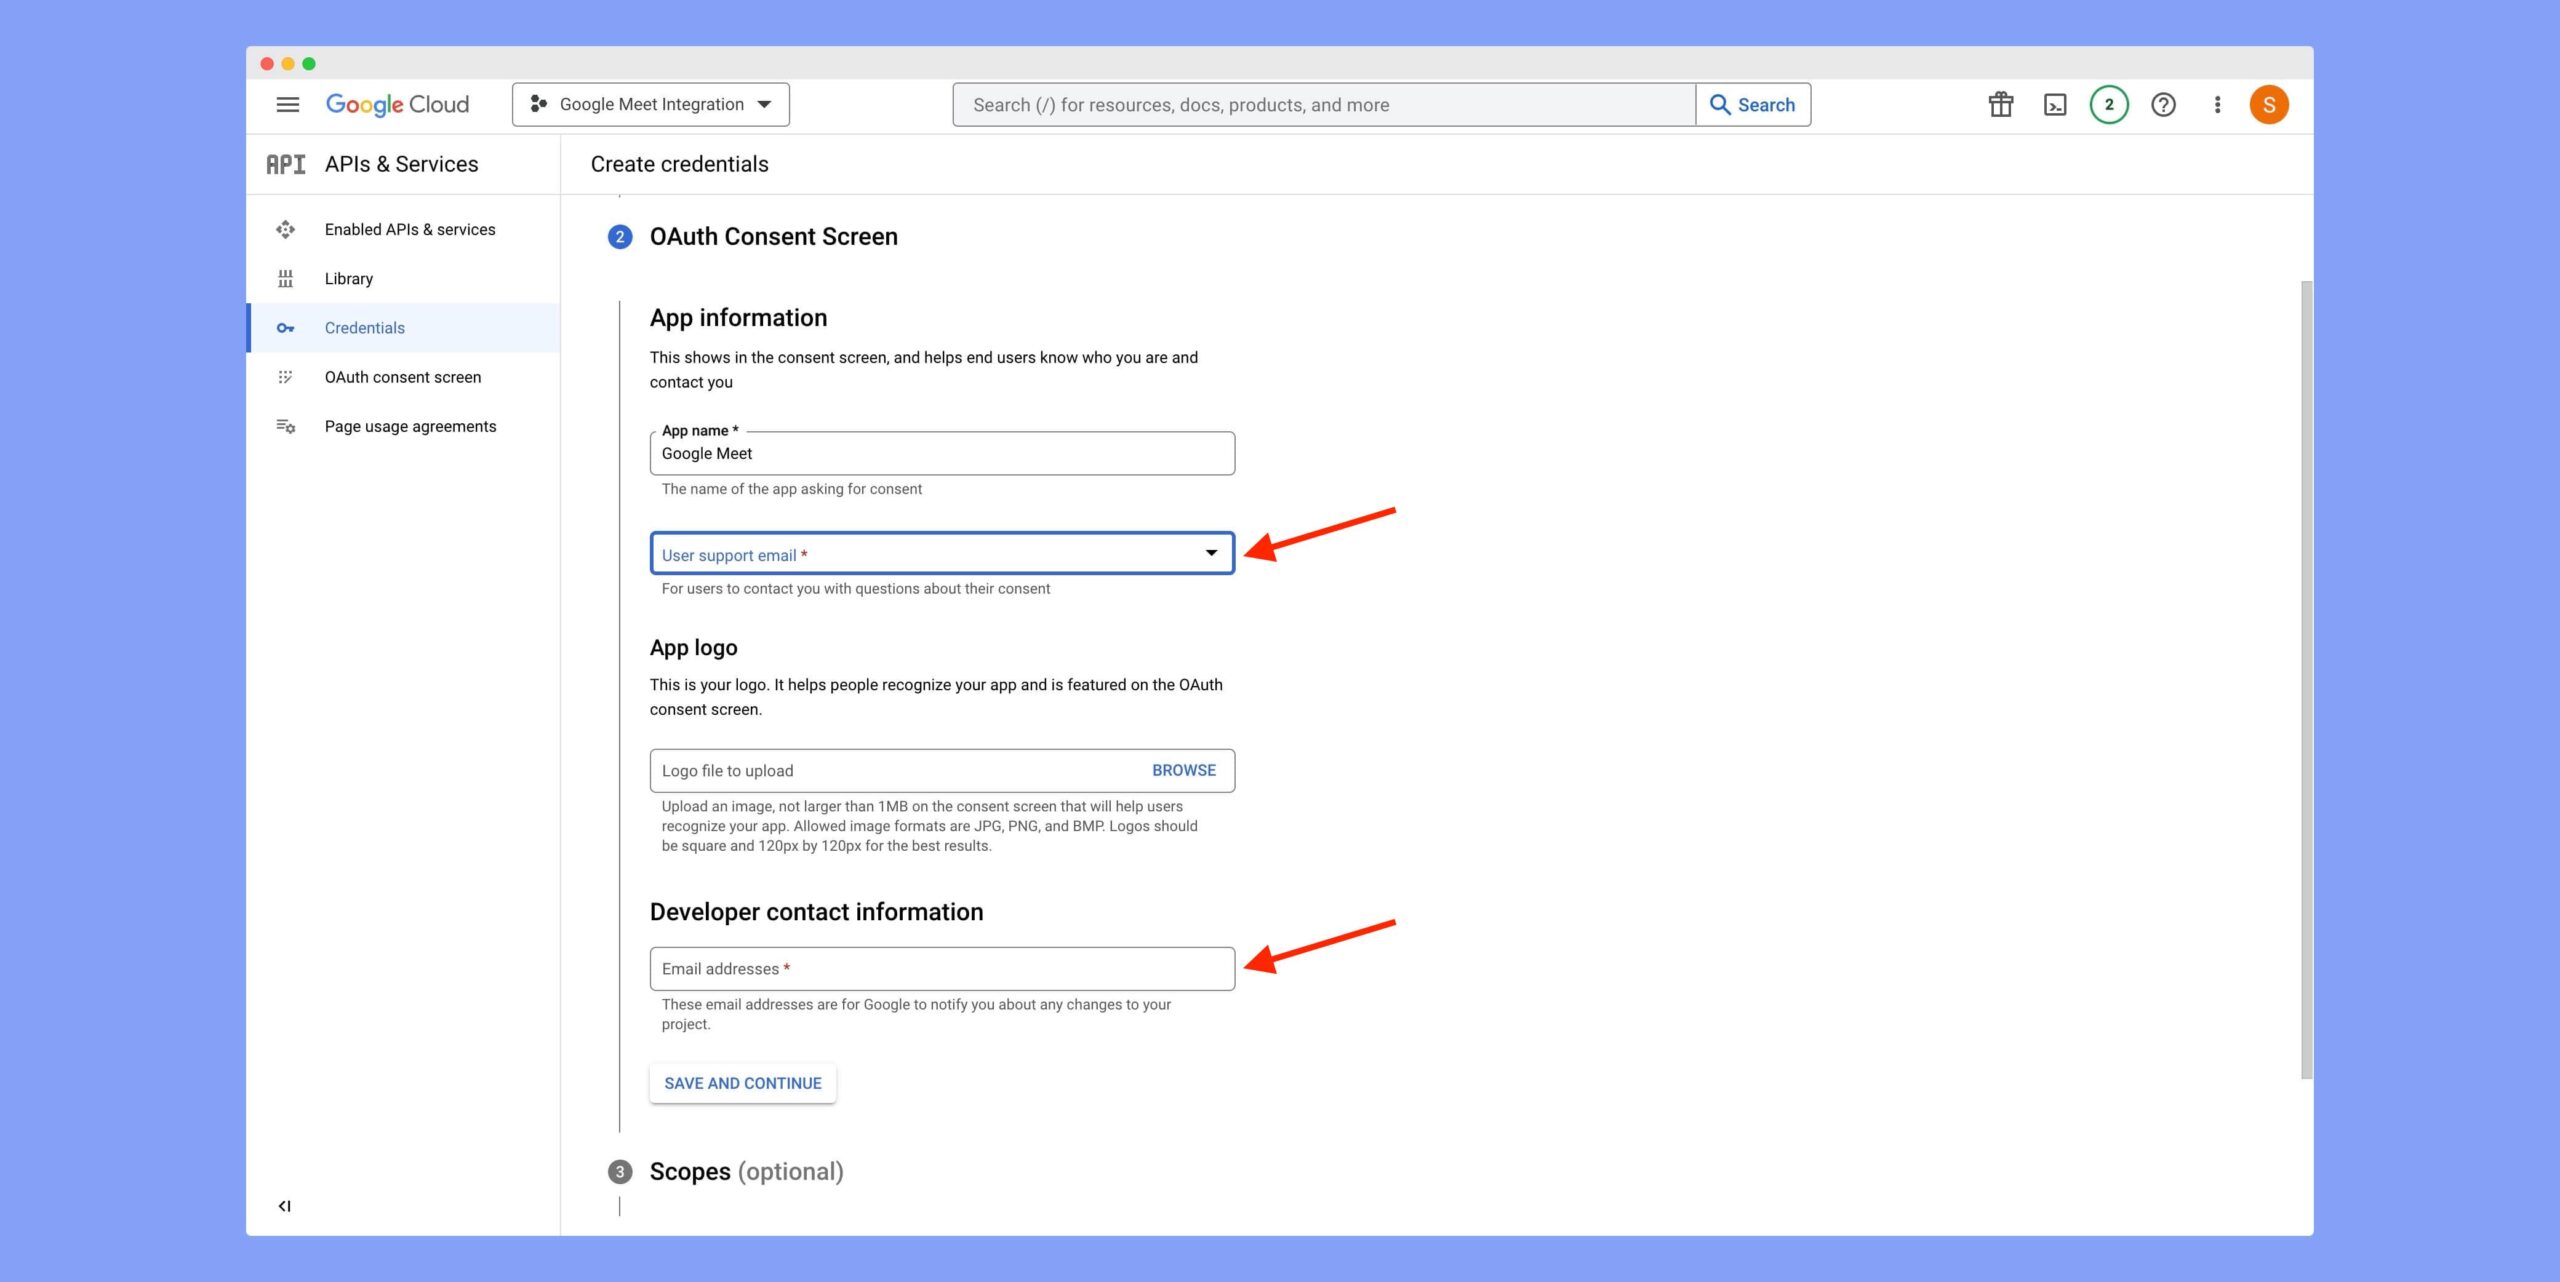
Step 8: In the OAuth Consent Screen section name your app and add your User support email and Developer Contact email.
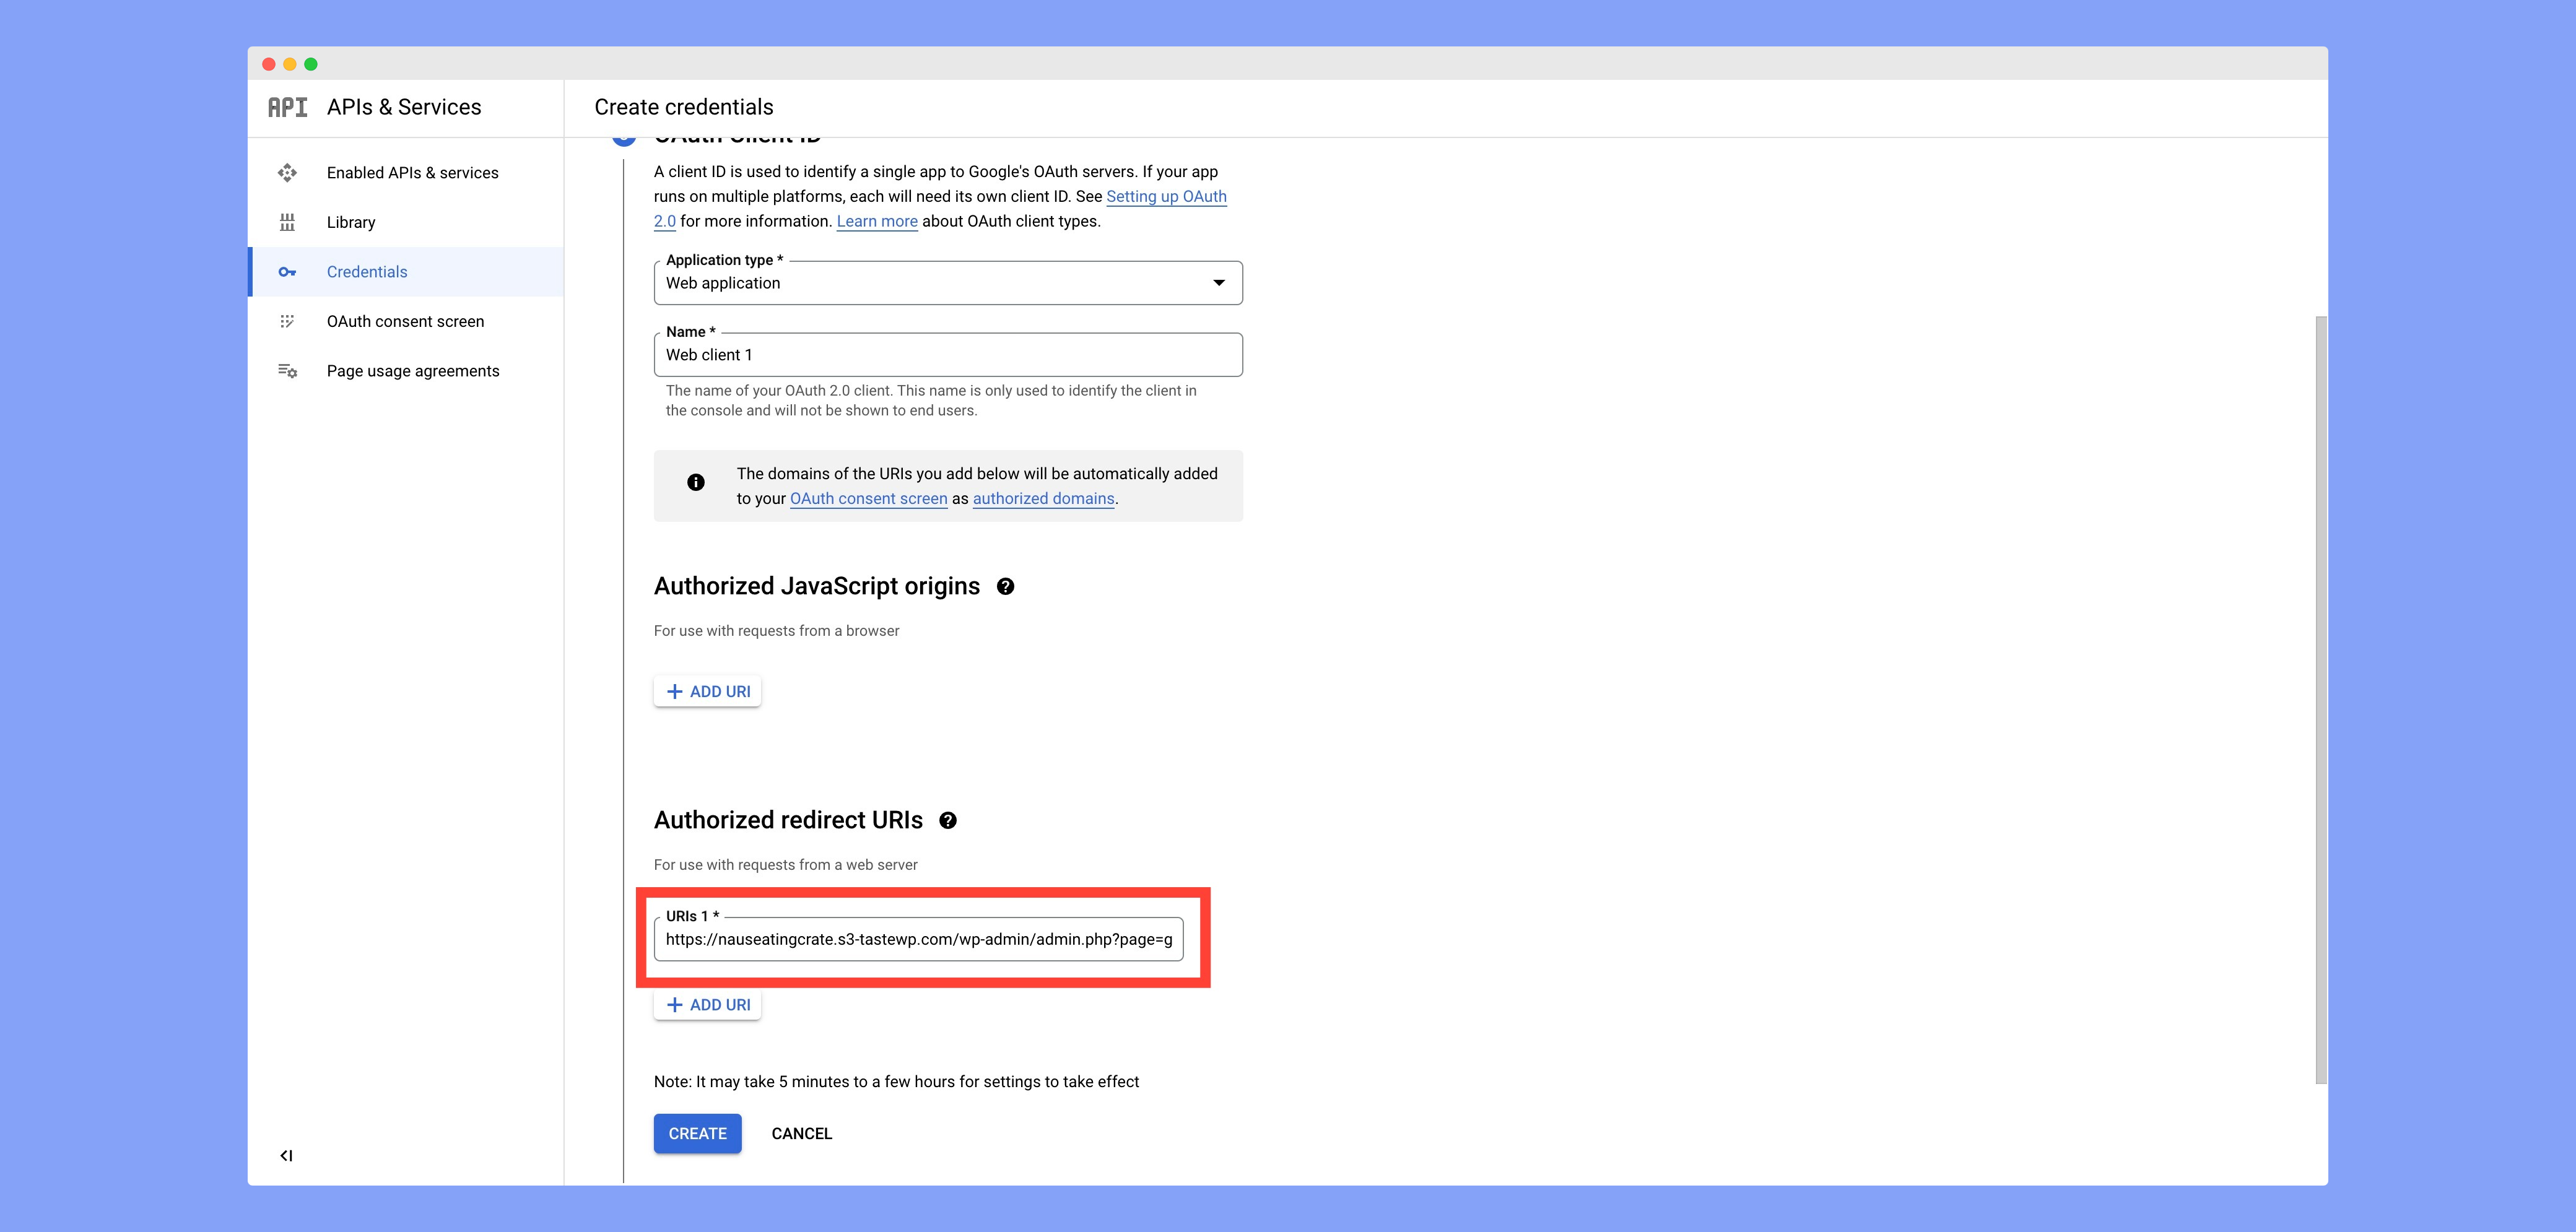
Step 9: After that, you can select the OAuth Client ID. Select Web application as your application type. Then you have to set an Authorized redirect URI.
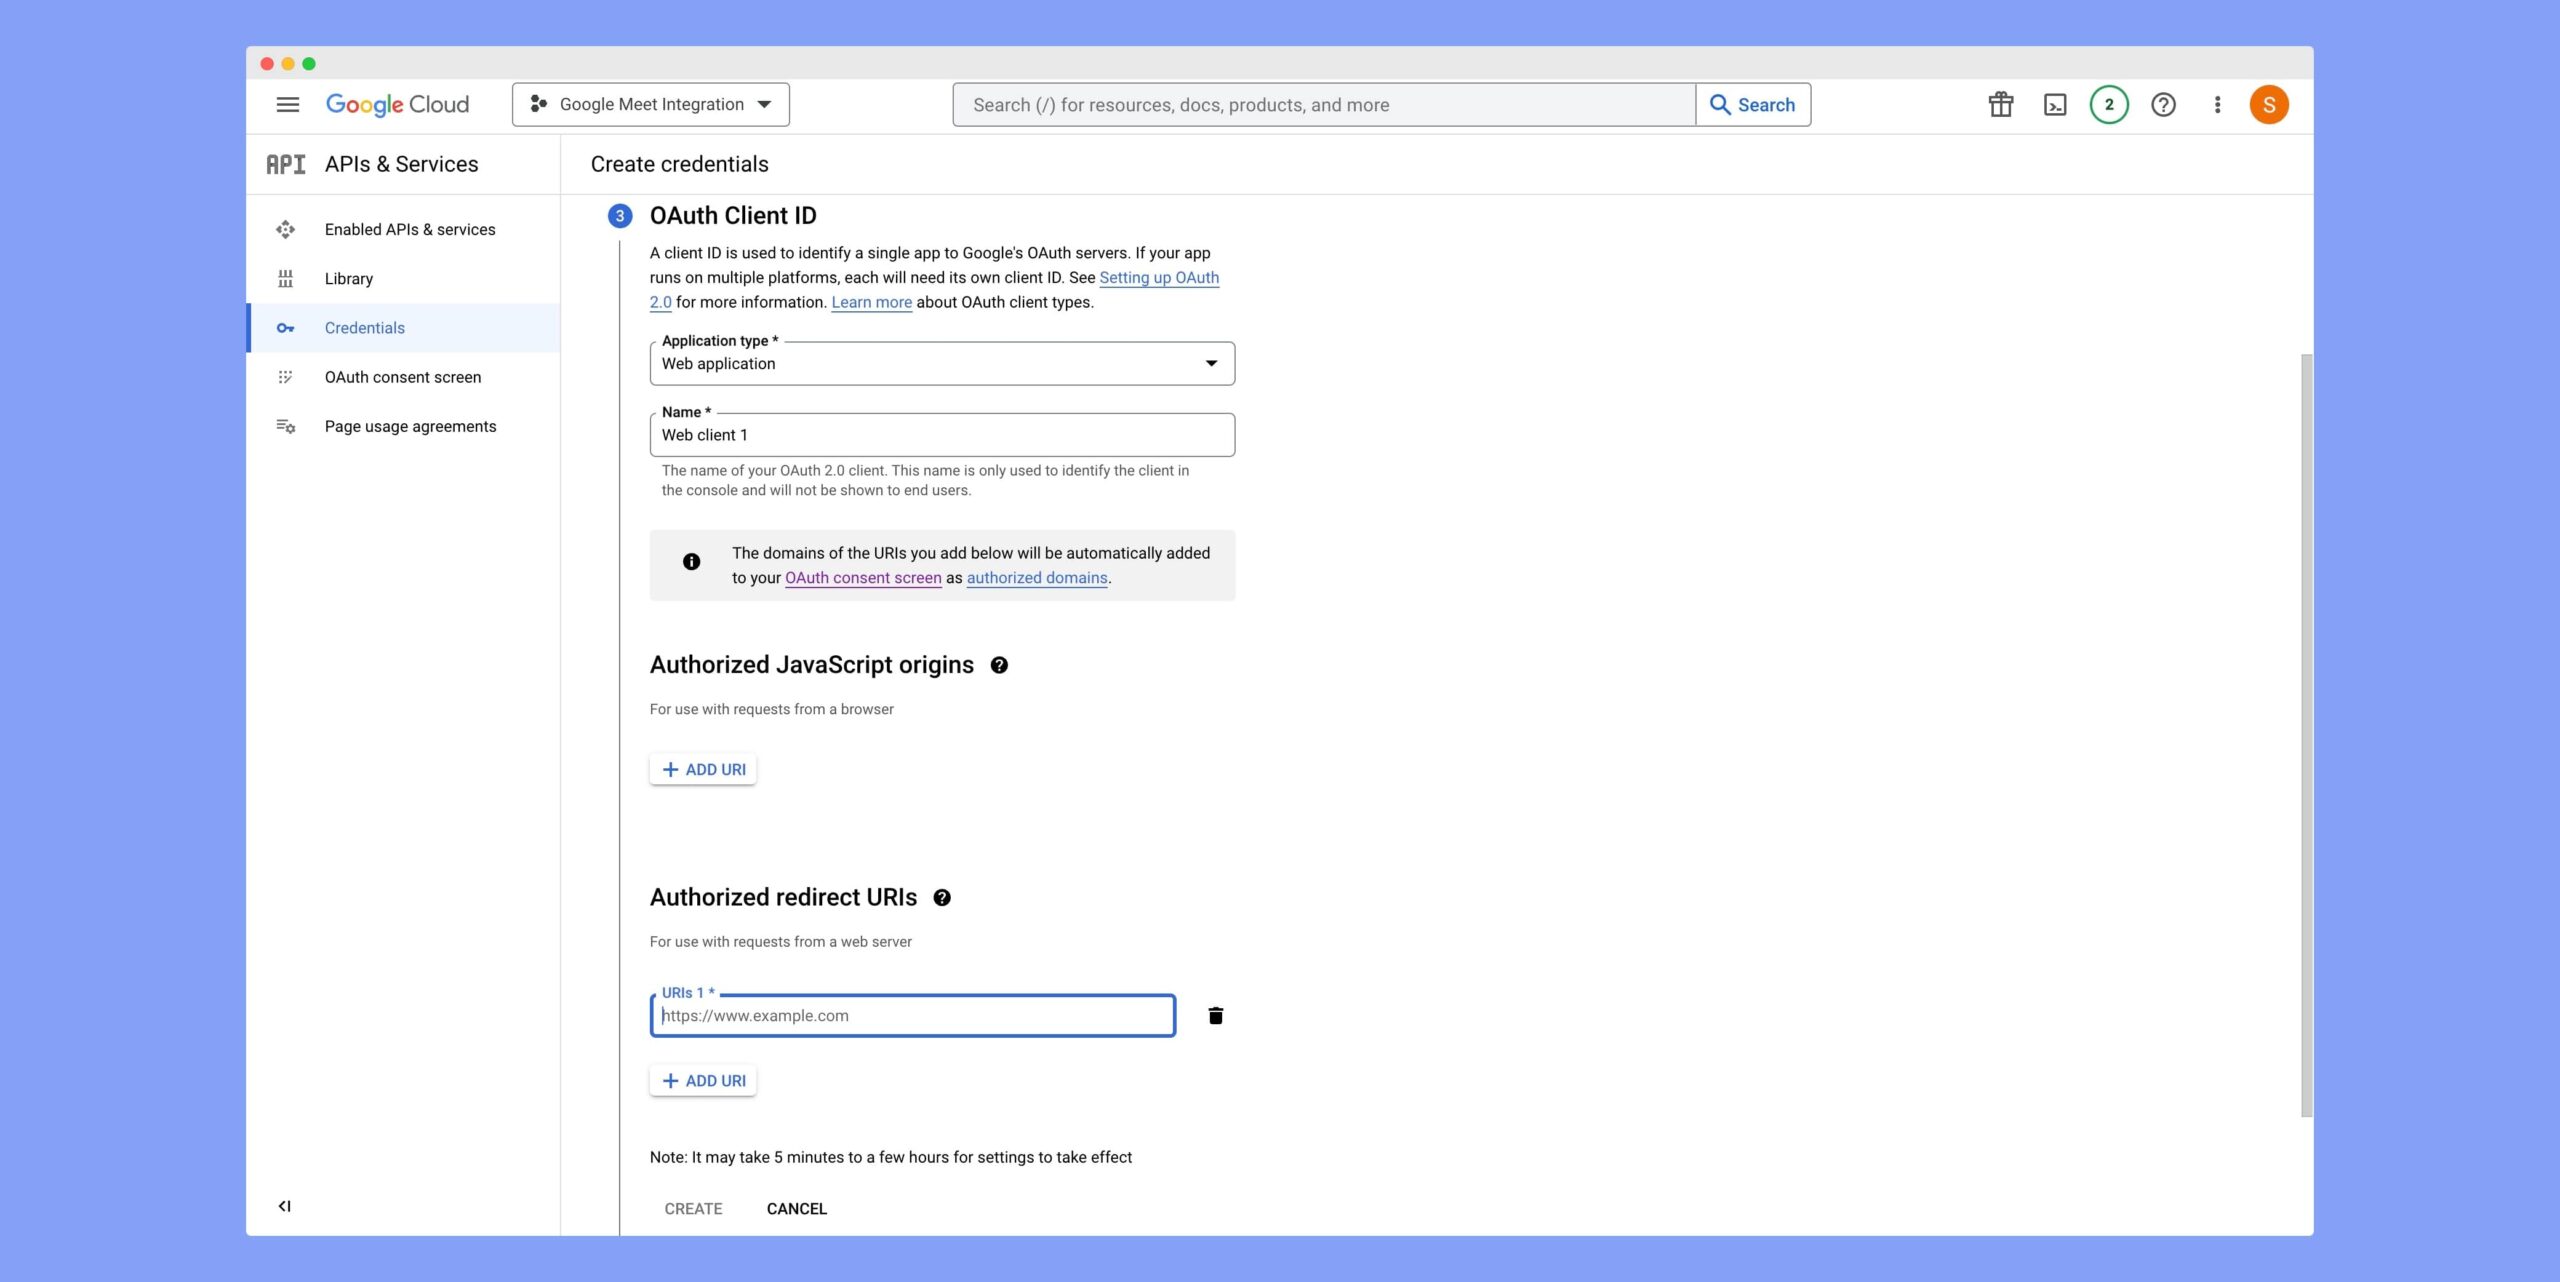
For the Authorized redirect URI go back to your WordPress admin backend.
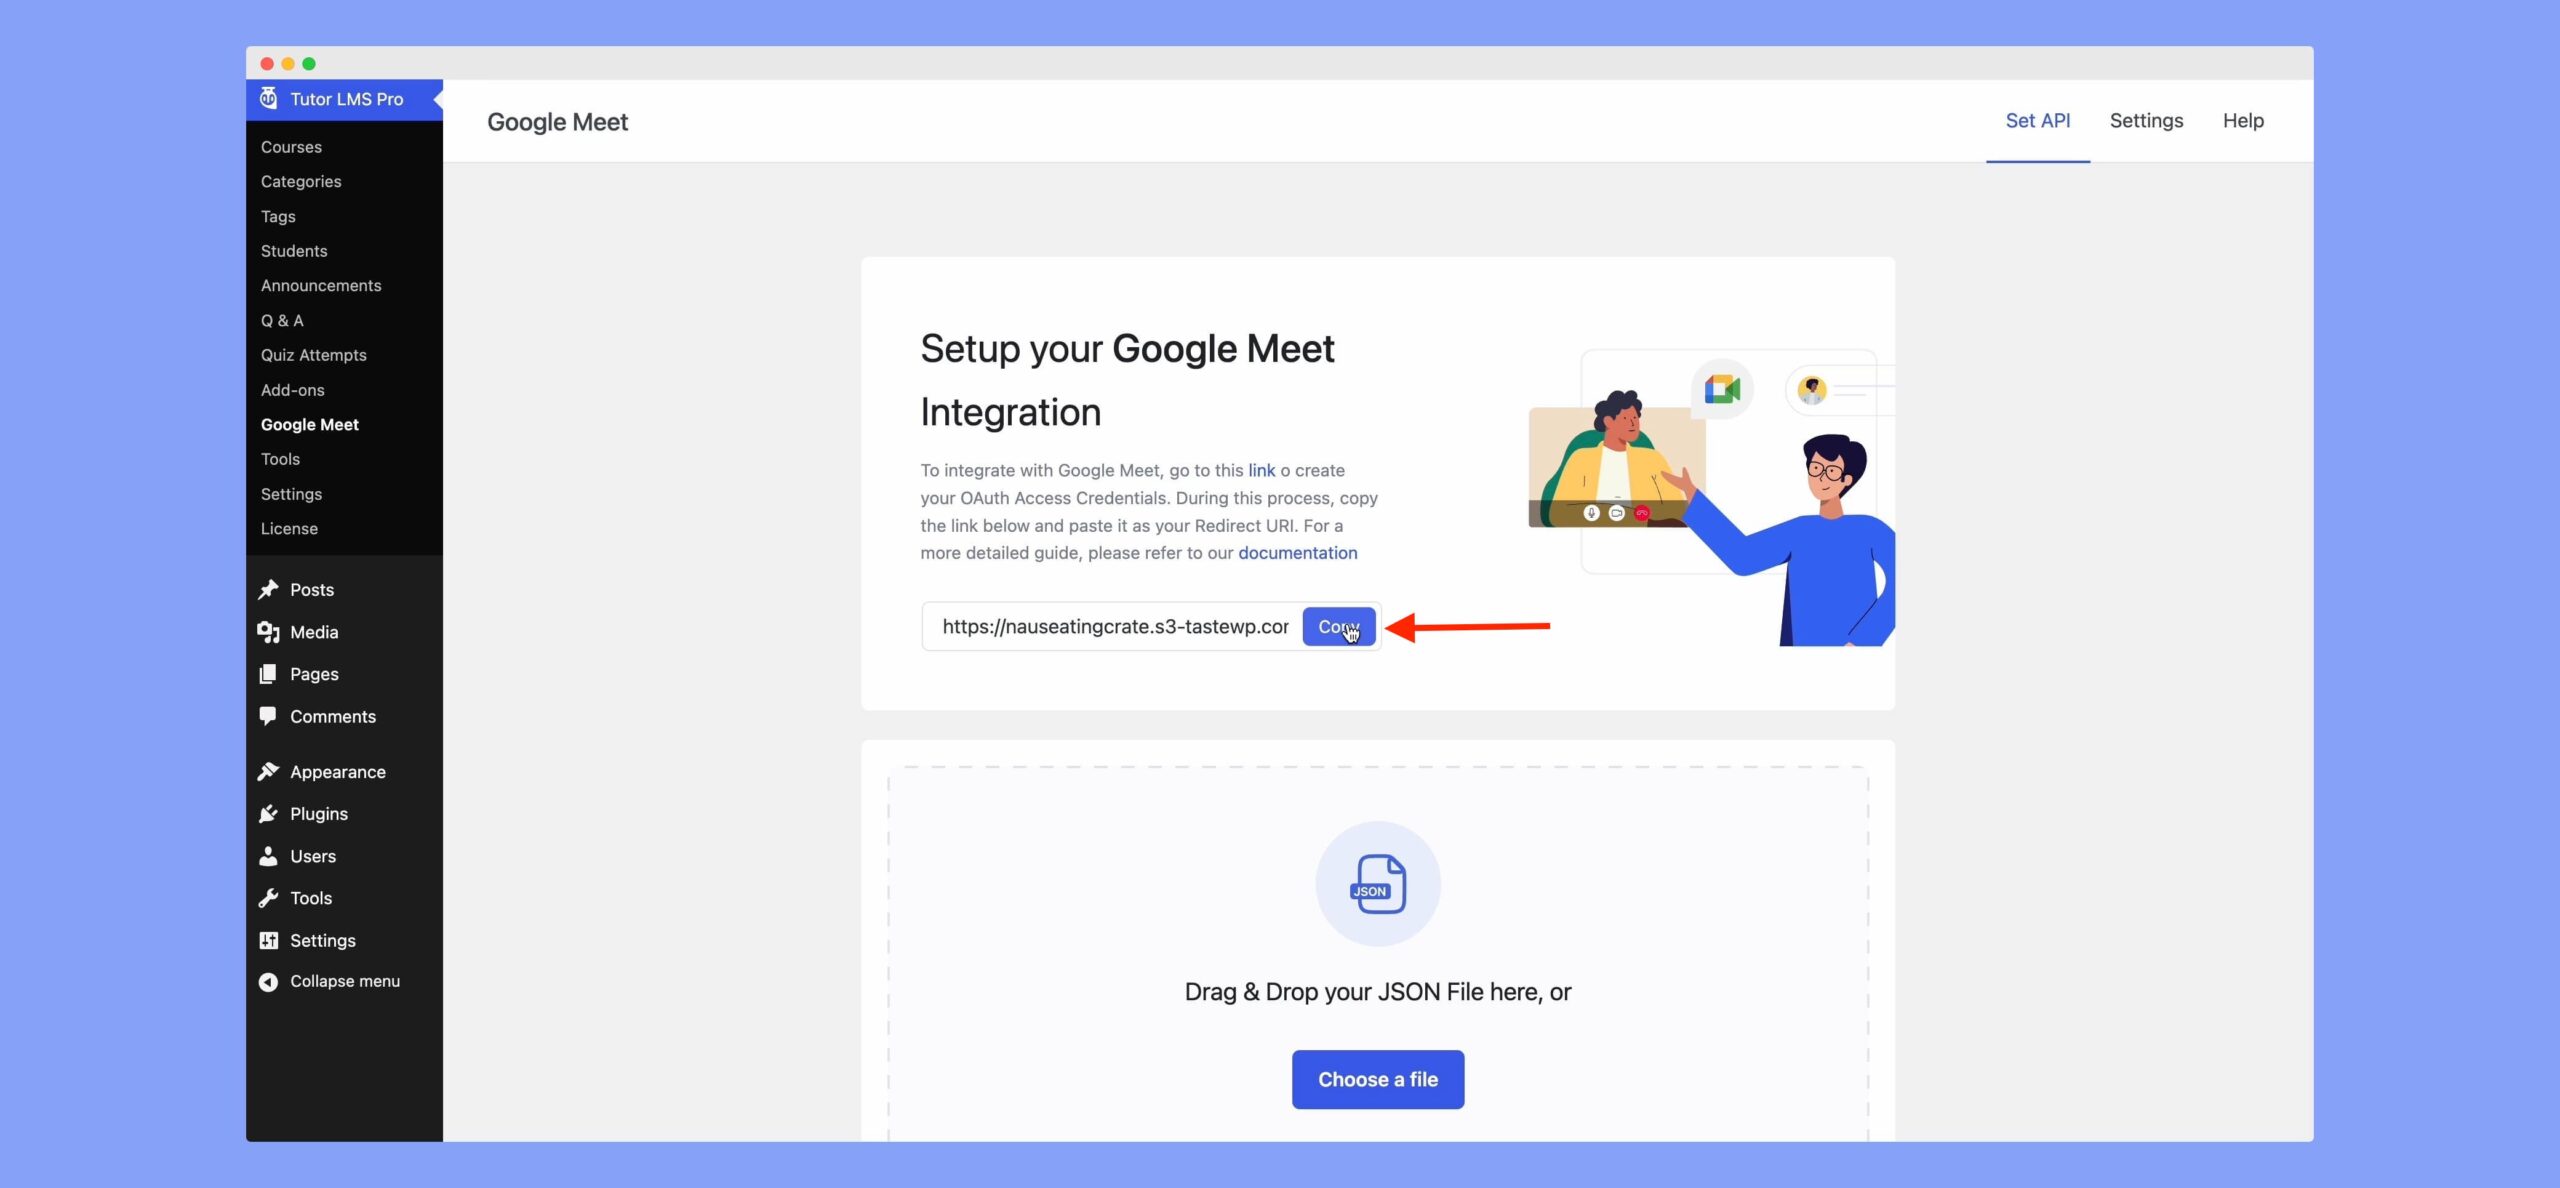
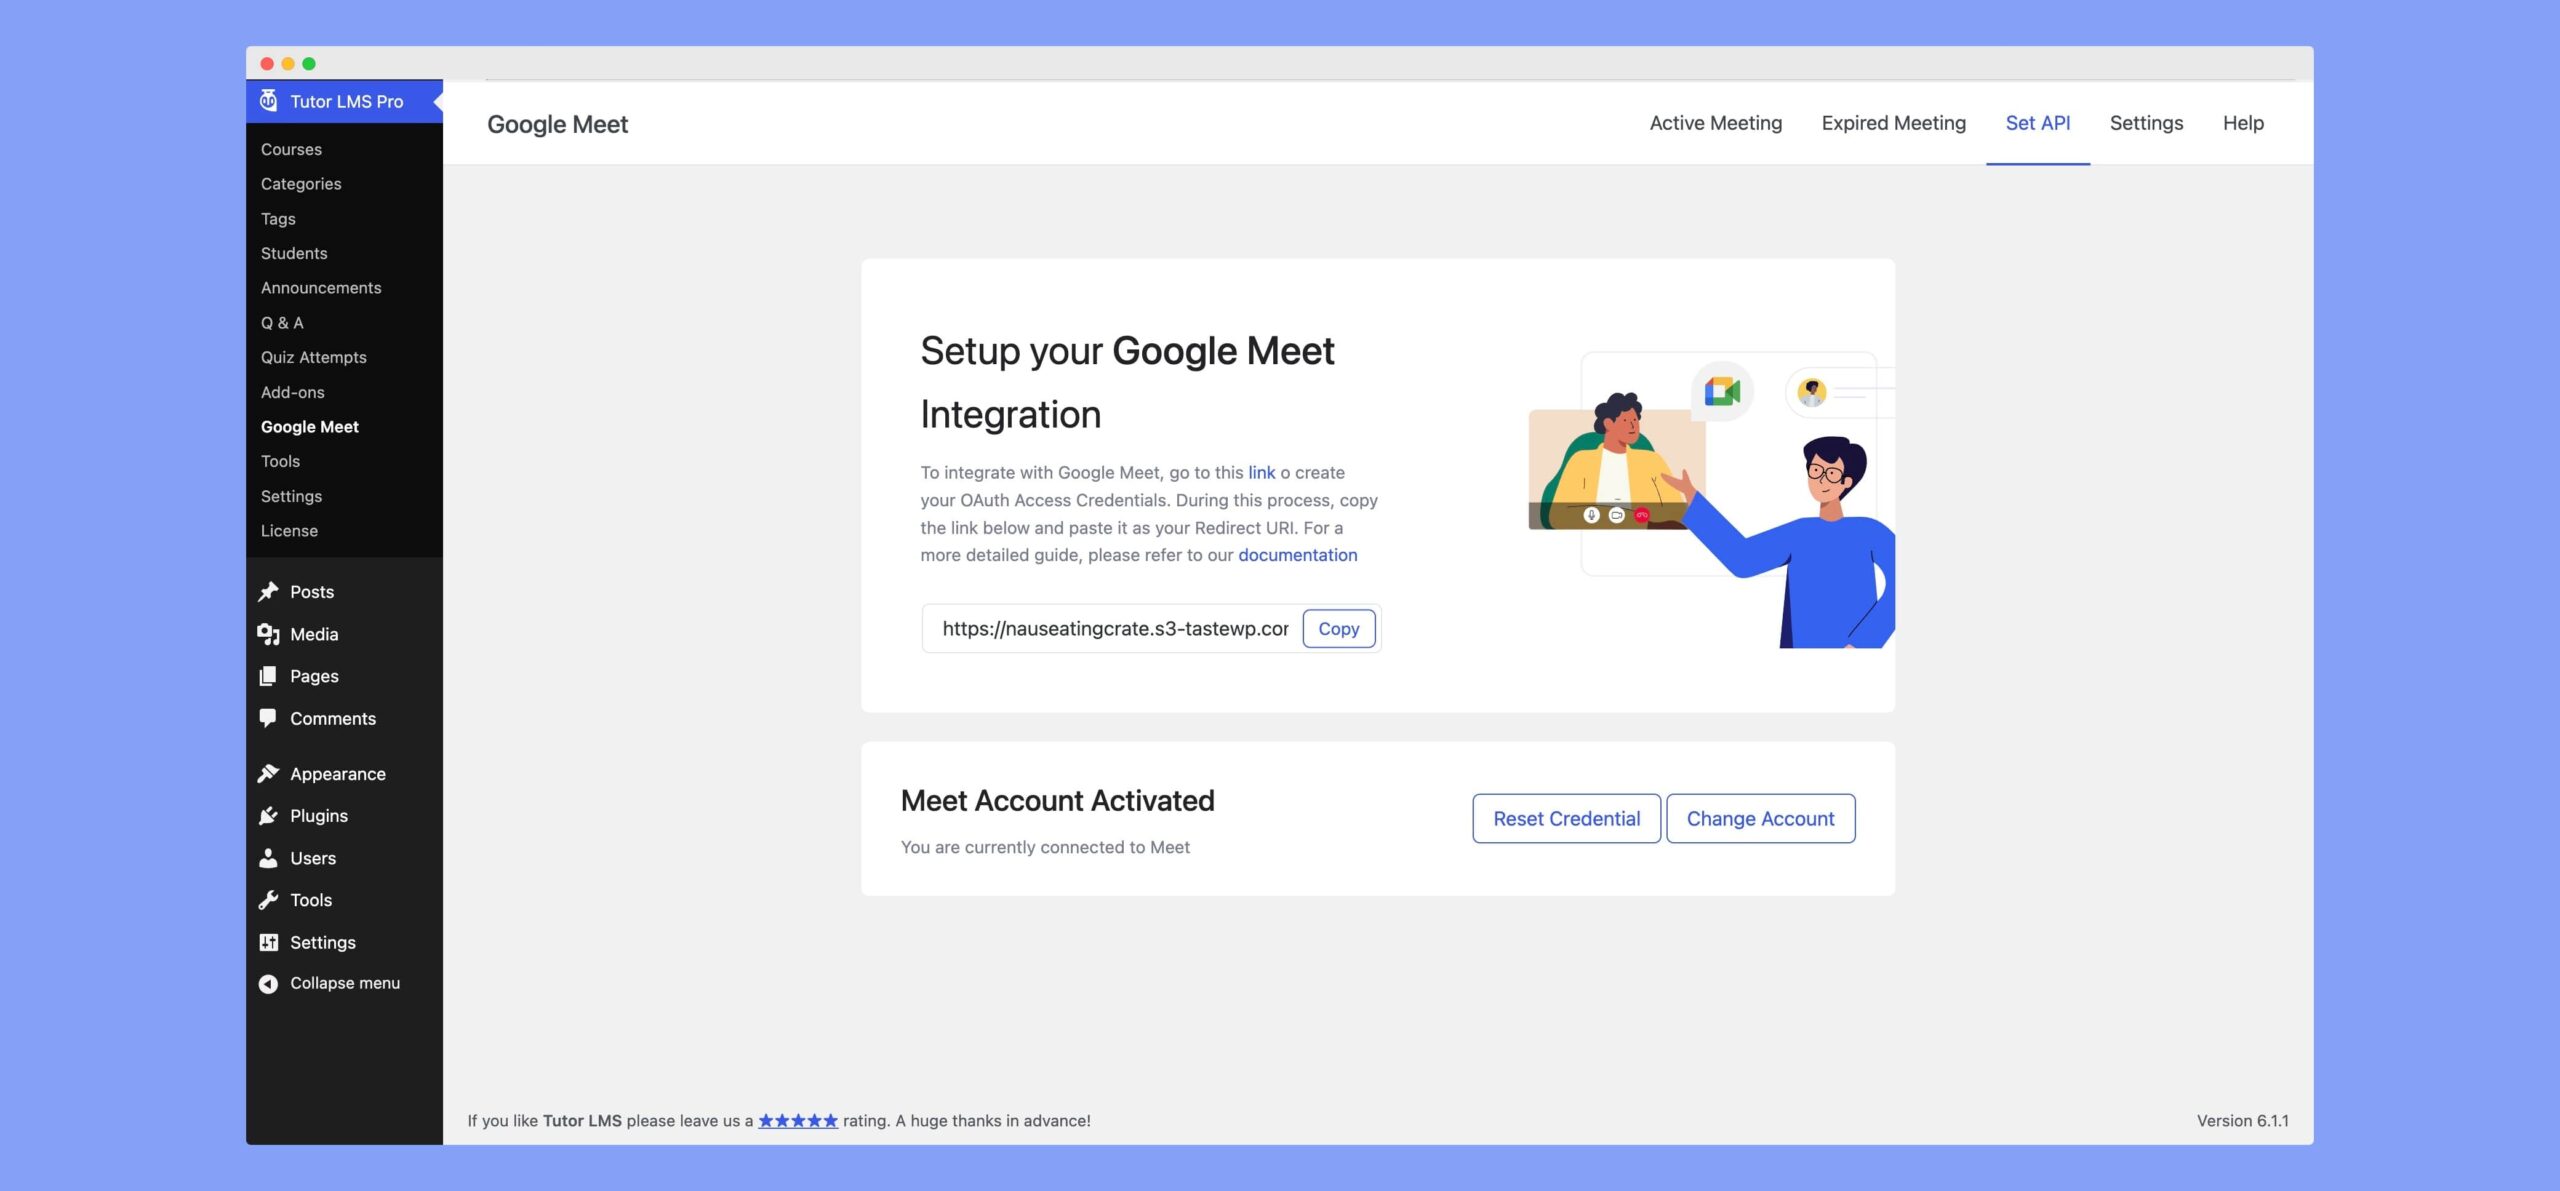
Step 10: You will find a link to copy in the Tutor LMS > Google Meet > Set API tab. Copy that link and go back to the Google developer console.
Step 11: Paste the link on the Authorized redirect URI section. This is the redirect URI that Google Calender API needs. Hit Save and then you have completed the task.
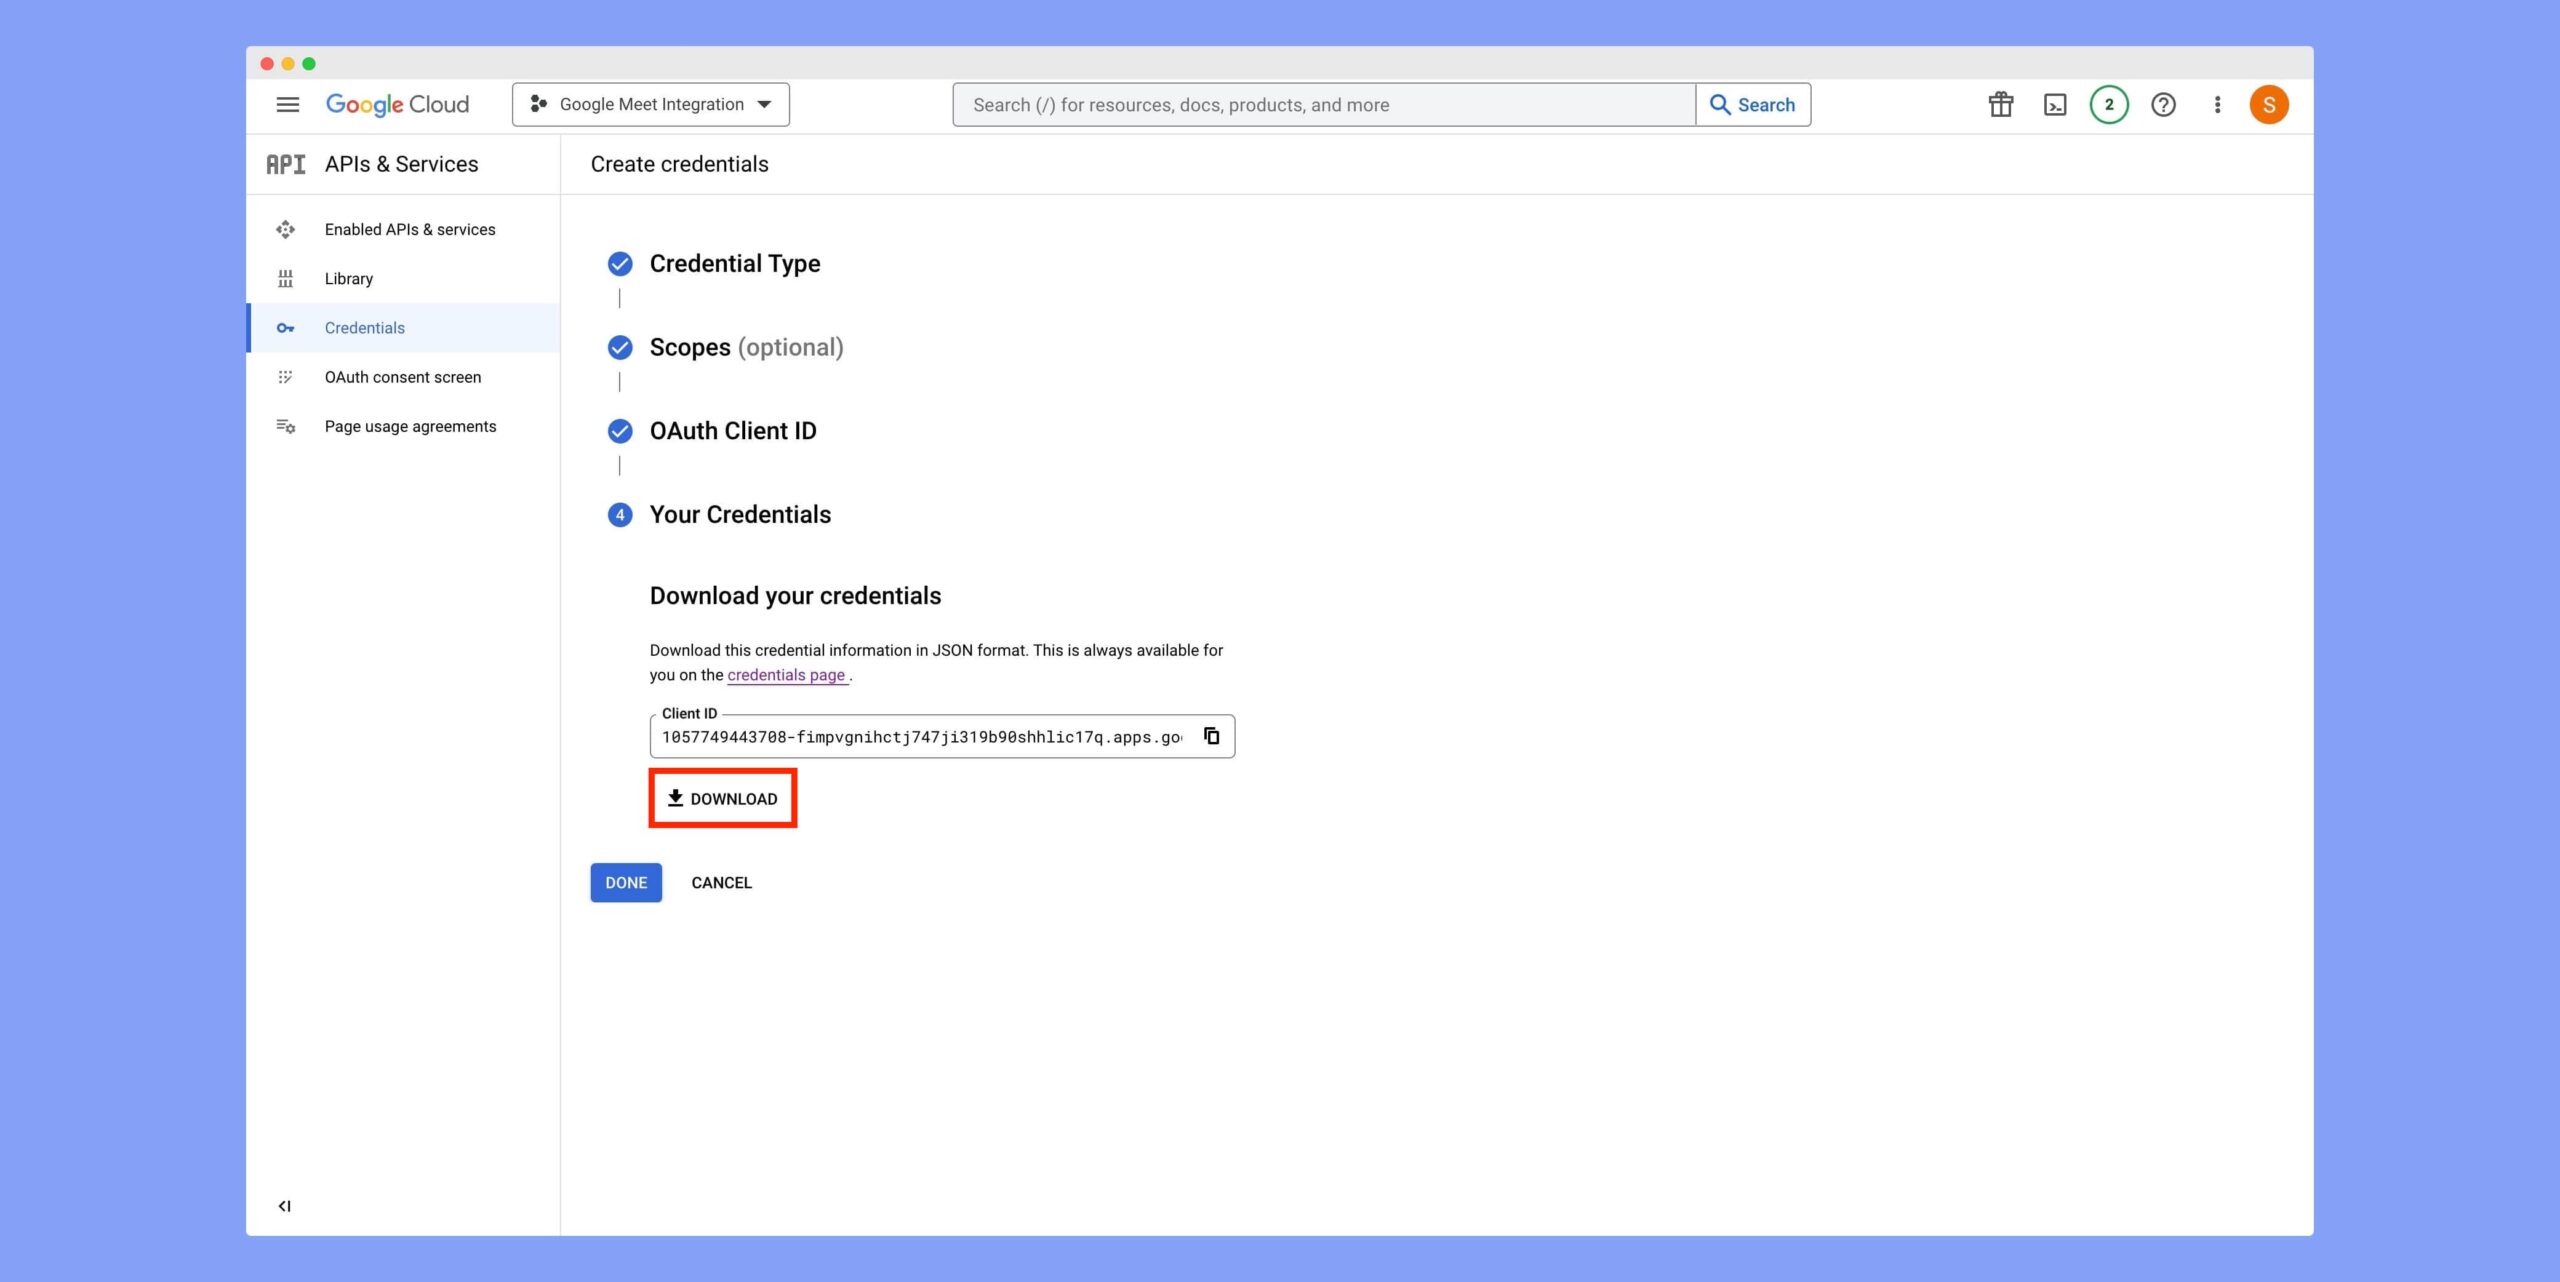
Step 12: After creating the credentials, you can then download the JSON file from the credentials dashboard. Simply click on the download icon to continue.
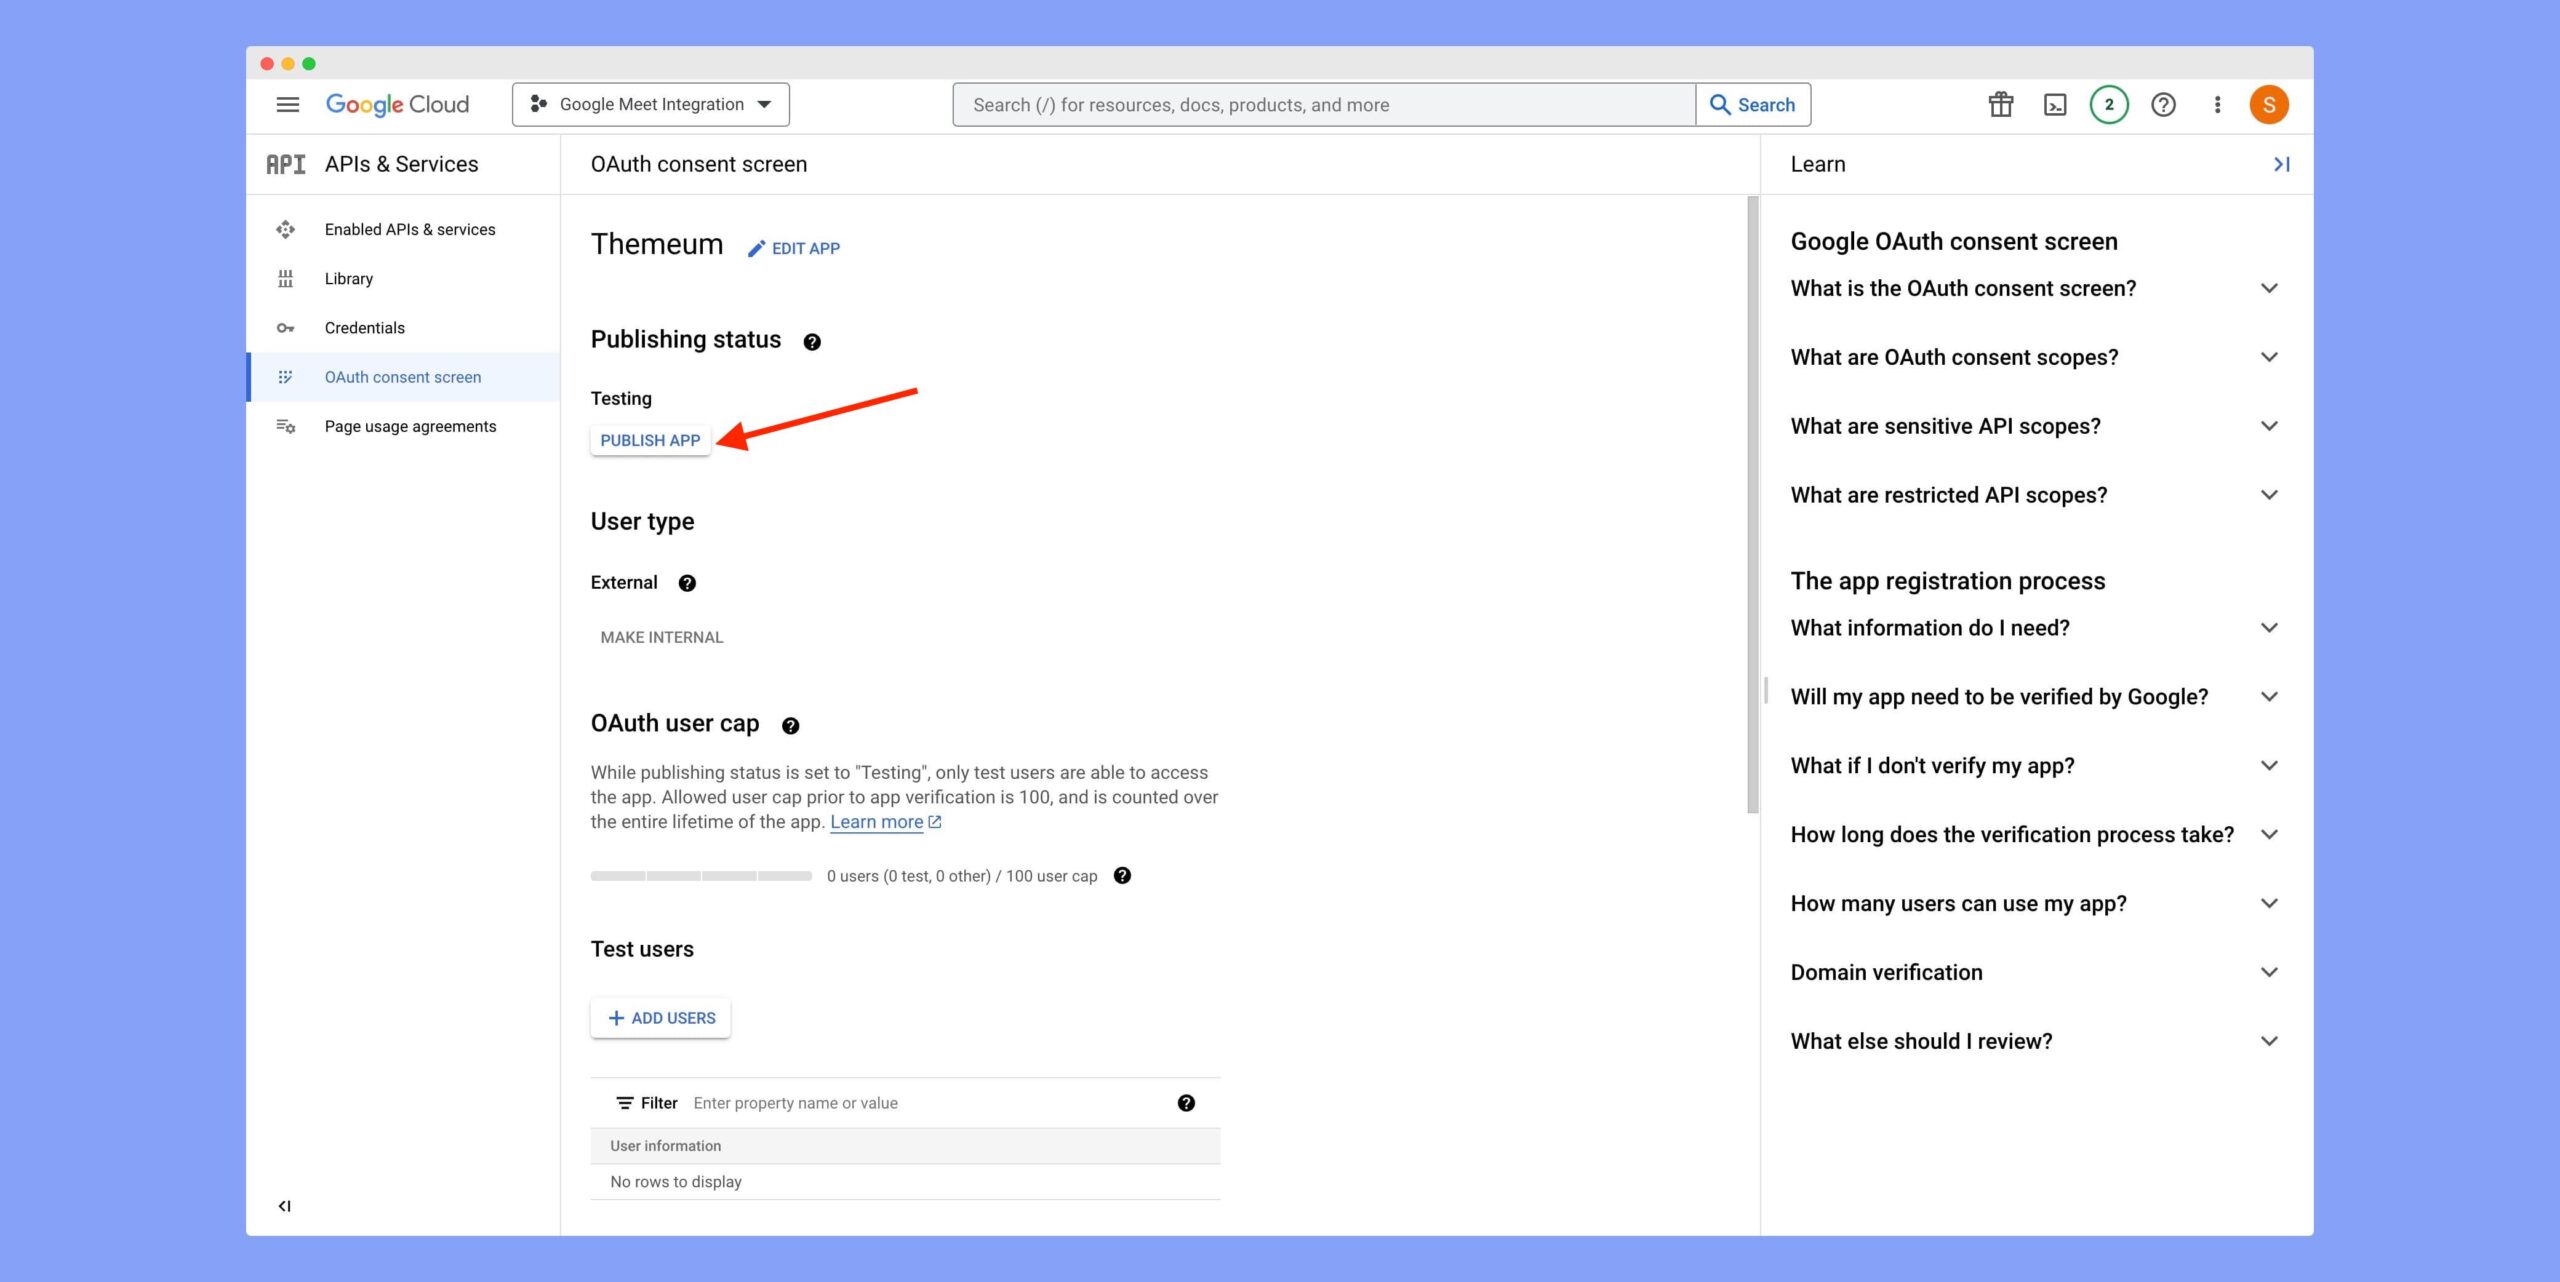
Step 13: Lastly, click on the OAuth consent screen tab and then click Publish App to publish this app. Doing this will make sure you can give Tutor LMS and Google permission to use this integration. This is a very important step, without doing this you might get an error so make sure to do this step.
Connecting to Google Meet
After you have access to your JSON file, you can connect Tutor LMS to Google Meet in just a few more steps. From the backend of your WordPress site and go to Tutor LMS > Google Meet.

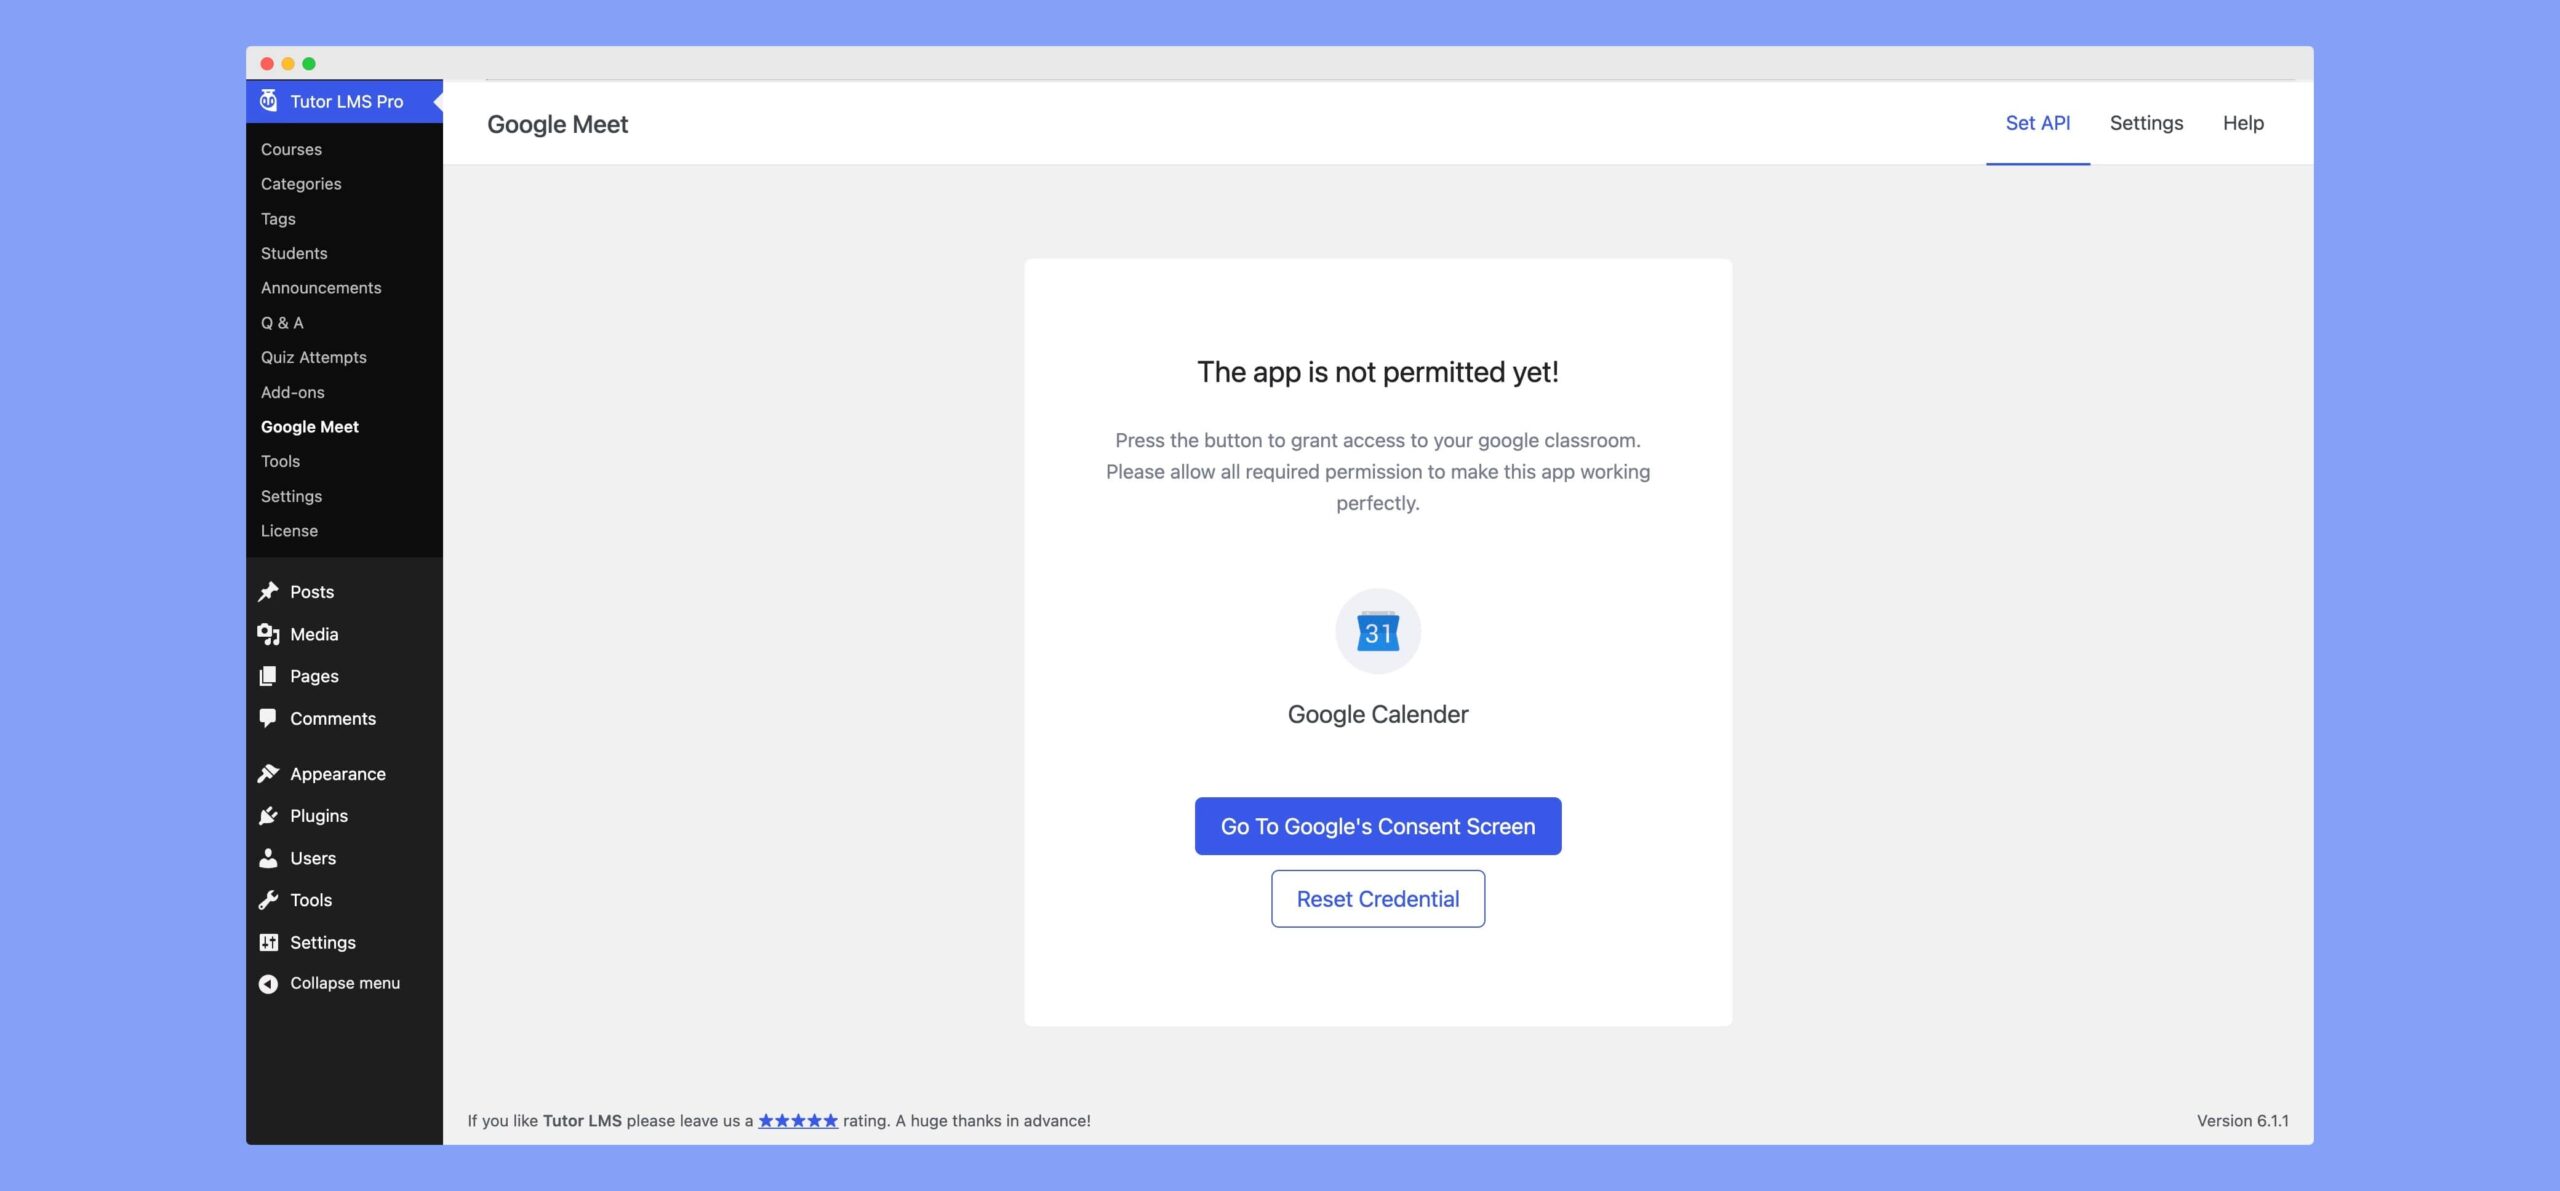
Click on Choose a file to upload your JSON file, and upload the JSON file. Once uploaded it will authenticate your website with the API credentials. Once the file uploads you will be met with the screen shown below, from here, click on Go To Google’s Consent Screen.
Set the Email address you want to add and allow all the permissions you want to have Tutor LMS set up with Google Meet.
Thats it! You are done with the integration setup.
If you want to change anything and use a different JSON file, click on Reset Credentials.
Creating a Meeting
To create a meeting, there are two ways. You can create a meeting for a lesson under topics for a course in the Tutor LMS course builder. Alternatively, you can find a new Google Meet section in the Tutor LMS course builder.
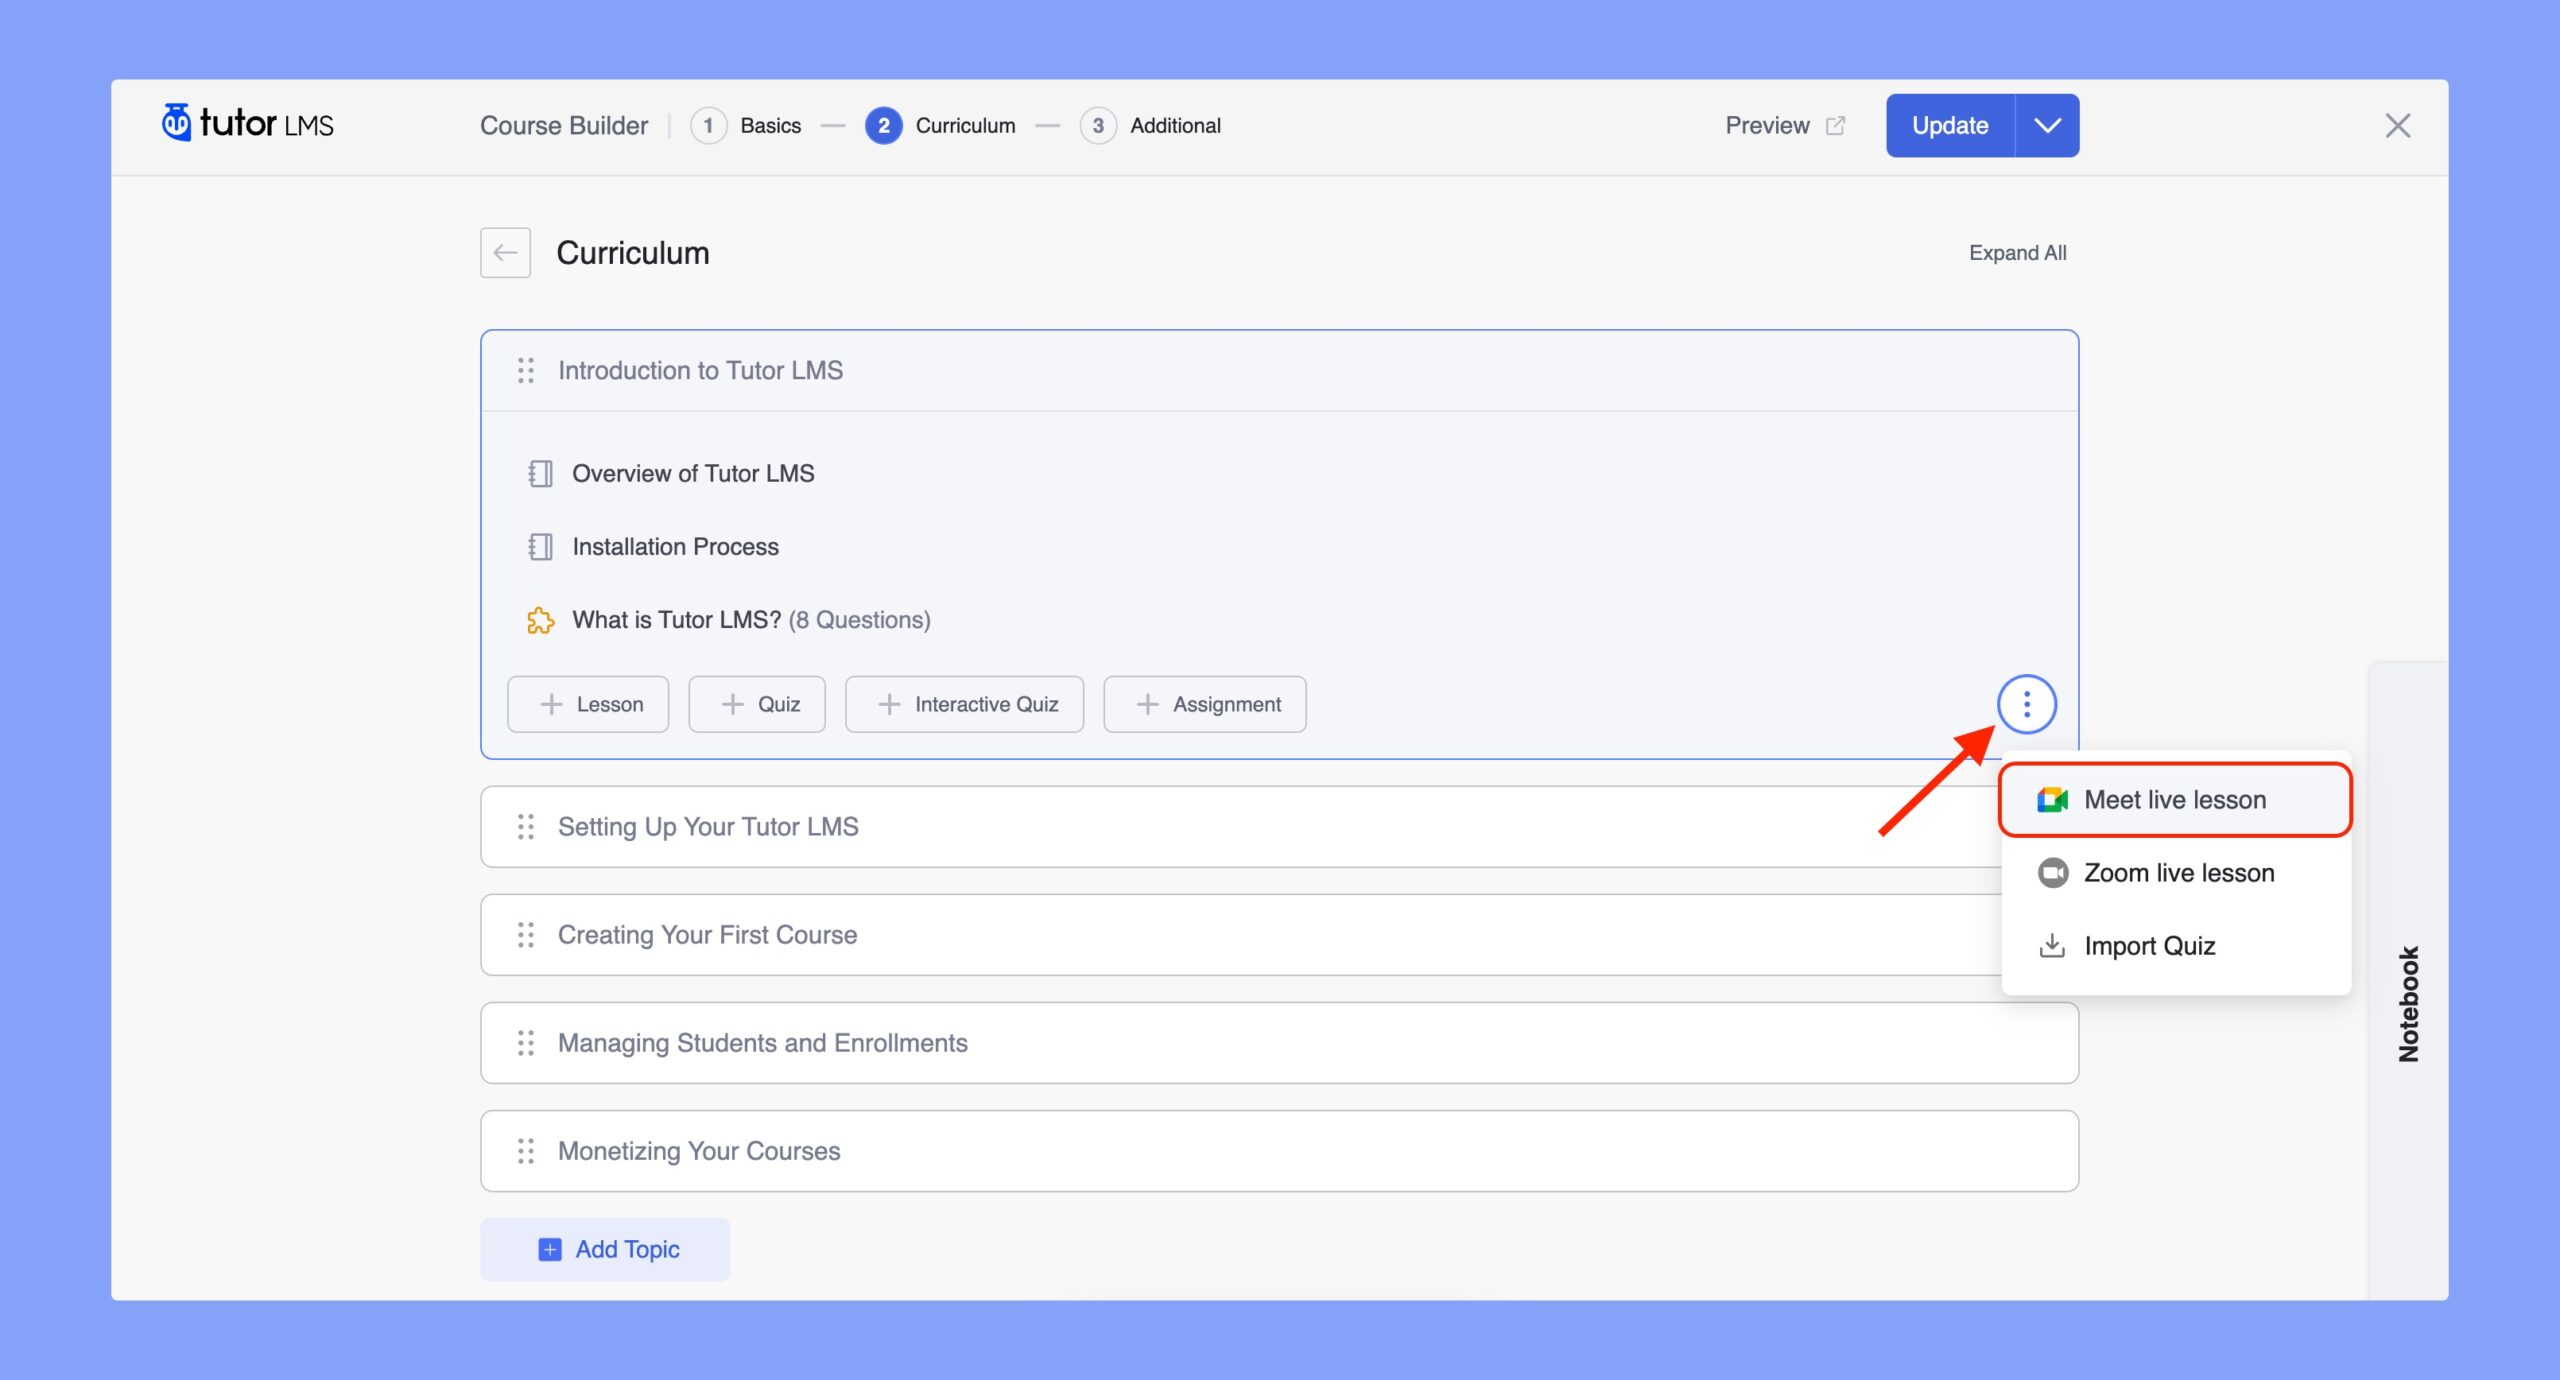
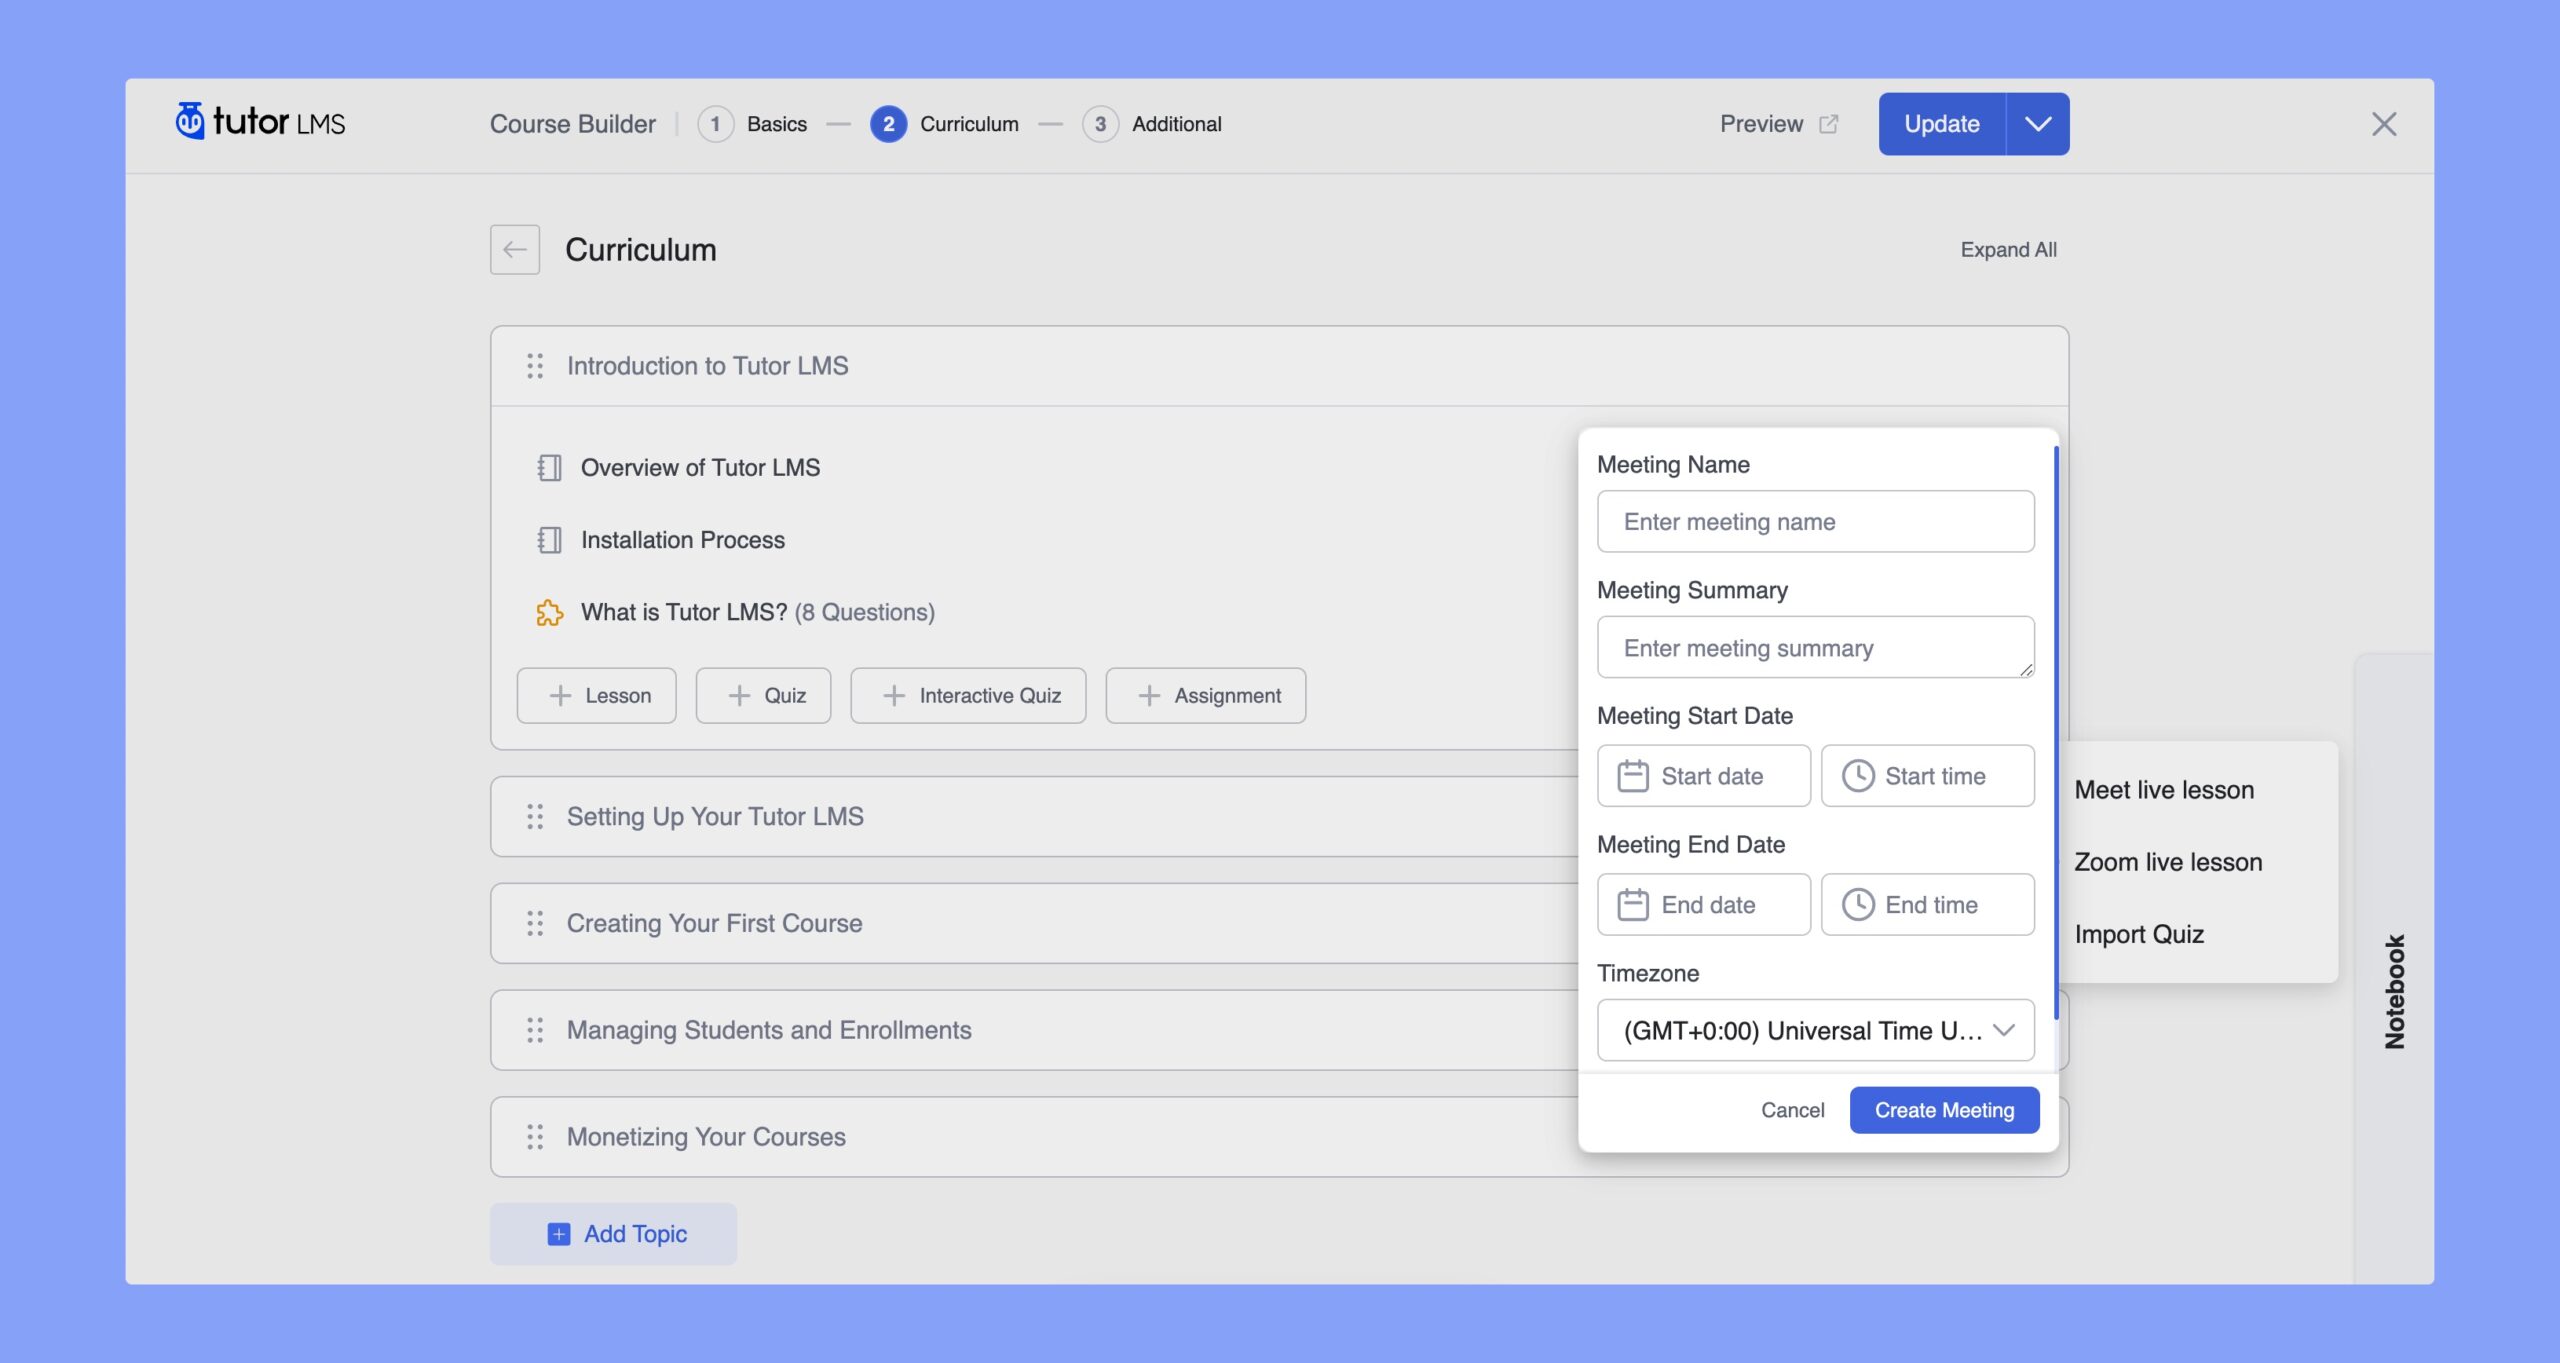
Clicking on Create a Google Meet will bring up a pop up where you can configure the details of your meeting.
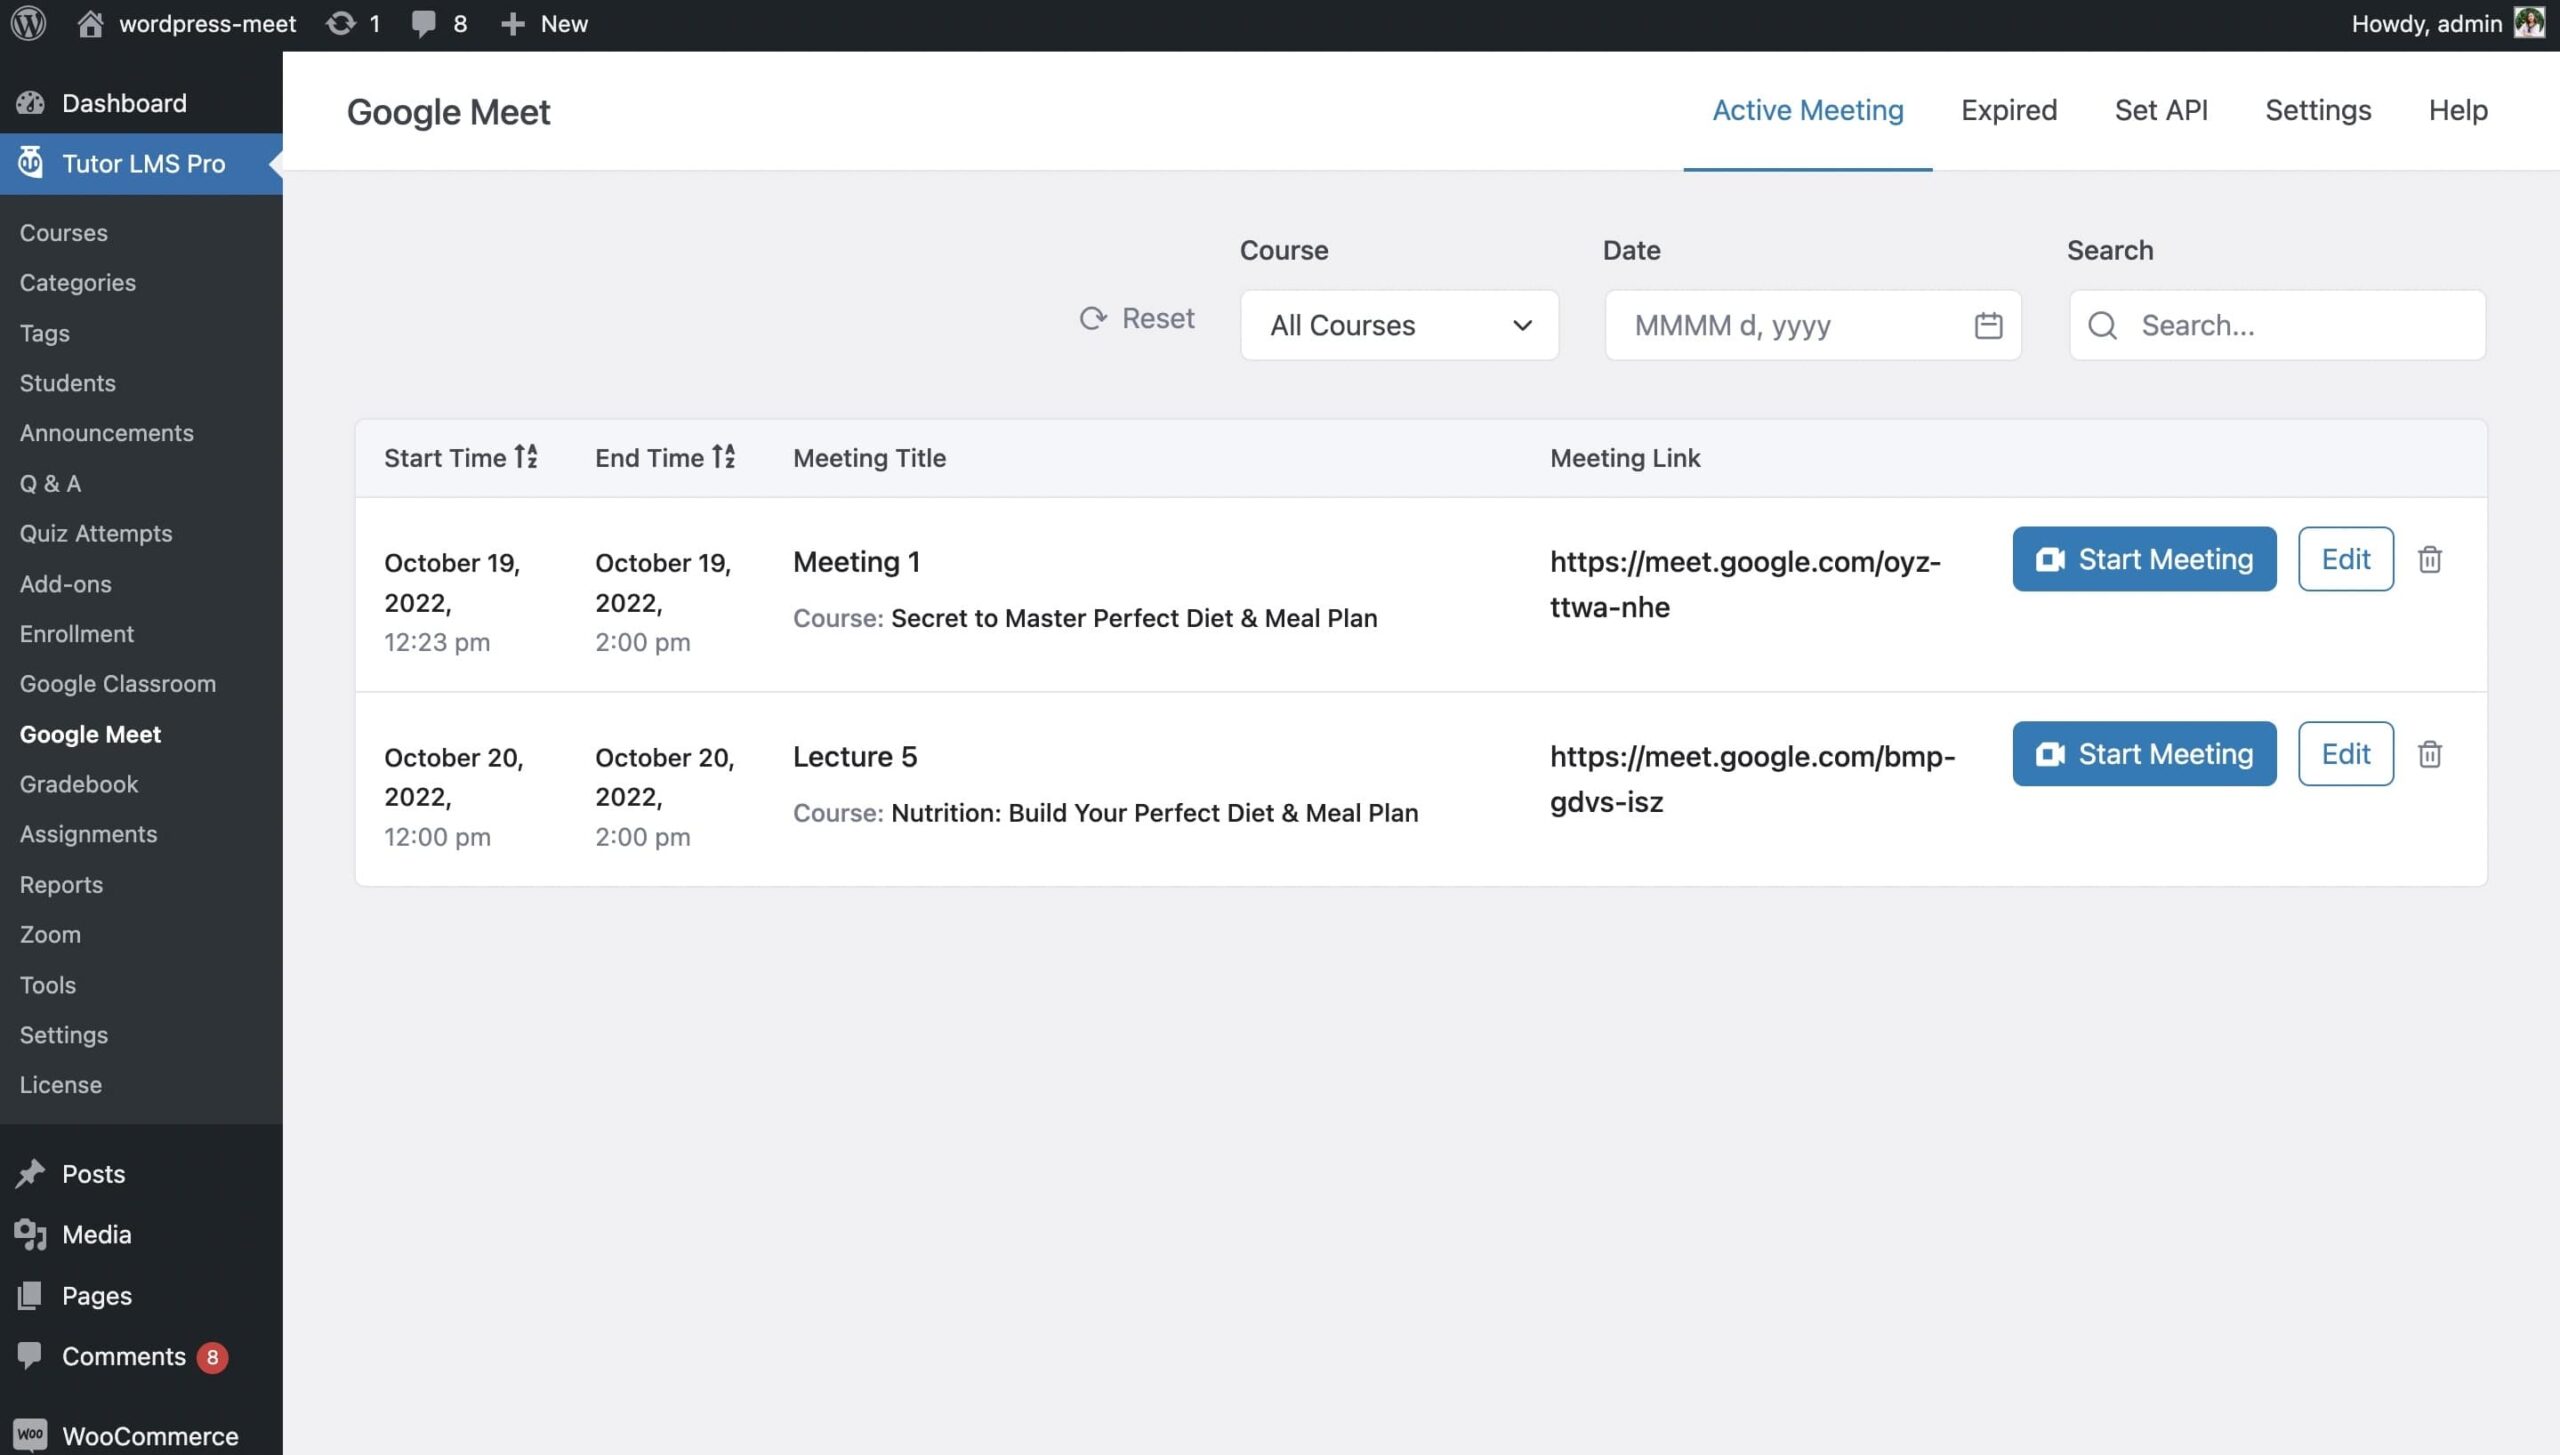
You can find a list of all the active meetings you have set up in Tutor LMS > Google Meet > Active Meetings. You can also edit the meetings from this page.
Specific Google Meet Integration Settings
You can find these settings on the Settings tab of Google Meet.
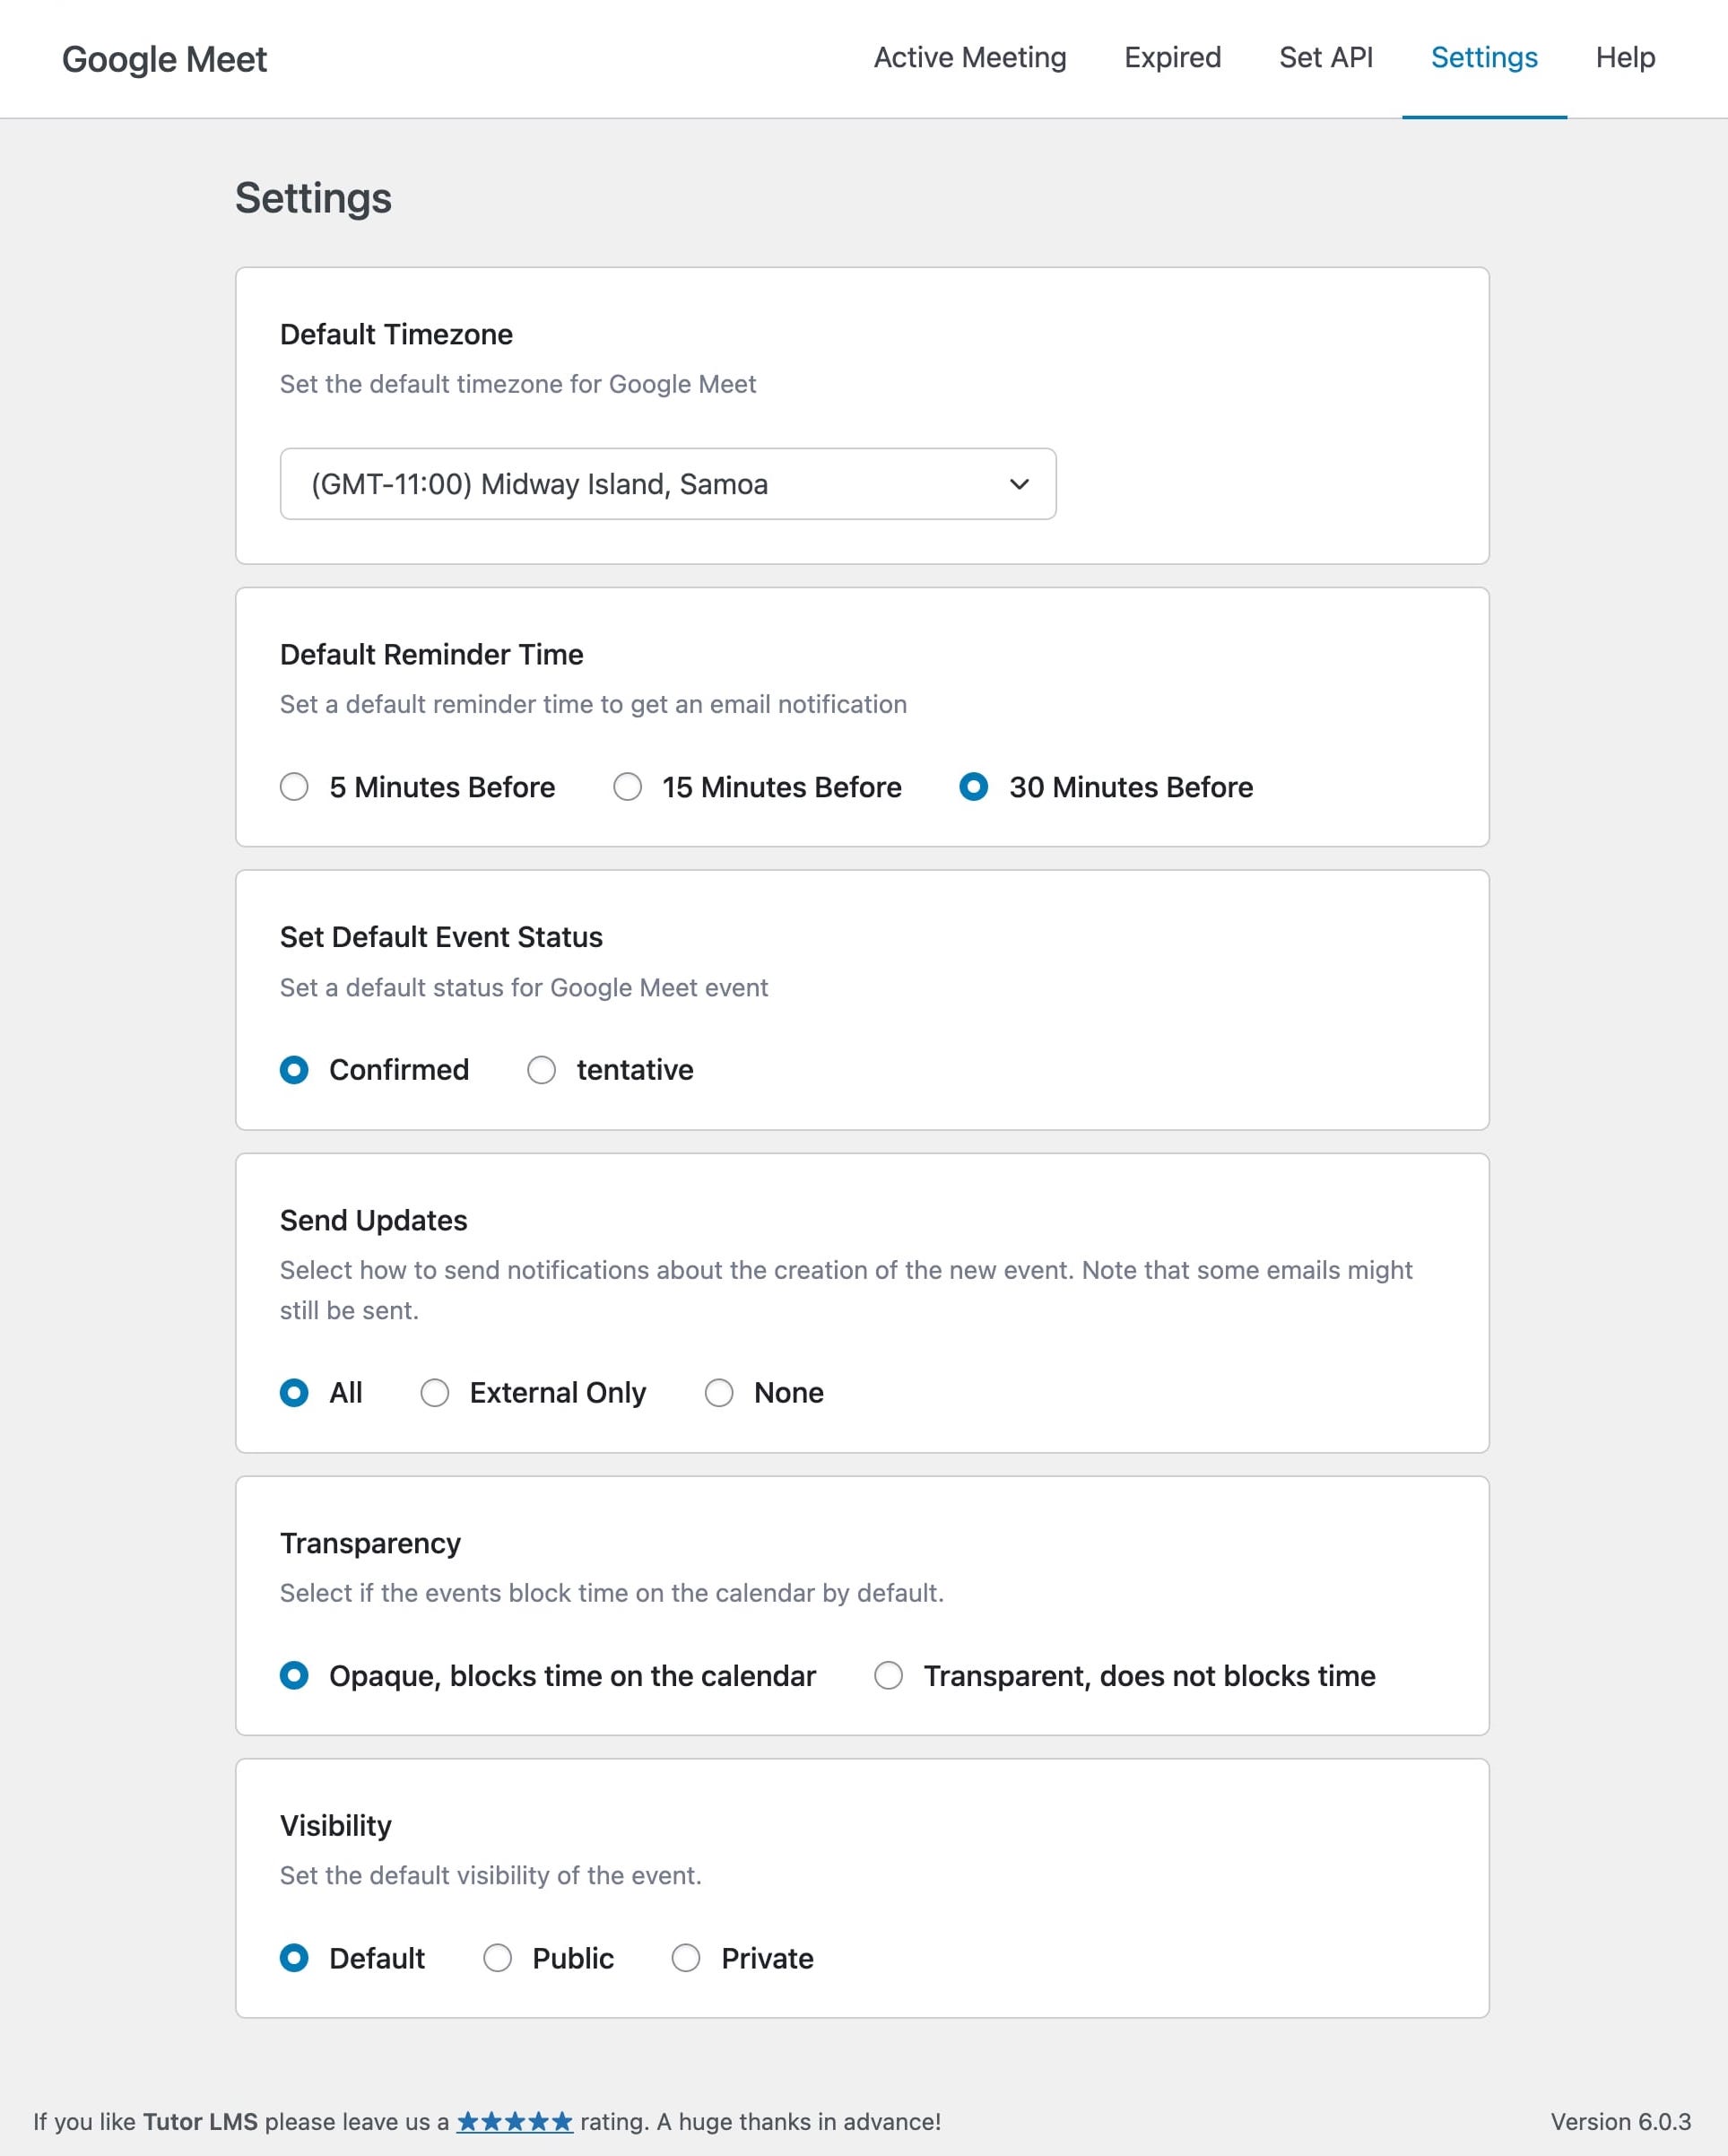
Default Timezone: Set the default timezone that will be set for your meetings. You can change this for individual meetings when setting up a new meeting.
Default Reminder Time: Set a default reminder time for participants to get an email notification
Set Default Event Status: Set a default status for Google Meet event.
Send Updates: Select how to send notifications about the creation of the new event. Note that some emails might still be sent.
Transparency: Select if the events block time on the calendar by default.
Visibility: Set the default visibility of the event.
Reset Credential for Google Meet
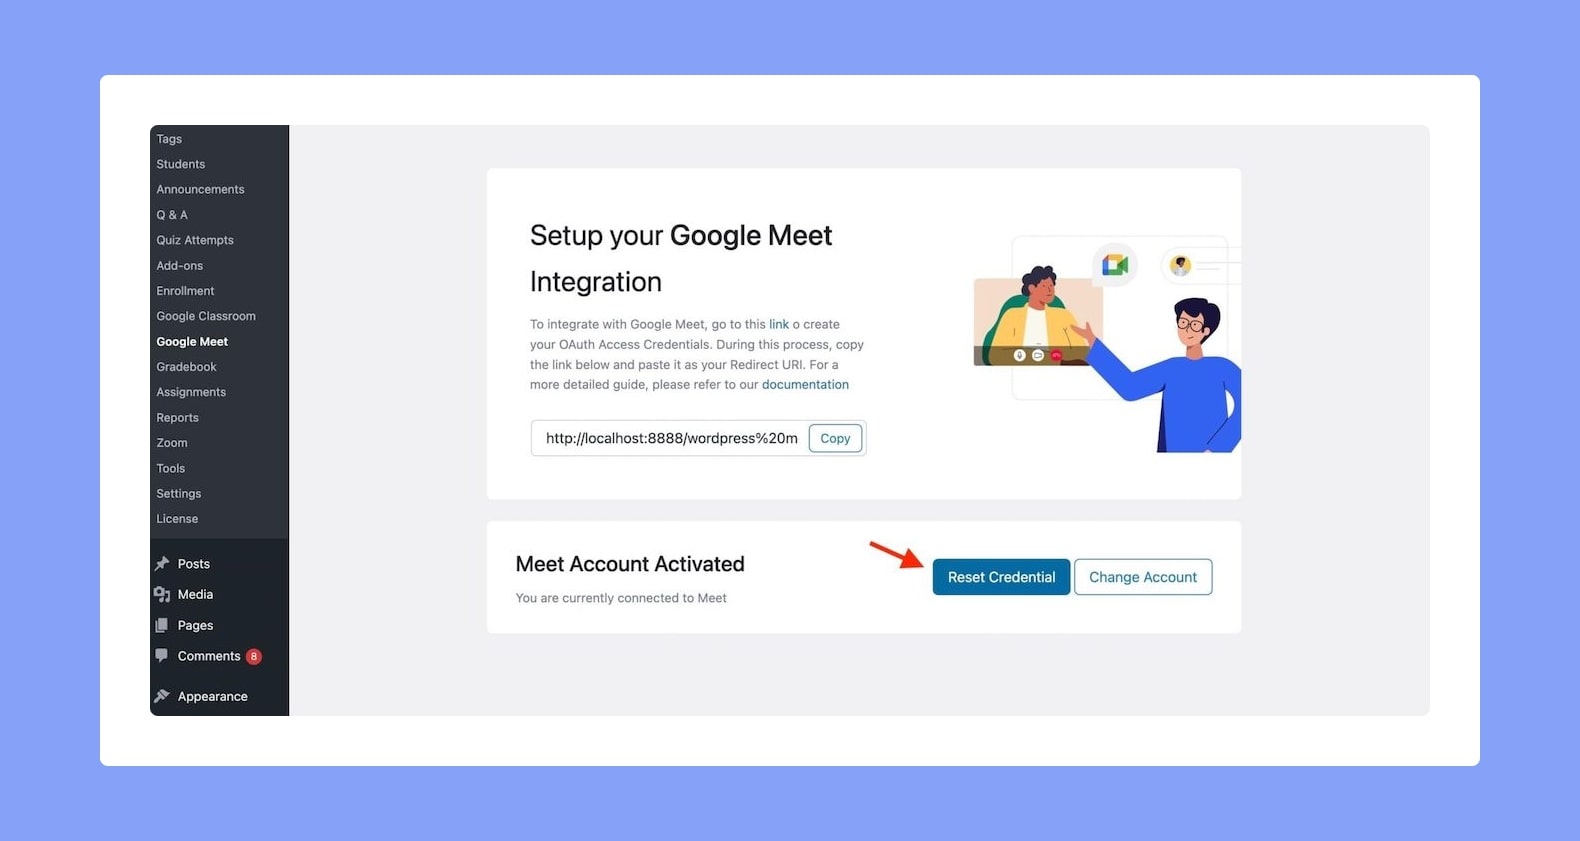
Should the need arise, you can also invalidate your current Google Meet credential using the Reset Credential button.
To find this button, head over to WP Admin > Google Meet > Set API. After clicking on Reset Credential, your currently connected Meet Account will get invalidated.