Enrollment Expiration in Tutor LMS lets you set an expiration on how long a student can access a course after enrolling in it. This allows instructors to create a recurring payment model for courses.
To set an enrollment expiration for a course, simply follow these steps:
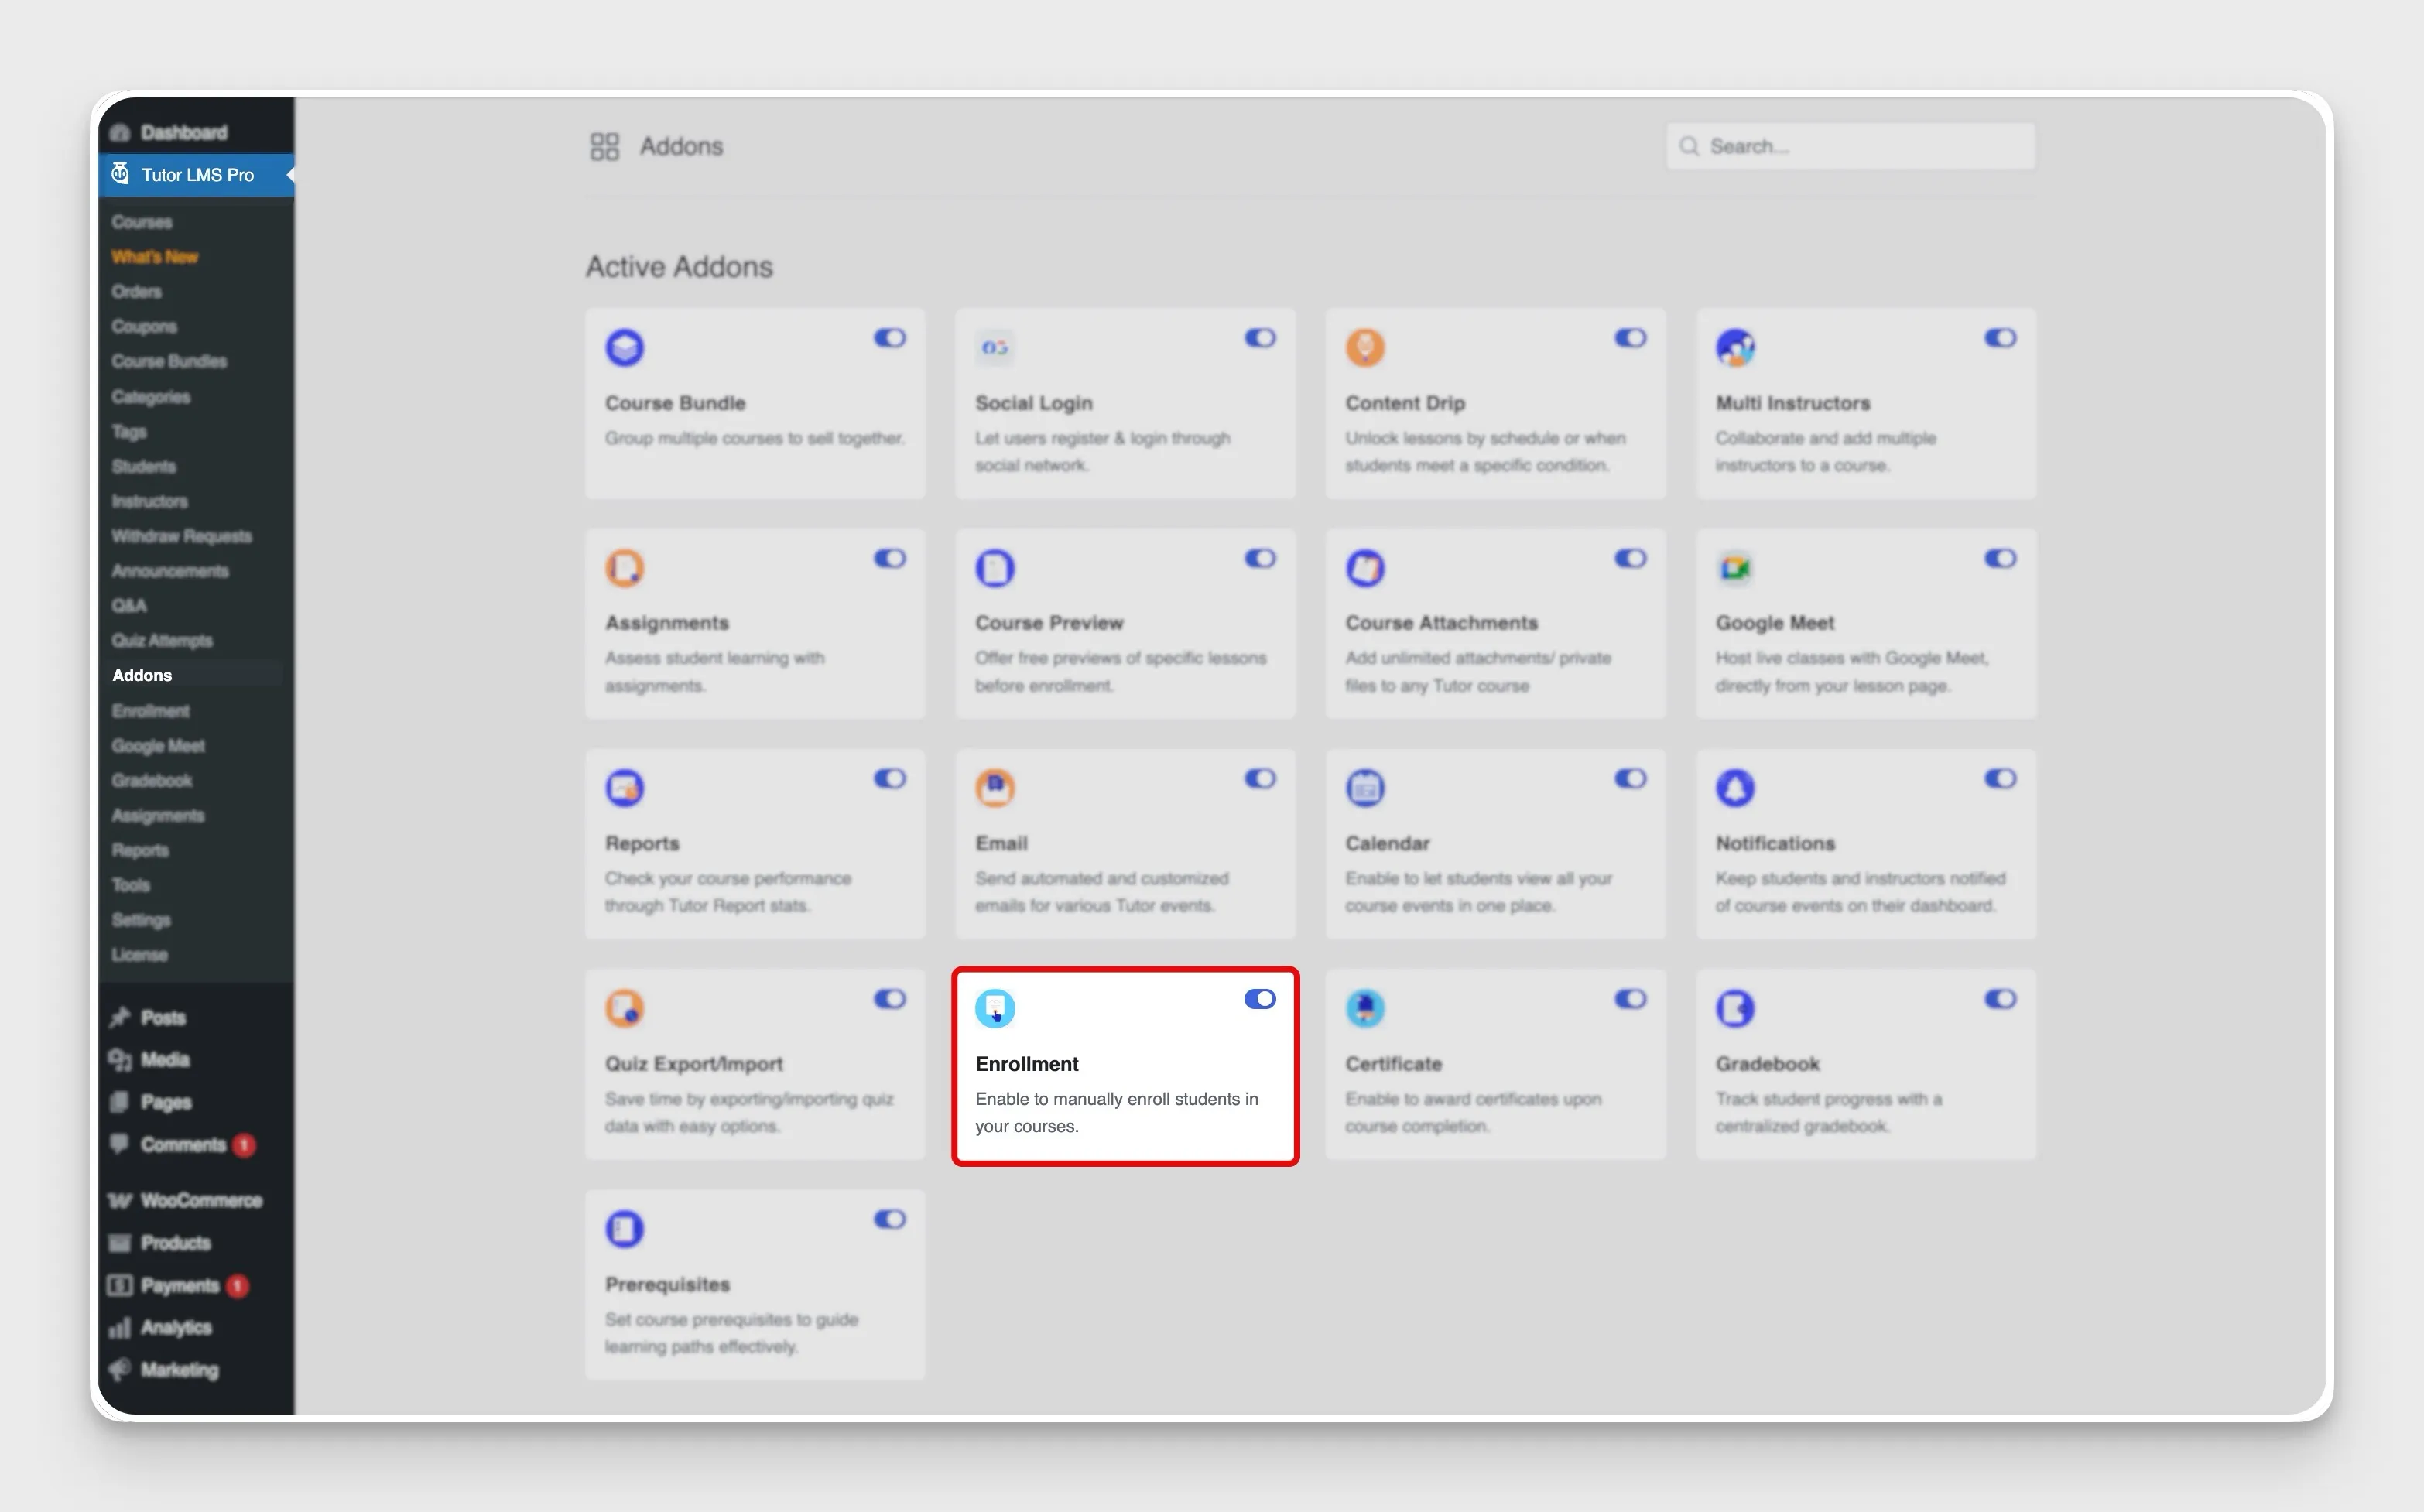
Step 1: Enable the Enrollment Addon
You have to enable the Enrollment addon first to set the enrollment expiration.
Step 2: Enable Enrollment Expiration From Settings
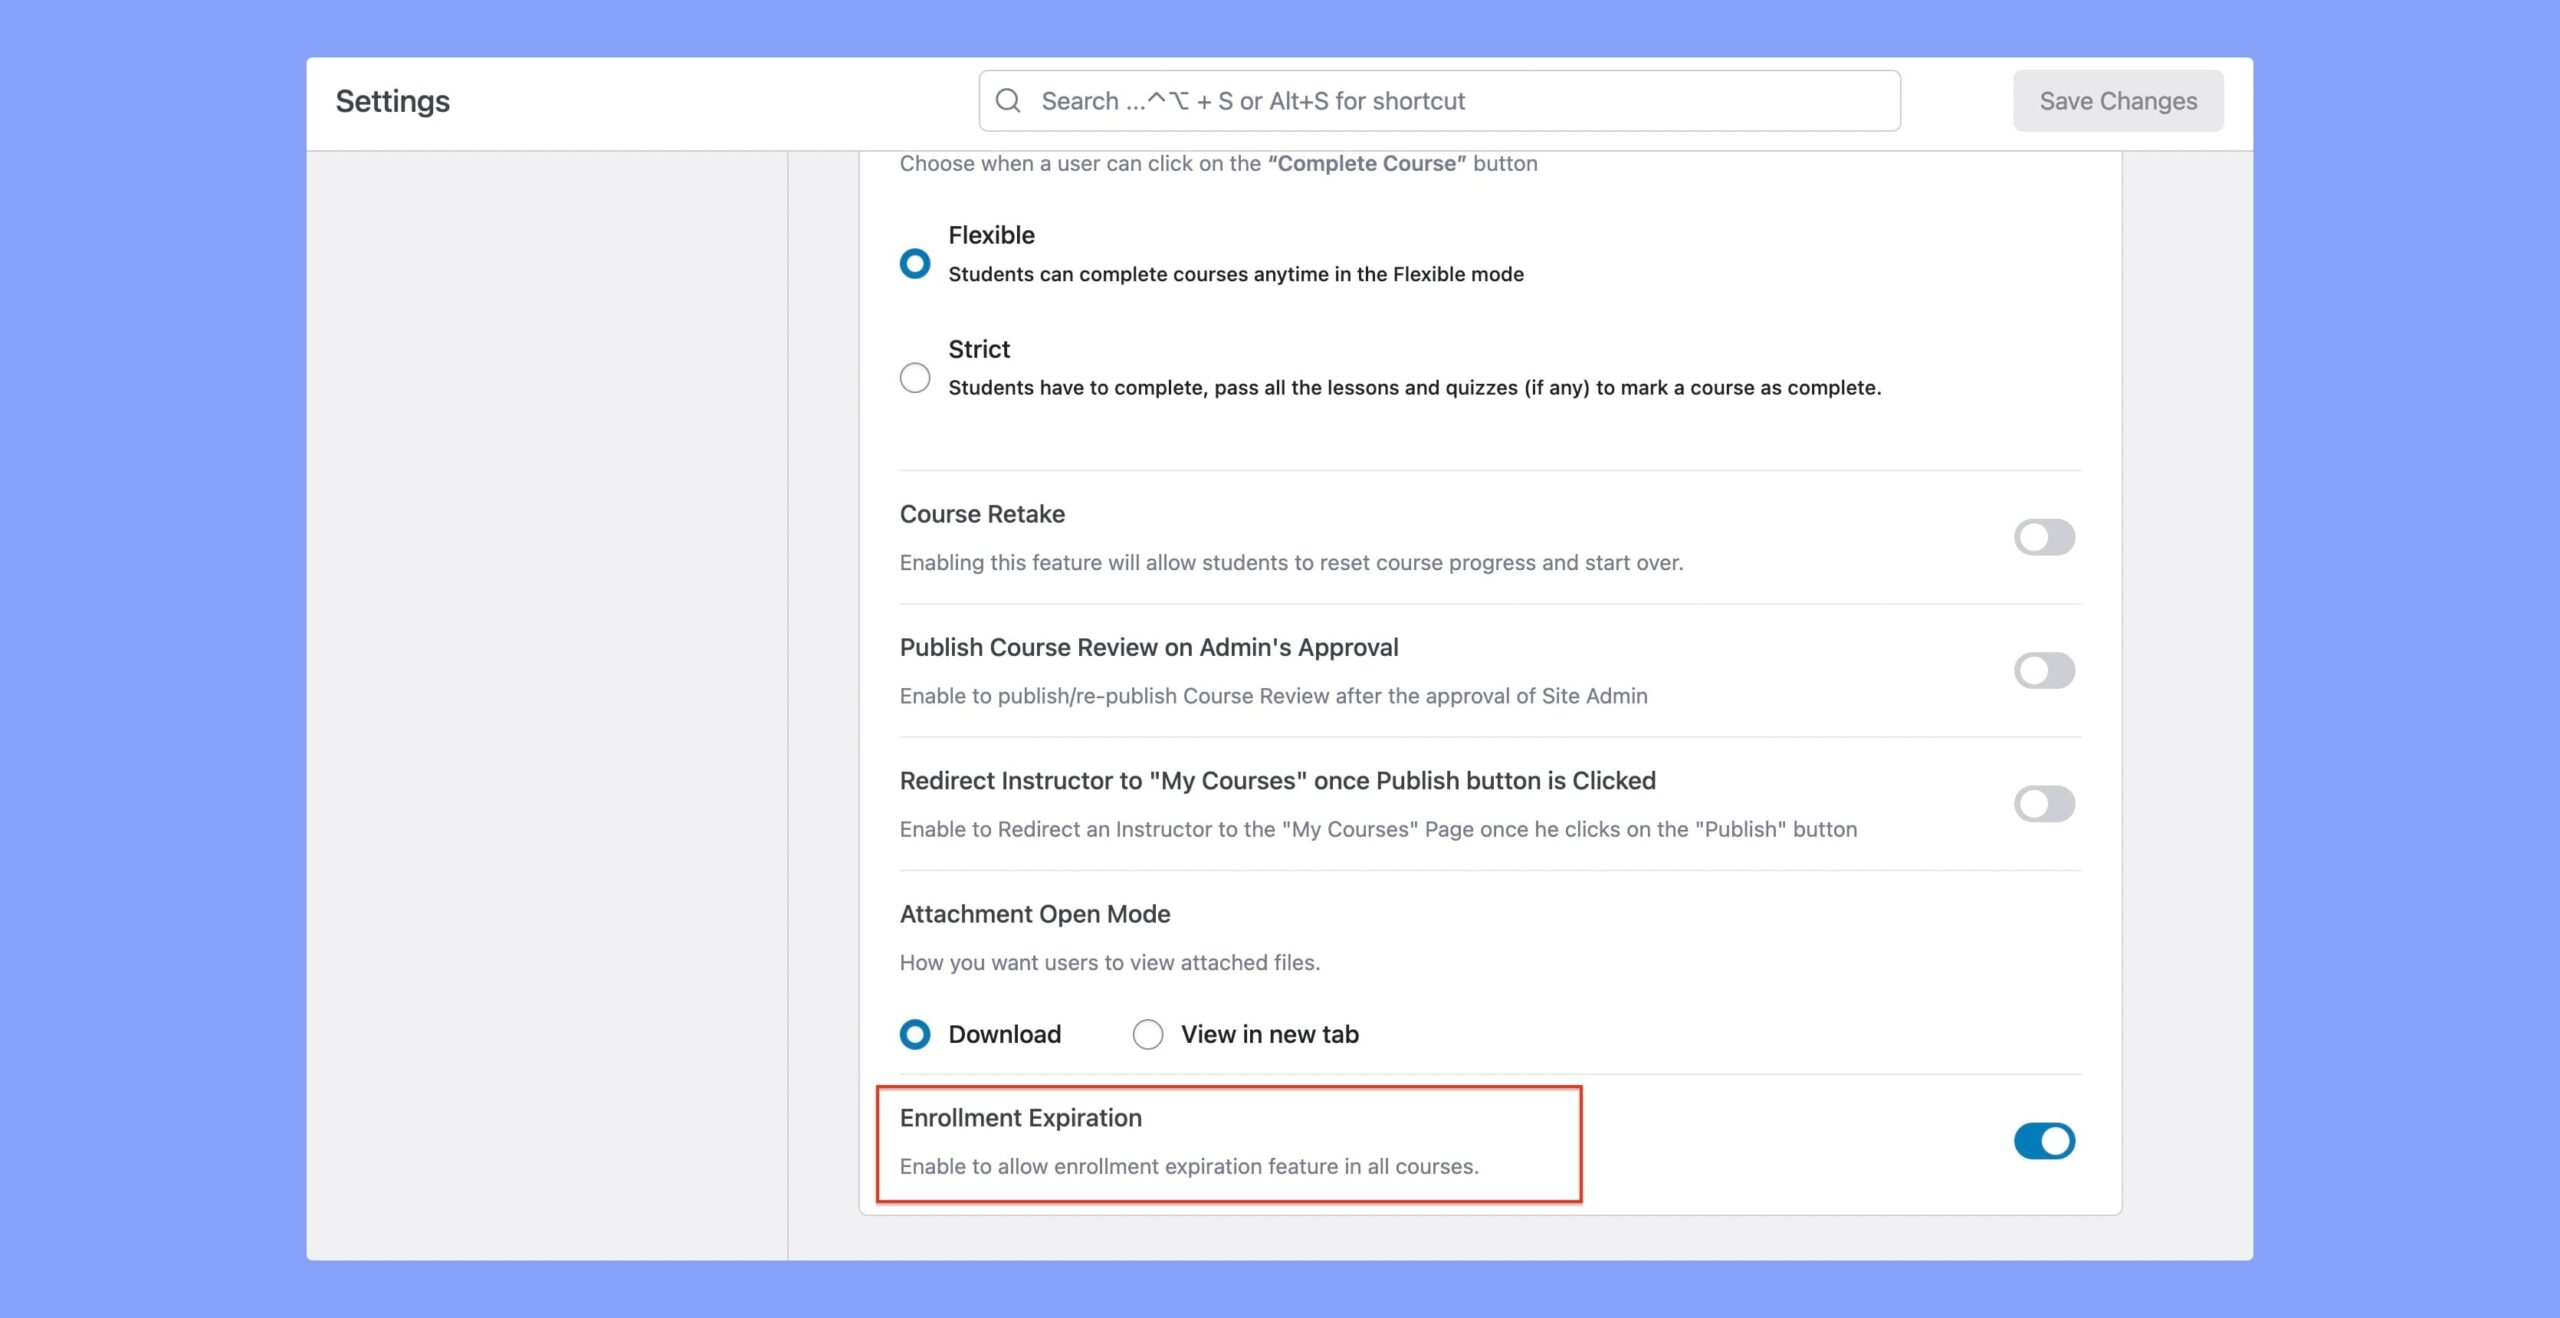
From the WordPress dashboard, navigate to Tutor LMS Pro > Settings > Course. Scroll down until you find the Enrollment Expiration option and enable it.
Step 3: Set Expiration Time For Each Course
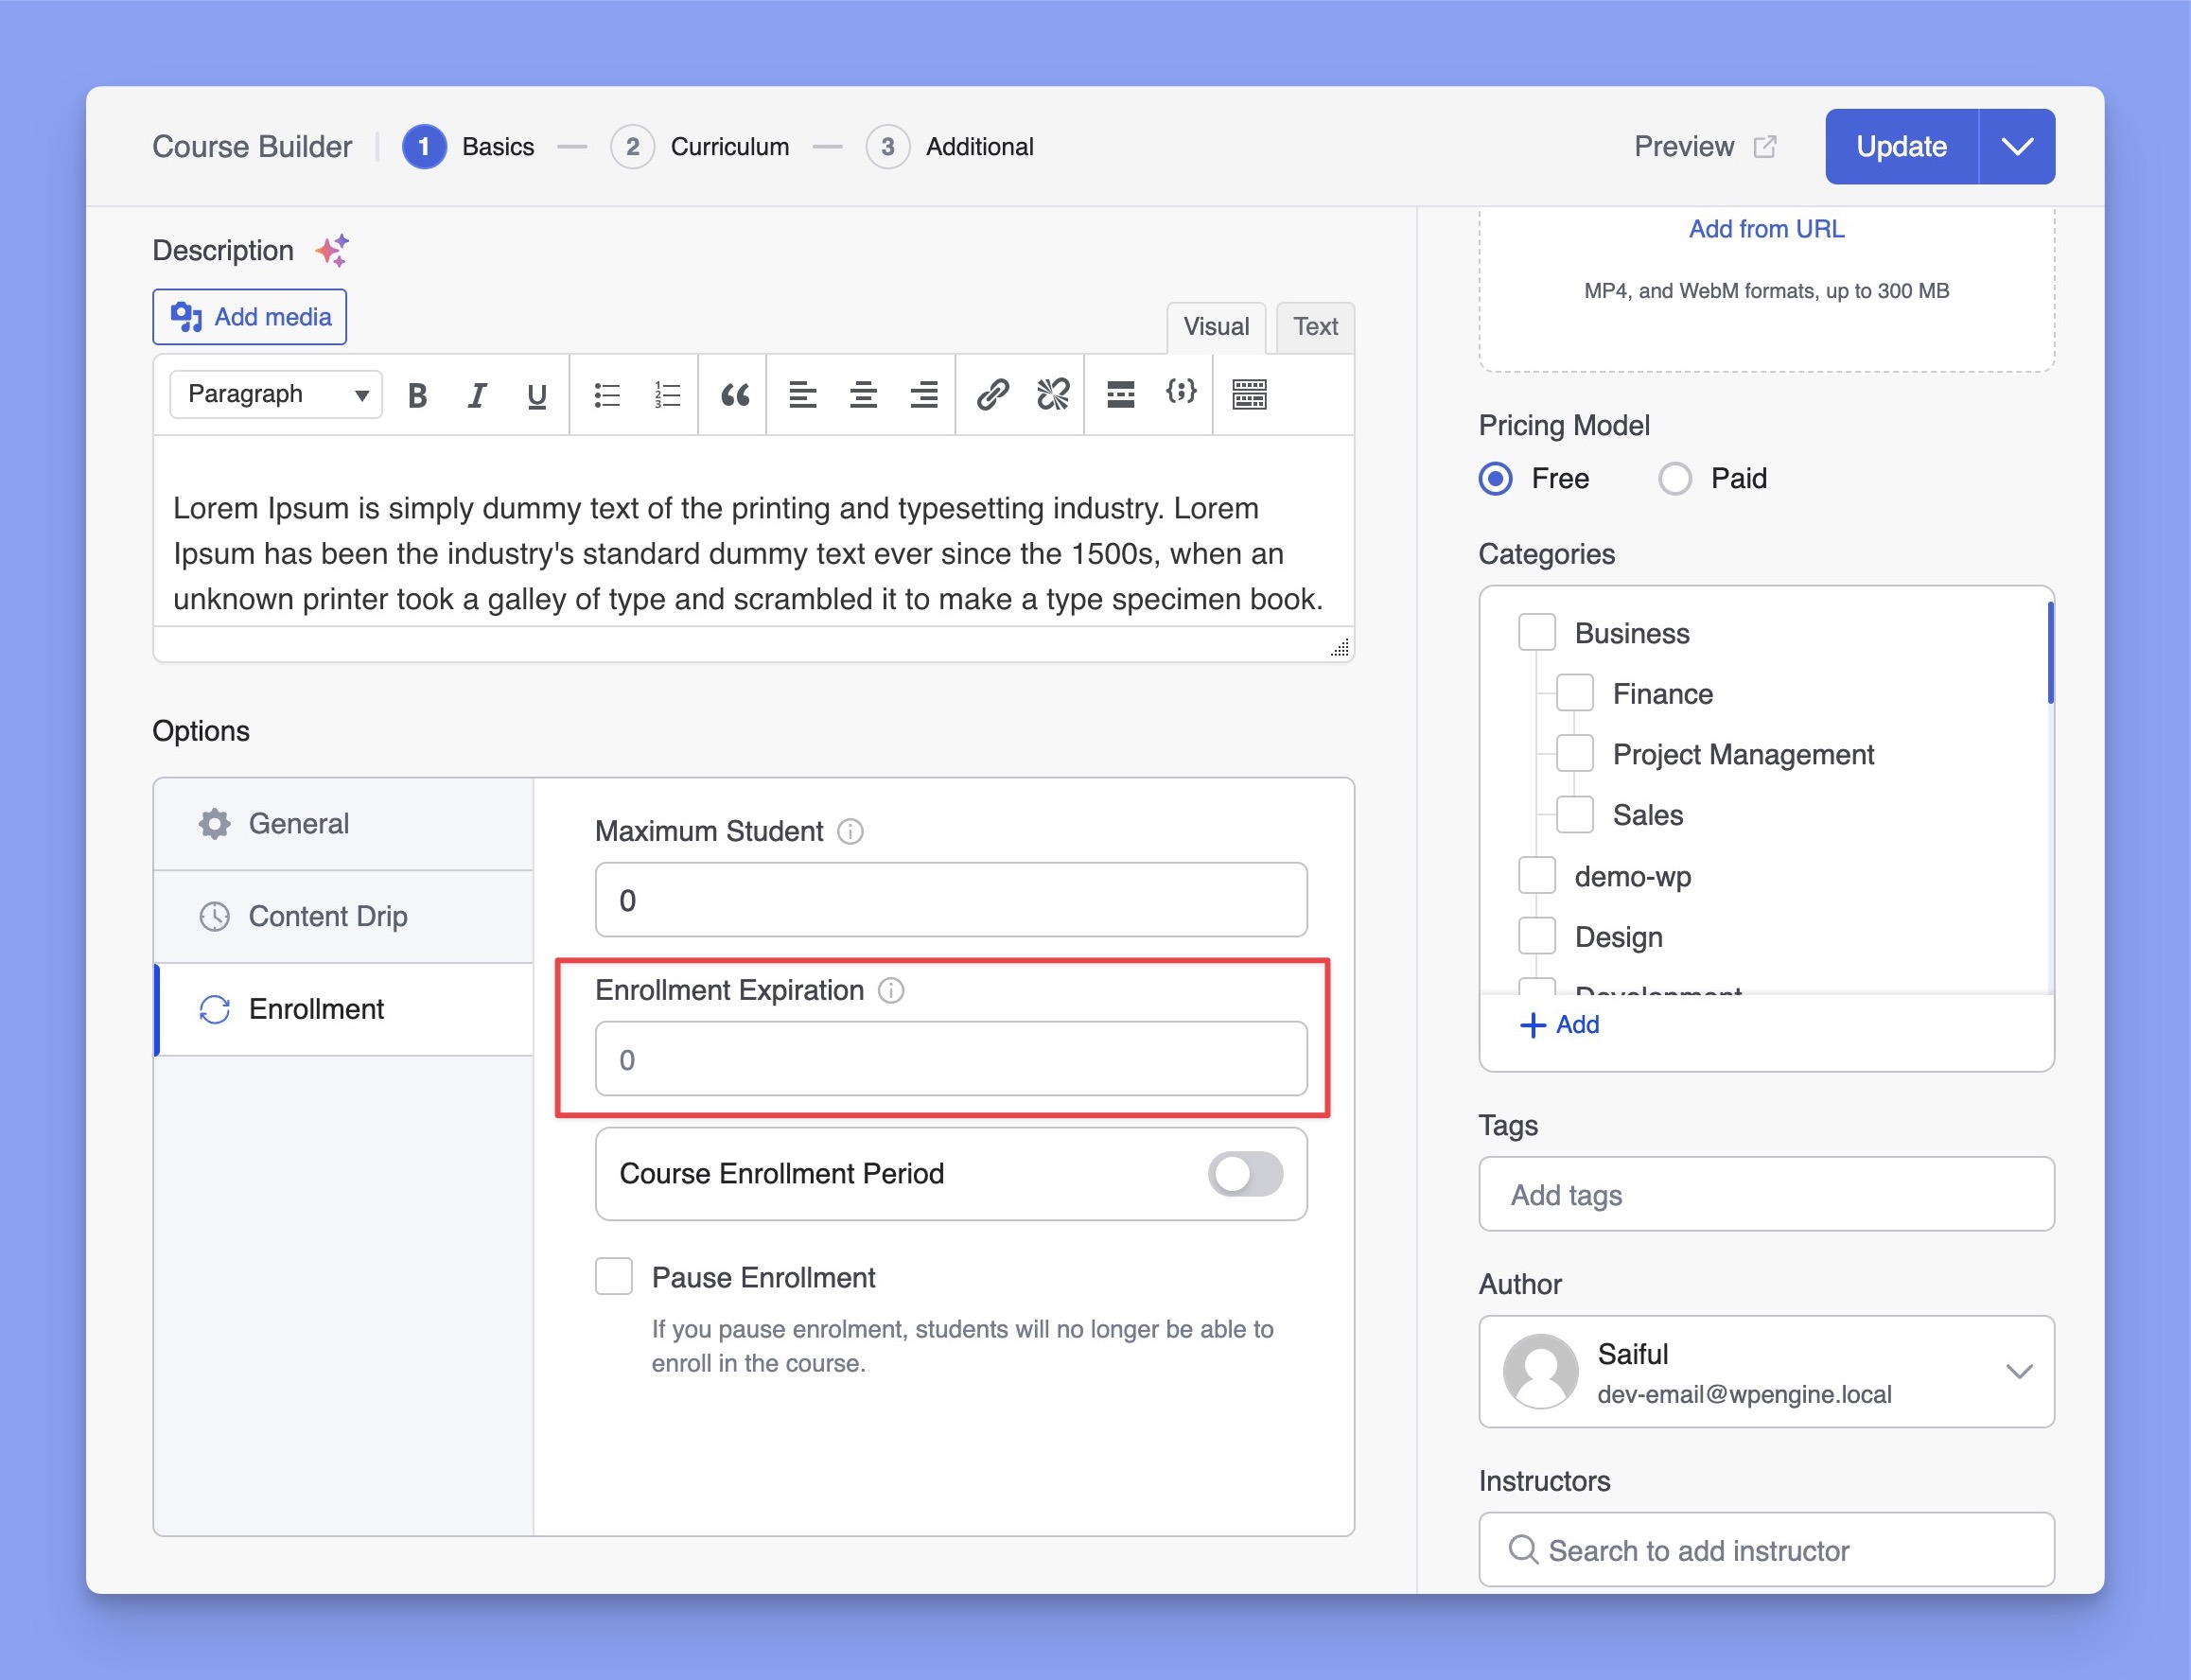
Now, navigate to Tutor LMS Pro > Courses and select the course you want to add enrollment expiration to. In the Course Settings, you will find the option to set the Enrollment Expiration field in the Enrollment tab.
For example, If an instructor sets the enrollment expiration to 50, the students will only be able to access the course for 50 days. After that, the students will have to re-enroll to get access to the course again.
Displaying the Enrollment Expiration
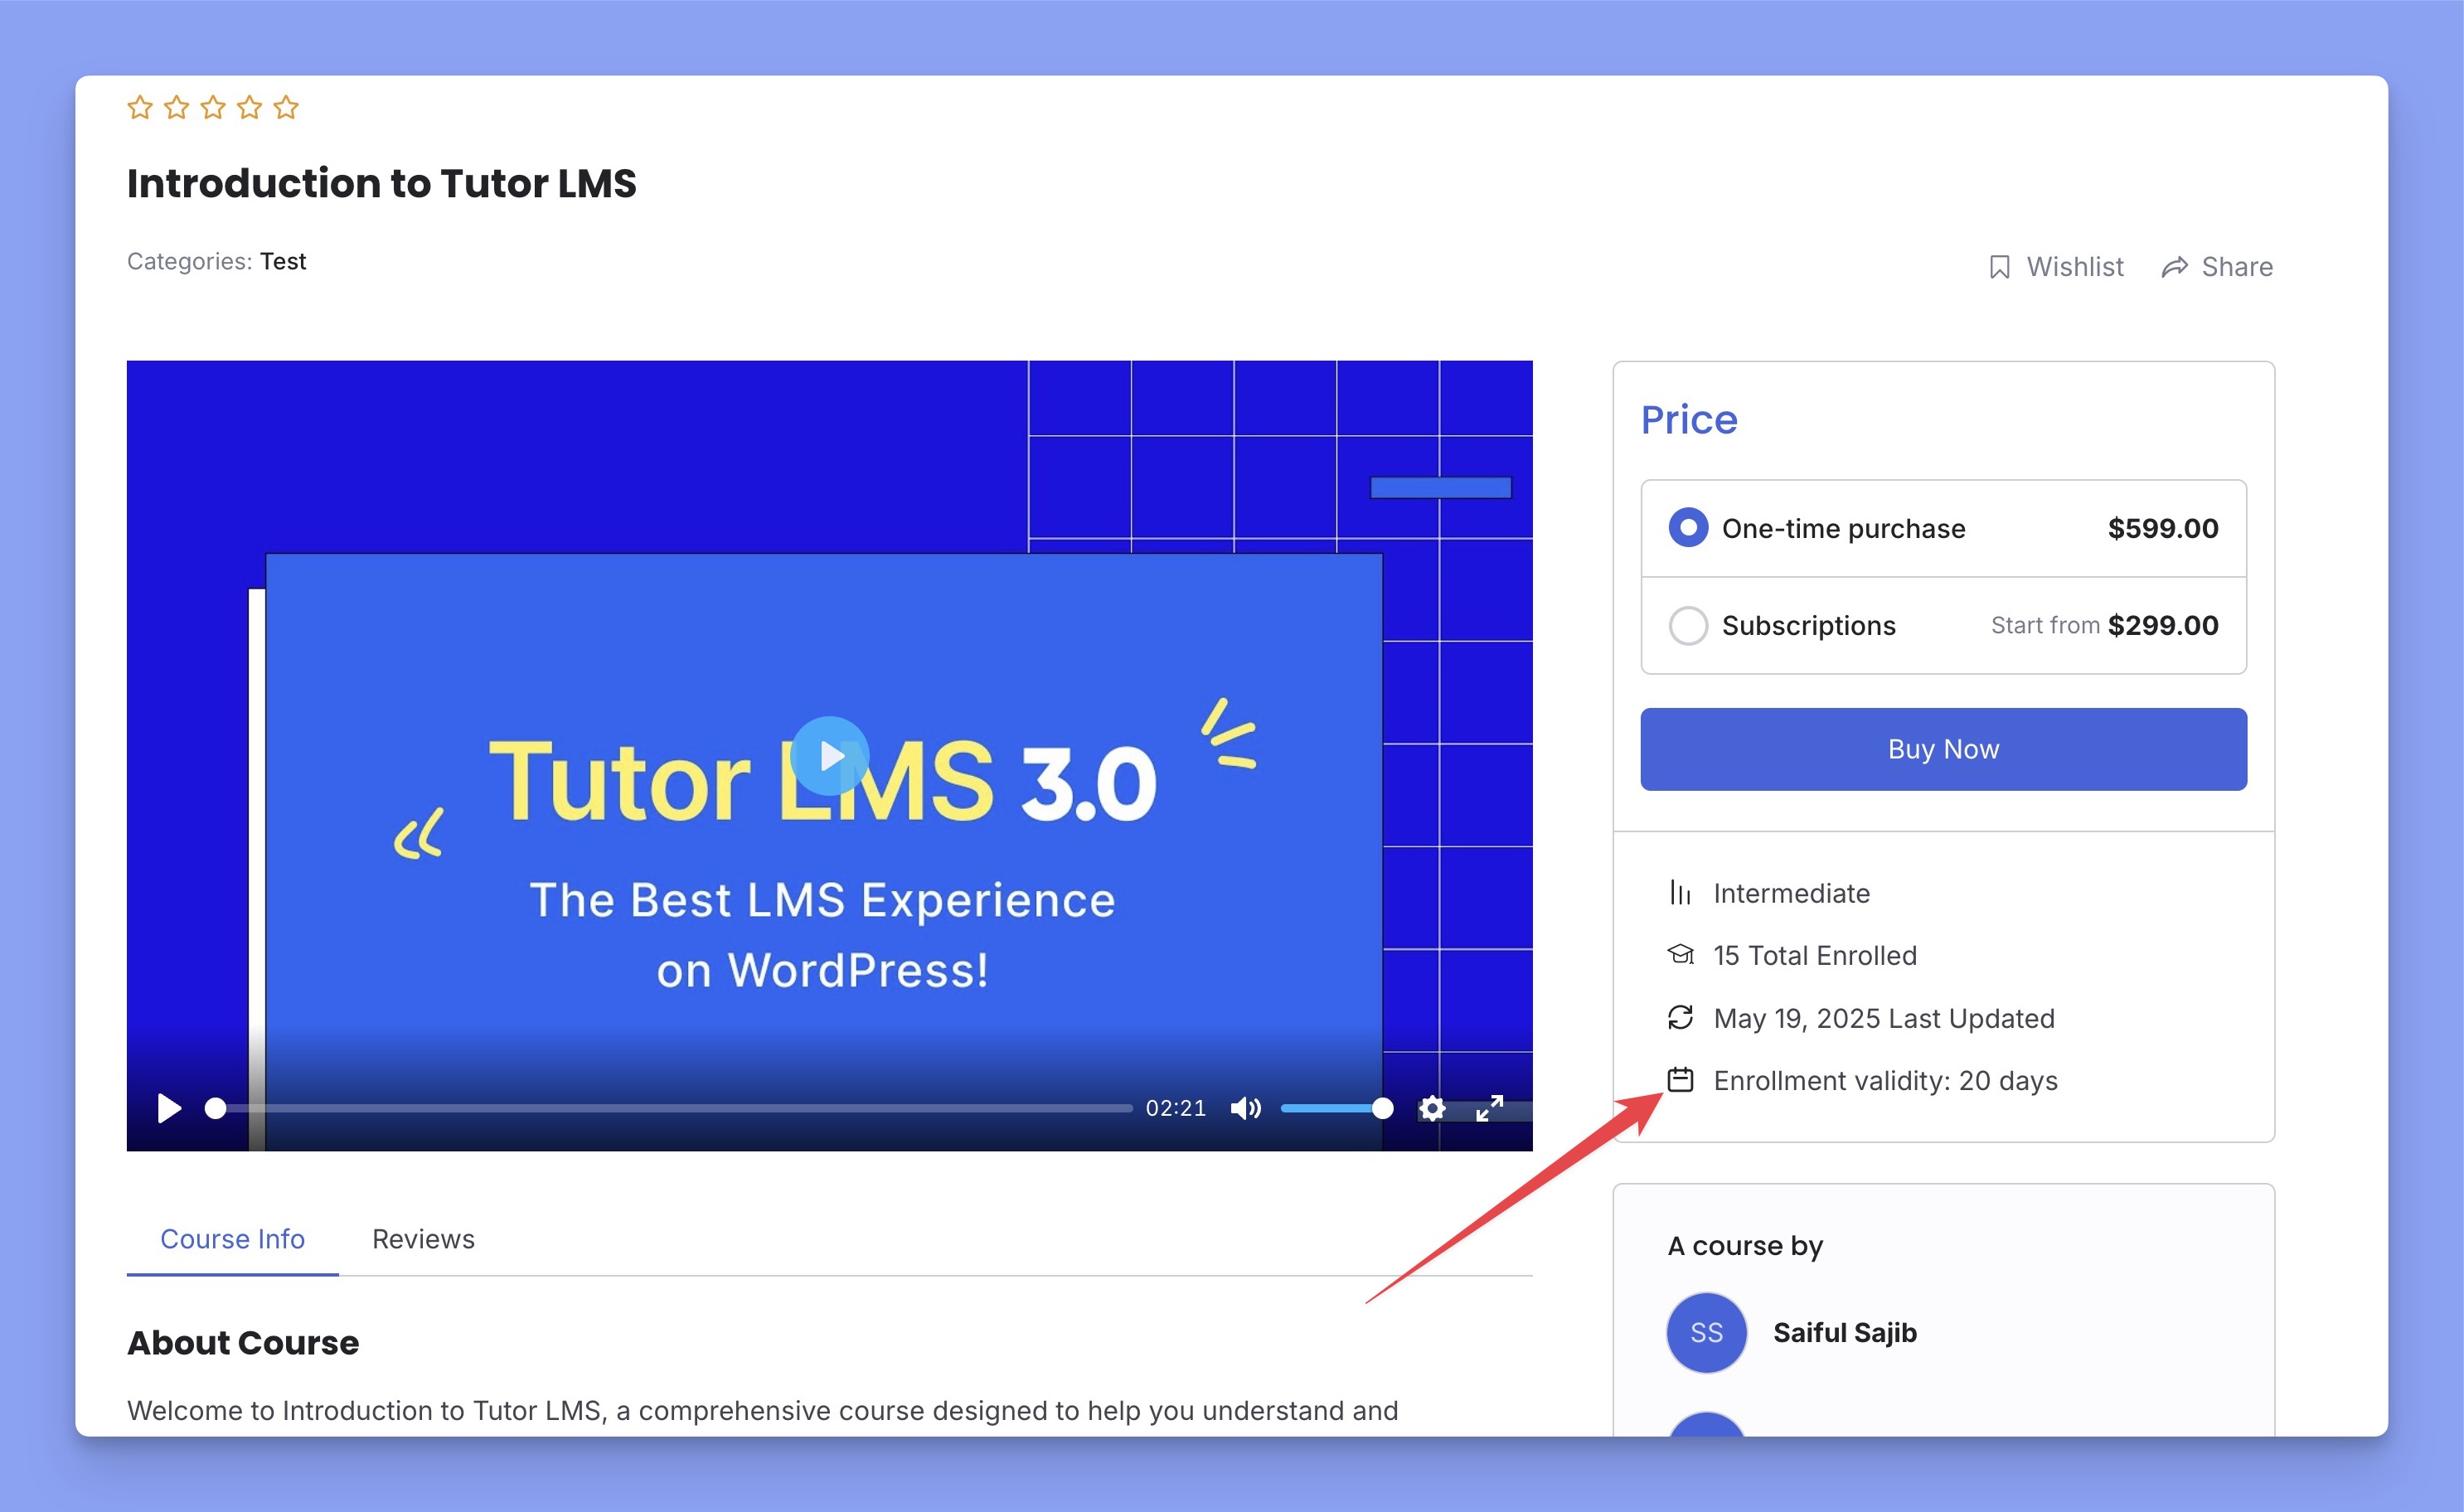
Prospective students can see this expiration period of your course on the front-end right below the “Add to Cart” button. Once a student enrolls, this value will count downward every day to show the correct enrollment validity for his or her course enrollment.