Google reCAPTCHA uses an advanced risk analysis engine to protect your website from potential fraud. To integrate Google reCAPTCHA with Tutor LMS, you will need only the reCAPTCHA site key and secret key.
Here are the steps to generate the Google reCAPTCHA site key and secret key:
Step 1: Navigate to the reCAPTCHA Admin Console
Visit the reCAPTCHA Admin Console. You will need to sign in with your Google account to proceed.
Step 2: Register a New Site
Click on the “+” button or visit this link to register a new site directly. There you have to enter a label for this new site. This label will help you to identify the site in the future.
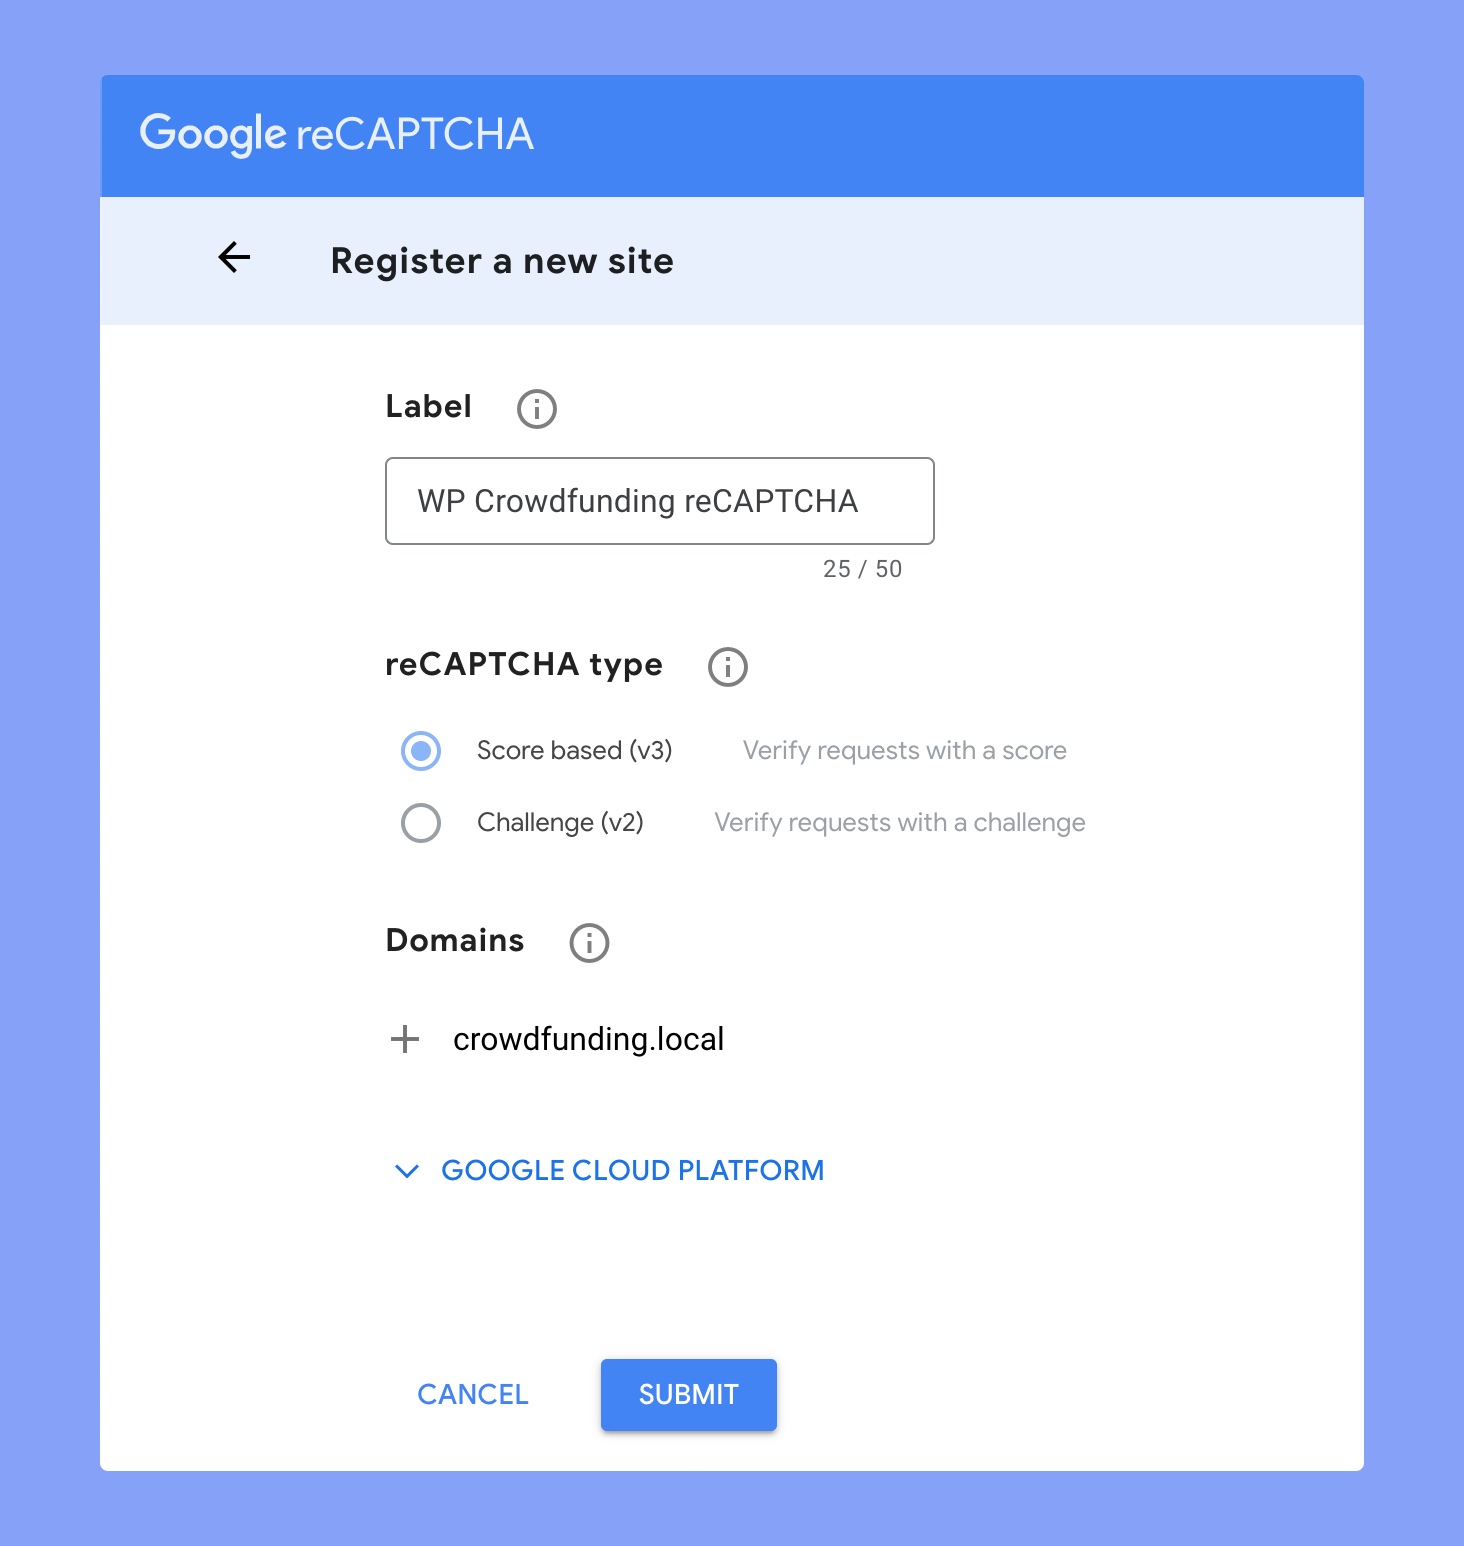
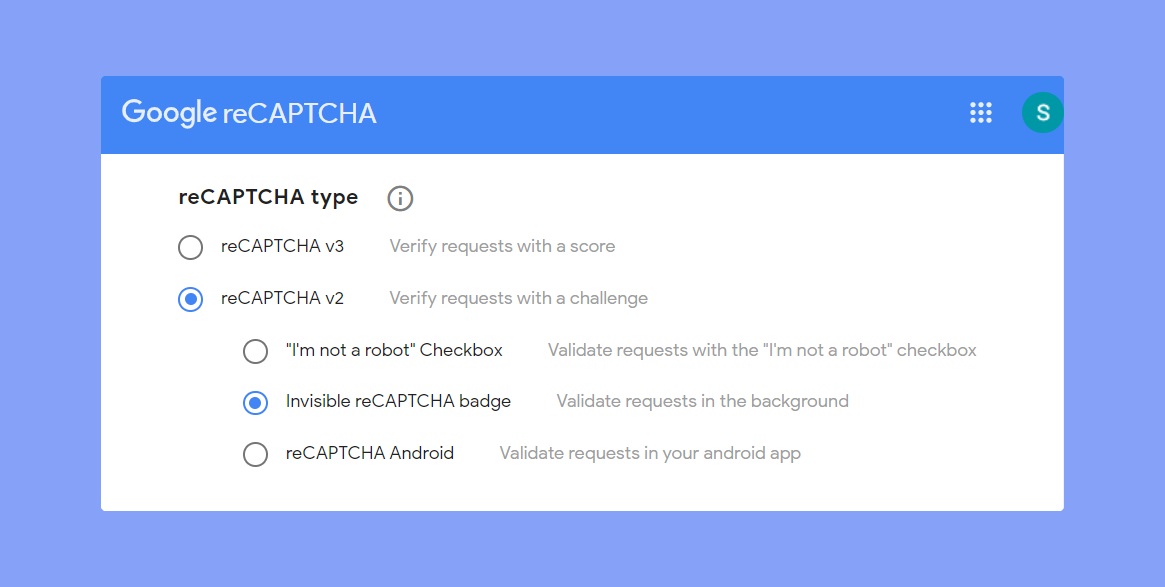
Step 3: Choose the Type of reCAPTCHA
Select the type of reCAPTCHA you want to use. The available options are:
- reCAPTCHA v2: The reCAPTCHA v2 requires clicking the “I’m not a robot” checkbox and submitting an image recognition challenge. But, if you choose the “Invisible reCAPTCHA badge” option, Google will validate the request in the background.
- reCAPTCHA v3: The reCAPTCHA v3 runs in the background and generates a score based on a user’s behavior on your site. If the score is satisfactory, Google won’t bother the user with any verification challenge.
Choose the reCAPTCHA type properly. Because, the keys generated for a specific reCAPTCHA version will work only with that reCAPTCHA version.
Step 4: Enter the Domains
Add the domain names for your website where you want to use reCAPTCHA. You can enter multiple valid domains here. Remember, you don’t need to include the subdomains here separately. Google will automatically fetch the subdomains using the root domain.
Step 5: Set the Owners
Enter the email address to who you want to provide the ownership rights over the site key. The email addresses listed in this section can access the reCAPTCHA report of your websites.
Step 6: Send Alerts to Owners
Don’t forget to click on the ‘Send alerts to owners’ checkbox. By doing so, Google will send an email alert whenever it detects any misconfigurations or an increase in spam or suspicious traffic. Thus you can take action immediately to solve the problem.
Then accept the reCAPTCHA terms and click on the SUBMIT button.
Step 7: Get the Site Key and Secret Key
You’ll get your Site Key and Secret Key right after clicking on the ‘Submit’ button. Make sure to copy these keys and store them securely.
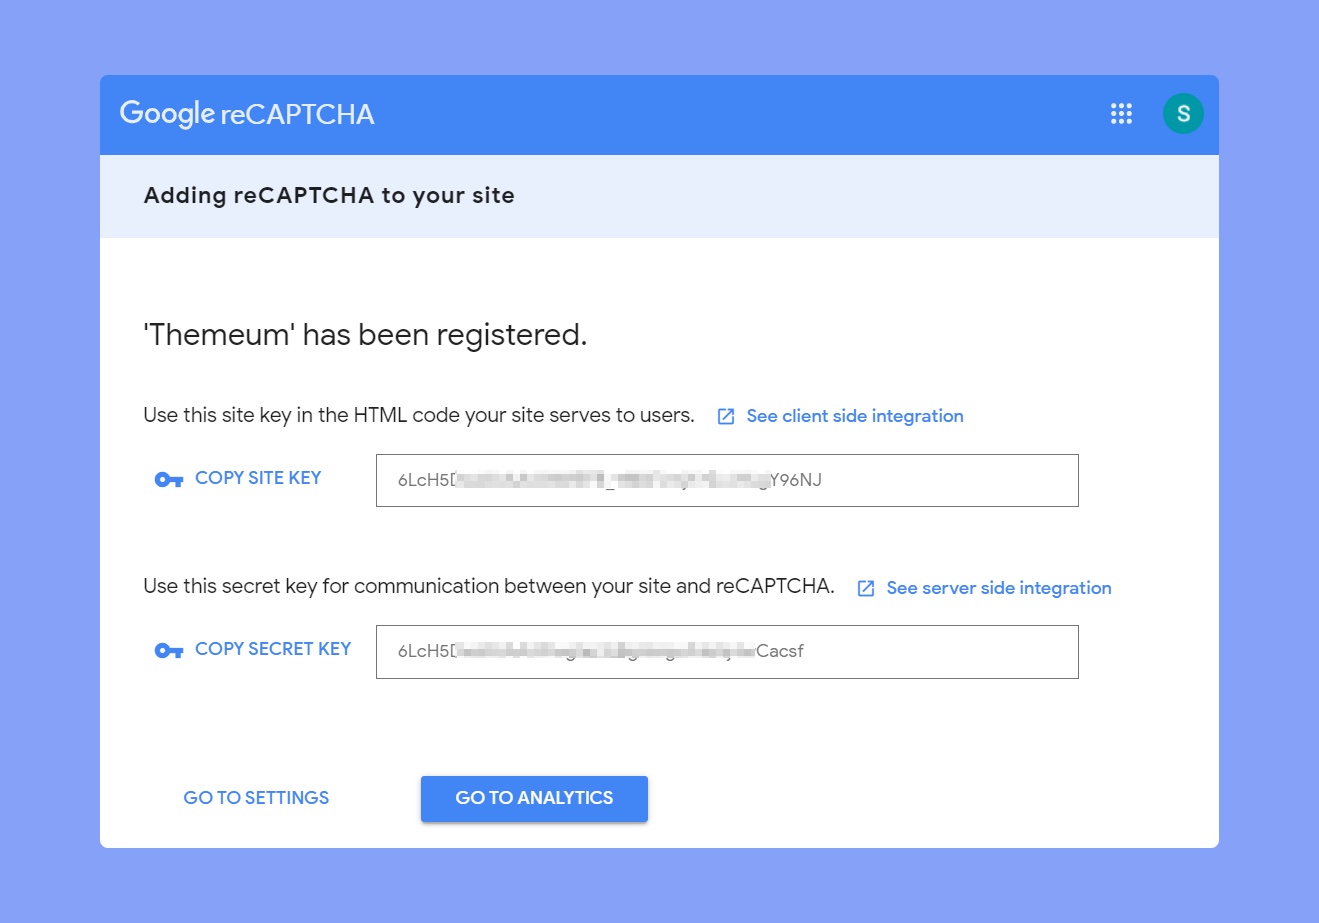
That’s it! You have successfully generated your Google reCAPTCHA Site Key and Secret Key. You can now paste these keys on the Tutor LMS settings page.
Step 8: Use the Google reCAPTCHA Keys on Tutor LMS
Go to Tutor LMS Pro > Settings > Authentication and click on the toggle button beside the Enable Fraud Protection option. Select Google reCAPTCHA v2 or v3 as your fraud protection method. It will display two extra text fields where you have to input the site key and secret key. Lastly, choose the location where you want to display the Google reCAPTCHA and click on the Save Changes button.
