Similar to Students, Instructors are another crucial aspect of an LMS site. You can access the Instructors list from the Tutor LMS menu.
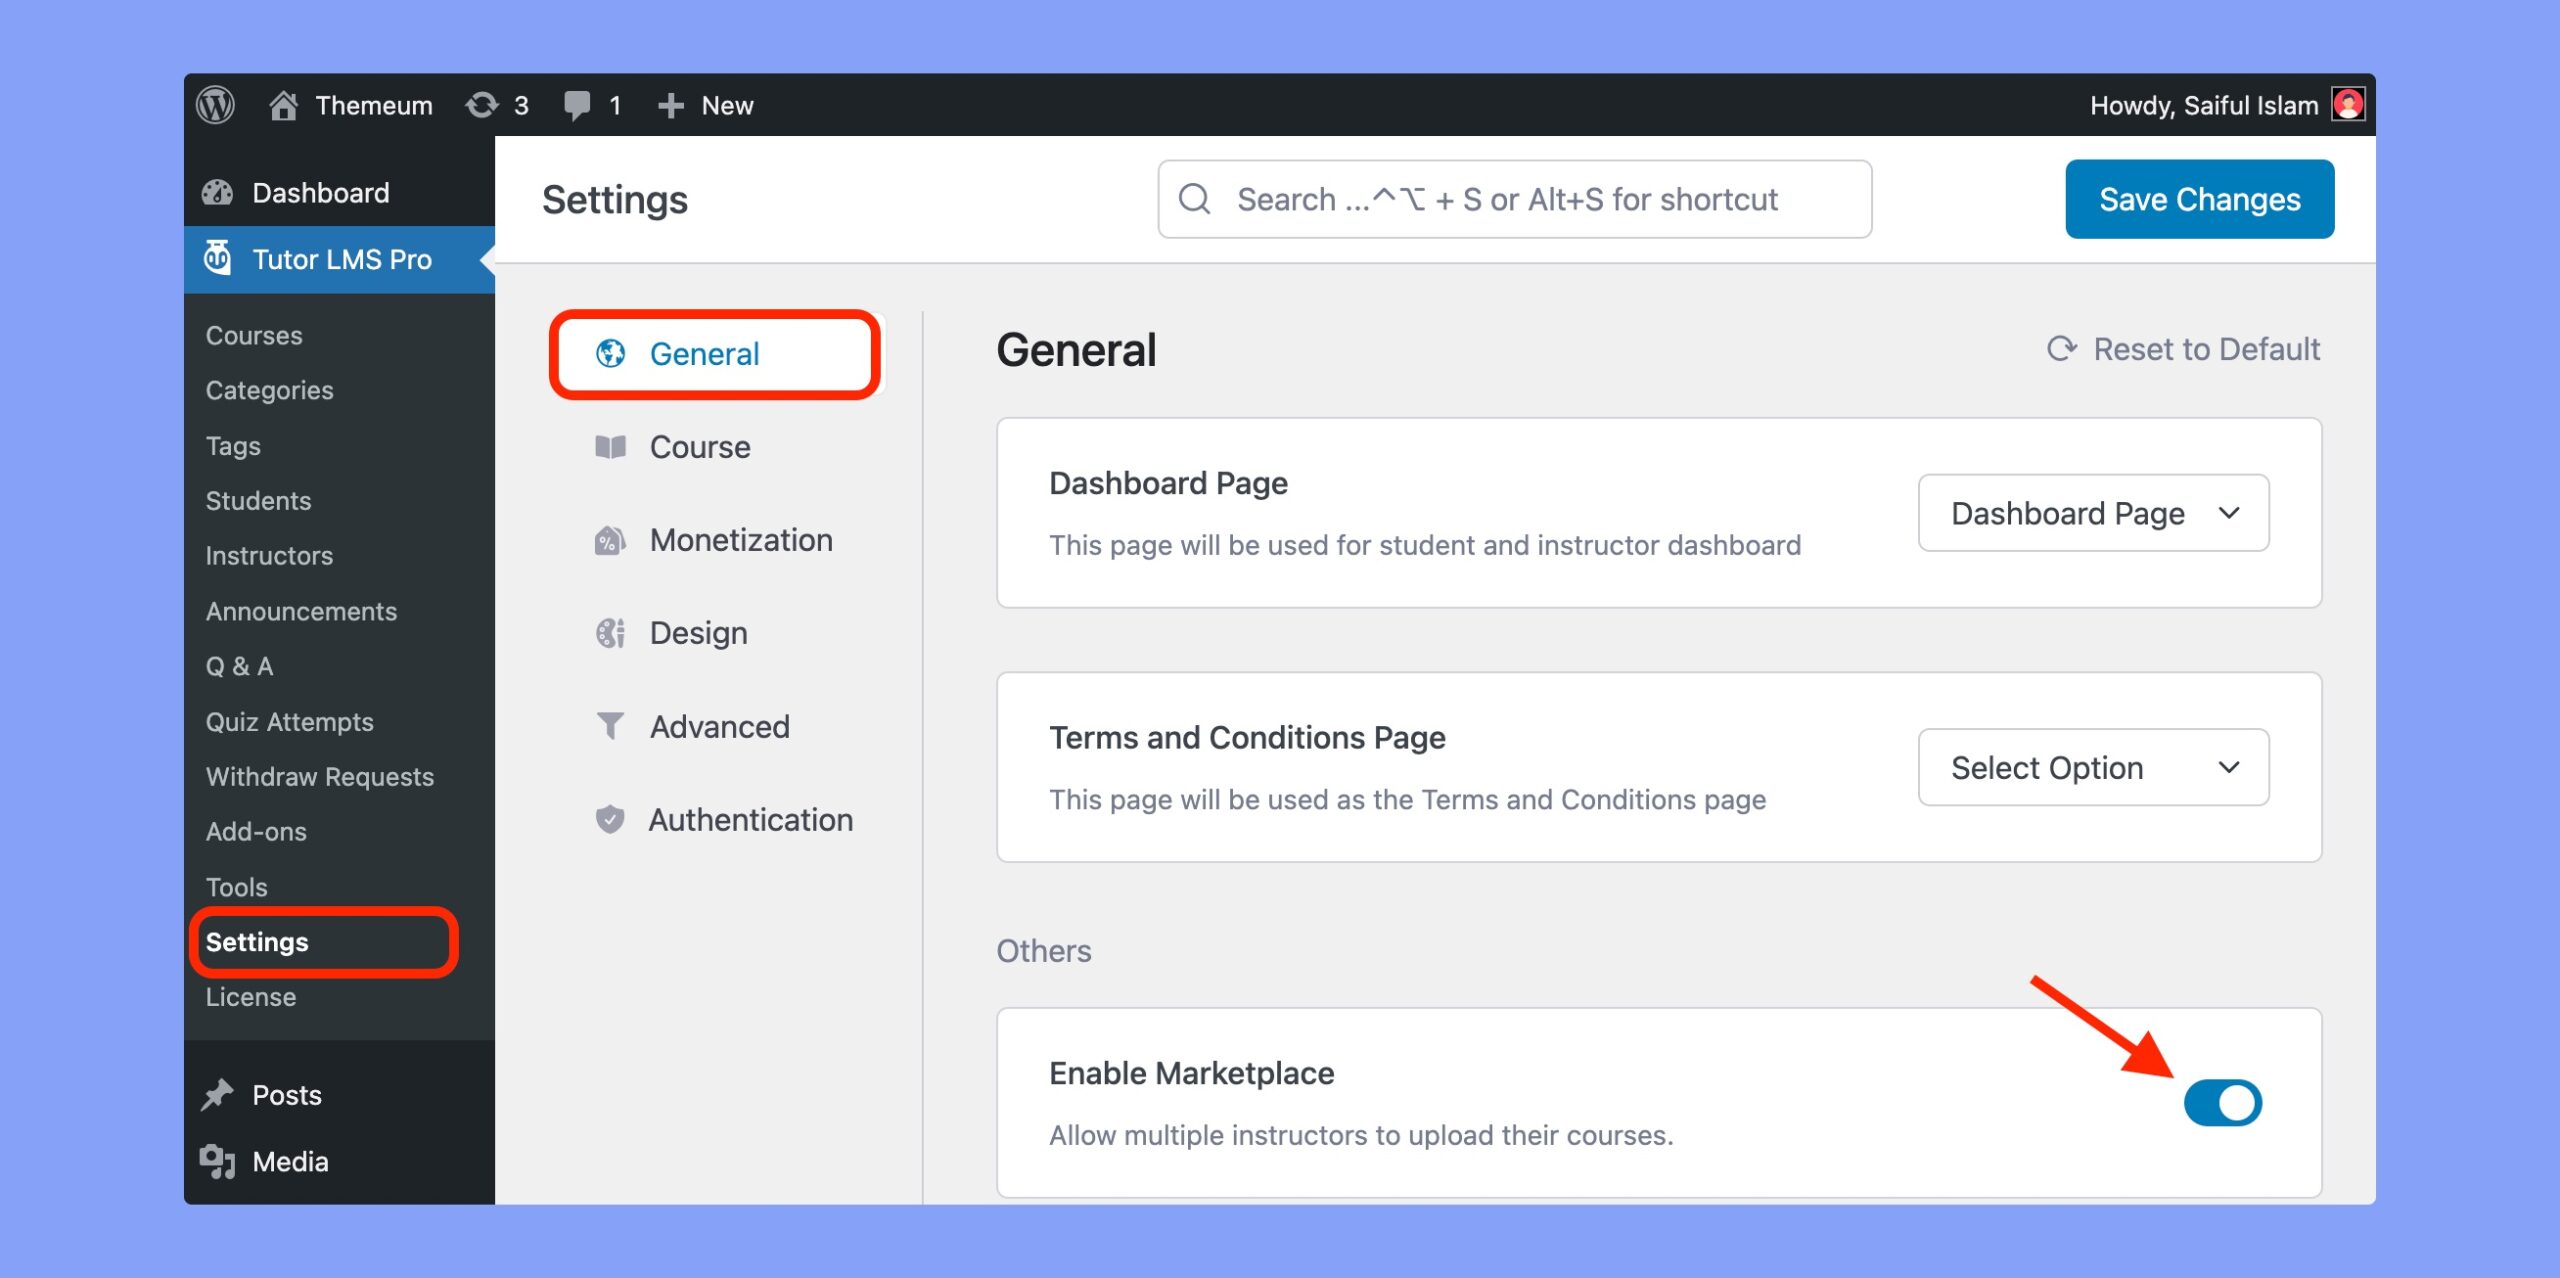
But, if you can’t find the “Instructors” menu, it is likely because you have not enabled the Marketplace option. Go to Tutor LMS > Settings > General and enable the Marketplace option using that toggle button and click on the “Save Changes” button to apply the modifications.
Now, you can access the Instructors list by navigating to WP Admin > Tutor LMS > Instructors. Here, you’ll be able to view all of the instructors registered on your site along with their basic info, manage them, and even add new instructors.
Instructors List
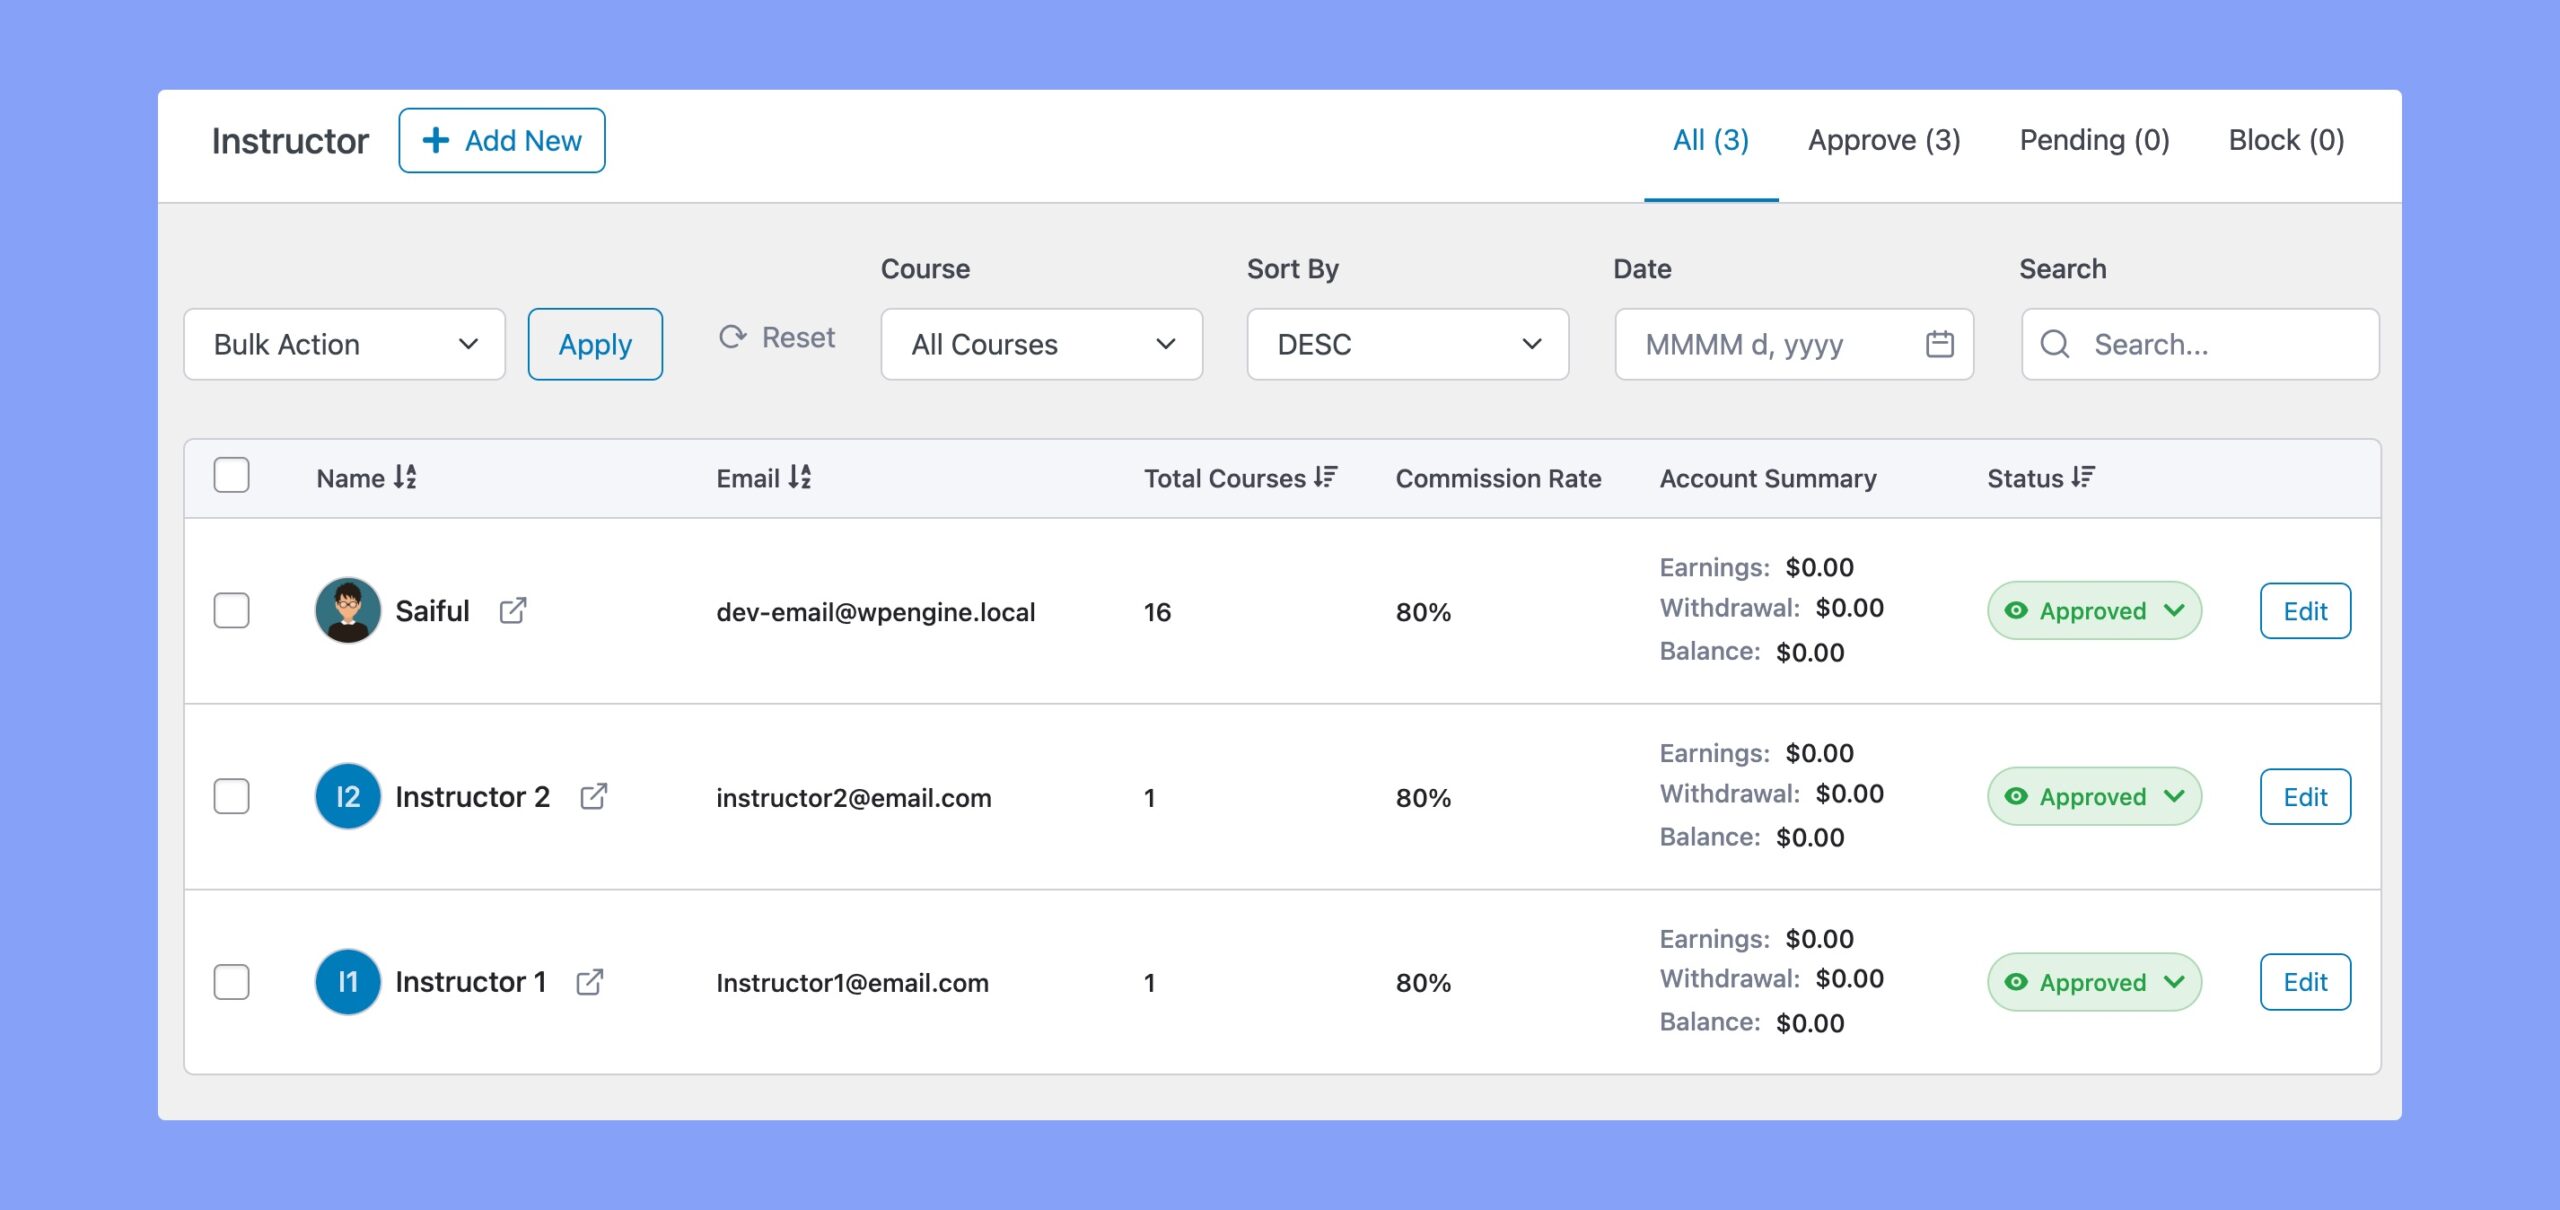
Here, you’ll be able to see a comprehensive list of all the instructors registered on your site. On the top left, you’ll find the tabs for All, Approved, Pending, and Blocked allowing you to see the instructors according to their status.
The list provides essential information about each instructor, including:
- Email: The email address associated with the instructor’s account.
- Total Courses: The number of courses by the instructor.
- Commission Rate: The rate at which the instructor earns commissions from course sales.
- Account Summary: A summary of the instructor’s earnings, withdrawals, and balance (available for the Tutor LMS Pro users).
- Status: The current status of the instructor’s account (pending, approved, or blocked.)
Add New Instructor
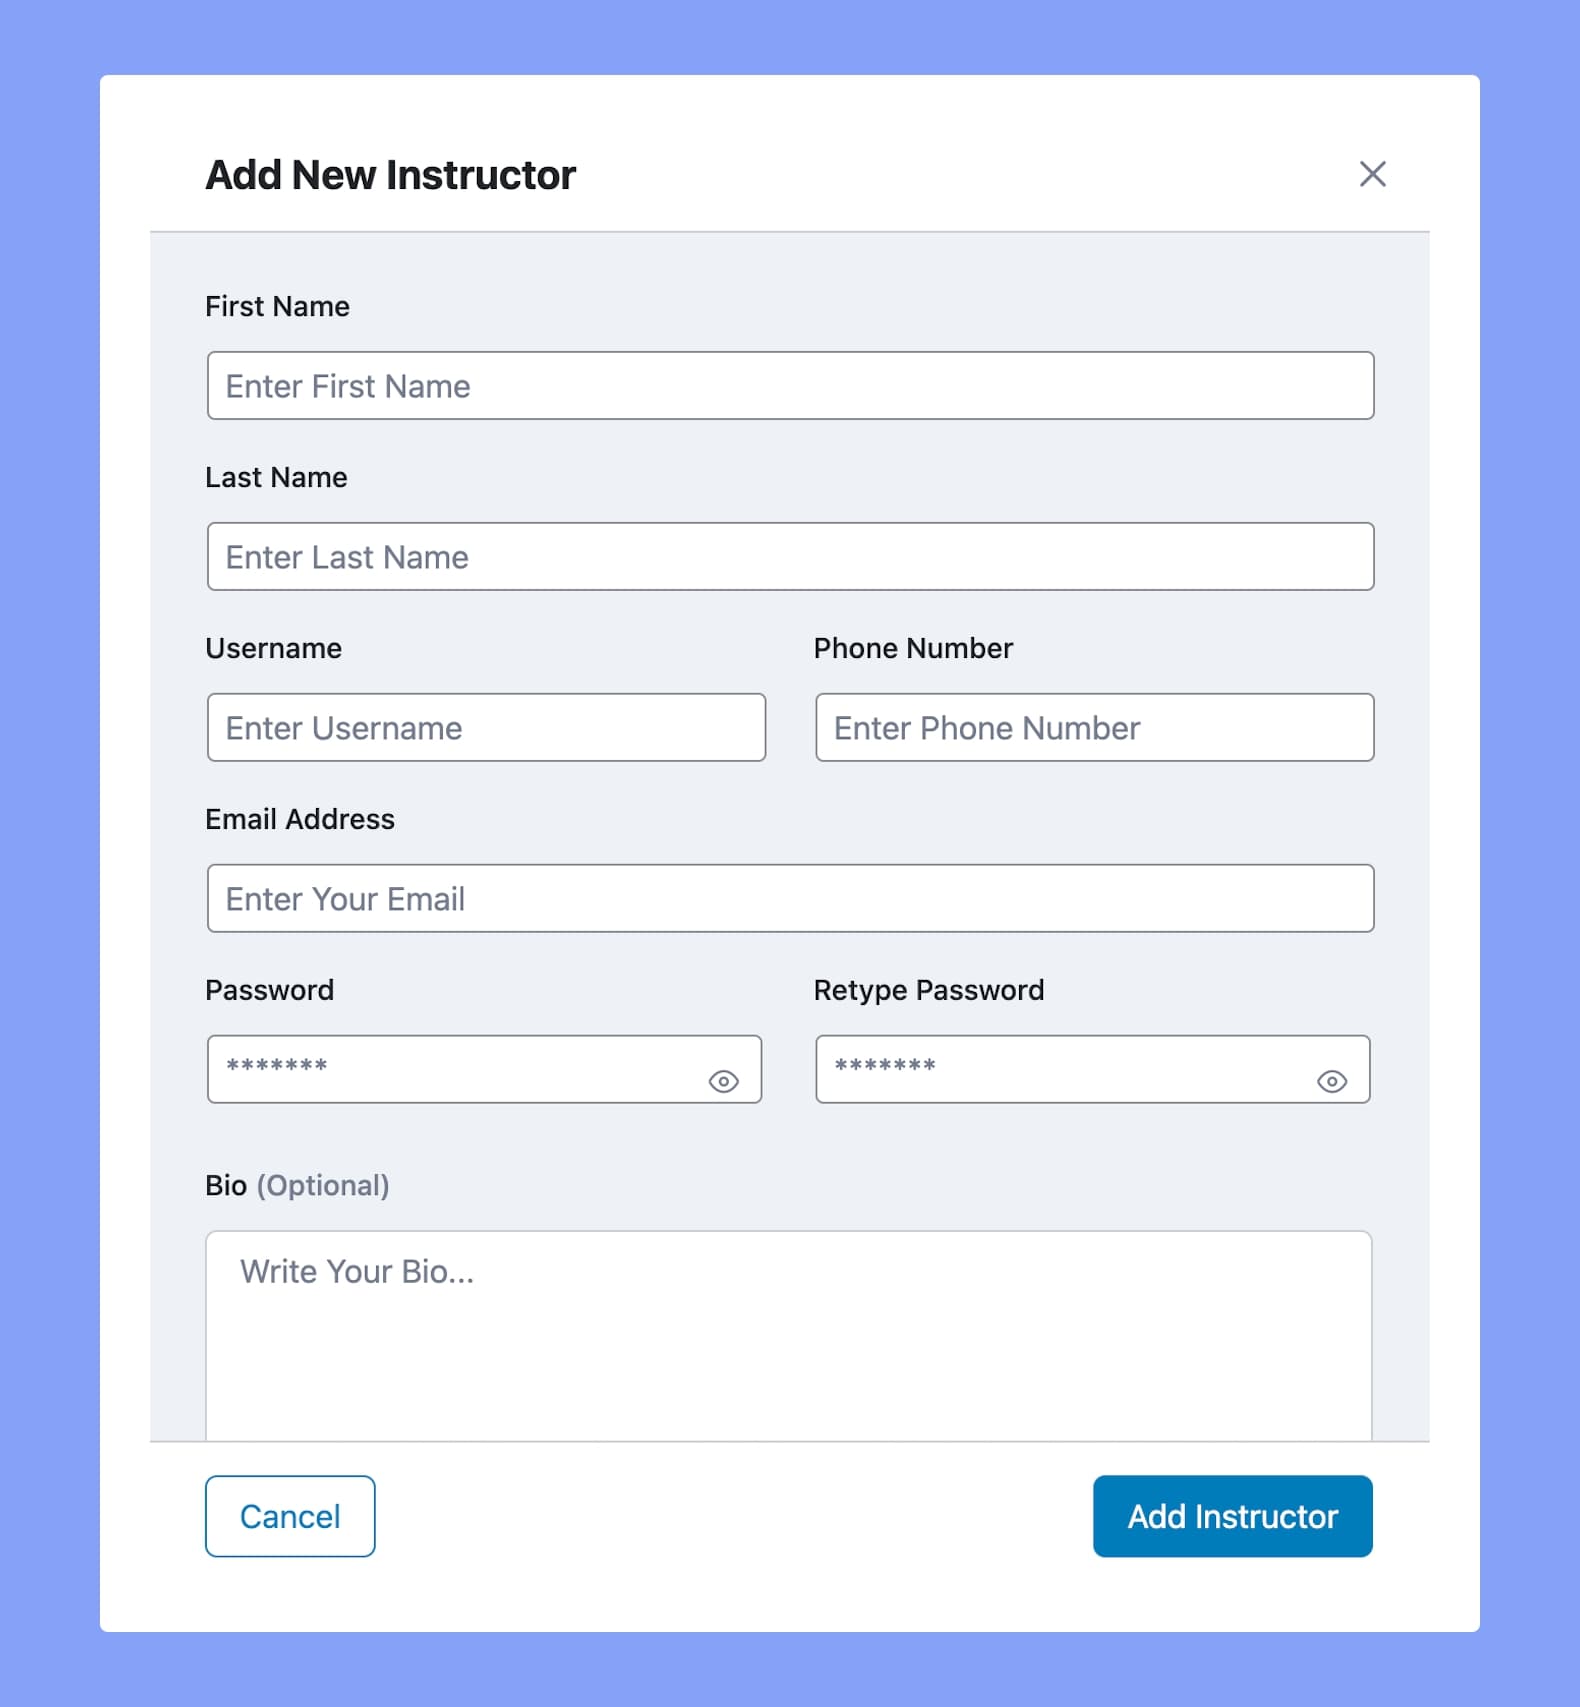
While Tutor LMS gives you the option to allow Instructors to register, you can also manually add them yourself from this page by clicking on the Add New button.
Upon clicking, a pop-up window should appear with the following fields:
- First Name: Enter the Instructor’s First Name.
- Last Name: Enter the Instructor’s Last Name.
- Username: Define a Username for the Instructor.
- Phone Number: Enter the Instructor’s Phone Number.
- Email Address: Enter the Instructor’s Email Address.
- Password: Set a Password for the Instructor.
- Retype Password: Retype the password you just set.
- Bio (Optional): Write a short description of the instructor.
After filling in all the relevant information, click on the Add Instructor button to finally submit this data.
Status
To change the status, you can simply click on the label and a drop-down list with other status options should appear.
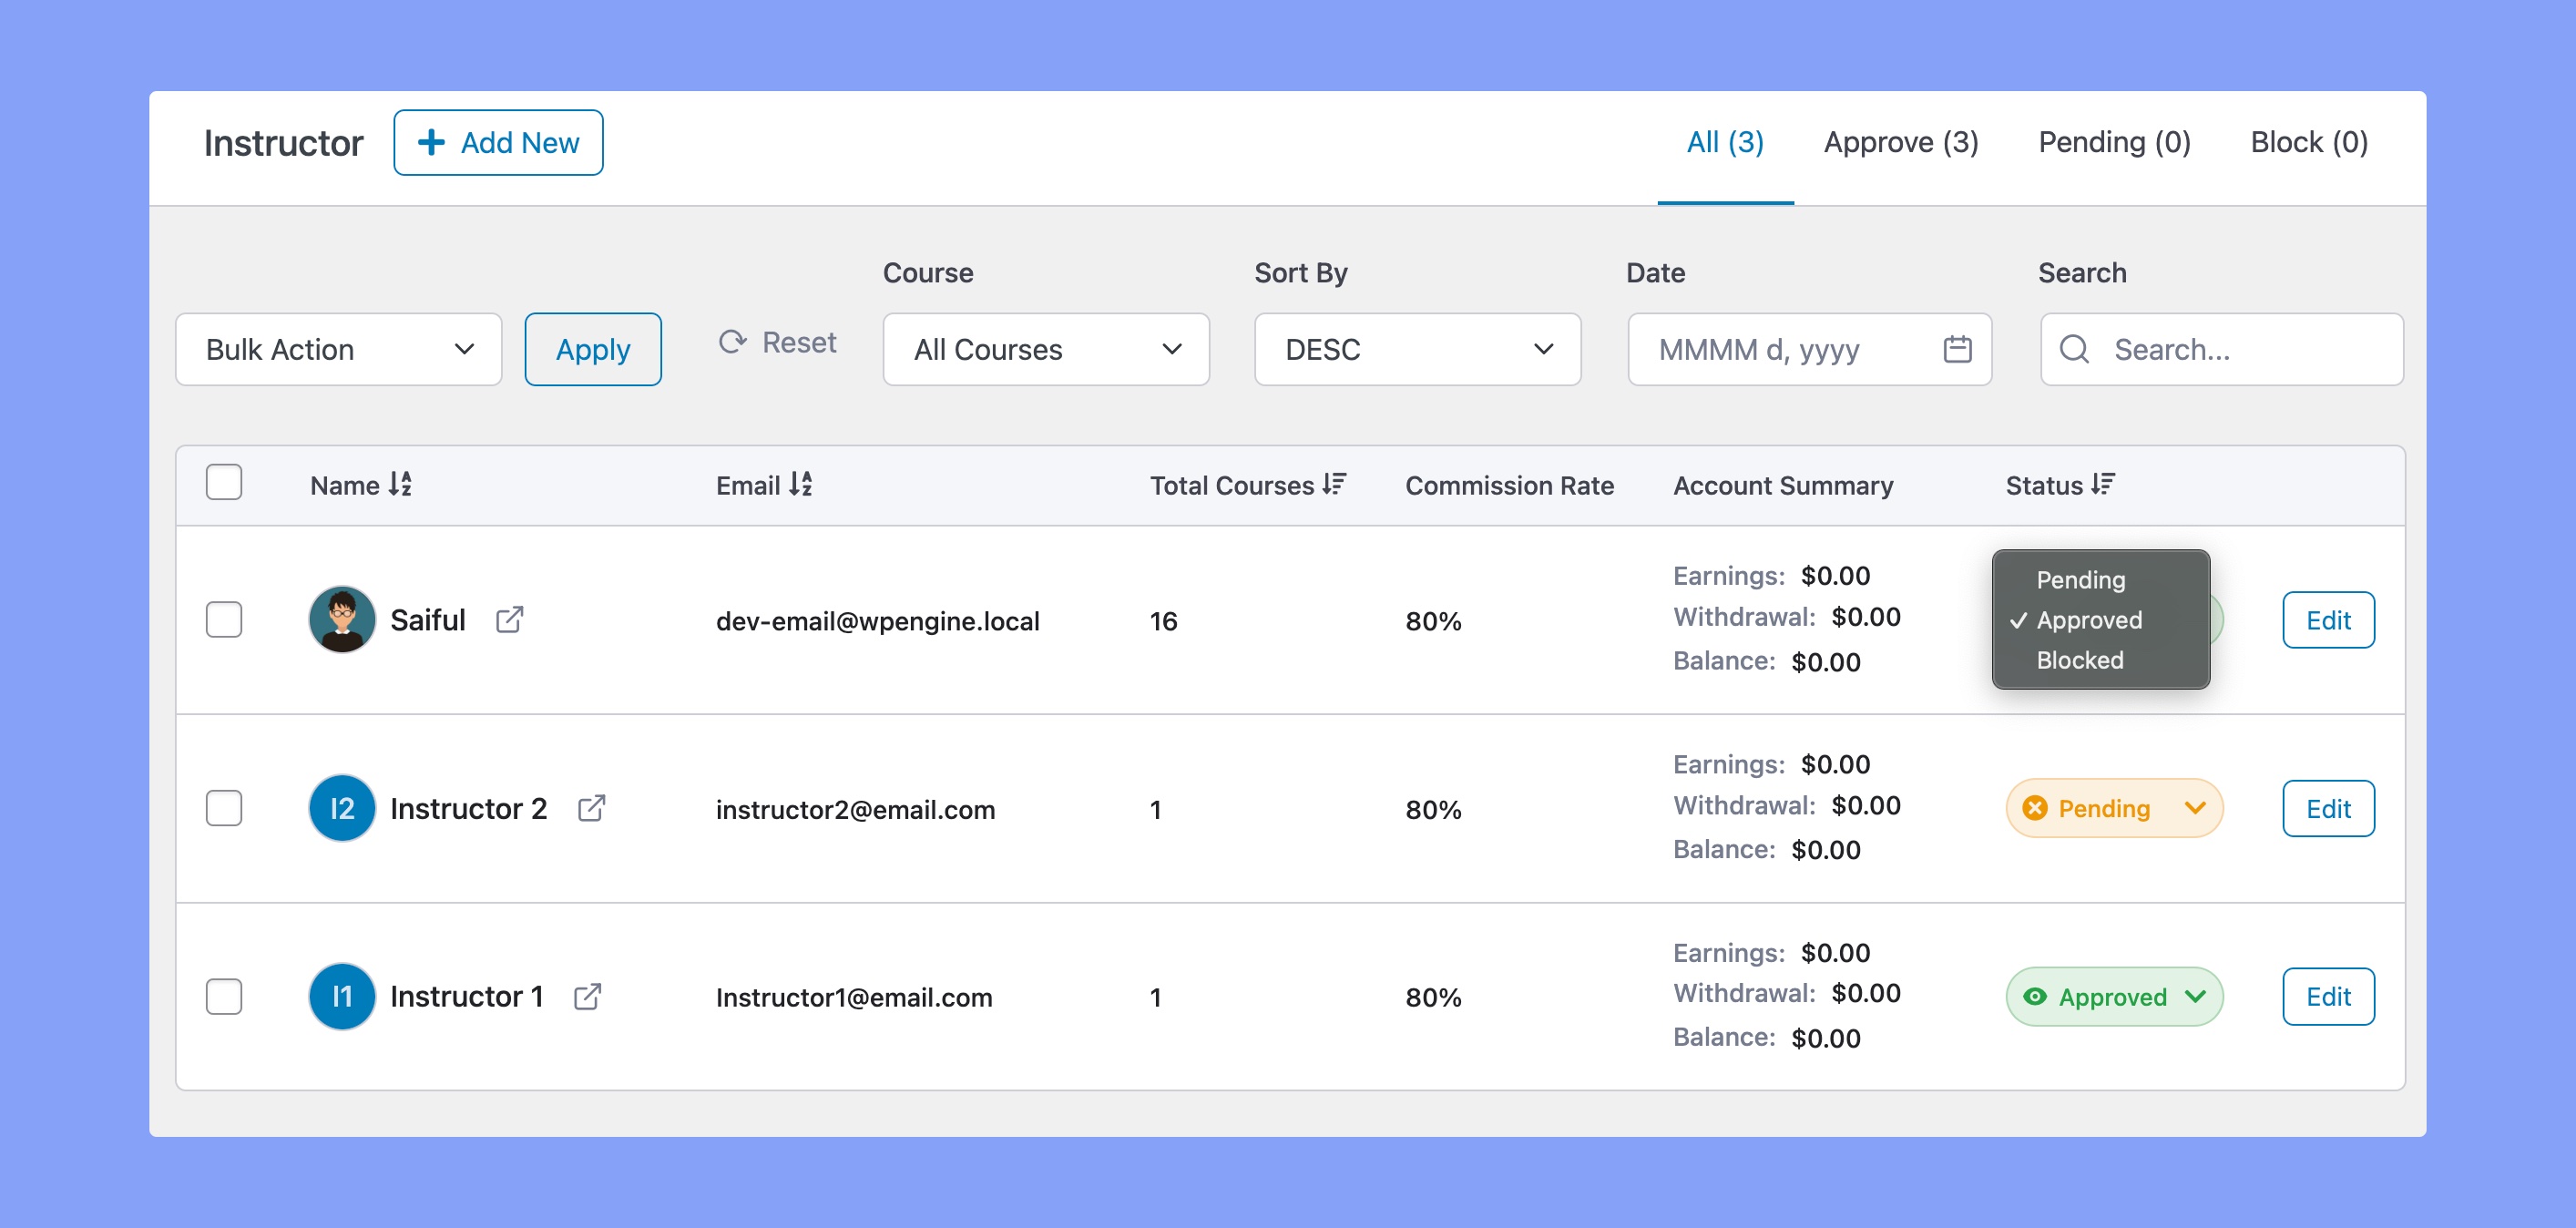
The options available are:
- Pending: This status is for users who registered to become an instructor but are pending approval from an admin.
- Approved: This status is for admin-approved instructors.
- Blocked: This status is for users who registered to become an instructor but the admin rejected their application.
To easily find an Instructor, you can make use of the search, filter, and sorting options that are situated at the top.
Edit Instructor
Lastly, to update the information of any Instructor, click on the Edit button next to their information on the table. This will take you to WordPress’ native User Information Editor where you can alter their information like Name, Contact Info, Password, etc.
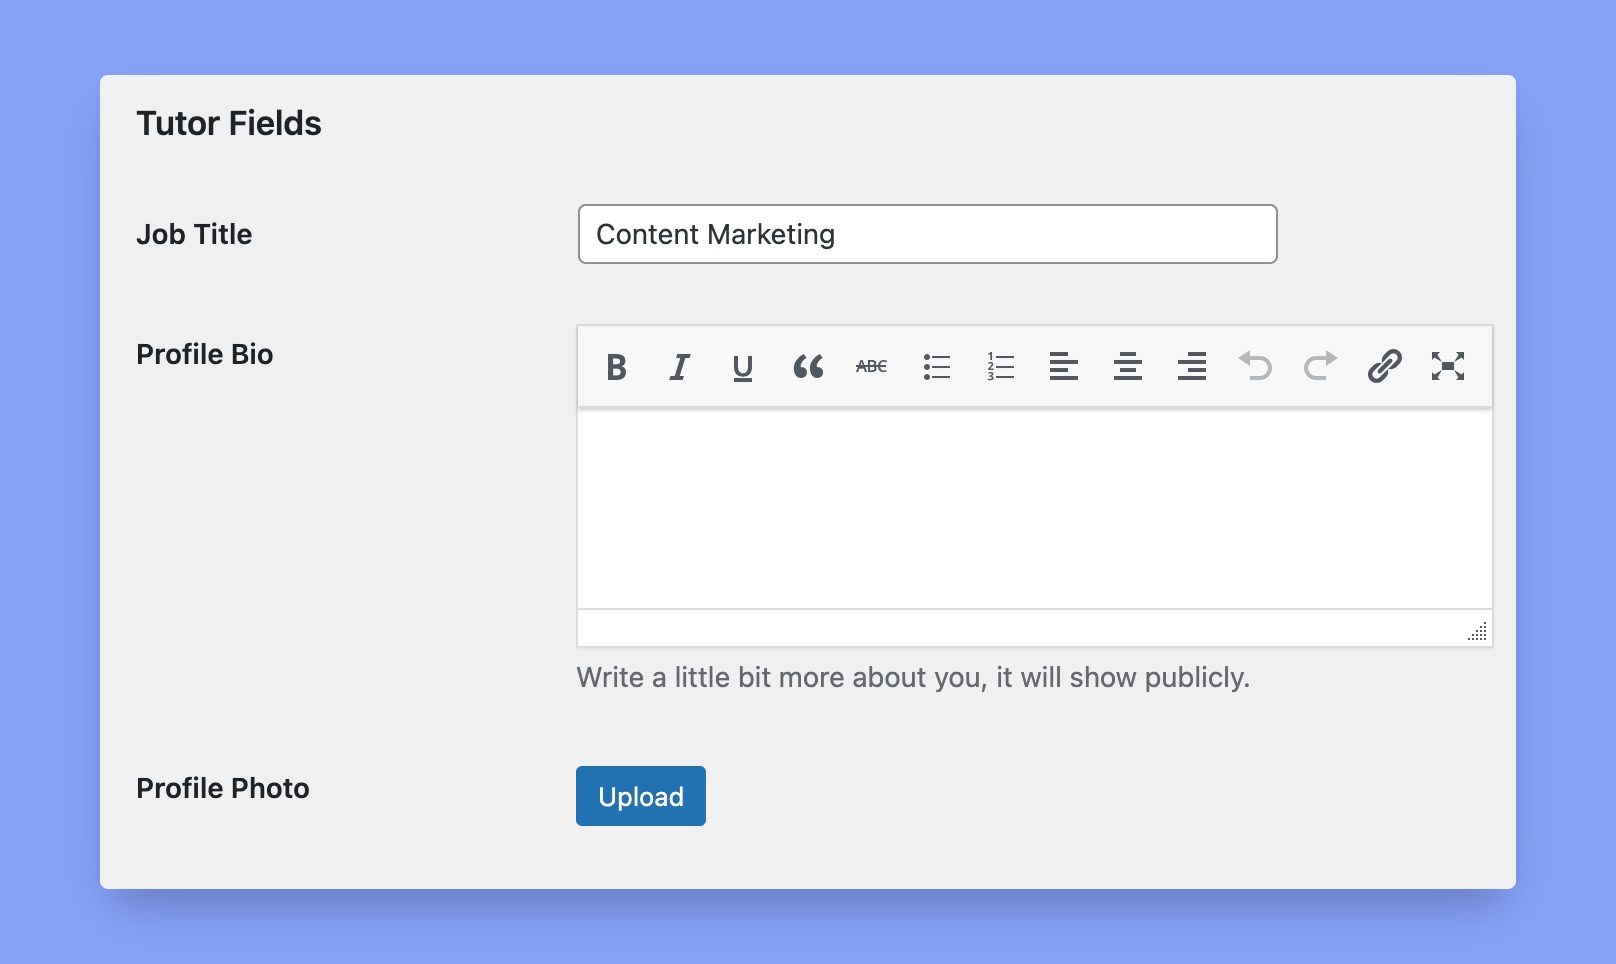
If you scroll down on this page, you can also find a Tutor Fields section, where you can set their Job Title, Profile Bio, Profile Photo, and Billing address. To finish up, click on Save to keep your changes!
However, the Tutor LMS Pro users can edit instructors’ information right from this Instructor page. Clicking on the Edit button will display the following modal window.
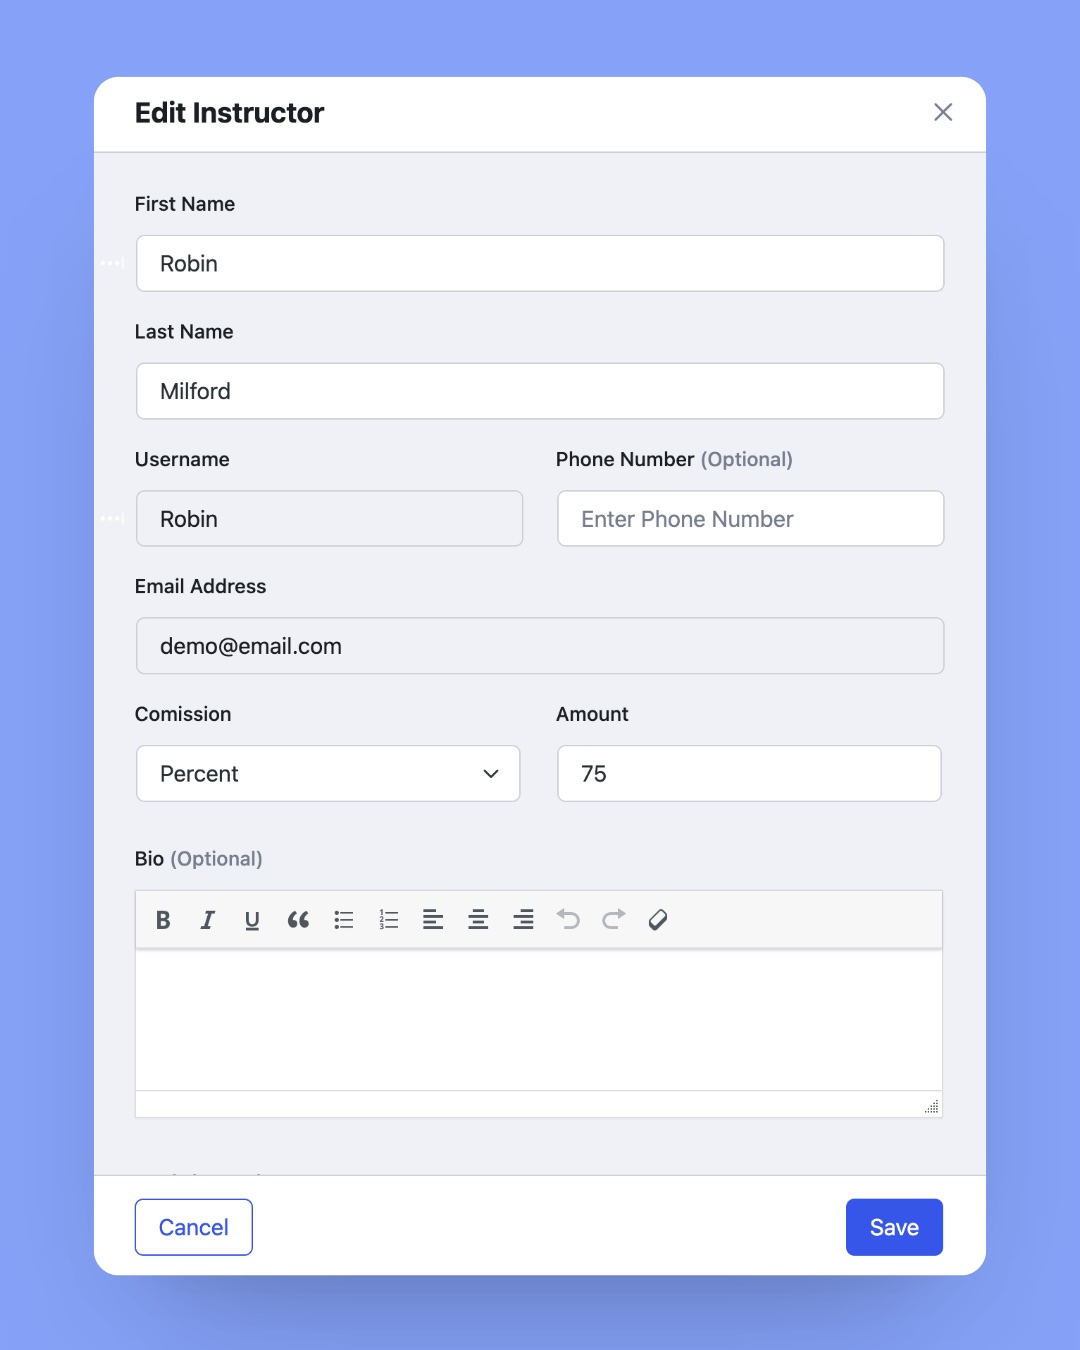
Here, you can update the following options:
- First Name: Enter the instructor’s First Name.
- Last Name: Enter the instructor’s Last Name.
- Username: Define a username for the instructor.
- Phone Number (Optional): Enter the instructor’s phone number.
- Email Address: Specify the instructor’s email address.
- Commission: Choose between a percentage or a fixed amount for commission.
- Amount: Enter the commission amount.
- Bio (Optional): Write a short description of the instructor.
After setting up everything, click on the Save button.