After setting up all other Mega Menu configurations, the only task remaining is the single Mega Menu item building. It’s pretty easy if you already have created a Mega Menu theme (WordPress Dashboard > WP Mega Menu > Themes) and a WordPress menu (WordPress Dashboard > Appearance > Menus).
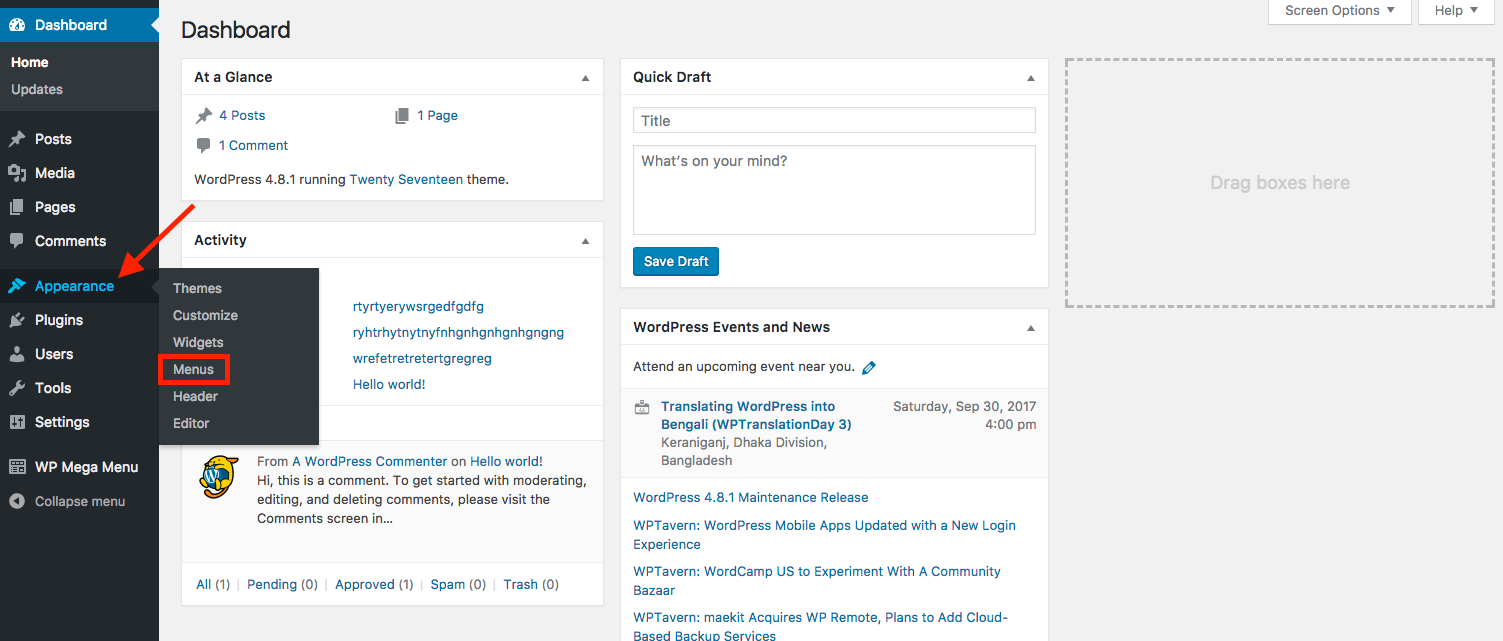
In the above part of this documentation, we’ve shown how to create a WordPress menu and a Mega Menu theme. So now it’s time to create and configure single Mega Menu items. To do this, firstly you need to visit WordPress Dashboard > Appearance > Menus.
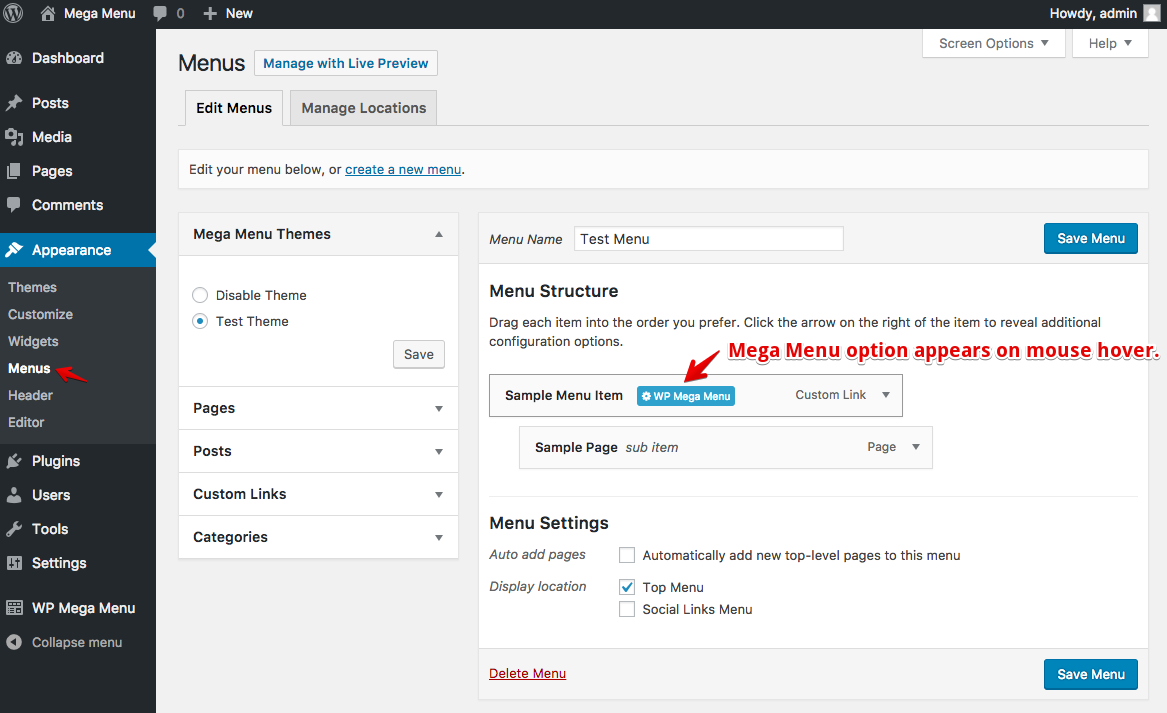
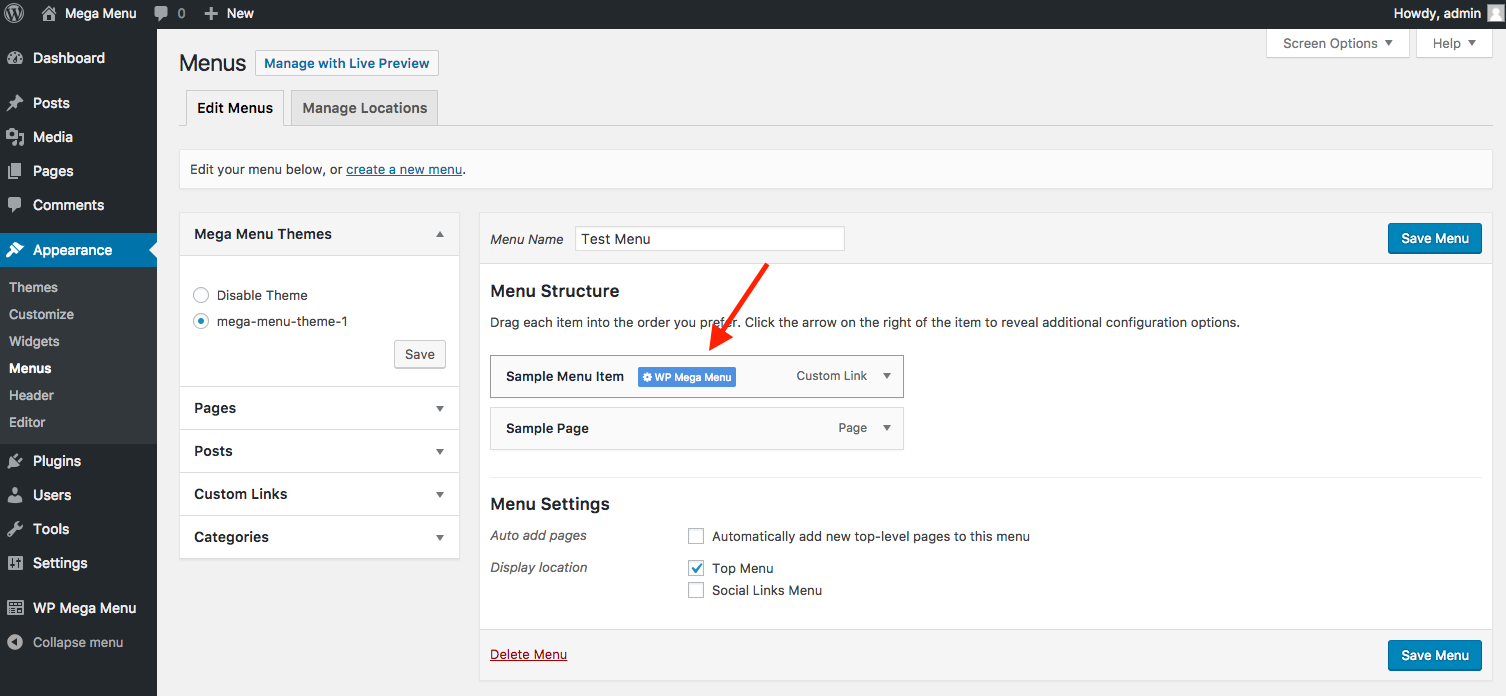
There you will see a menu opened in editing mode. From the left, you can choose a Mega Menu theme to use with the currently editing menu. You can also choose to disable a menu theme and use your website theme’s typography and designs. Still, you can use the Mega Menu structure.
Building a Mega Menu
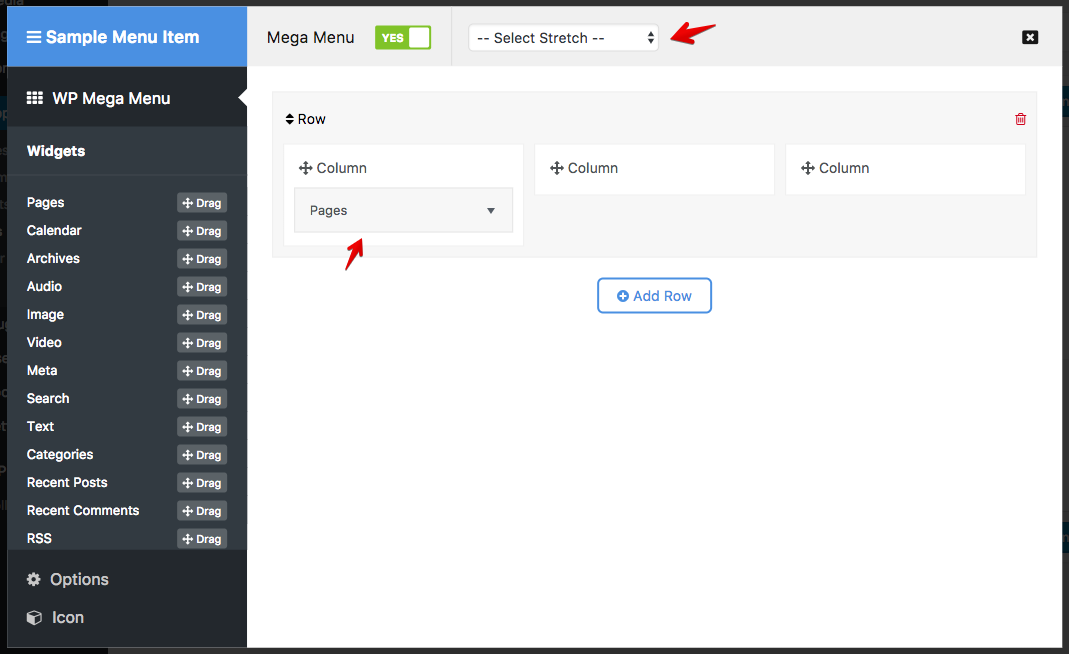
You can build a Mega Menu only with top-level menu items. Submenu items cannot be used to build a Mega Menu. But you can apply other Mega Menu features like visibility, options, and icons on all levels of menus. You will get the Mega Menu building option on an individual menu item by hovering the mouse on it.
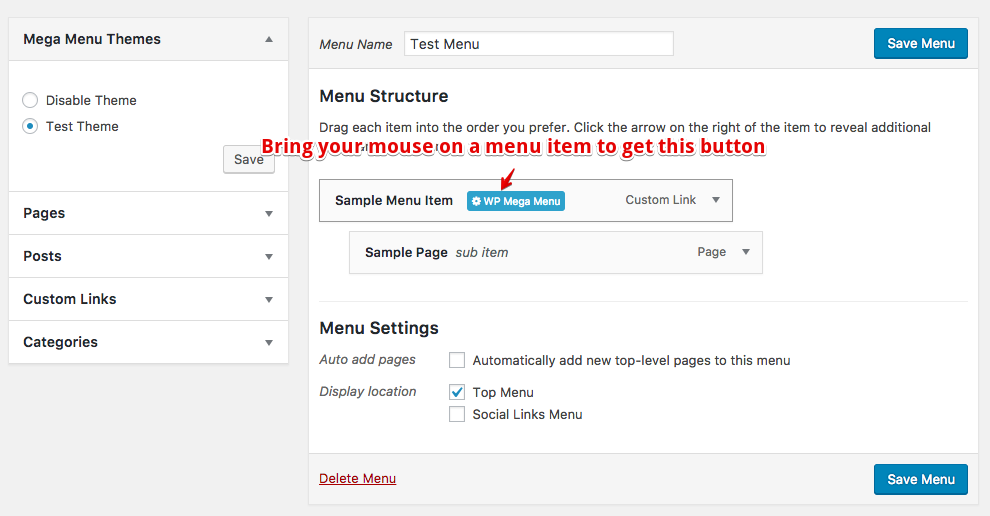
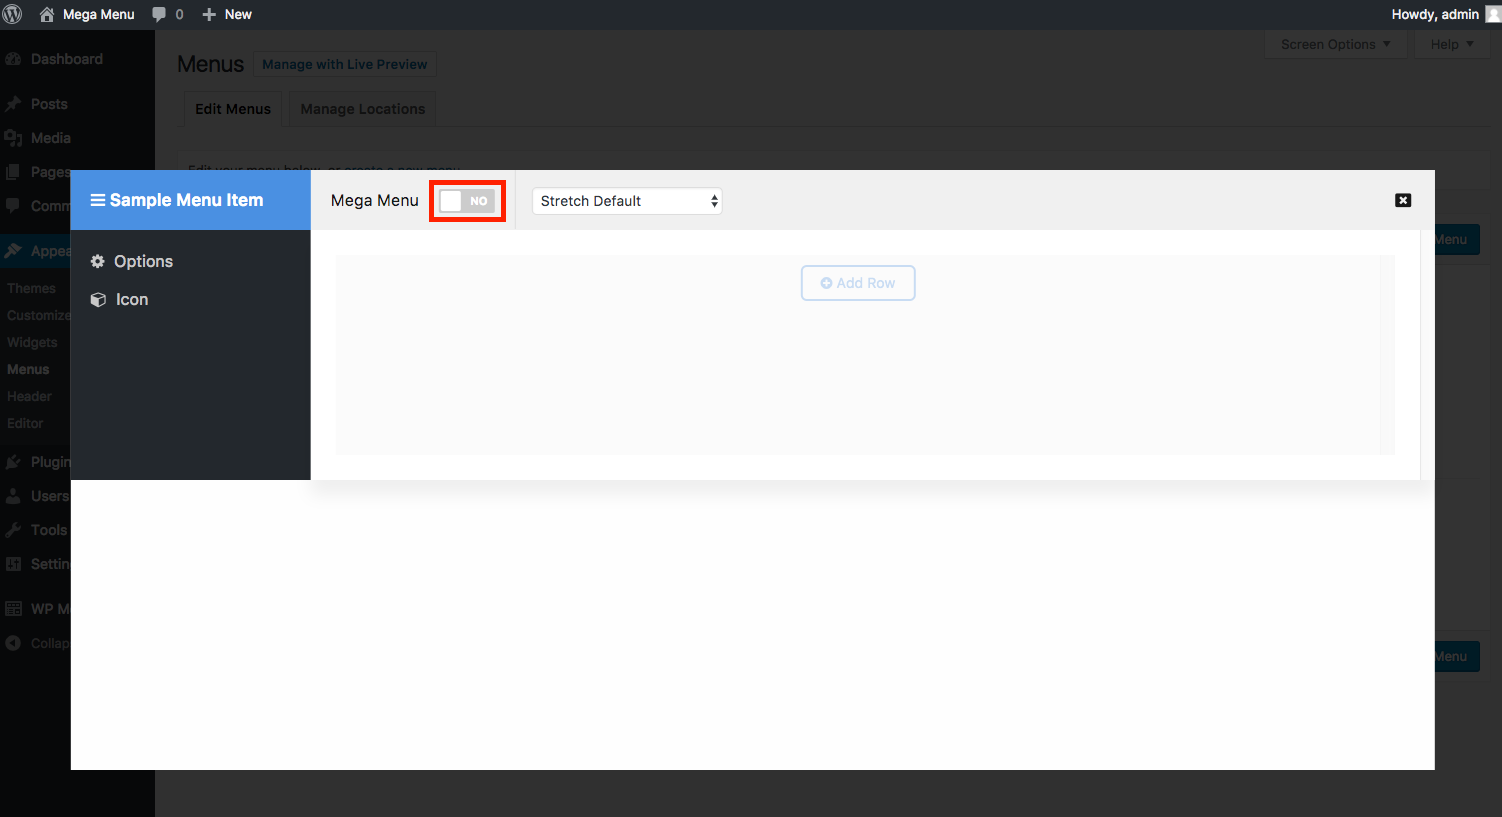
So, click the ‘WP Mega Menu’ button, and the following window will appear.
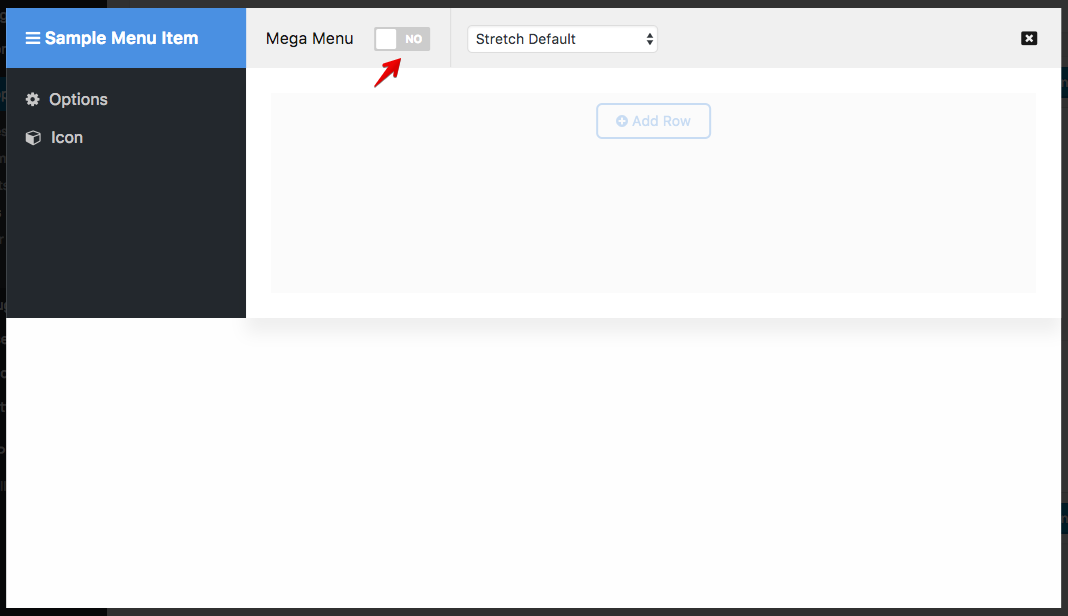
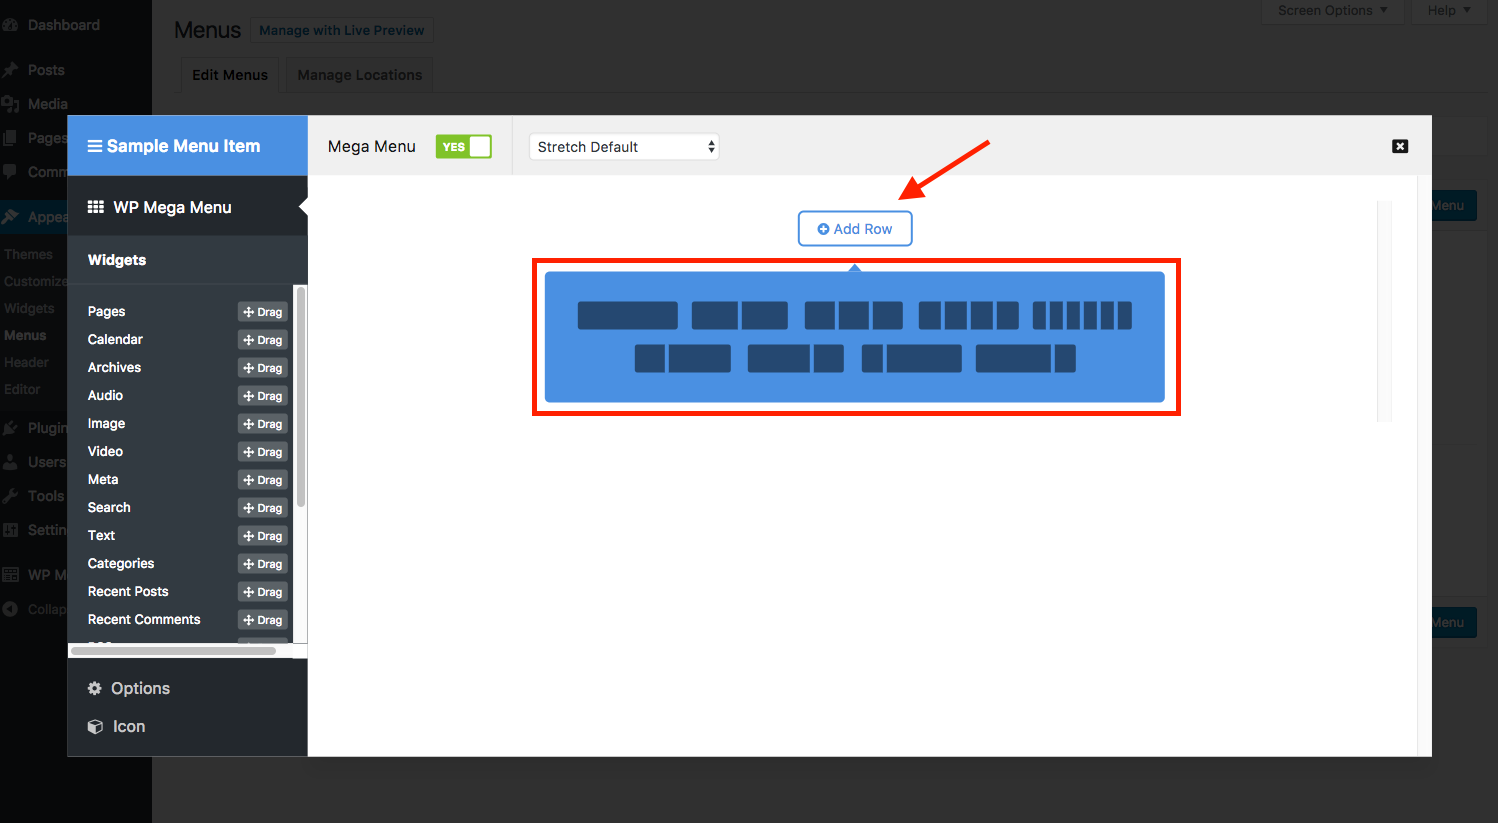
To start building a Mega Menu, toggle the Mega Menu switch to ‘Yes’. The drag-and-drop visual menu builder will be activated.
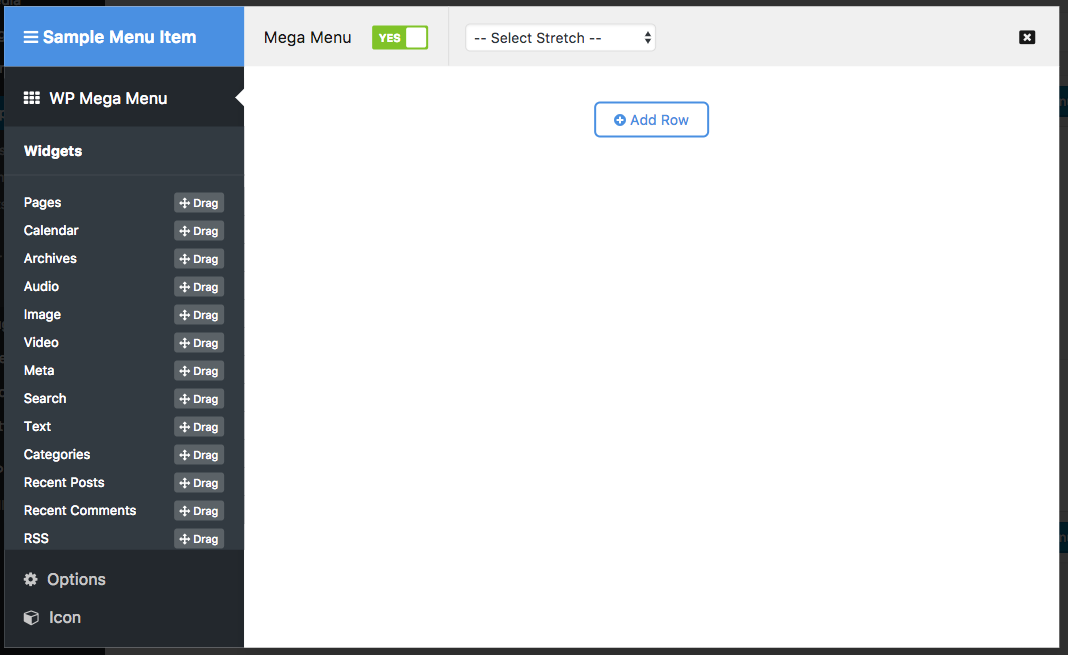
Once the Mega Menu is activated, you can add rows and then drag and drop widgets into the columns of these rows.
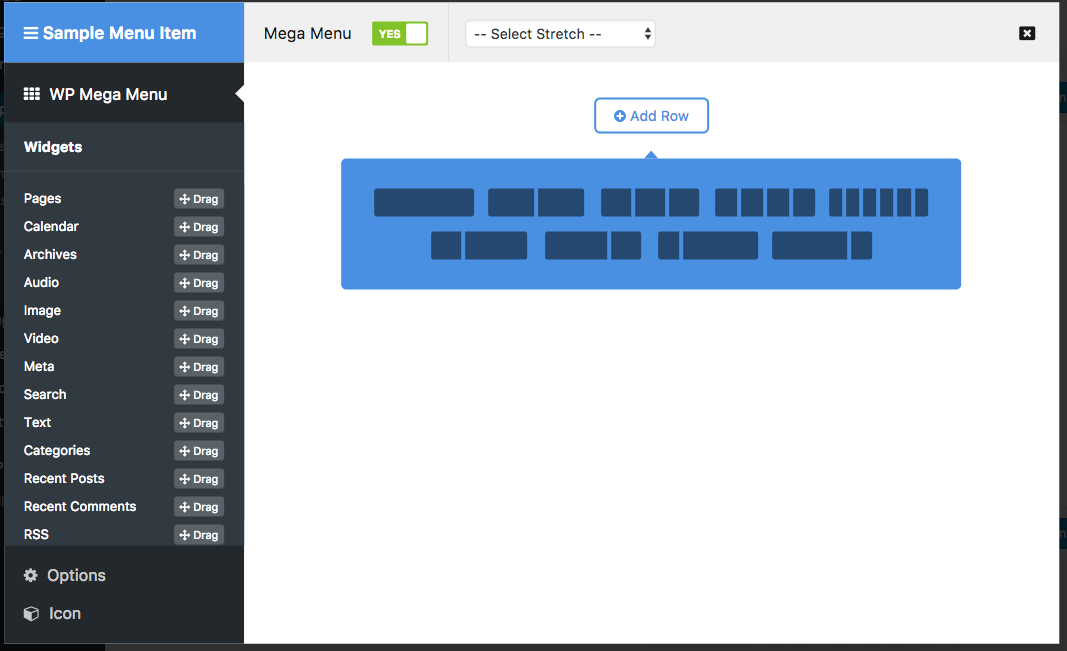
After finishing adding widgets inside the rows/columns, you need to define the menu stretch. Select a stretch (default, stretch row, stretch row and contents) from the top bar.
The Mega Menu drag-and-drop builder automatically saves the changes as you edit the menu layouts. There’s no separate Save button.
Adding a Tabbed Mega Menu
Creating a tabbed mega menu is a lot easier with WP Mega Menu. Go to the Dashboard and hover over the Appearance section. You will find the Menus link in the extended portion. Click on the Menus.
Once you click on Menus, you will be taken to a page that looks like below.
If you hover over individual menu items, you will find WP Mega Menu option on that. Click on that to proceed on.
If you haven’t changed anything before, you will find the system in “off” mode. Turn that on (Yes).
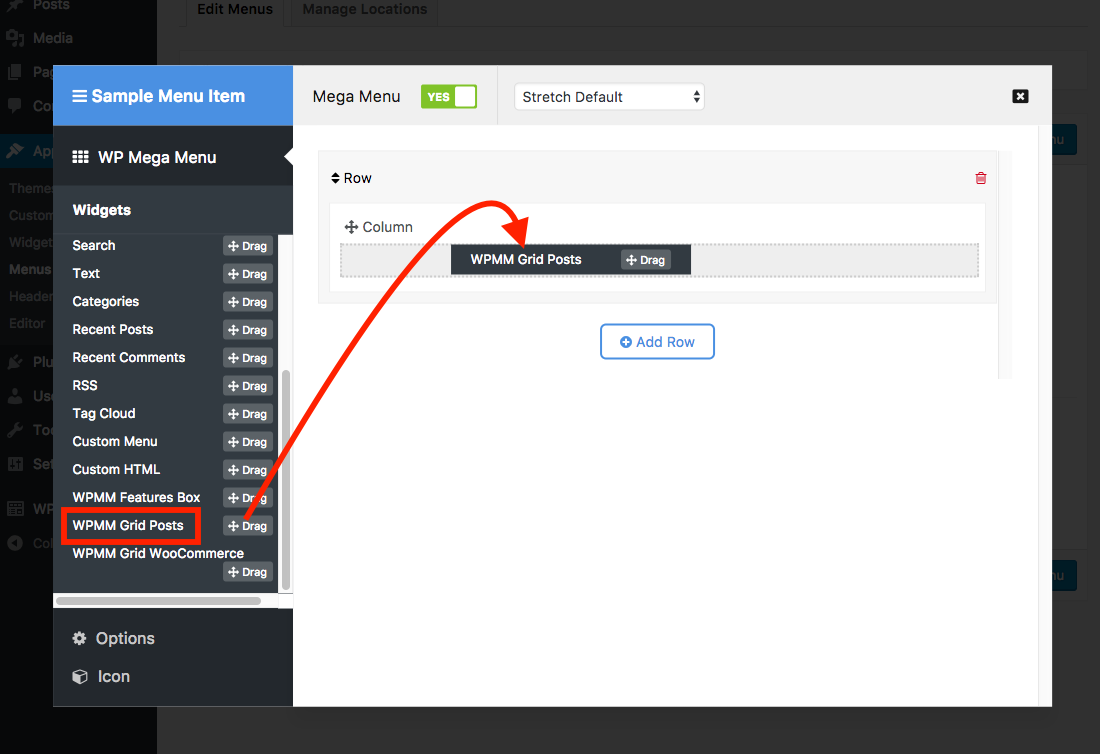
After turning on the Mega Menu, click on the Add Row button to see the options for adding rows. After selecting your desired row, click on it to the widgets.
Now you’ll see many widgets on your left. Scroll down to find WPMM Grid Posts and drag that widget from there and drop it on the column.
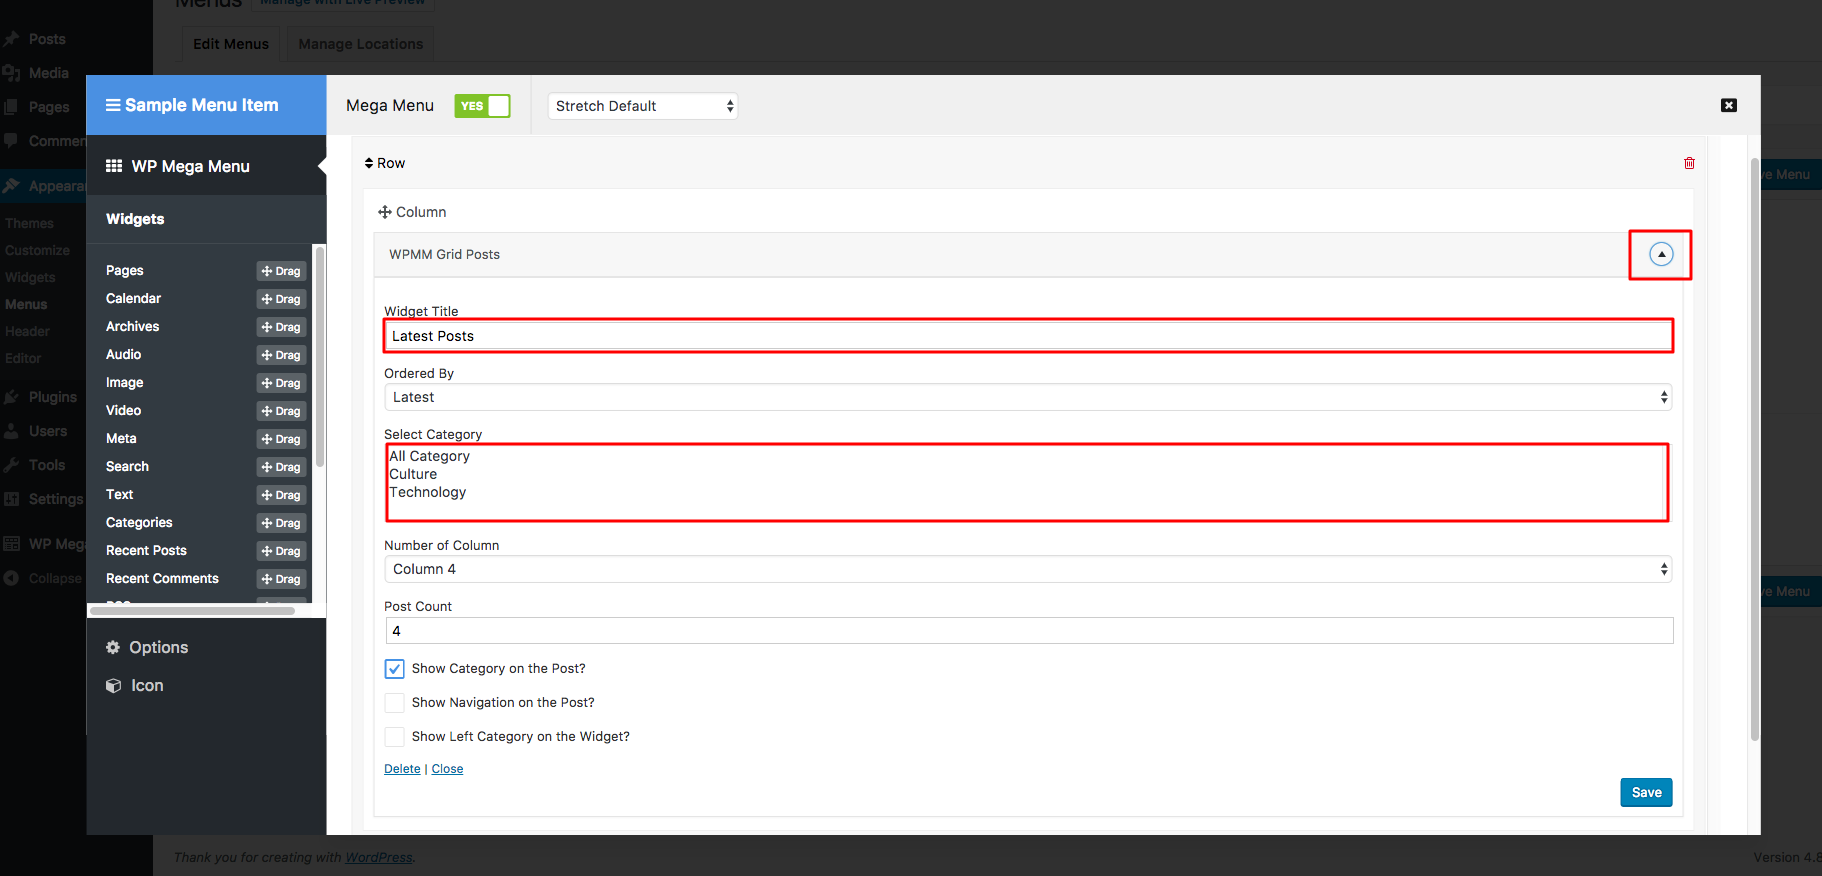
After that, click on the triangle button on your right then edit your tabbed menu as you want them to see. You can give it a title and select a specific category or all categories.
Once this setup is done, click on the Save button. Go to your website to see what changes you have made by hovering the mouse on the specific menu item where you’ve added the WPMM Grid Posts widget.
Adding the WooCommerce Store Widget to your Menu
Adding a WooCommerce store widget to your menu is very simple. Go to the Dashboard and hover over the Appearance section. You will find the Menus link in the extended portion. Click on Menus.
Once you click on Menus, you will be taken to a page that looks like below.
If you hover over individual menu items, you will find the WP Mega Menu option on that. Click on that to proceed on.
If you haven’t changed anything before, you will find the system in “off” mode. Turn that on (Yes).
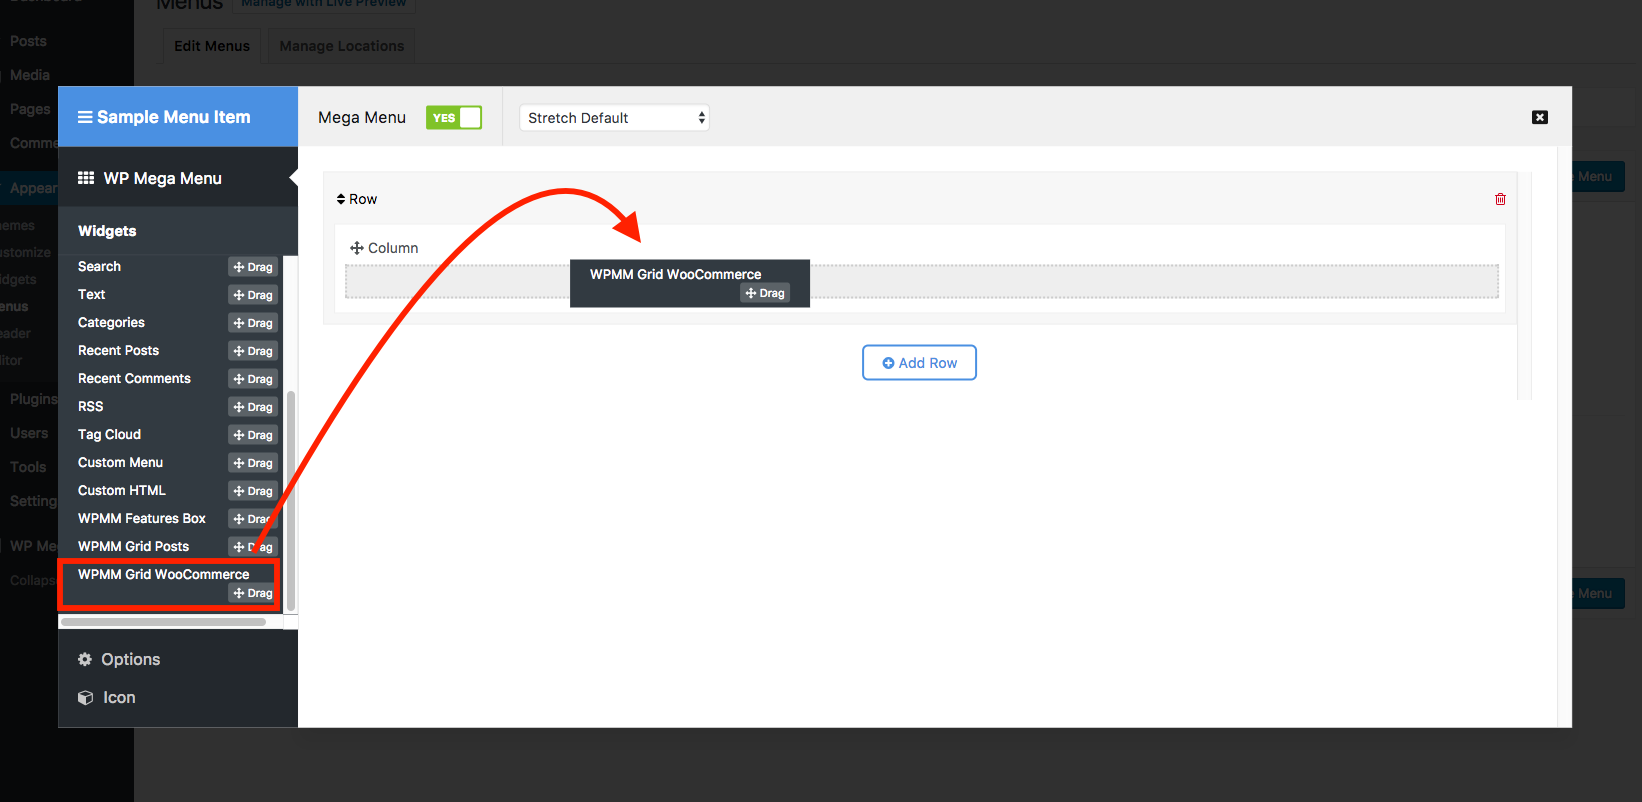
Now you’ll see many widgets on your left. Scroll down to find WPMM Grid WooCommerce widget and drag that widget from there and drop it on the column.
Now you’ll see many widgets on your left. Scroll down to find WPMM Grid Posts and drag that widget from there and drop it on the column.
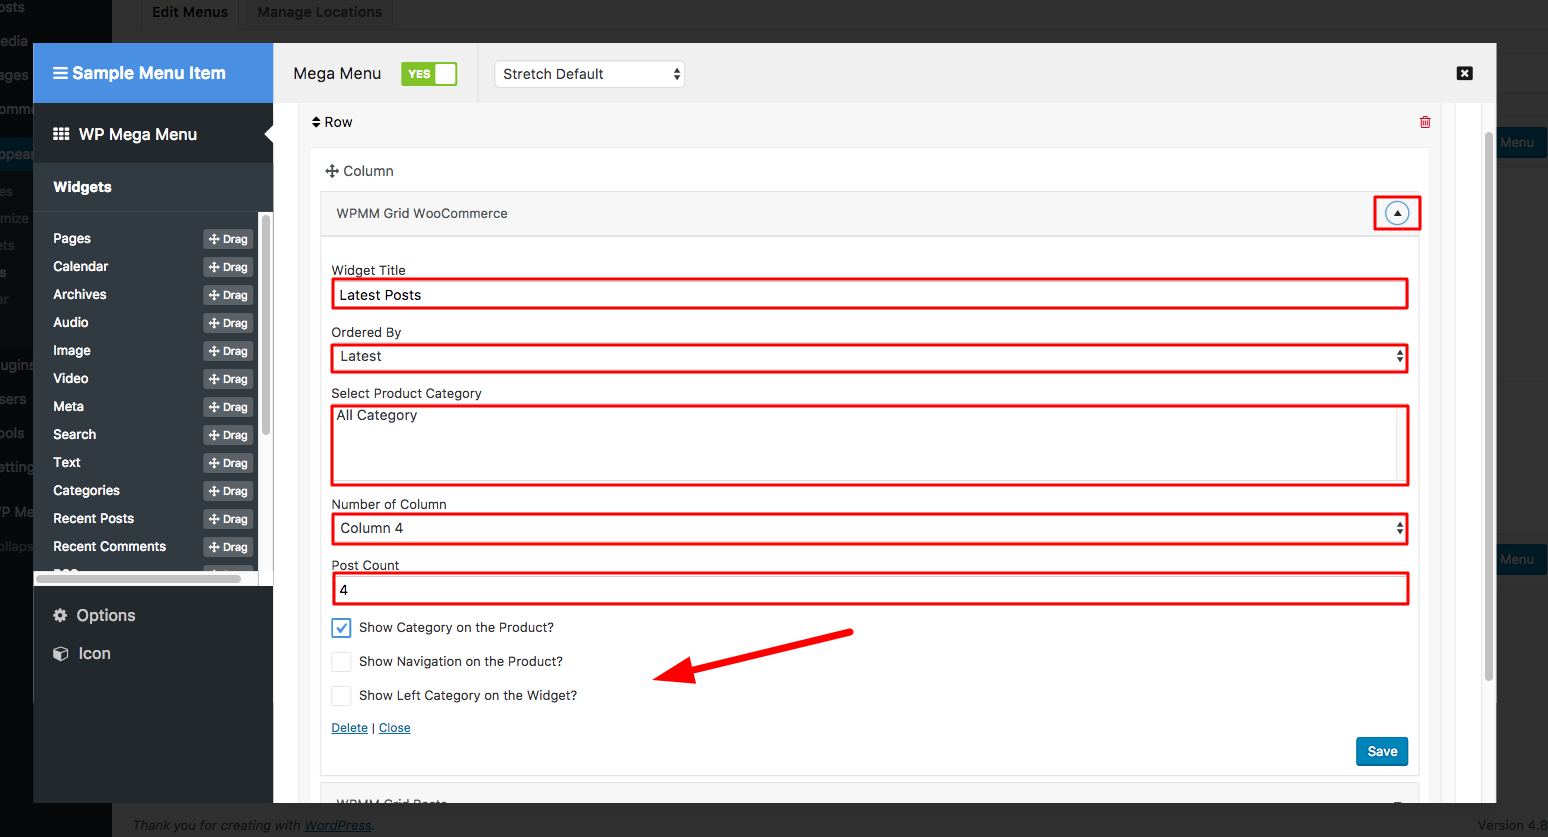
After that, click the triangle button on your right then edit your WPMM Grid WooCommerce widget by placing your products with their images and information as you want them to see. You can give it a title and select a specific category or all categories to display products from all categories.
Single Menu Item Options
You can use the Mega Menu item options on any level of menu items. To use this feature, simply open a WordPress menu in editing mode, and hover the mouse on the menu item. You will get the ‘WP Mega Menu’ button on the menu item. Click the button and open the menu item editing page.
Here you will get several menu item options. One or a few of them would not appear for sub-menu items.
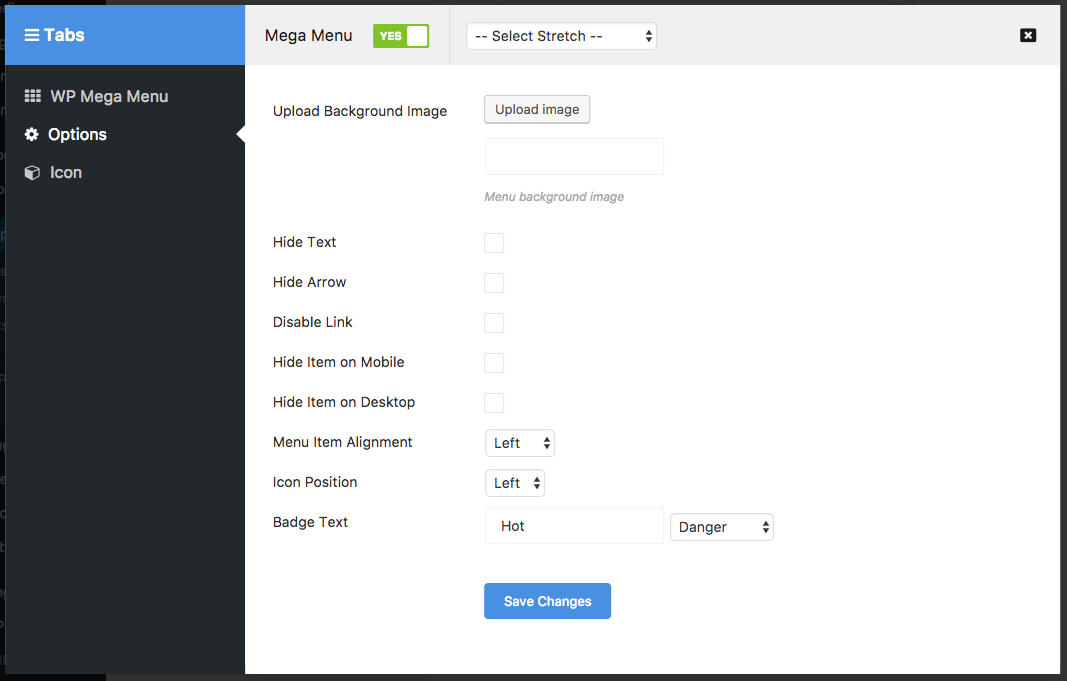
Upload Background Image: For a top-level menu item, you can upload a background image. Use this option to get it done.
Hide Text: If you want to show a menu item without displaying the menu text (e.g. a widget), check this option to hide the menu item text.
Hide Arrow: If you want to show a menu item without displaying an arrow (which may have been added by a drop-down menu), check this option to hide that arrow.
Disable Link: Choosing this option will disable the link of a menu item.
Hide Item on Mobile: Choosing this option will hide the menu item on mobile devices.
Hide Item on Desktop: Choosing this option will hide the menu item on computers.
Menu Item Alignment: You can choose the menu item alignment as left/right/center.
Icon Position: You can display icons with menu item titles. Choose the menu icon alignment as left/right/center using this option.
Badge Text: To present some menu items differently for attracting visitor attention, you can add badge text to them. Enter your badge text and choose a preset style. Save changes. That’s it.
Icon
Choose and set an icon for a menu item from this huge collection.
Here you get the default WordPress icons, and also Font Awesome icons. Search and find the icon you need. Save changes.