2Checkout is an online payment that makes it easier for you to take payment for your digital sales worldwide. WP Crowdfunding has a built-in addon that lets you connect your 2Checkout account and take payments for your campaigns.
You’ll just need an active 2Chekcout account to implement the 2Chekcout payment gateway to your website. To start the implementation process, please follow the below-mentioned steps.
Step 1: Enable 2Checkout Add-on
First, you need to enable the 2Checkout add-on from the Addons list of WP Crowdfunding.

Step 2: Enable & Configure Your 2Checkout Payment Gateway
To start taking payments, you need to add your 2Checkout account and configure it to suit your needs.
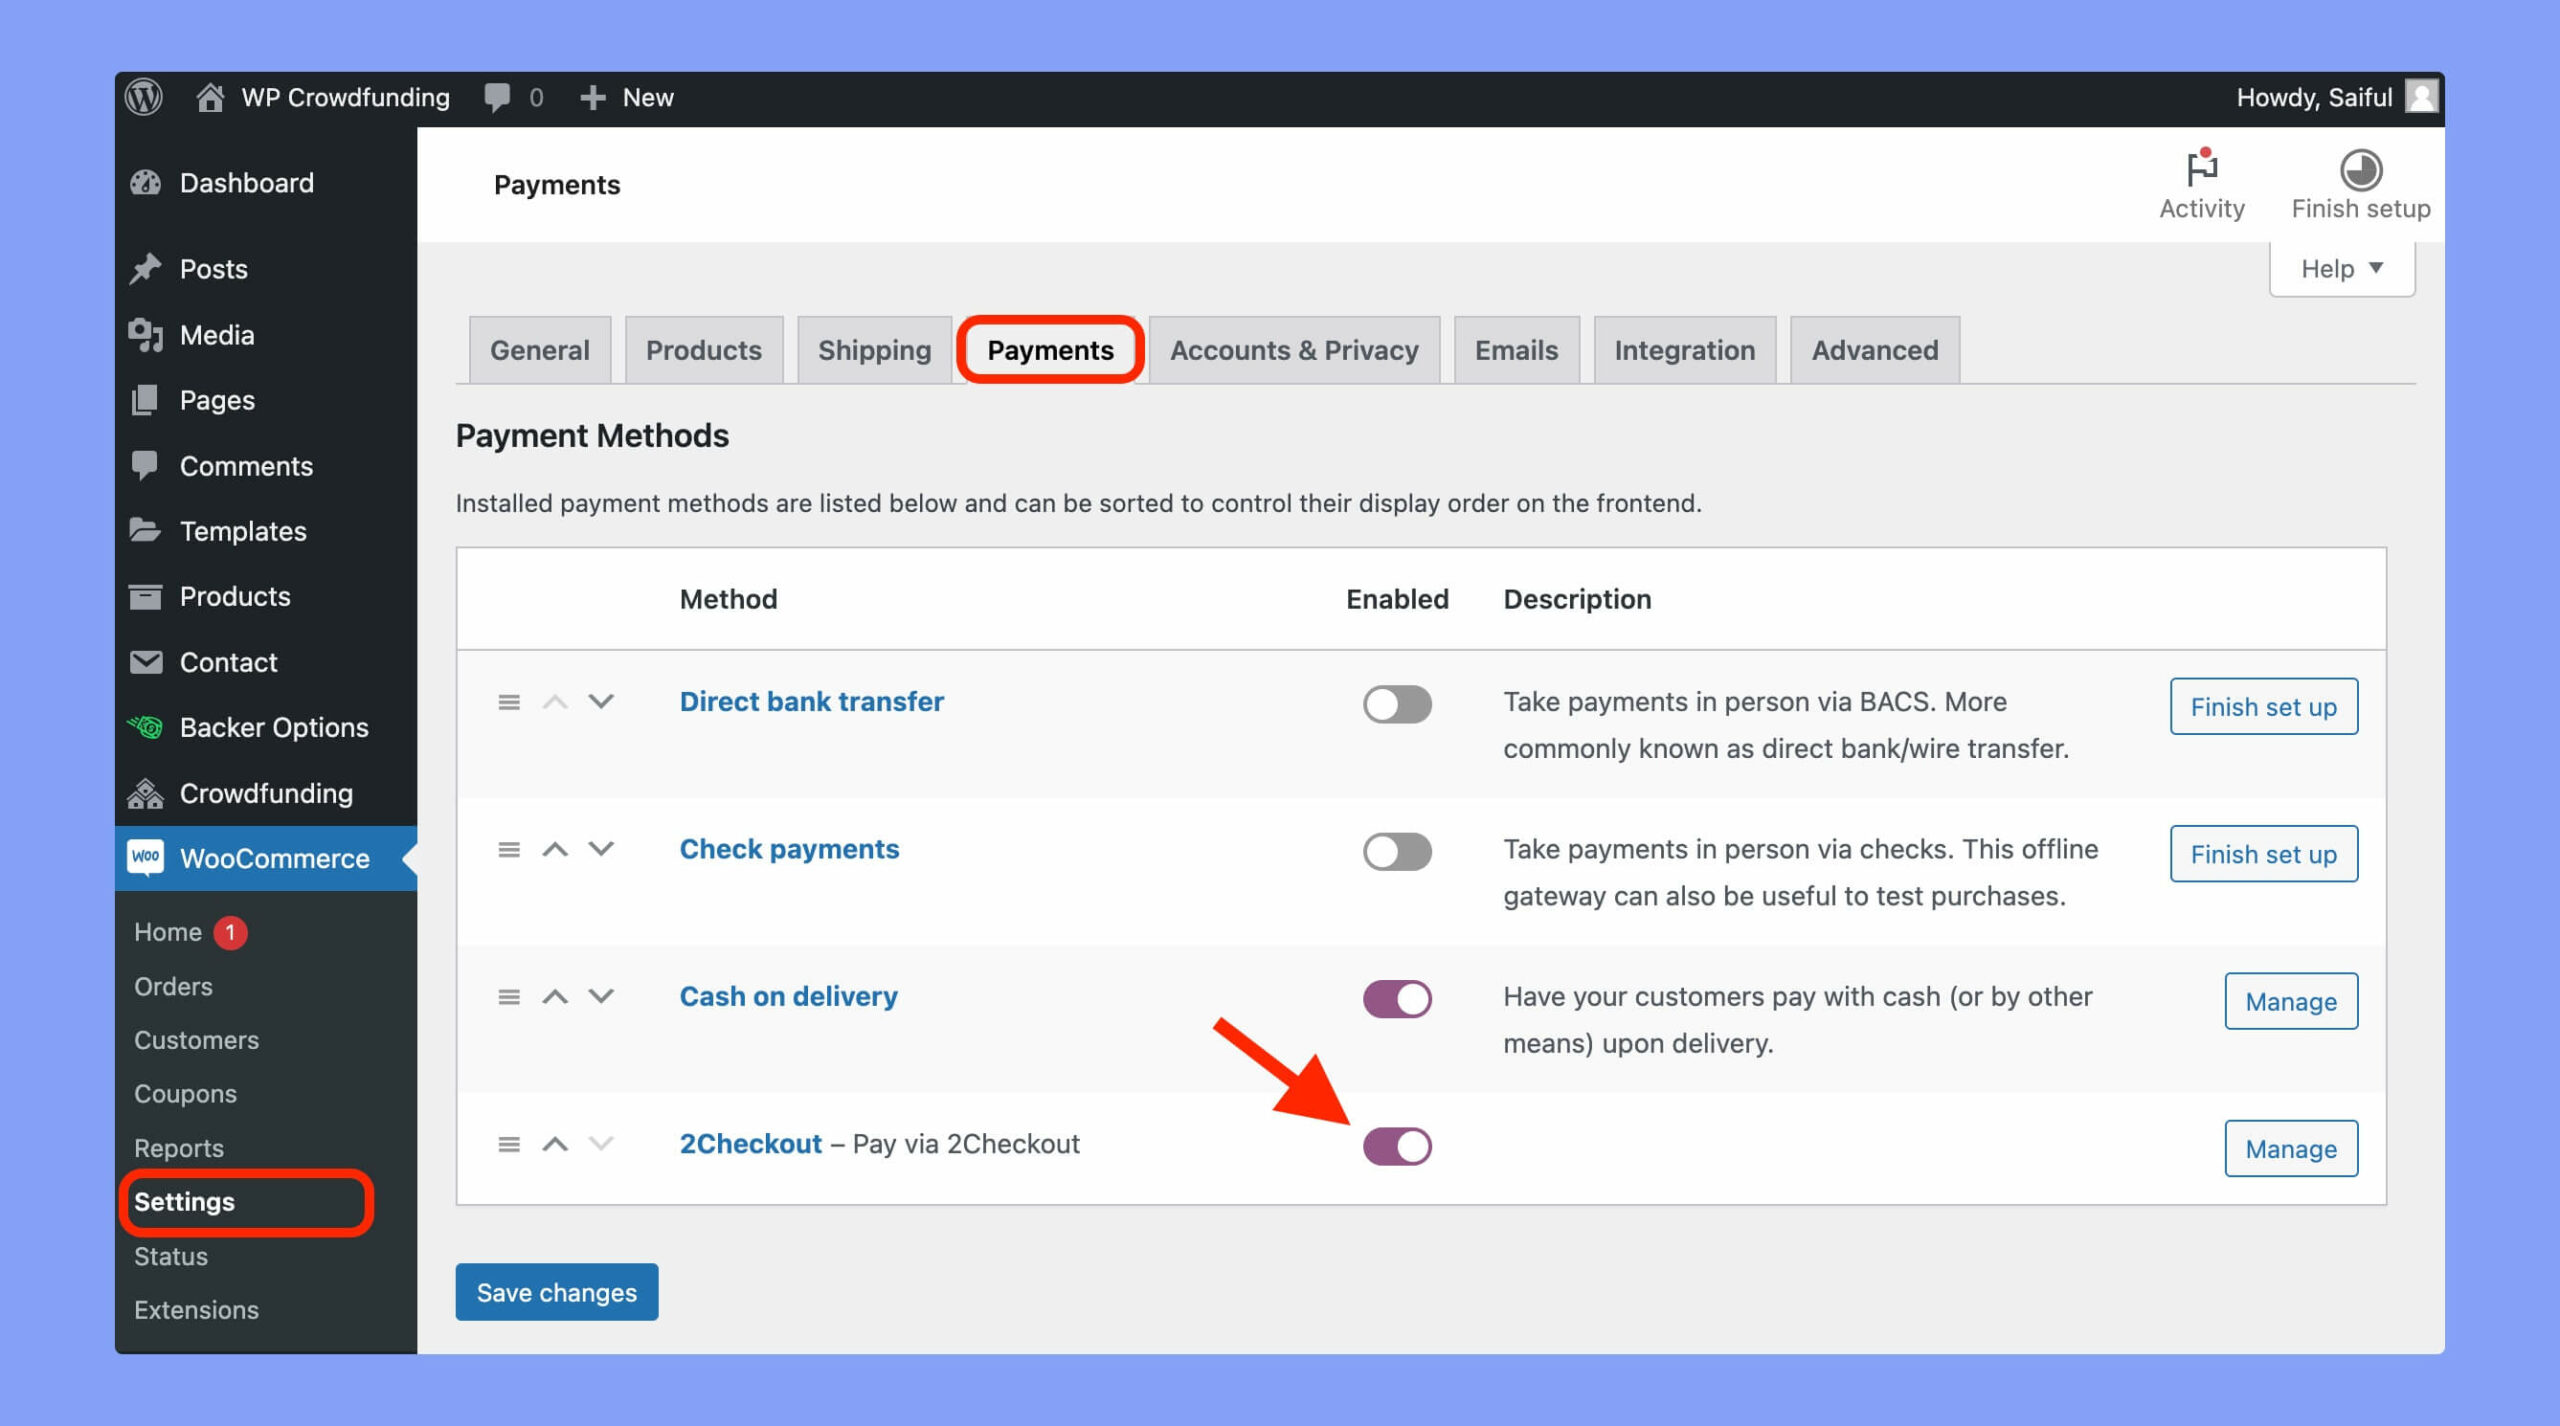
Navigate to WP Dashboard -> WooCommerce -> Settings -> Payments tab and enable 2Checkout. After you have enabled it, click on the “Manage” button to set it up in the way you want.
Once you click on it you will find the following options at your disposal.
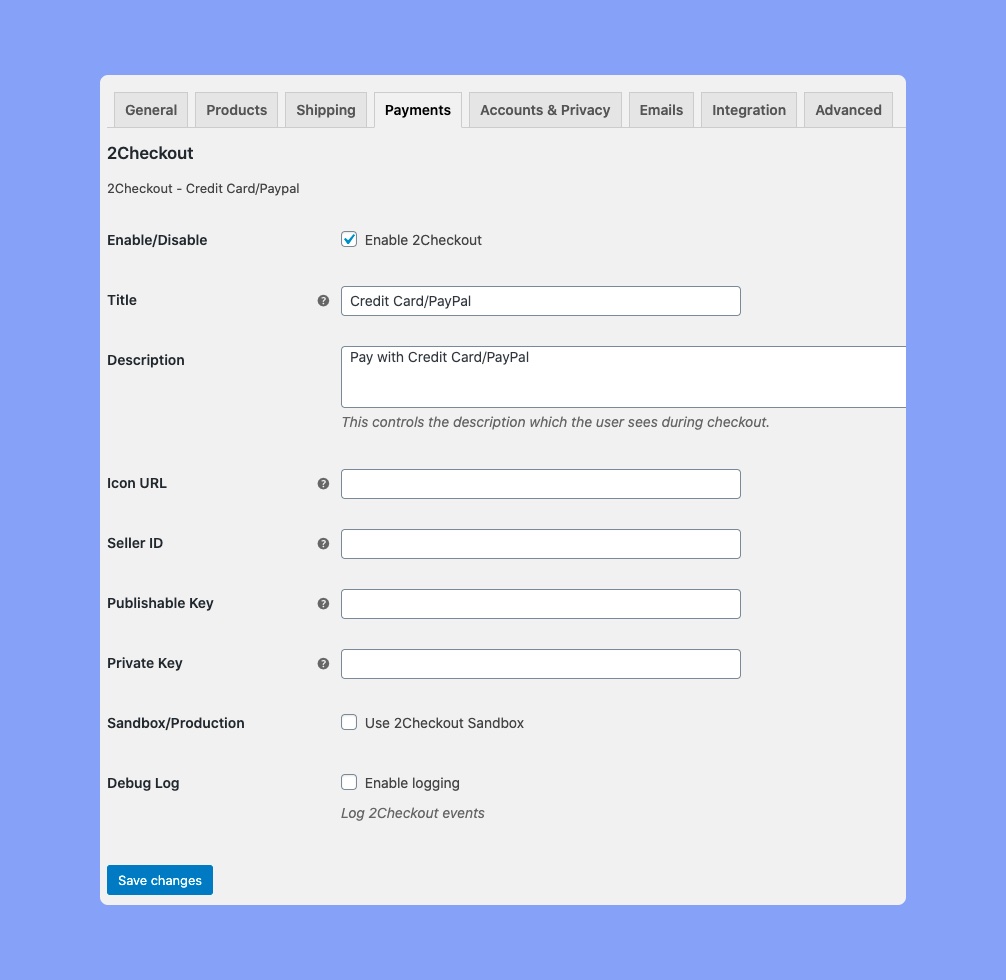
Here, the available options are:
- 2Checkout Enable/Disable: Use the checkbox to enable or disable 2Checkout payments.
- Title: Set the checkout title.
- Description: Add a short checkout description.
- Icon URL: Provide the URL of the payment gateways icons which will be visible on the checkout page.
- Seller ID: Enter your 2Checkout account number or Seller ID for payment processing.
- Publishable Key: Enter your 2Checkout account’s Publishable Key.
- Private Key: Enter your 2Checkout account’s Private Key.
- Sandbox/Production: Enable for testing or production environment.
- Debug Log: Activate logging of 2Checkout events for testing.
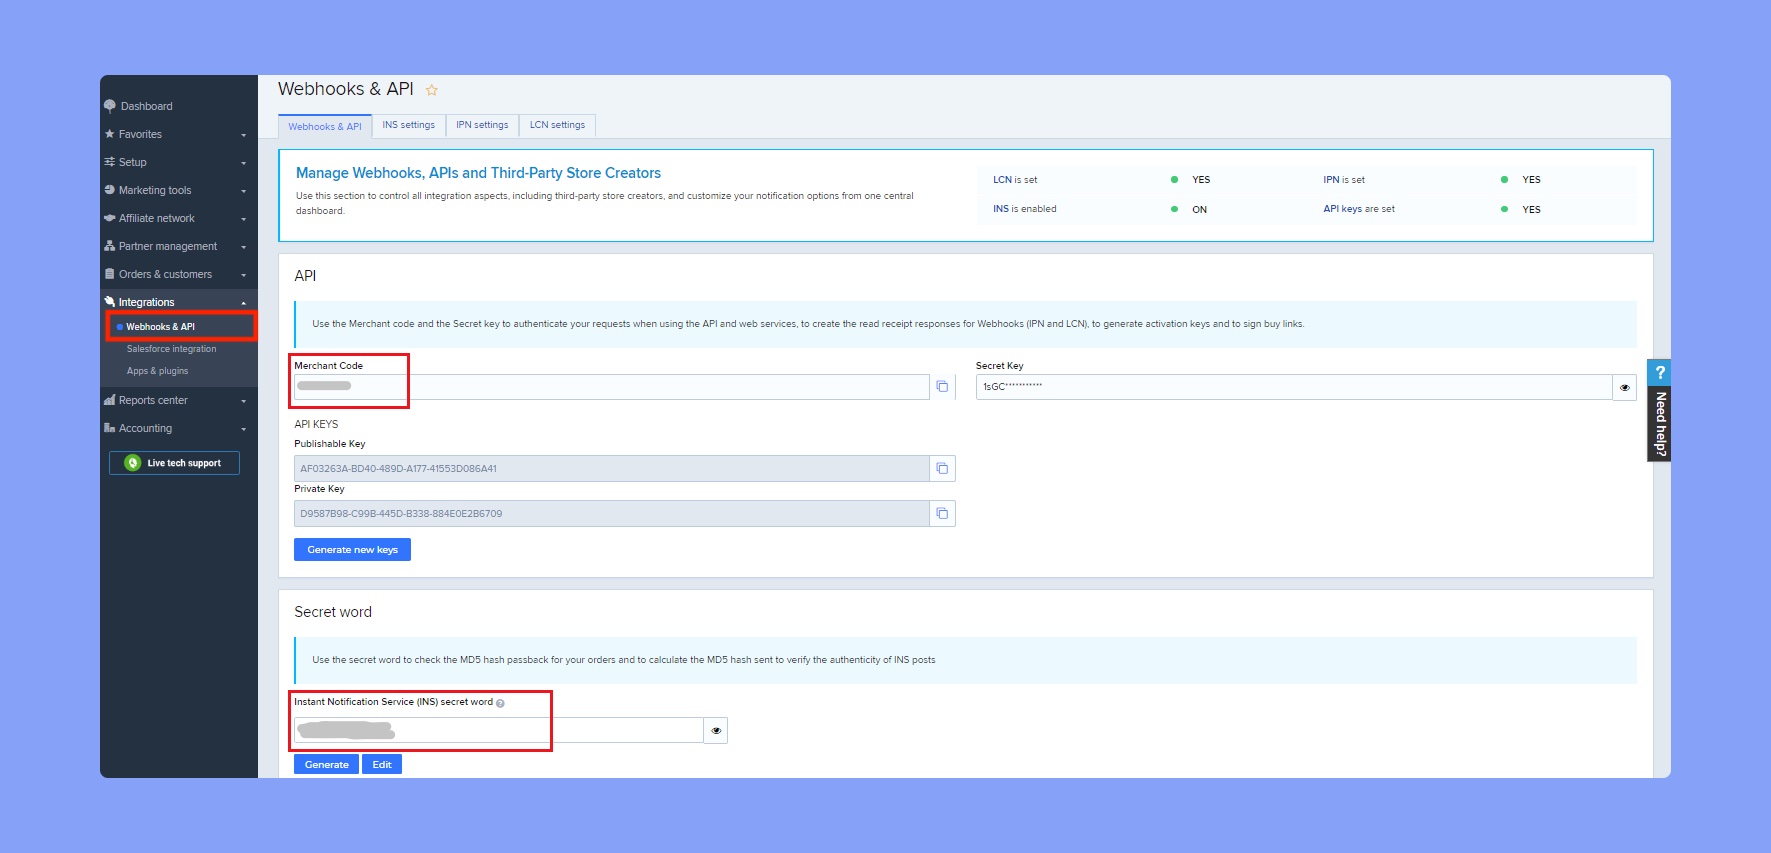
By the way, you have to collect the publishable key and other keys from the 2Checkout Webhooks & API page.
Once you are done with the configuration hit Save Changes. Now the visitors can pay via the 2Checkout payment gateway.
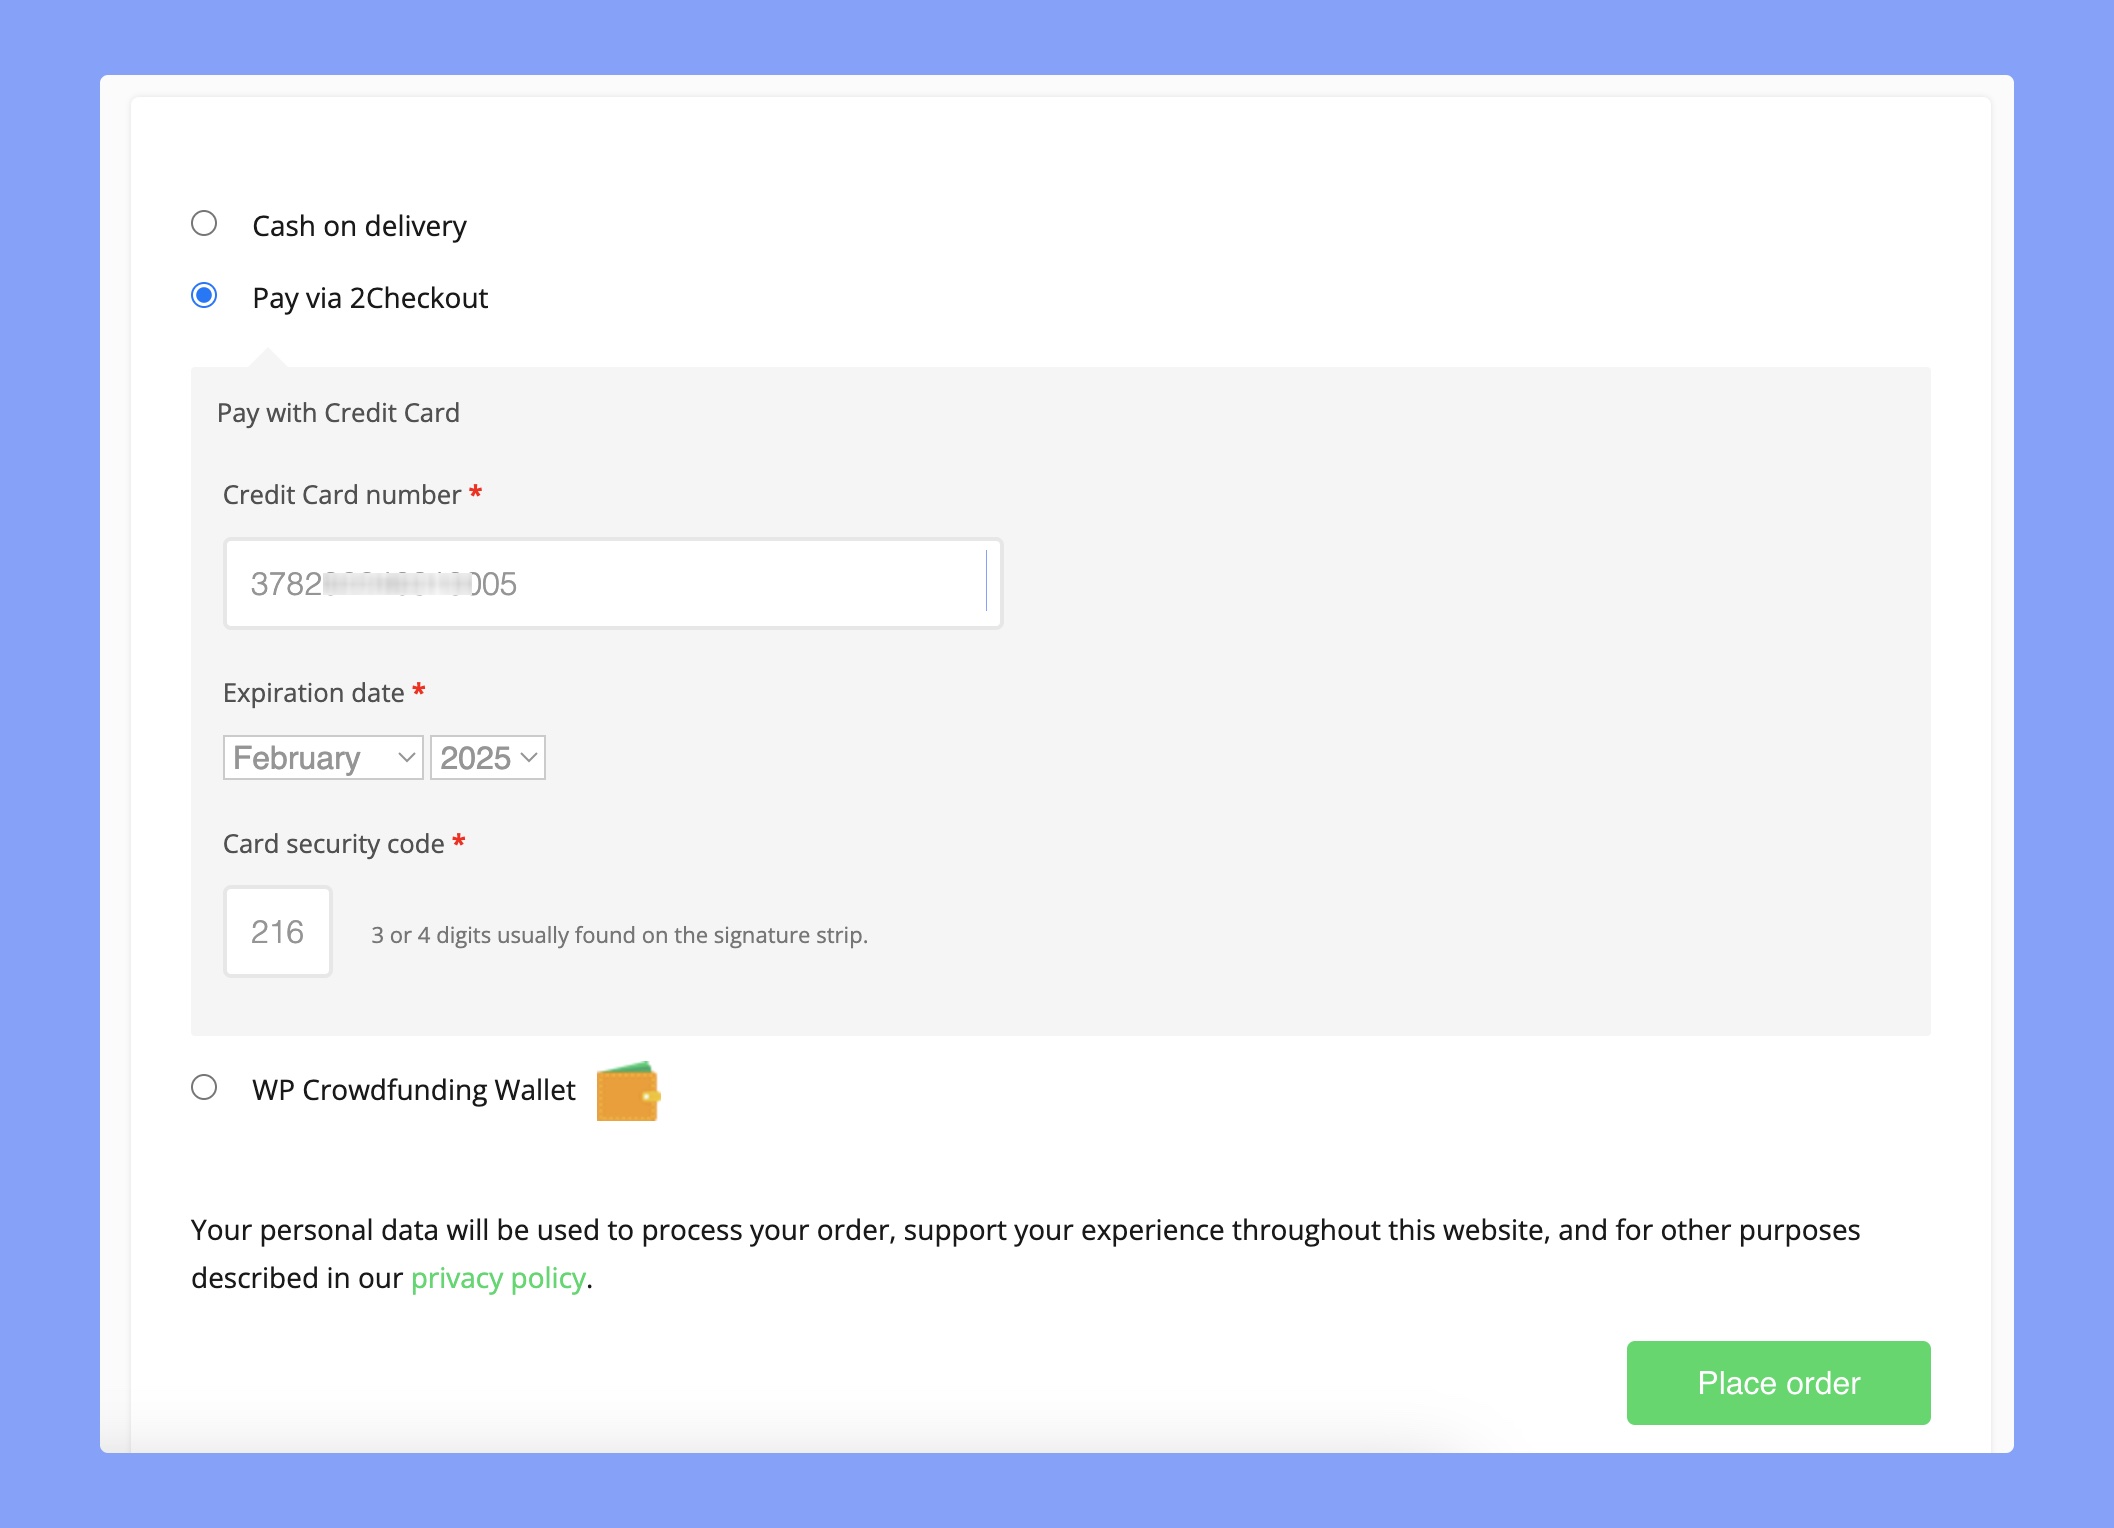
Here’s the frontend preview of the 2Checkout payment method: