Stripe is a widely used payment gateway. You can use Stripe Connect with WP Crowdfunding to receive payment from the donors. Most importantly, you can receive adaptive payments with Stripe.
Step 1: Enable Stripe Connect Add-on
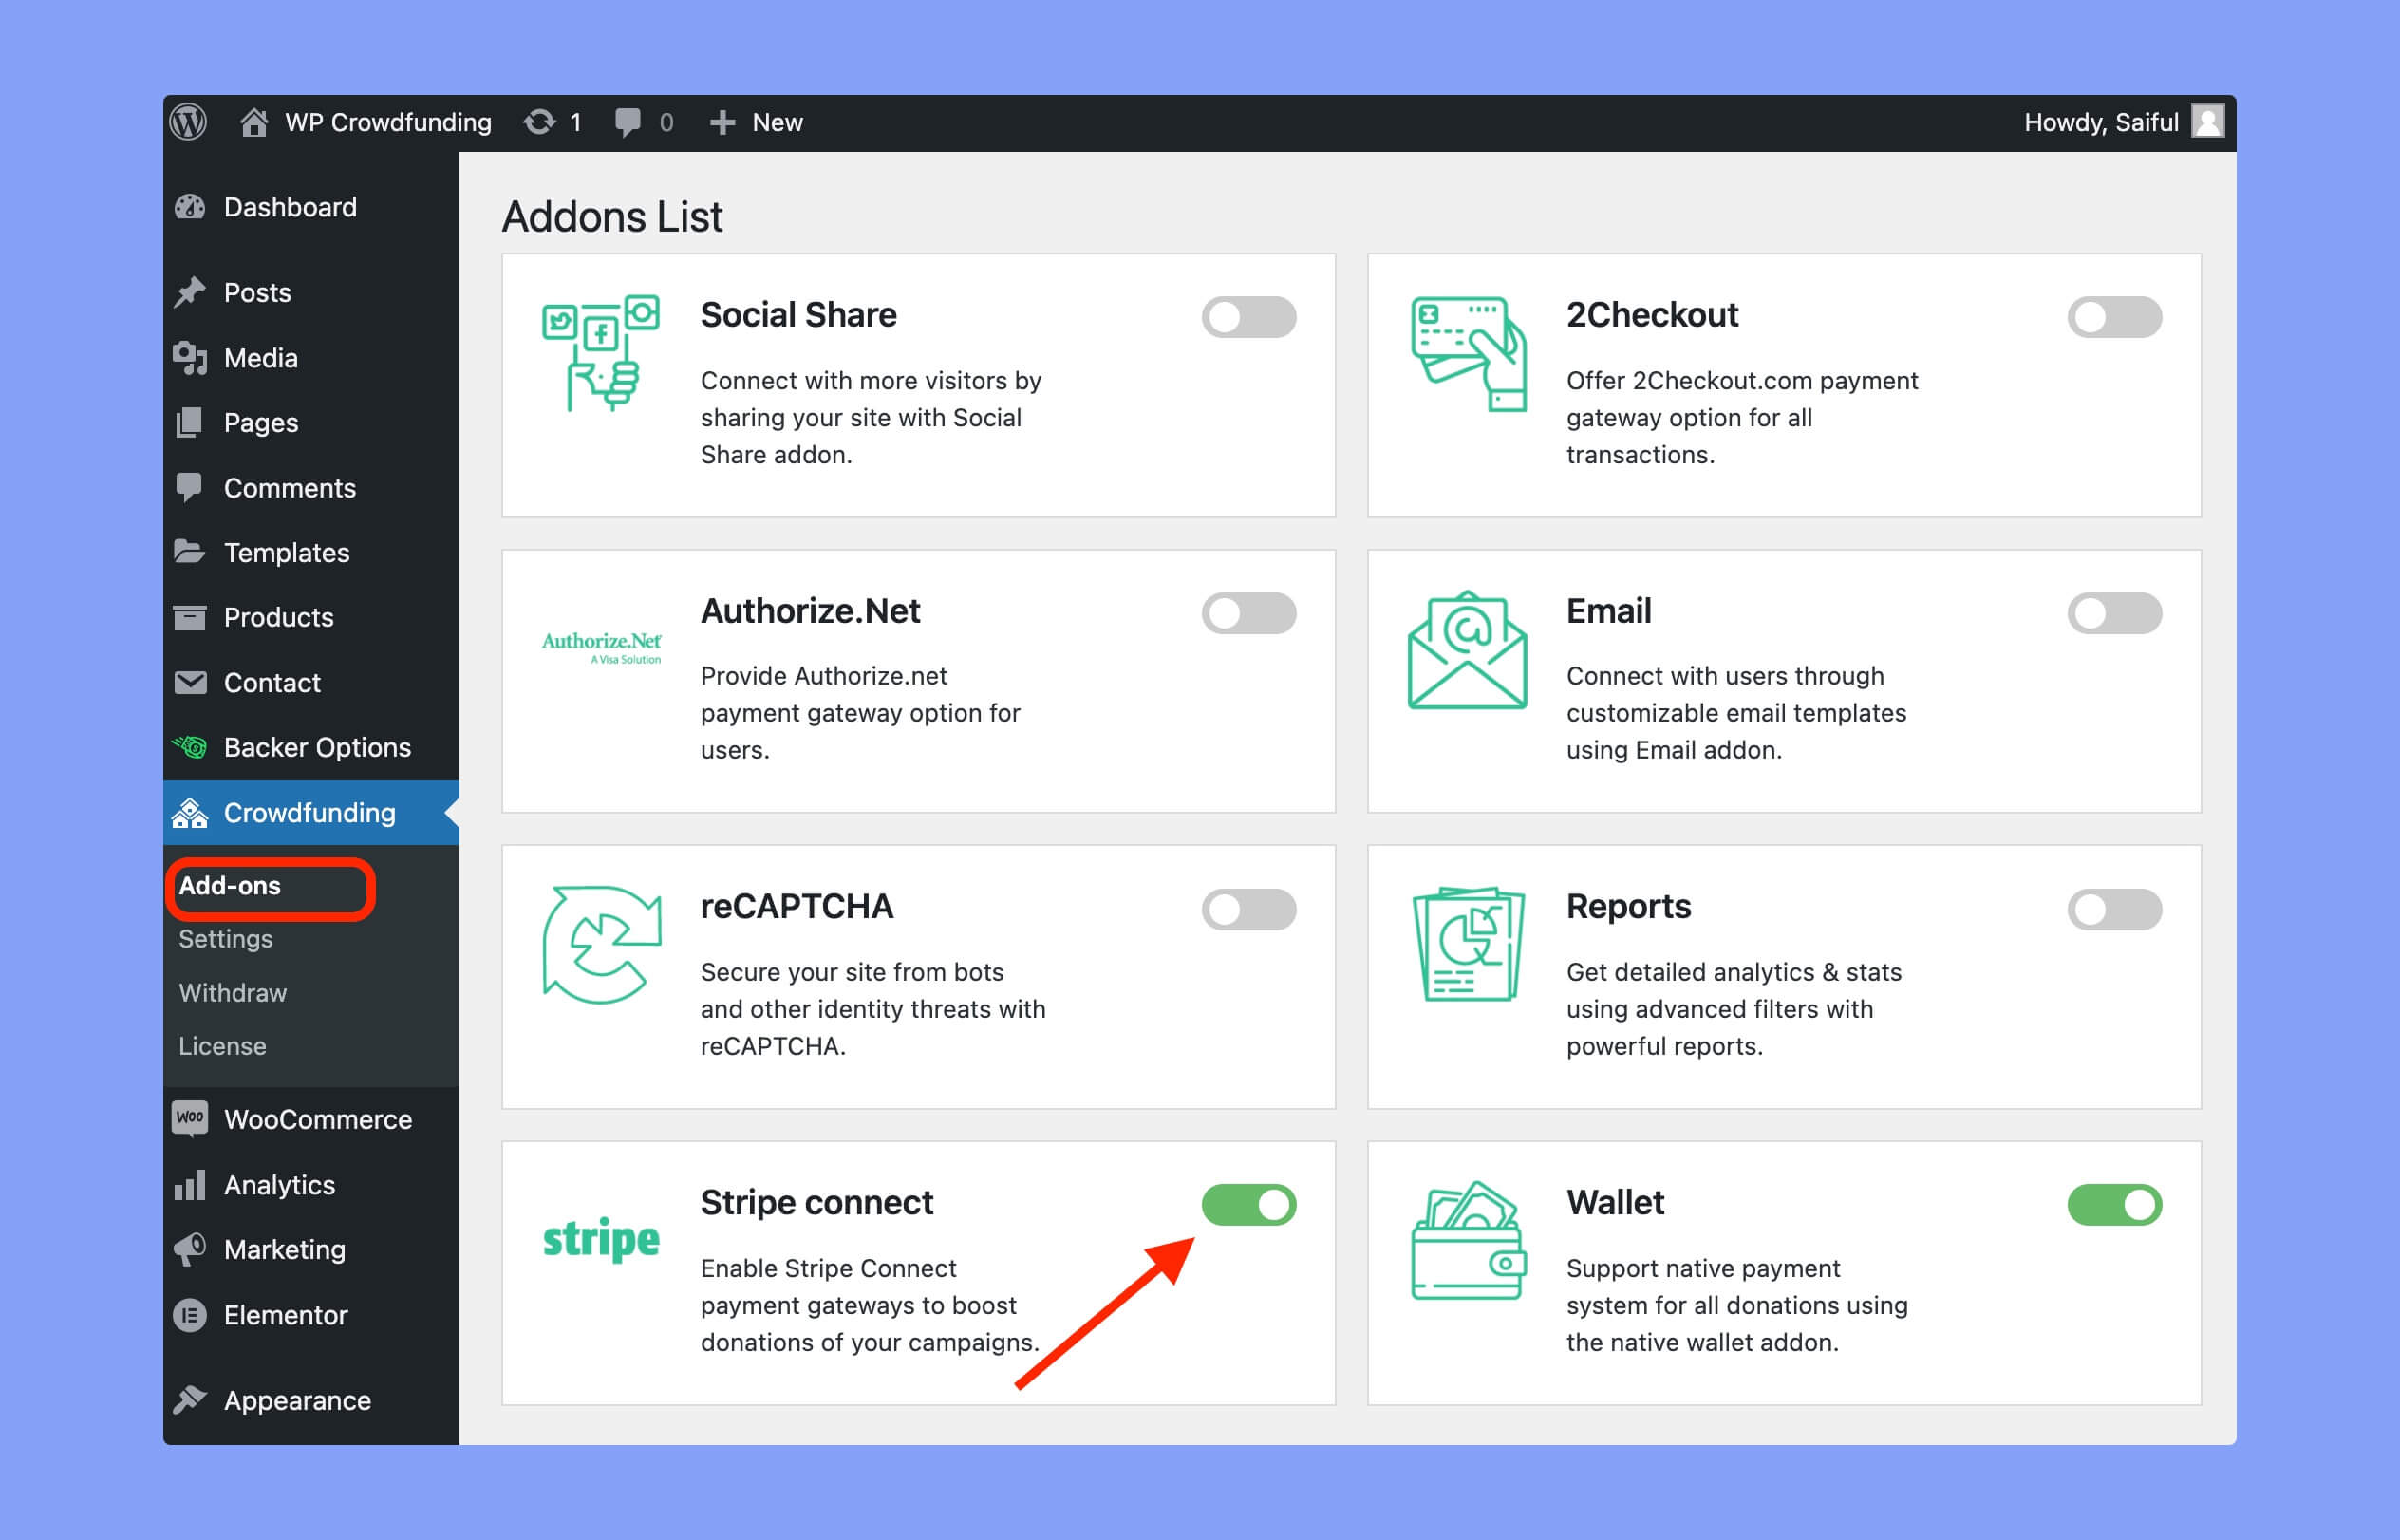
First, you need to enable the Stripe Connect add-on. Go to WP Dashboard > Crowdfunding > Add-on and enable Stripe Connect using the toggle button.
Step 2: Enable & Configure Your Stripe Payment Gateway
To start taking payment, you need to add your Stripe Connect account and configure it accordingly.
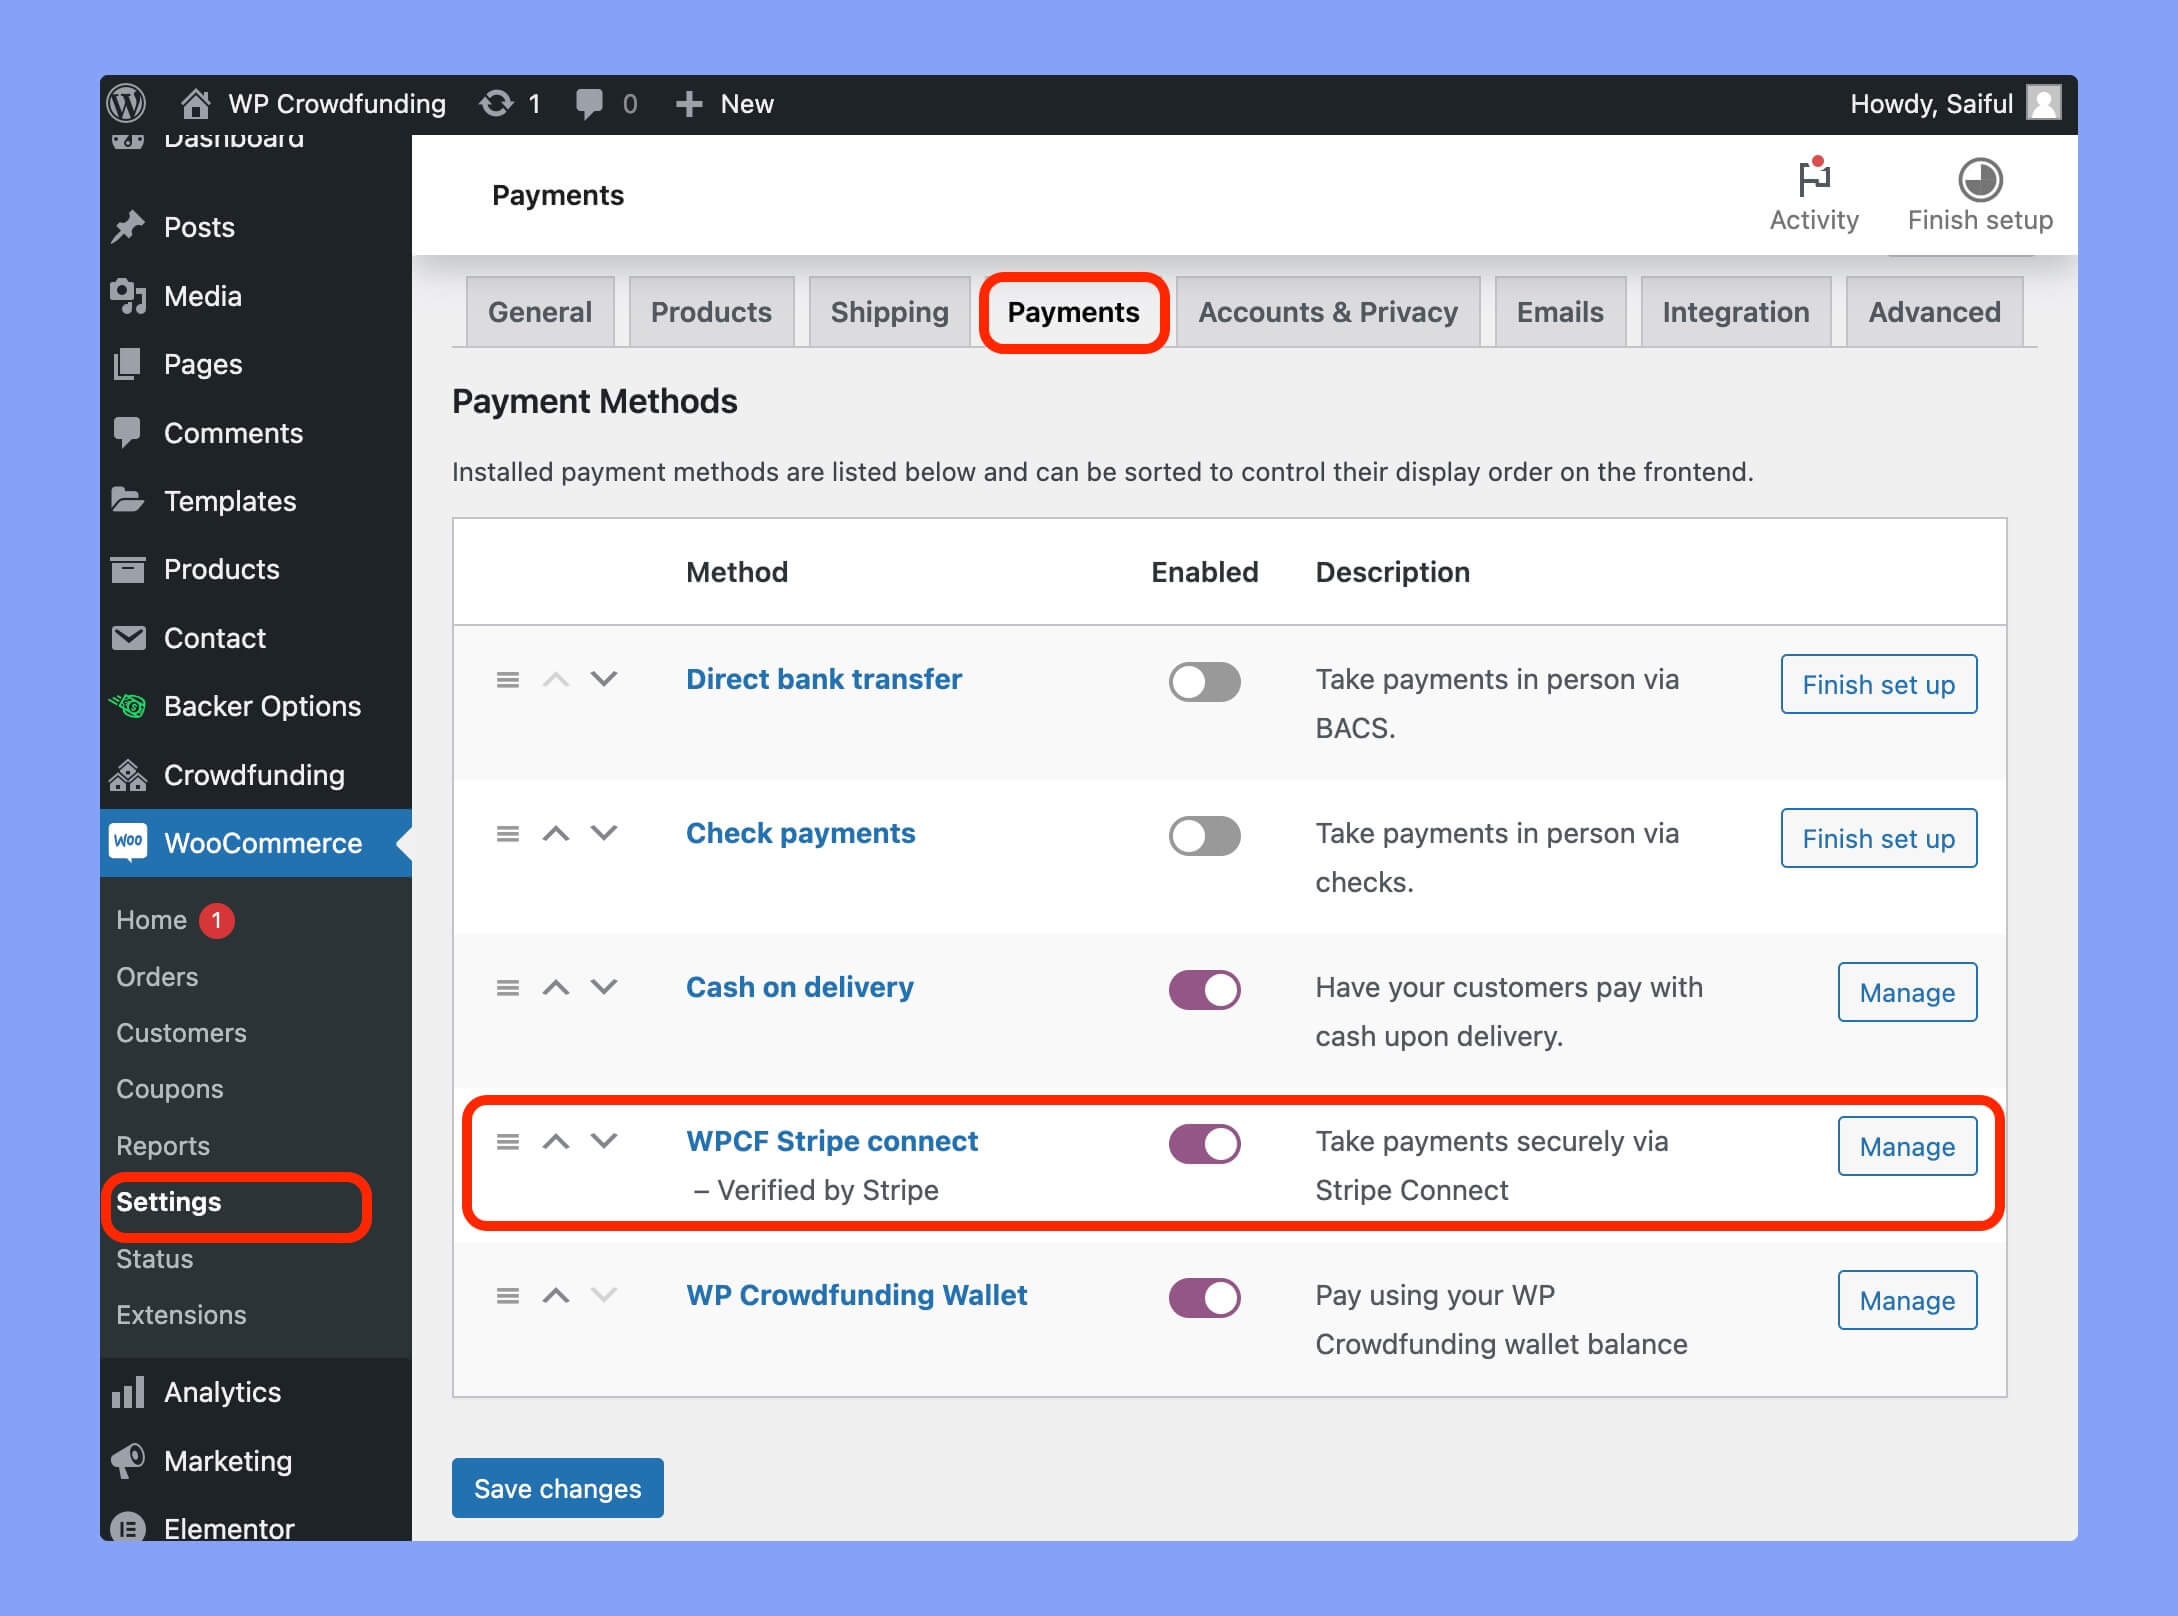
Navigate to wp-admin > WooCommerce > Settings > Payment
From here, enable the WPCF Stripe Connect payment option using the toggle button and click on the “Manage” button to set it up.
Once you click on it you will find the following options at your disposal.
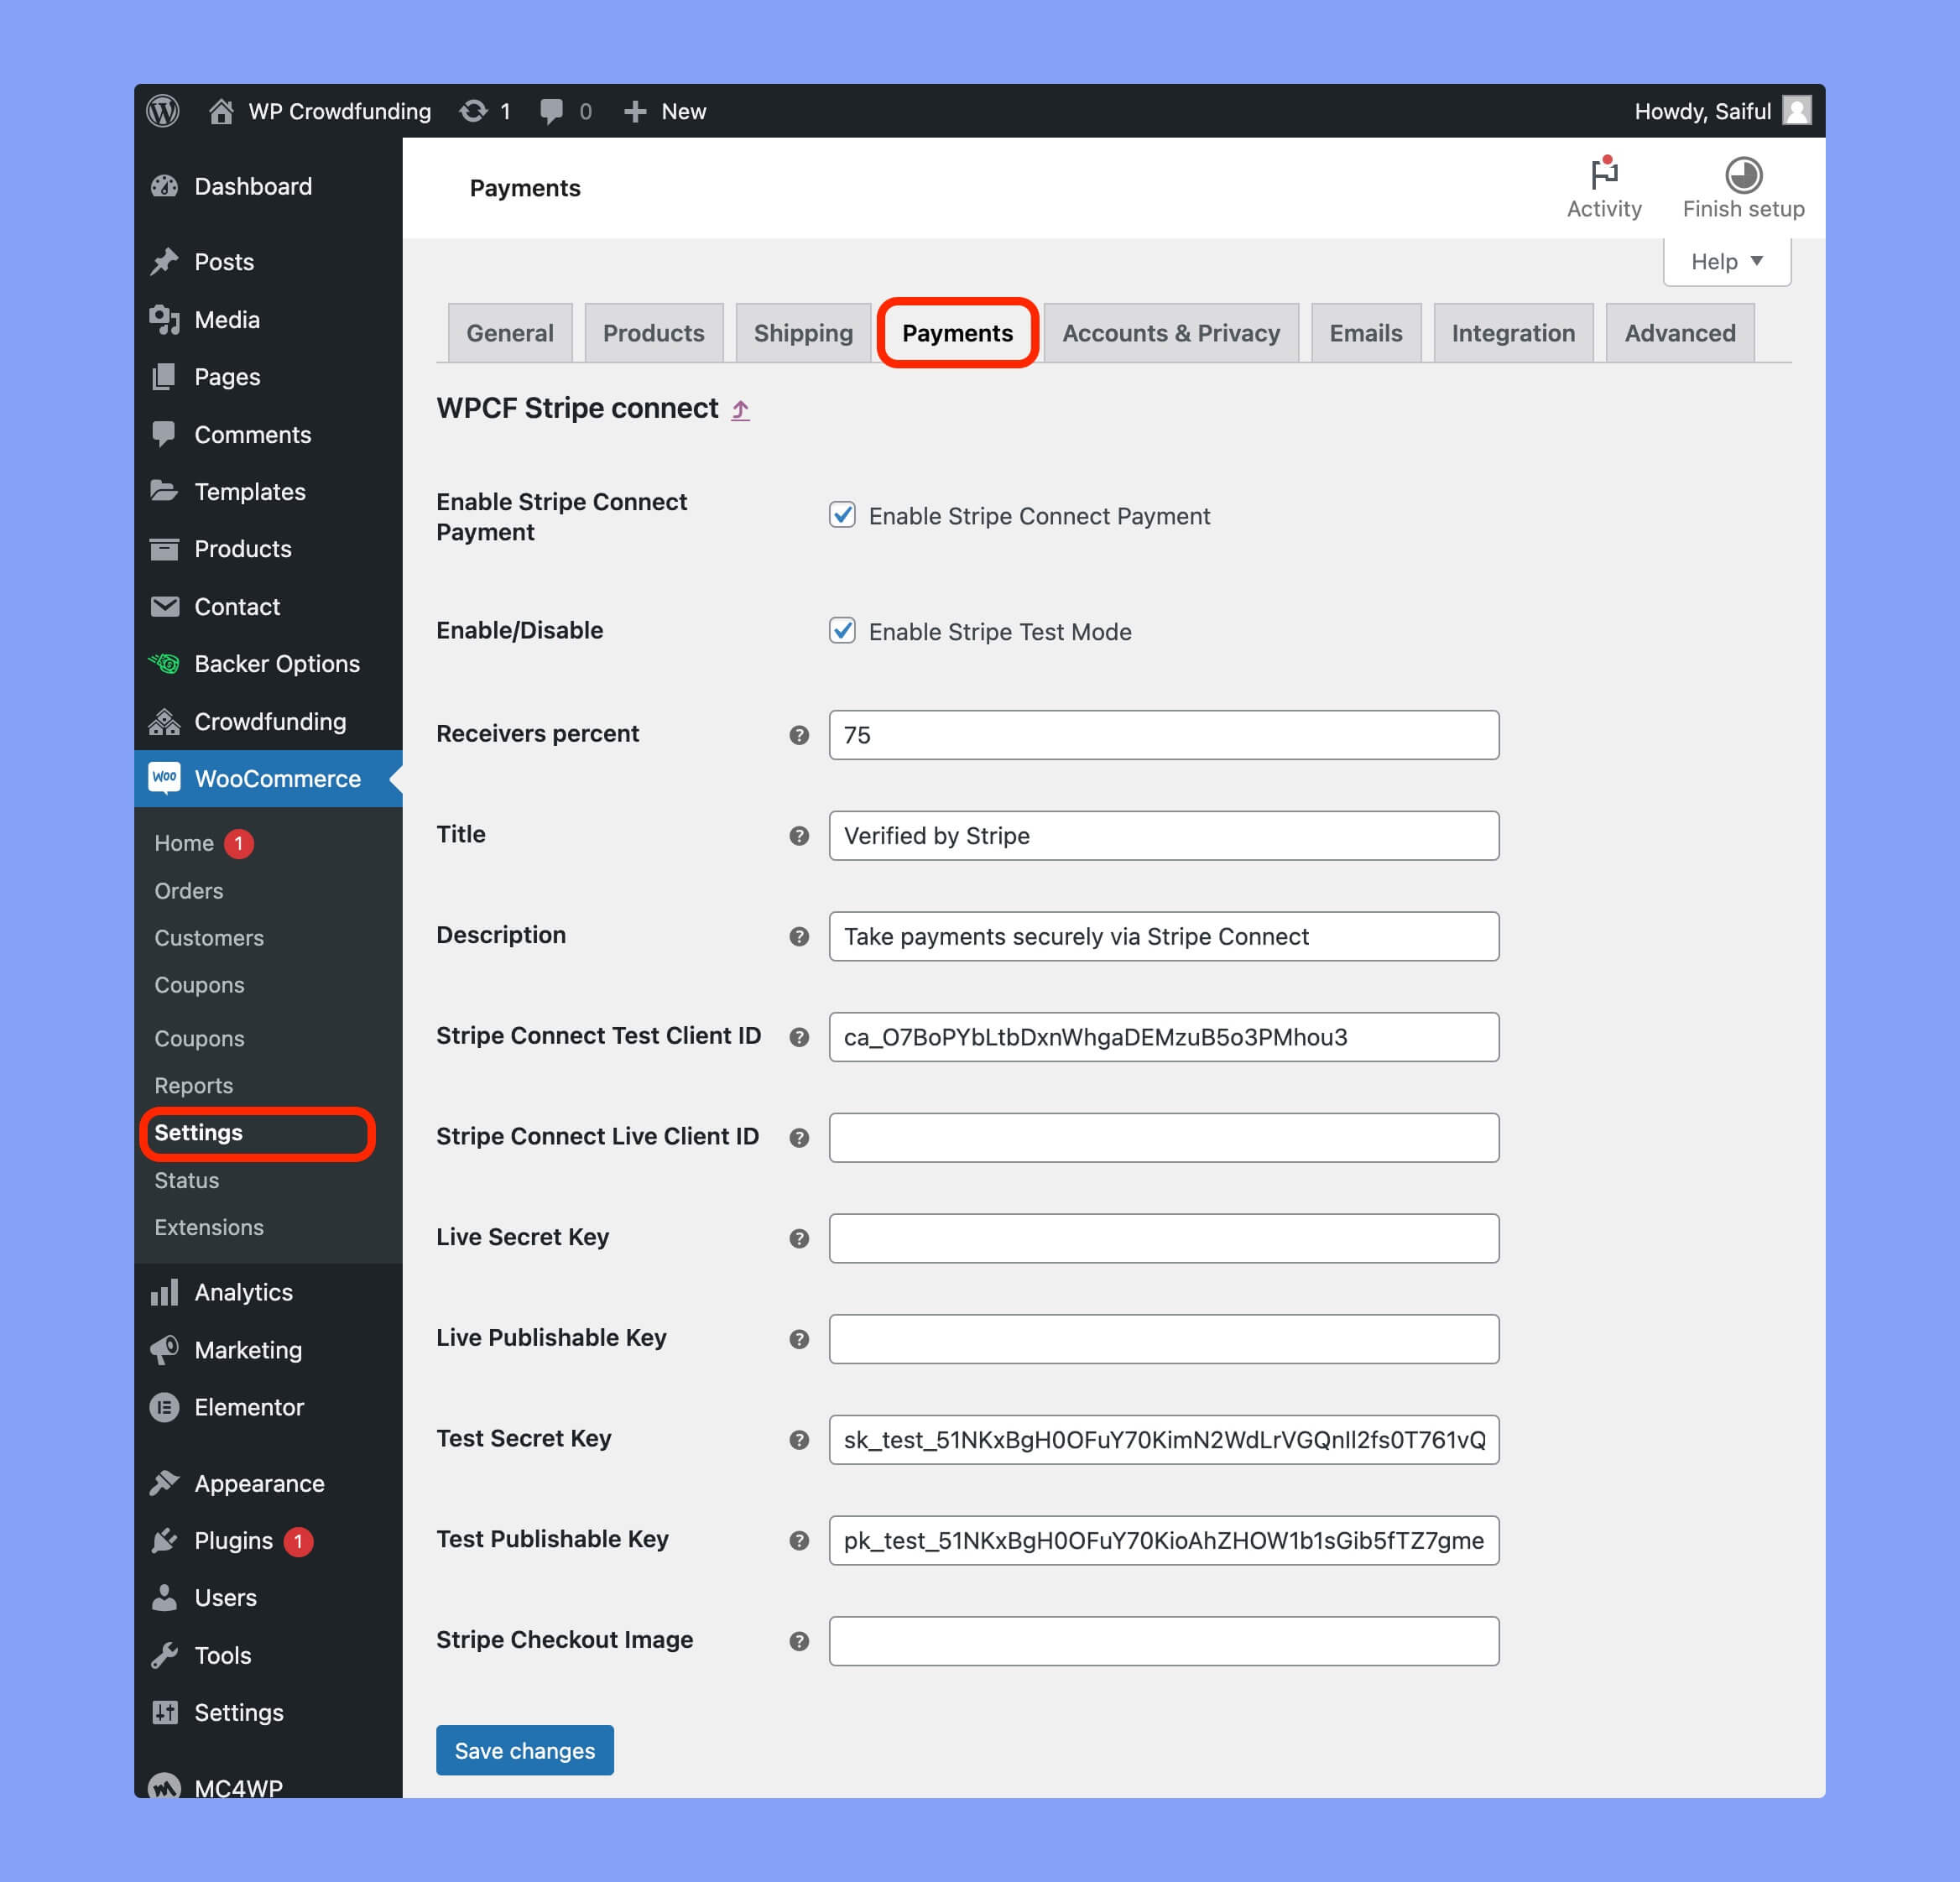
- Enable/Disable Stripe Connect: You can enable or disable the Stripe Connect payment option using the checkbox.
- Enable/Disable Stripe Test Mode: You can use this feature to enable/disable the Stripe test mode for various testing purposes.
- Receivers percent: Set the amount that the campaign owners will get. Rest of the amount will be deposited to Stripe owners account as fee.
- Title: Set the title that your visitors will see during checkout.
- Description: Set the description using the textbox that your visitors will see during checkout.
- Stripe Connect Test Client ID: Add your Stripe Connect Test Client ID from your Stripe account here.
- Stripe Connect Live Client ID: Add your Stripe Connect Live Client ID from your Stripe account here. Add your Stripe Connect Test Client ID from your Stripe account here.
- Live Secret Key: Add your Stripe Live Secret Key from your Stripe account here.
- Live Publishable Key: Add your Stripe Connect Live Publishable Key from your Stripe account here.
- Test Secret Key: Add your Stripe Connect Test Secret Key from your Stripe account here.
- Test Publishable Key: Add your Stripe Connect Test Test Publishable Key from your Stripe account here.
- Stripe Checkout Image: Enter the URL of the 128×128 px image that you want to add as the image of your product.
Once you are done with the configuration hit Save Changes.
Step 3: Setup your Stripe Account
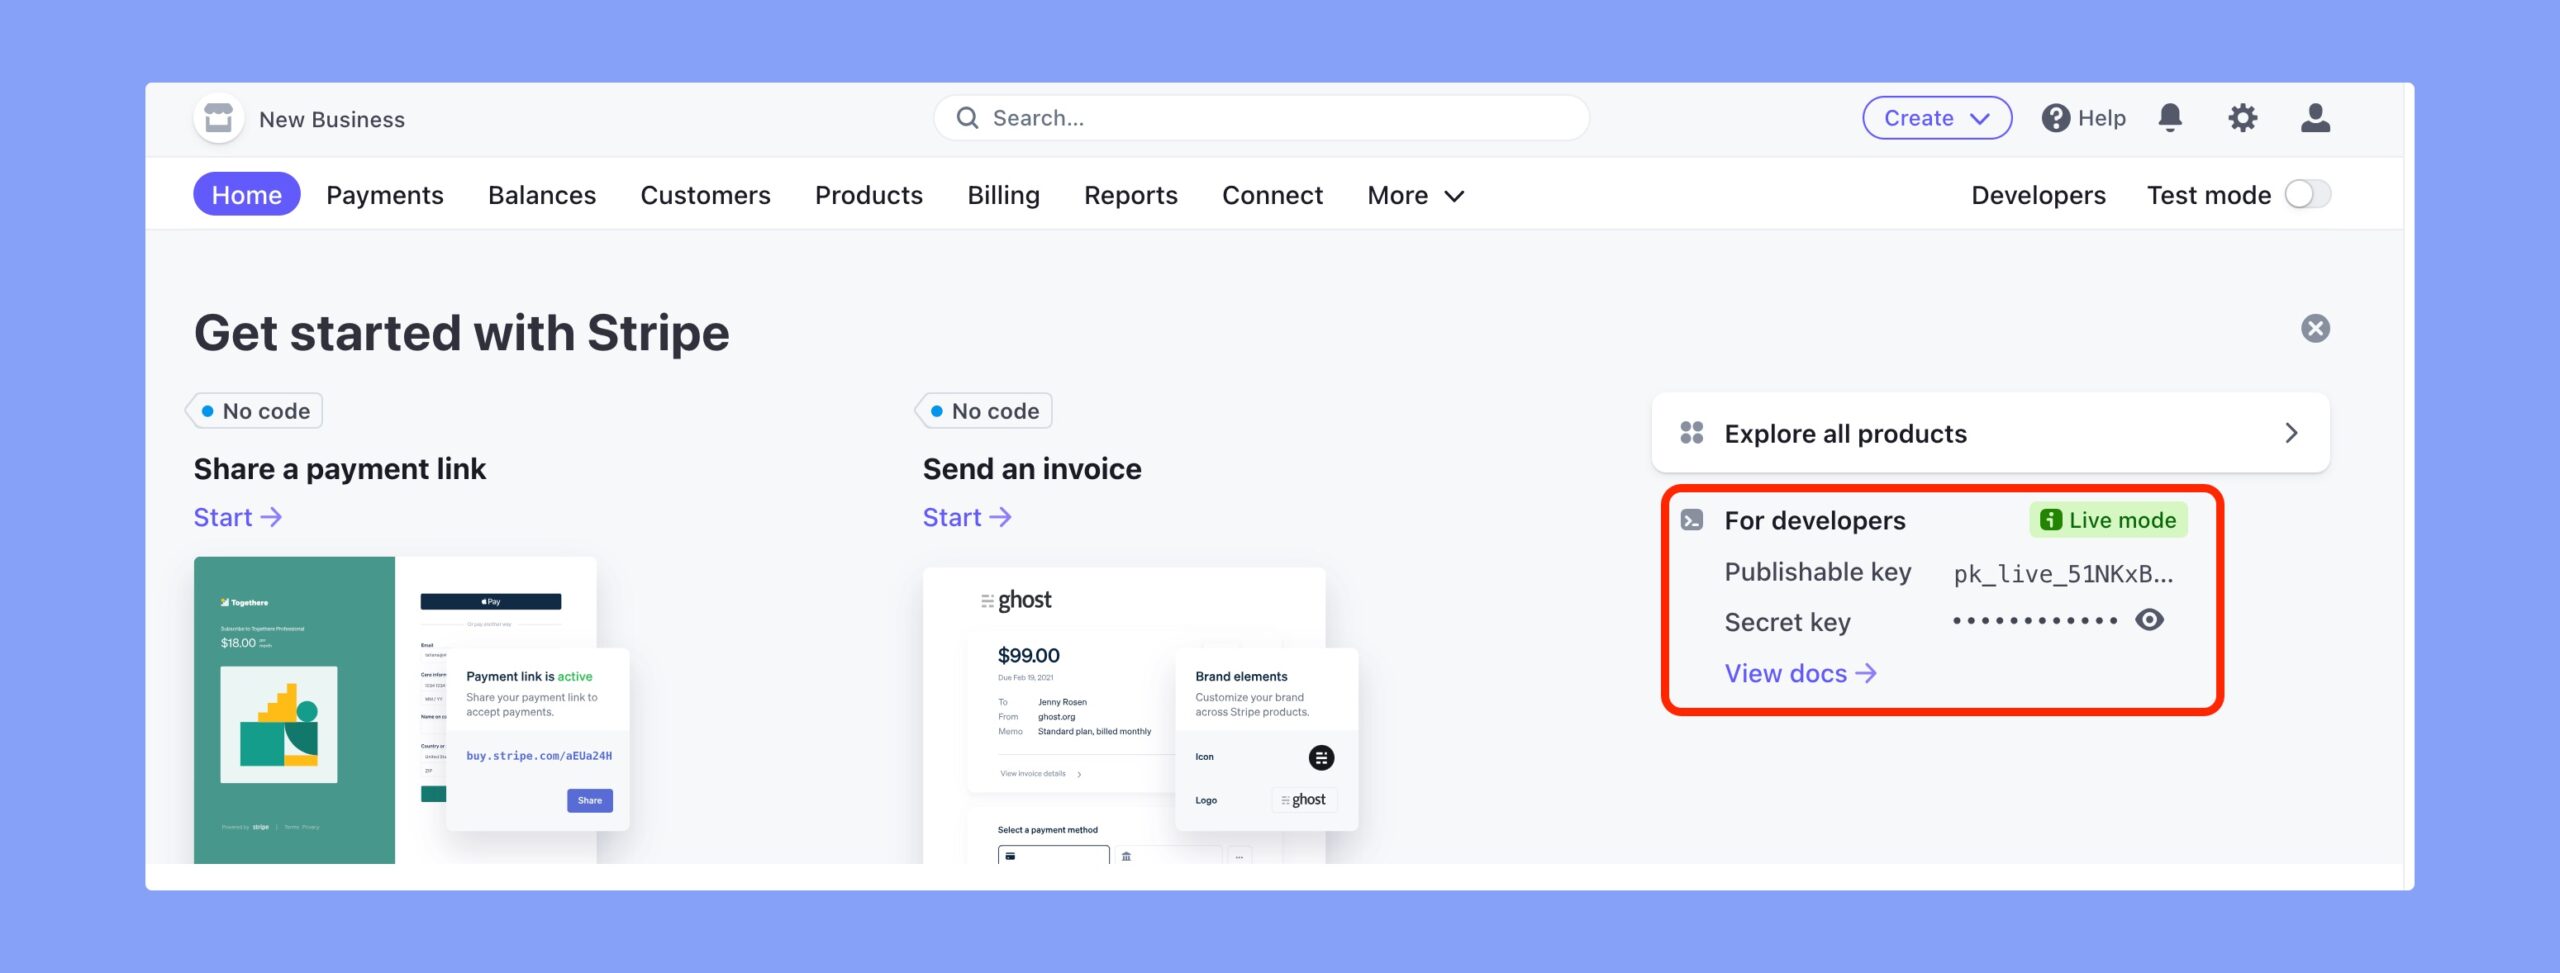
At first, create a Stripe account with your official Email and proceed to Stripe Dashboard. If you scroll down a little bit, you’ll get the “Get started with Stripe” section. Collect the Publishable Key and Secret Key from there.
Then go to the Settings option from the top bar and proceed to Stripe Connect Settings. Scroll down until you get the Redirects URI field.
Now, Click on the Add URI button and set the cf-dasboard page of your website as the Redirects URI.

Suppose, the domain name of your website is https://example.com. So, your Redirects URI will be https://example.com/cf-dashboard/
Step 4: Check Stripe Connection
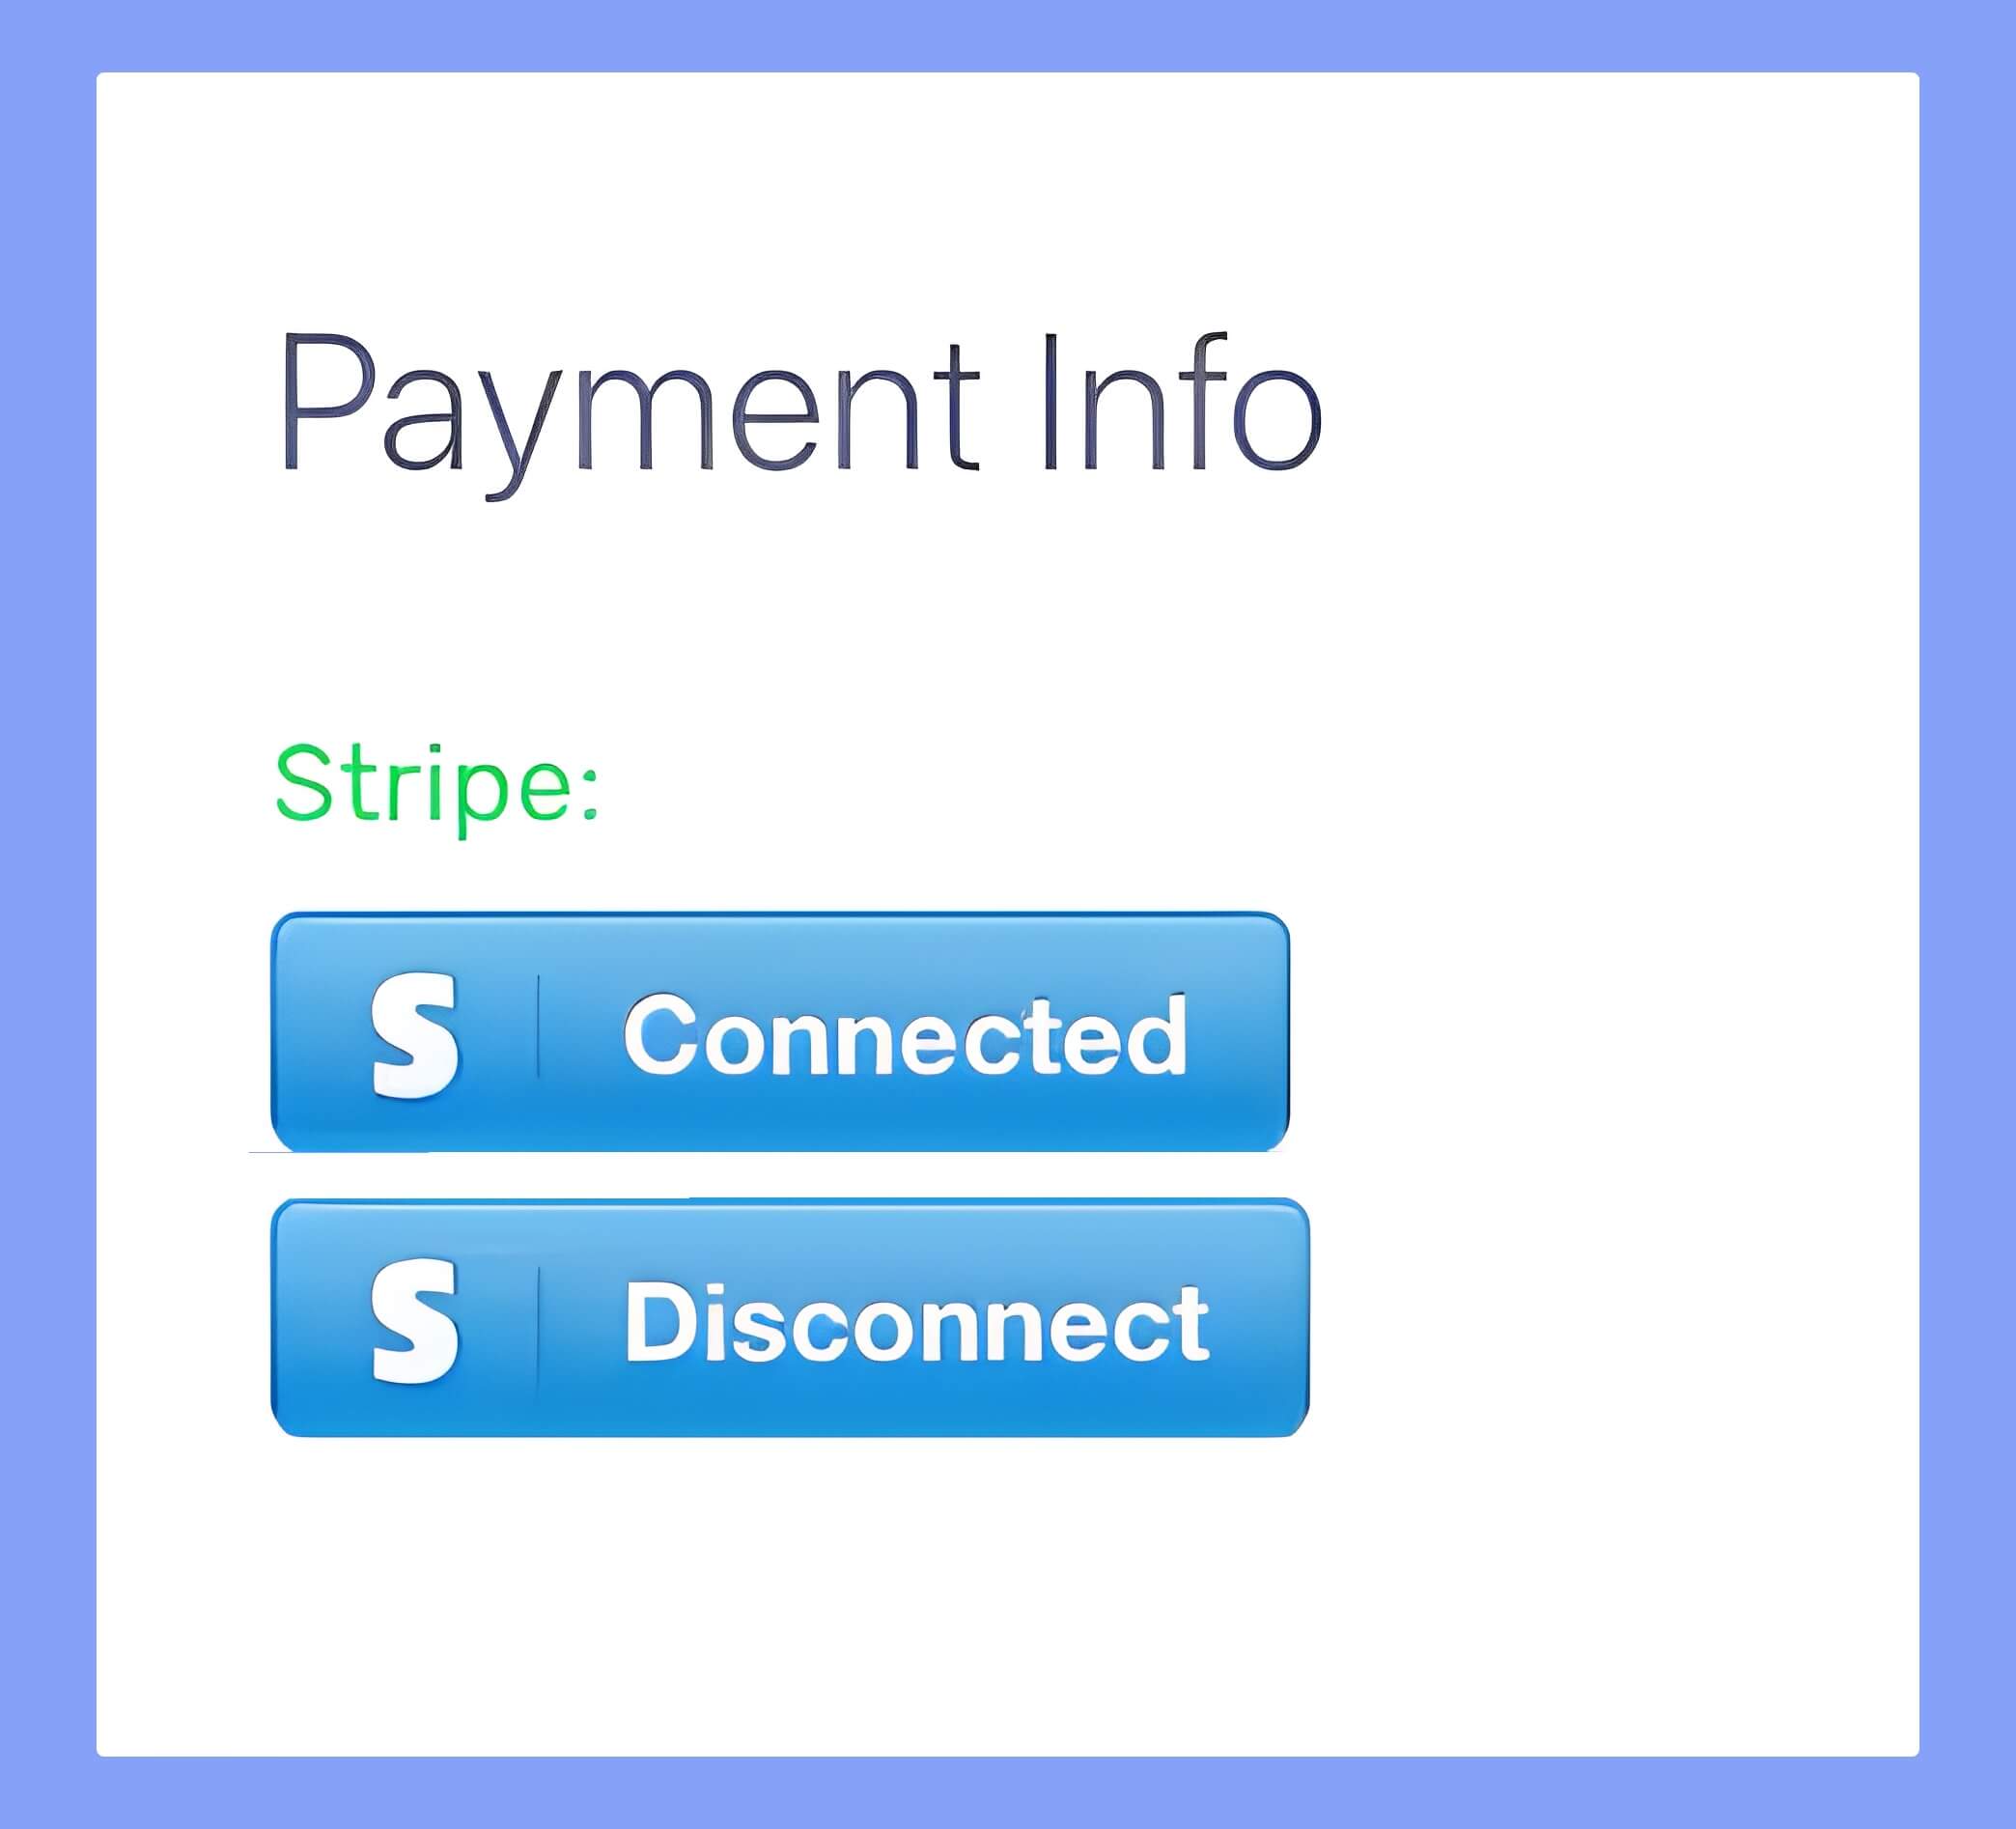
If everything goes right, you’ll get the “Connect with Stripe” button on every campign owners Crowdfunding dashboard under the ‘Payment Info’ section. This section will look like this:
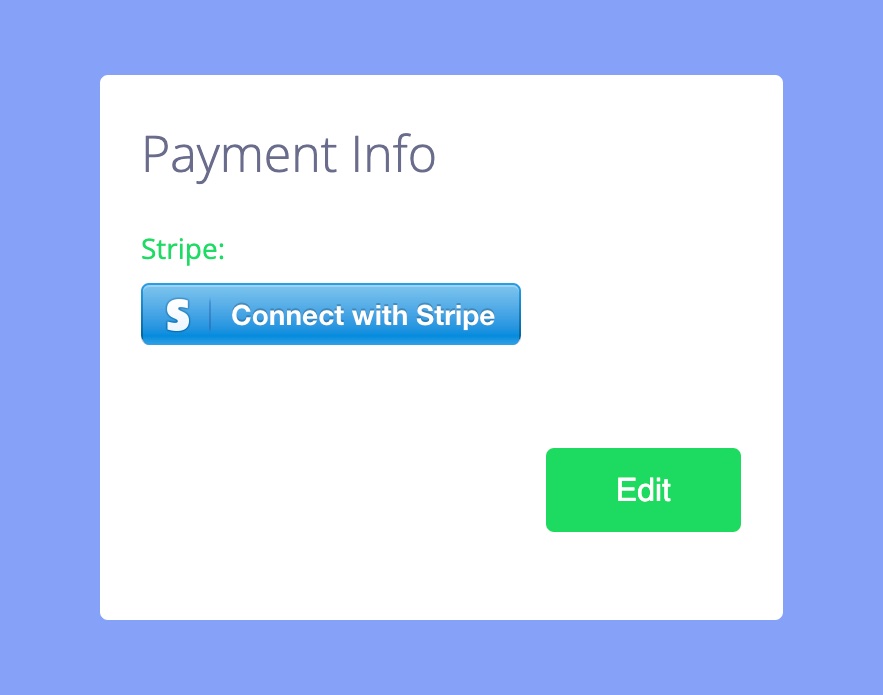
Clicking on this button will redirect the campaign owner to the Stripe Connect login page.
There the campaign owner’s have to login their individual Stripe account using their own credentials.

After loggin in successfully, of campaign owner will be redirected to Crowdfunding dashboard and the disconnect button will appear.
Once it’s connected properly, now you will be able to start taking payments using the Stripe Connect payment gateway.
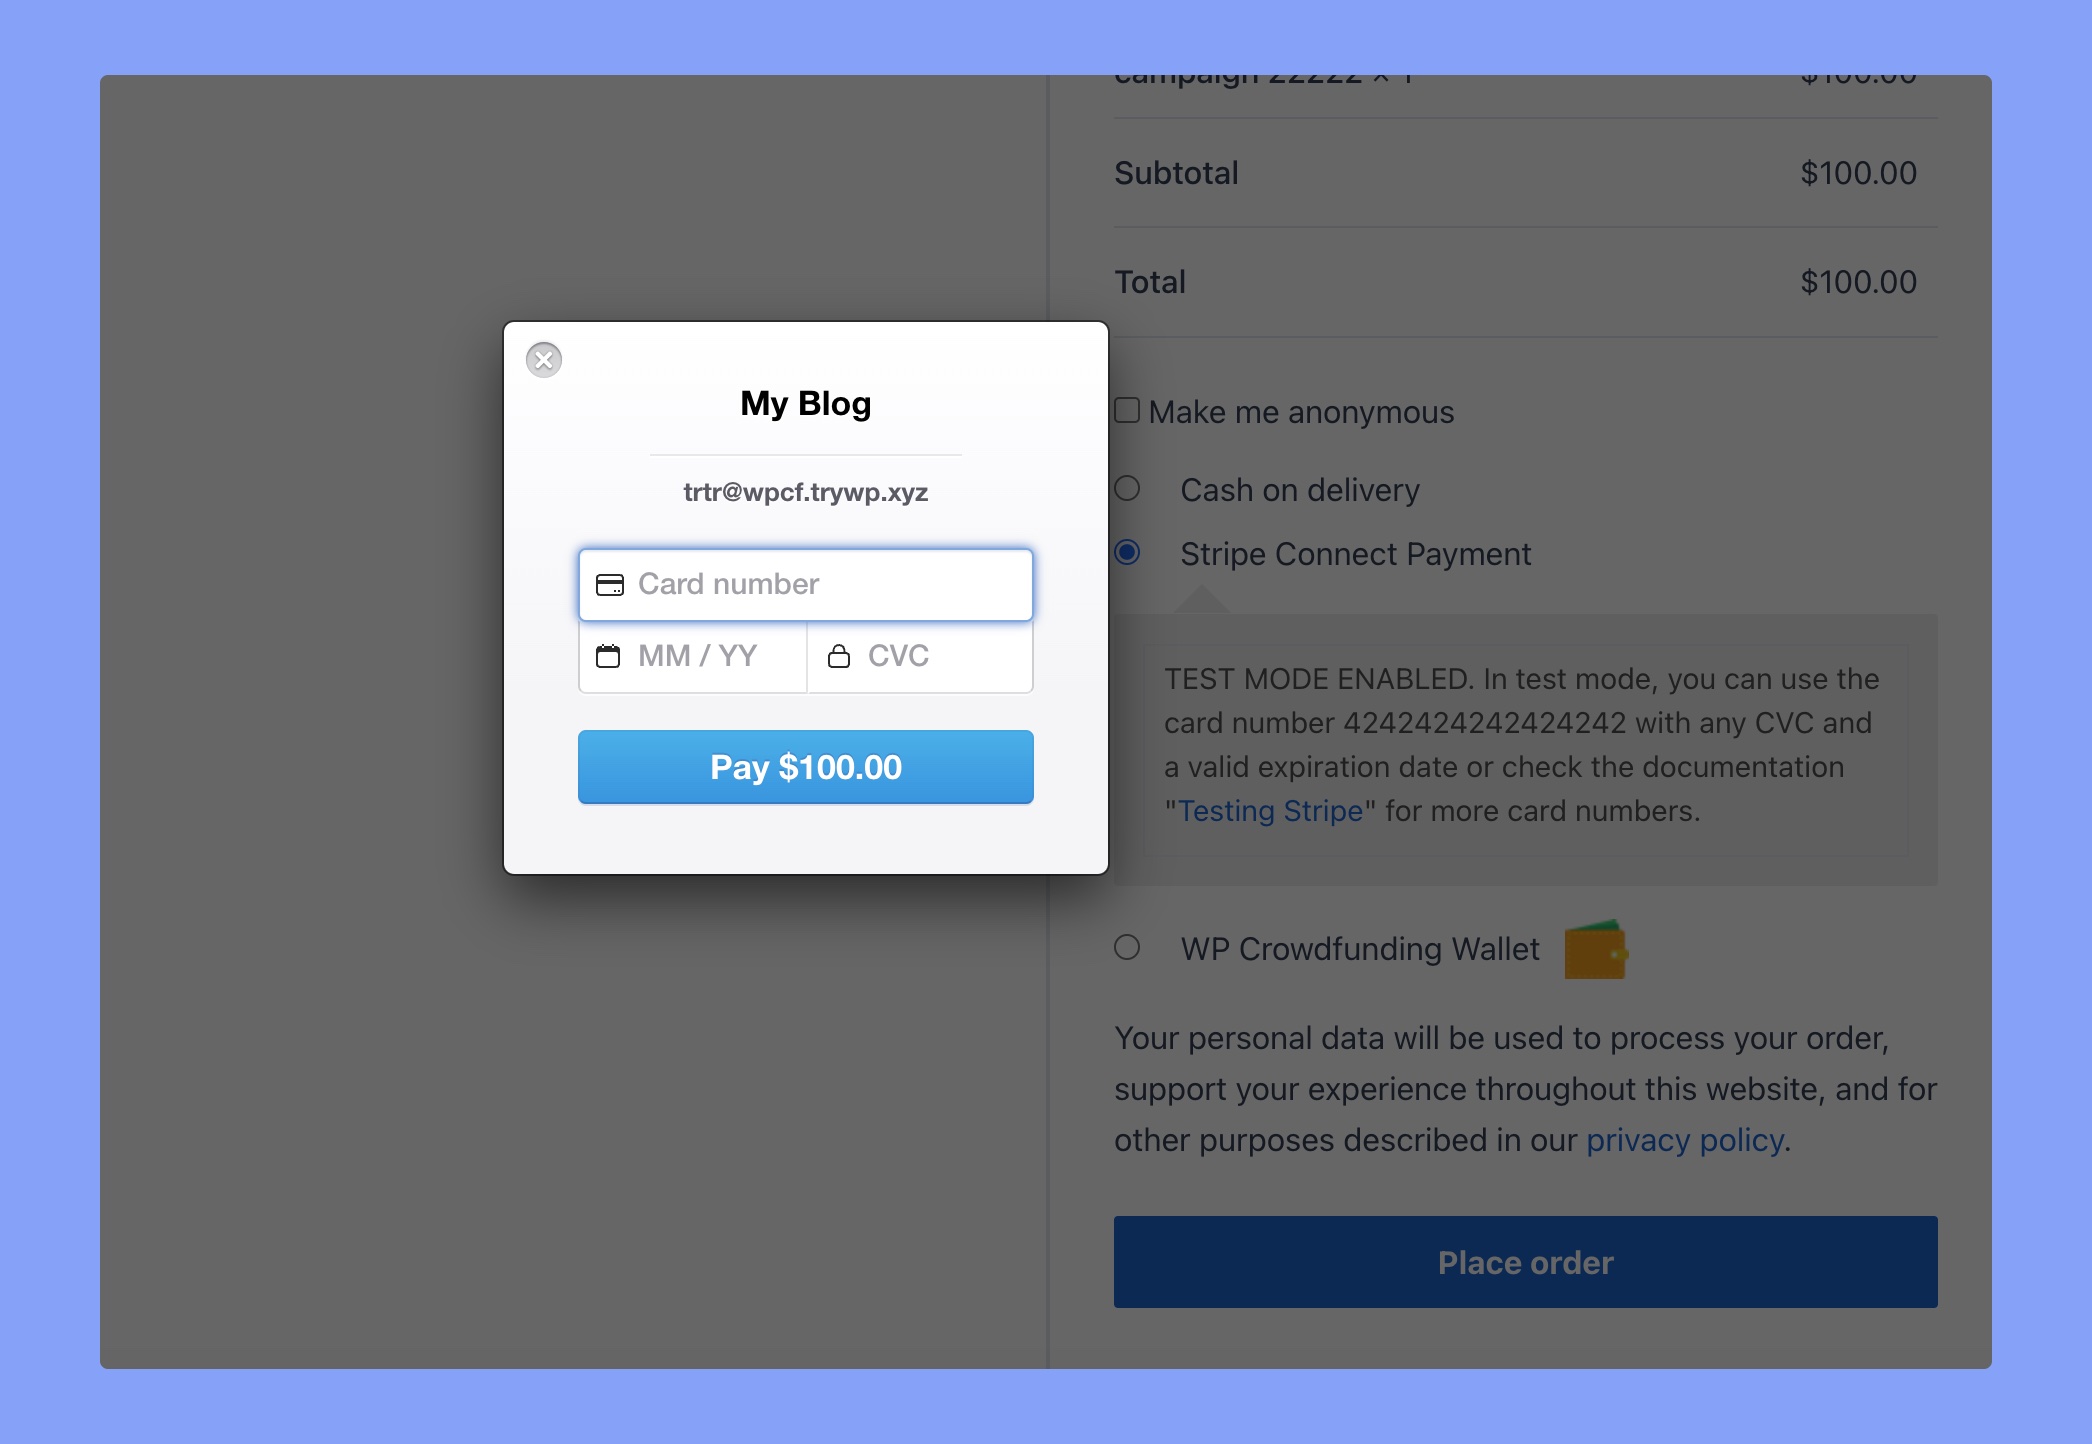
Payment Procedure via Stripe
To pay via Stripe, Backers have to select the “Stripe Connect Payment” option as the payment method.

After clicking on the “Place order” button, Backers will get a popup where they have to input their card information. Then click on the Pay button and the donation will be completed.