Autorize.Net is a popular payment gateway that is used by some of the most popular sites in the world. WP Crowdfunding has a built-in addon that lets you connect your Authorize.Net account and take payments for your campaigns.
You’ll just need an active Authorize.Net account to implement the Authorize.Net payment gateway to your website. To start the implementation process, please follow the below-mentioned steps.
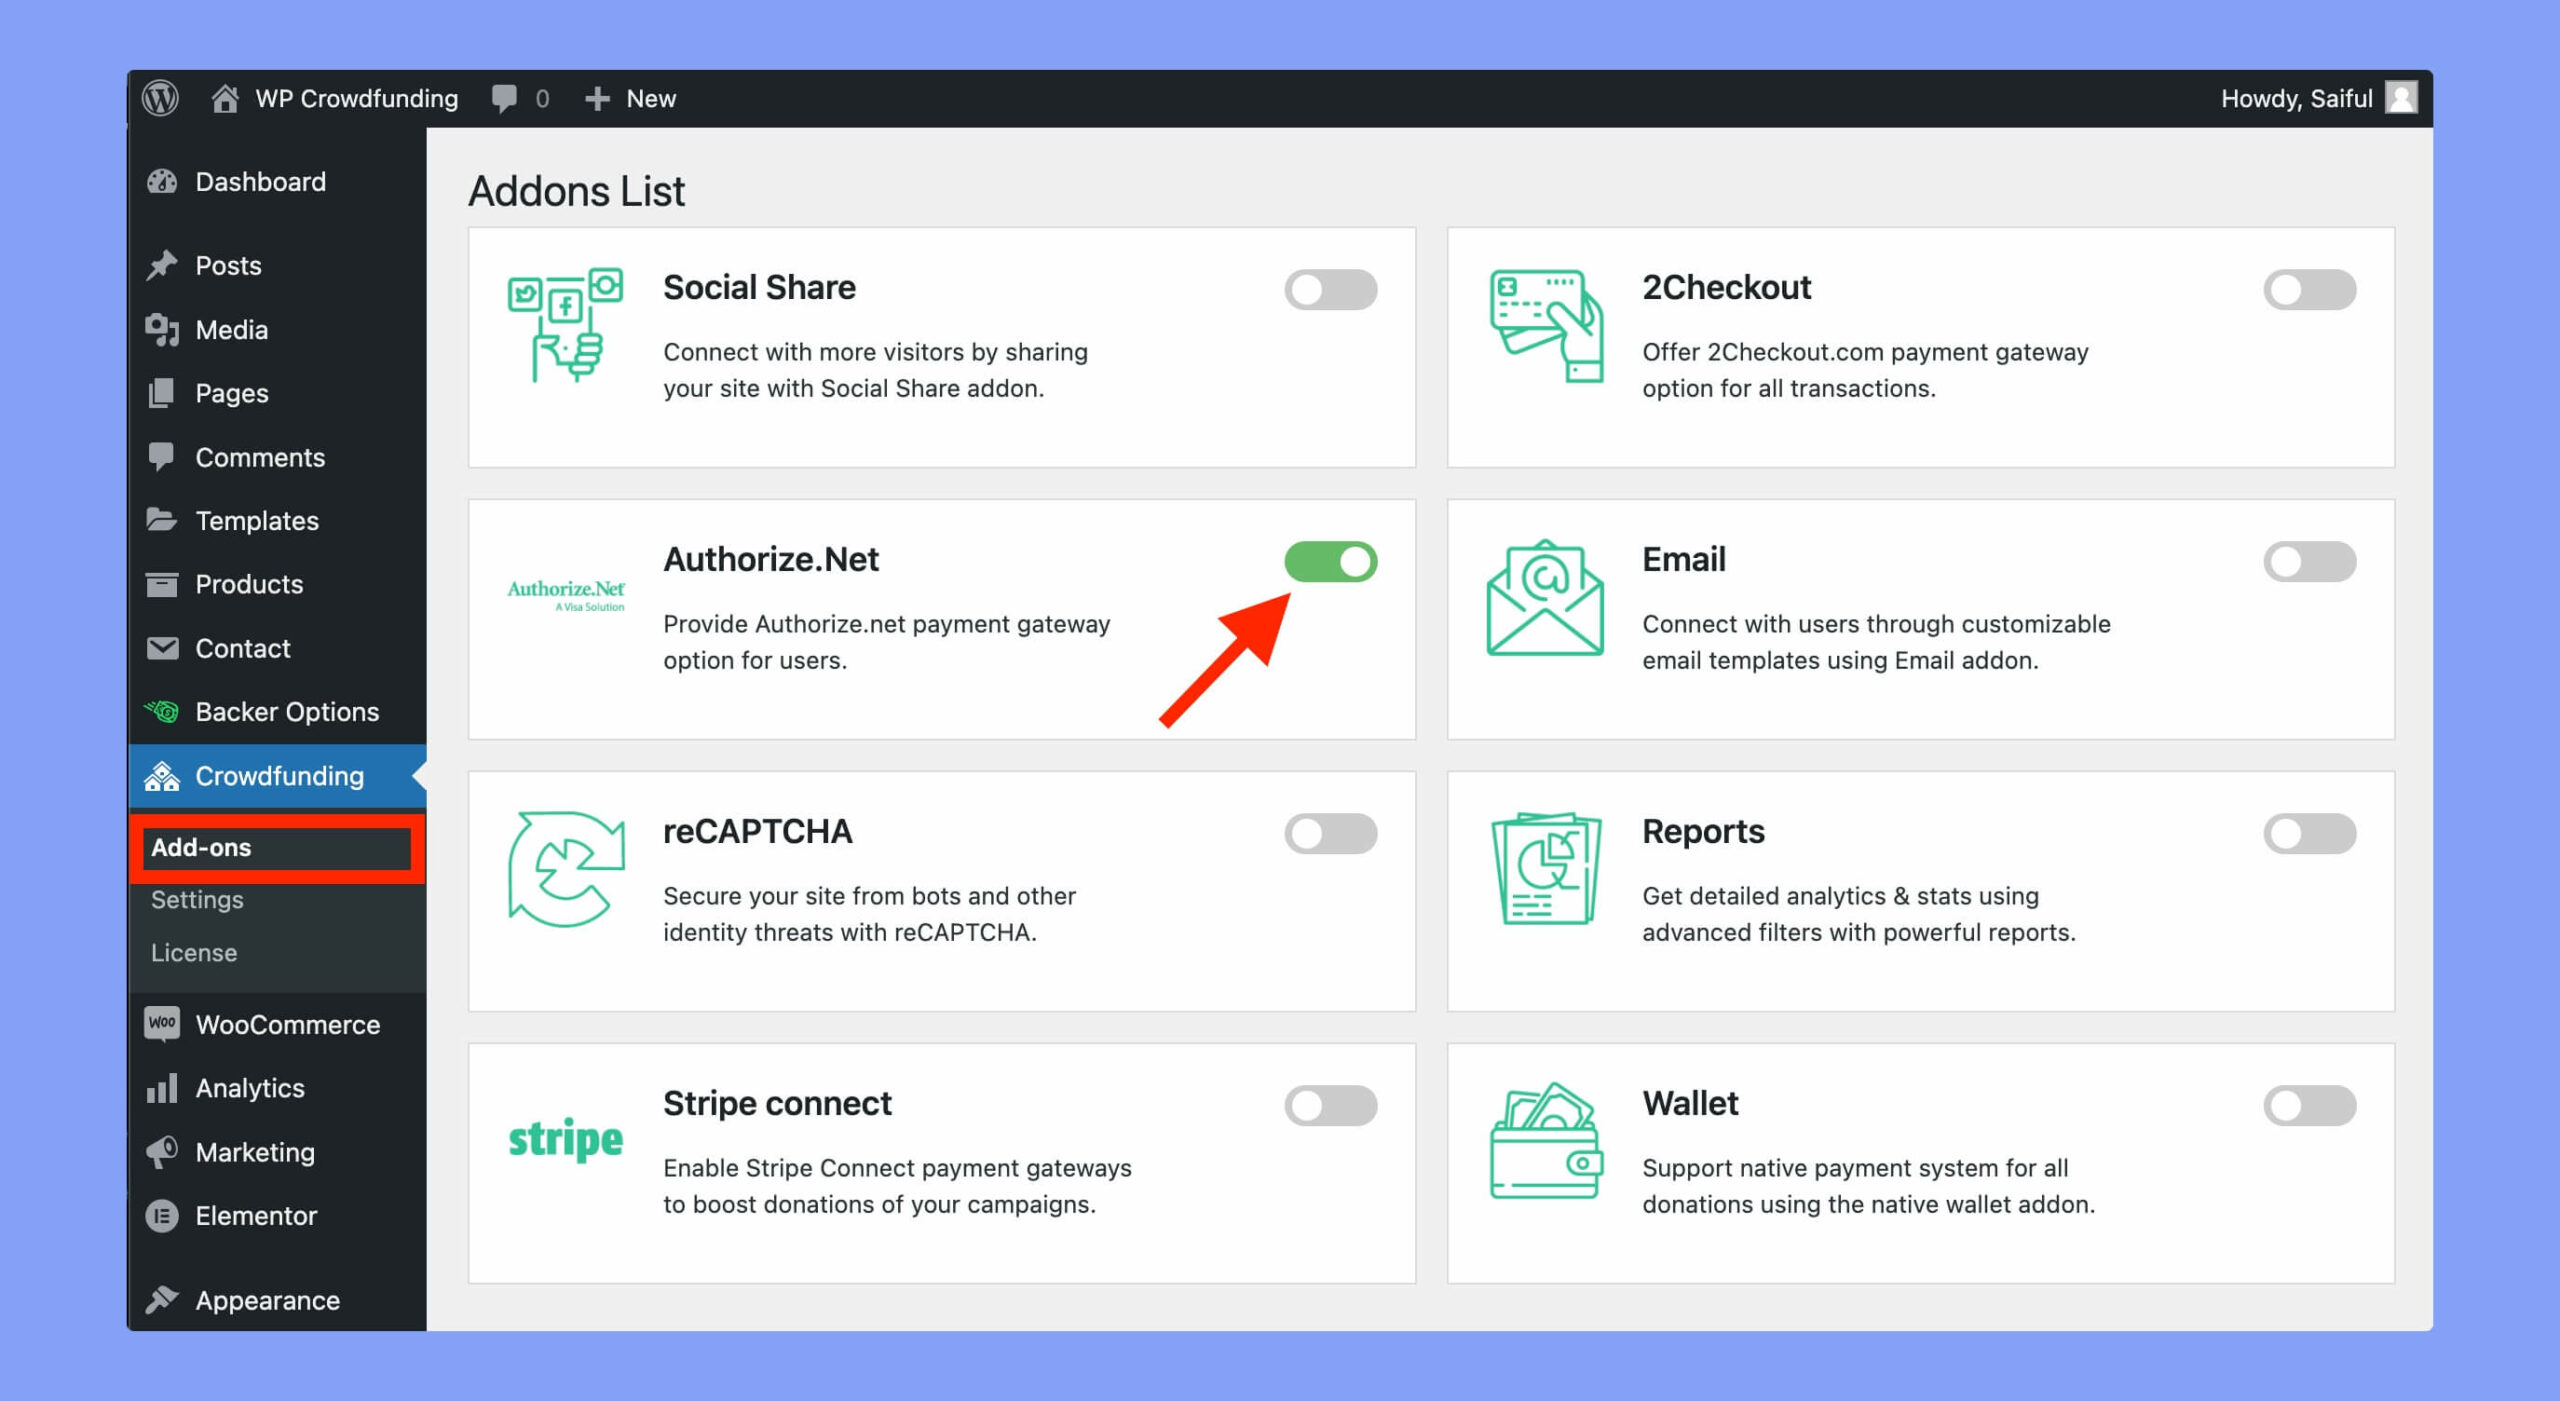
Step 1: Enable the Authorize.Net Add-on
First, you need to enable the Authorize.Net add-on. Go to WP Dashboard > Crowdfunding > Add-ons and enable the Authorize.Net addon using the toggle button.
Step 2: Enable & Configure Your Authorize Payment Gateway
To start taking payment, you need to add your Authorize.Net account and configure it to suit your needs. Navigate to WP Dashboard > WooCommerce > Settings > Payment and enable the Authorize.Net payment gateway.
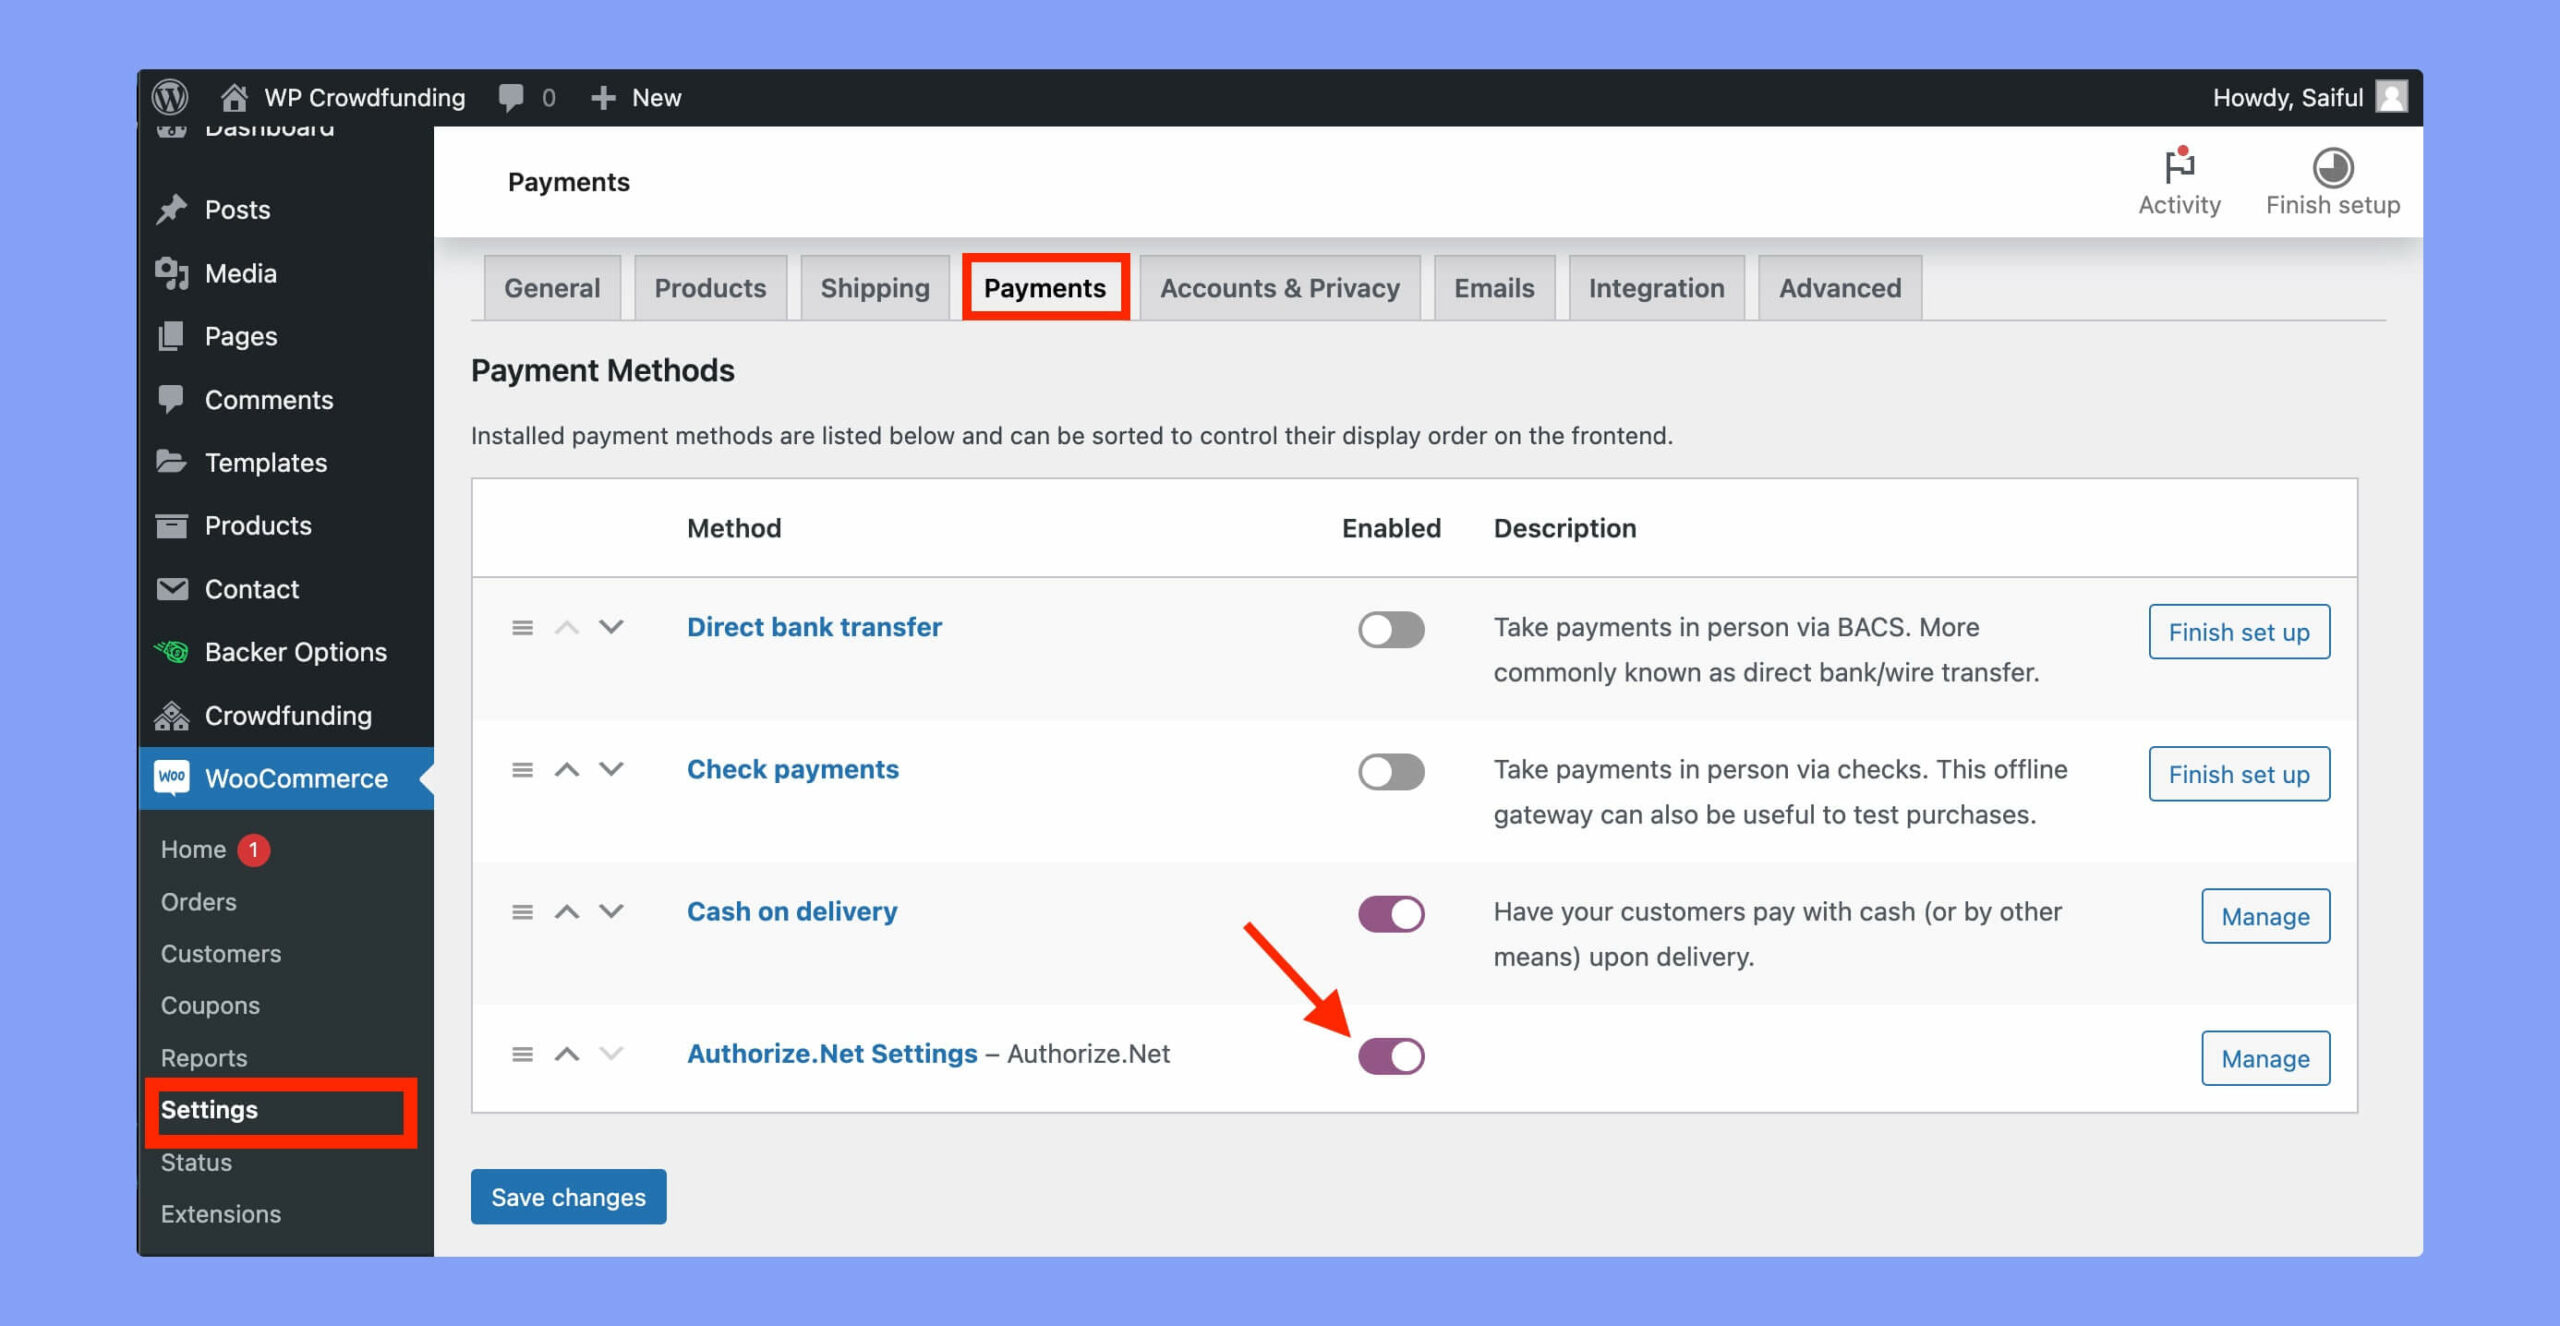
Afrer enabling, click on the “Manage” button to set it up in the way you want. Once you click on it you will find the following options at your disposal.
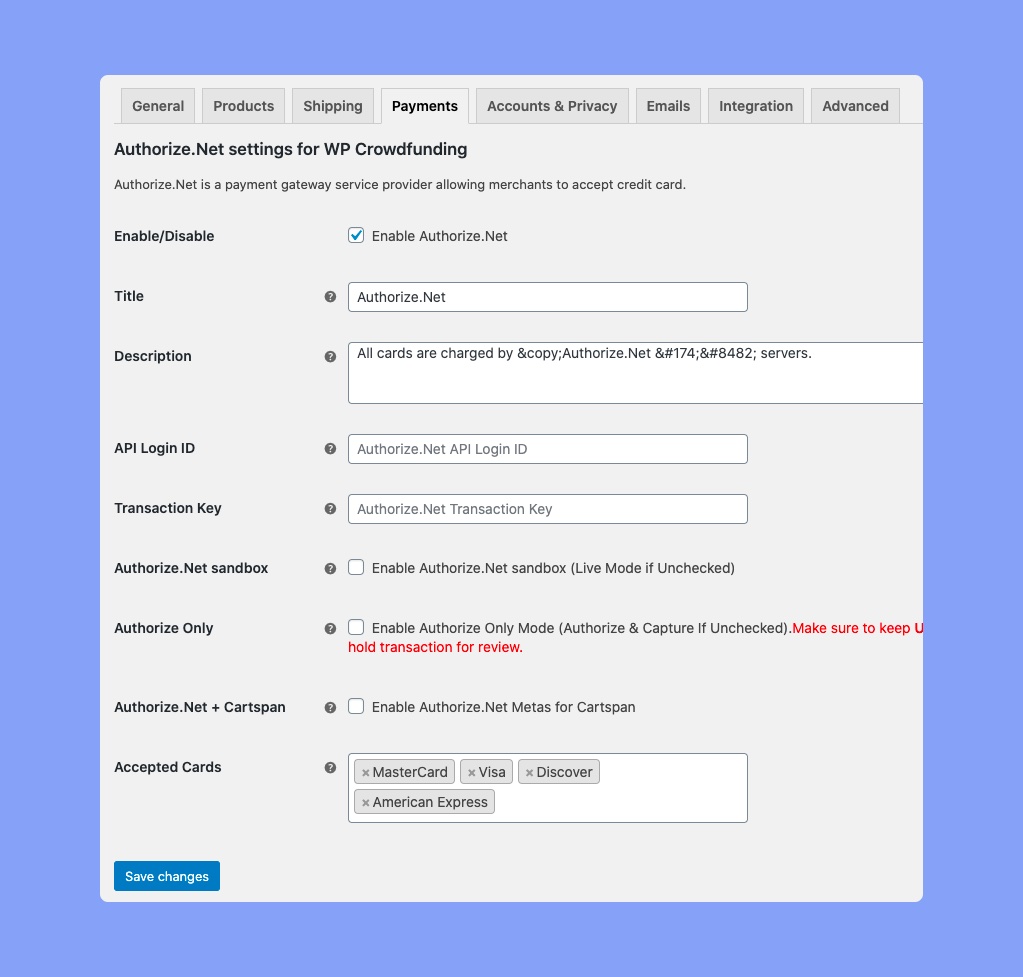
Here, the available options are:
- Enable/Disable Authorize.Net: Use the checkbox to turn the Authorize.Net payment option on or off.
- Title: Specify the title that will be displayed to users during the checkout process.
- Description: Provide a short description for users to see during checkout.
- API Login ID: Enter the API Login ID associated with your Authorize.Net account in order to begin accepting payments.
- Transaction Key: Enter your Authorize.Net Transaction key to start accepting payments.
- Authorize.Net sandbox: Activate this option to establish a sandbox environment for testing Authorize.Net payment processing.
- Authorize Only: Use this option to authorize Credit Card payments only at checkout. Leave unchecked if your Address Verification Service (AVS) requires transactions to be held for review.
- Authorize.Net + Cartspan: Use this option to store the last 4 digits and card brand of cards used in transactions to your local database from the transaction response. Enable or disable as desired.
- Accepted Cards: Select which cards your site accepts, such as Visa, MasterCard, American Express, etc.
Once you are done with the configuration, hit Save Changes. Now you will be able to start taking payments using the Authorize.Net payment gateway.
How to get Authorize.Net API Login ID and Transaction Key?
Follow the steps below to collect Authorize.Net API Login ID and Transaction Key.
- Login to the Merchant Interface
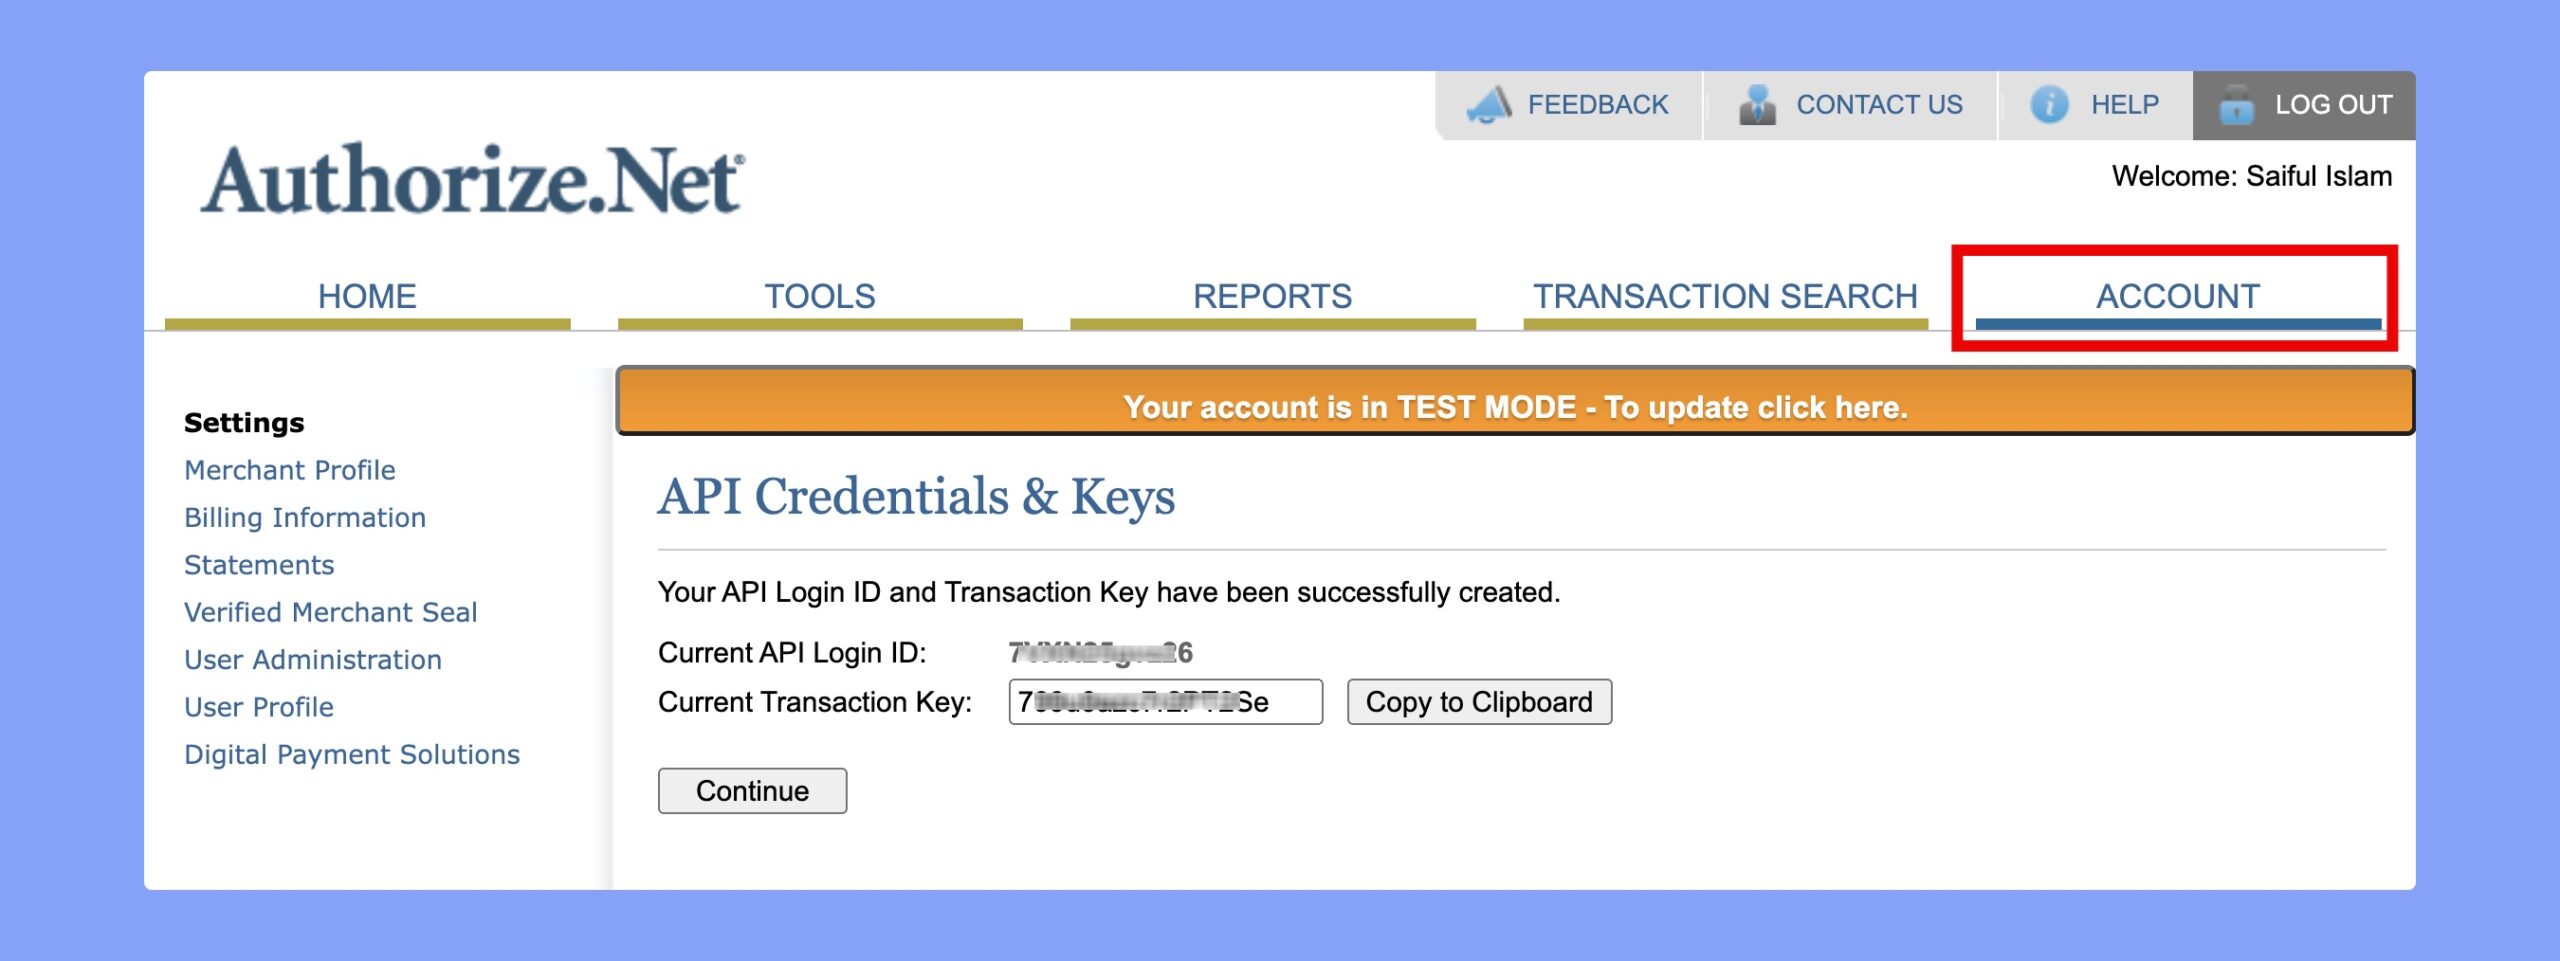
- Navigate to the Account option in the main toolbar
- Choose Settings from the left-side menu
- Select API Credentials & Keys
- Opt for a New Transaction Key
- Click Submit to proceed
- Request a PIN for verification
- Verify the pin and you’ll get your credentials
Here’s the preview of Authorize.Net API Credentials and Keys page.
If you do not check the “Disable Old Transaction Key Immediately” box, the old key will expire automatically after 24 hours. If you check the box, the key will expire immediately.
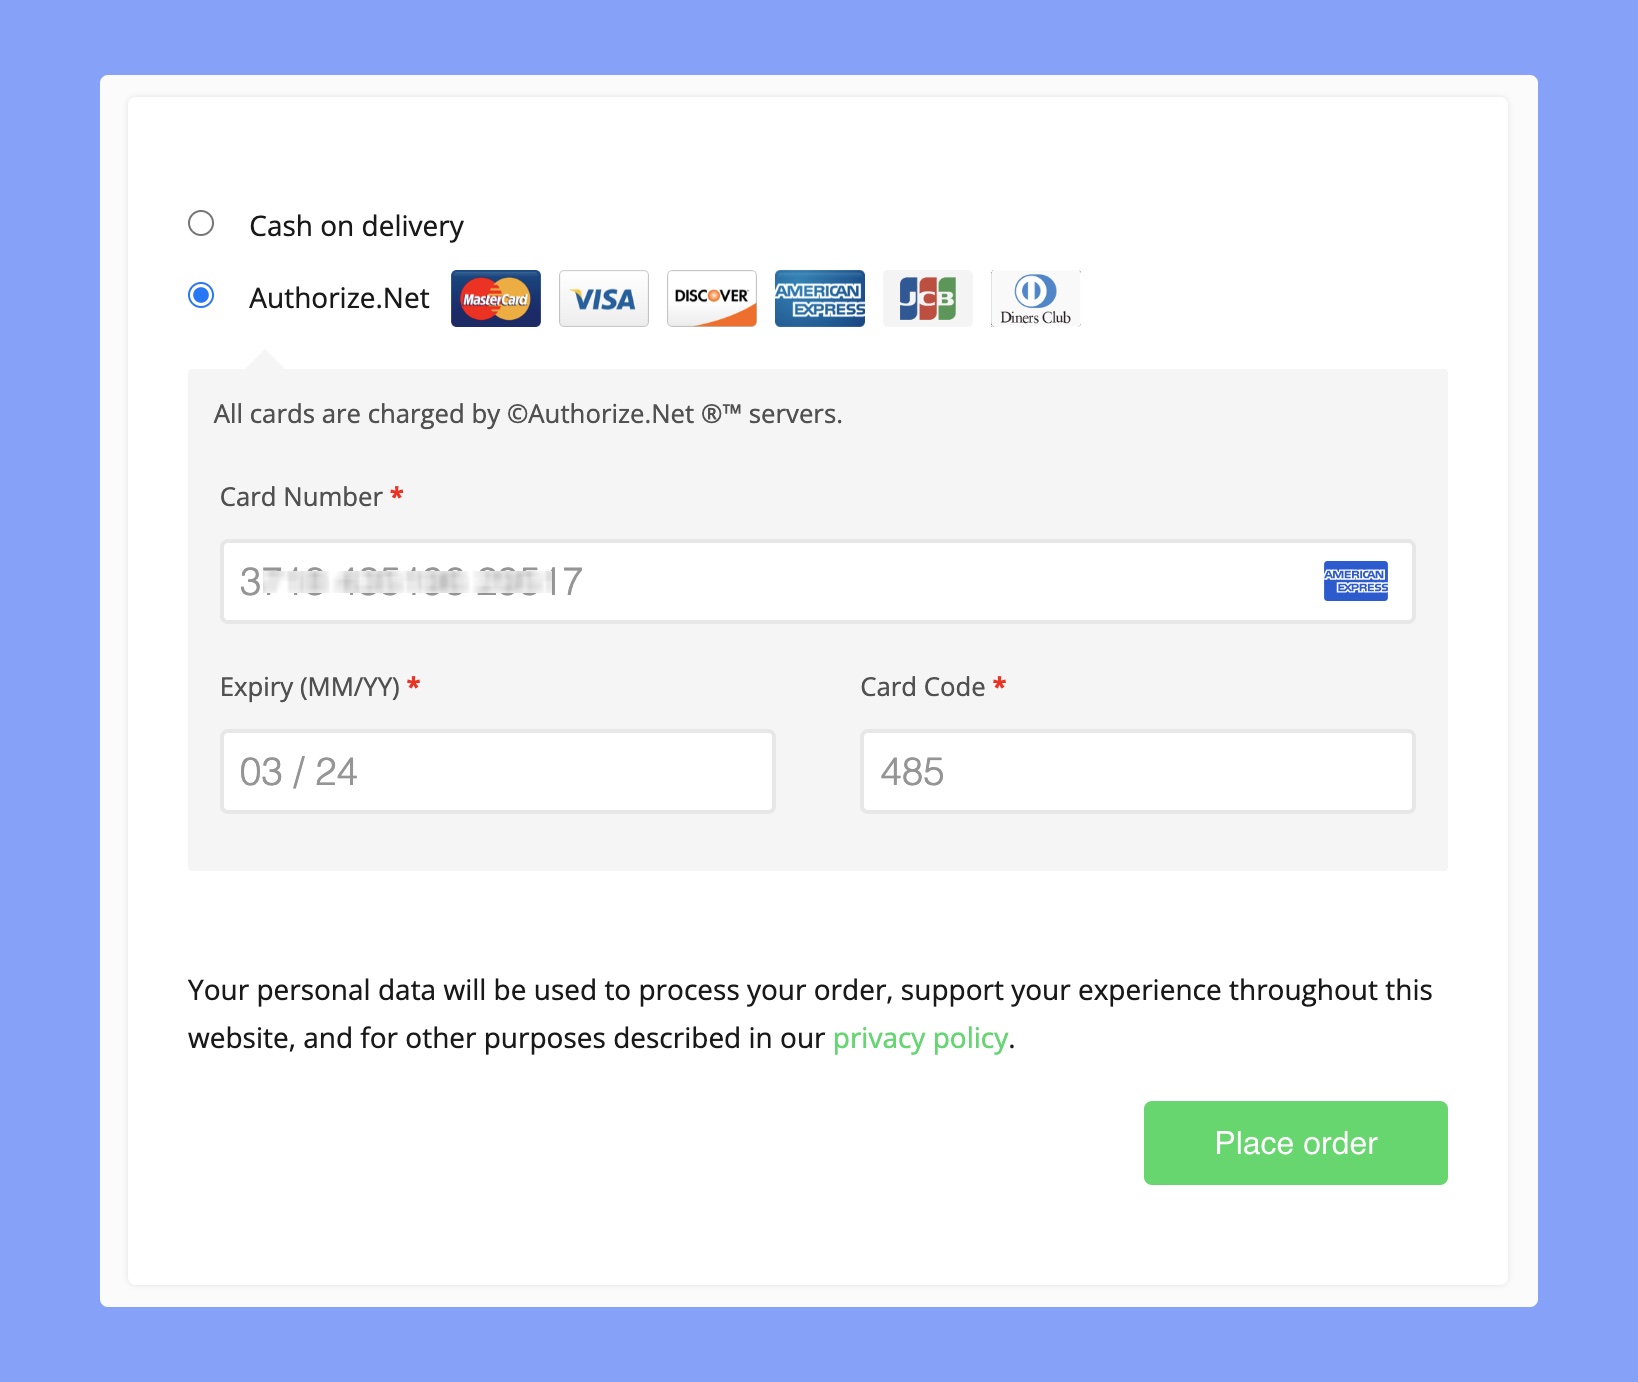
After completing all of these steps, the Authorize.Net payment gateway will be visible on the checkout page. Here’s the frontend preview of the Authorize.Net payment gateway.