The Tutor LMS Quiz Builder is a powerful tool that can help you create interactive and innovative quizzes for students.
It boasts 10 modern yet familiar question types to test out the students’ knowledge of the course material and also offers several customization options so you can perfectly tailor the tests to suit your needs.
Quiz Info
To get started, from the course builder (either the frontend or the backend), navigate into a topic and then click on the +Quiz button.
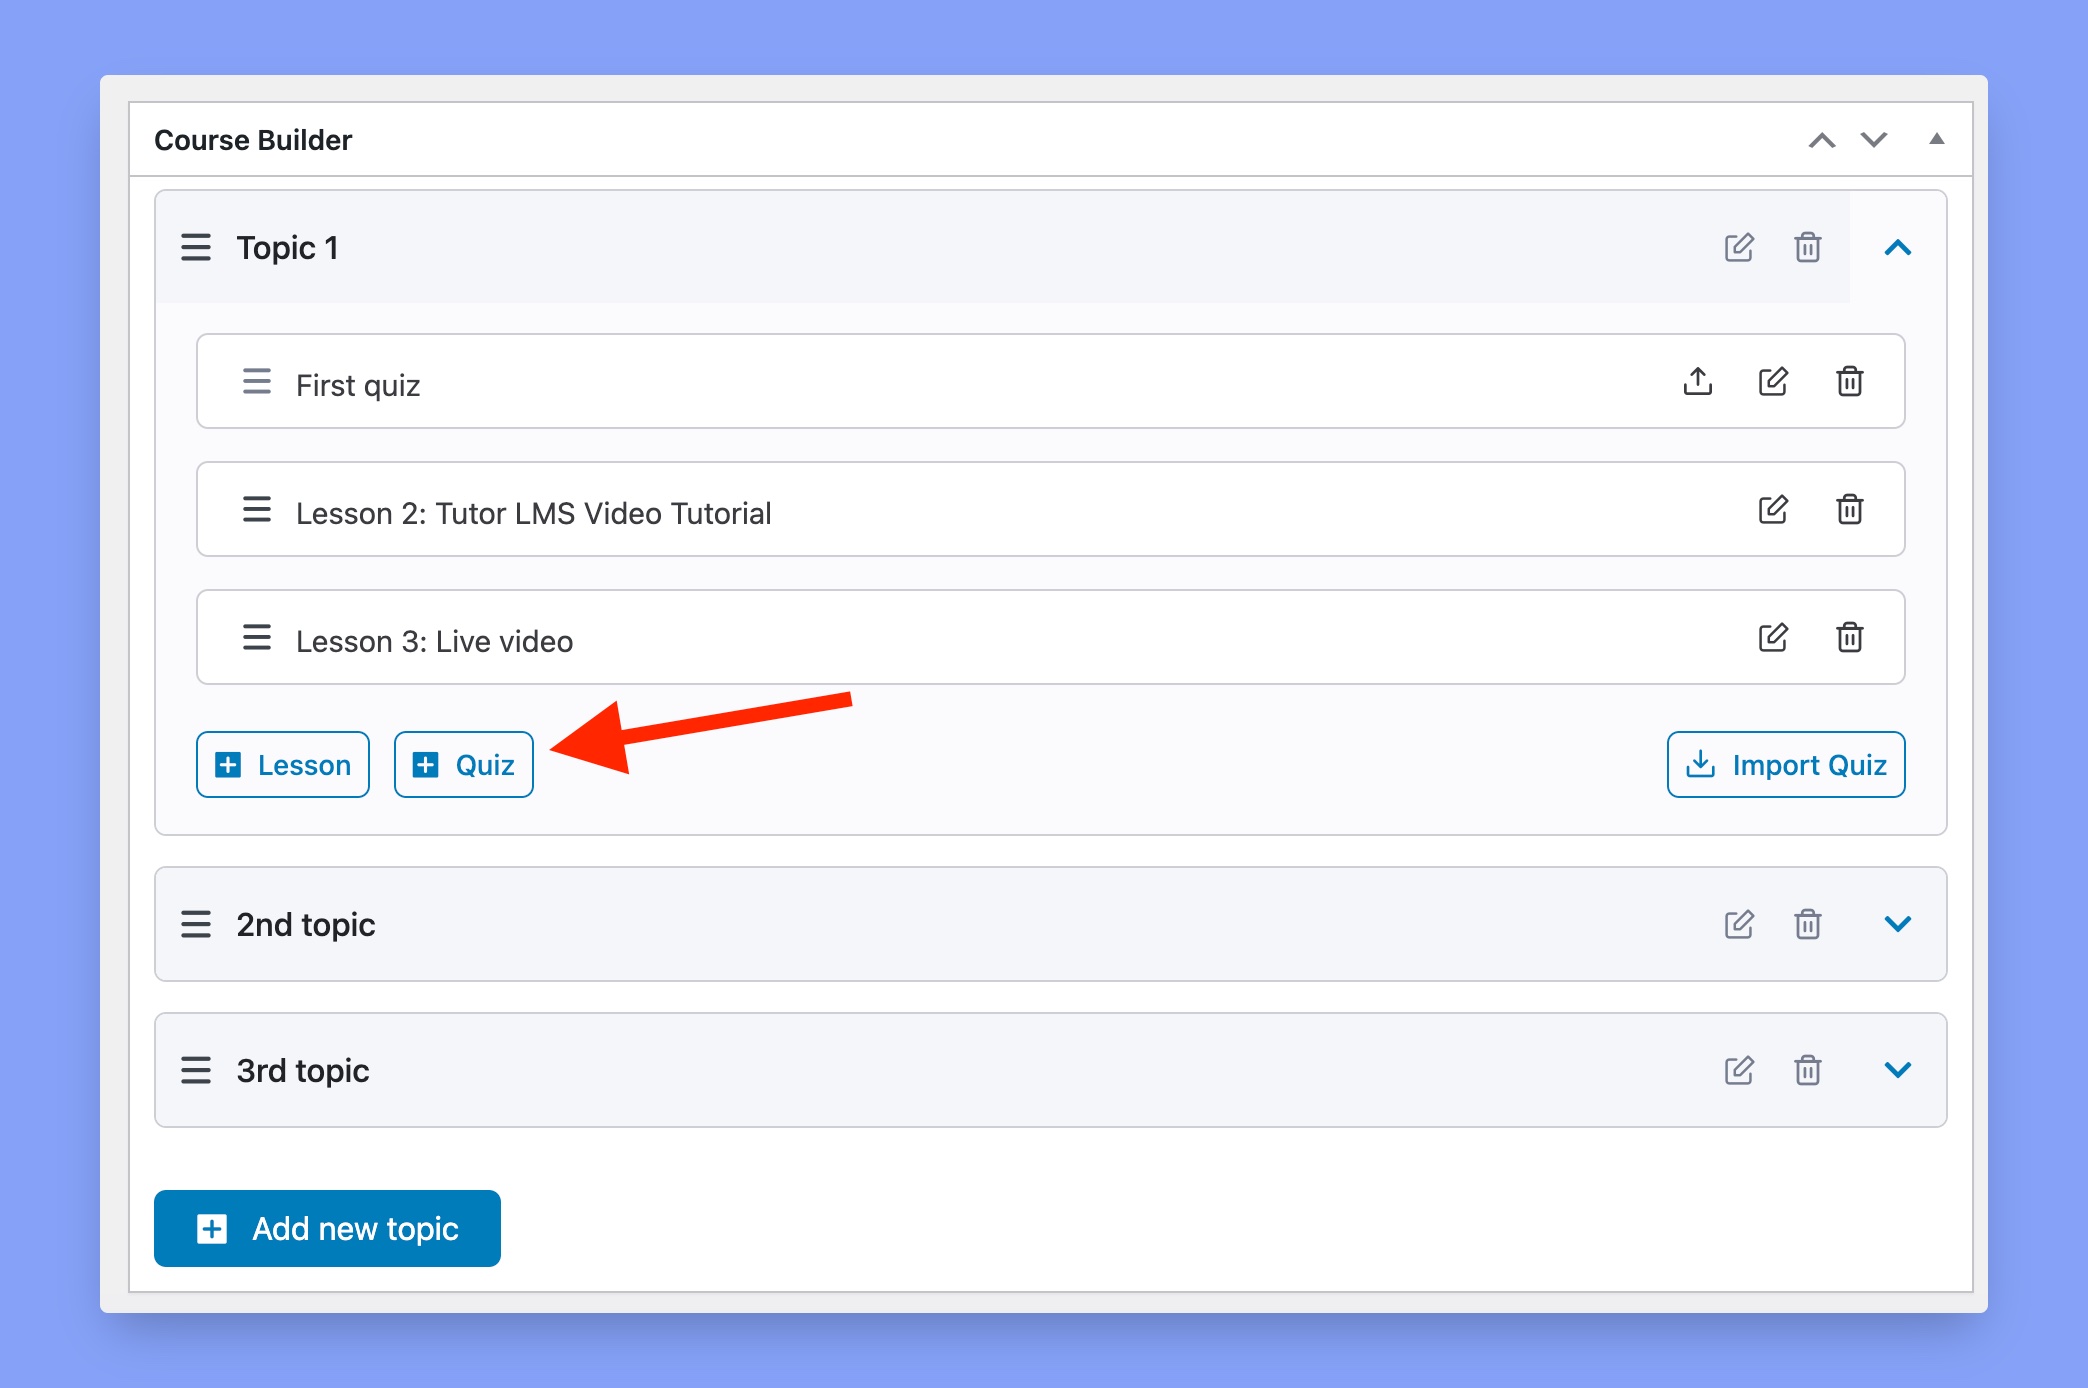
This will open the Quiz Builder window with its very first section called Quiz Info. Here, give the quiz a Title and add a short summary to let students know what this quiz is about.
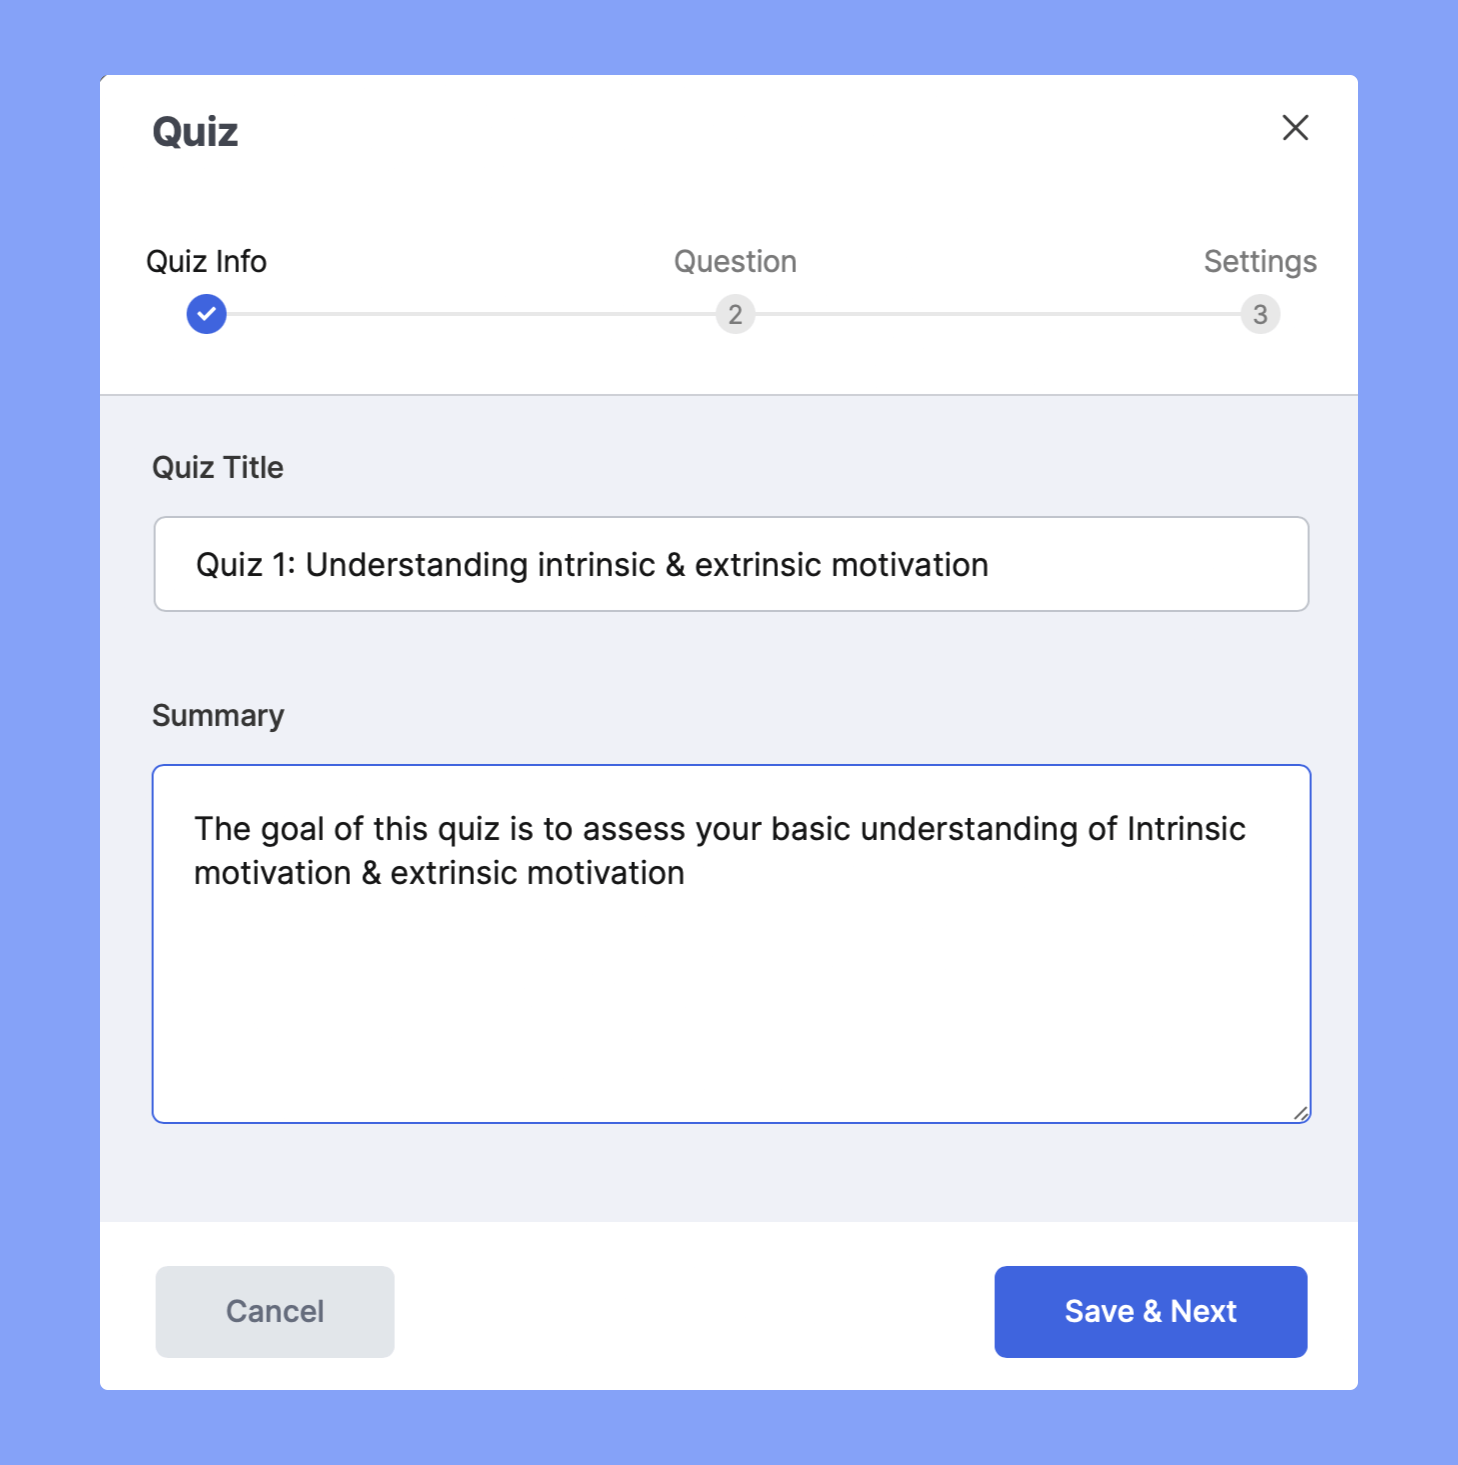
To go to the next stage, i.e. Question, simply click on the Save & Next button.
Quiz Description
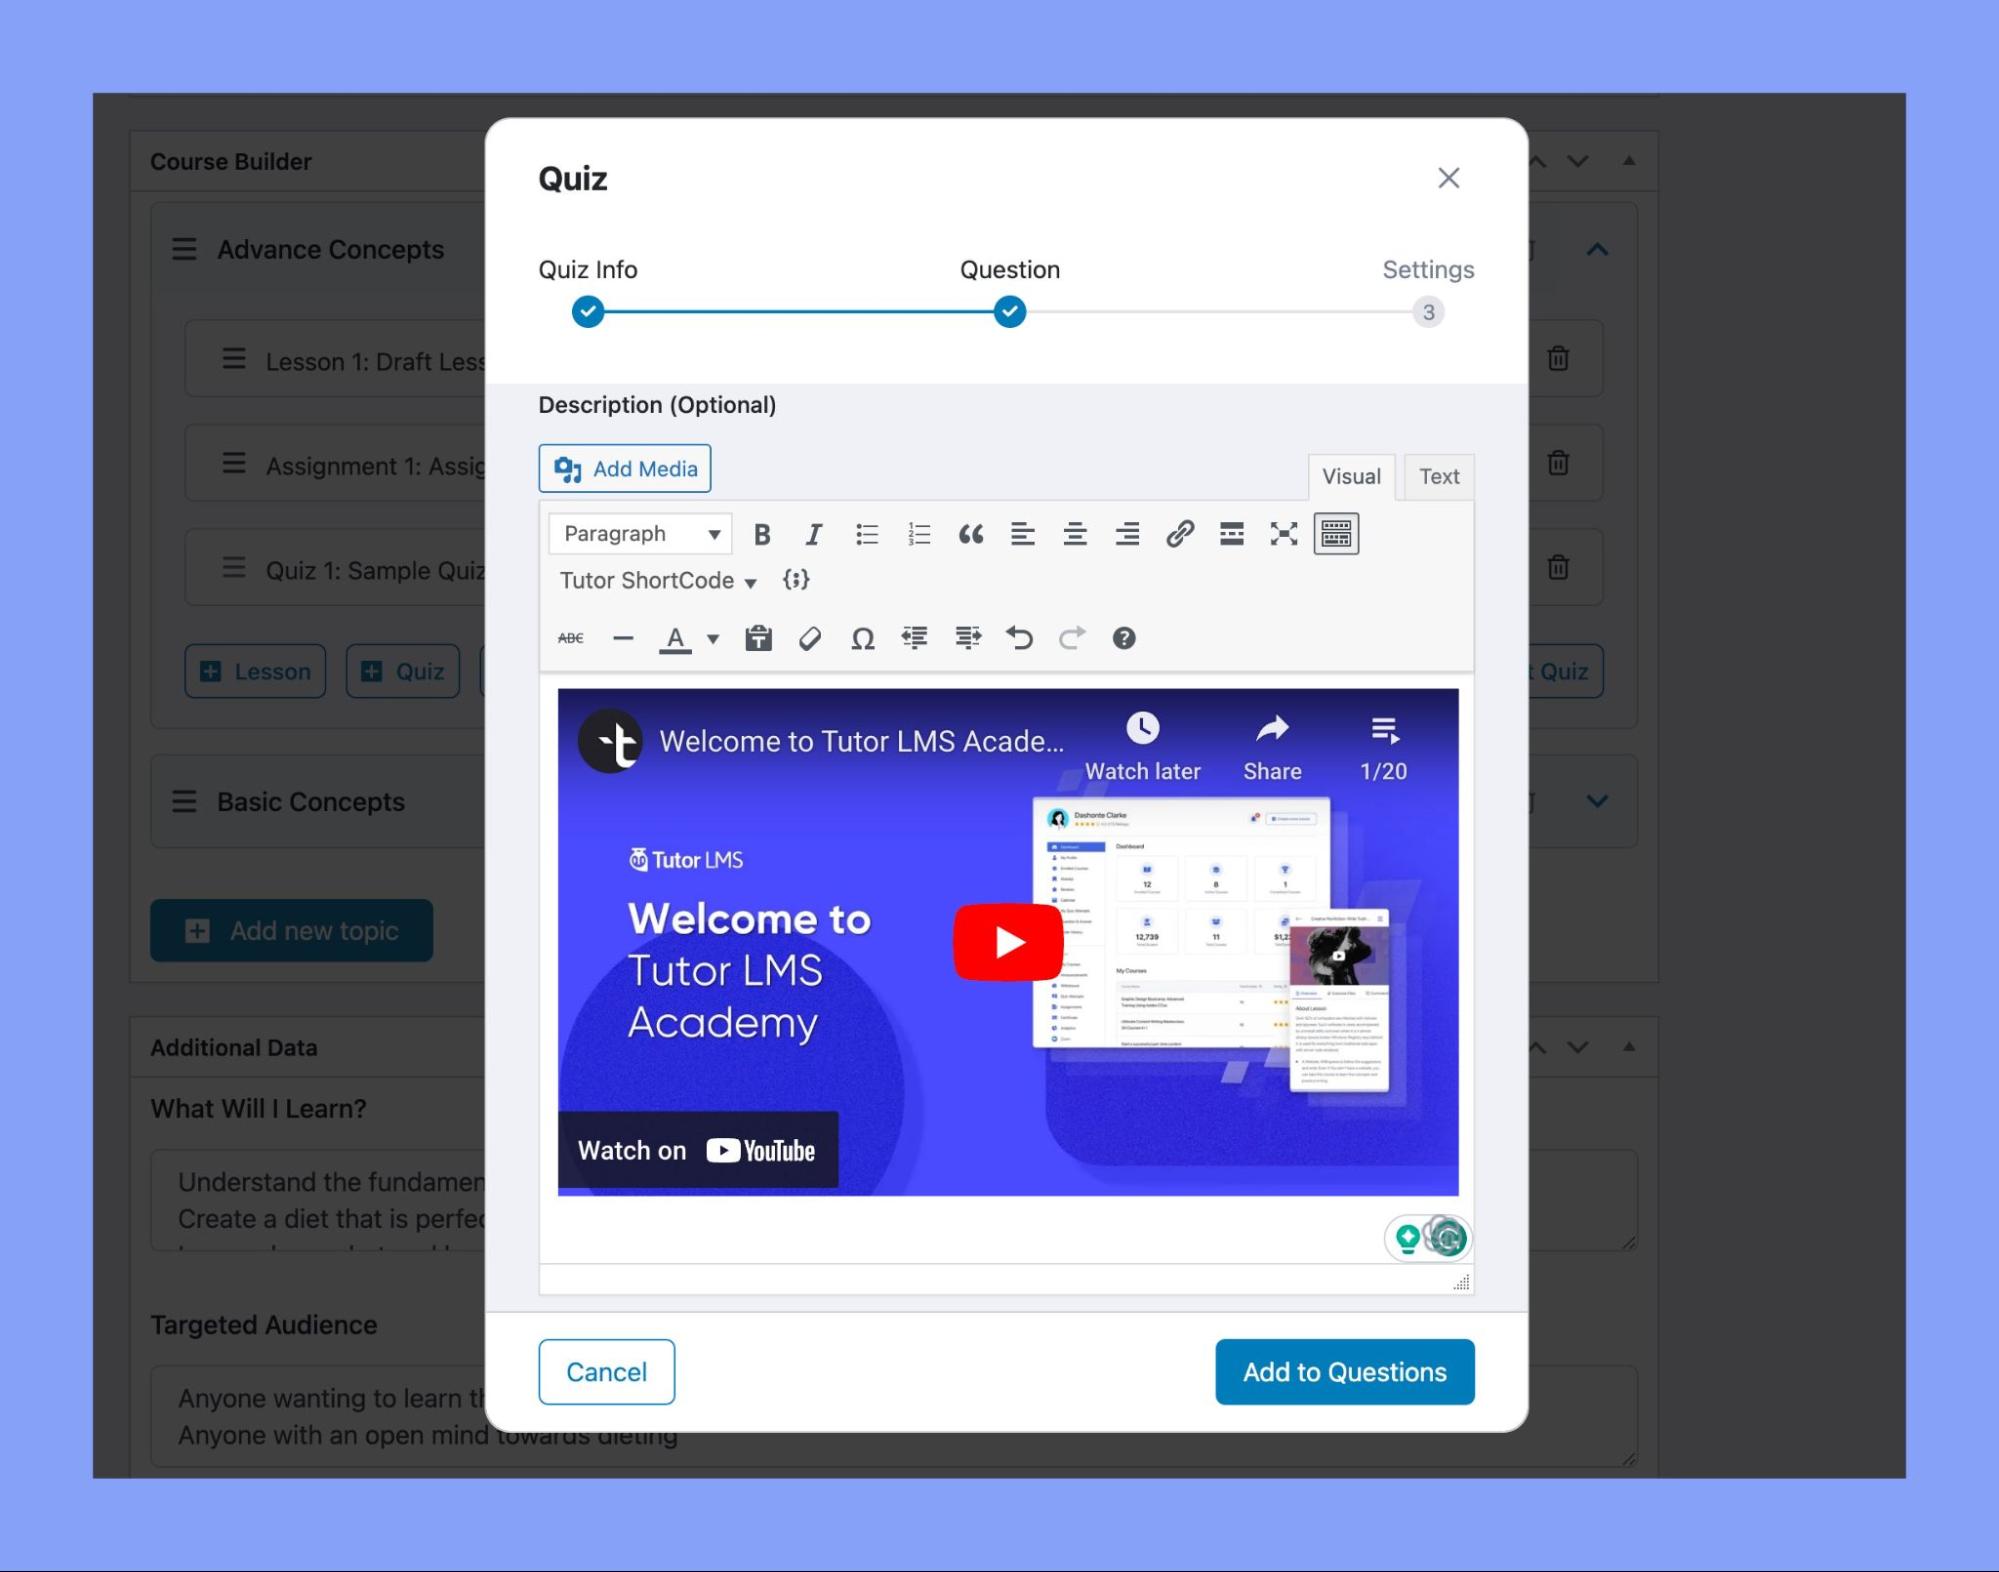
Tutor LMS has WP Editor support for the Quiz Question Description field. This allows quiz creators to add rich text formatting, images, videos, and more to their quiz question descriptions.
With the WP Editor, quiz creators can now add:
- Text styling like bold, italics, underlines, text color, etc
- Bullet points and numbered lists
- Hyperlinks
- Images and videos via embed codes or URL links
- Audio files like podcasts via embed codes
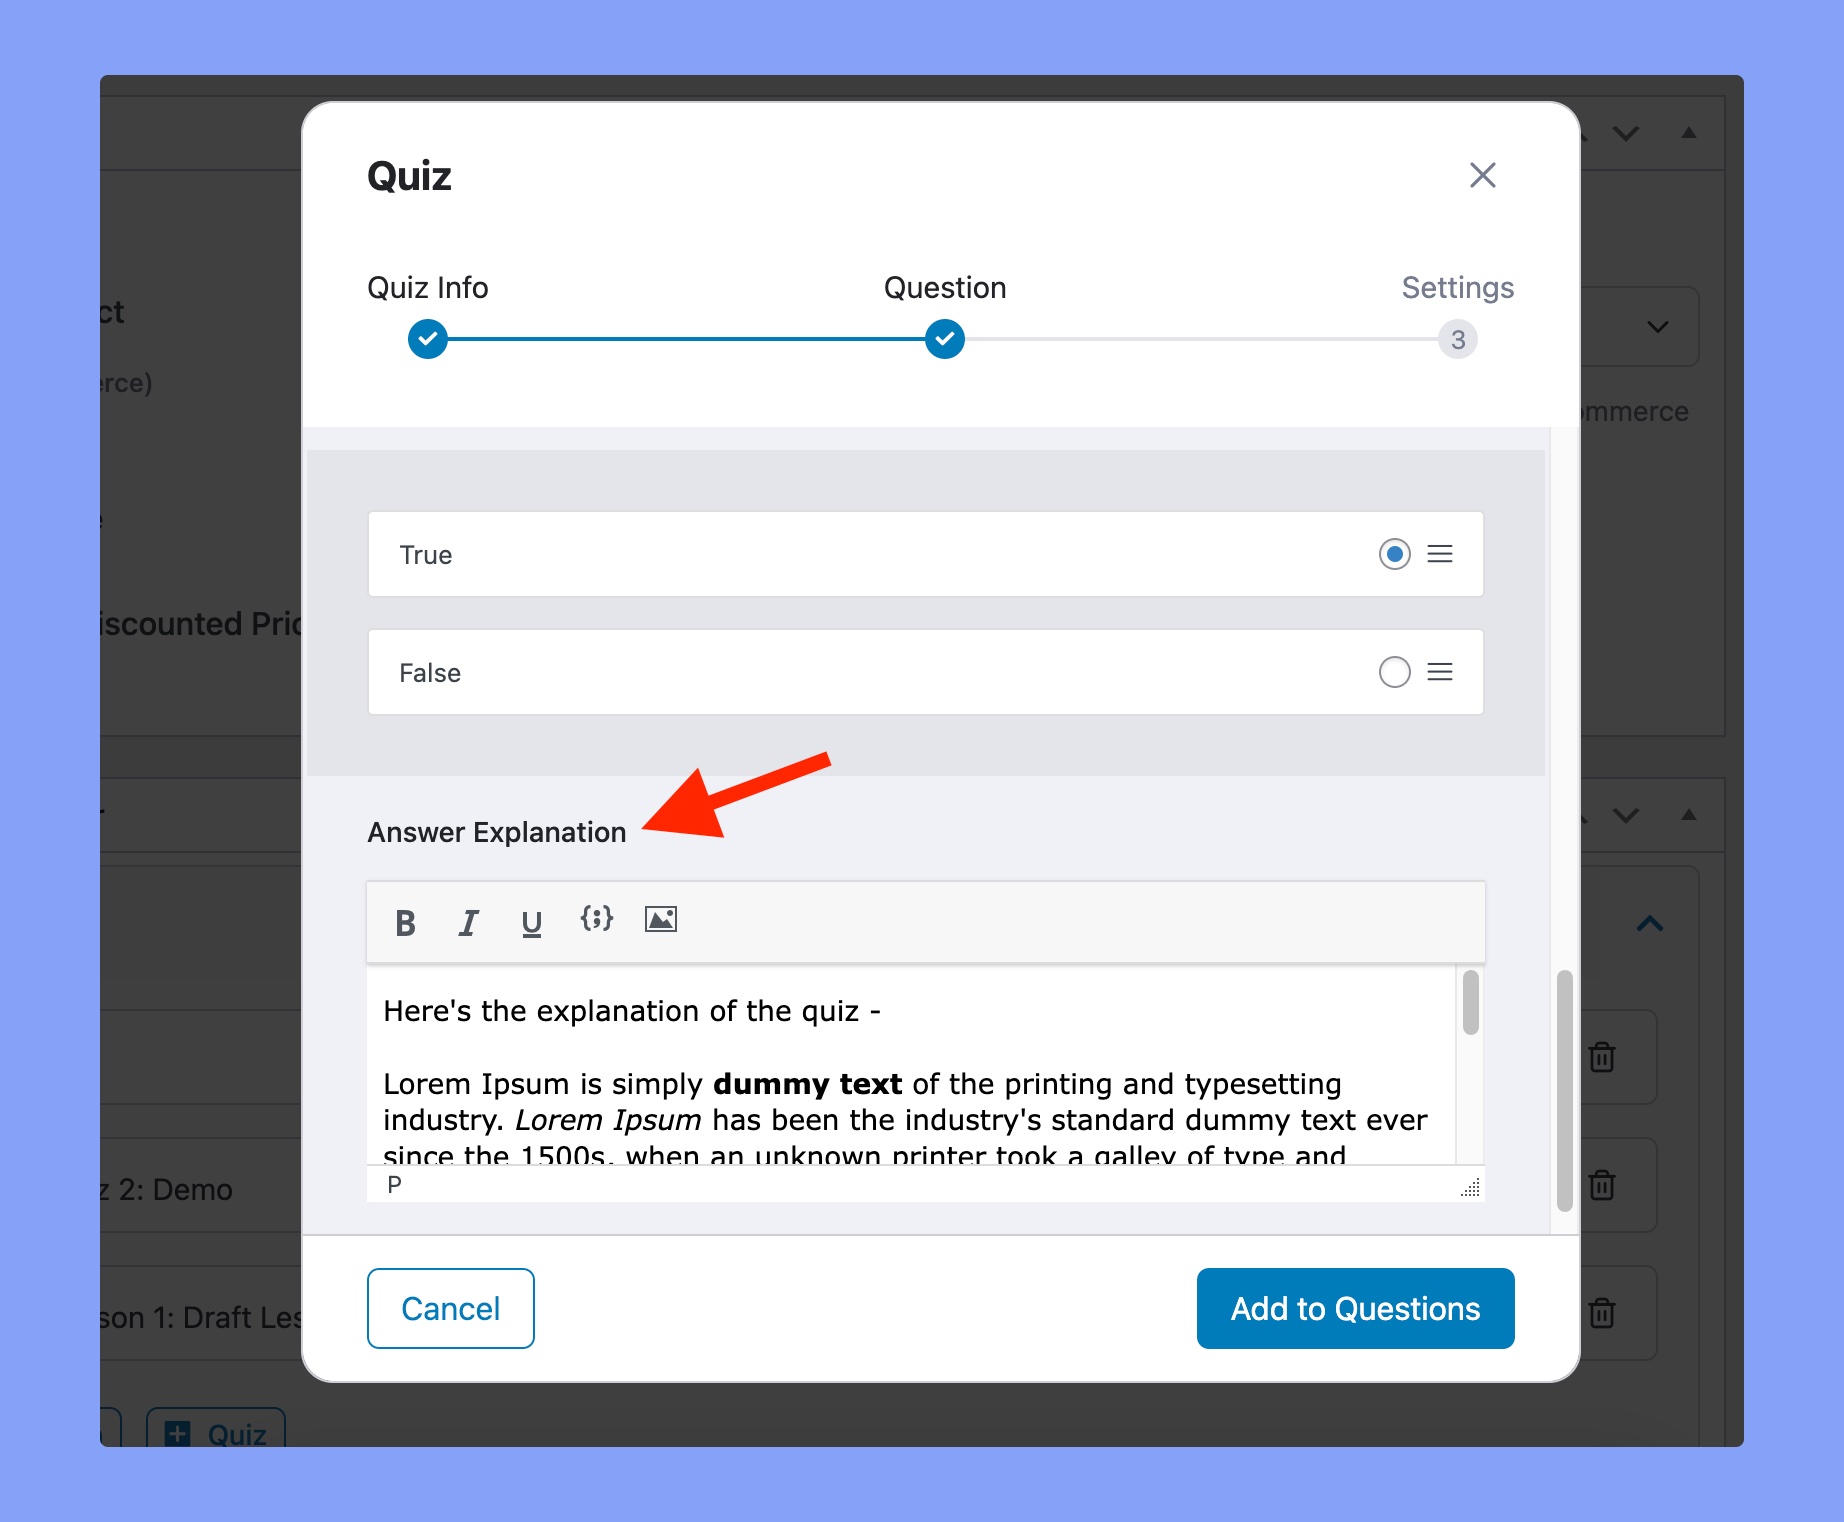
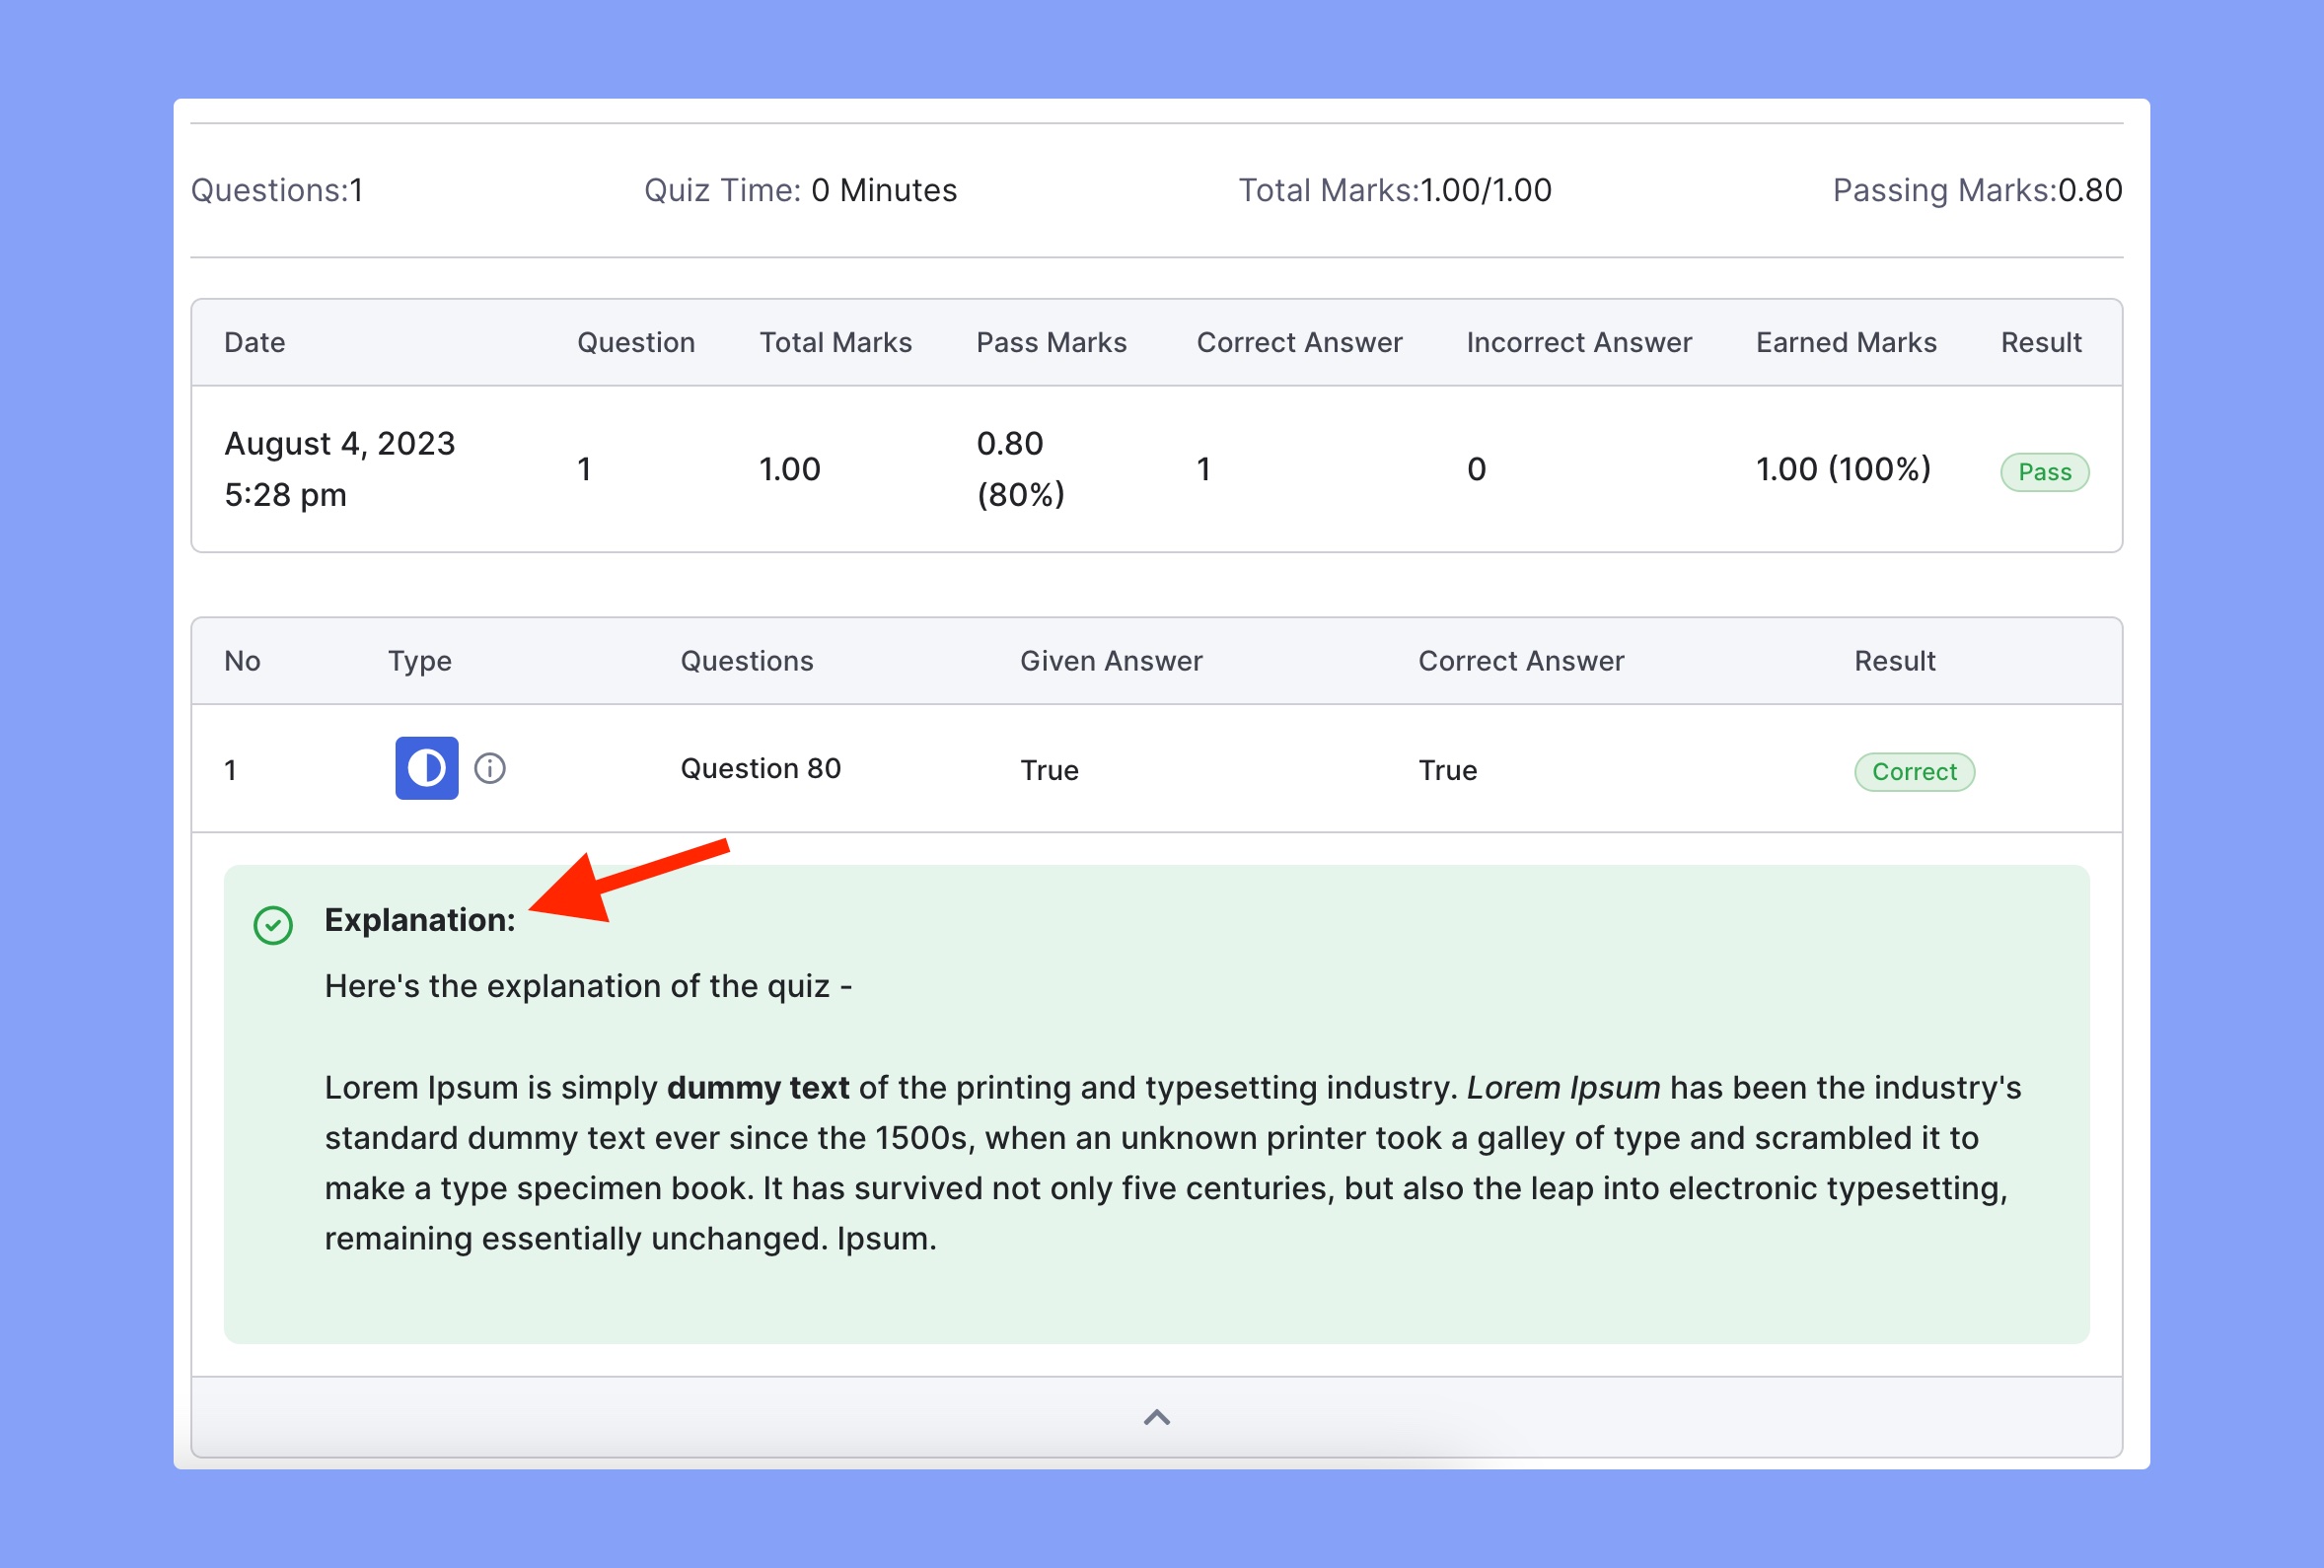
Later, you’ll get the Answer Explanation section. Here you can provide a concise yet informative explanation to help learners understand the correct answers and the reasoning behind them.
Students can access the explanation from the Quiz Details page only after they’ve attended the quiz. Here’s the frontend preview of the quiz explanation:
Question Types
At the Question stage, you can start adding questions to the quiz by clicking on the Add Question button. This will take you to the Question form where you must first select the Question Type.
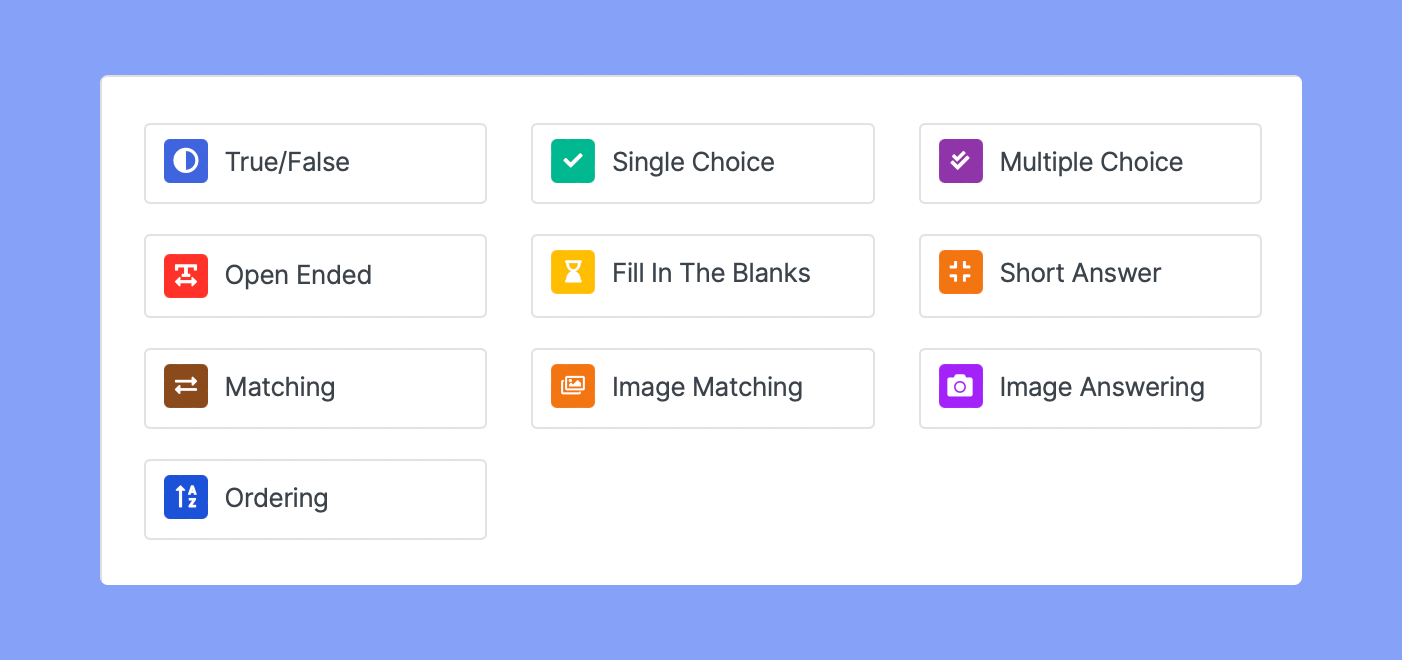
As mentioned earlier, there are a total of 10 question types for Tutor Pro users. Below is a list of what these types are as well as an explanation of how they work.
True/False
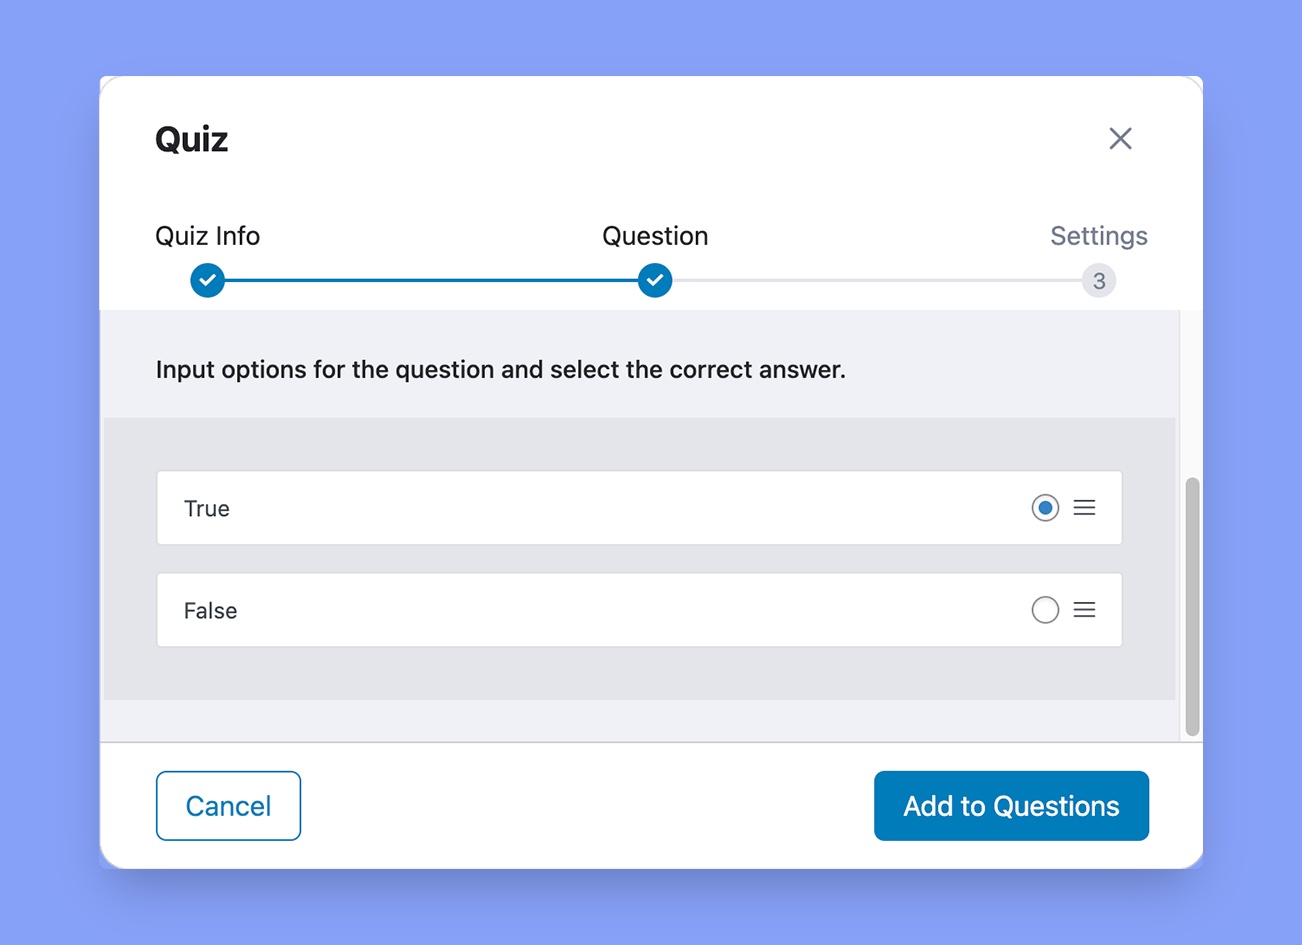
To set up a true/false question, first select your question type as True/False. Then you’ll get the option to choose the answer. Then write your question and choose the answer. Click on the radio button to choose the right answer.
Single Choice
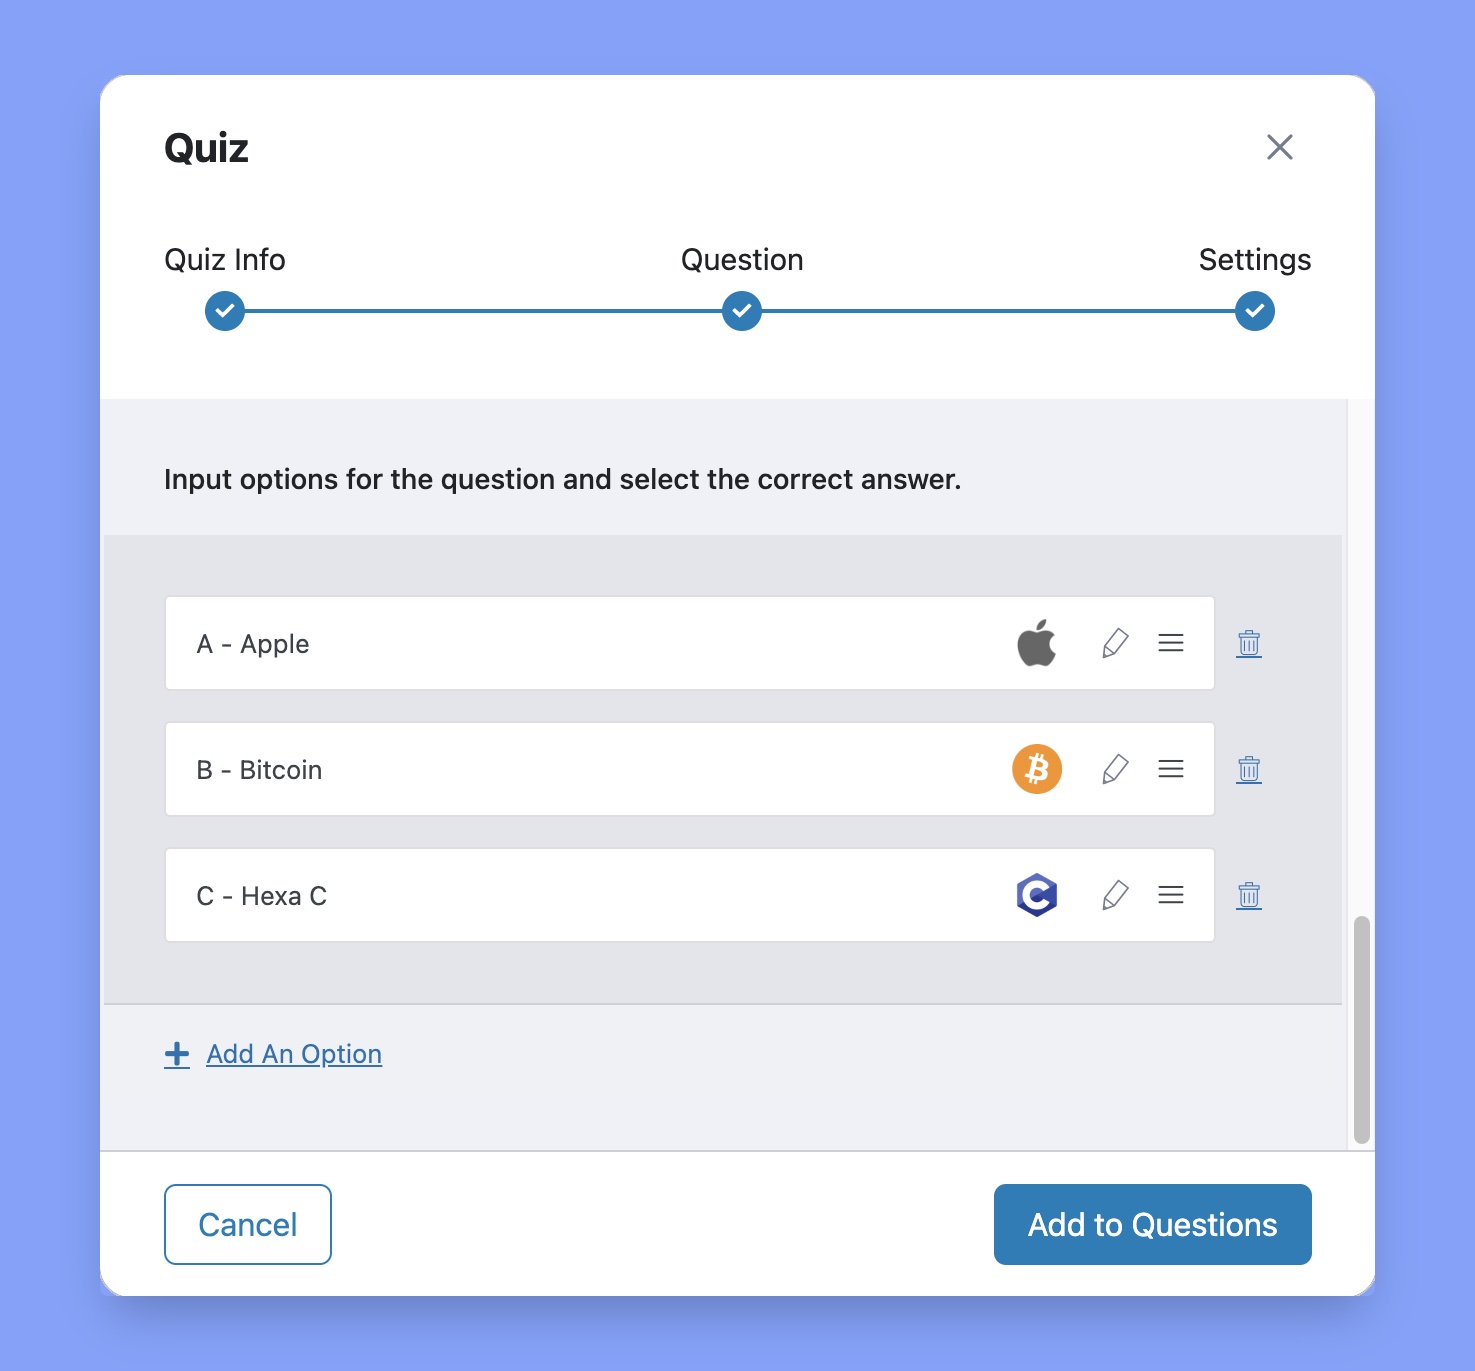
Use the single-choice quiz format if you want to use a multiple-choice question with only one correct answer. To add the options, click on Add an Option and define the answer in the Answer Title, upload an image if needed, and select the display format of your choice.
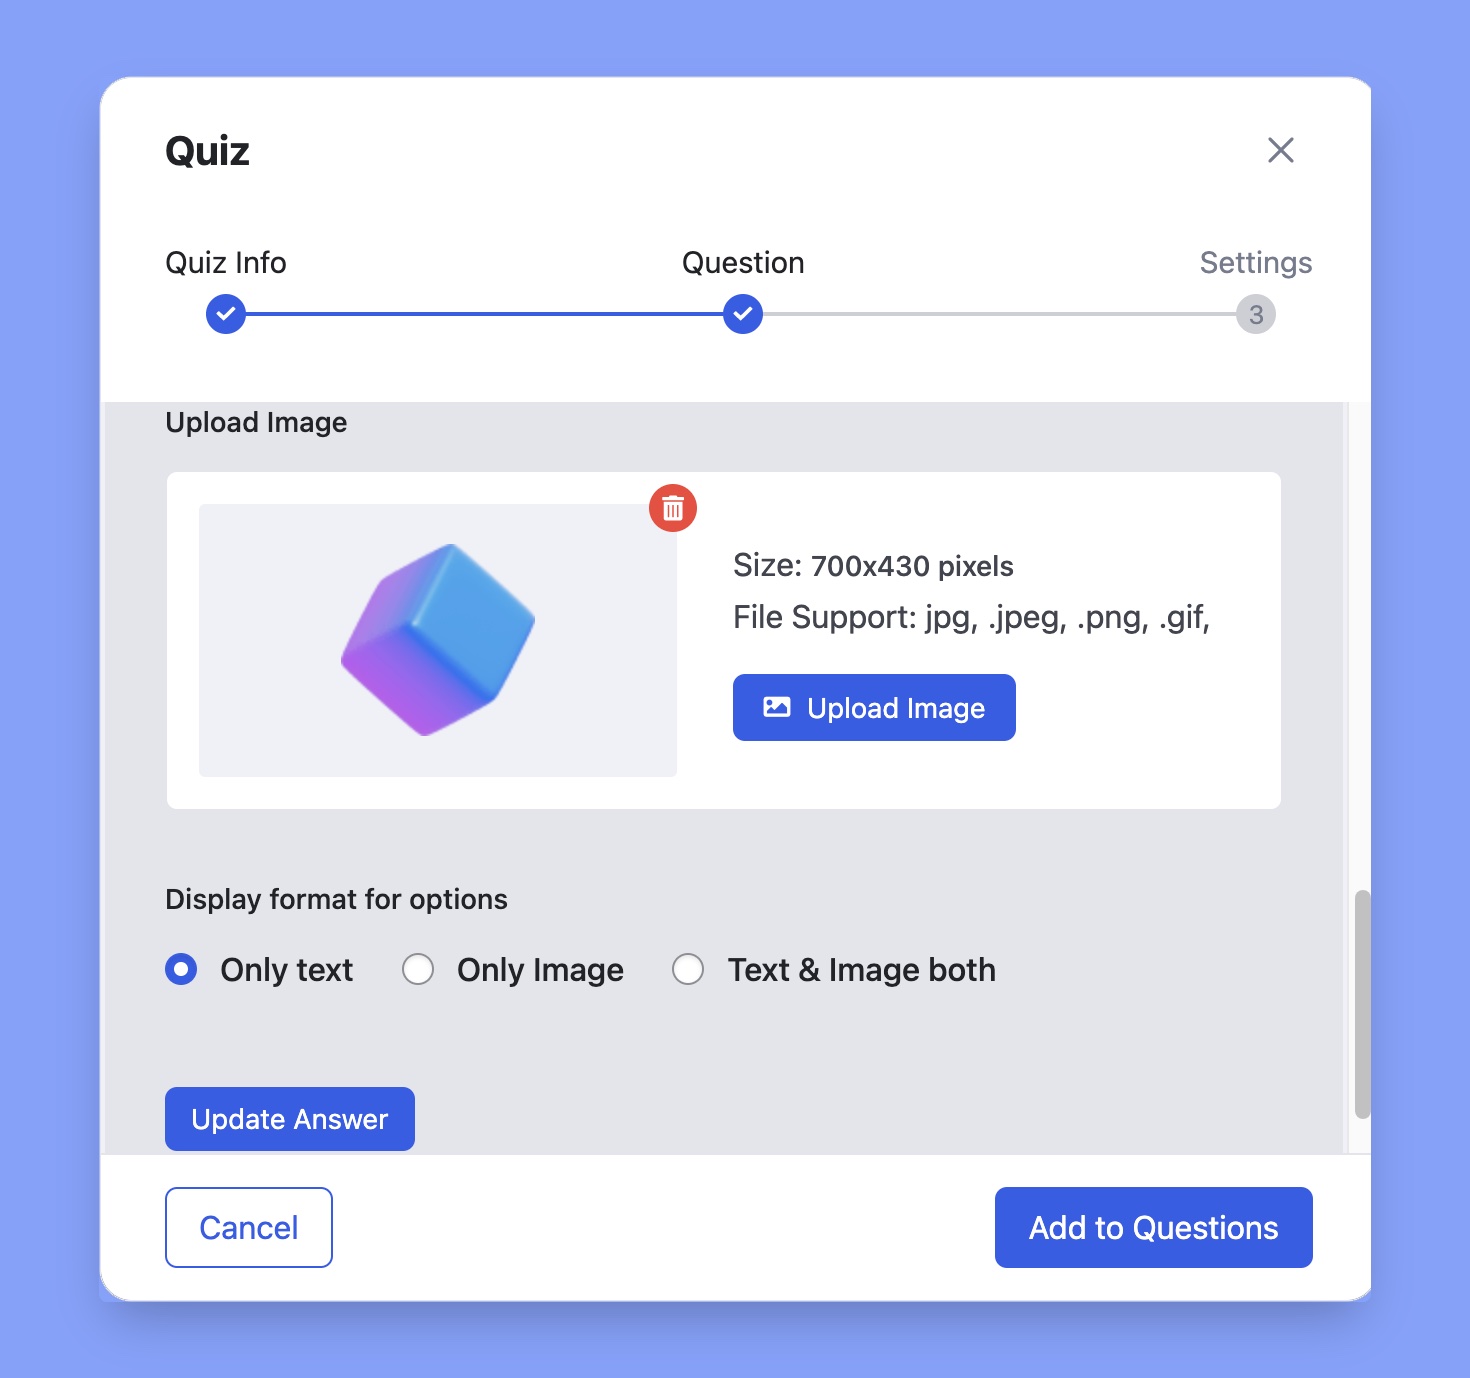
Finally, click on Update Answer and repeat these steps for the other options. Don’t forget to specify the correct answer at the end.
Multiple Choice
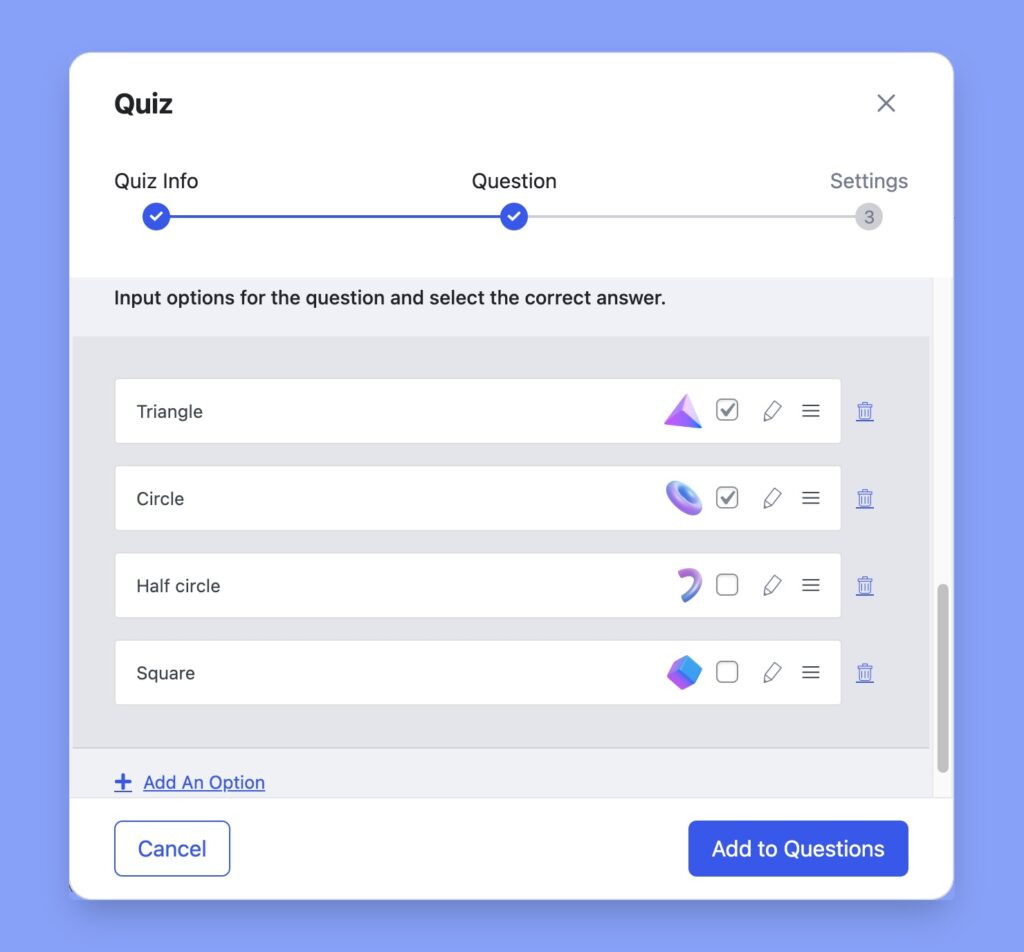
The multiple-choice question is almost similar to the single-choice answer. If you want to list multiple correct answers for a simple question, choose the multiple-choice option. Thus students will get full marks only if they select all of the right answers while answering the question.
Open-Ended
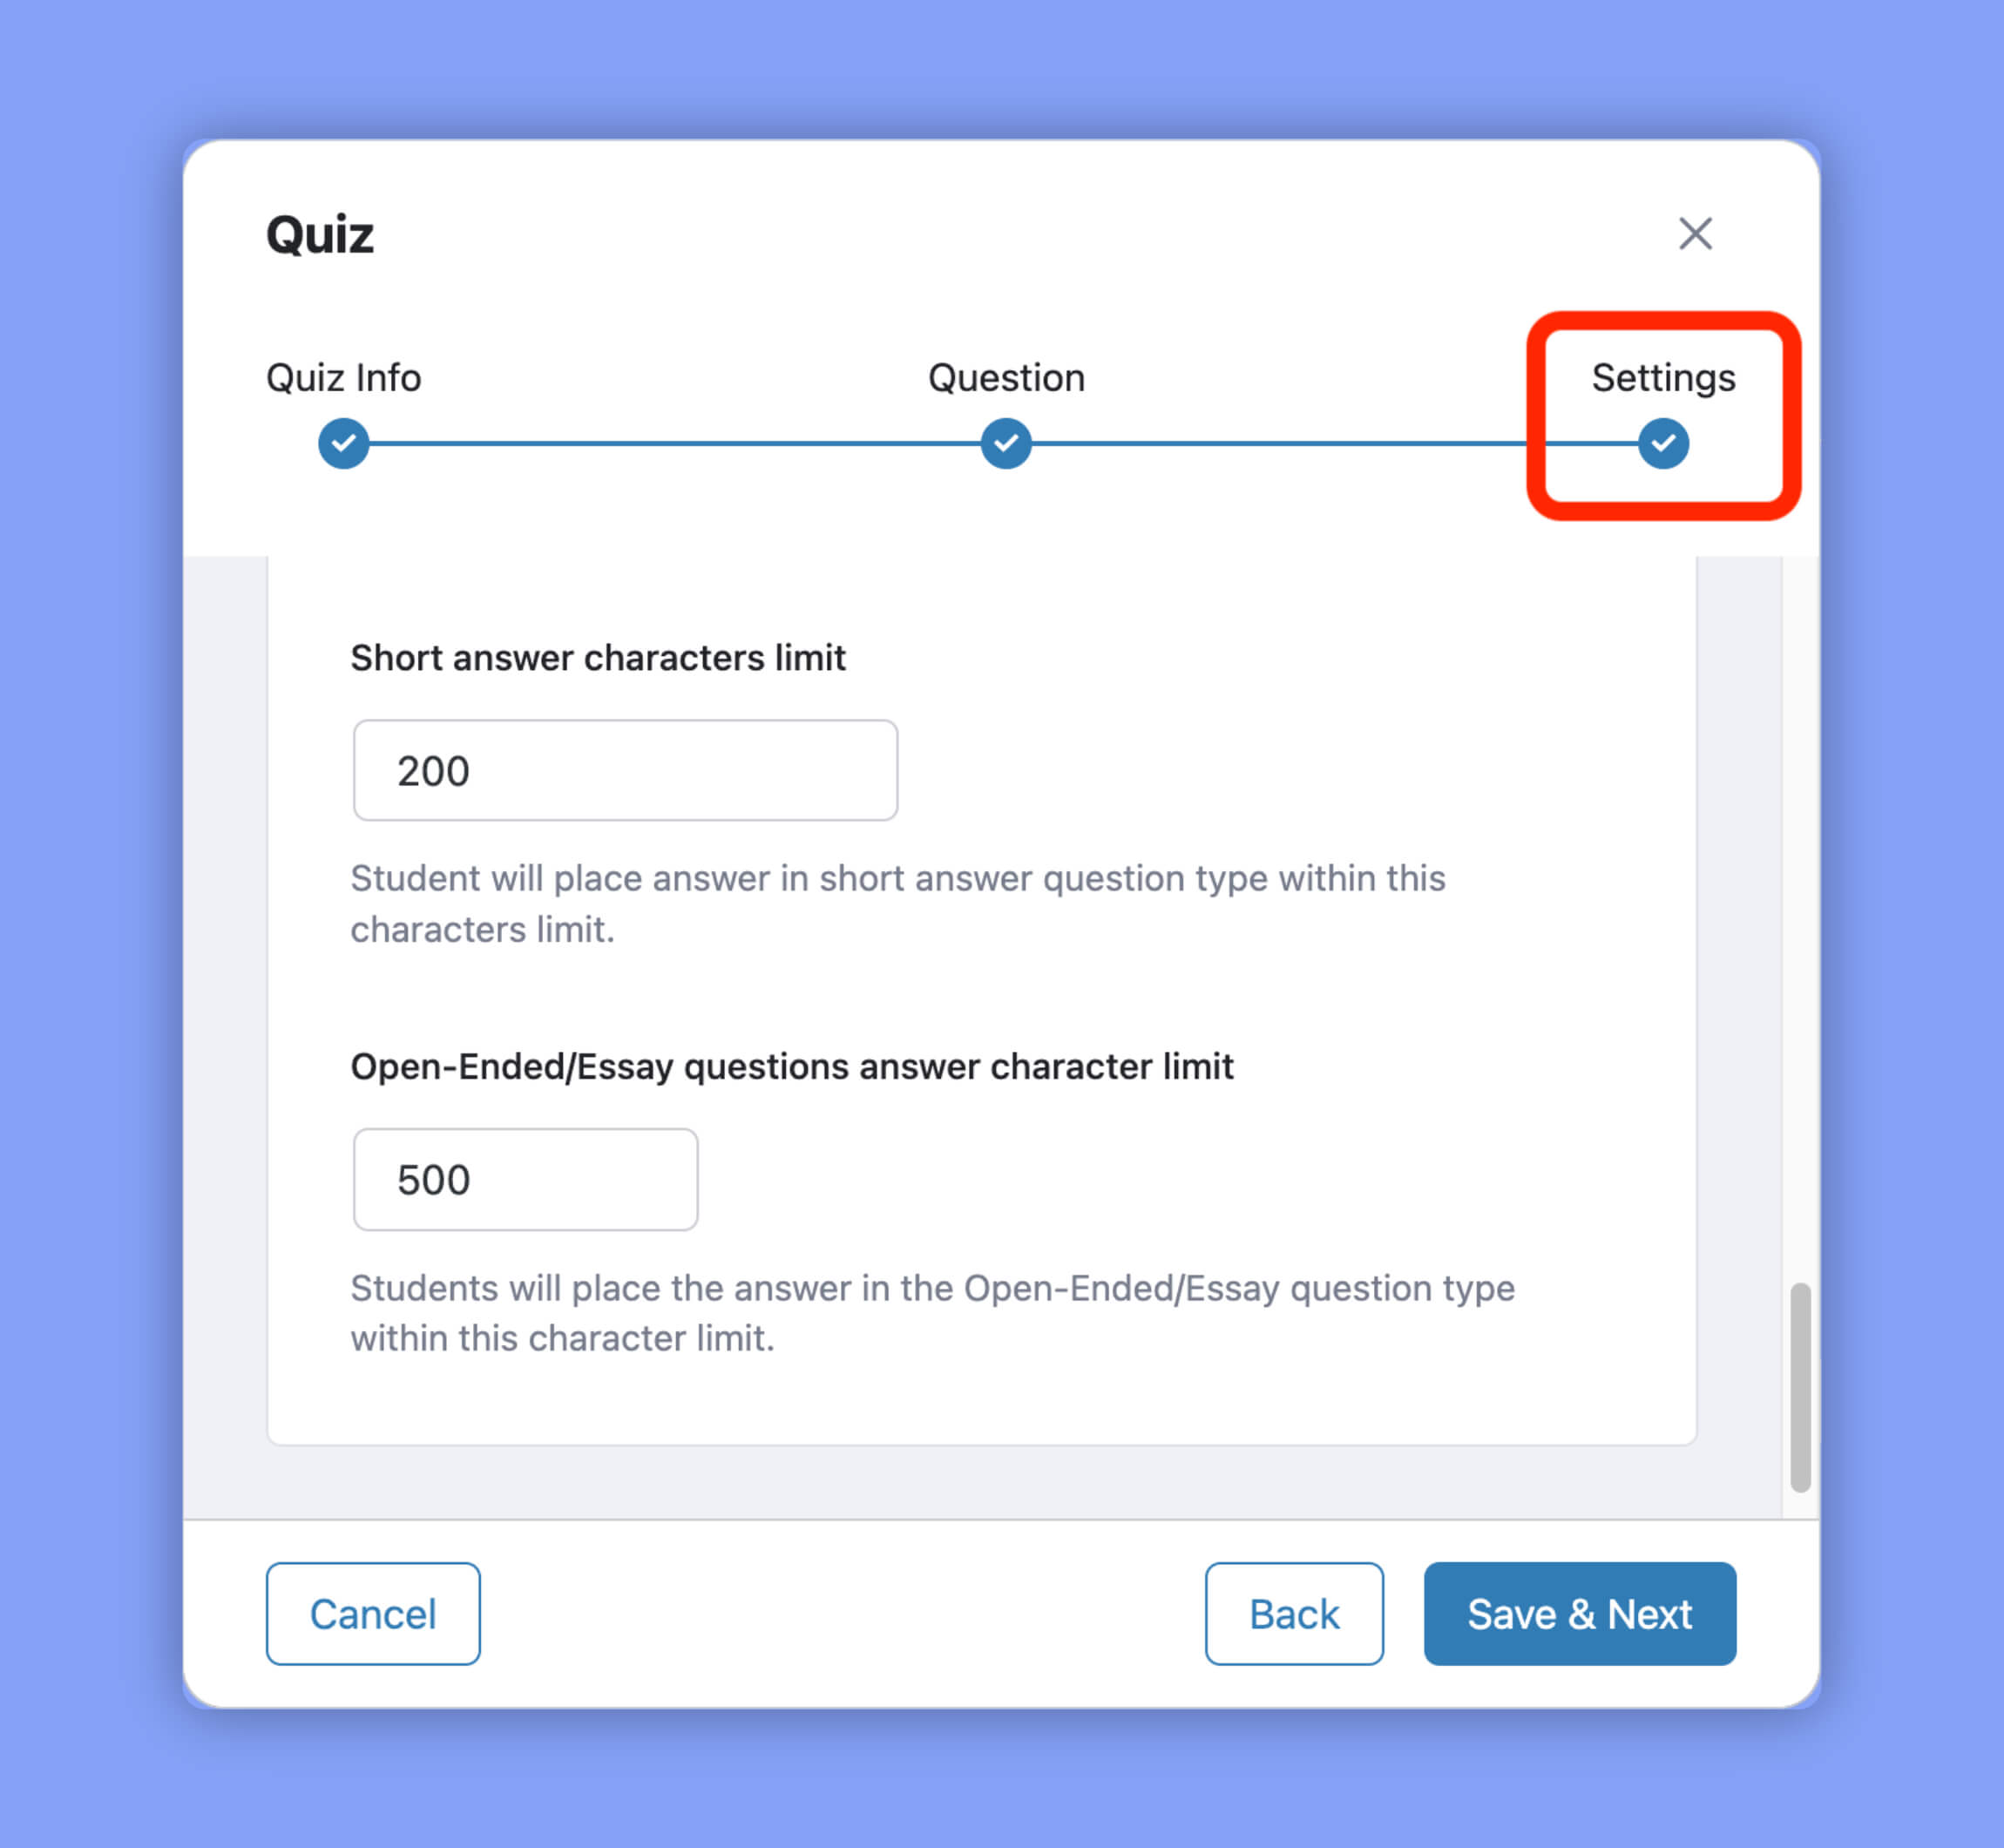
A long answer question type where students can give descriptive answers as this field can have a larger character limit. To define this character limit, go to Quiz Builder > Settings > Advanced Settings and find the Open-Ended/Essay questions answer character limit field.
Short Answer
A Descriptive-type question with a more precise and shorter answer. Instructors can define Character Limit> Settings > Advanced Settings under the Short answer characters limit in Quiz Builder.
Fill In The Blanks
Set a sentence prompting students to fill up the missing blanks with the correct answers.

Here first, enter the question and then click on Add an Option.
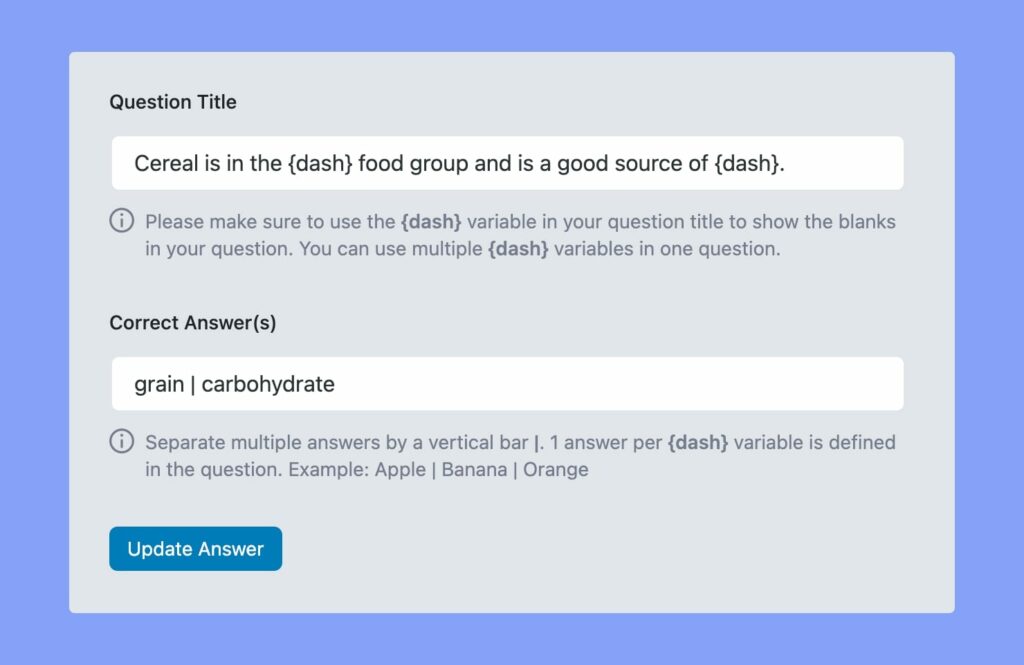
Then, type your entire question again under Question Title and replace the blanks with the variable {dash}. Below that field, define your Correct Answers each separated by a vertical bar |. Let’s check an example.
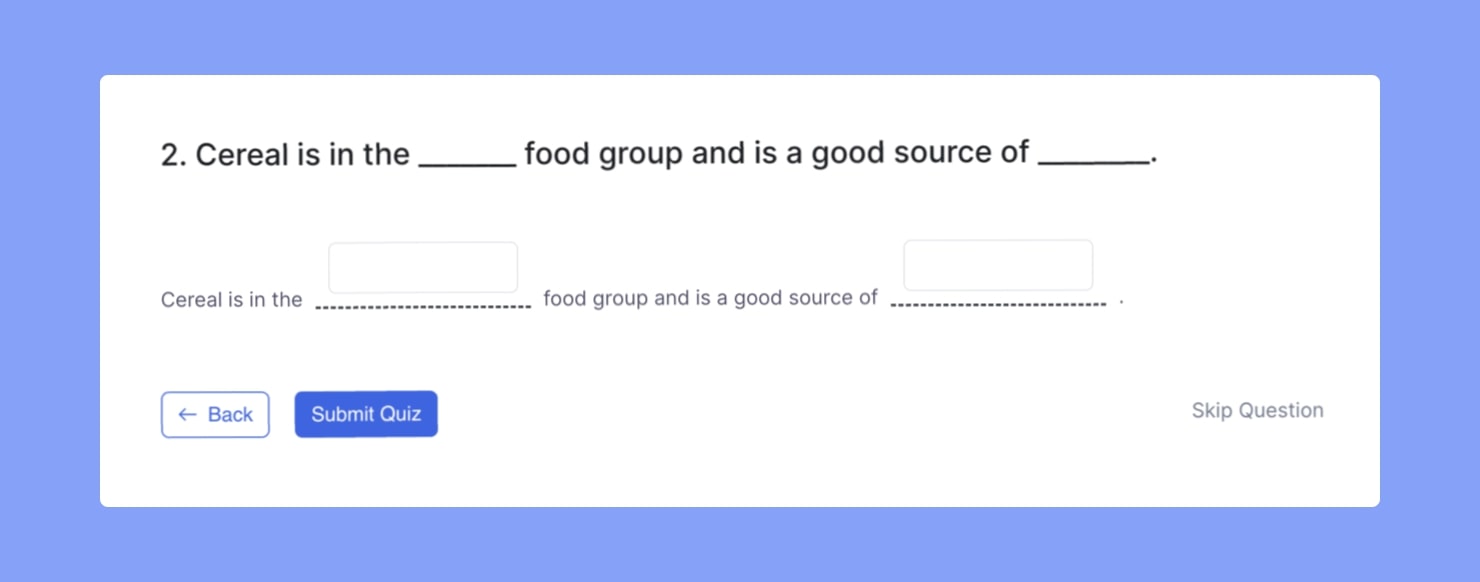
Students will see something like what’s shown in the image above on the frontend when they take the quiz.
Matching
Use this answering category only if you want to set a question pattern where students have to match the answers. To do this, enter your question and click on Add an Option. Enter your answer prompt and its matched answer.
You can also upload an image along with the answer prompt. Finally, select the display format you prefer and repeat these steps to add more options.
Ordering
Set an ordering question where students have to reorder the given text, images, or both in the correct sequence to obtain marks.
Here, click on Add an Option and enter your first answer item under the Answer Title field. Like the previous question types, you can also upload an image to go along with this.
Repeat these steps to add more items and make sure to add them in the right order.
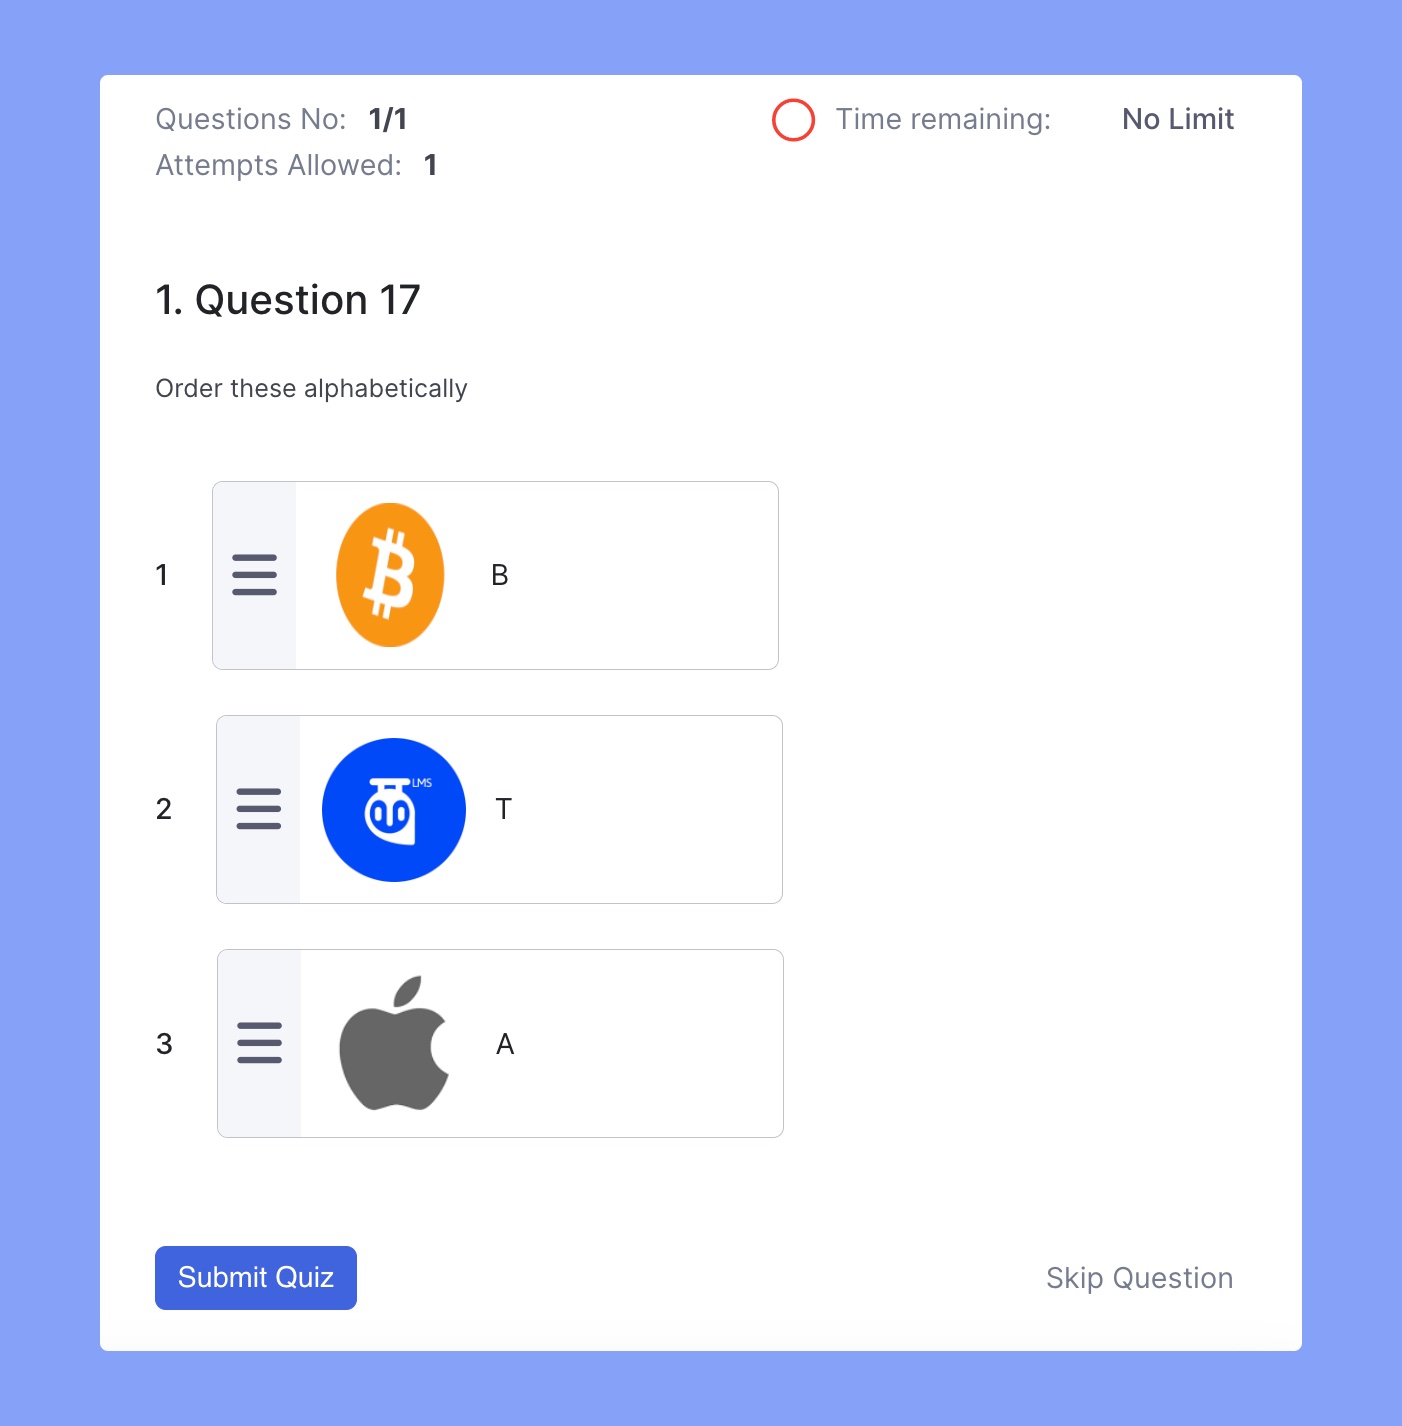
Image Matching
Set a matching type question where students can match an image to the correct text to obtain marks.
To implement this, enter your question, click on Add an Option and upload your image prompt, enter its matched answer and click on Update Answer. Repeat these steps to add more options.
Image Answering
Set an identification type question where students need to answer questions based on images.
Similar to Image Matching, click on Add an Option and upload your image and then enter its corresponding answer. Lastly, click on Update Answer and repeat these steps to add more options.
Question
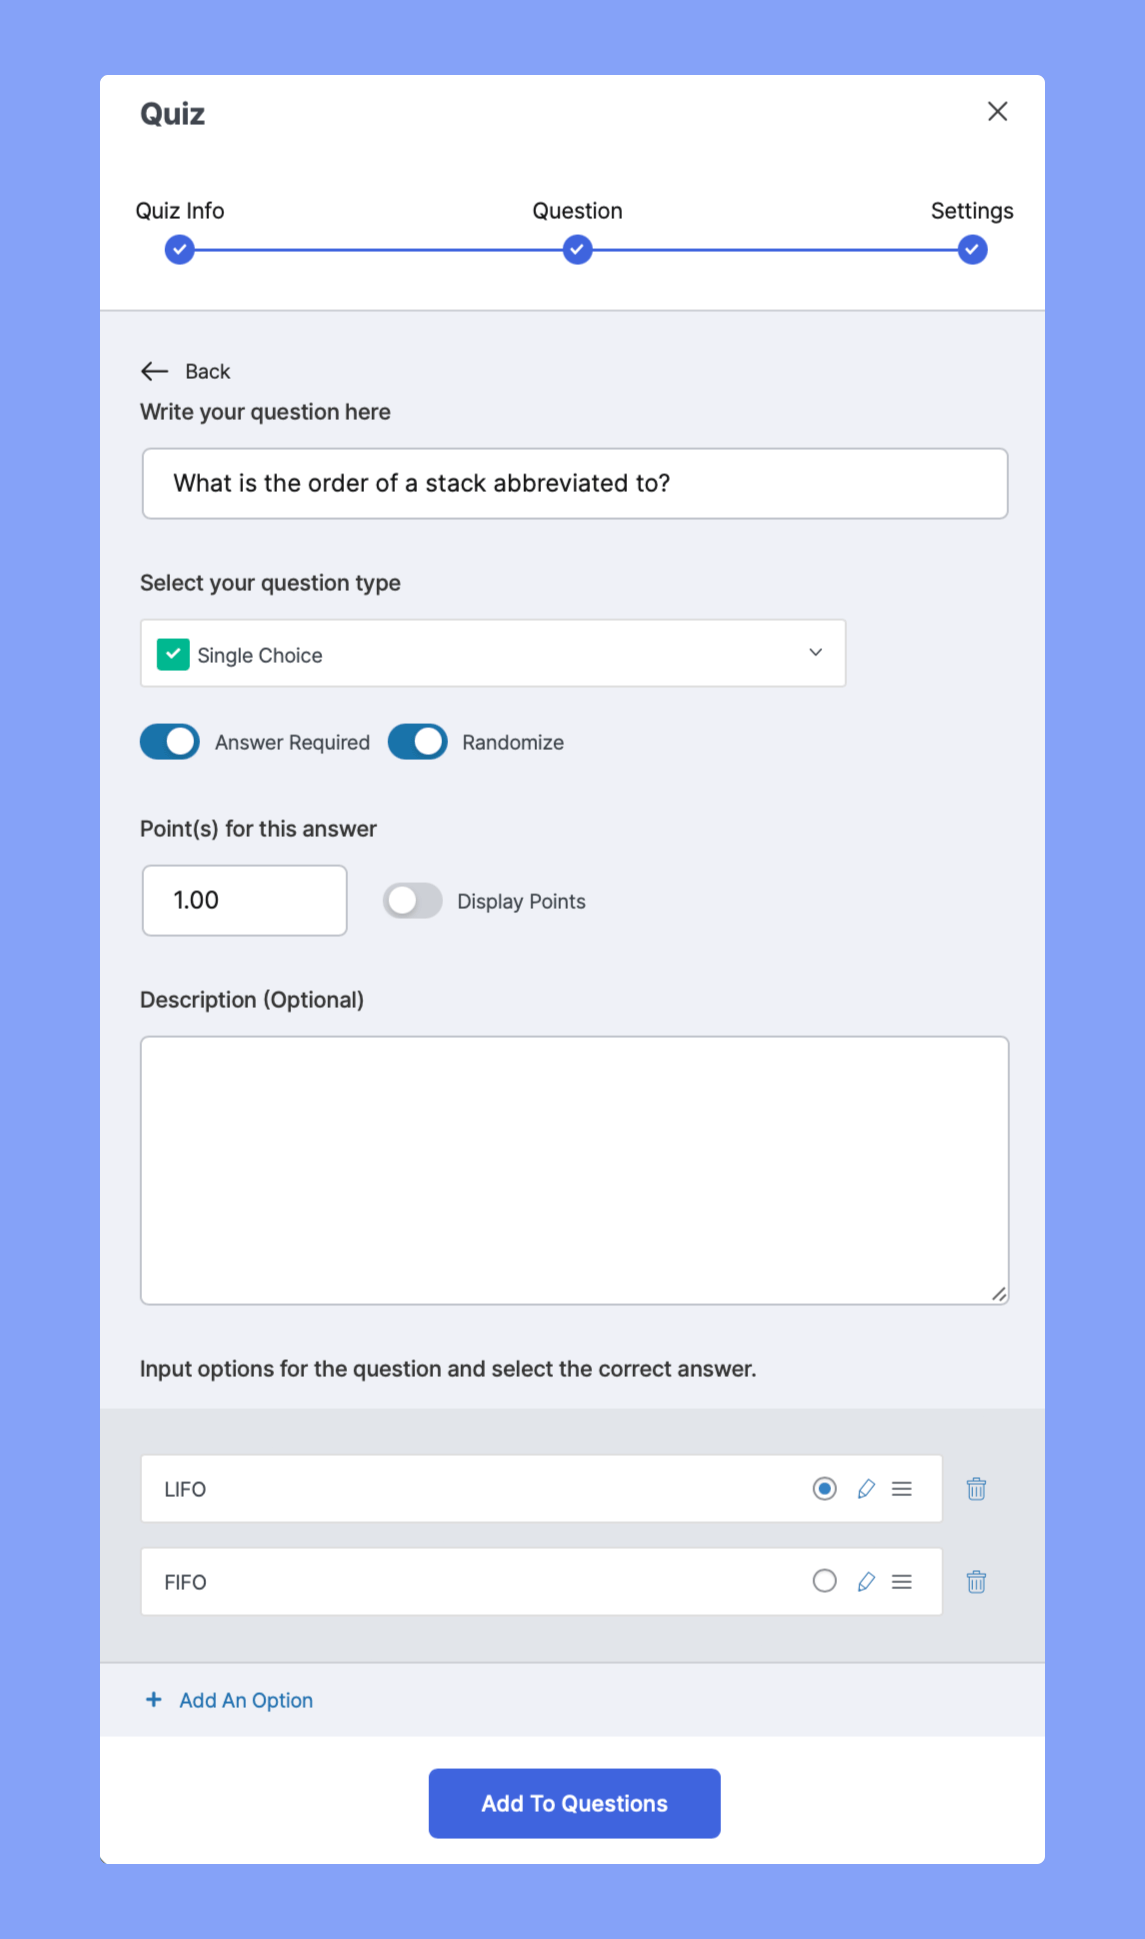
On the Question Form, add the question text, select the type from the dropdown, and add a description if you want. Following that, are a few settings for each question that you need to understand to best use them:
- Answer Required: Toggle this if you want this question to be mandatory to answer.
- Randomize: Toggle this if you want this question’s order to be randomly shuffled among the list of questions.
- Points for this answer: Use this field to set the points to be awarded for getting this question right.
- Display points: Enable this if you want to display the points on the quiz field.
Add the relevant answer(s) and select the correct answer if required.
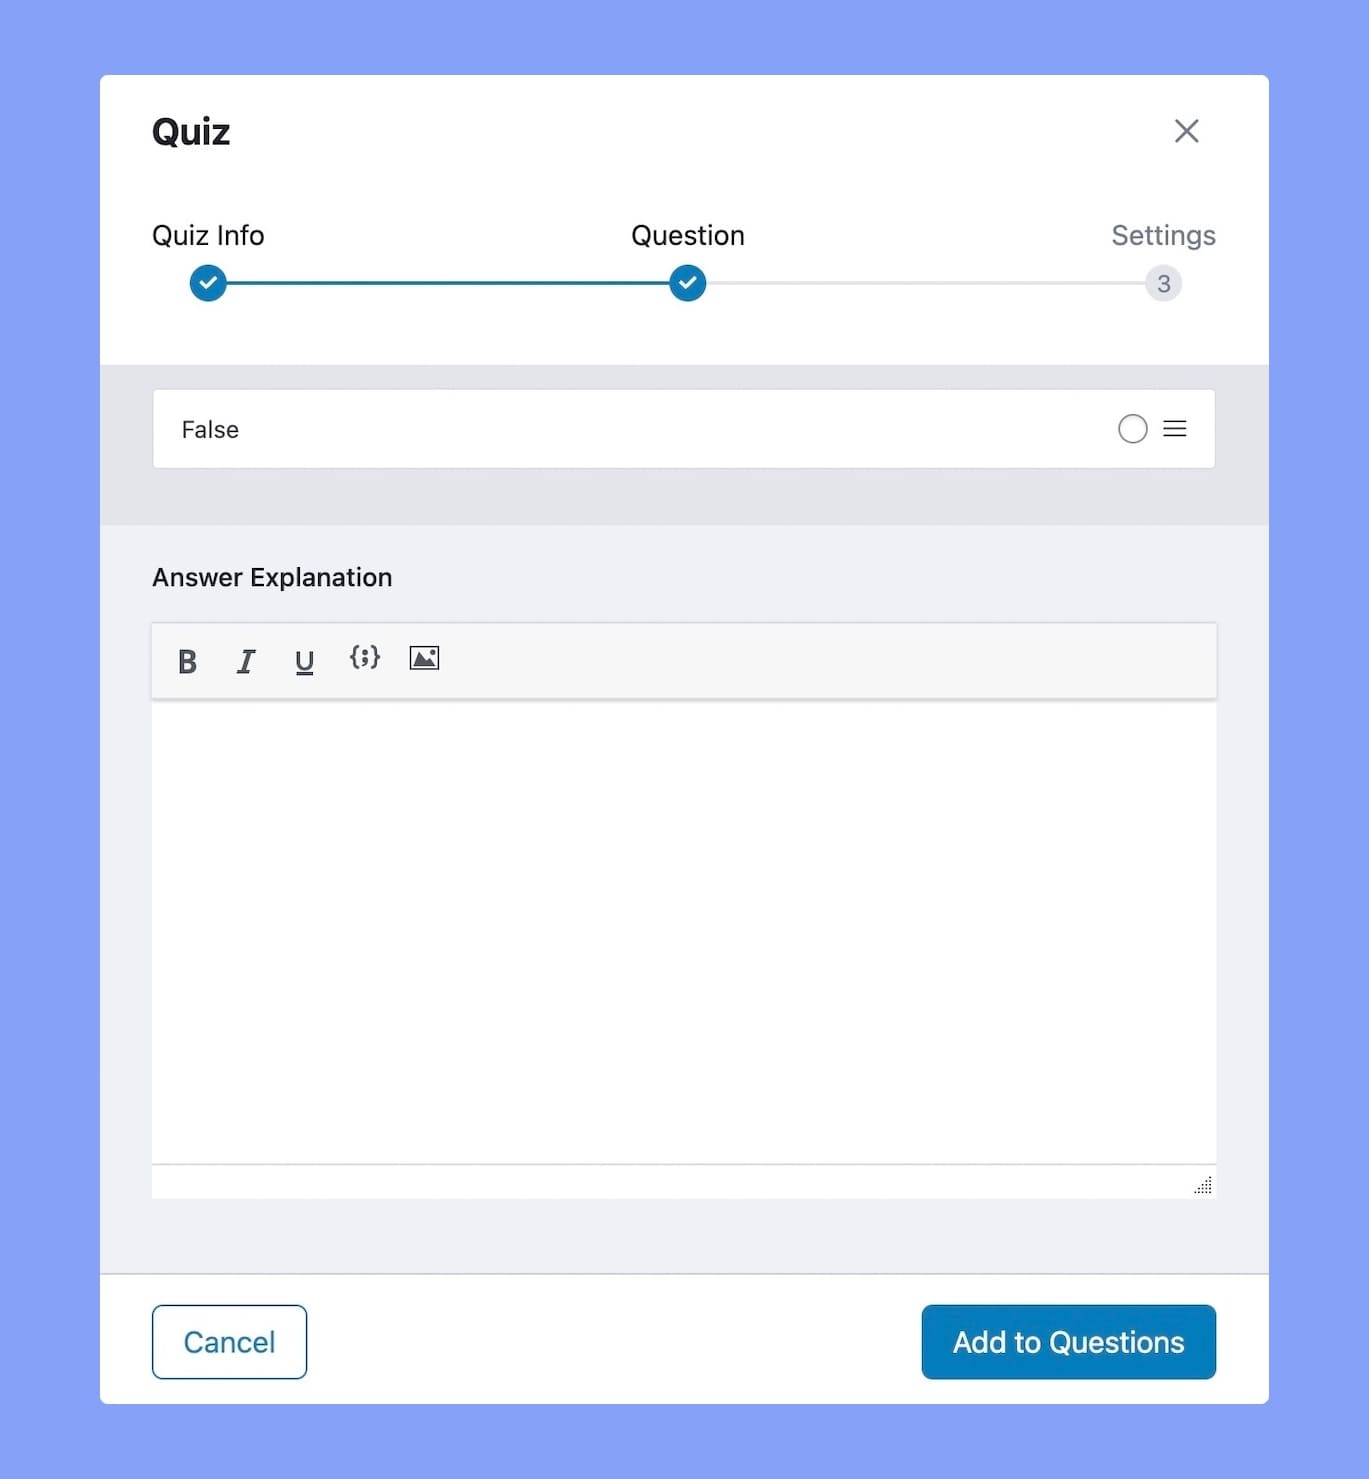
Answer Explanation: Next, if you’re using the pro version of Tutor LMS, you’ll see a field called ‘Answer Explanation’ where you can add the explanation for the correct answer.
Keep in mind that this is an optional field so you can leave it blank if you don’t want to add any explanation.
This field is available for any question type and students will be able to see it from the Quiz Details page.
Once the quiz has been submitted, click on the Details button that’s beside each Quiz Attempt. Then expand any question item to see its Answer Explanation.
Once you’re done, click on Add to Questions to save it. Doing this will take you back to the previous window where you’ll see the new question already added.
To add more questions, simply click on the Add a Question button again and repeat the same steps. Once you’re done adding all of the questions, click on the Save & Next button to go to the final stage of quiz building which is Settings.
Settings
In this section, you can use the following settings to adjust the quiz behavior according to your preferences. Let’s explain all of these settings in short:
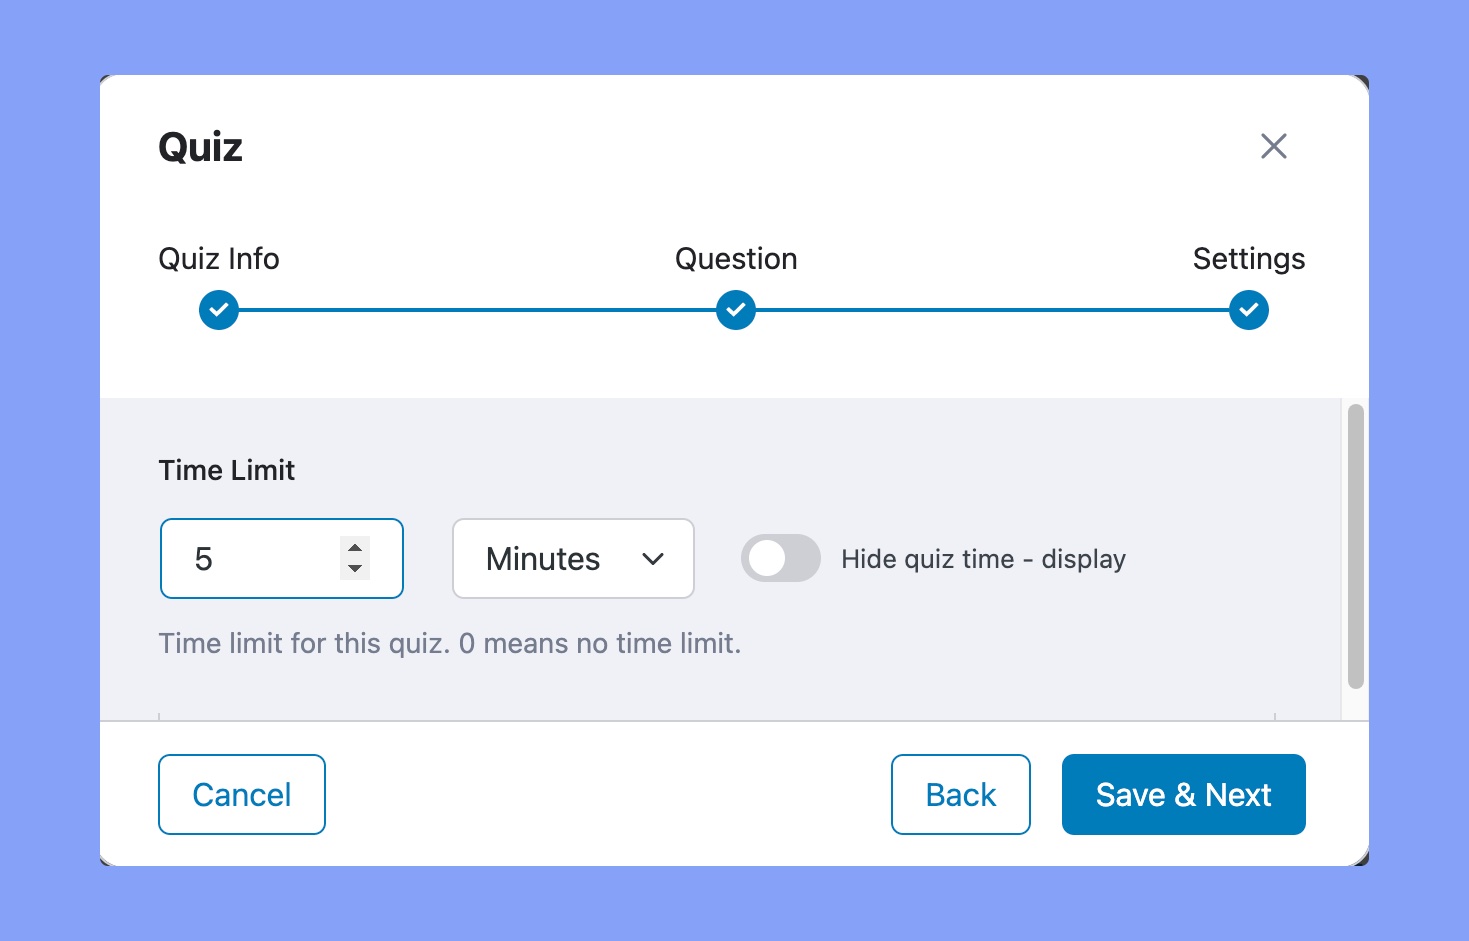
Time Limit
You can set time limit from here in seconds, minutes, hours, days, and weeks format. Use 0, if you don’t want to set any time limit. Besides, you can also hide the quiz time by toggling the Hide quiz time button.
Quiz Feedback Mode
Decide how you want to provide your students with feedback after they are done taking the quiz. The tooltips give you an idea of what each mode means.
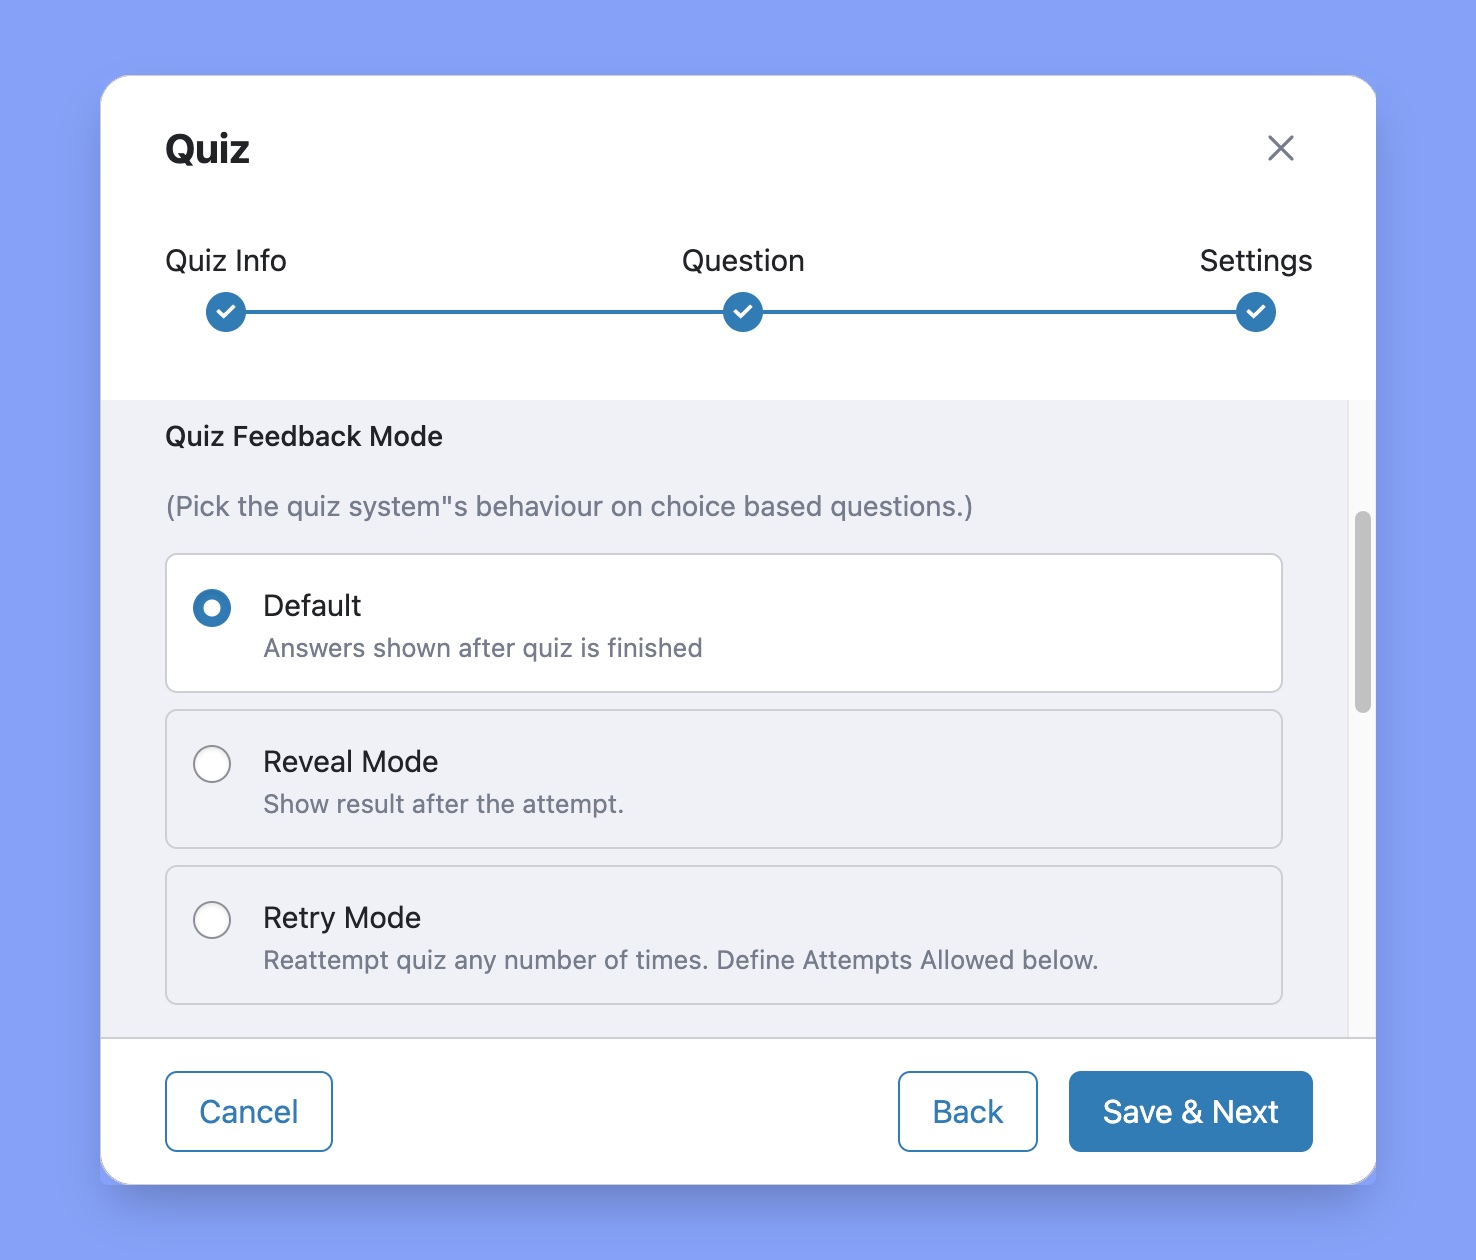
Here, you’ll get three different feedback modes. These are:
- Default: Answers are displayed after the quiz is finished.
- Reveal Mode: Answers are shown after the attempt.
- Retry Mode: Reattempt the quiz any number of times. You can define the number of times students can repeat a quiz using the Attempts Allowed setting.
Passing grade
It specifies the passing grade for this quiz. You can set the passing grade only in the percentage unit.
Max Question Allowed to Answer
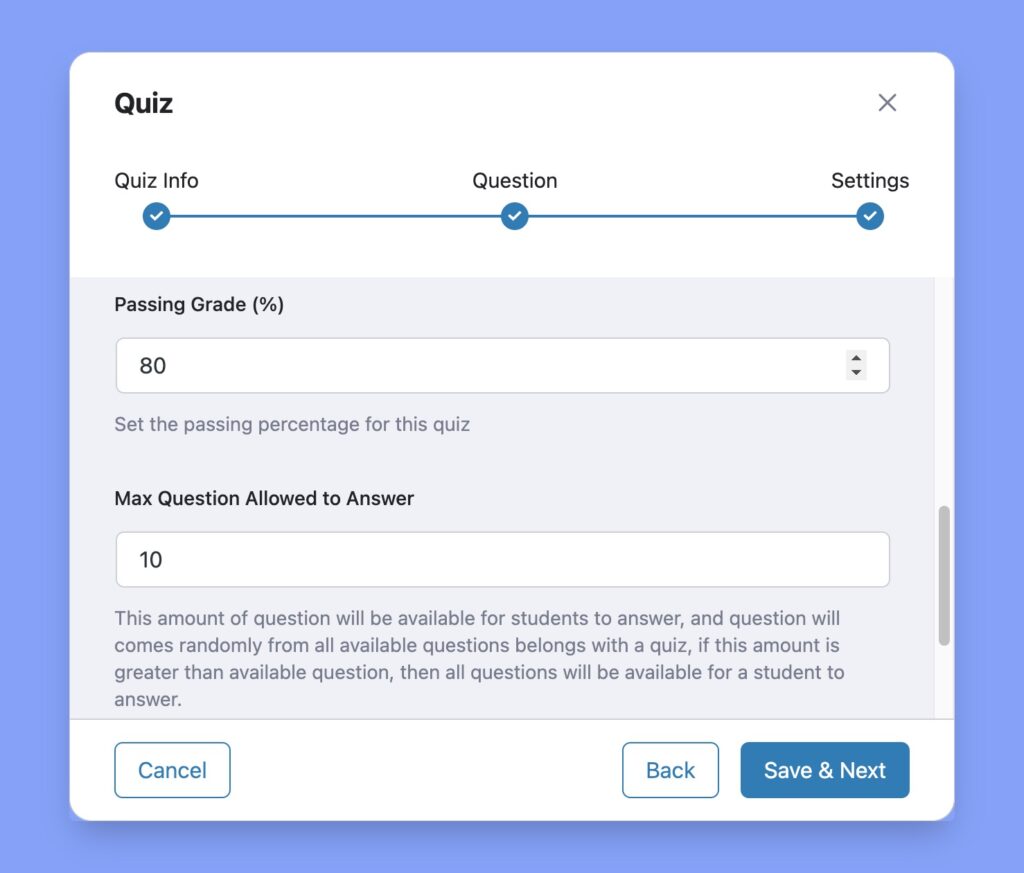
This feature is introduced to randomize questions in a quiz. The purpose of this function would be more clear with an example.
This option is a little bit tricky. Let’s have an example. Suppose, you have 50 questions in a quiz, if you put 50 here, a student will have to answer all 50 questions in order to complete the quiz. But if you put 10 here, the student will have to answer only 10 questions out of the 50 and these 10 questions will appear randomly. No student will get the same set of questions.
Advanced Settings
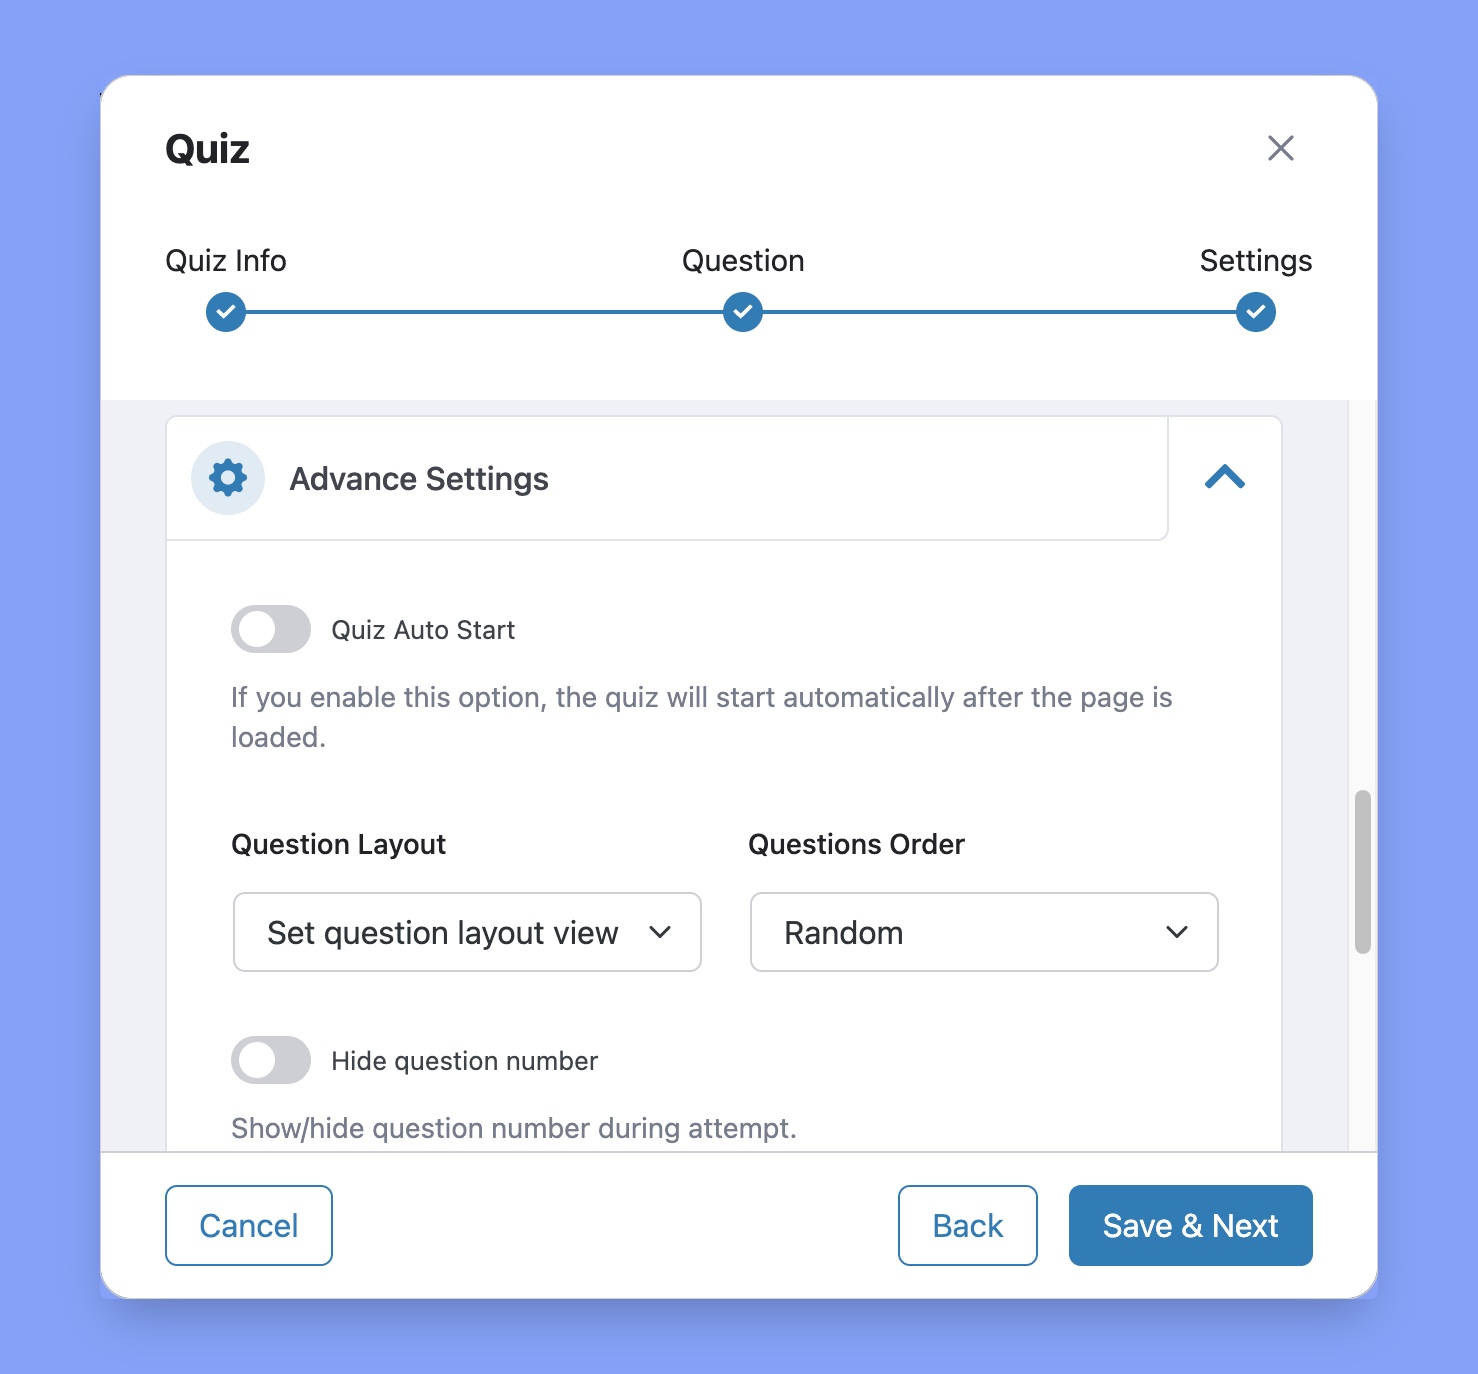
The following are some more Advanced Settings options that you can access by clicking on the Advanced Settings header.
- Quiz Auto Start: Enable this to make the quiz start immediately after the page is loaded.
- Question Layout: Set the layout for the quiz page. Options include Single Question, Pagination, and Question below the other.
- Question Order: Select the order for the questions provided to you. Options include Random, Sorting, Ascending, and Descending.
- Hide Question Number: Select to hide the question number during the quiz.
- Short Answer Character Limit: Select the character limit for short answers.
- Open-ended/Essay Question Answer Character Limit: Select the character limit for open-ended/essay question answers.
Finally, once you’re satisfied with the settings click on Save & Next again to save your quiz. It should appear under your chosen topic on the Course Builder.
To Edit the quiz, simply click on the edit icon that’s on the right side of the quiz listing, and to Delete it, click on the trash icon that’s right beside it.
✨ Bonus: You can also Import Quizzes if you’re using the Pro version of Tutor LMS! To find out more details about this feature please visit the quiz export/import documentation.
Make Passing a Quiz Mandatory to Access Next Course Content
Quizzes are an amazing study tool but when it comes to eLearning, there is one particular flaw in the system that can baffle Instructors. Yes, we’re talking about online classes where the students have the ability to move on to the next course content even after failing a quiz that precedes it.
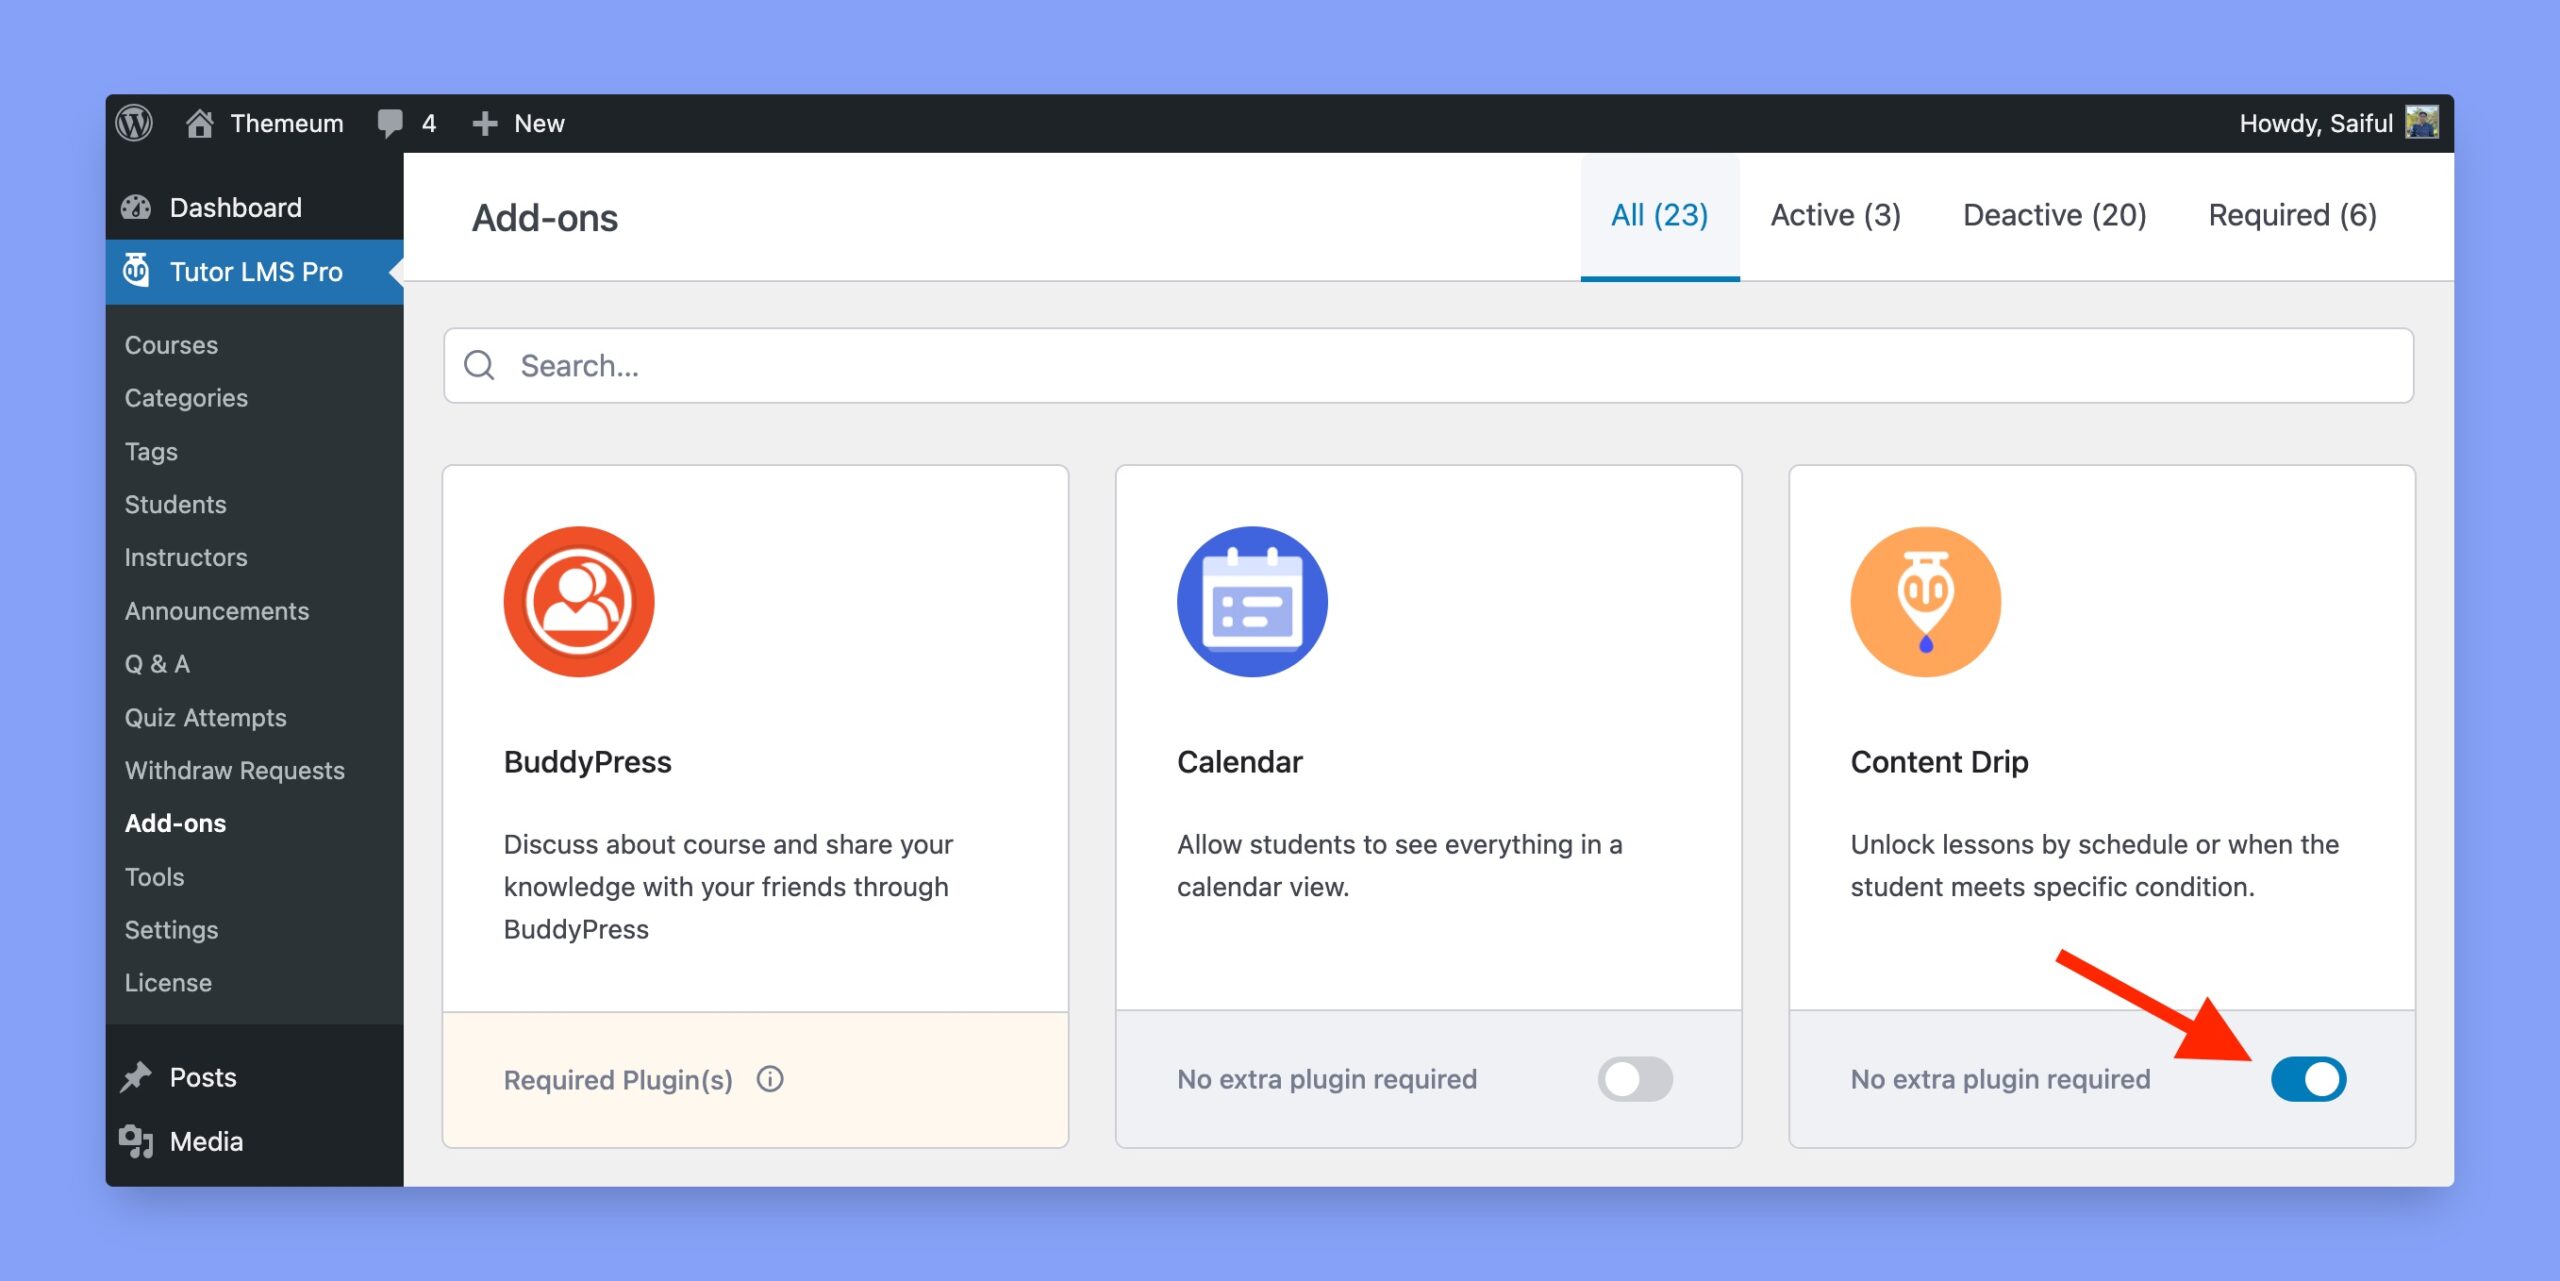
Luckily, Tutor LMS Pro users can ensure this is not possible and make it mandatory for students to pass a quiz in order to access the next course contents. To enable this feature, you have to enable the Content Drip addon. You can find this addon by navigating to Tutor LMS Pro > Add-ons.
After enabling the addon, follow the steps below:
- On the Course Builder page, under Course Settings, enable Content Drip and set its type to Course content available sequentially.
- At this point, update the course to ensure this change is applied.
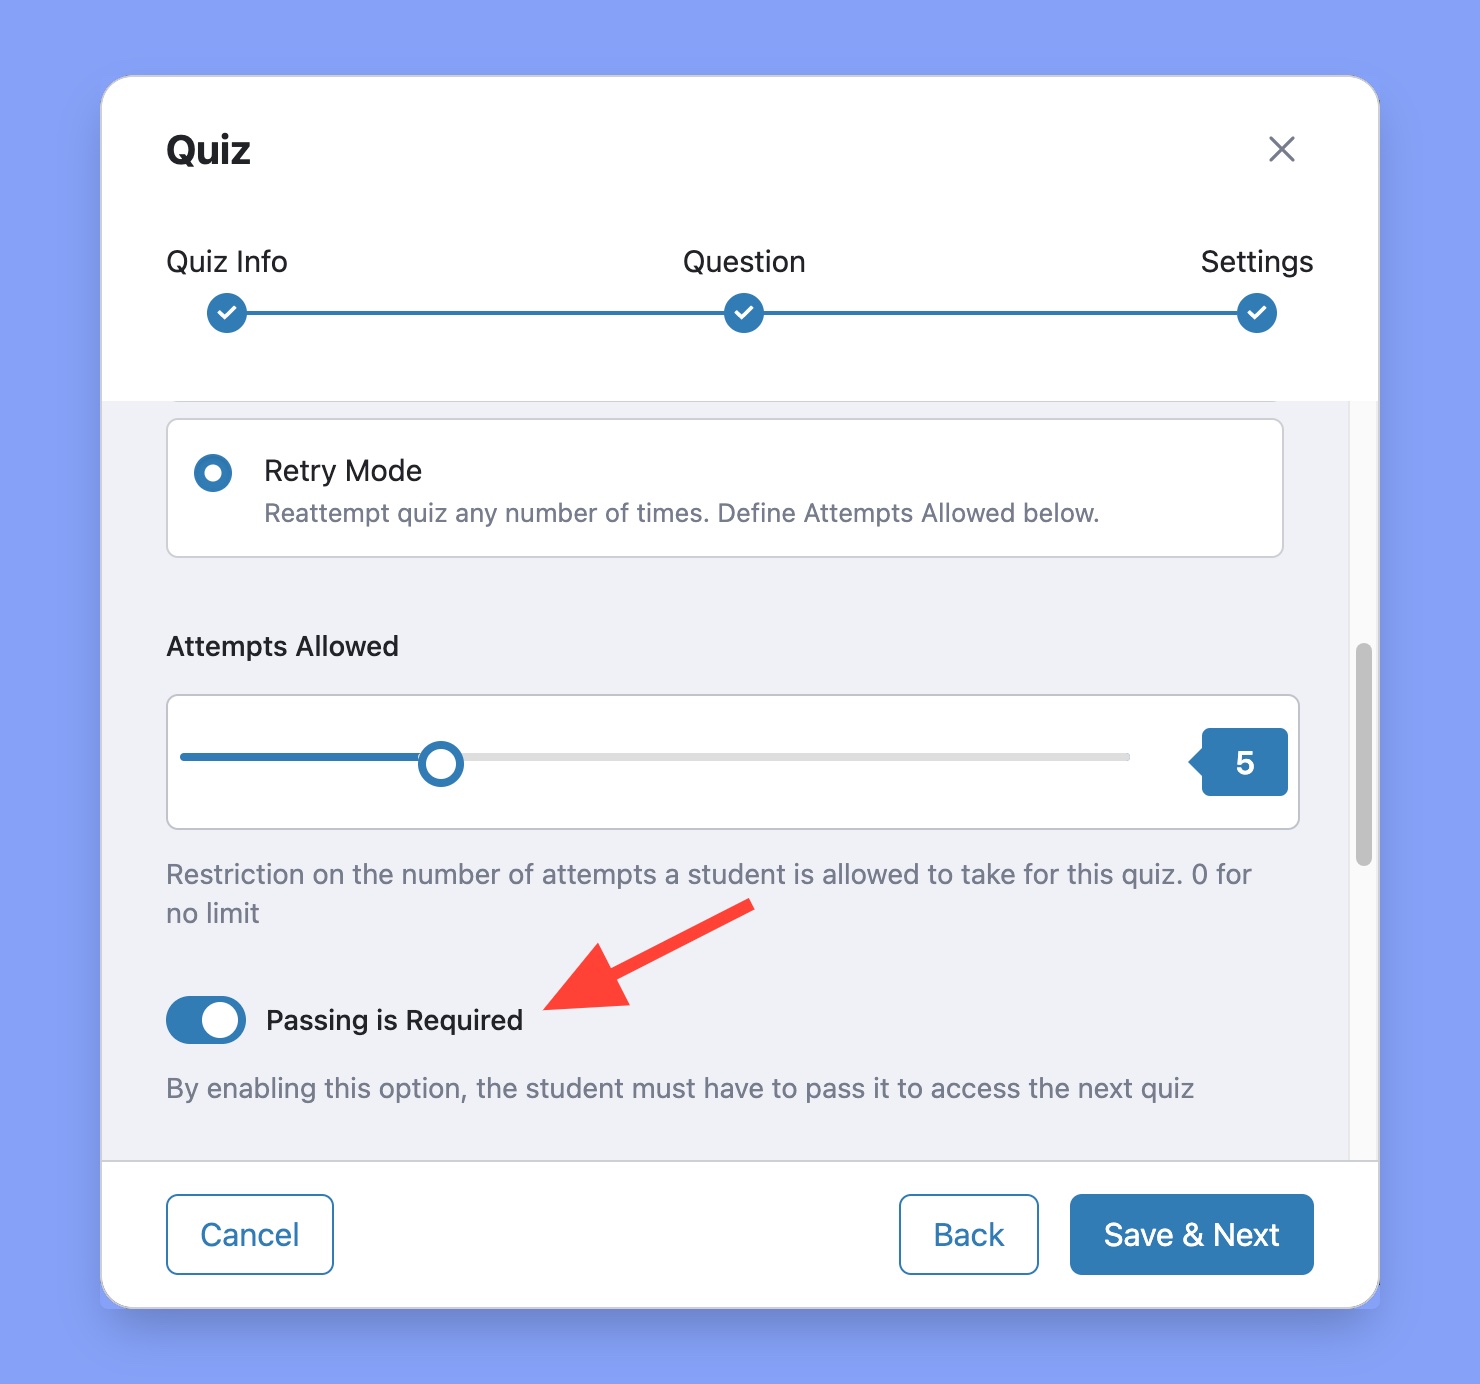
- Next, from Quiz Builder > Settings set the Quiz Feedback Mode as Retry Mode.
- Finally, you should see the Passing is Required toggle appear below the Attempts Allowed slider. All you have to do now is enable this option, click on Save & Next, and Update your course to save the changes.
And voila, it’s now mandatory for your students to pass this quiz in order to access the course material that follows!
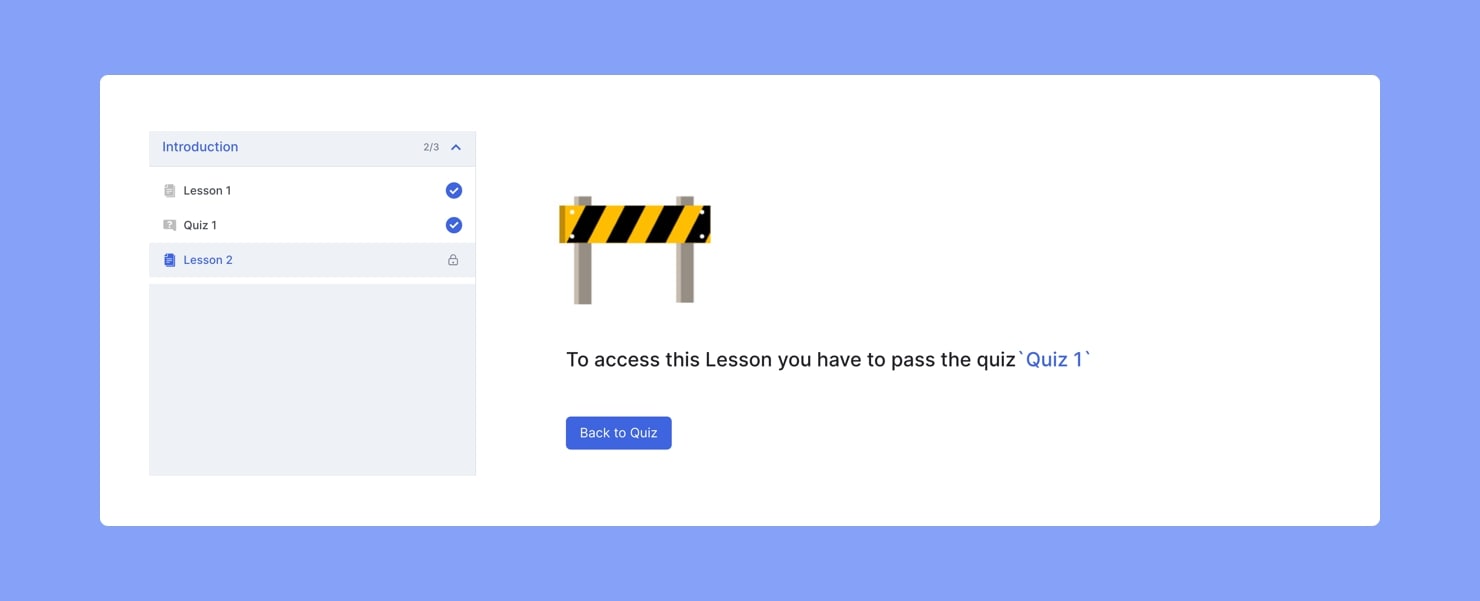
If they fail a quiz that requires passing and attempt to access the next lesson, they’ll now get a message like this:
Note: Do keep in mind that if a quiz contains any open-ended questions which require the instructor’s review, the next course content will only be available after the instructor does so.