If you want to offer subscription-based pricing for specific courses, then WooCommerce Subscriptions is the perfect fit for you.
Please note that, WooCommerce Subscriptions can not help you with a subscription for the entire site. If you need to offer sitewide membership, use the Paid Memberships Pro plugin.
Requirements to Use the Subscription Feature
You will need the following plugins in order to offer a subscription-based course:
Install and activate all of these plugins on your eLearning website.
Create a Subscription-based Course
The process of creating a subscription-based product is almost the same as adding a WooCommerce product to the course. It just needs a enable an addon. Here’s the process of creating a subscription-based course:
1. Enable WooCommerce Monetization
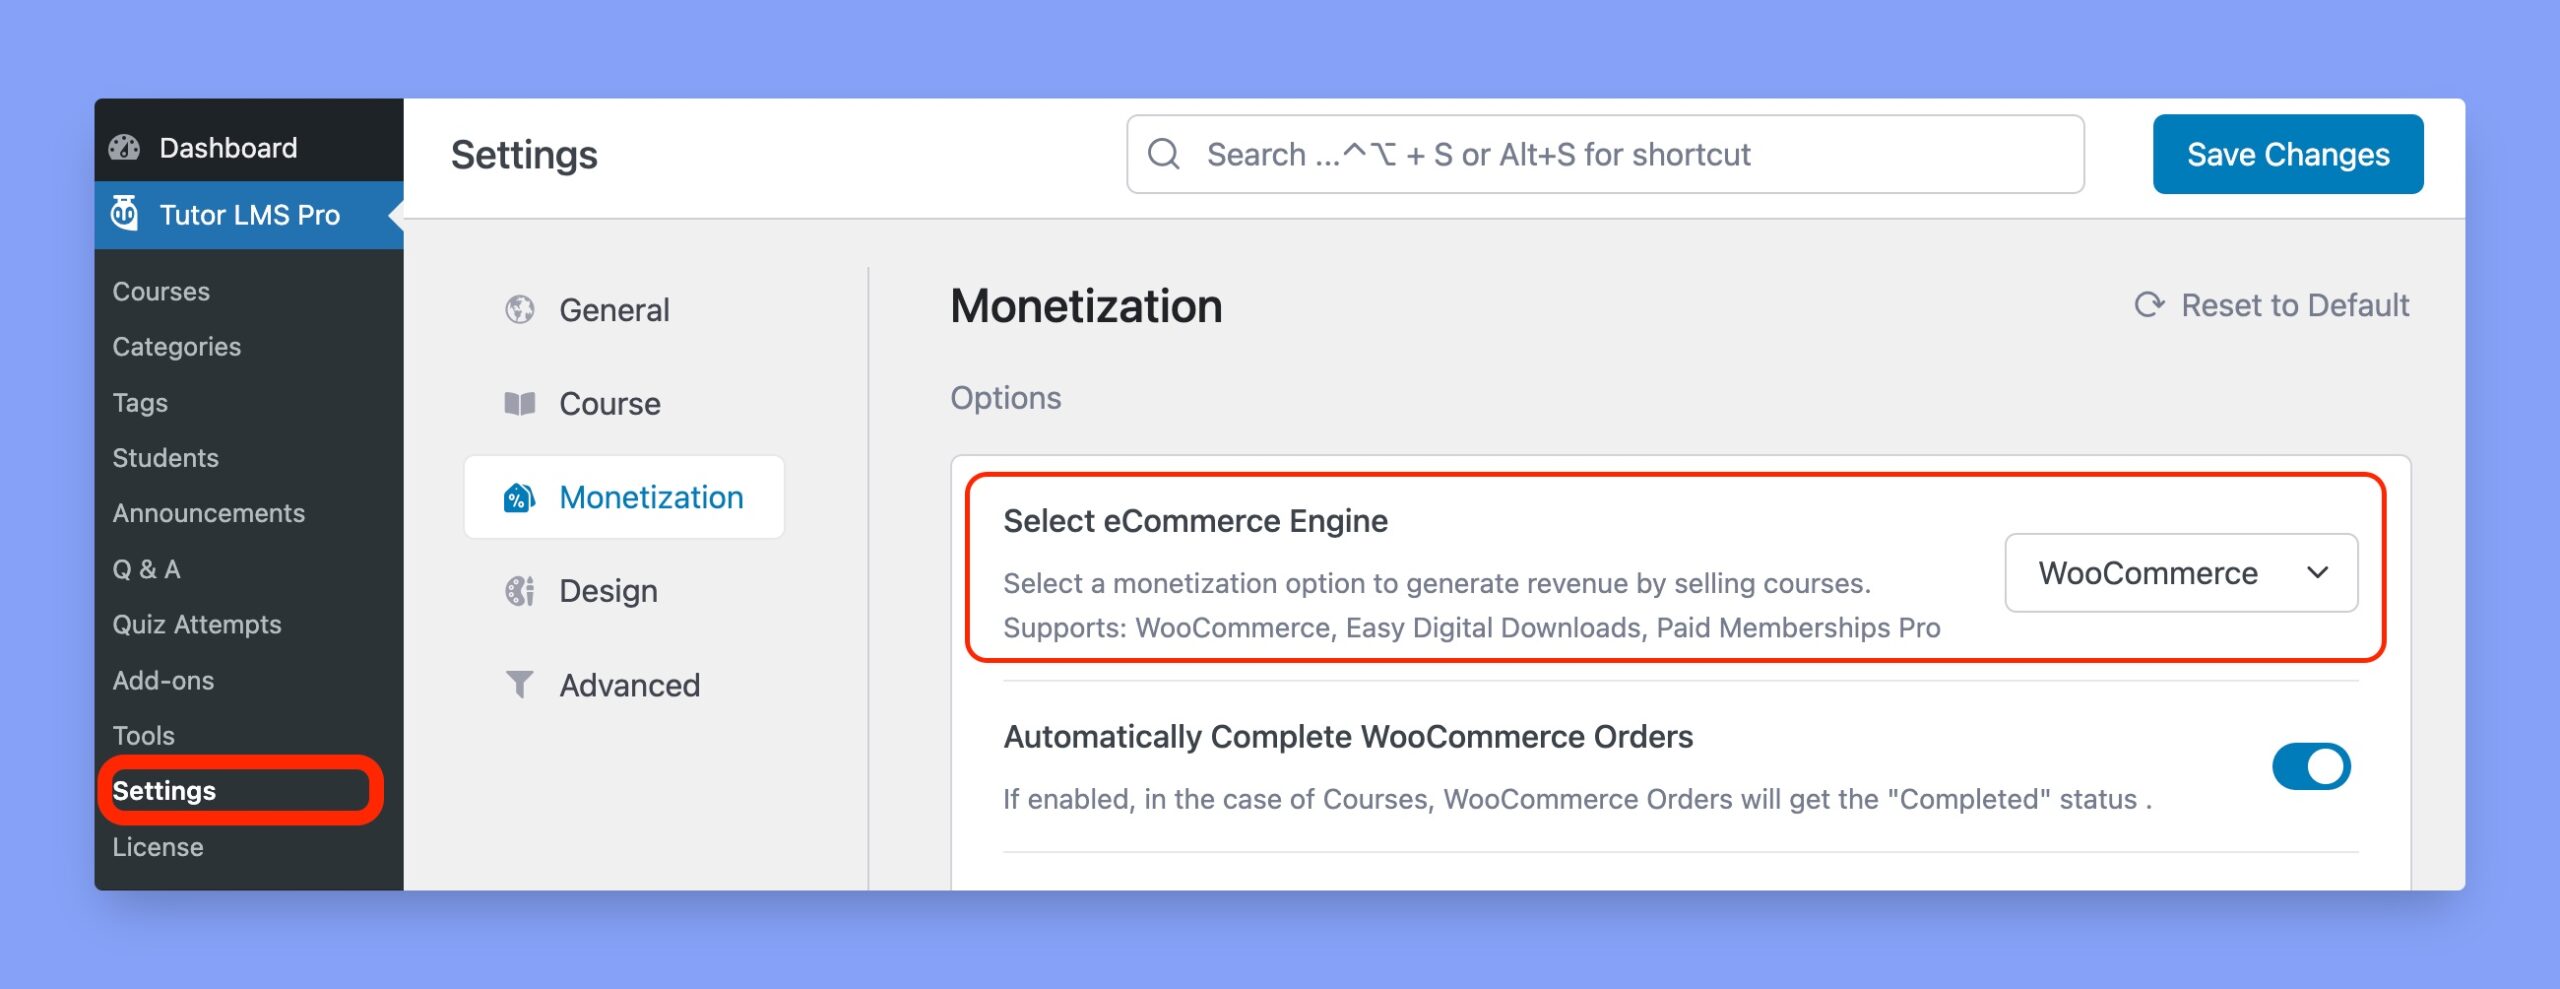
In order to create a subscription-based product, you must enable monetization first. You can access the monetization option from Tutor LMS Pro > Settings > Monetization. Here, select WooCommerce as your eCommerce Engine and click on the Save Changes button on the top.
2. Enable WooCommerce Subscriptions Addon
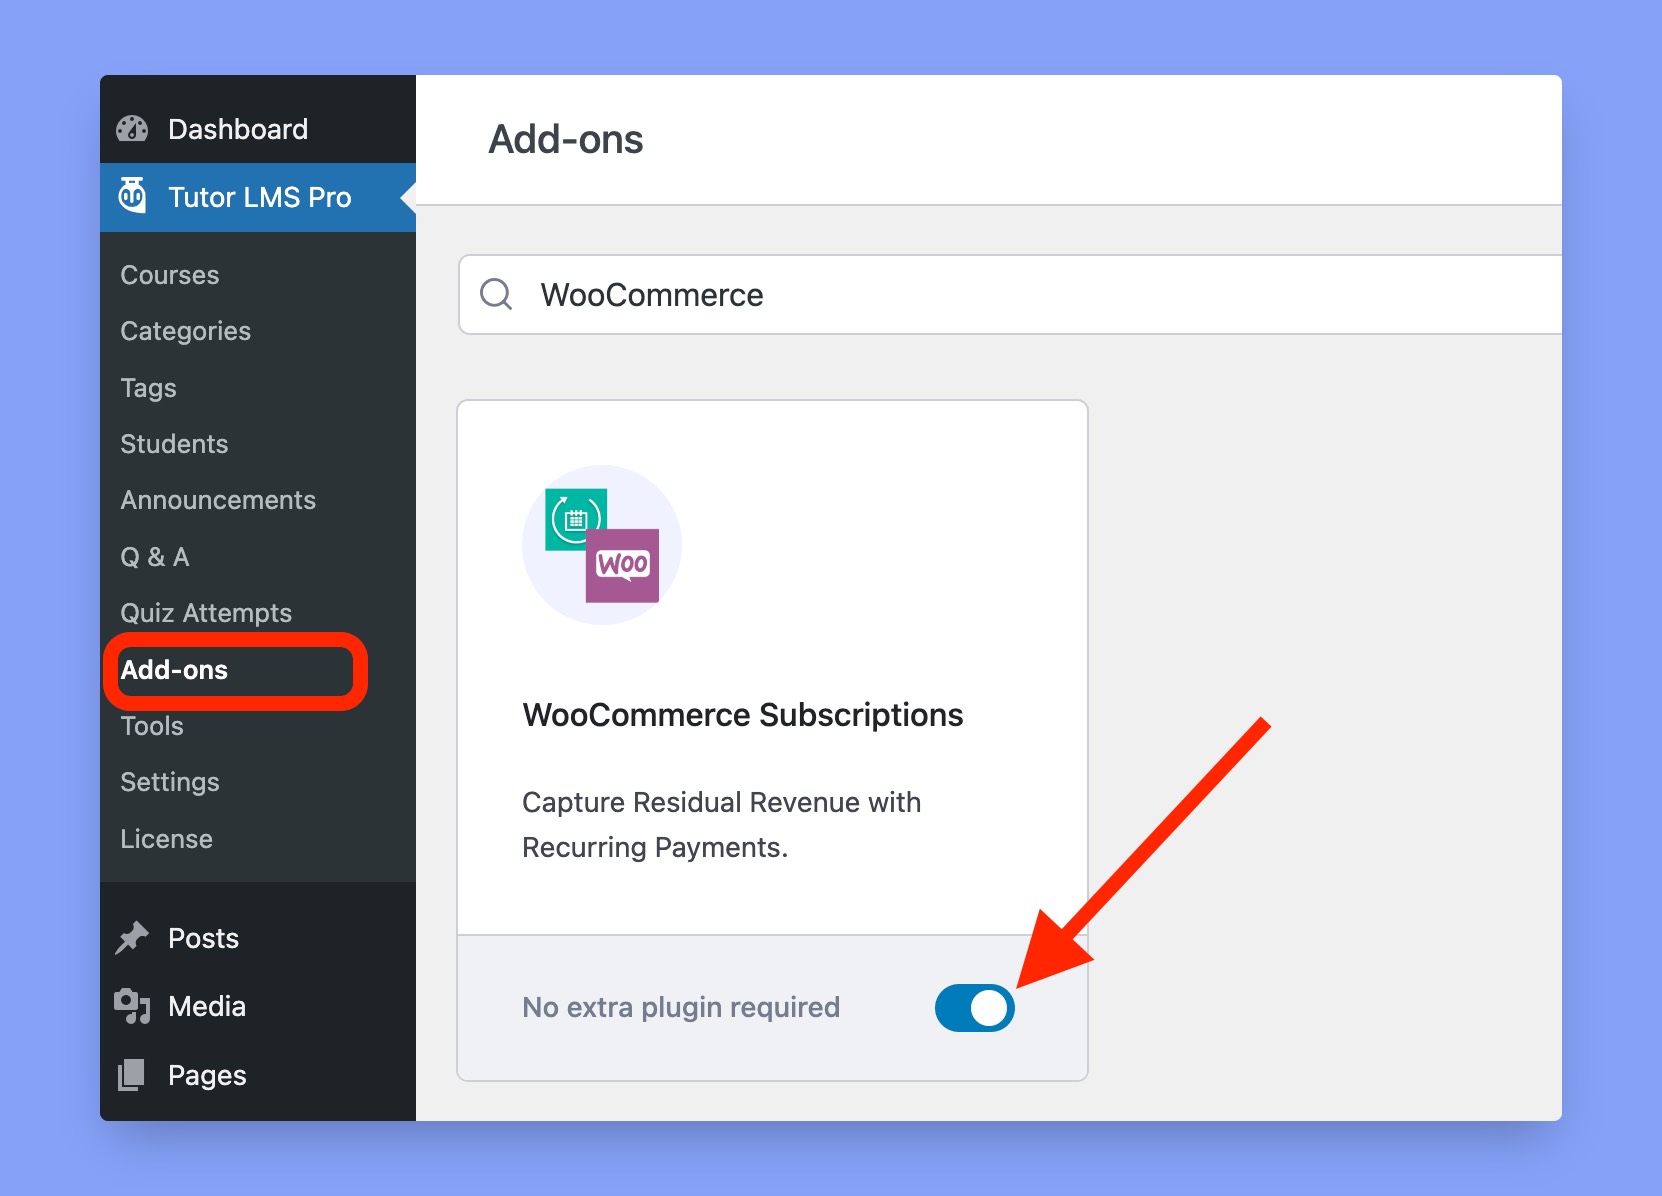
Go to Tutor LMS Pro > Add-ons and search for the WooCommerce Subscriptions addon. Then enable the addon using the toggle switch beside that.
3. Create a Subscription Product
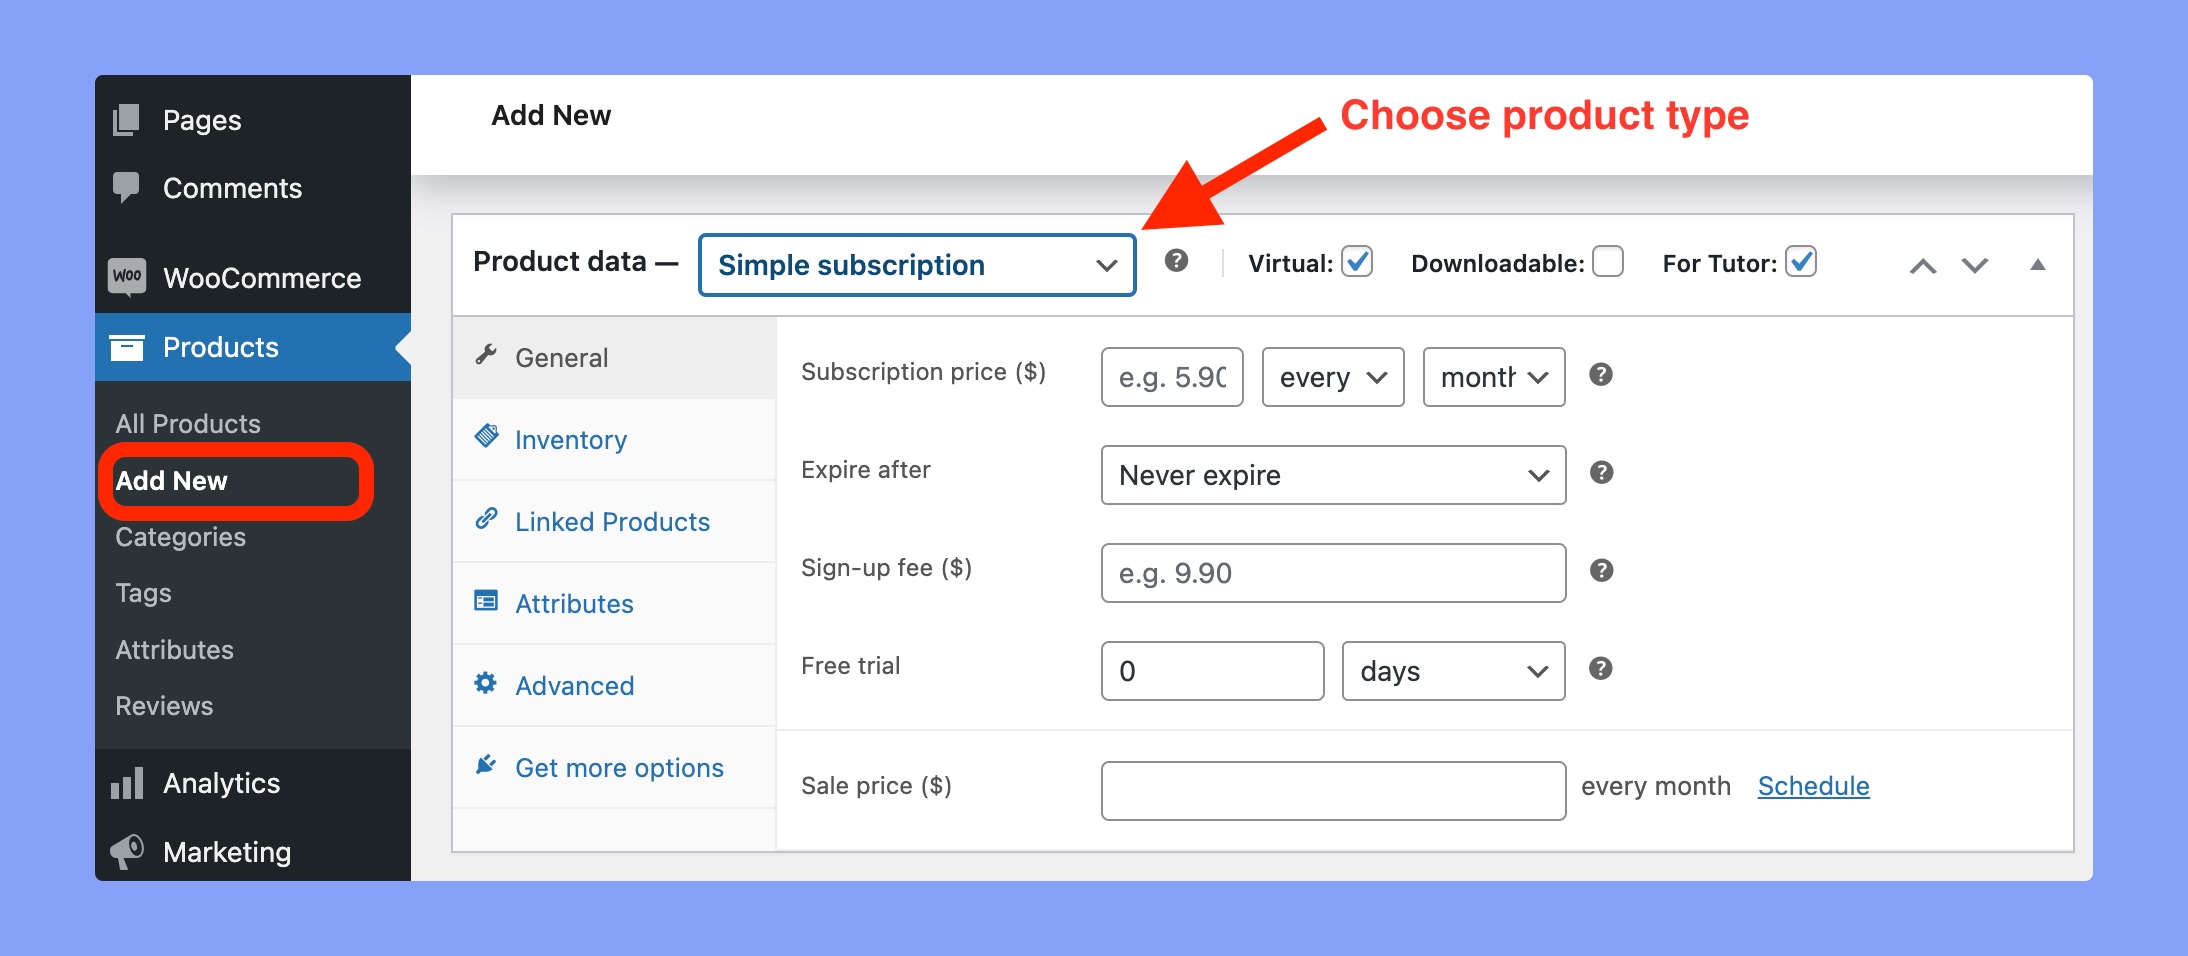
Go to WP Dashboard > Products > Add New and input the required information there. Here, put a tick mark on the Virtual and Tutor option and input the following details:
- Product name: Enter the name of your subscription product.
- Product description: Write a short description of your product.
- Select product type: Select ‘Simple subscription’ as your product type.
- Add subscription price: Set the subscription-product price and select the billing schedule. You can set the billing date here in day, week, month, and year.
- Set expiry date: Choose the date when the payment will be completed.
- Add sign-up fee: If the students need to pay a sign-up fee during the enrolment, input it here.
- Offer free trial: Enter how many days, weeks, months, or years you want to offer a free trial of your course.
- Offer sale price: Enter the sale price in this field. You can also set a validity for this sale price.
These are the available options while setting up a subscription product. After setting up everything, publish the product.
Add the Subscription Product to Your Course
After creating a product, it’s time to add the product to your course. To do so, you have to open the course using the backend course builder. Then scroll down and choose the Paid radio button on the Add Product section.
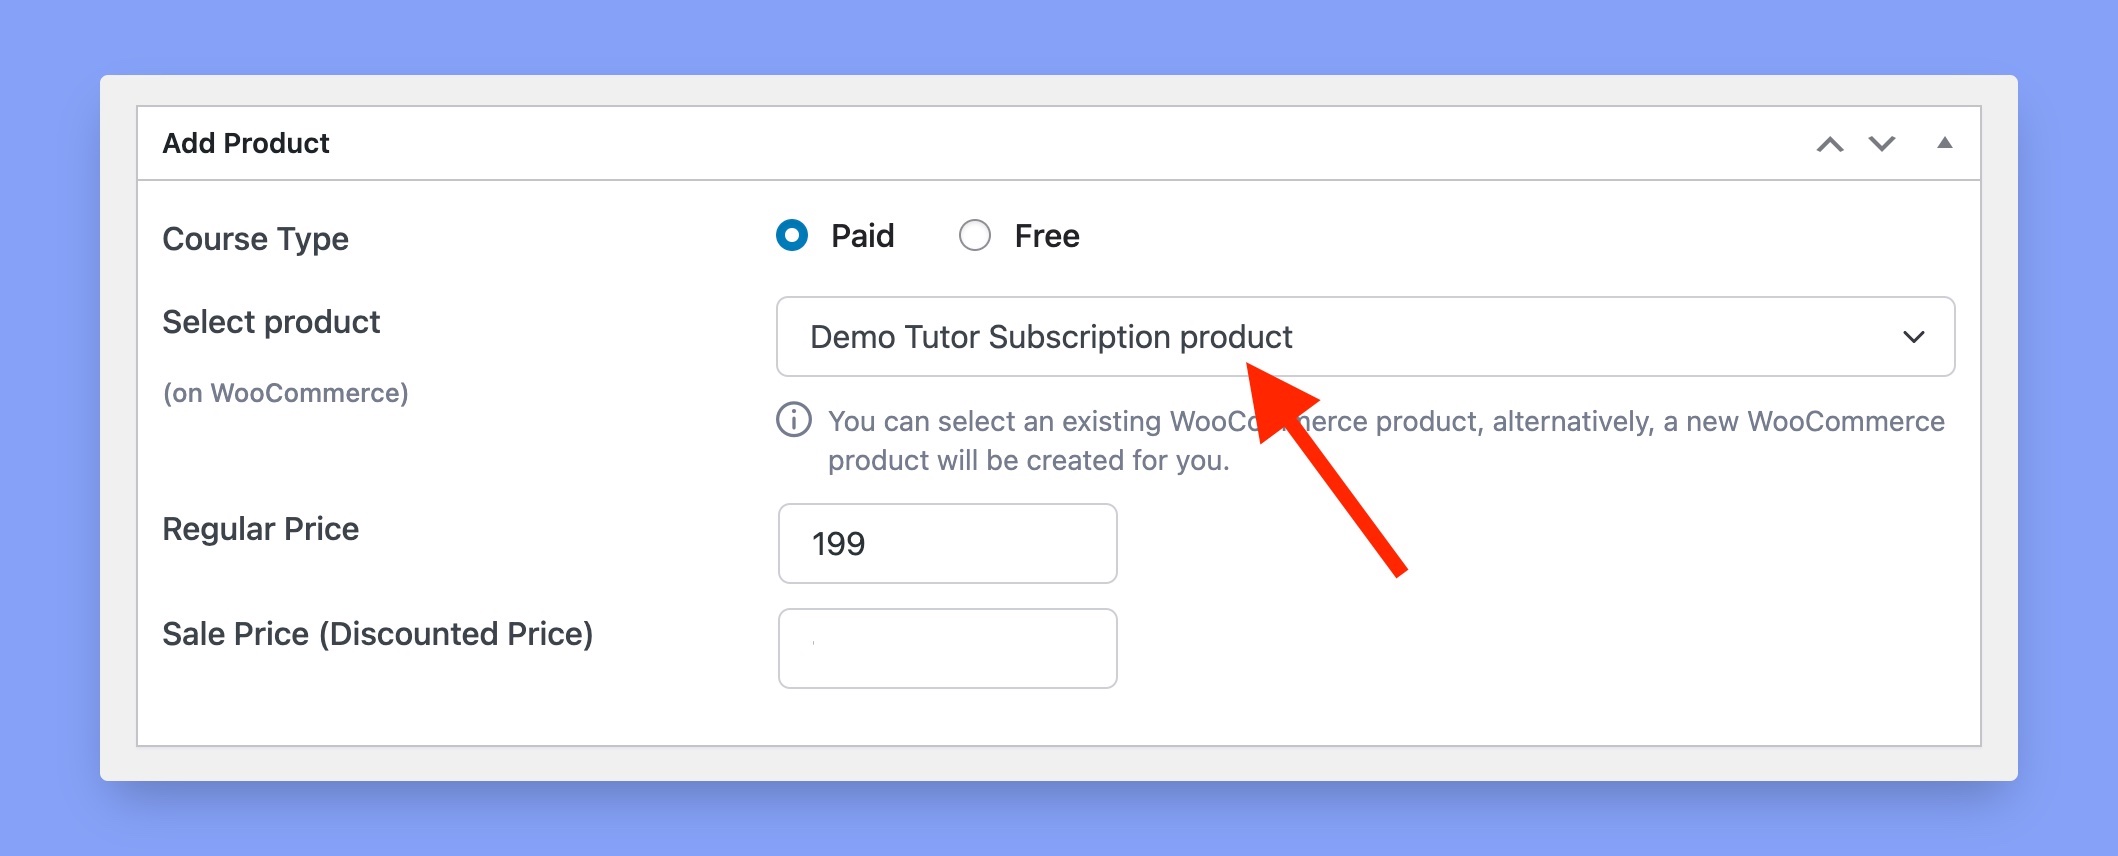
In the Select Product option, choose the subscription product you’ve created in the previous step. The pricing section will be automatically filled up based on your product price. You don’t need to update the price manually. Up next, update your course and the new price will be added to your course.
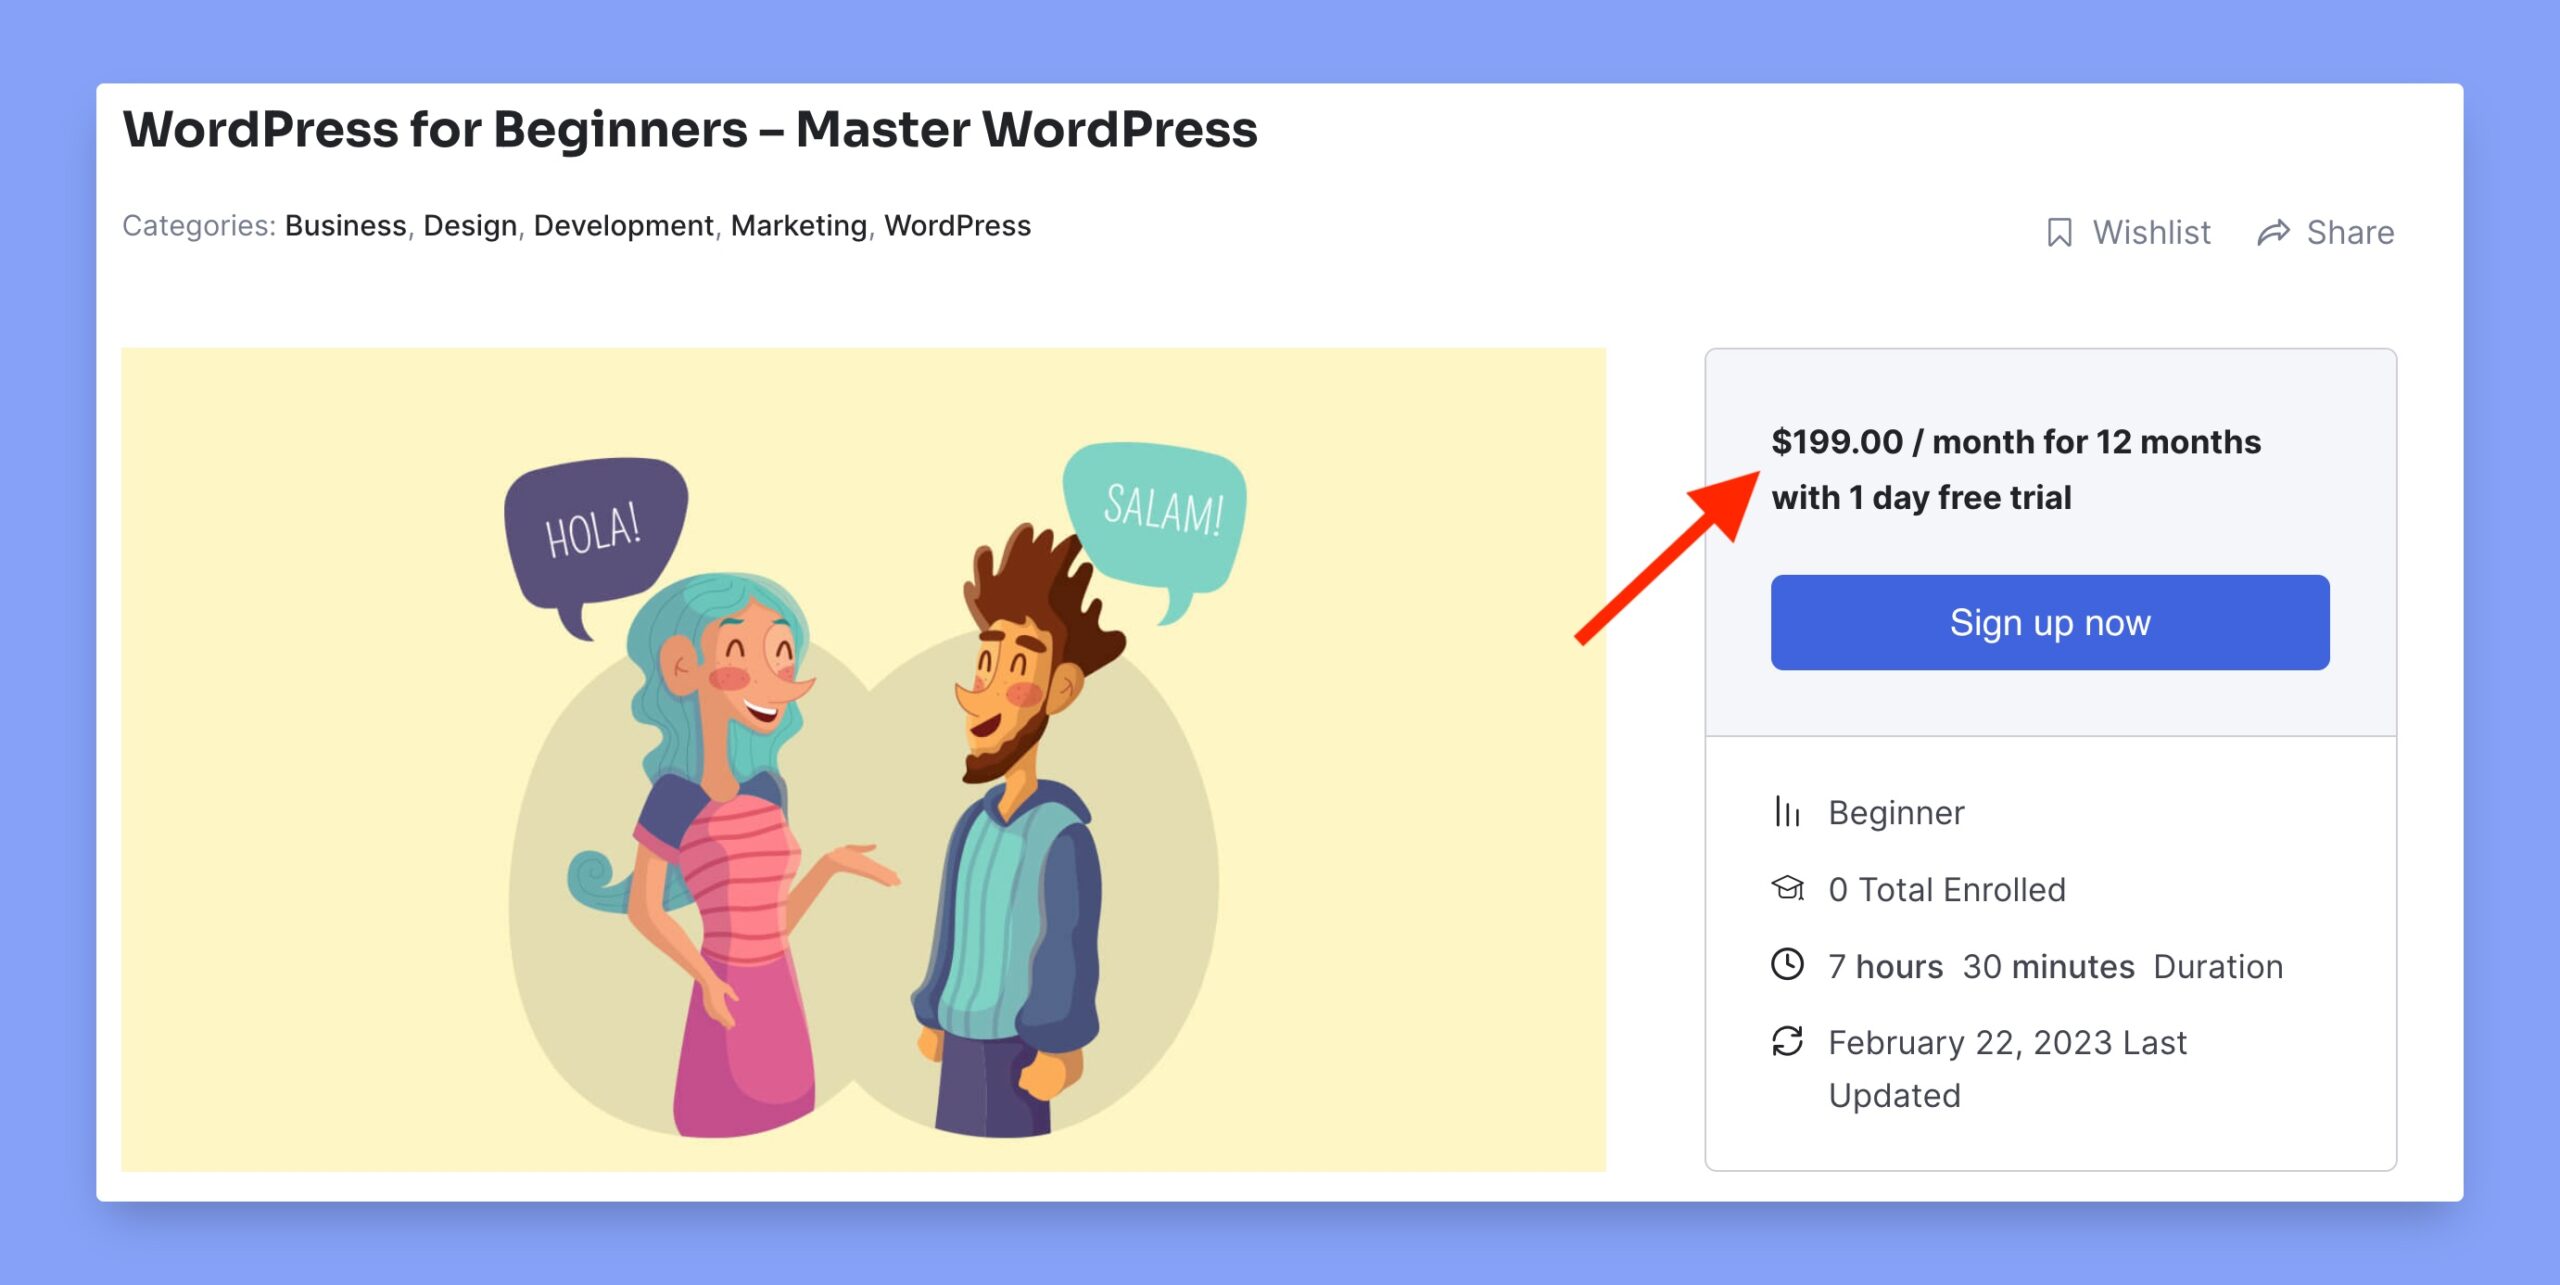
Here’s the frontend overview after adding the subscription product to your course: