WP Crowdfunding is a solution for creating crowdfunding platforms with a WordPress website. It allows you to crowdsource funds for your campaigns. Since you’ll be operating a site with hundreds (or thousands) of users, it is crucial to understand commission allocation, money management, and money distribution.
Money Management options for Free Users
Since WP Crowdfunding is powered by WooCommerce, it supports all payment methods that are supported by WooCommerce. You can add your desired payment method by simply installing their WordPress plugin.
Once you’ve added your payment method to your site, you can configure the setting by going to WP Dashboard > WooCommerce > Settings > Payments and enable your preferred payment method.
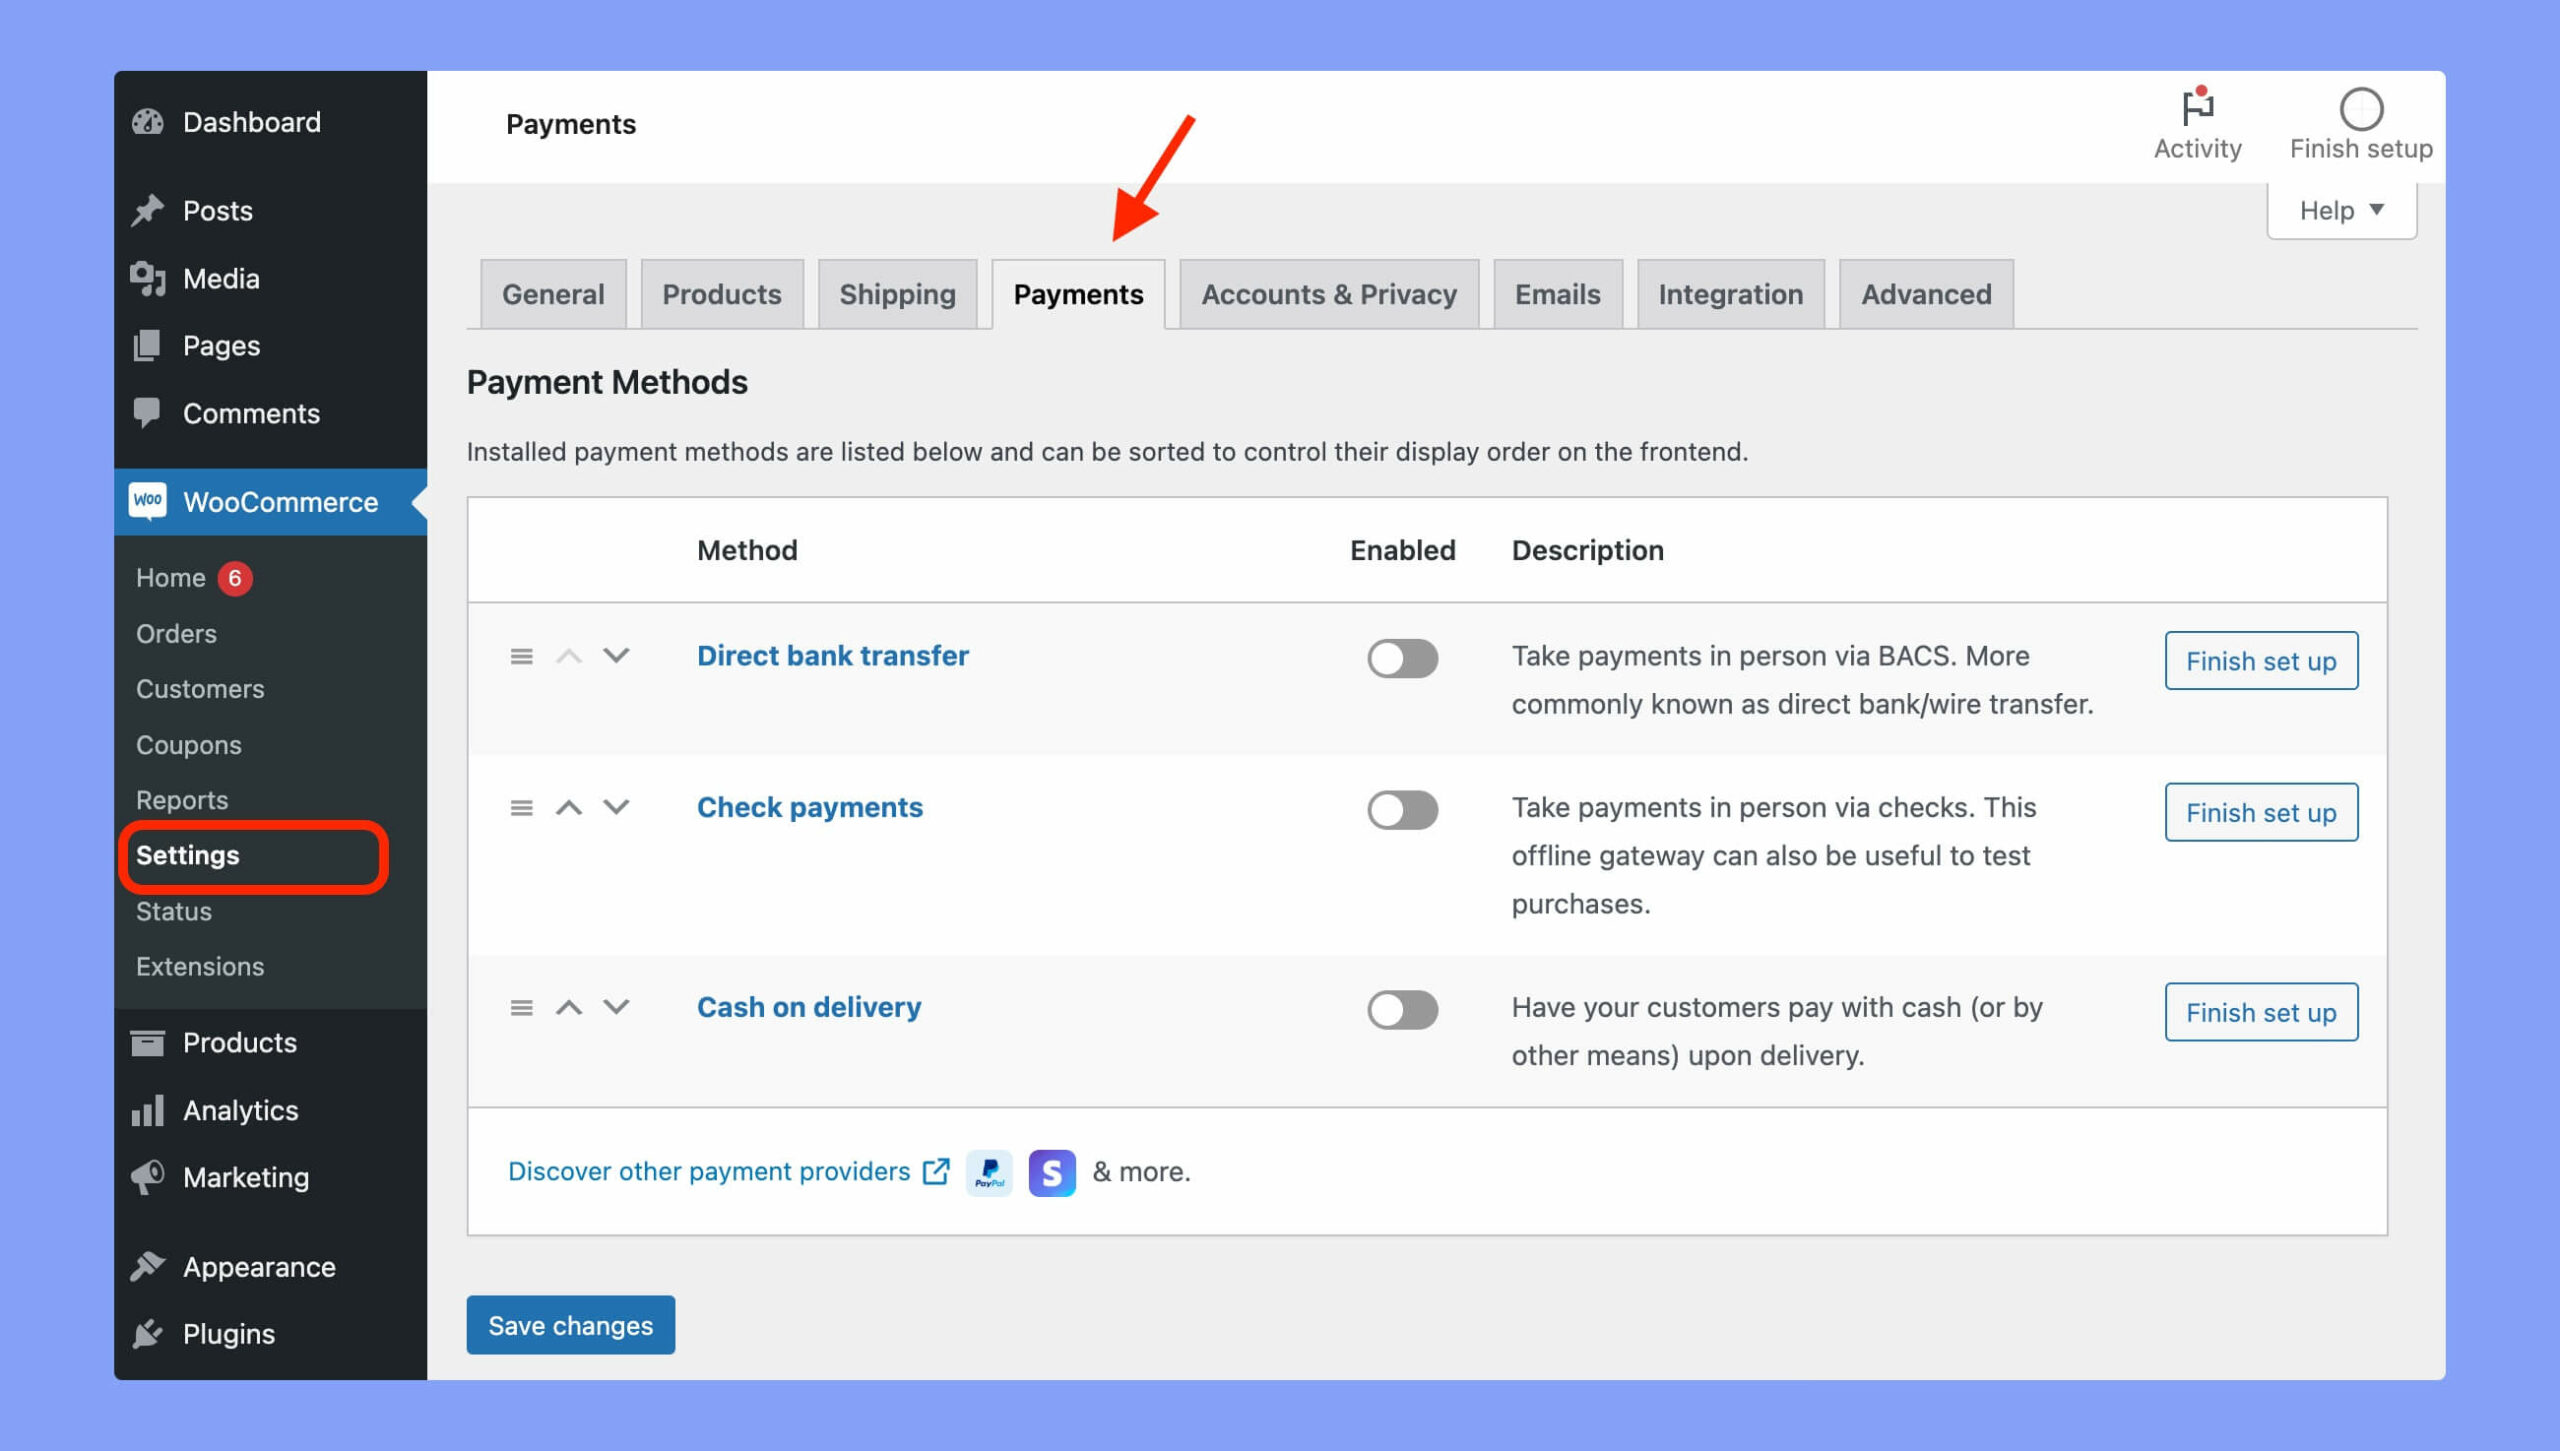
You can either accept direct bank transfer or check payment system. Otherwise, download Stripe for WooCommerce and install it. You can accept all major debit and credit cards as well as local payment methods using Stripe.
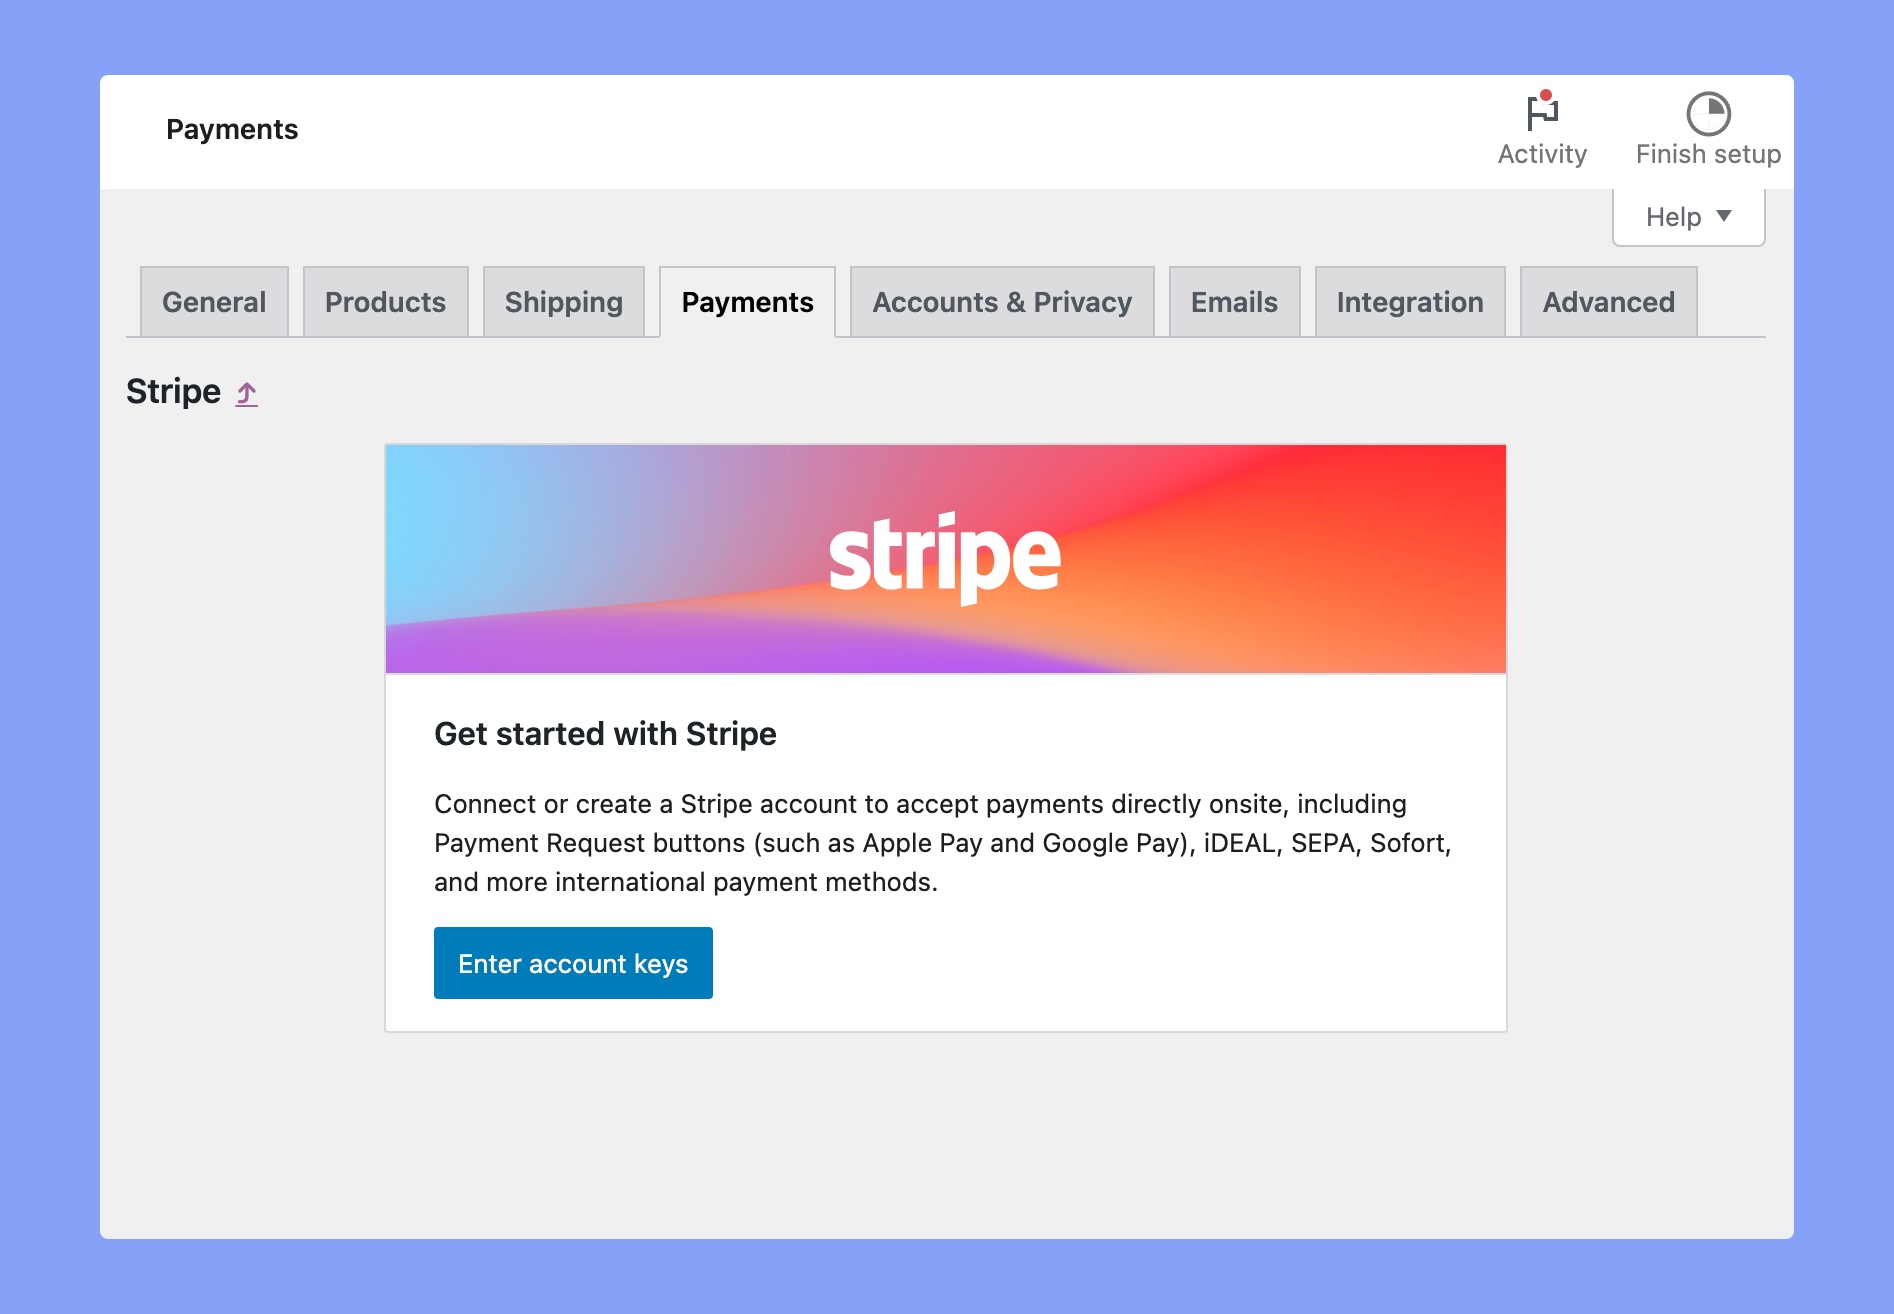
After installing Stripe, enable it by navigating to WP Dashboard > WooCommerce > Settings > Payments and setup Stripe using the account keys. Then test your connection and click on the ‘Save change’ button when you are done.
Money Management for Premium Users
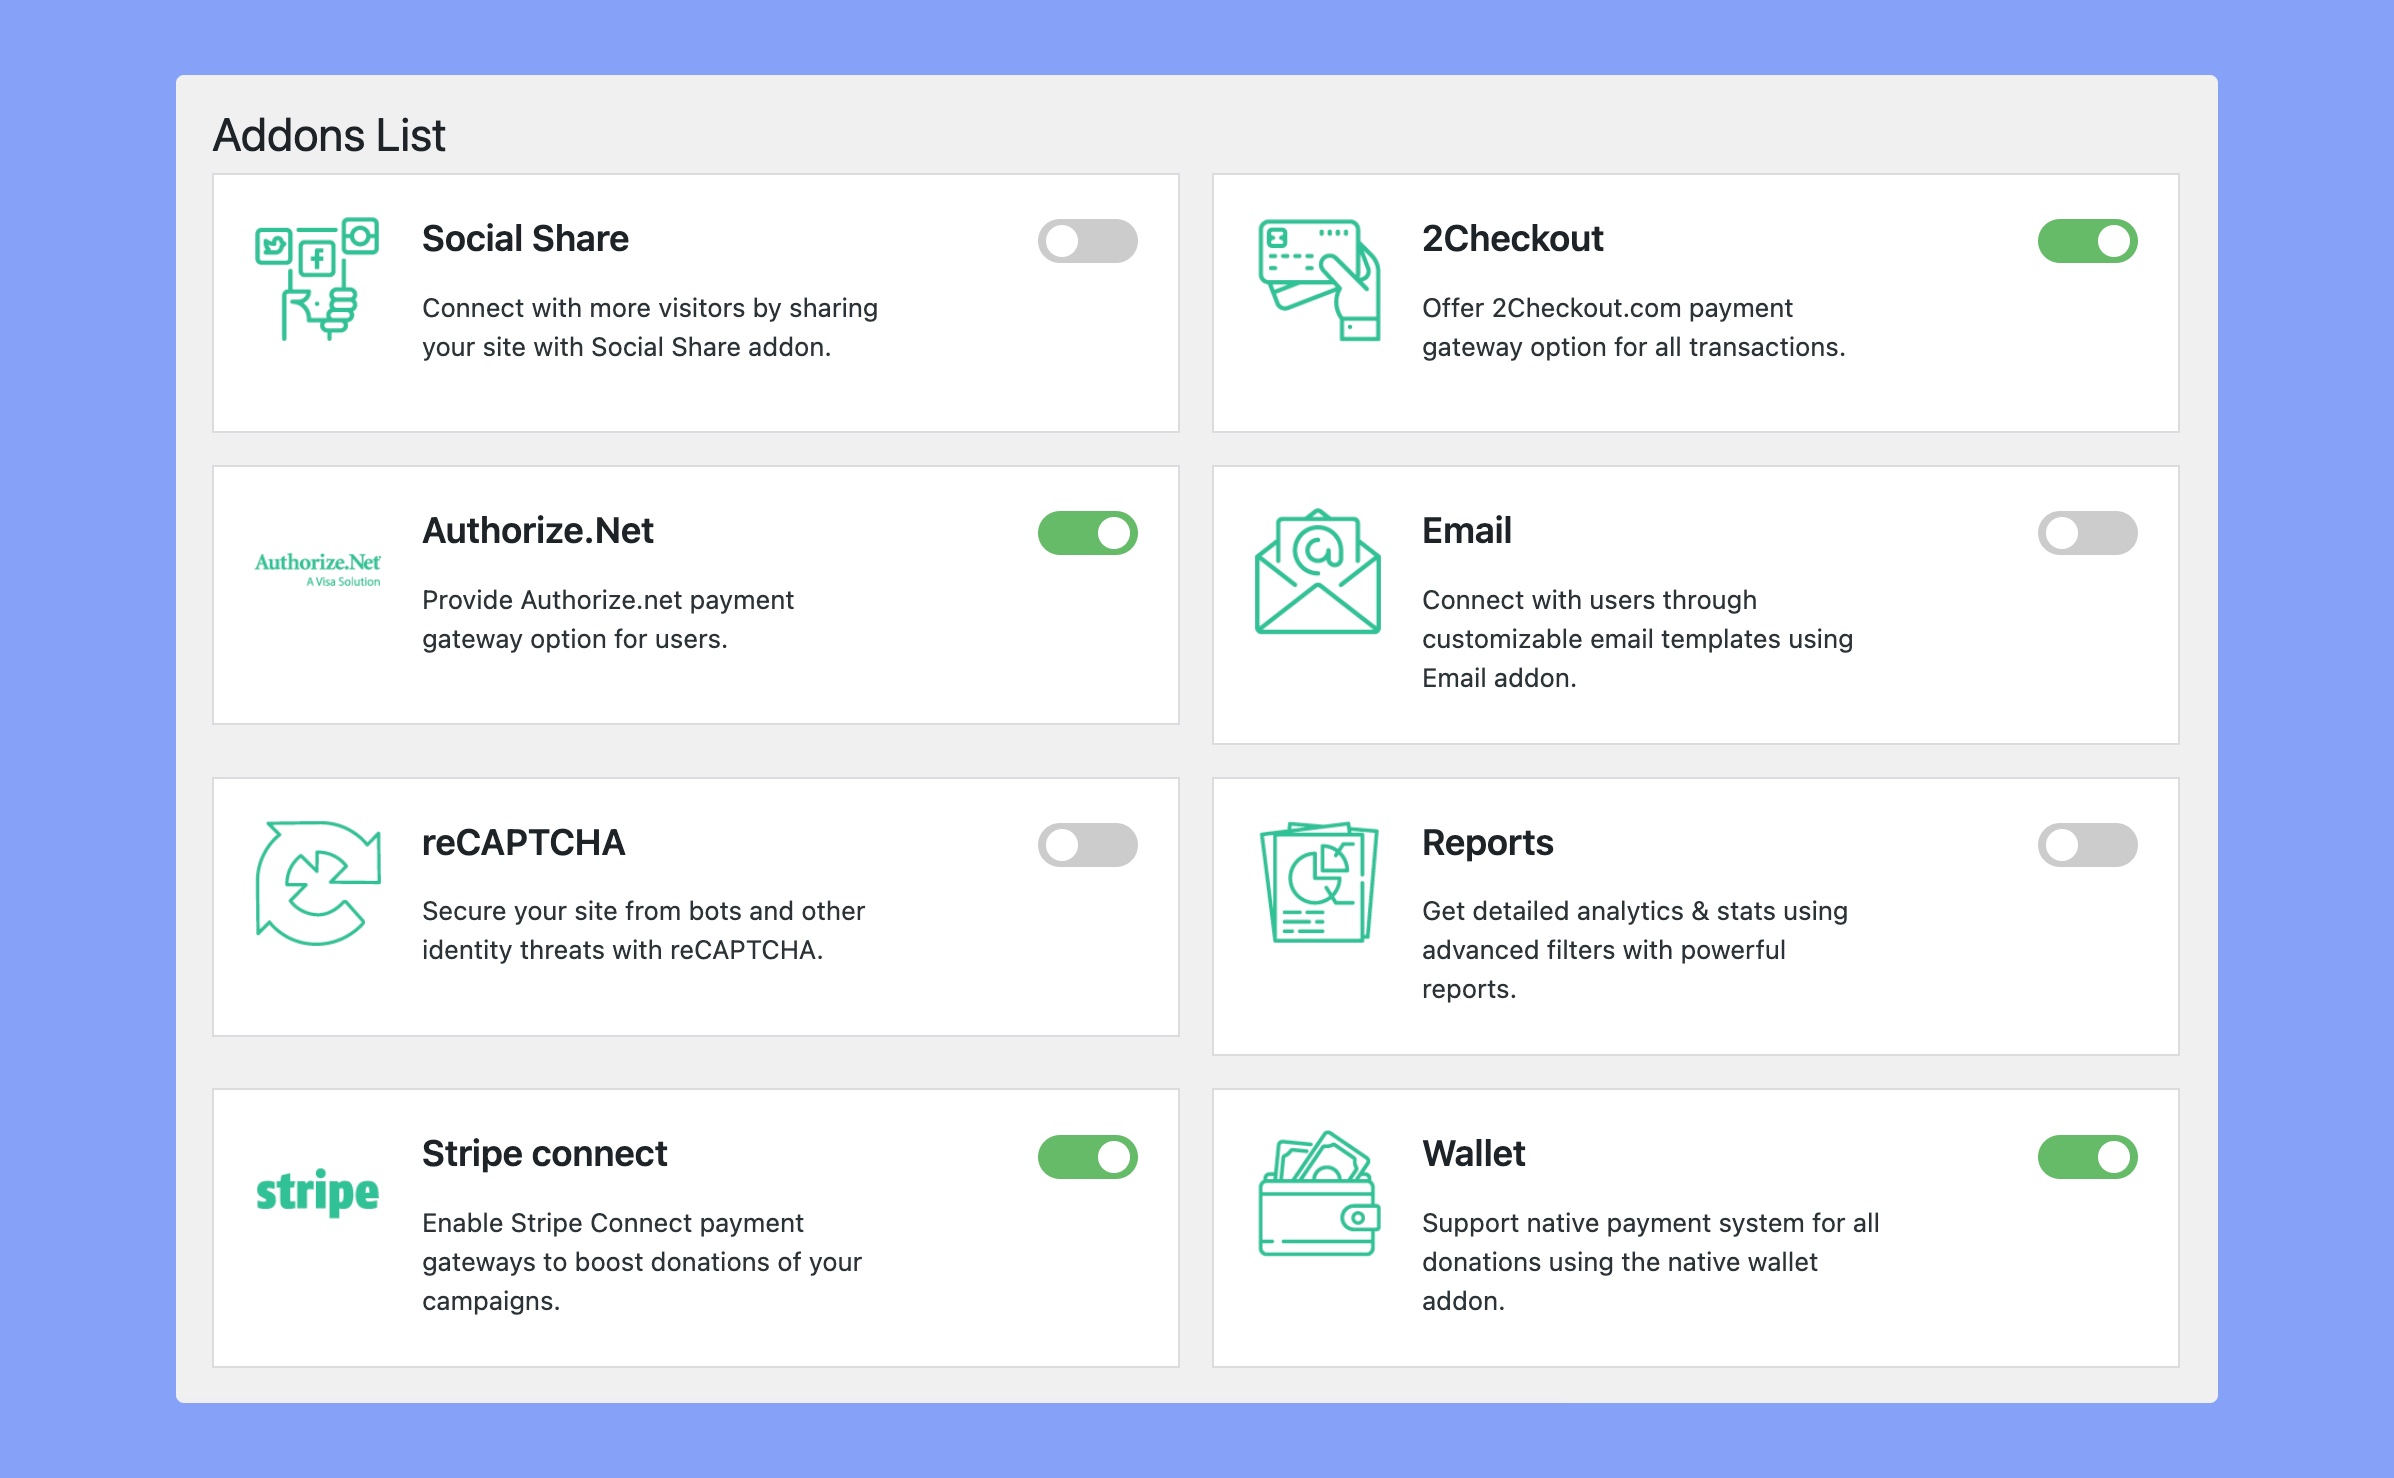
The WP Crowdfunding pro users can define the commission rate for campaign owners, set minimum withdrawal amount, and/or define when they can request a withdrawal. All these features are managed by the native Wallet addon of WP Crowdfunding.
You have to enable the Wallet addon in order to get these features. To enable the Wallet addon, navigate to WP Dashboard > Crowdfunding > Addons.
Wallet Settings
You can access the Wallet settings by navigating to WP Dashboard > Crowdfunding > Settings > Wallet tab.
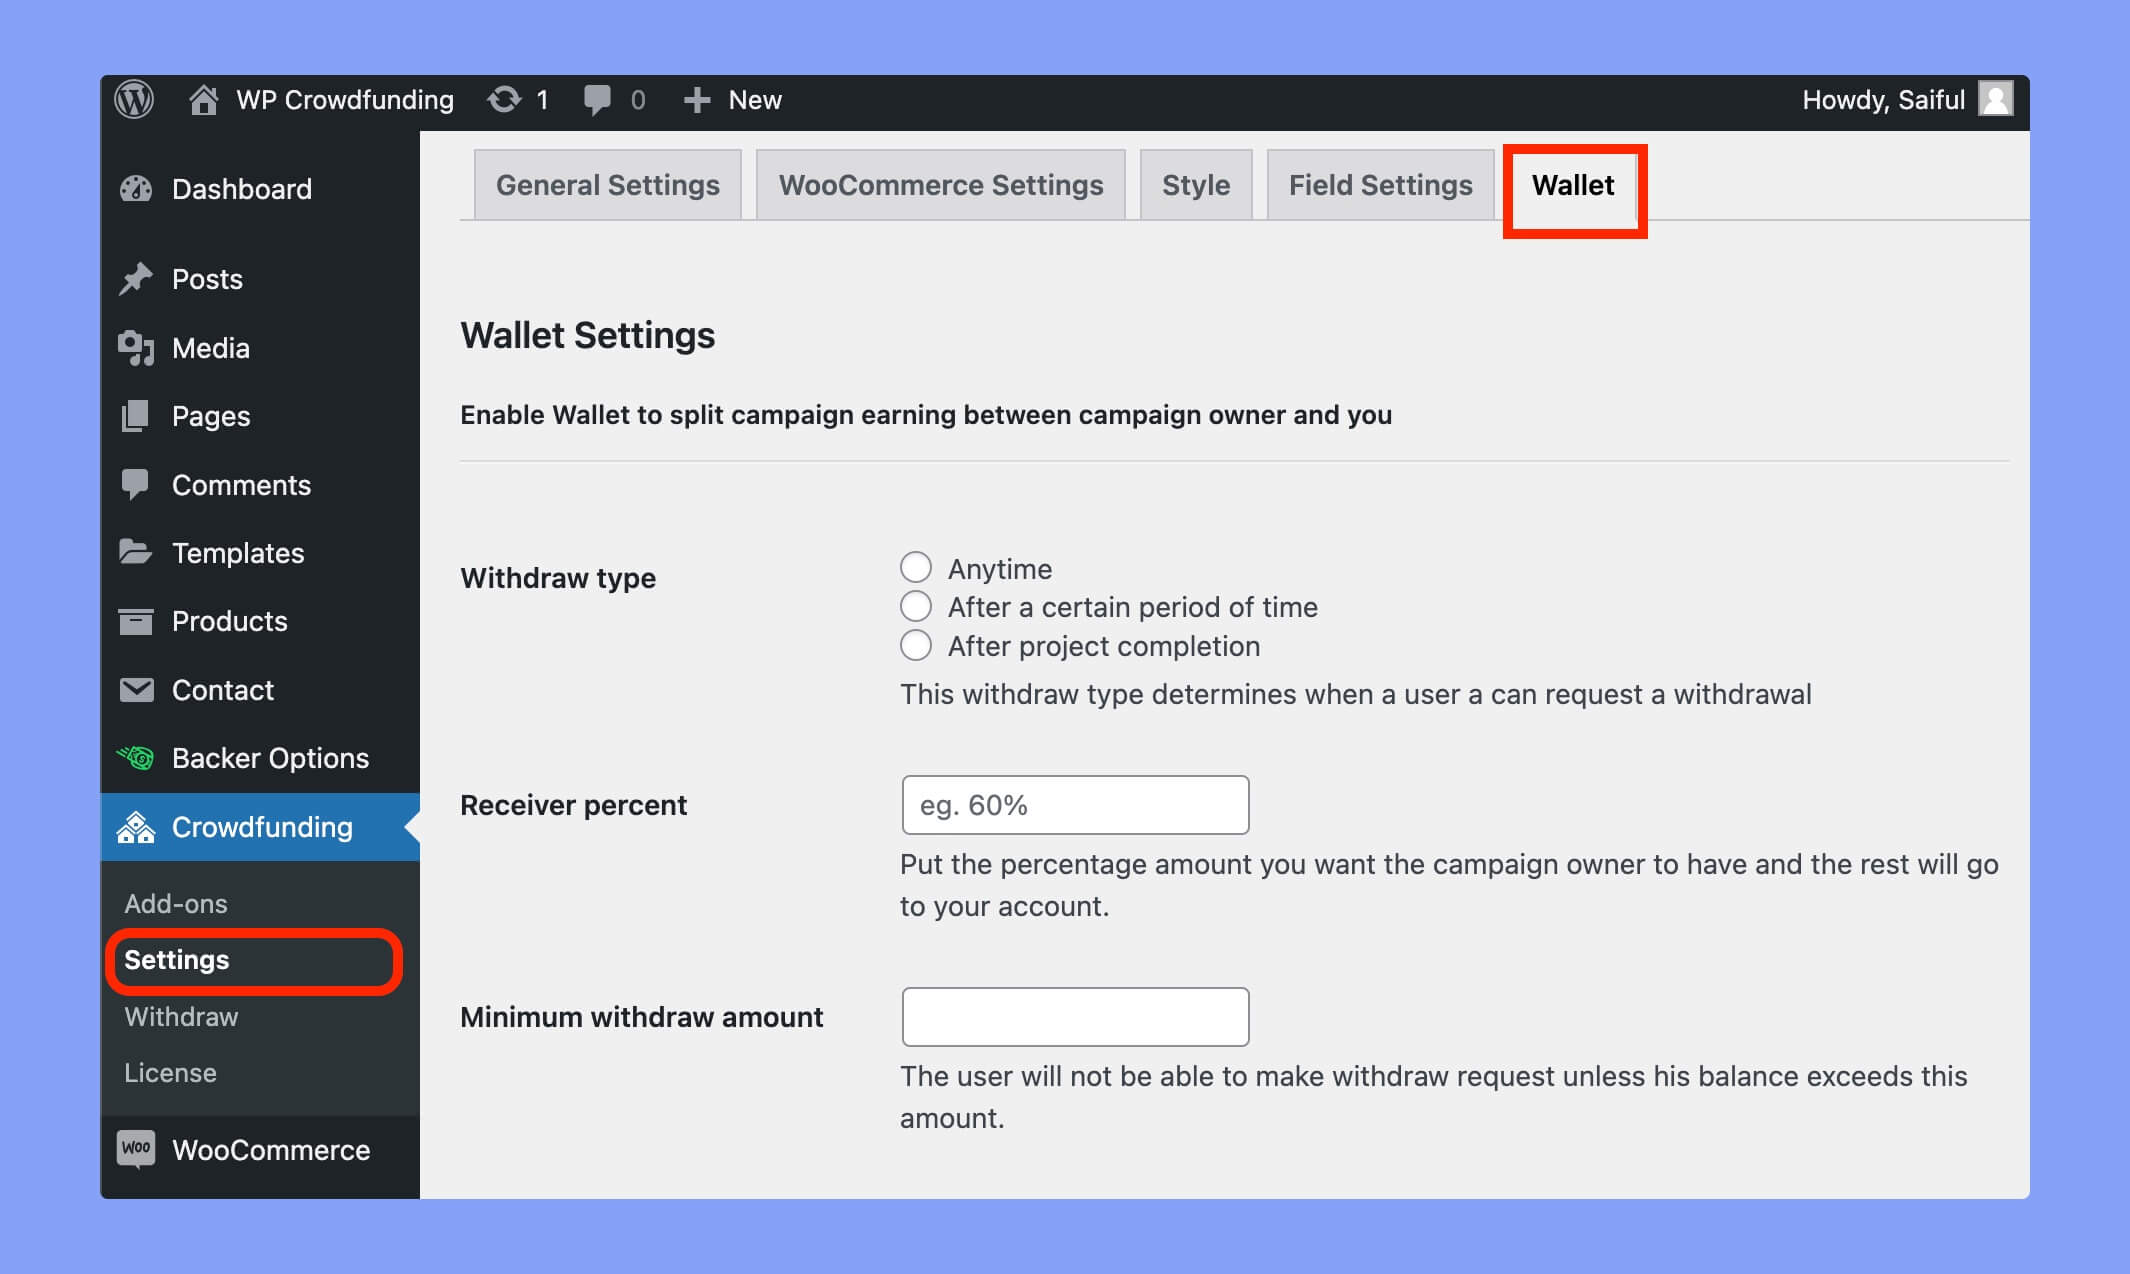
You’ll find the following settings under the Wallet tab.
- Withdraw type: You can set when a user can request for the withdrawal. You can either set to withdraw whenever the user want or after a certain period of time.
- Receiver percent: Set the campaign owner’s percentage. If you set 80 here, it means the campaign owners will get 80% and you’ll get 20% of the total donation.
- Minimum withdraw amount: Set the minimum withdraw amount here. Users can withdraw their money only after their amount exceeds this balance.
Deposit Money
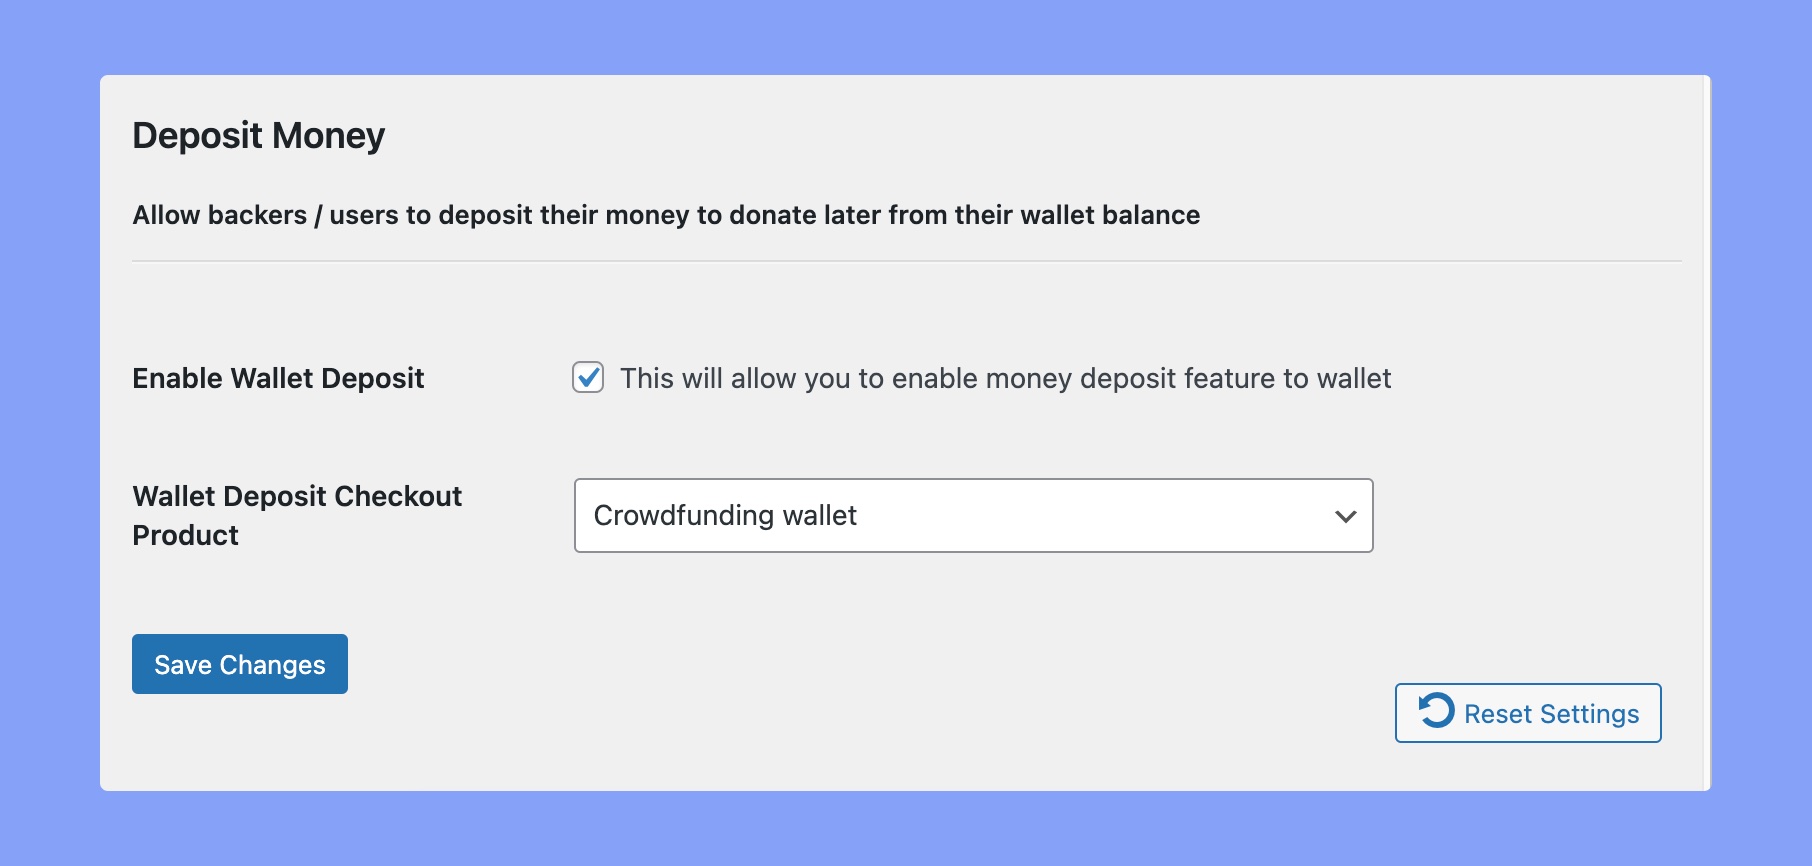
The Wallet feature comes with an interesting setting. It allows any user to deposit money on their accounts. Using this Wallet balance, a user can donate to other campaigns.
To enable this feature, put a tick mark on the “Enable Wallet Deposit” option. Then choose the deposit product and click Save Changes button. It will enable “Add Balance” option on the dashboard for all users.
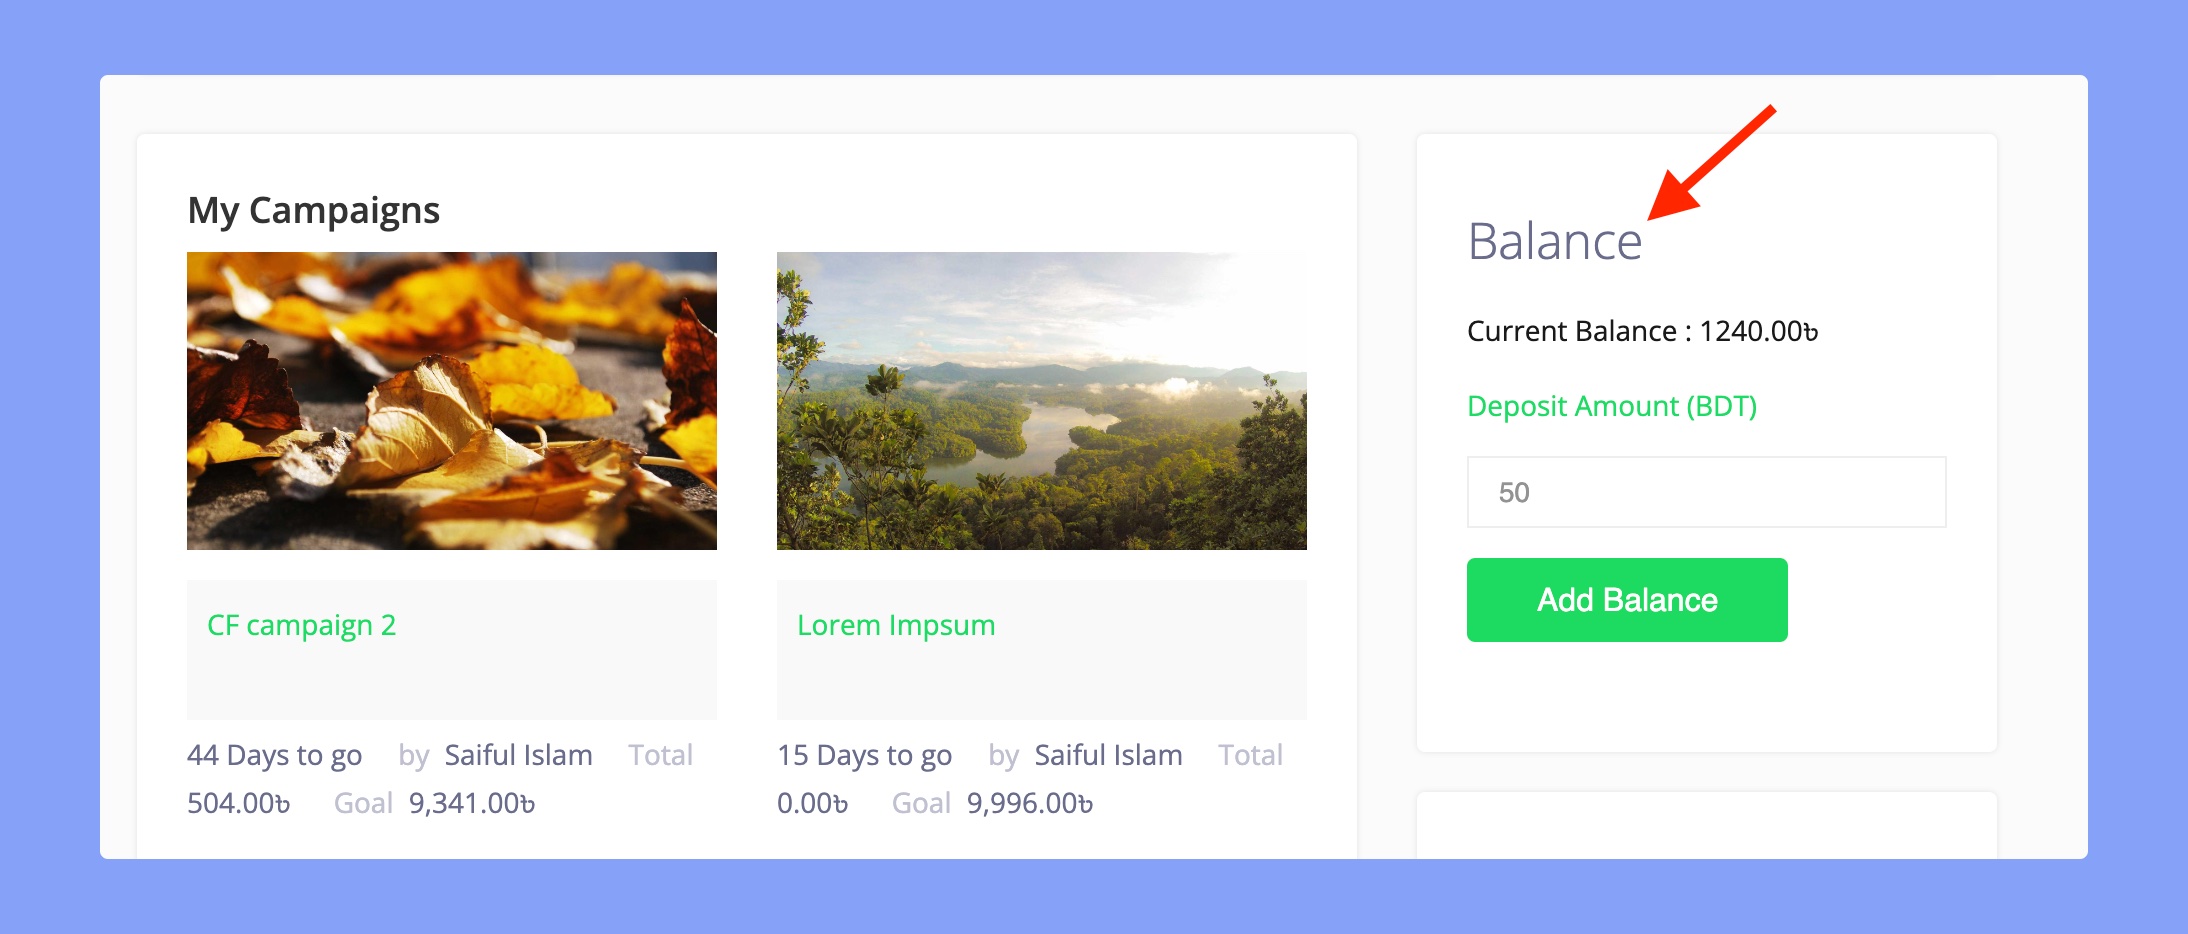
Users can deposit balance to the Crowdfunding wallet from here and donate later on their preferred campaign.
Please be informed when Stripe Connect is used as your payment method, you only get your allocated portion of the money, not the entire amount. Thus, if a campaign owner violates any policy, you cannot hold/suspend their transaction or give a penalty (since they already possess campaign money).