WP Crowdfunding Email functionality allows users to customize and send email notifications to backers at various stages of their crowdfunding campaign. With this feature, users can create personalized emails to keep backers engaged and informed about the progress of the project.
To receive emails for the crowdfunding campaigns, users have to follow the steps below:
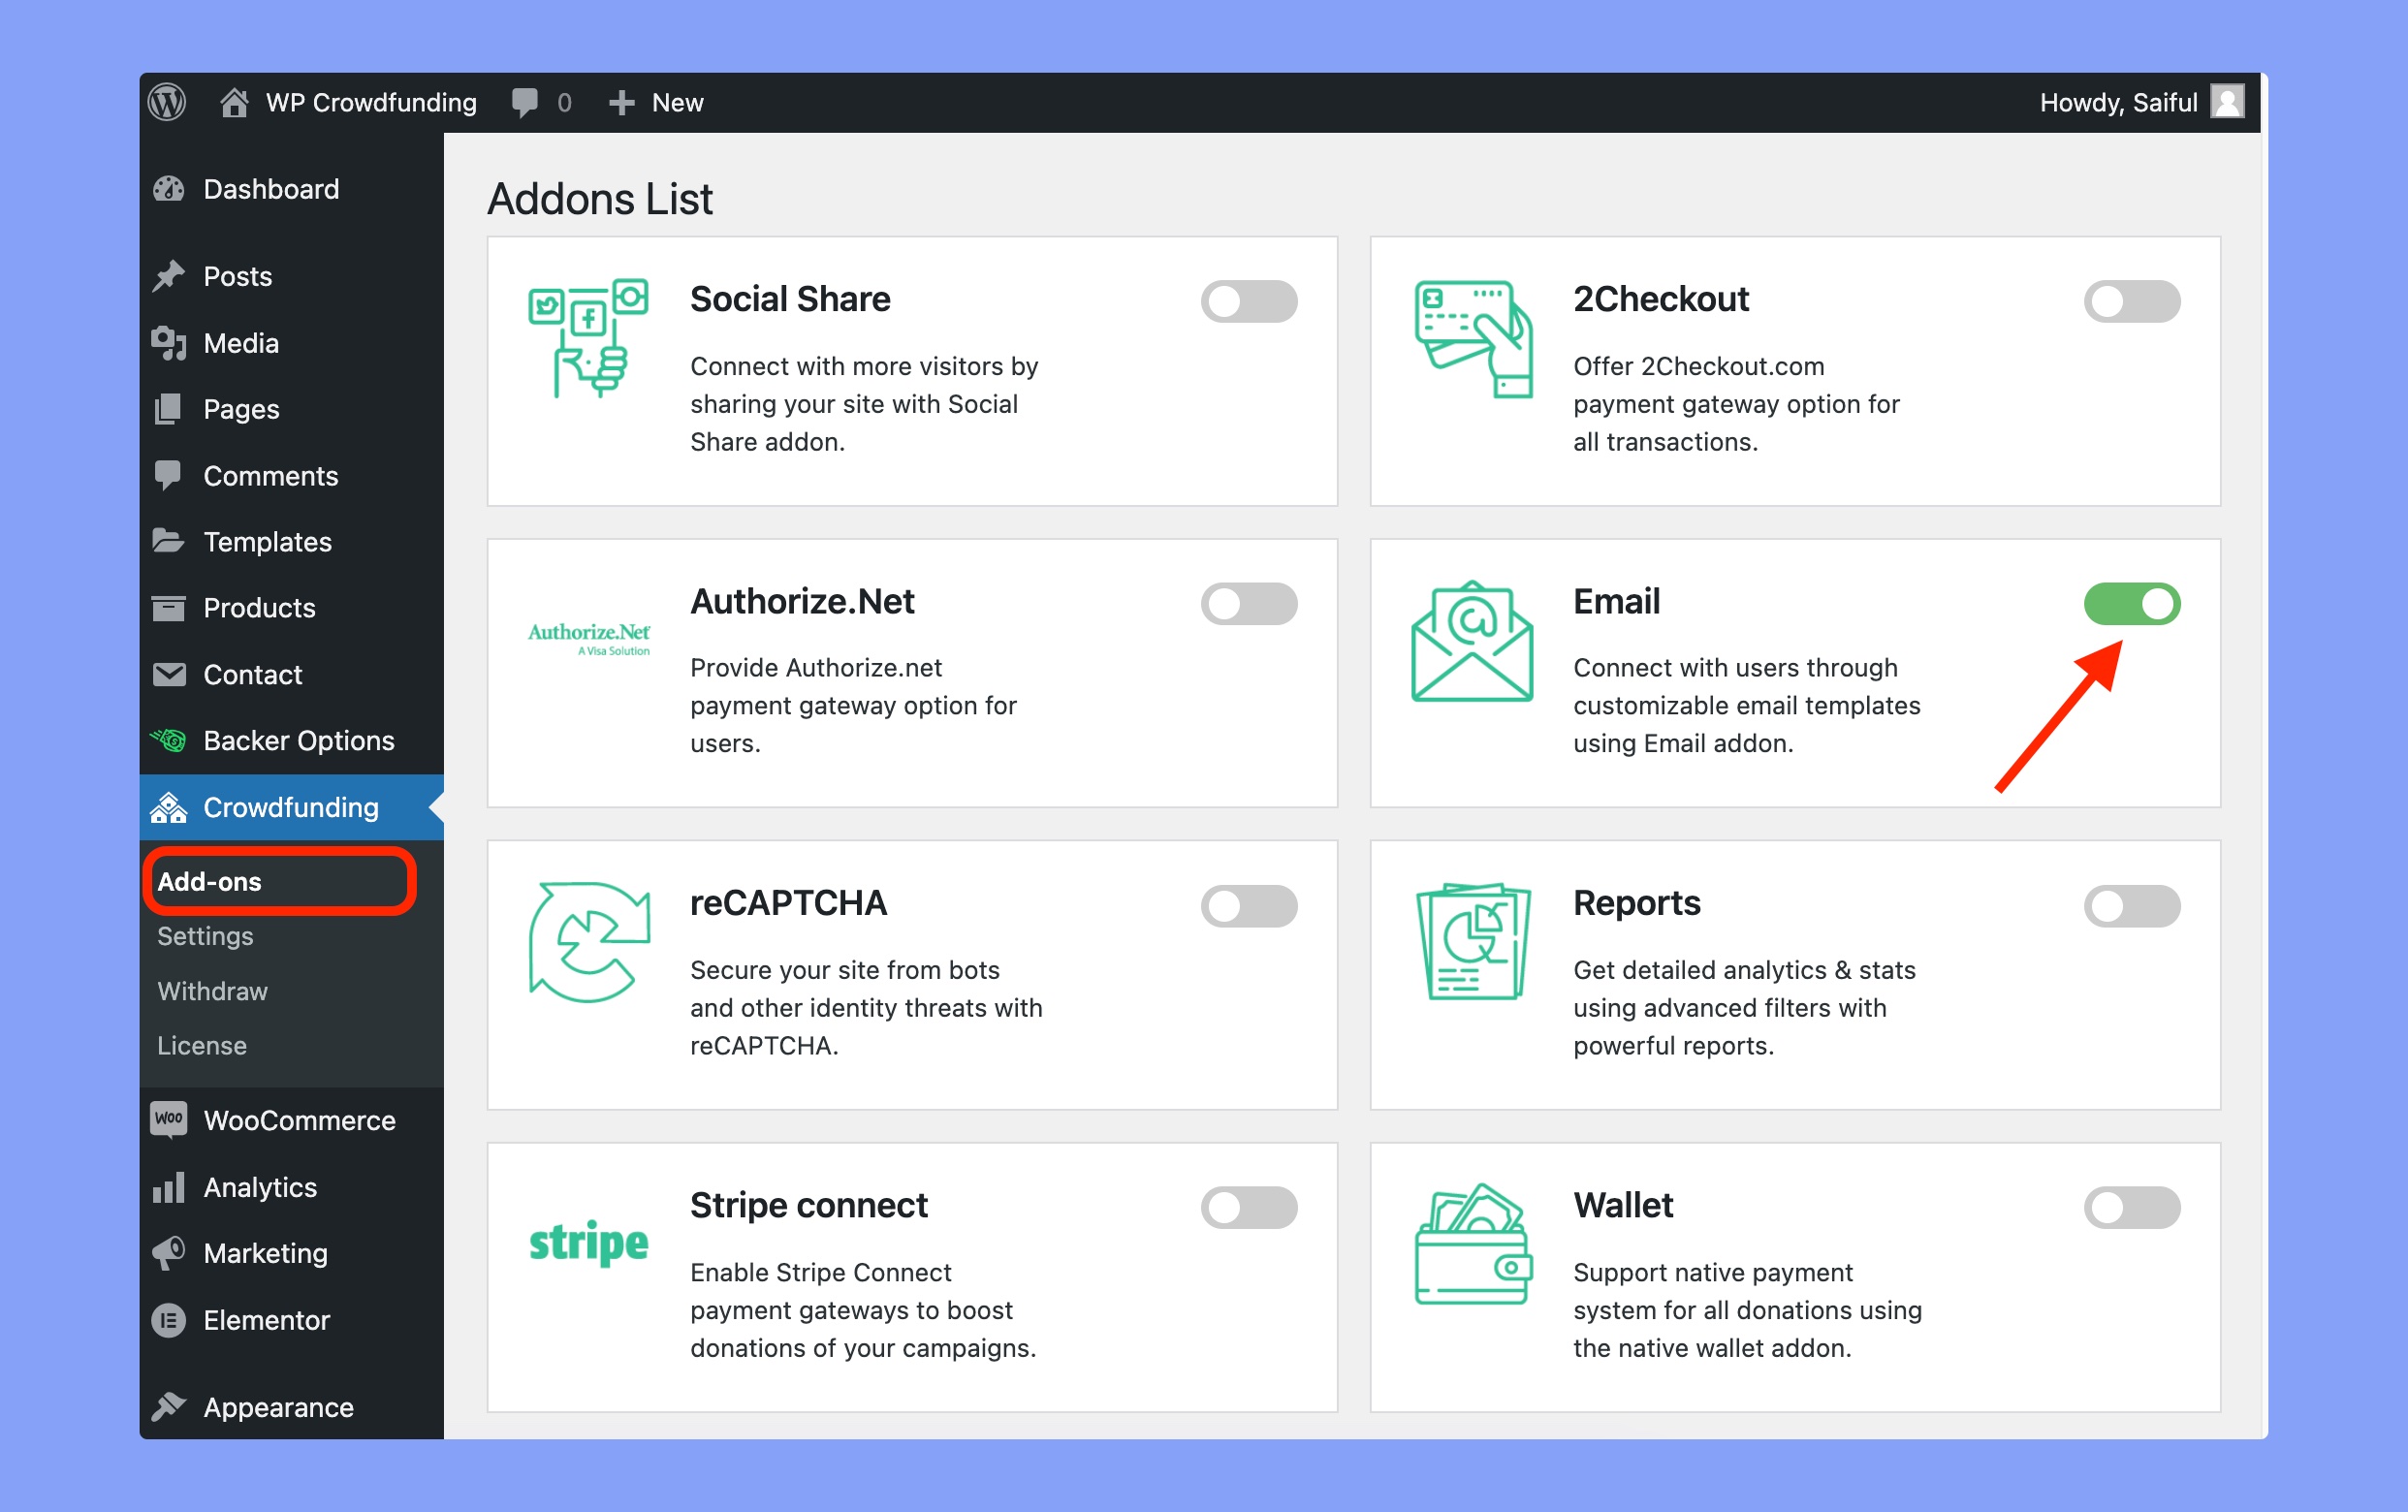
Step 1: Enable Email Addon
Navigate to WP Dashboard > Crowdfunding > Add-ons and enable the Email addon.
Step 2: Enable SMTP for WP Crowdfunding
Go to WP Dashboard > Crowdfunding > Settings > Email tab and enable SMTP. If you don’t enable SMTP, you won’t get any email from your website.
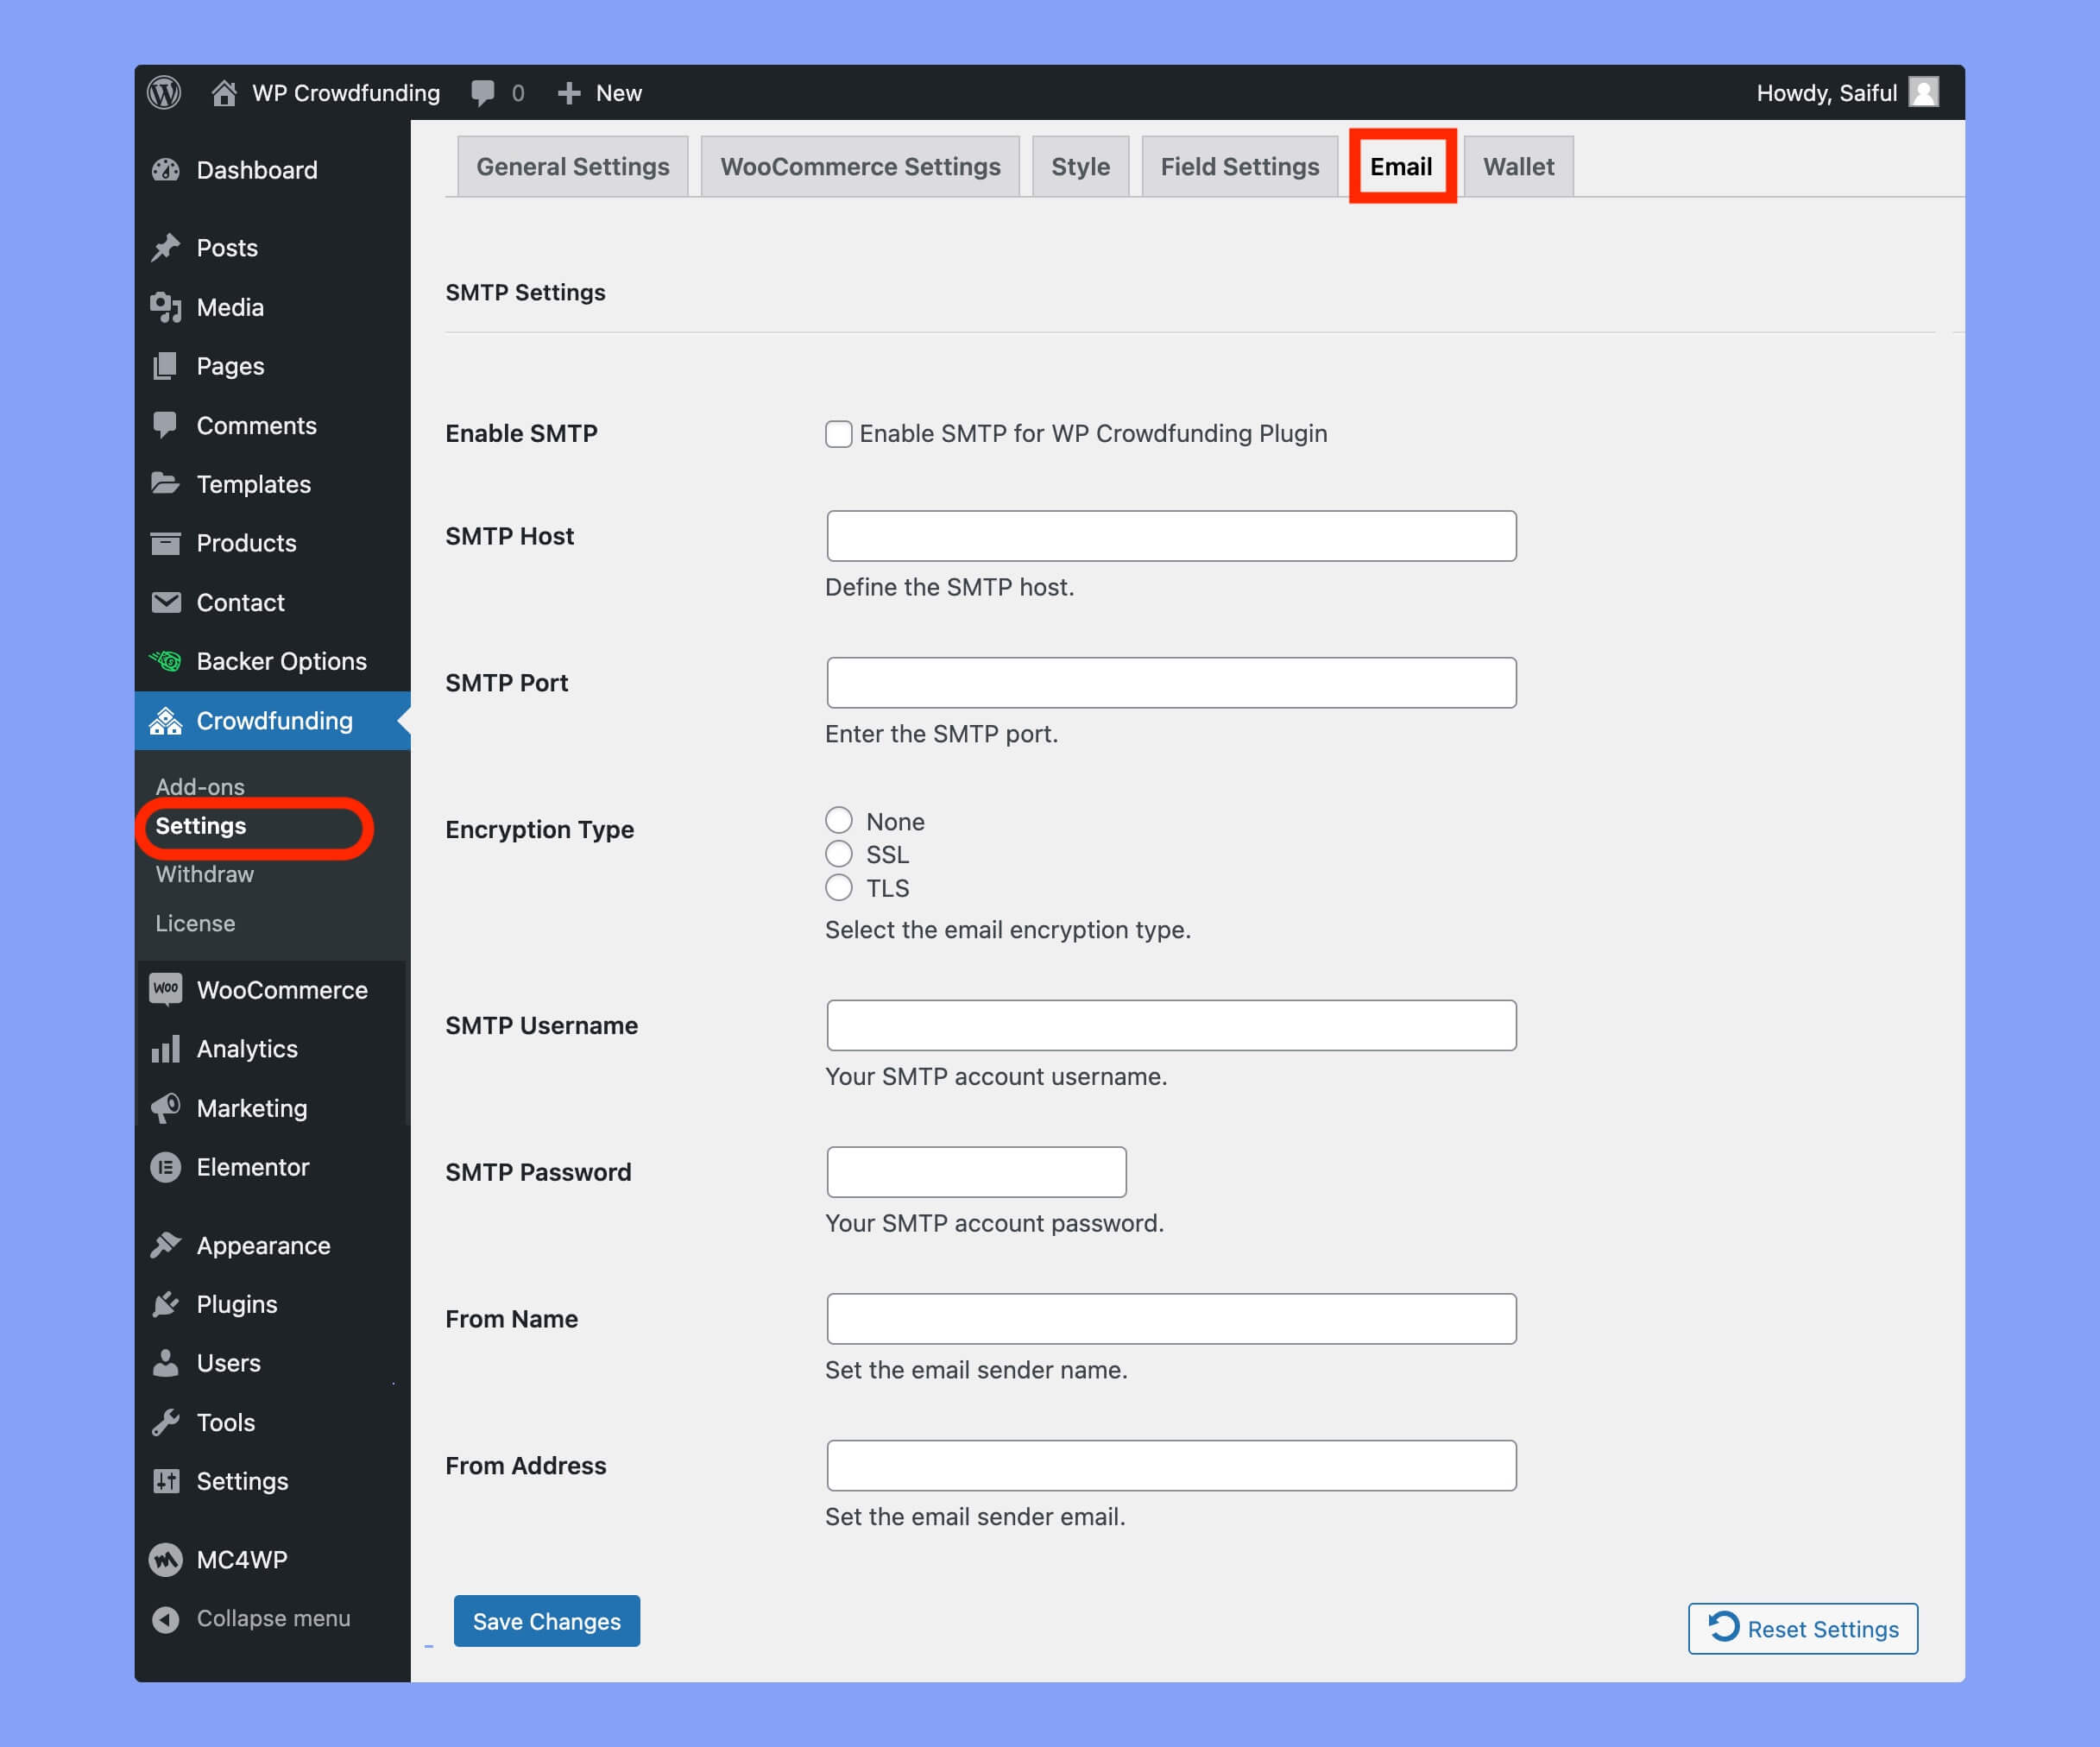
In this section, you have to provide the following information:
- Enable SMTP checkbox: Enable/disable SMTP for WP Crowdfunding Plugin.
- SMTP Host: Define the host for SMTP emails.
- SMTP Port: Set the SMTP port using the text box.
- Encryption Type: Choose email encryption type – None, SSL, or TSL.
- SMTP Username: Enter your SMTP username.
- SMTP Password: Enter your SMTP password in the text box.
- From Name: Define the sender name of the emails.
- From Address: Set From Address of the emails.
If you do not want to use your hosting provider’s email gateway or PHP Mailer, you can use a third-party emailing service using the SMTP settings.
Step 3: Customize Email templates from WooCommerce
WP Crowdfunding has 7 different email templates to keep the users updated at various stages of their crowdfunding campaign.
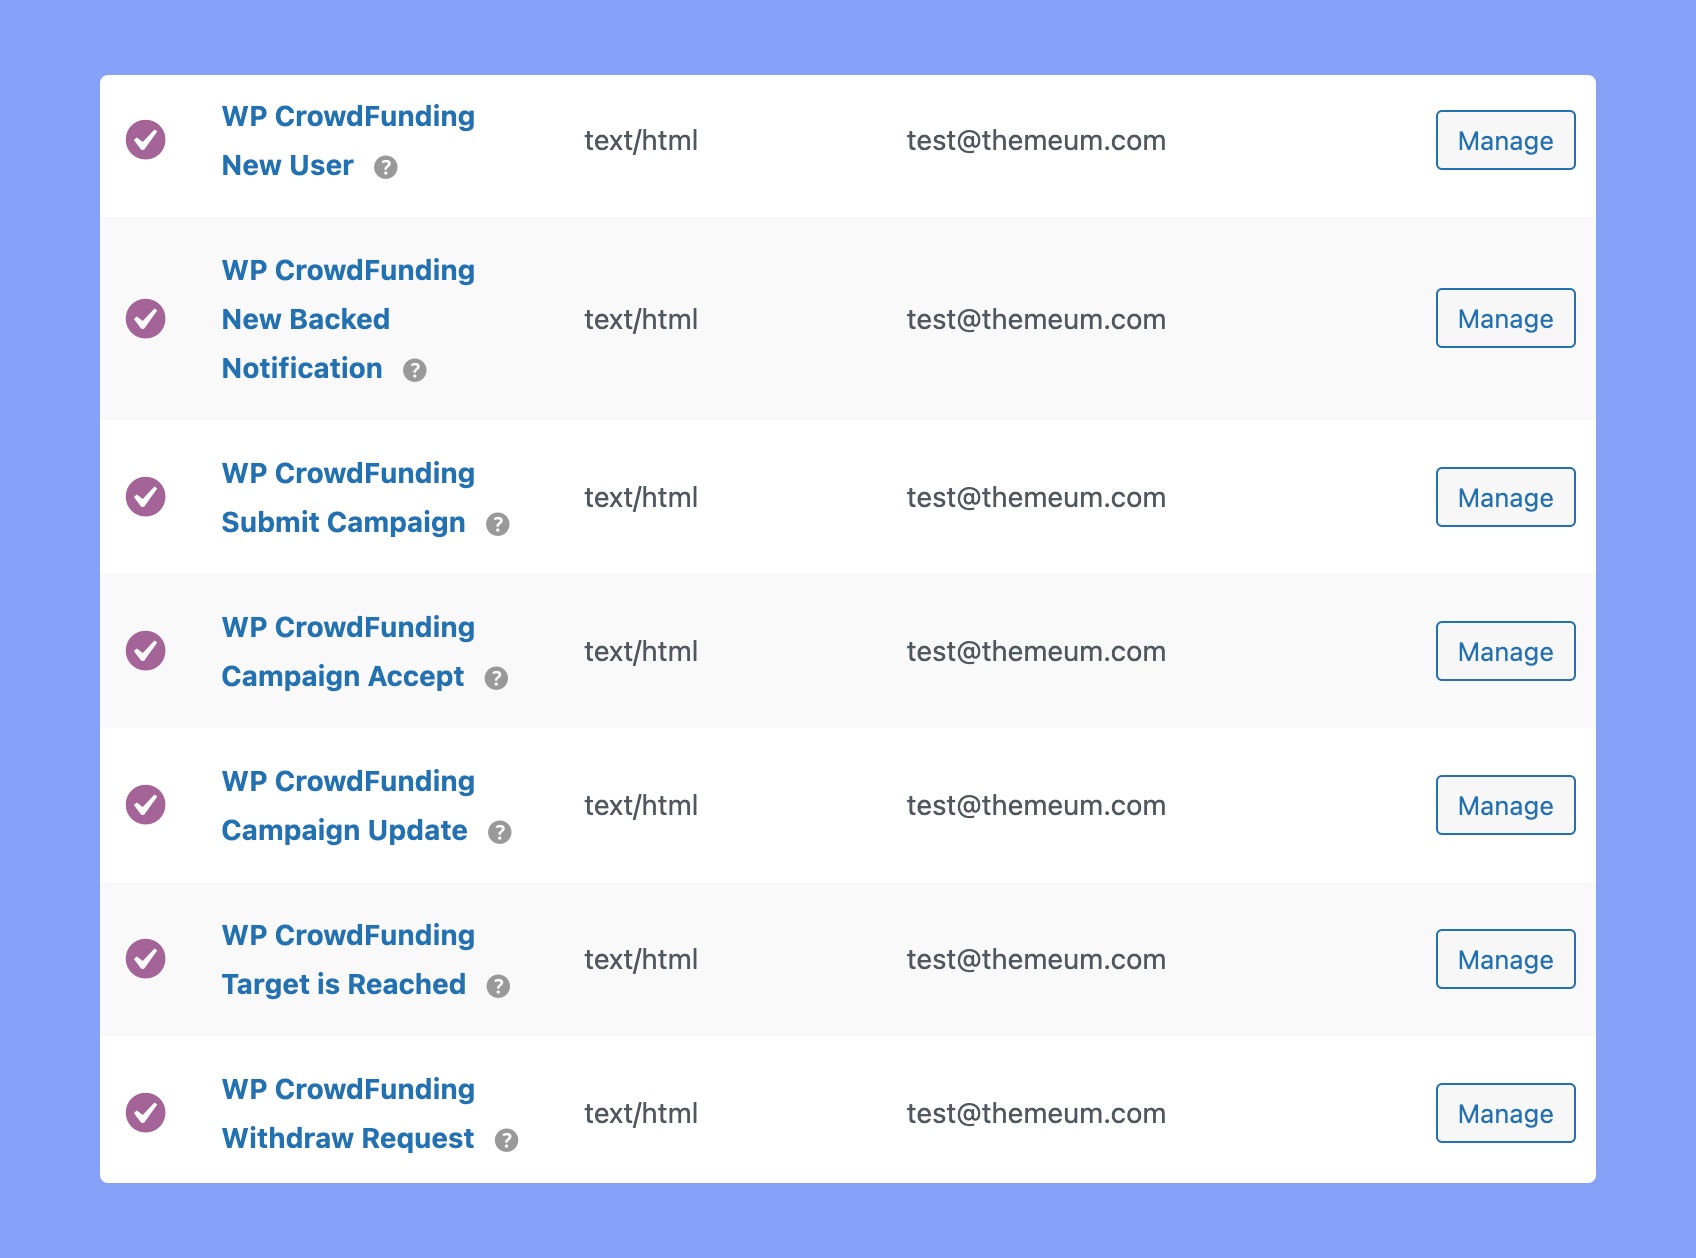
The available email templates are:
- WP CrowdFunding New User: A welcome email template for new users of the WP CrowdFunding platform.
- WP CrowdFunding New Backed Notification: An email template to notify campaign creators when they receive a new backer on their crowdfunding campaign.
- WP CrowdFunding Submit Campaign: This template will inform users about the successful submission of their crowdfunding campaign.
- WP Crowdfunding Campaign Accept: It notifies campaign creators that their crowdfunding campaign has been accepted.
- WP CrowdFunding Campaign Update: This template will inform campaign supporters about the latest updates on a crowdfunding campaign.
- WP CrowdFunding Target is Reached: An email template to inform campaign backers that the target funding amount of a crowdfunding campaign has been reached.
- WP CrowdFunding Withdraw Request: An email template to notify campaign creators that their withdrawal request from the WP CrowdFunding platform has been received and is being processed.
If you want to customize any of these templates, simply click on the template name and update that accordingly. There you can enable/disable that template, customize the email subject or body message, etc.