Until now, all previously discussed Frontend Dashboards were common for All Users however it’s time to take a look at the Dashboards specific to Instructors and Admins that Tutor LMS Pro offers.
My Courses
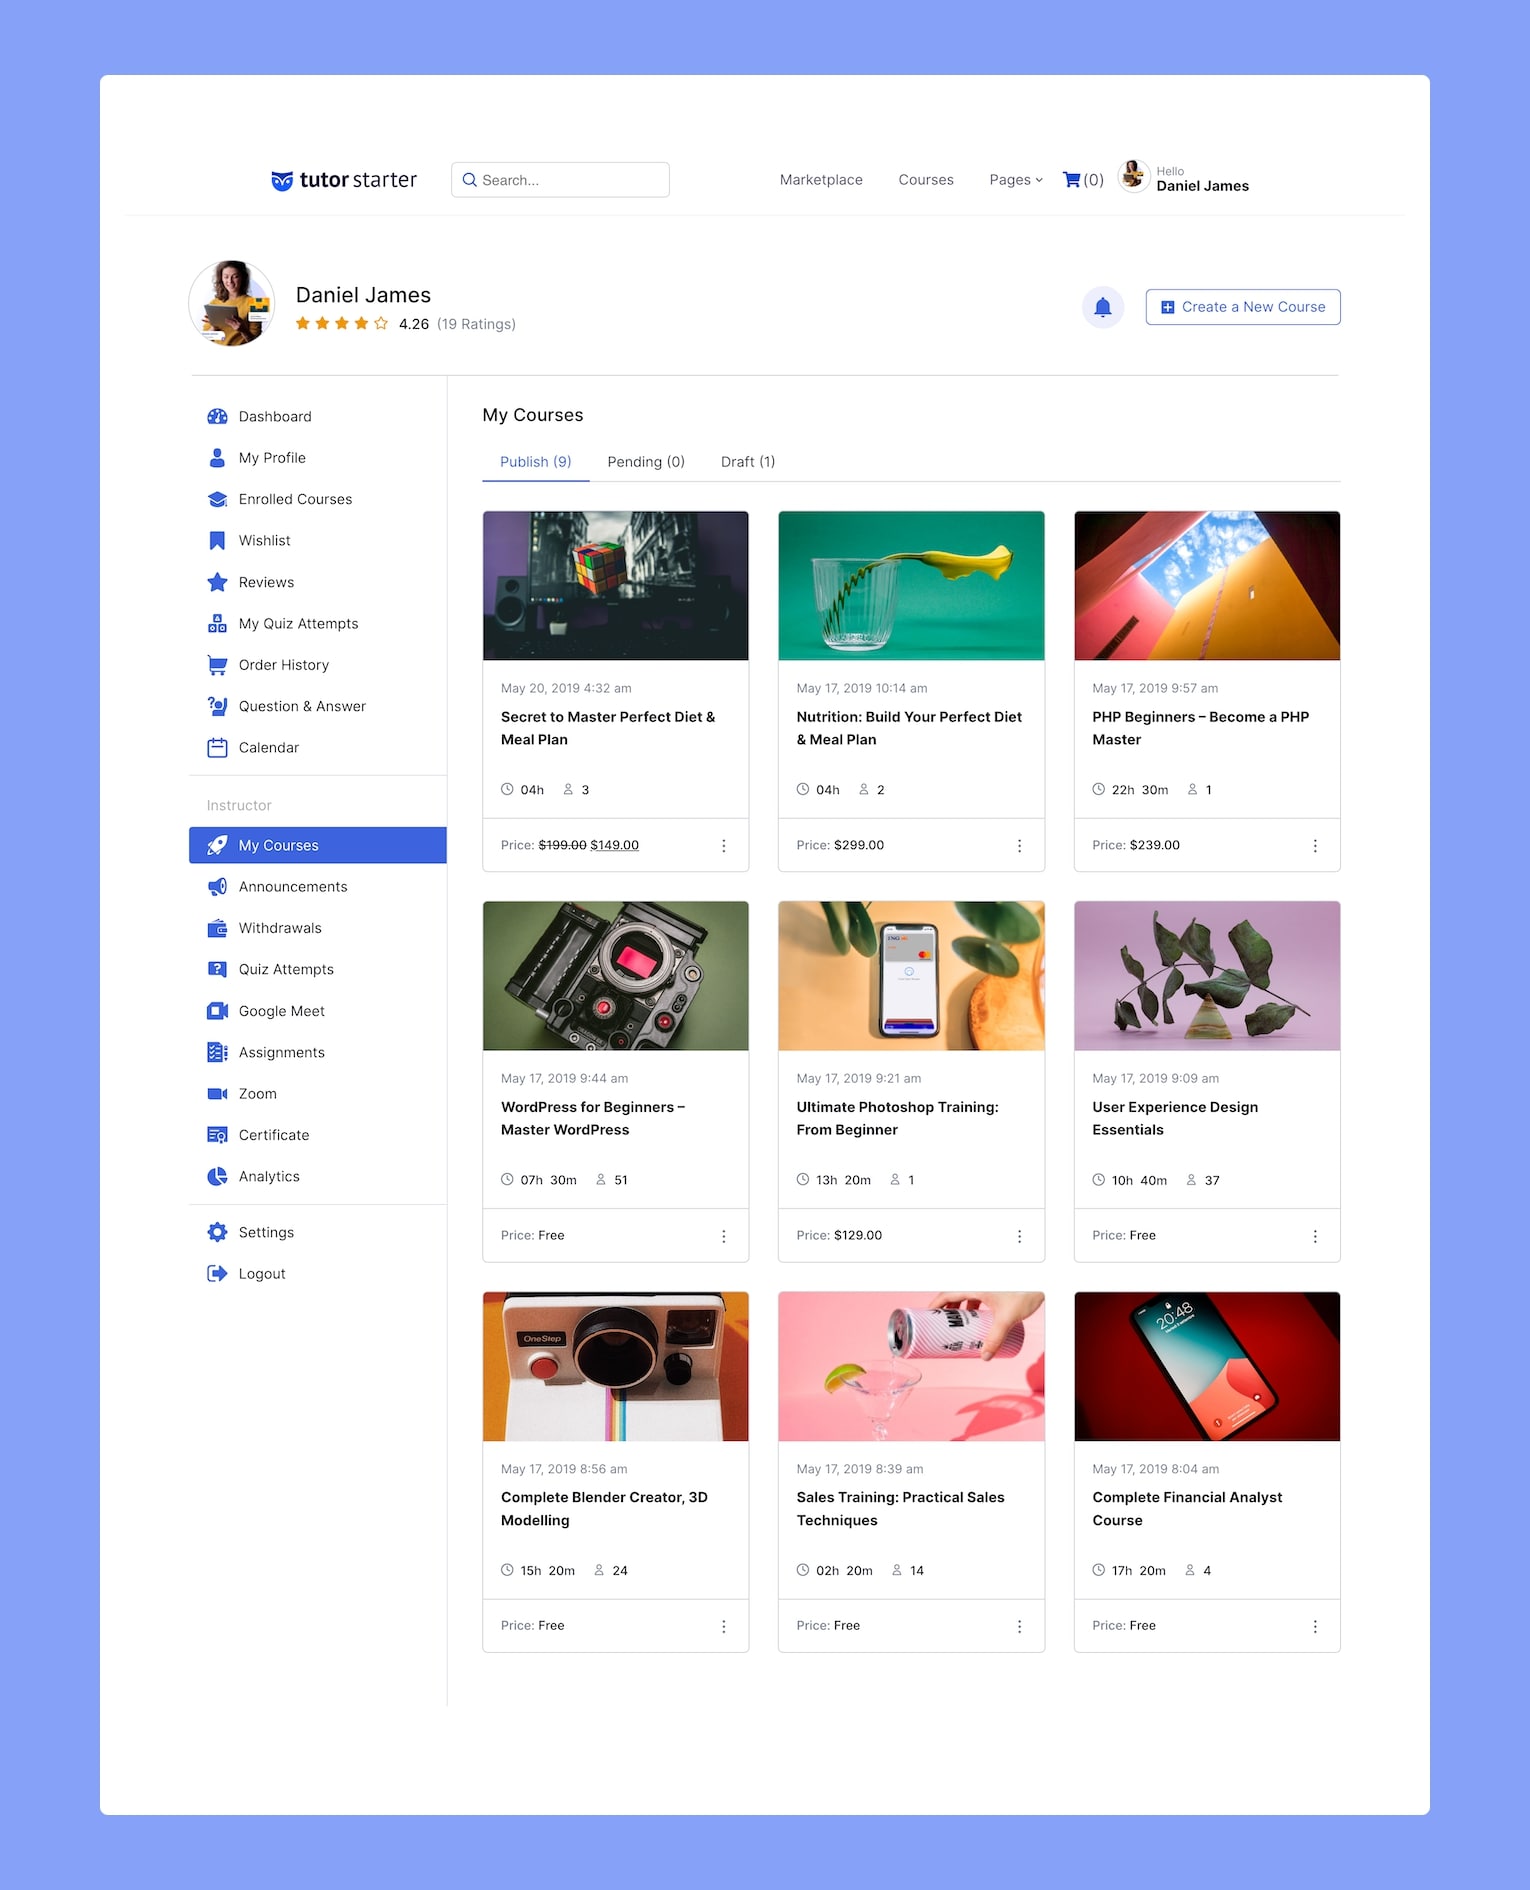
The My Courses dashboard shows the list of your Courses grouped according to their status. It showcases Course Details like the duration of the course, how many students are enrolled in it, and its cost.
If you want to edit any course you can do so from here and you even have the option to delete it right from this dashboard.
Announcements
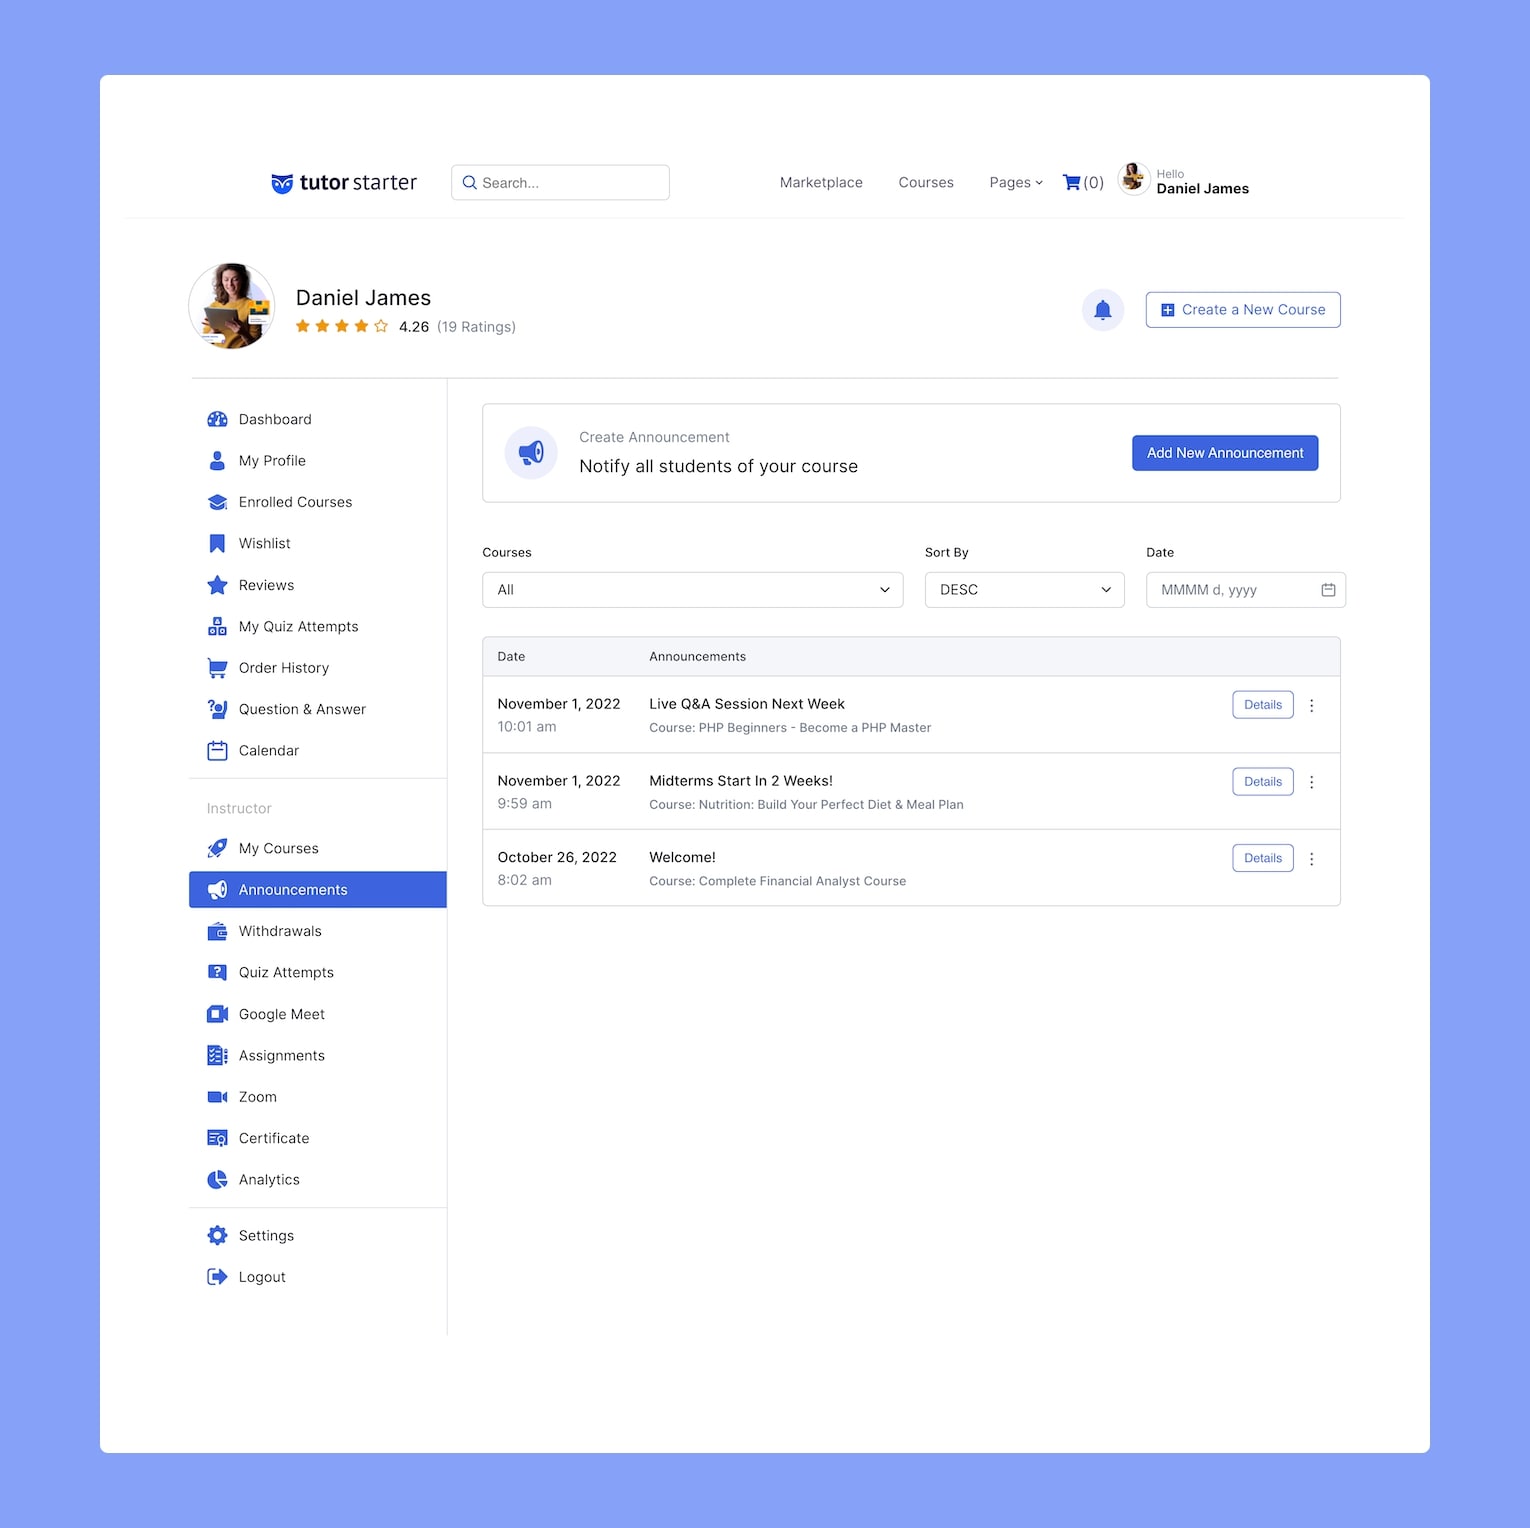
The Announcements section is where you can create new Announcements for any of your courses. To create one, simply click on the Add New Announcement button.
Then, on the pop-up window, select the course from the drop-down list, give your Announcement a title and add the details under the summary field. Hit Publish and you should now be able to see this new Announcement listed below.
All your announcements will be listed here and you will be able to view their details by clicking on the Details button located beside each one.
This list can be filtered by course and date and you can even sort it in ascending or descending order. If need be, you can also edit or delete any Announcement from here as well.
Withdrawals

The Withdrawals section is where you will be able to see your Current Balance and if it is more than the defined Minimum Withdrawal Amount, then you will be able to Withdraw an amount from here. You’ll also be able to see a list of Pending, Completed, and Rejected Withdrawals if any.
To get a better idea of how Tutor LMS Money Management works, check out its detailed money management documentation.
Quiz Attempts
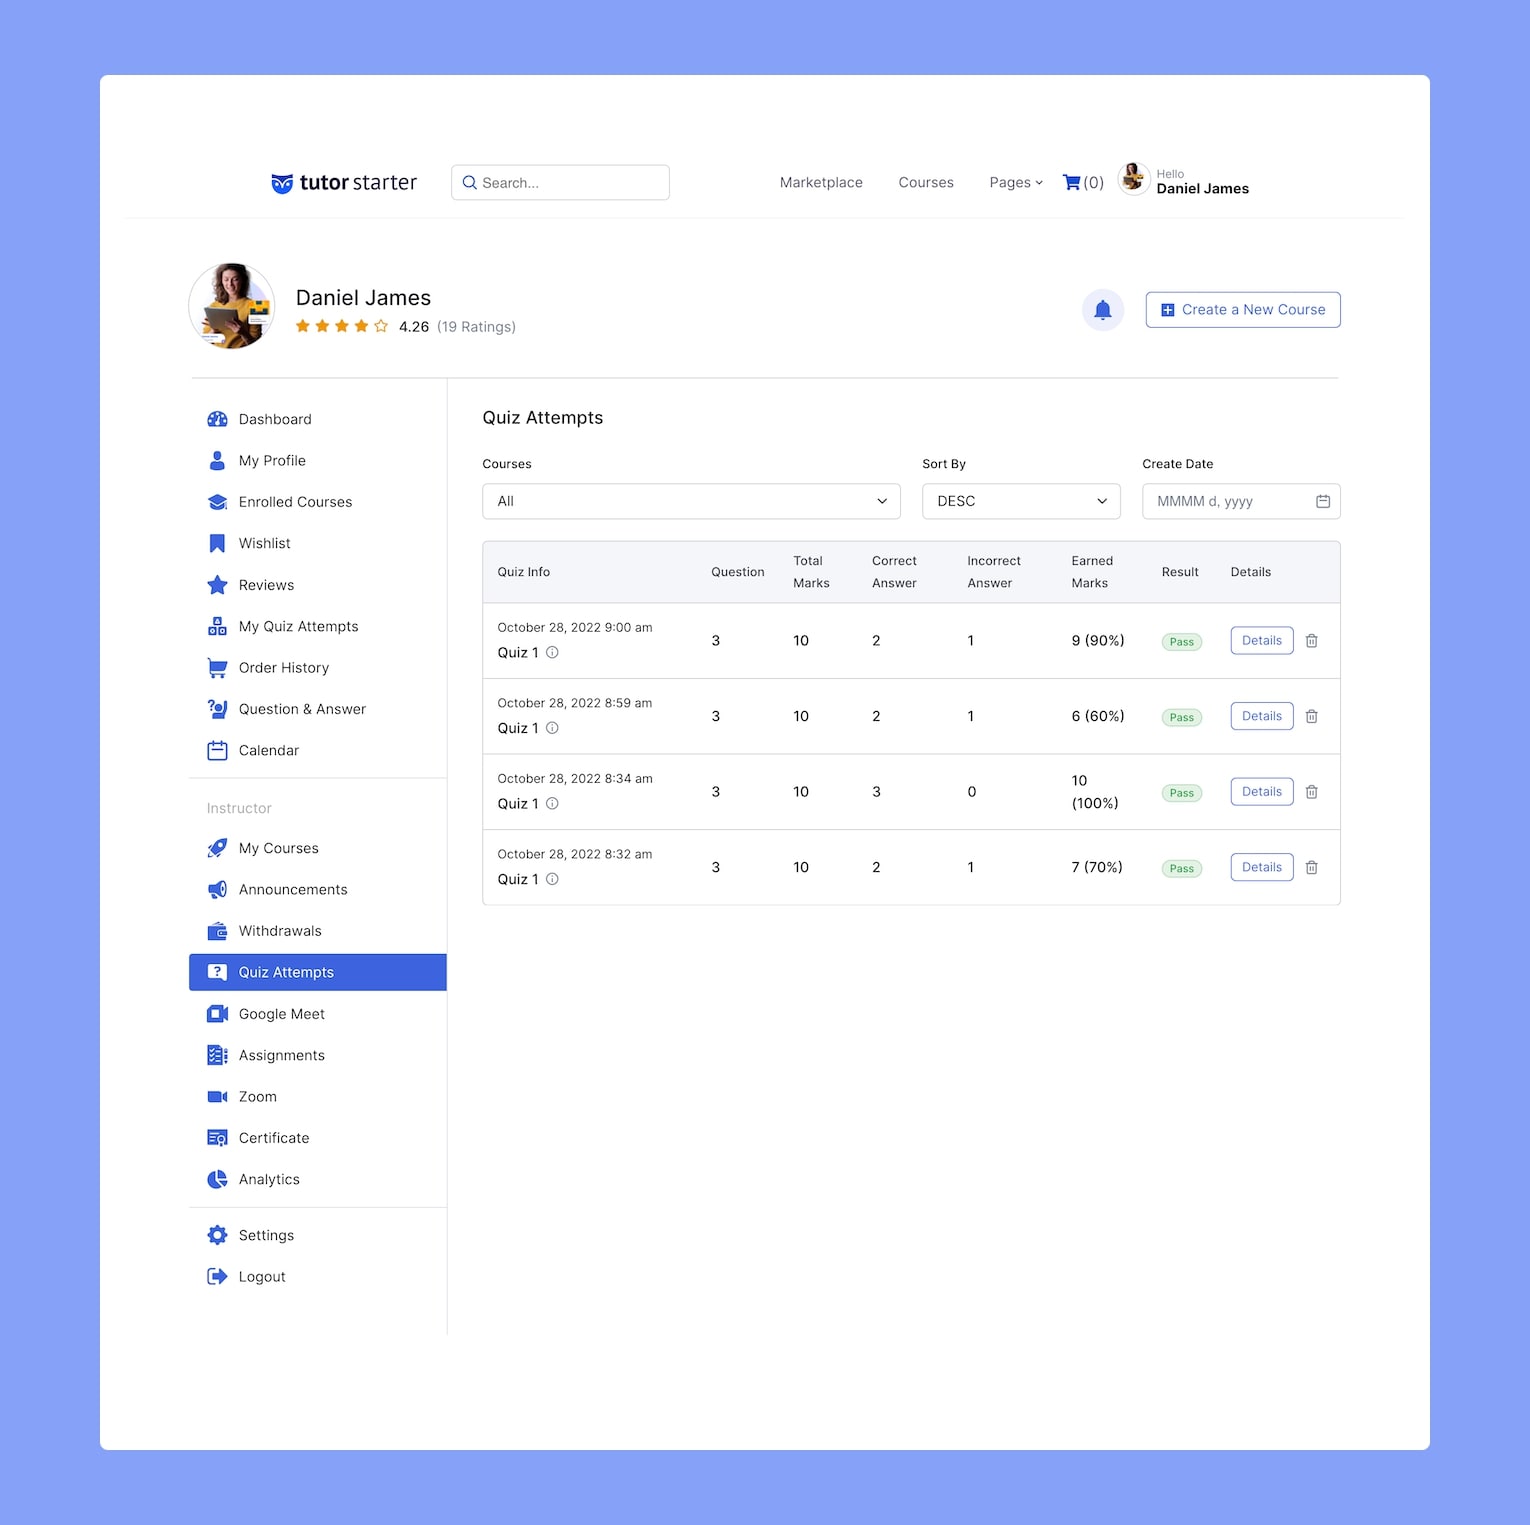
This is where you will be able to see a list of all of your Students’ Quiz Attempts. These can be filtered by course and date and you can even sort them in ascending or descending order.
Moreover, clicking on the Details button beside any one of these will take you to the Quiz Feedback Mode where you can manually Review each question if needed.
Below this section, you’ll find the Instructor Feedback field, where you can share any helpful advice.
Google Meet
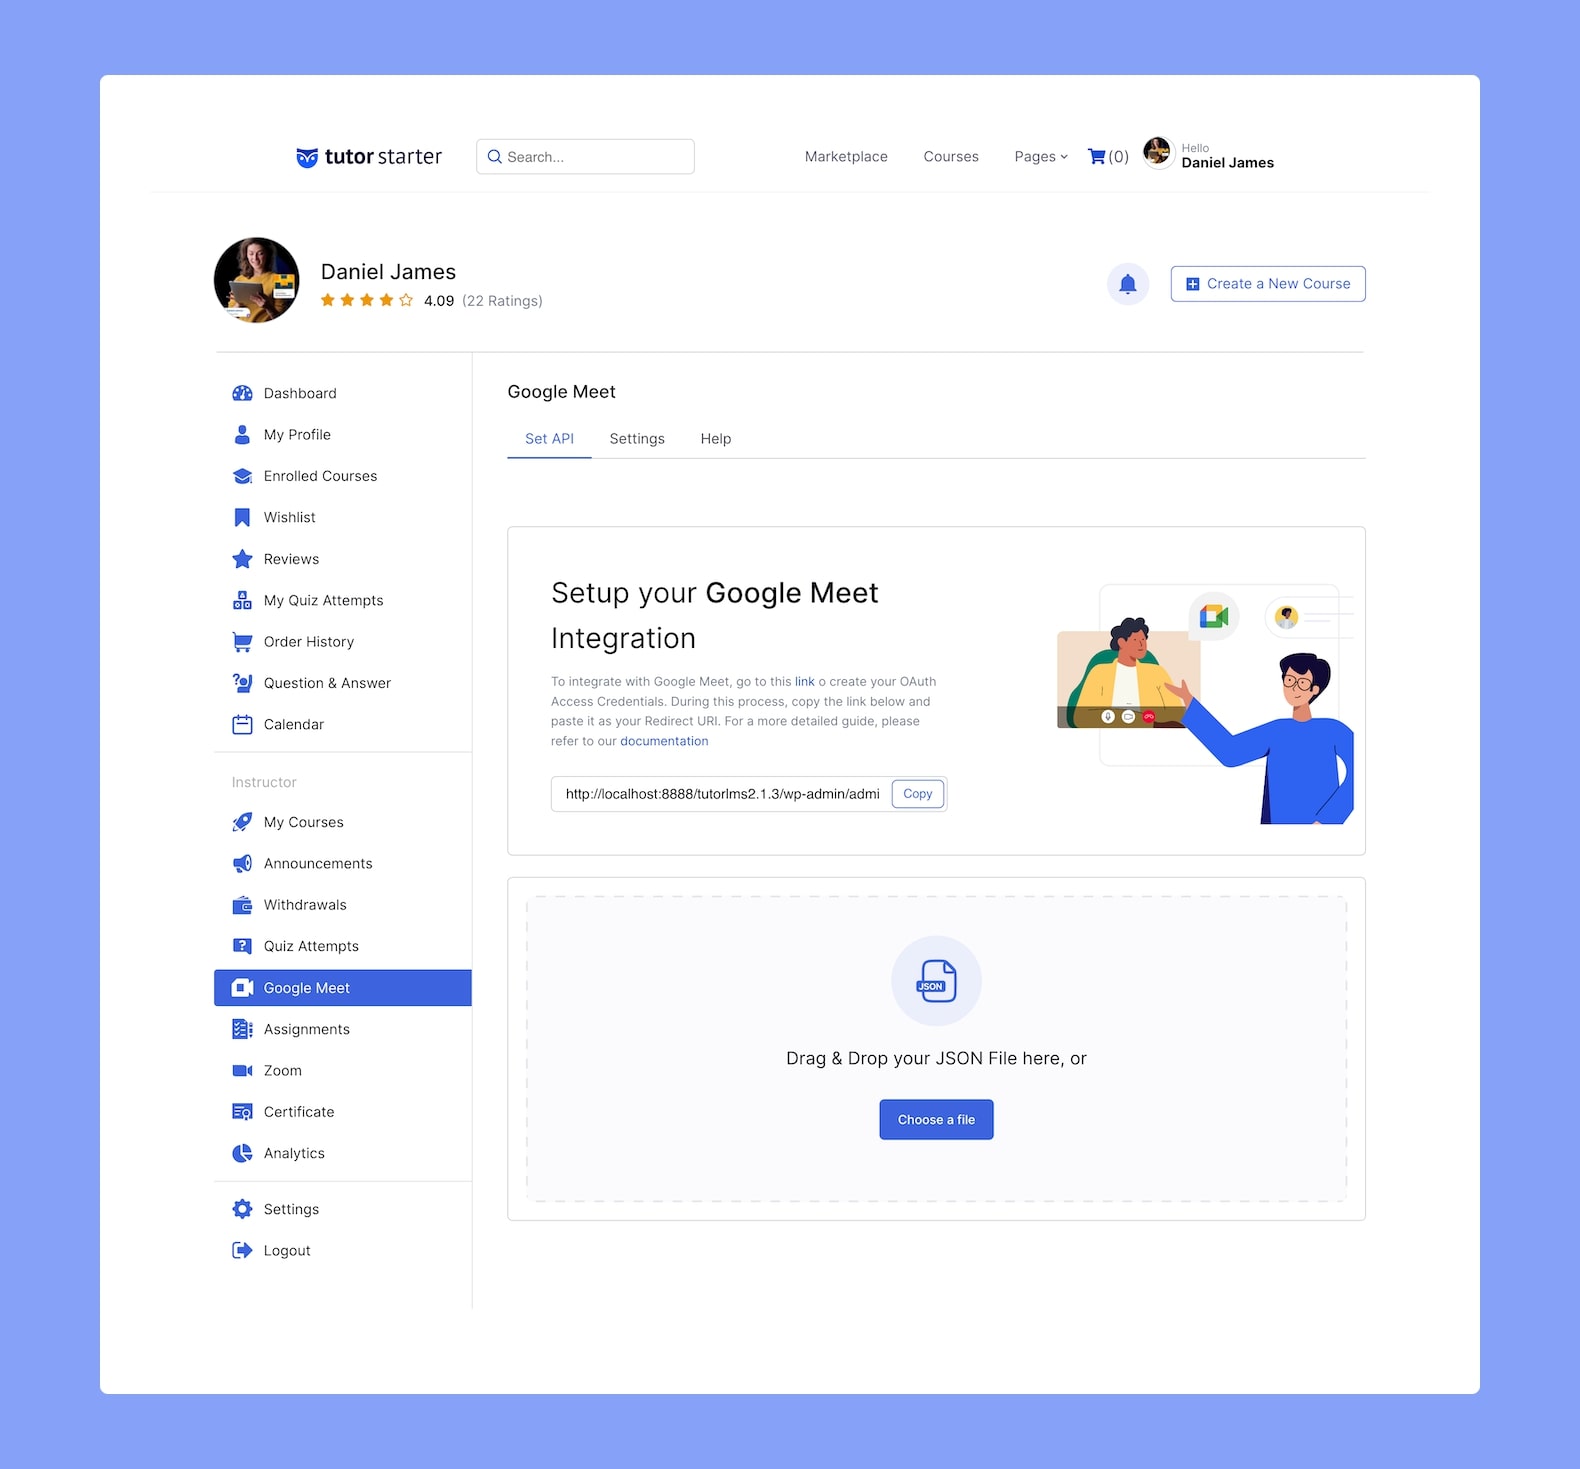
The Google Meet Dashboard is where you’ll be able to set up and access all your Google Meetings and related settings.
The frontend dashboard of Google Meet mirrors its backend counterpart exactly and as such, you’ll find more detailed information about these tabs in this documentation.
Assignments
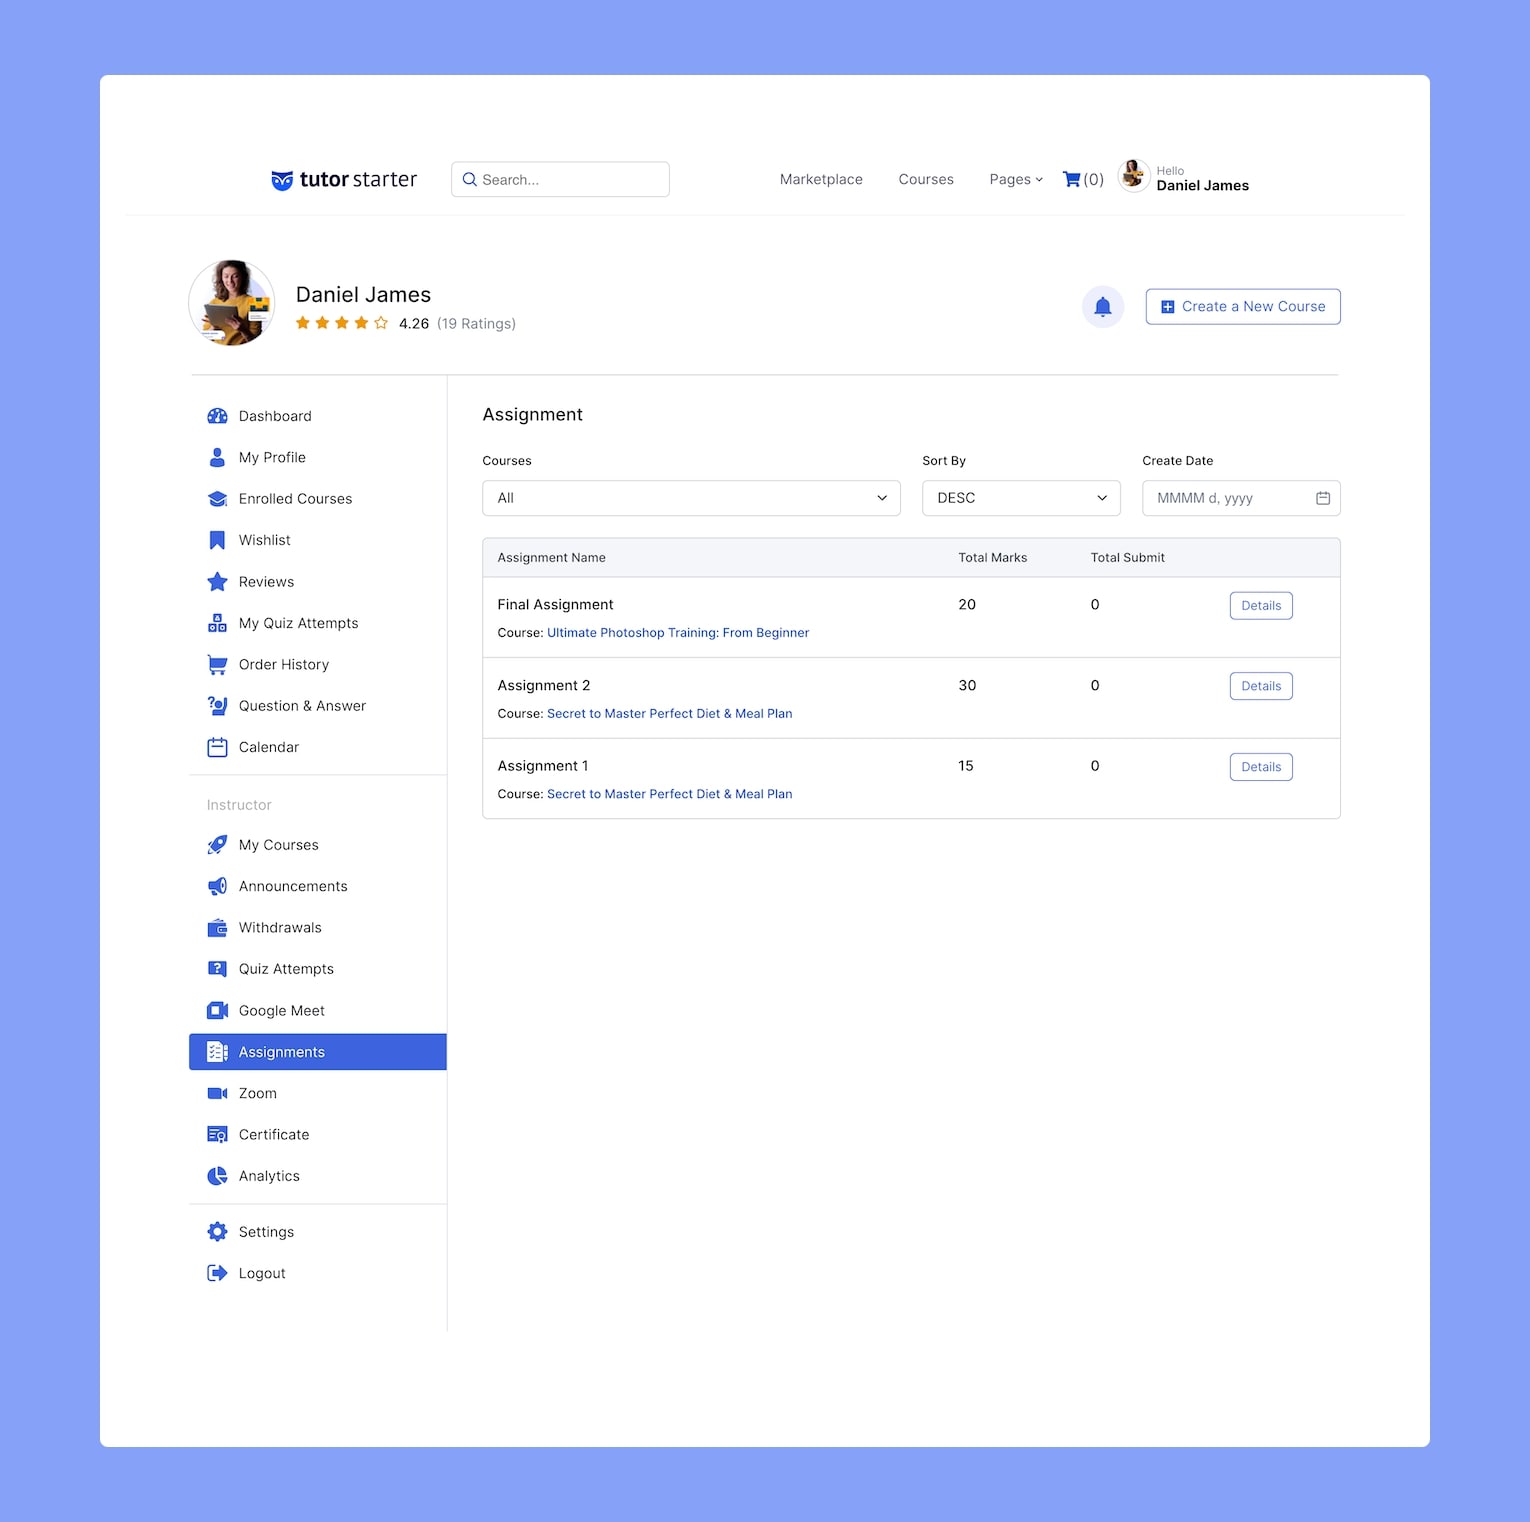
From the Assignments dashboard, you’ll be able to see a complete list of all the Assignments you’ve created for your courses. This list can be filtered by course and date and you can even sort them in ascending or descending order.
If you click on the Details button that’s beside one of these, you will be able to see the assignment details as well as a list of the Assignments submitted by the students. Here, you can evaluate the Assignments and also submit your feedback.
For more in-depth information about this add-on, check out its documentation.
Zoom
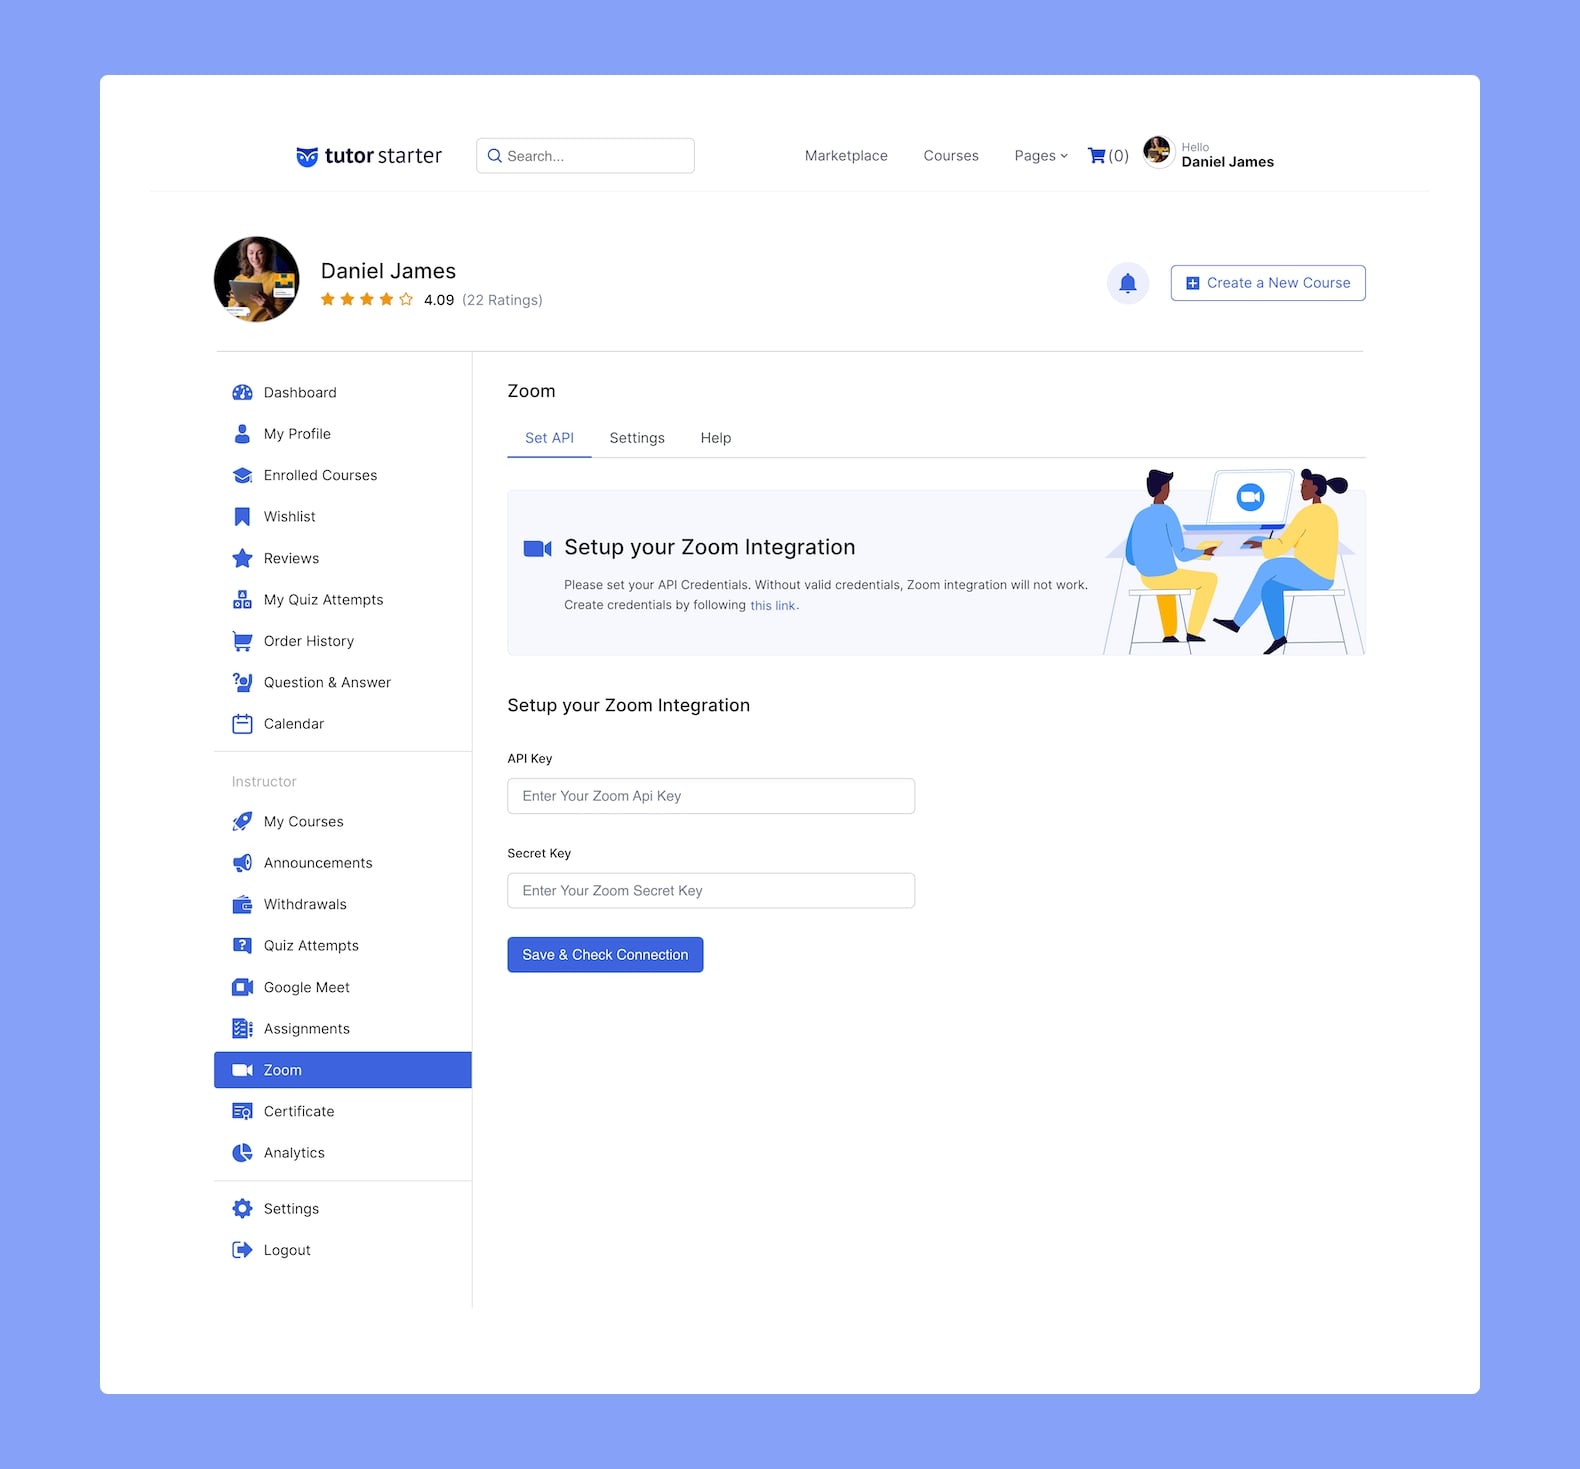
The Zoom Dashboard is where you will be able to access all your Zoom Meetings and other related functionalities. The first tab lists all Active Meetings and the second consists of all Expired Meetings.
To find a specific meeting, you can either search or filter them by course and date. Moreover, you can even start your meeting from right here by clicking on the Start Meeting button.
Also, clicking on the vertical ellipsis icon (︙) will give you the option to edit or delete it as well.
For more guidance on Zoom Integration, please go through its documentation page.
Certificate

Here, you can create new Certificates by clicking on the Create Certificate button which will take you to the Certificate Builder.
After you’ve published your Certificate, it’ll appear under the All Certificates section. From this section, you can also edit, unpublish, or delete any Certificate of your choice if you need to.
For more guidance on this feature, please take a look at the Certificates add-on and the Certificate Builder documentation.
Analytics
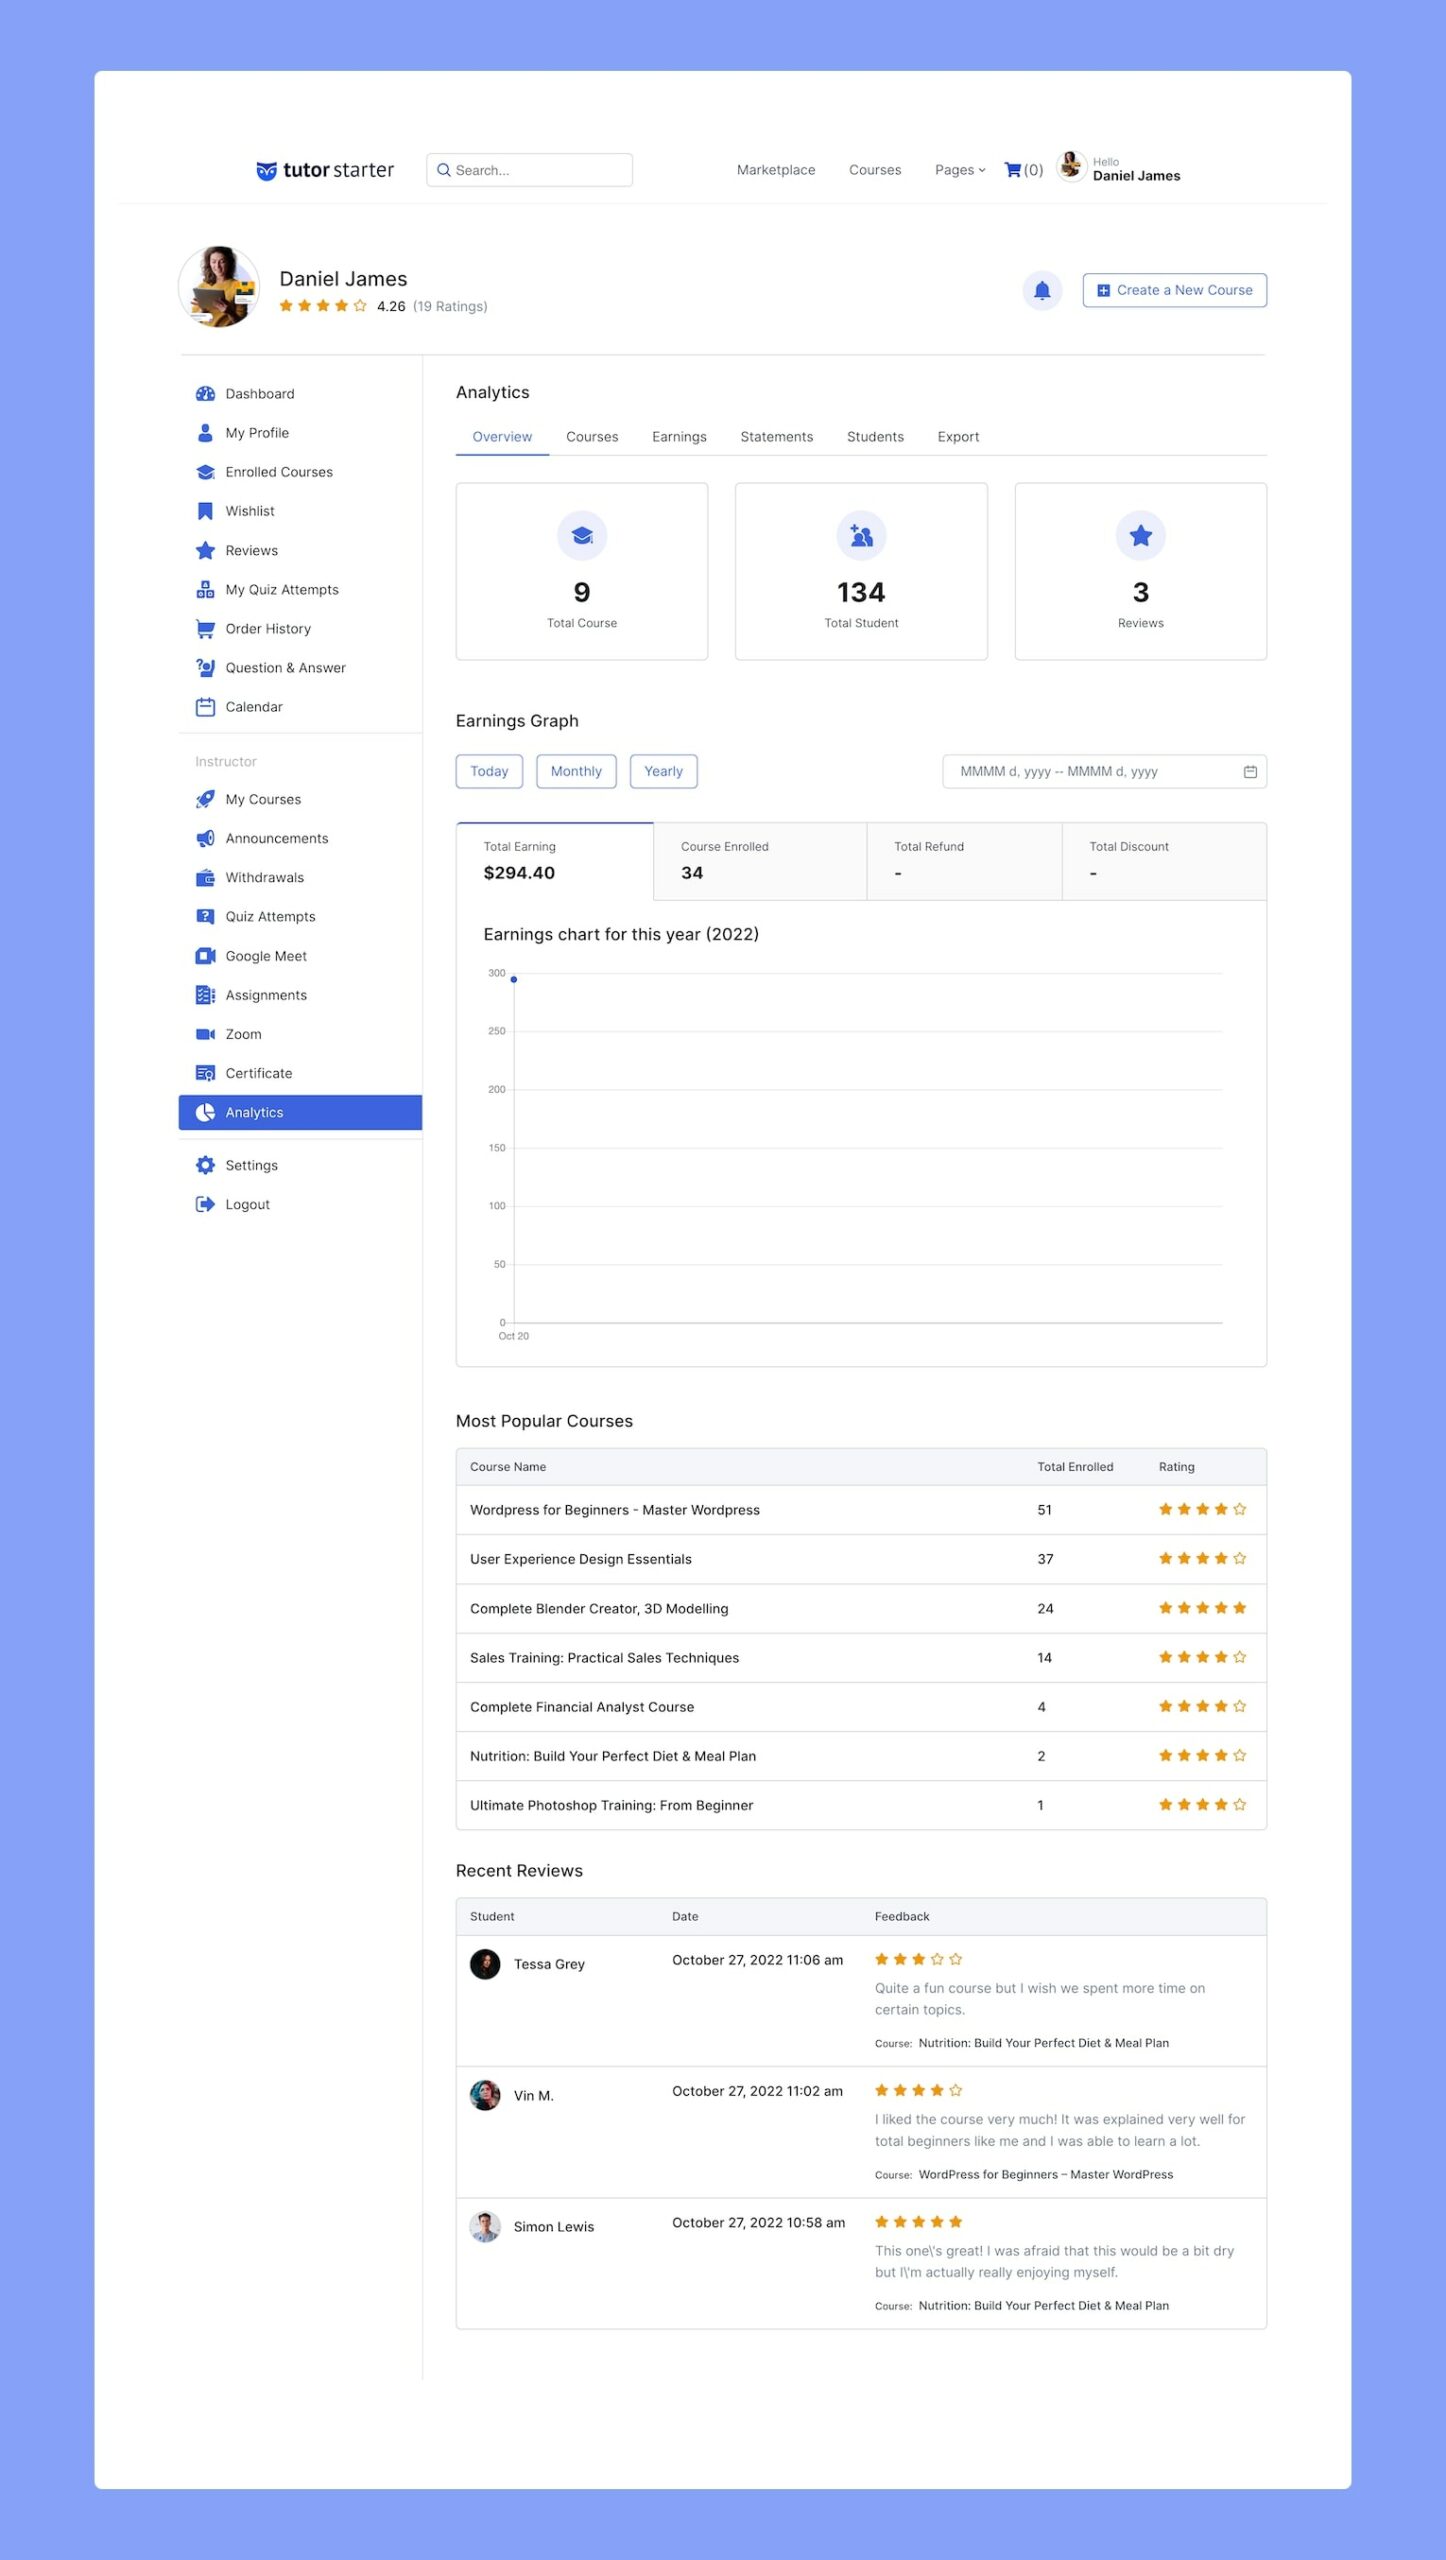
The Analytics dashboard is where you will find a detailed analysis of how your eLearning site is performing with dedicated reports like the following:
- Overview: Contains Quick Stats, the Earnings Graph, a list of the Most Popular Courses as well as a list of Recent Reviews.
- Courses: See a list of all your Courses, Total Learners, Earnings, and more.
- Earnings: Contains a detailed overview of your Sales with information like Total Earnings, Total Sales, Current Balance, Total Withdrawals, etc, and the Earnings Graph.
- Statements: See a list of all your Course Purchase Statements generated when Students buy your courses. This table will also detail the Earnings, Commission, and Fees.
- Students: See a list of all your Students and related information here.
- Export: From this tab, you can easily Export the reports on your Sales & Students with a single click of a button.
For more in-depth information on this section, please visit the Report add-on’s dedicated documentation.
Settings
This section is where you can adjust essential Settings for the following:
- Profile
- Password
- Withdraw
- Social Profile
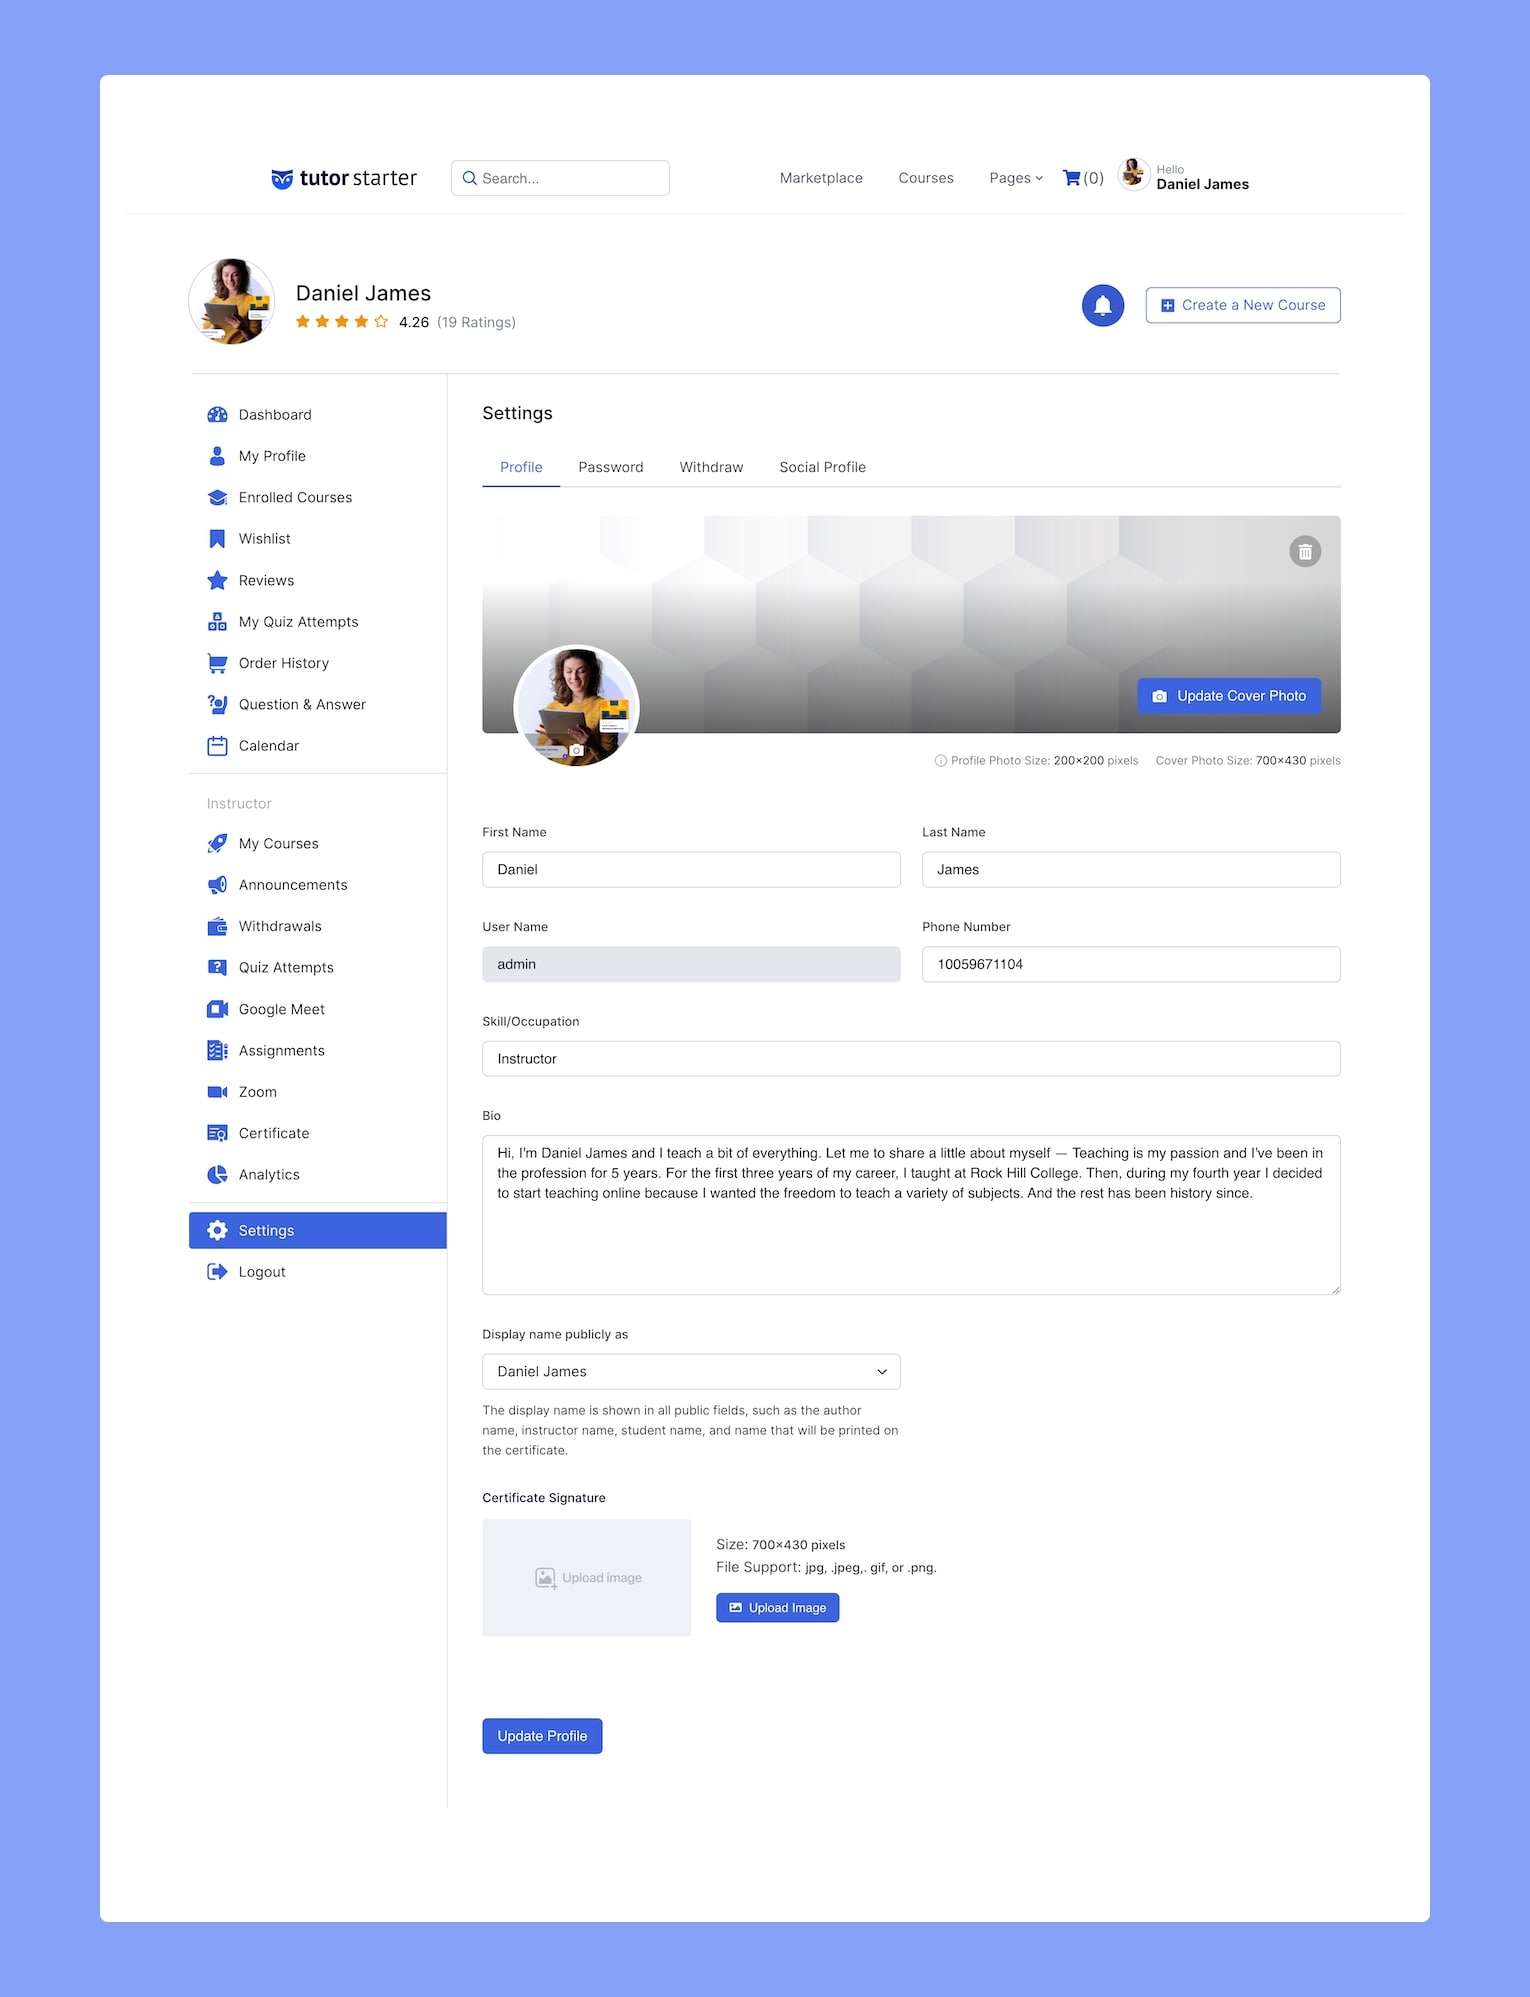
The Profile tab is where you can define your profile information like First Name, Last Name, Phone Number, Skill/Occupation, Bio, and Display Name. You can even upload your Profile Image, Banner, and Certificate Signature from here.
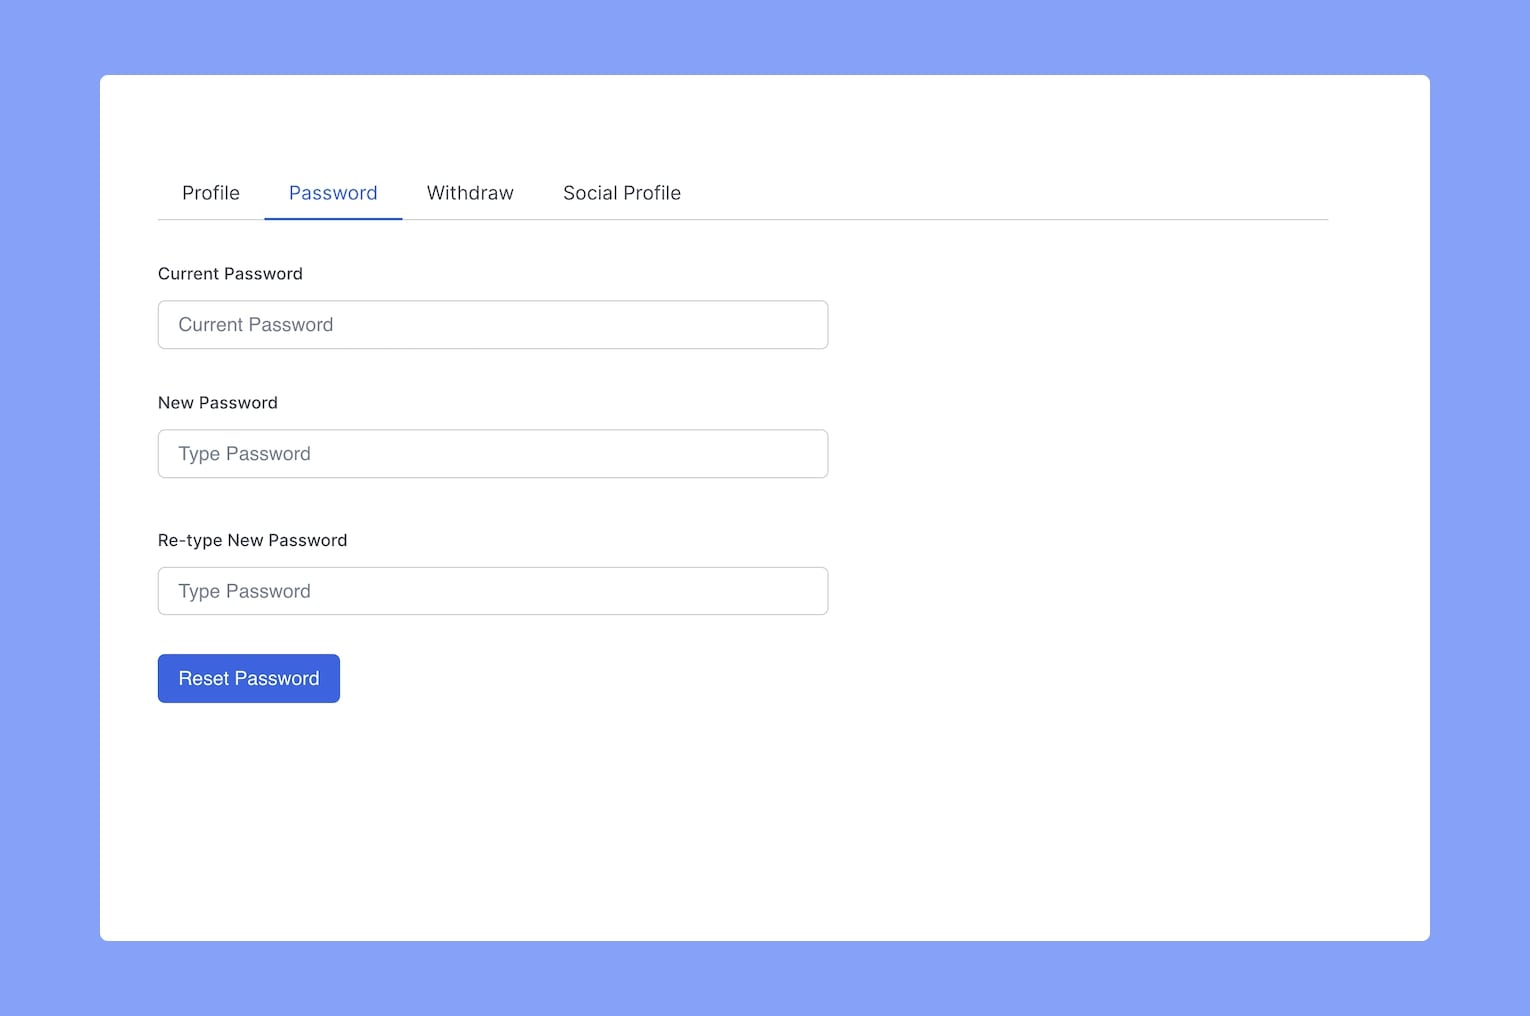
Next up, the Password tab is pretty self-explanatory because here, you can change your password.
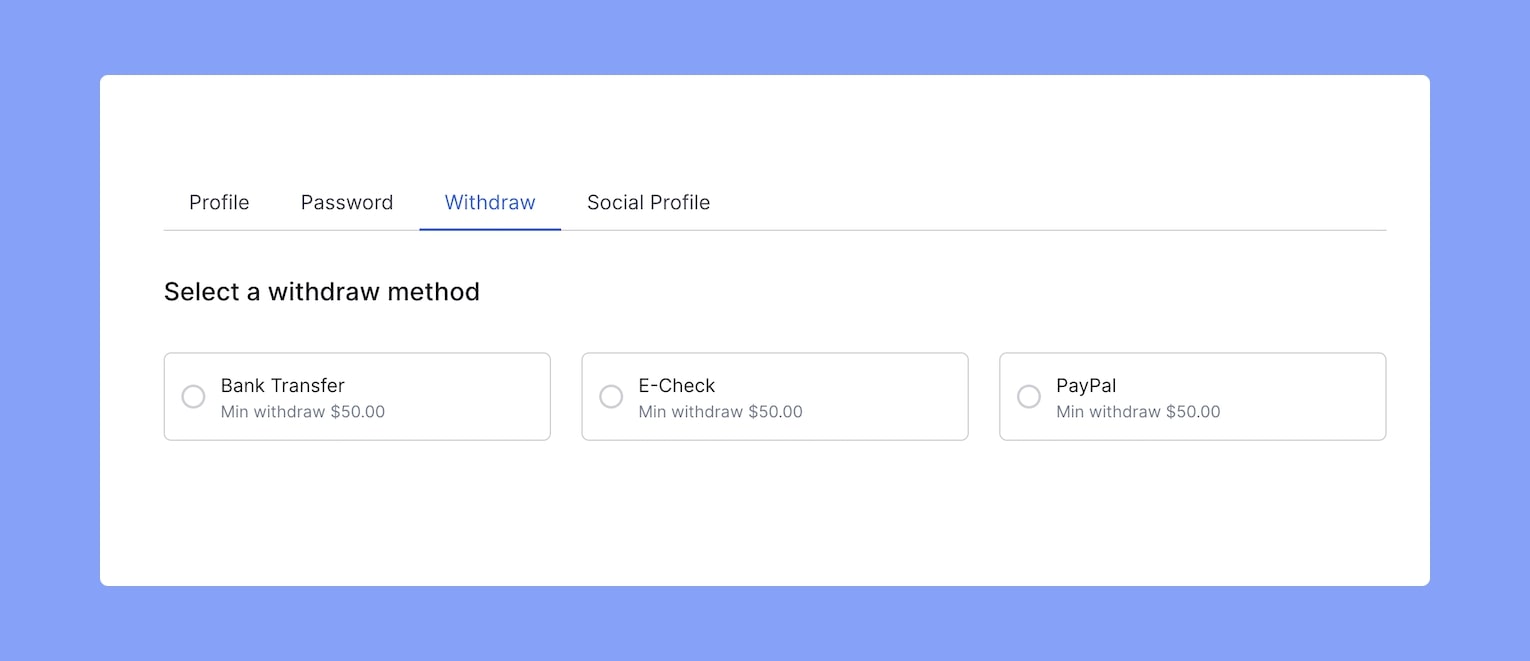
Then comes the Withdraw tab, where you can set your Withdraw preferences. Here, select your preferred method from the options available and then set up your account details.
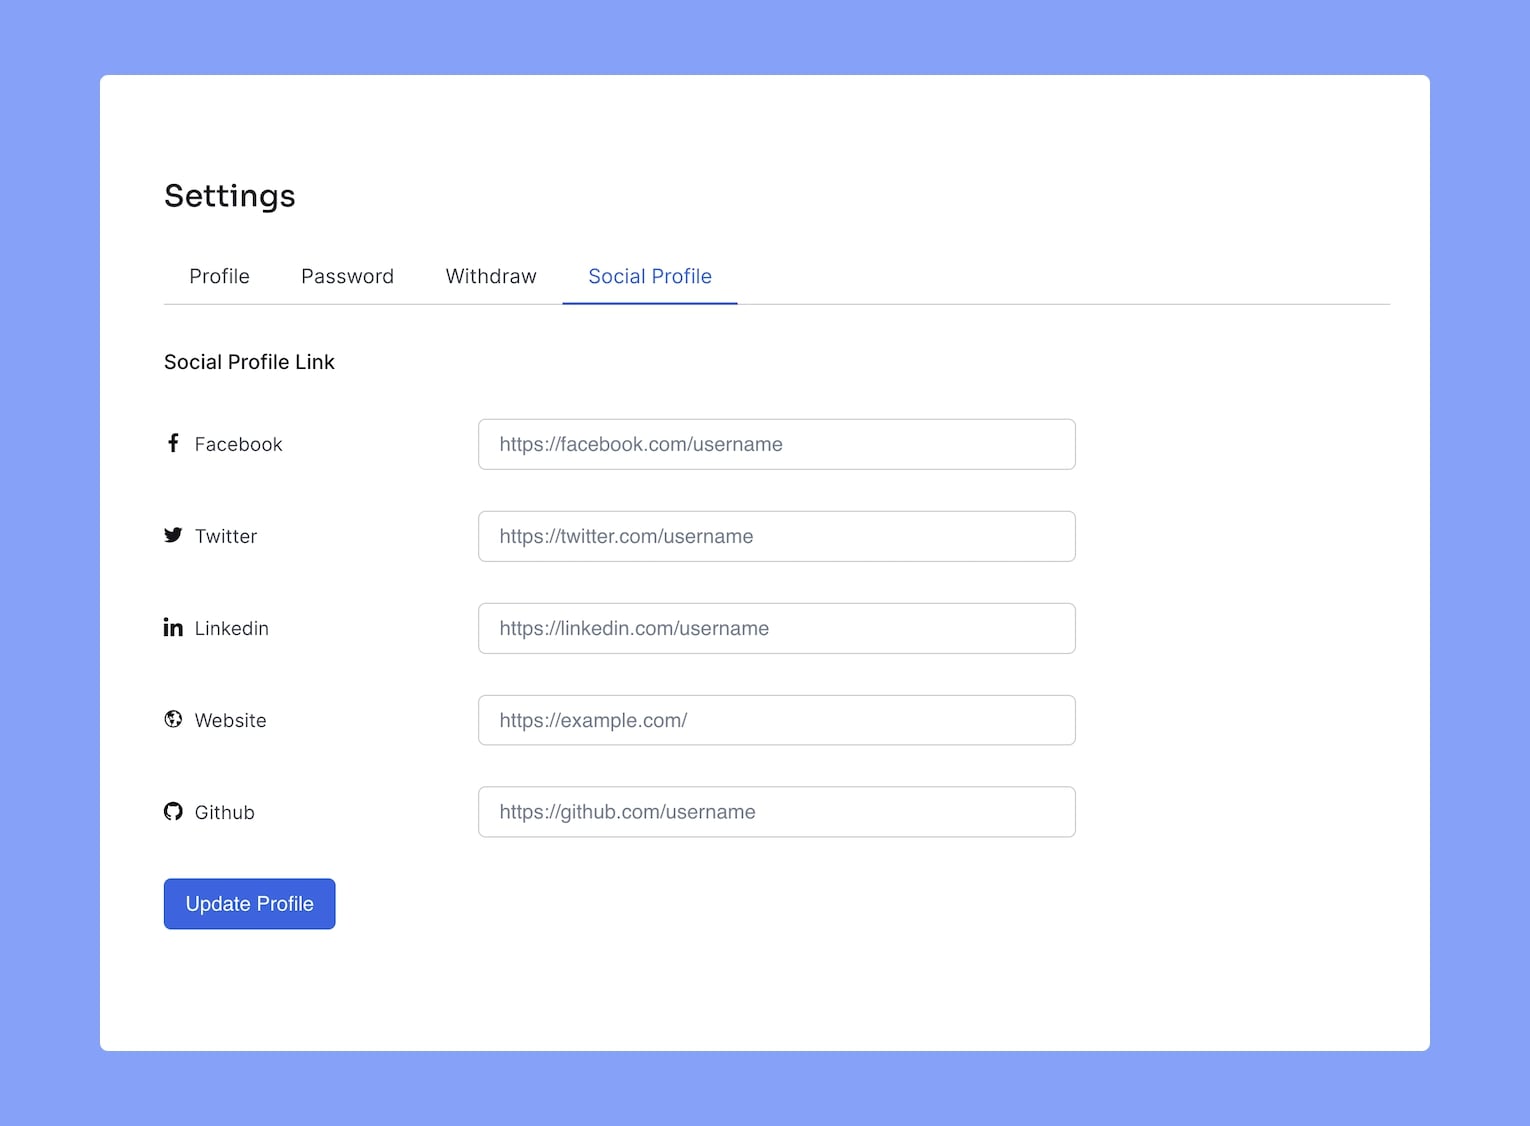
Finally, from the Social Profile tab, you can link you other socials like Facebook, Twitter, Linkedin, Website, and Github.