The Email Notification add-on is a useful feature that keeps users informed about the latest activities on an LMS site through email alerts.
For administrators, it’s particularly handy to receive notifications about new instructor sign-ups or other updates. It allows them to promptly review and approve or disapprove them.
Likewise, students will greatly benefit if they are notified of graded assignments, new announcements, or the publication of quizzes and lessons. These email notifications ensure that users stay updated on important events, even when they are not active on the eLearning site.
Enable Email Addon
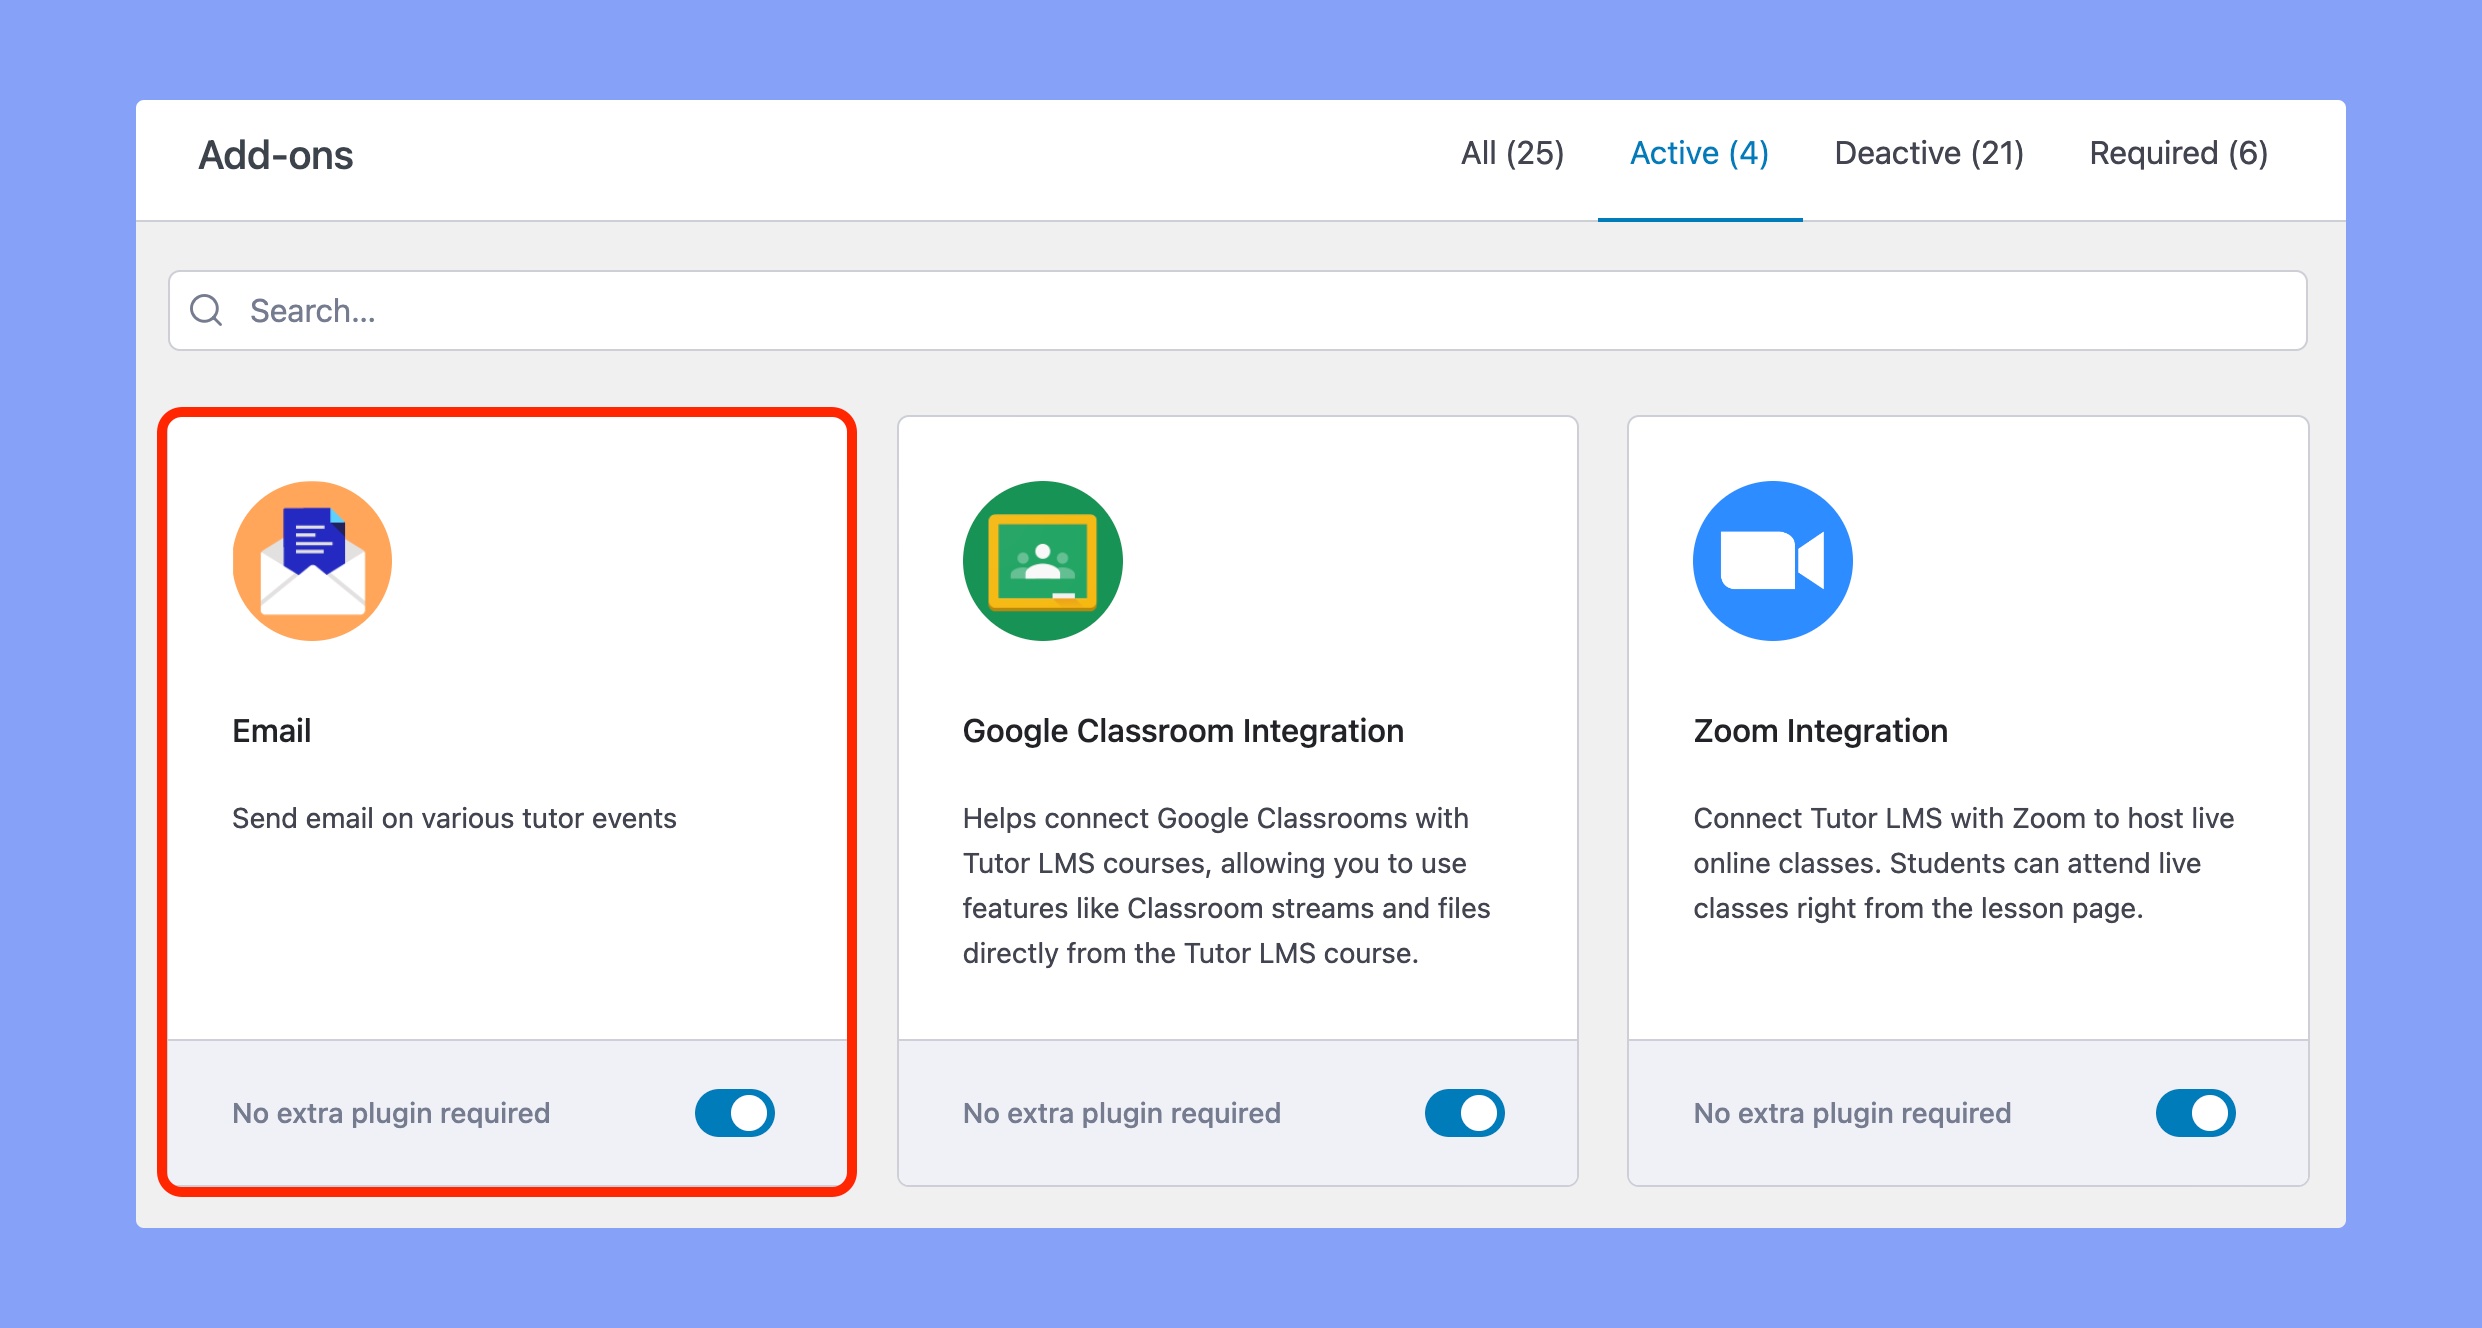
To get started with this feature, you have to enable the Email addon first. To do this, navigate to WP Admin > Tutor LMS Pro > Add-ons and click on the toggle under Email to activate it.
Configuring Email Settings
Now it’s time to configure the Email Notification Settings. To do this, go to WP Admin > Tutor LMS Pro > Settings > Email.
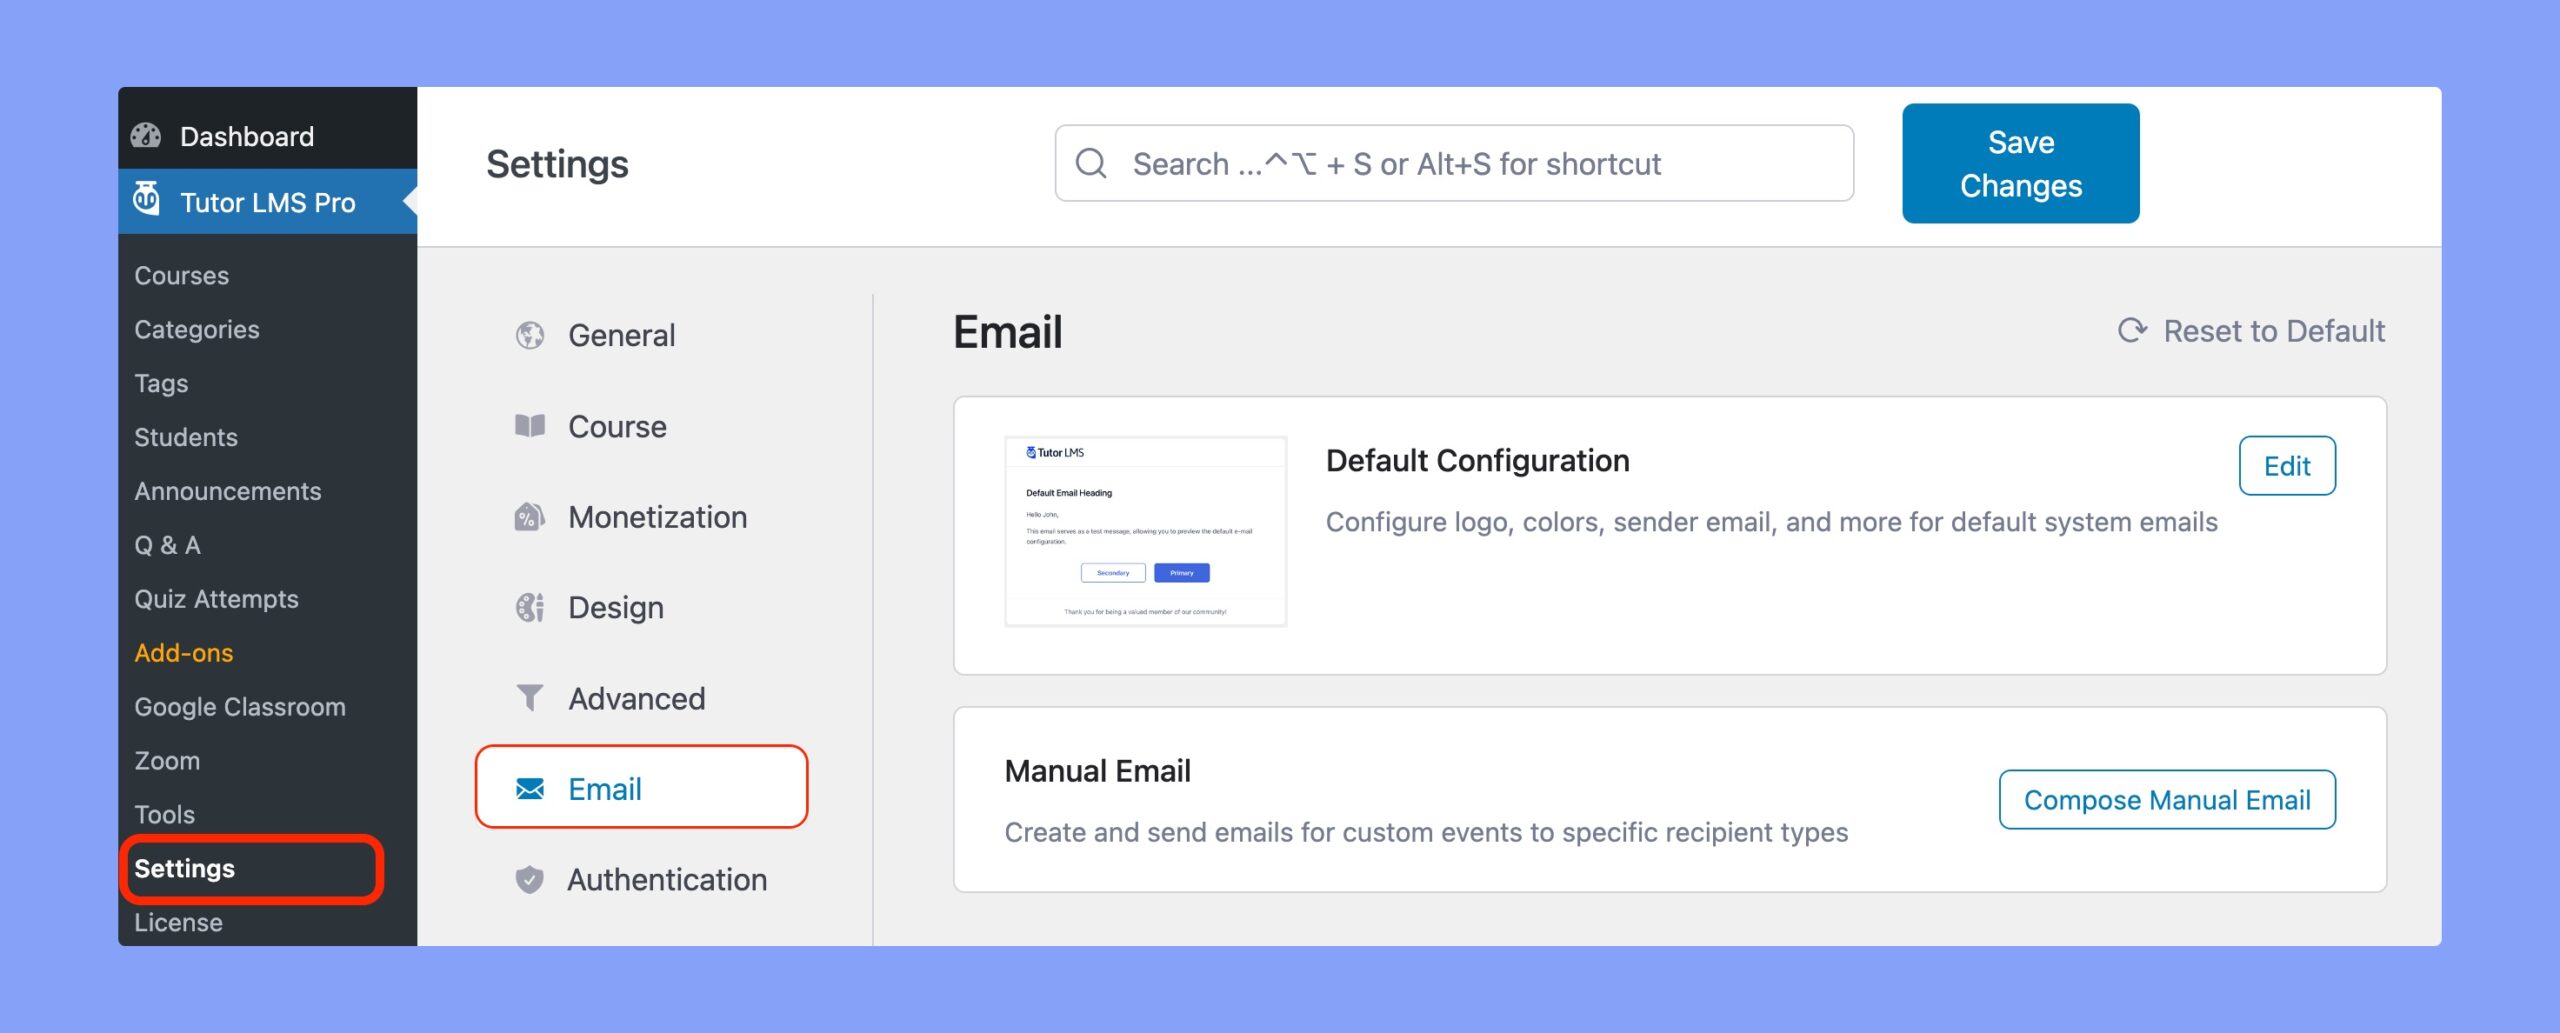
Here, you will find all the available settings to configure the Email notifications for your Tutor LMS site.
Email Settings
The Email settings contain two different Email configuration options:
- Default Configuration
- Manual Mailing
The Default Configuration is used to create a default Email template for every email. But, you have to use the manual mailing option to create and send personalized emails tailored to the students or instructors.
Default Configuration
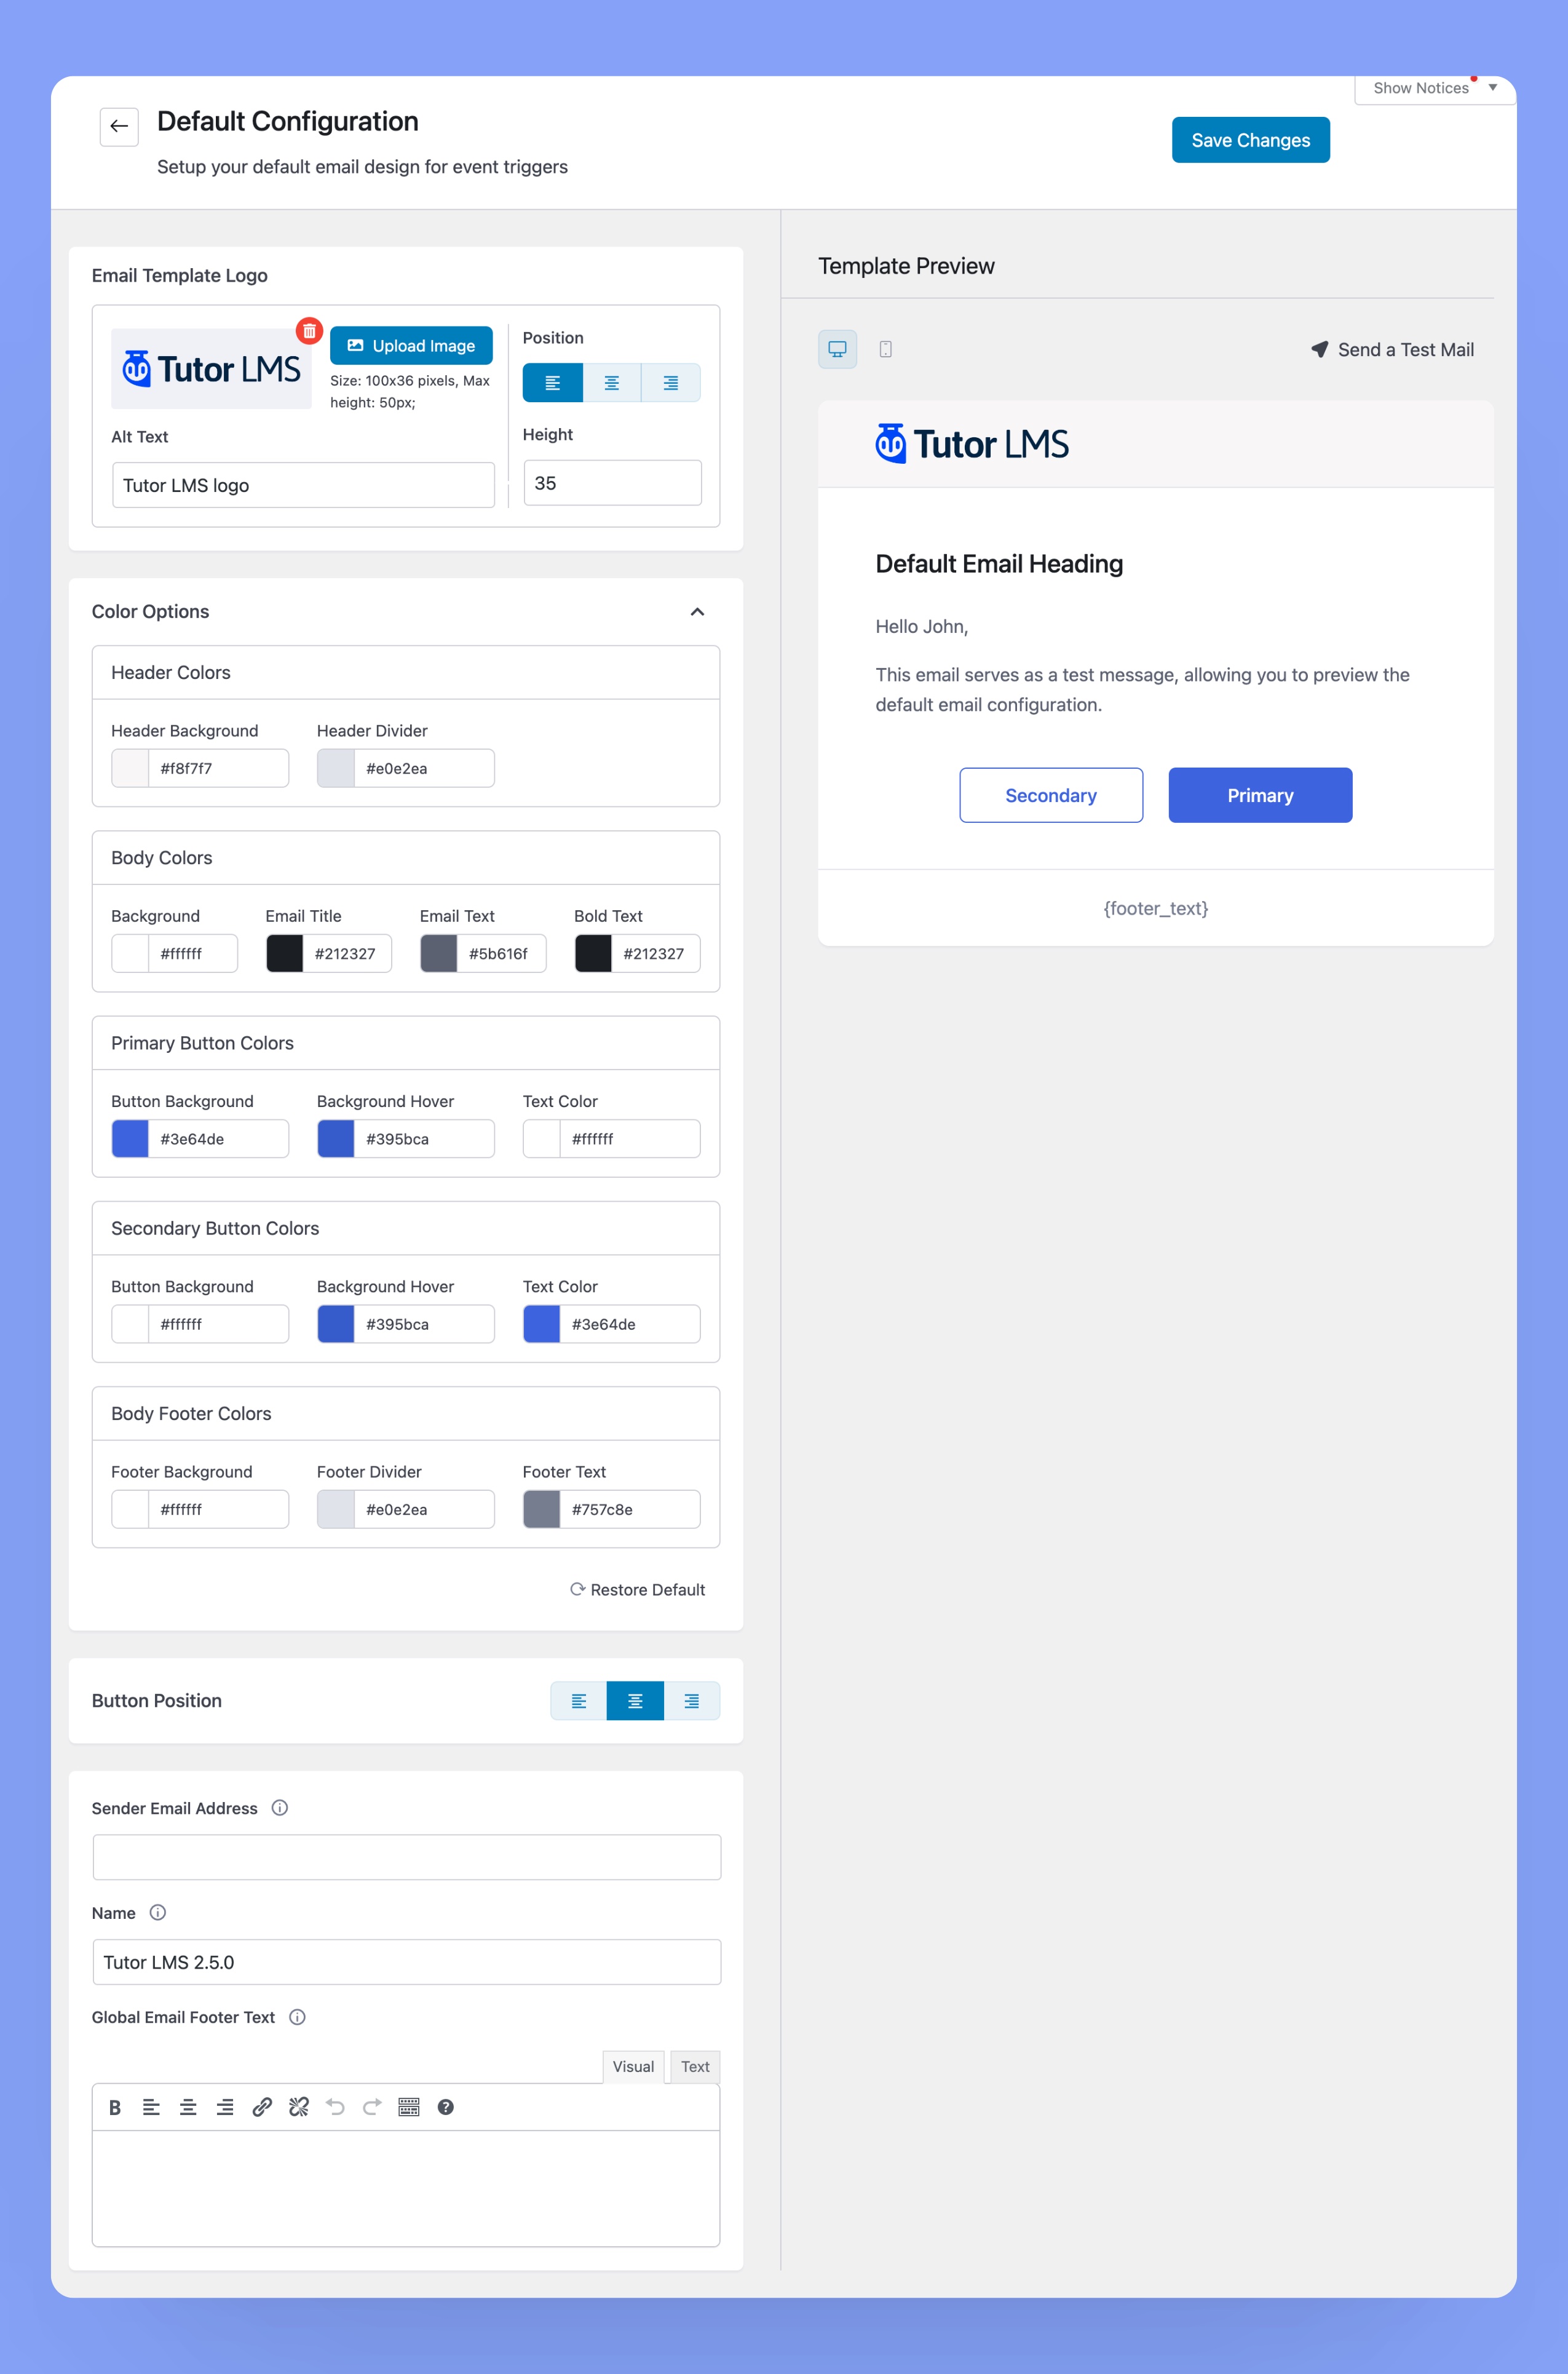
You can set up your default email design from here. In this section, the available options are:
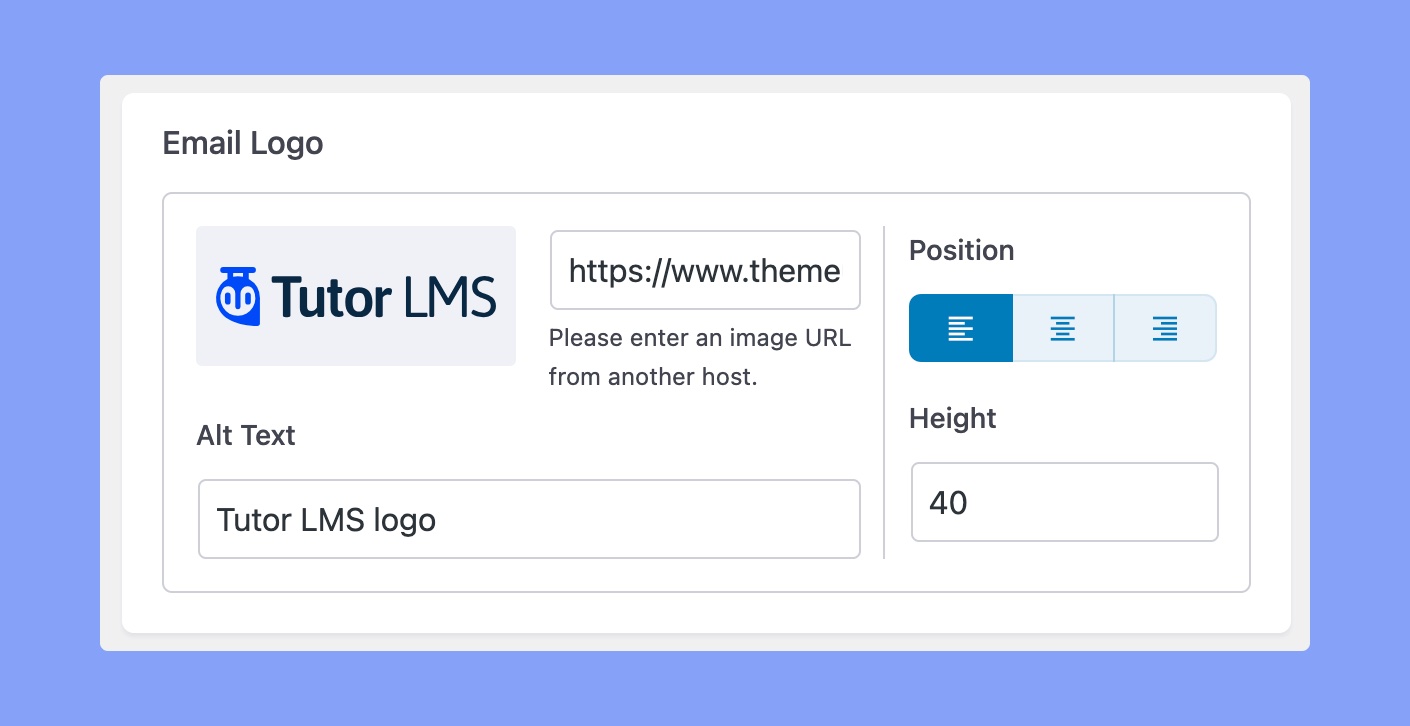
1. Email Template Logo
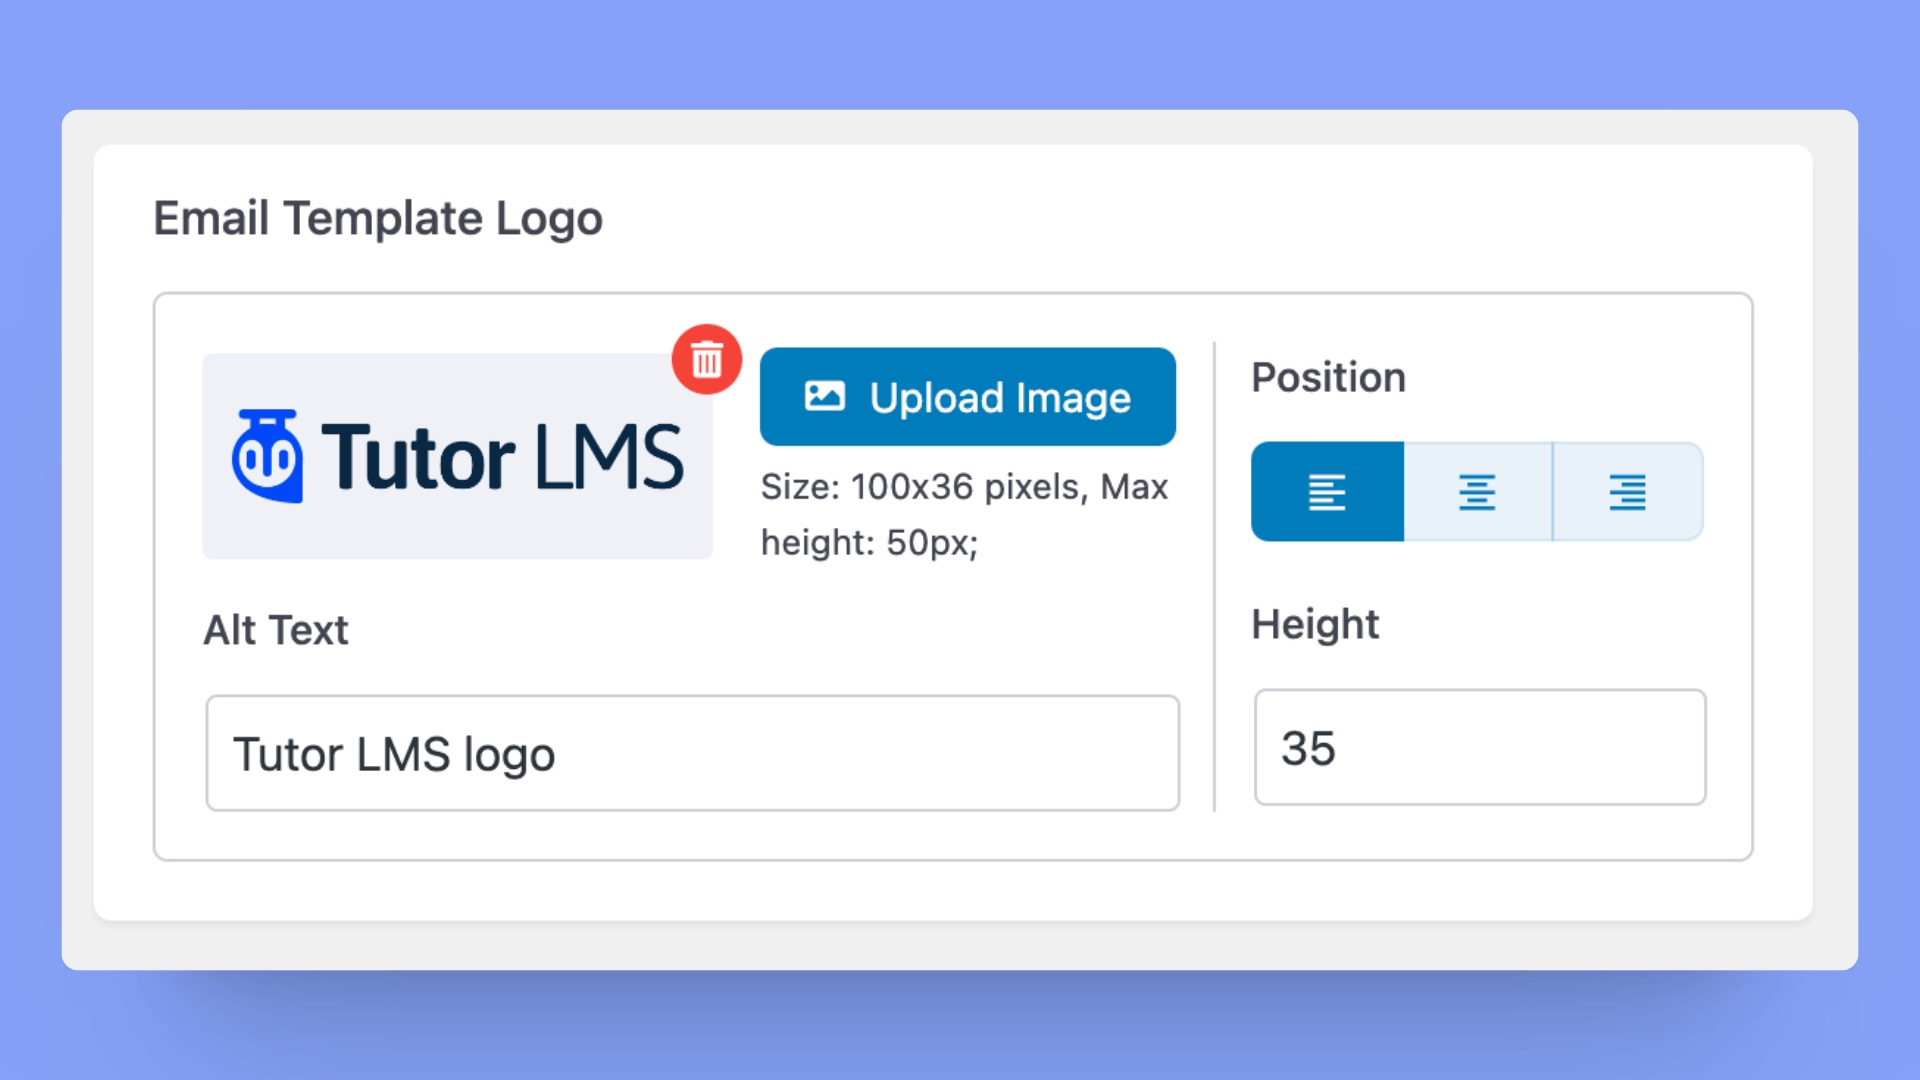
Here are the available options under the Email Template Logo section:
- Upload Image: Upload your website logo here. Ensure that the image size is 100×36 pixels and the maximum supported height is 50 pixels.
- Alt Text: Enter alternative text for the logo image. This text will be displayed if the image cannot be loaded.
- Position: Specify the positioning of the logo within the email template. Choose from options such as left-aligned, center-aligned, or right-aligned based on your design preferences.
- Height: Set the logo height in pixels. Ensure that the specified height adheres to your design requirements and fits seamlessly within the email template.
But, you have to input the logo manually if you enabled hotlink prevention feature.
2. Color Options
You can customize the color options for the Email template.
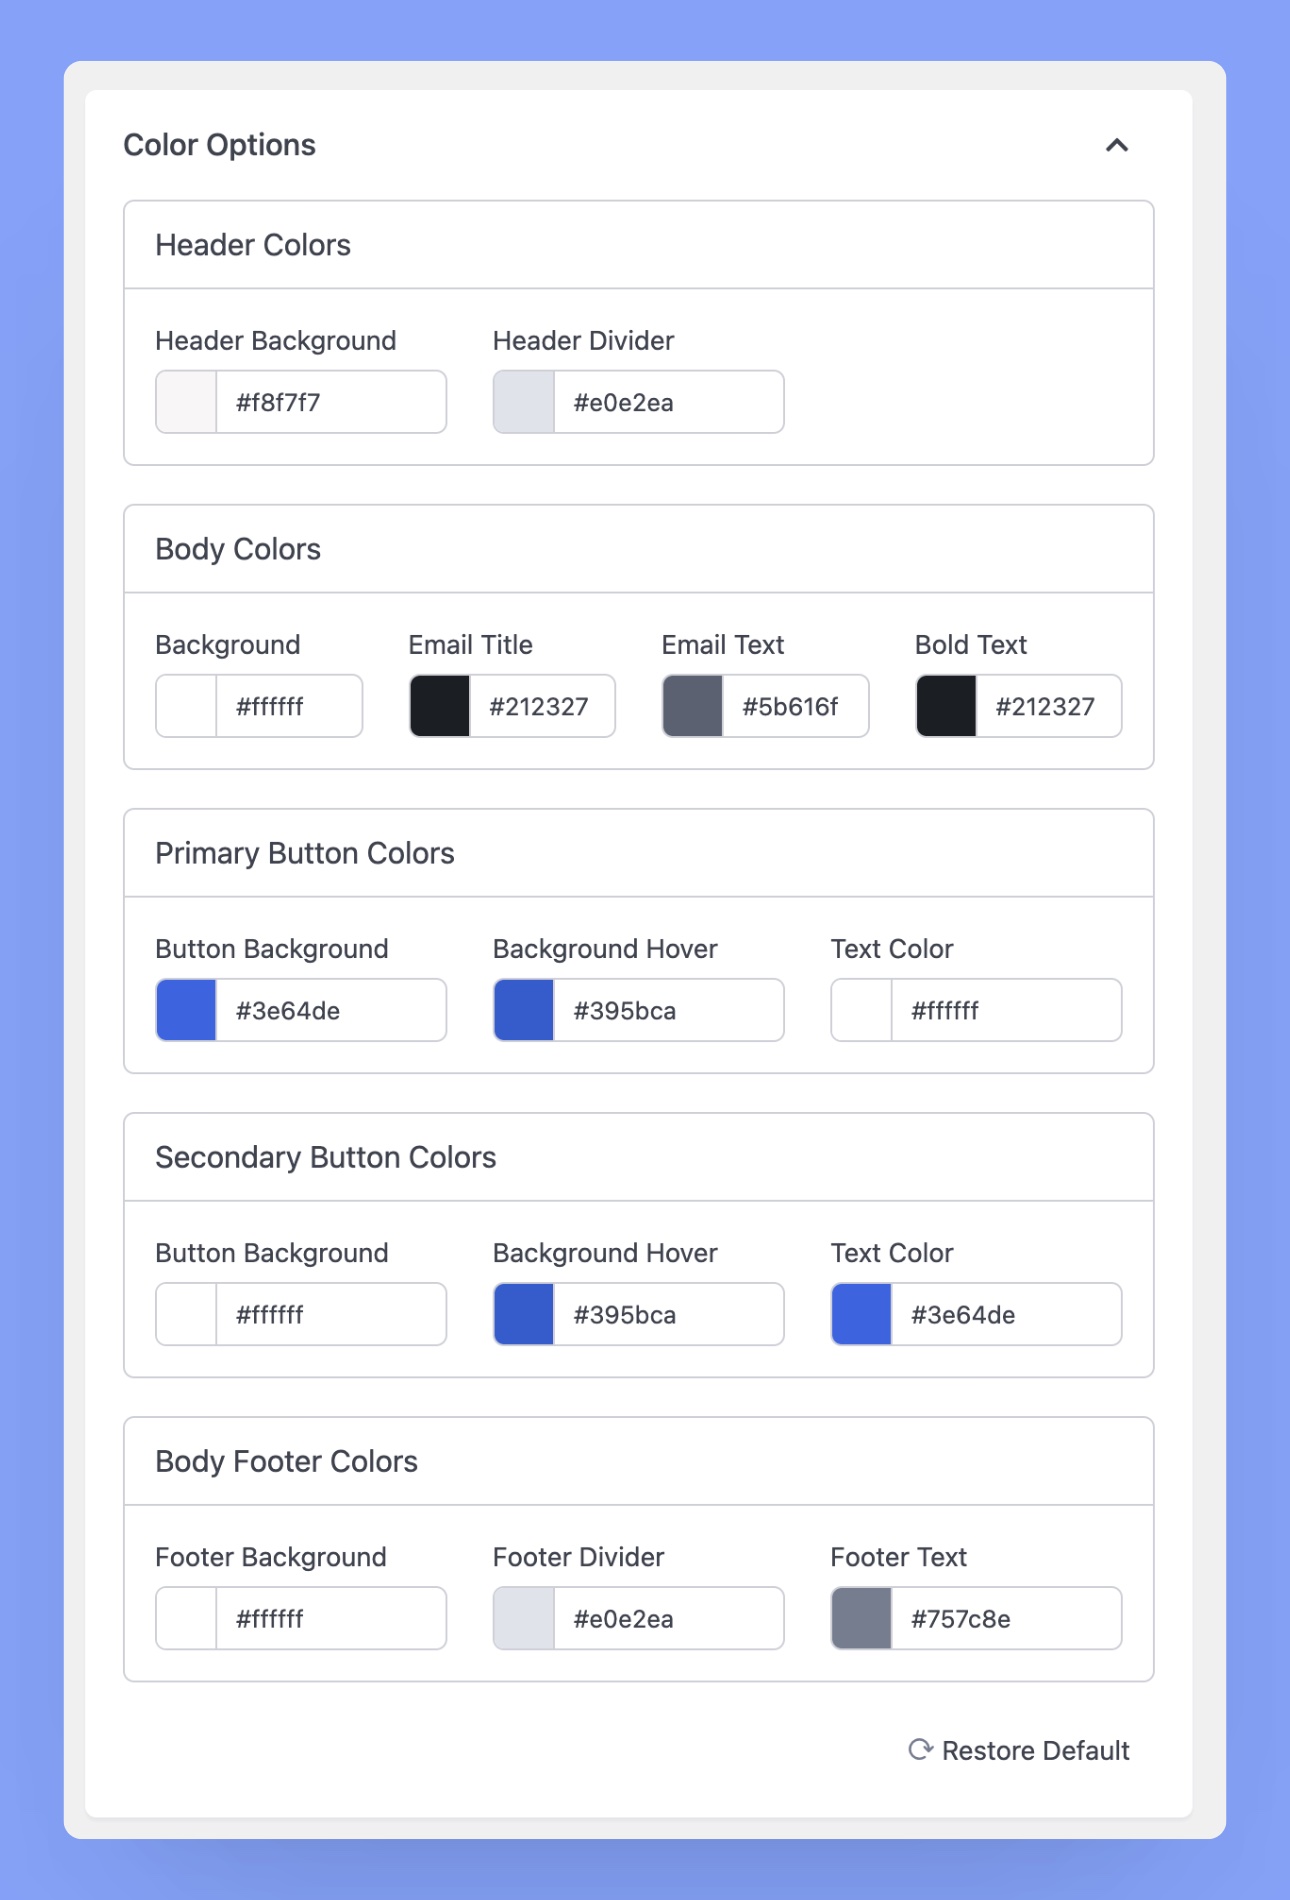
You can customize the colors for the Email header, body, button, and footer sections from here. Here are the available color customization options for the header section:
- Header Background Color: Splash a touch of brand identity onto your email header with a customized background color.
- Header Divider Color: Add a subtle color to divide the email header and body.
The following customization options for the body section:
- Body Background Color: Set the tone for your email body by selecting a background color that aligns with your brand.
- Email Title Color: Make your email titles pop by choosing a color that captures attention.
- Email Text Color: Define the color of the body text in your email for a visually appealing reading experience.
- Bold Text Color: Customize the color of bolded text to emphasize key points in your email.
Here are the available color customization options for the primary and secondary CTA buttons:
- Button Background Color: Jazz up your CTA buttons with a vibrant background color.
- Background Hover Color: Elevate user engagement by specifying the hover color of CTA buttons.
- Button Text Color: Set your CTA buttons to speak volumes by choosing a text color that stands out.
Here are the available color customization options for the footer section:
- Footer Background Color: Wrap up your email with a personalized touch by selecting a background color for the footer.
- Footer Divider Color: Define the color of dividers in your email footer to maintain a cohesive design.
- Footer Text Color: Tailor the color of text in your email footer to align with your brand’s aesthetic.
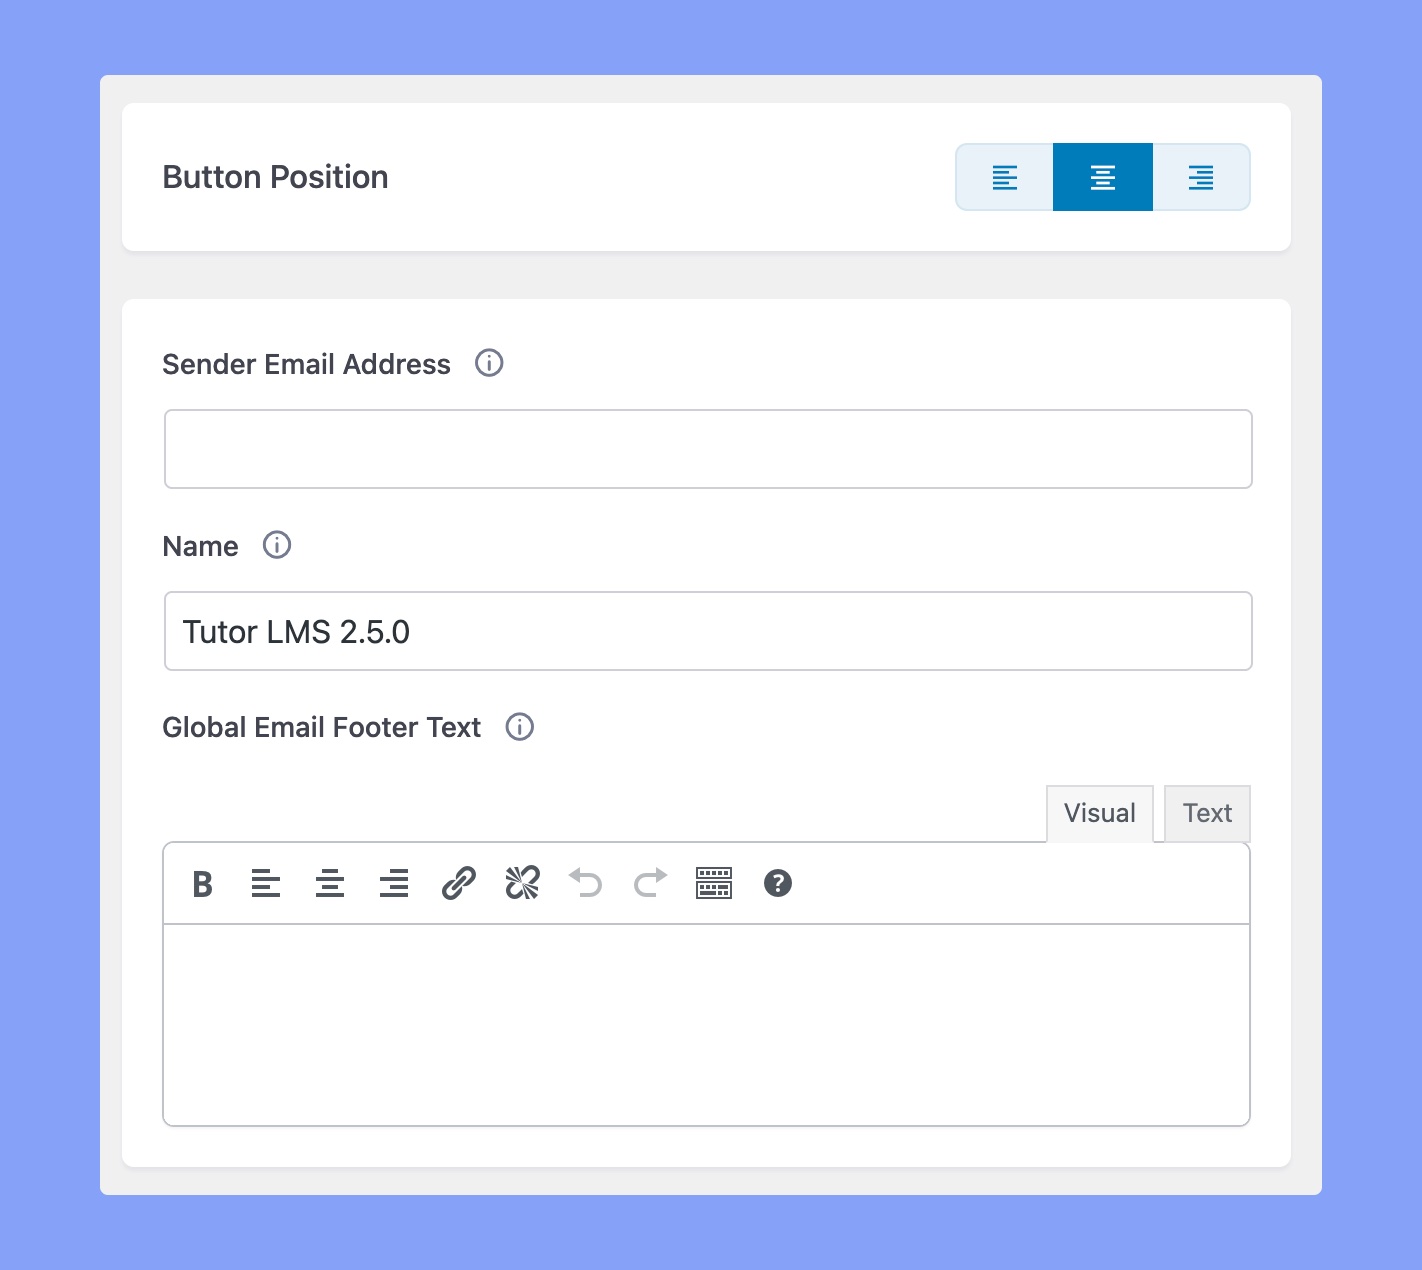
In the following section, you can change the alignment for the CTA buttons.
3. Sender Email Settings
You can update the default email sender, Sender name, and Global Email Footer Text from this section.
Manual Mailing
The Manual Mailing option lets you craft personalized mail for a specific set of users.
2. Make sure your email cron frequency is compatible with the email server limit. The hosting provider may suspend your account upon crossing the limit.
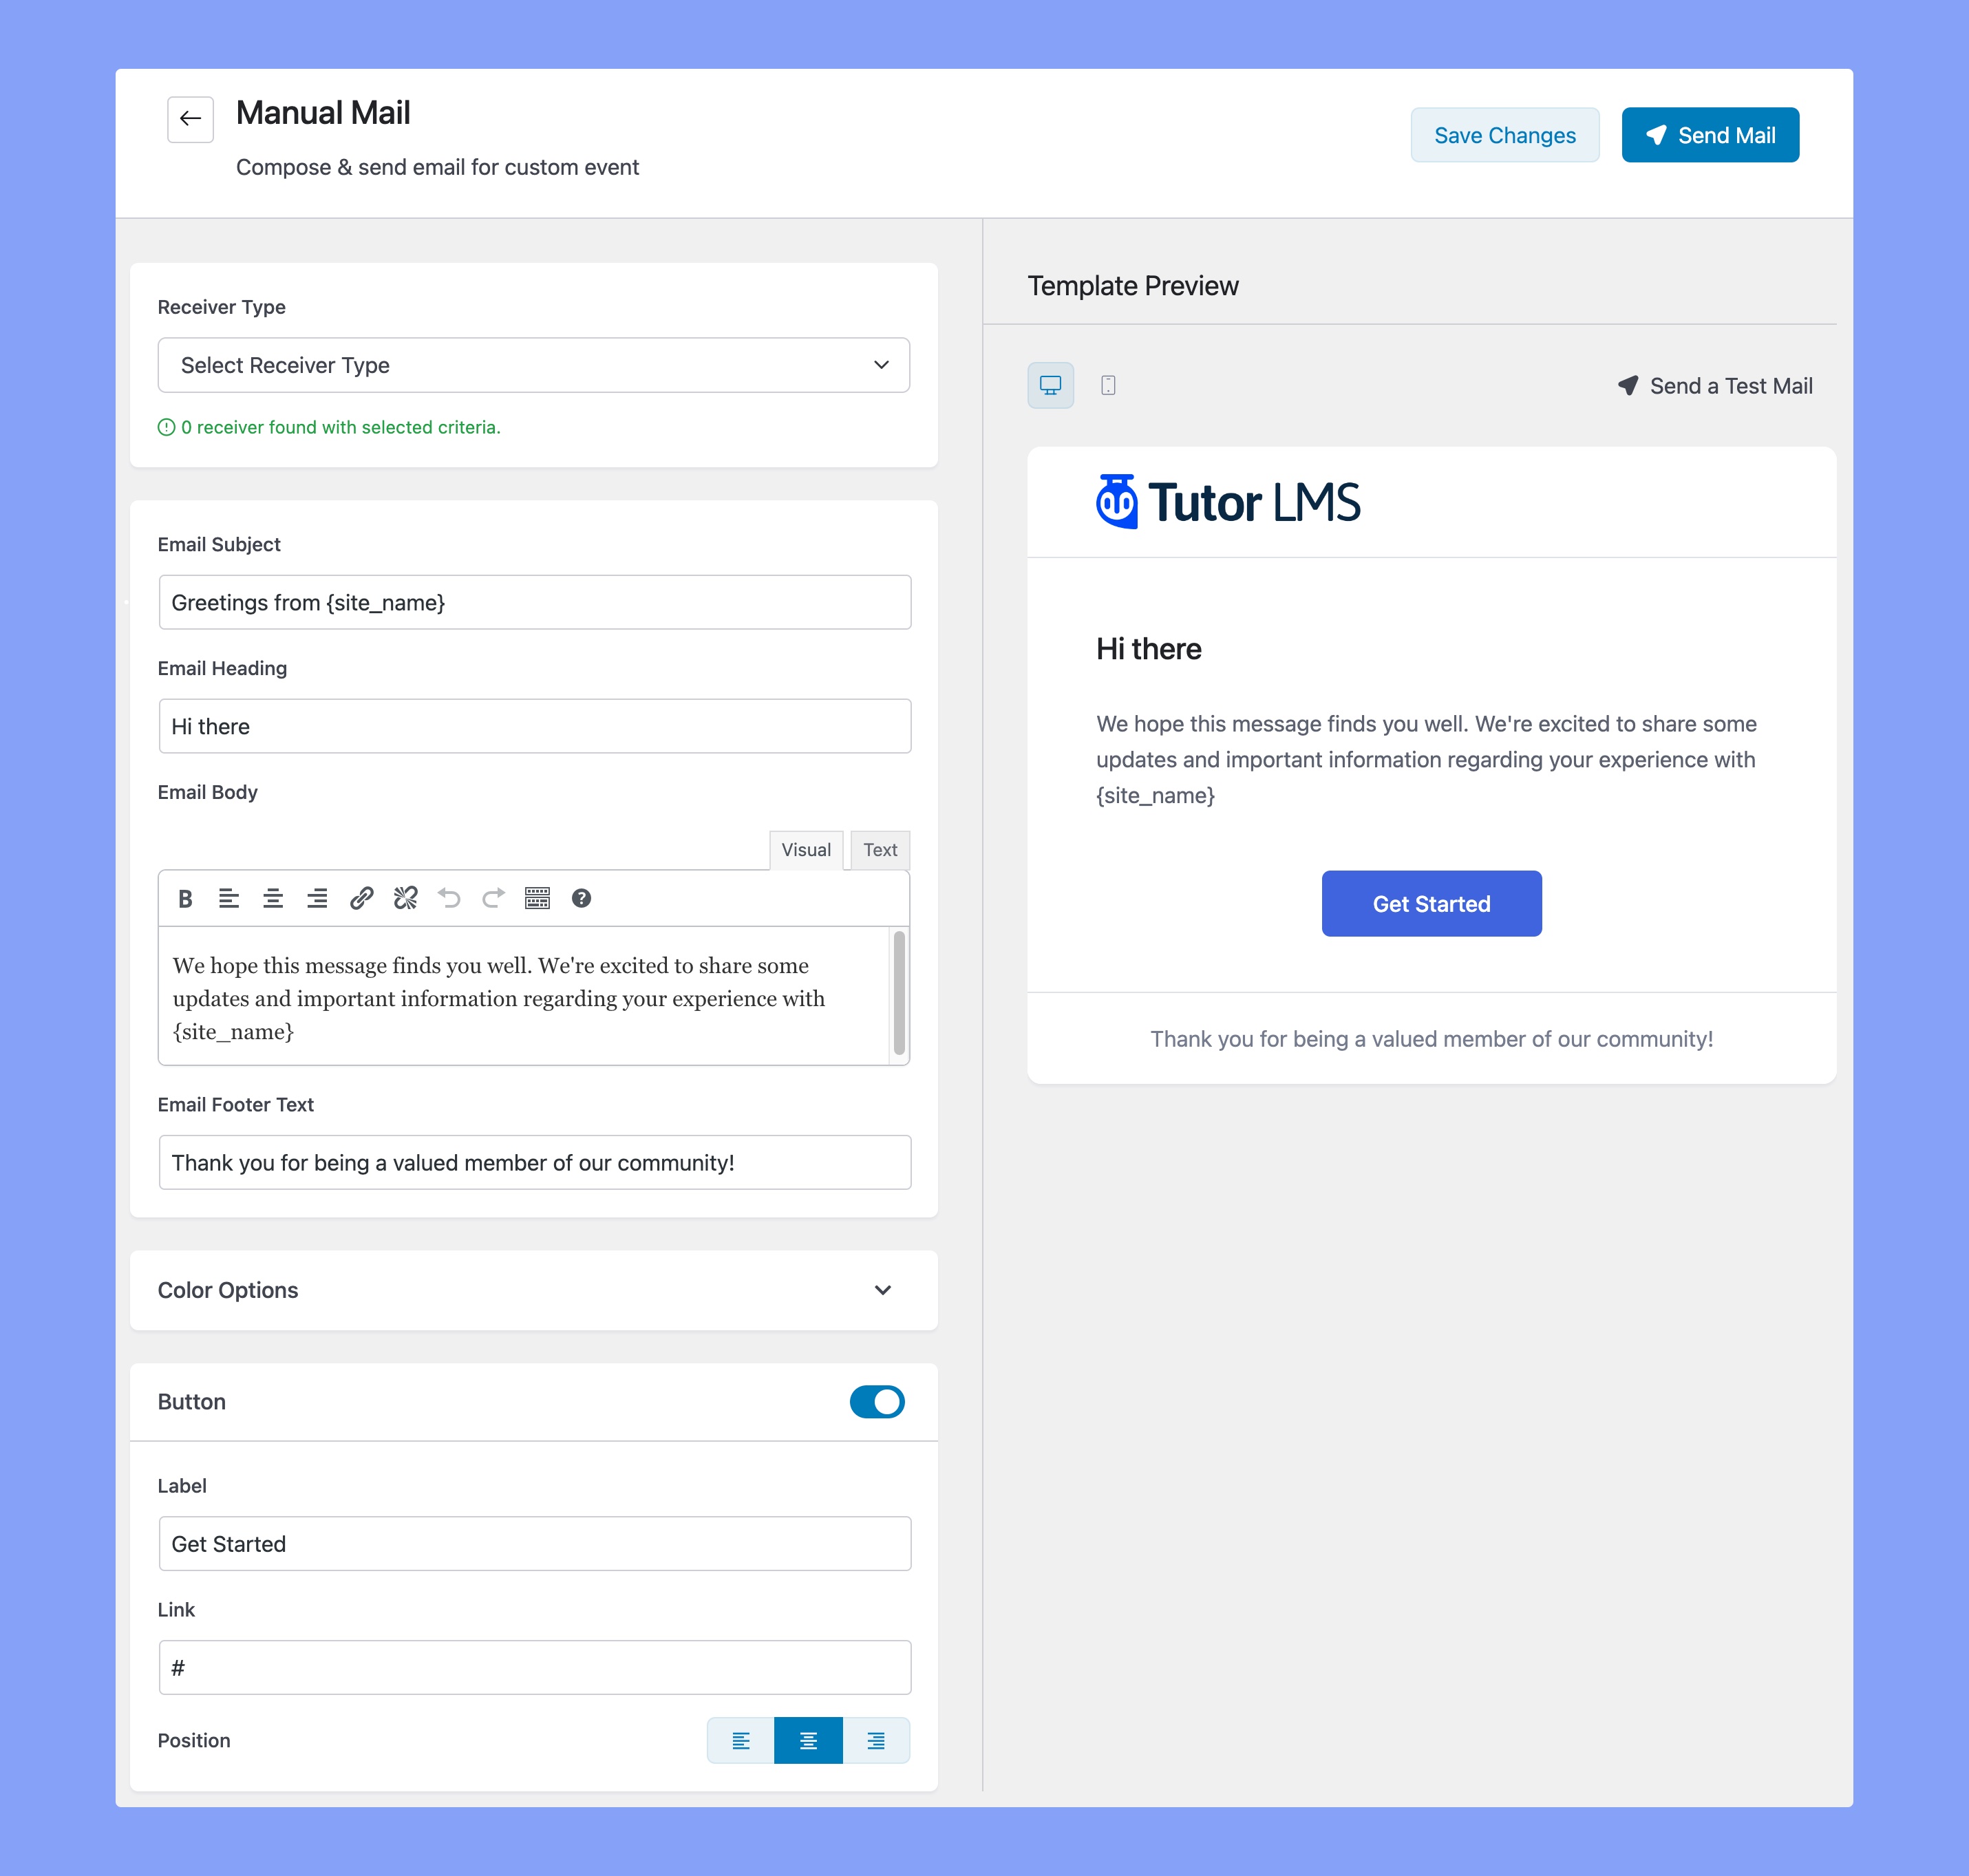
Here, you can customize multiple sections like receiver type, email section, buttons, and color options.
1. Choose Receiver Type
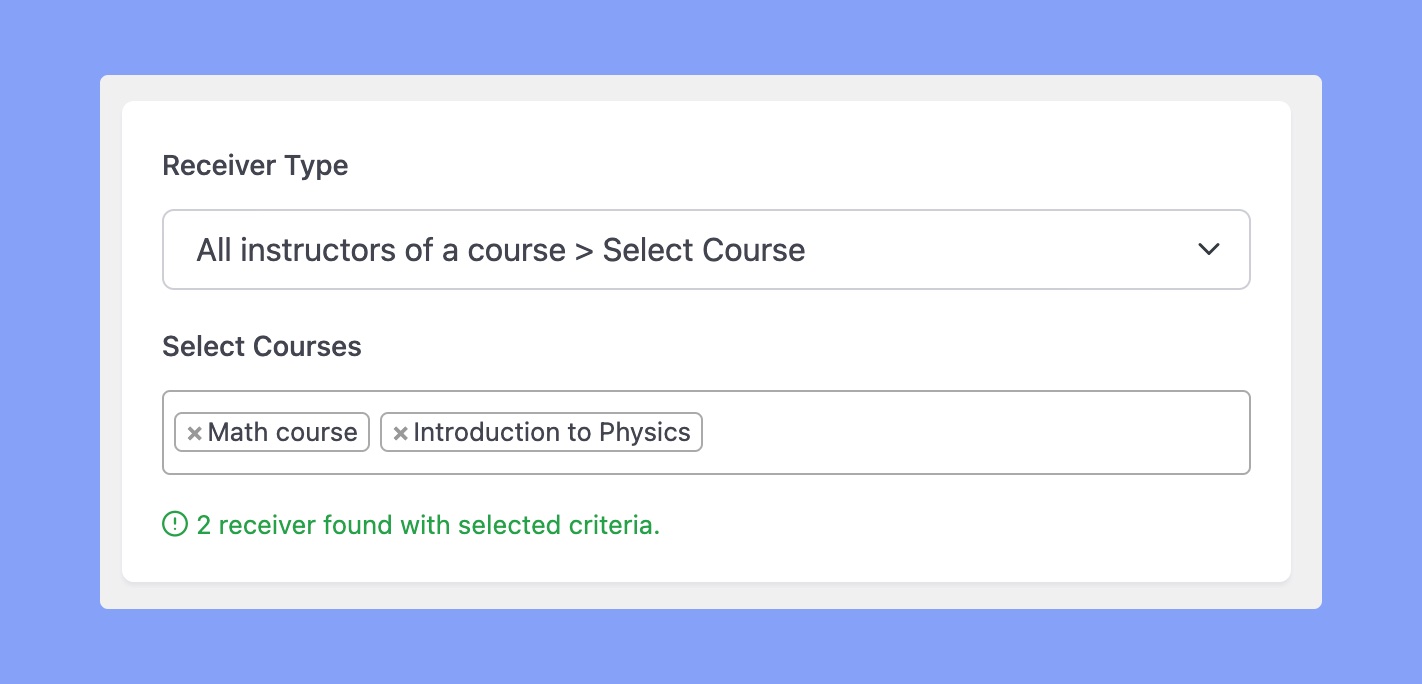
You can choose whom you want to send emails from the dropdown menu. The available options are:
- Everyone (Students, Instructors, and Admins)
- All student
- All instructor
- All Admin
- All students who completed any course
- All instructors of a course
- All instructors except selected courses
- All students of a course
- All students except selected courses
- All students who completed the selected courses
Upon selecting the recipient, Tutor LMS will display the total number of users who will receive this email.
2. Craft Your Email
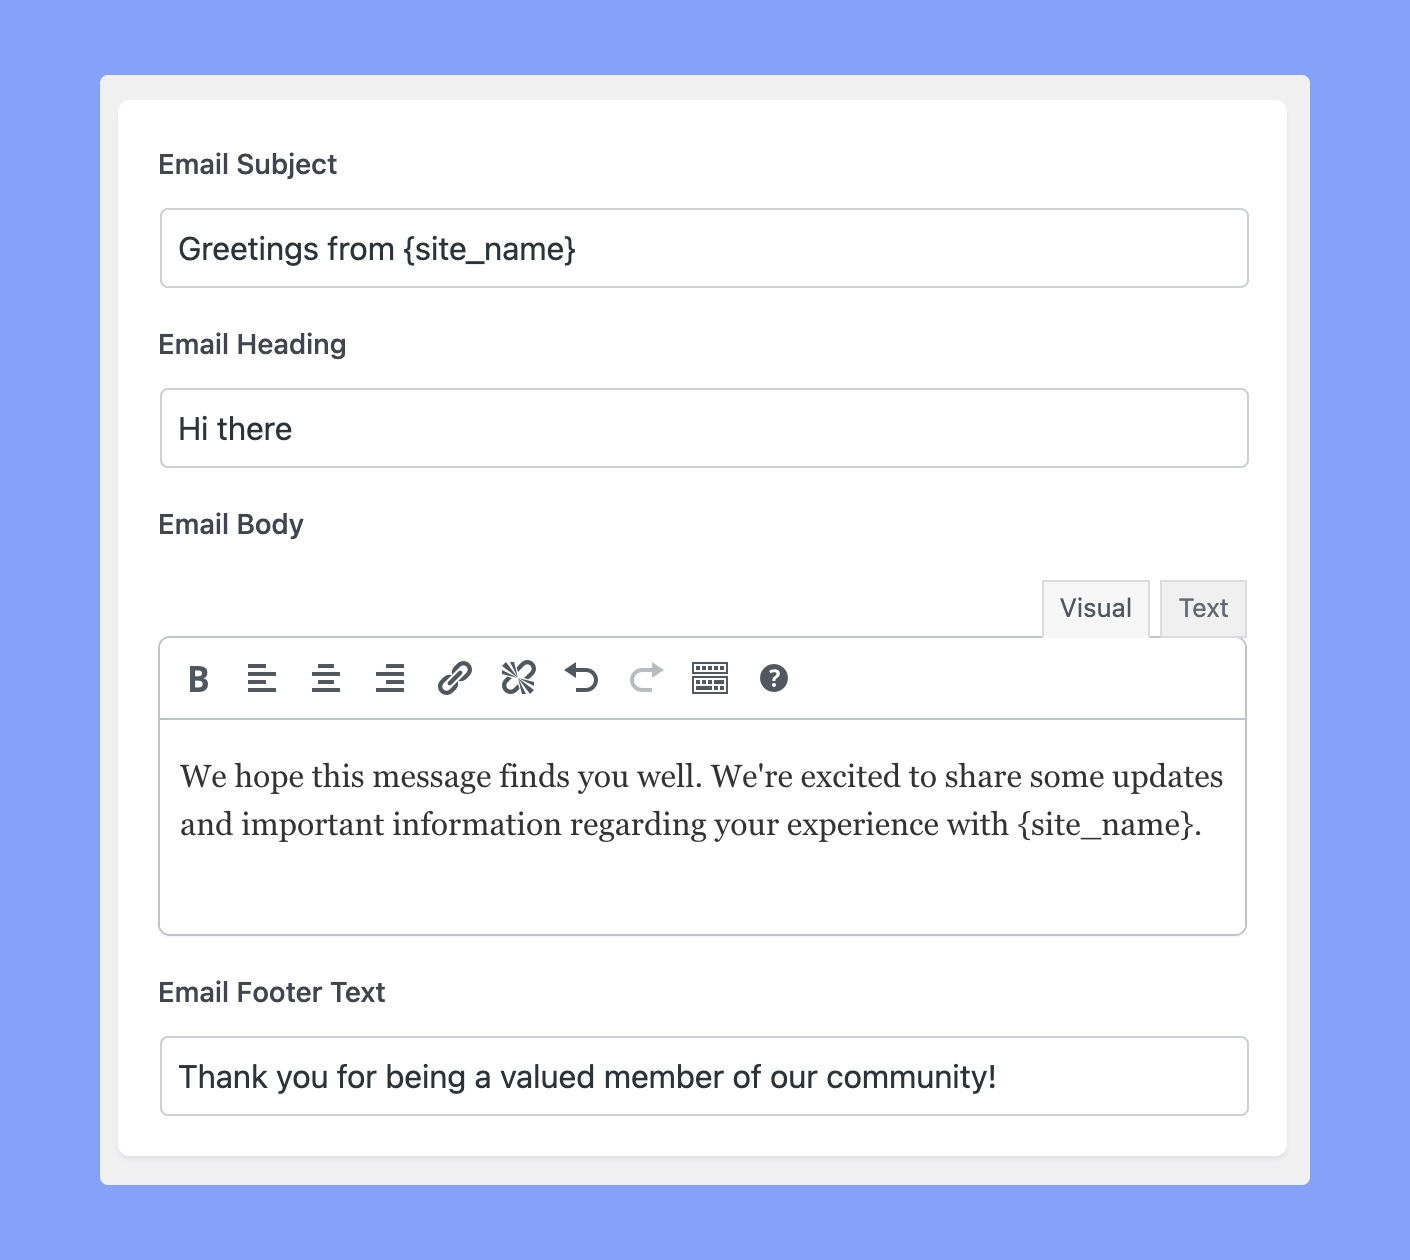
In this section, you have to craft the actual email. The available input sections are:
- Email Subject: Write a Short, concise, and compelling email subject for the users.
- Email Heading: Craft a captivating heading that sets the tone for your email.
- Email Body: Input the main content of your email in this section.
- Footer: Write any additional information or closing remarks in the footer of your email.
3. Color Settings
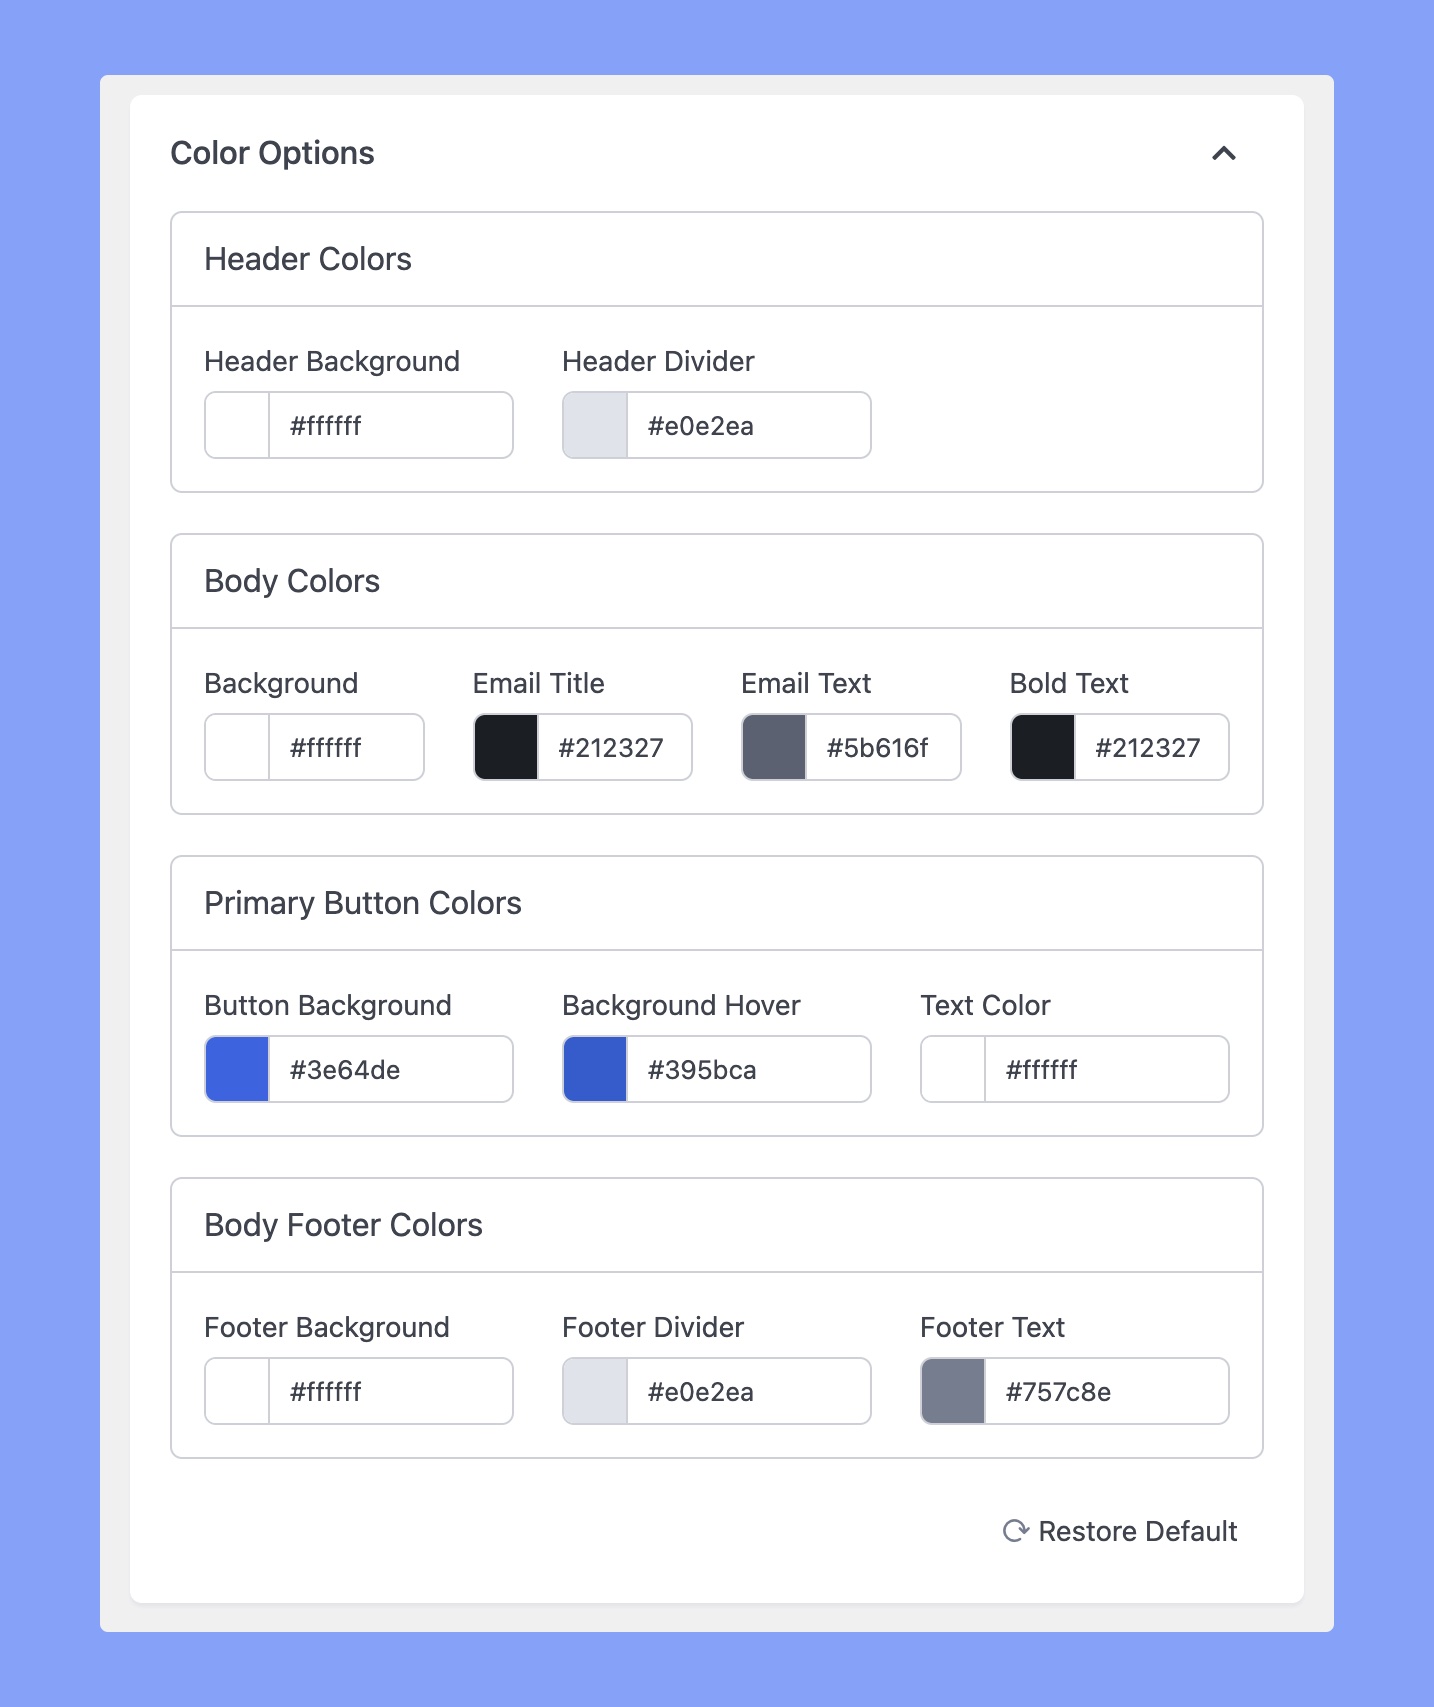
You can customize the colors for the Email header, body, button, and footer sections from here. Here are the available color customization options for the header section:
- Header Background Color: Splash a touch of brand identity onto your email header with a customized background color.
- Header Divider Color: Add a subtle color to divide the email header and body.
The following customization options for the body section:
- Body Background Color: Set the tone for your email body by selecting a background color that aligns with your brand.
- Email Title Color: Make your email titles pop by choosing a color that captures attention.
- Email Text Color: Define the color of the body text in your email for a visually appealing reading experience.
- Bold Text Color: Customize the color of bolded text to emphasize key points in your email.
Here are the available color customization options for the primary buttons:
- Button Background Color: Jazz up your CTA buttons with a vibrant background color.
- Background Hover Color: Elevate user engagement by specifying the hover color of CTA buttons.
- Button Text Color: Set your CTA buttons to speak volumes by choosing a text color that stands out.
Here are the available color customization options for the footer section:
- Footer Background Color: Wrap up your email with a personalized touch by selecting a background color for the footer.
- Footer Divider Color: Define the color of dividers in your email footer to maintain a cohesive design.
- Footer Text Color: Tailor the color of text in your email footer to align with your brand’s aesthetic.
4. Button Settings
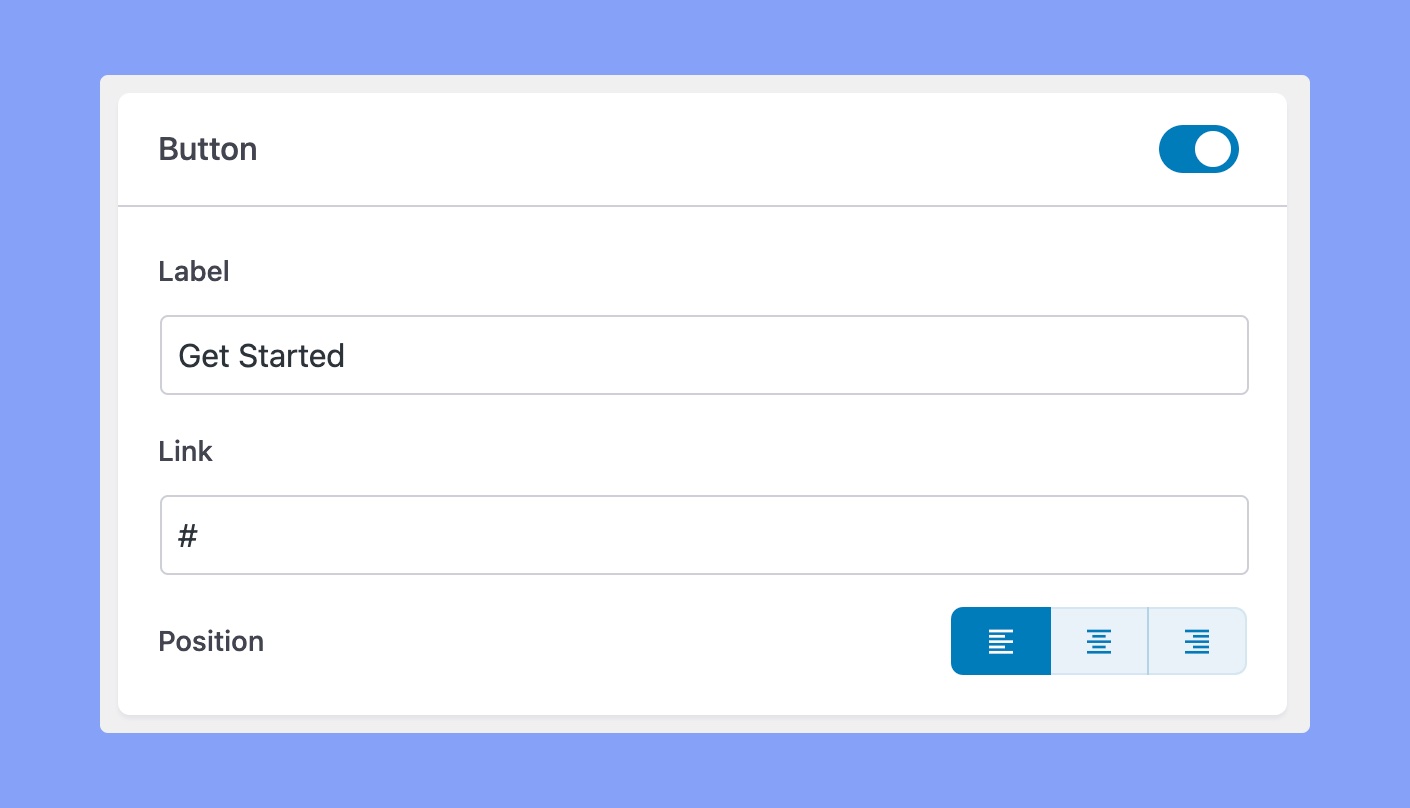
In this section, you can customize the CTA button. The available options are:
- Label: Write a compelling button text that encourages user engagement.
- Link: Specify the destination URL for your CTA button to direct the users to the desired webpage.
- Position: Set the alignment of your CTA button.
Email Template Editor
Next, you’ll find a list of Email Notification triggers that you can enable or disable depending on your needs. If you click on the Edit button located beside one of these options, it will take you to an Email Template Editor, where you can edit the email content to your liking.
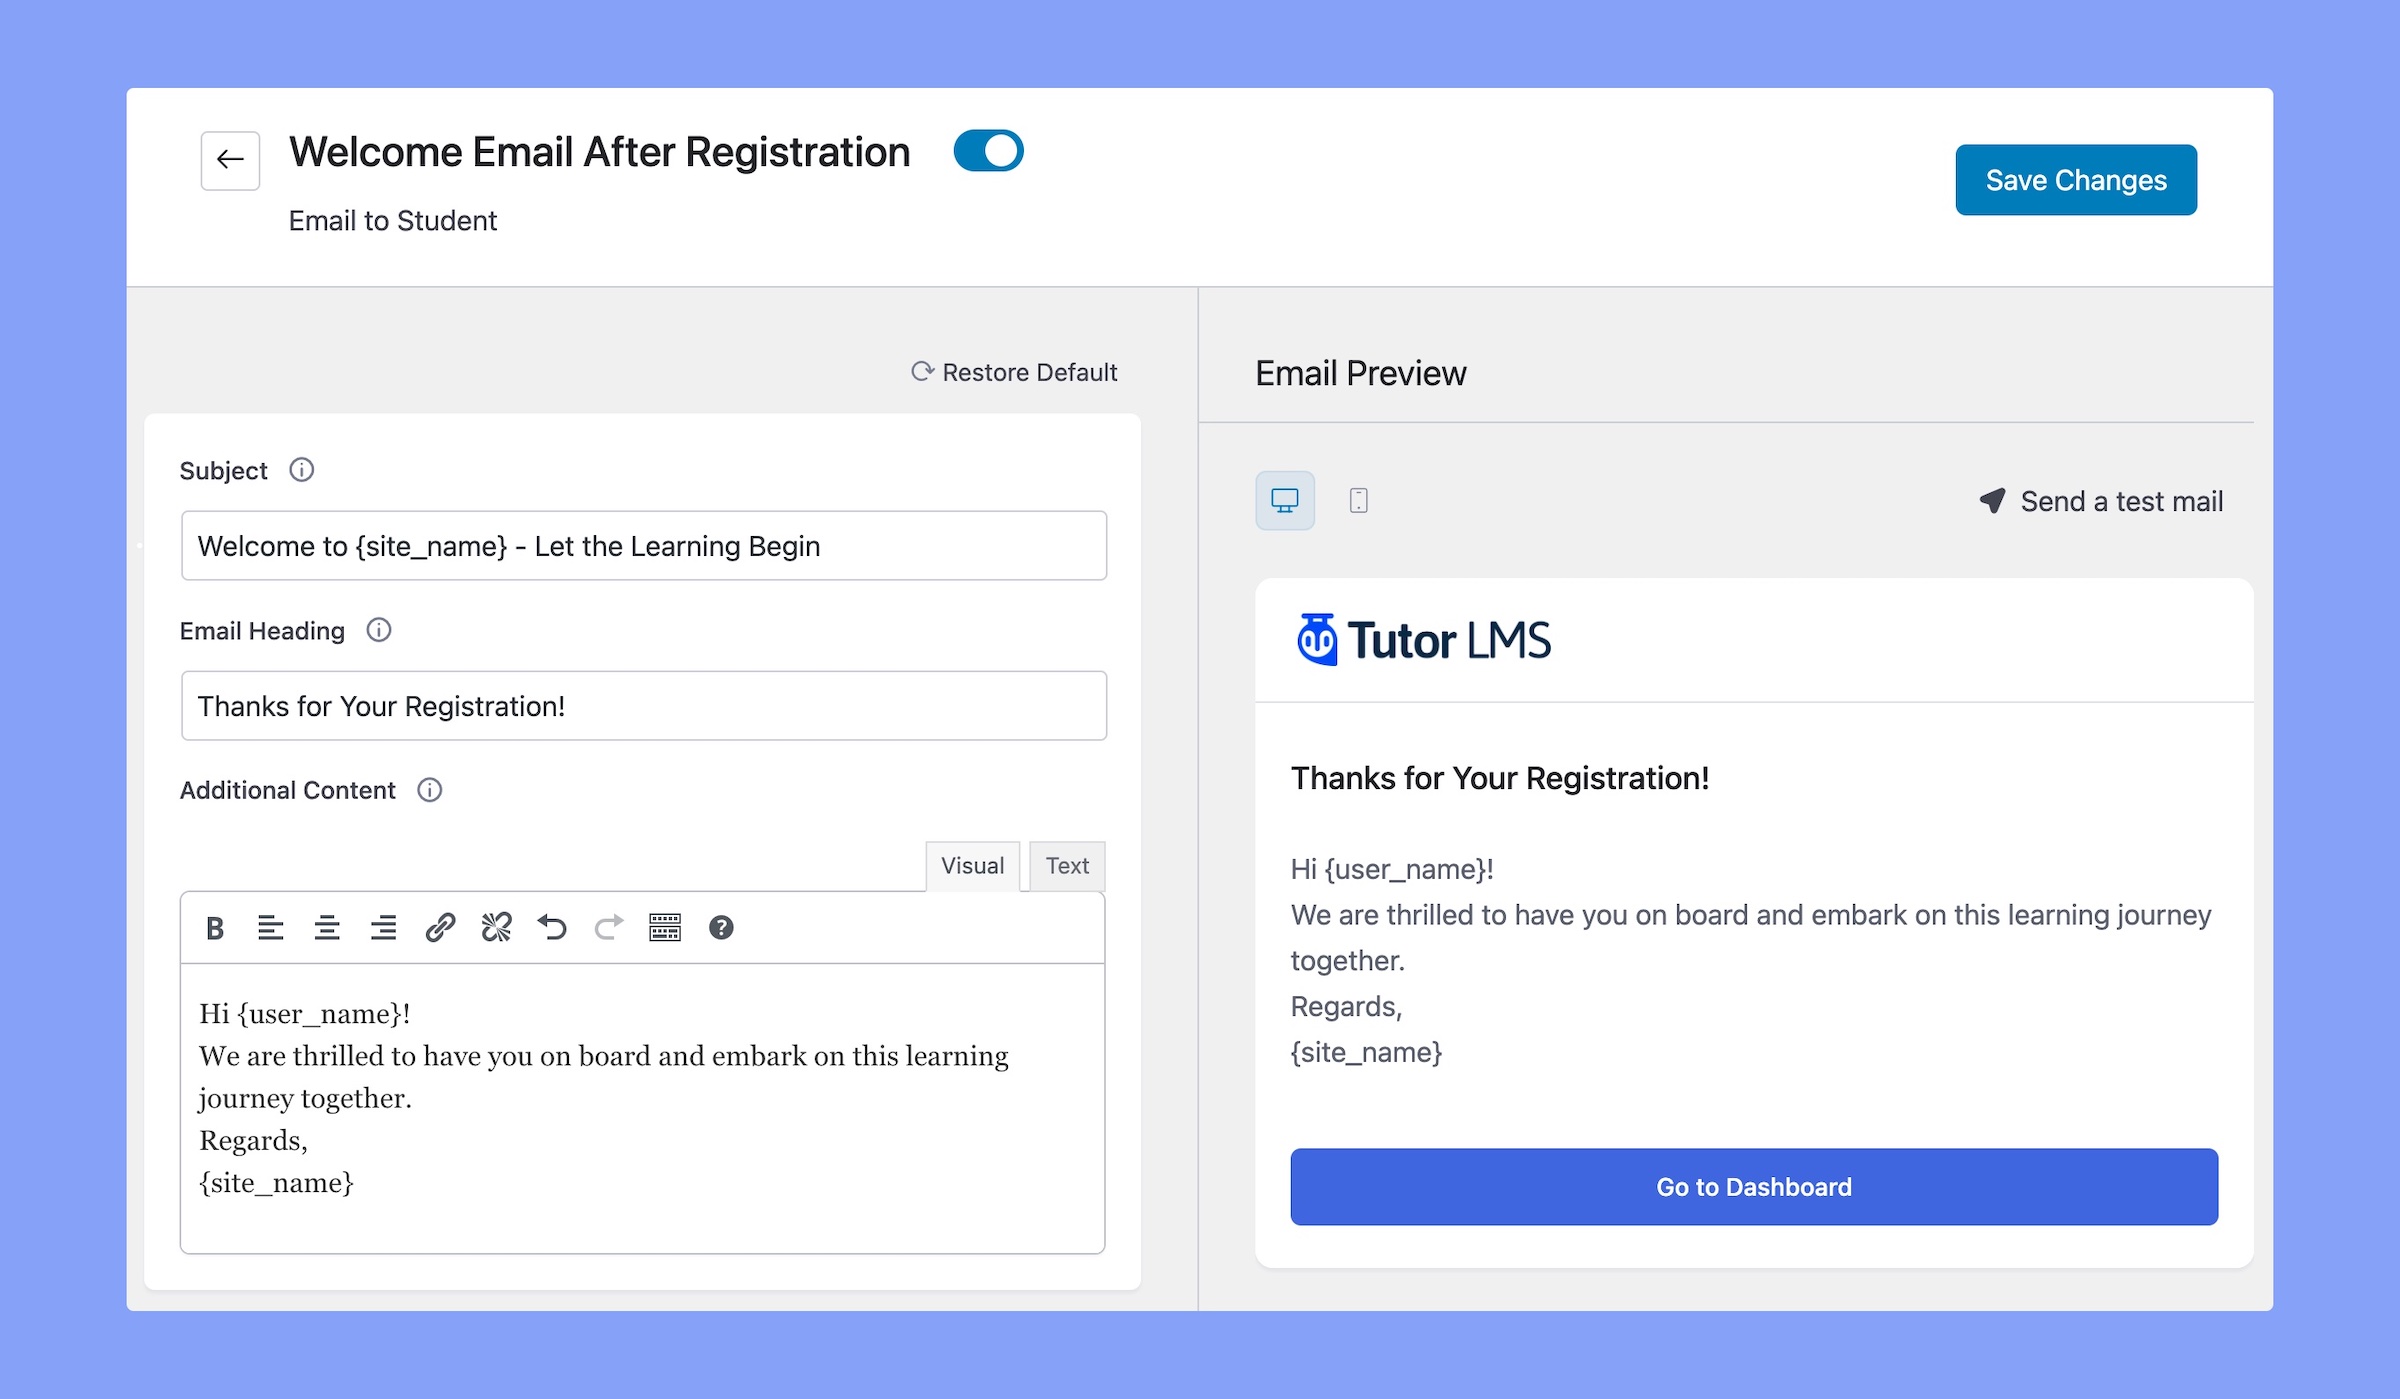
Every general Email editor comes with three different input options. These are:
- Subject: Start by entering a captivating email subject to grab your recipients’ attention right away.
- Email Heading: Create an appealing email heading that sets the tone and draws readers into your message.
- Additional Content: Compose the main content of your email in a clear and engaging manner.
However, there are some additional options to preview the email. These are:
- Template Preview: Any changes you make will be visible in the template preview section right away. This will help you visualize the content and make changes accordingly.
- Send a Test Mail: Use this button to verify your email’s delivery and preview the design changes by sending a test email. However, you must configure SMTP to send test mail to your personal email address.
- Preview Responsiveness: Click on the desktop and mobile icon to preview how your email appears on both desktop and mobile screens. It ensures the responsiveness of your email.
Students Email Triggers
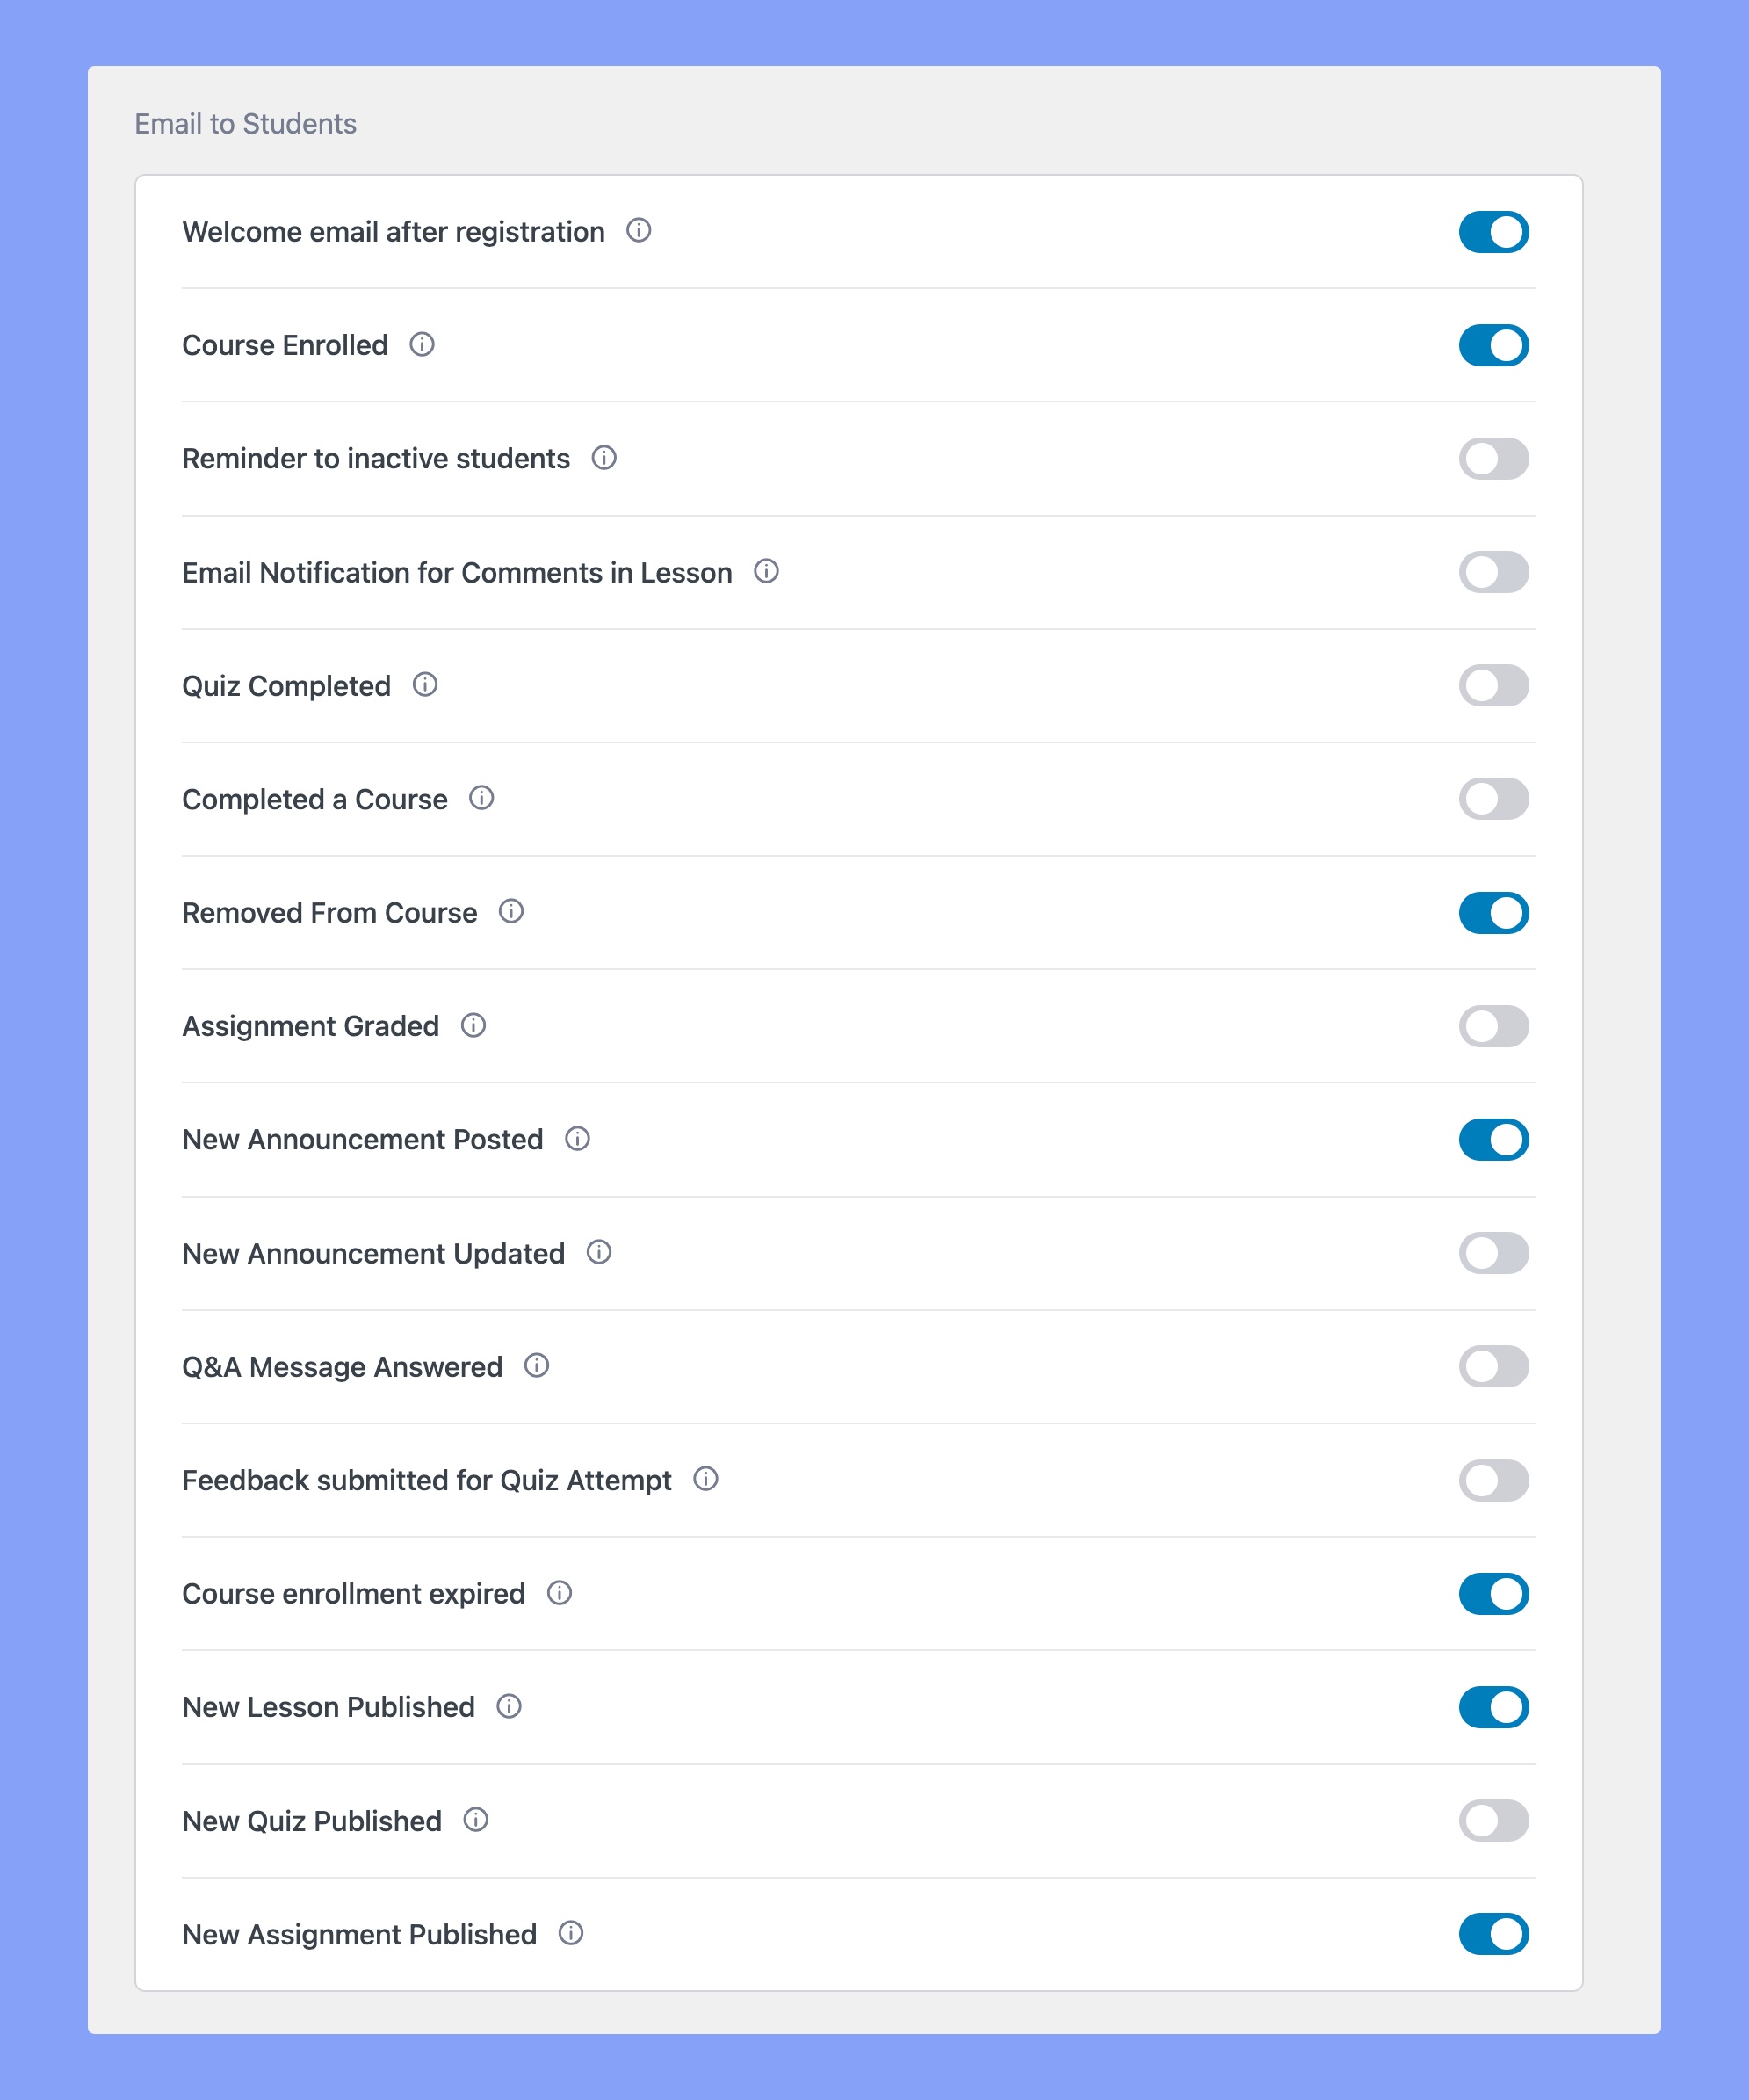
Here’s the list of the available email triggers for the students:
- Welcome Email After Registration
- Course Enrolled
- Reminder to Inactive Students
- Email Notification for Comments in Lesson
- Quiz Completed
- Completed a Course
- Removed From Course
- Assignment Graded
- New Announcement Posted
- New Announcement Updated
- Q&A Message Answered
- Feedback Submitted for Quiz Attempt
- Course Enrollment Expired
- New Lesson Published
- New Quiz Published
- New Assignment Published
Instructors Email Triggers
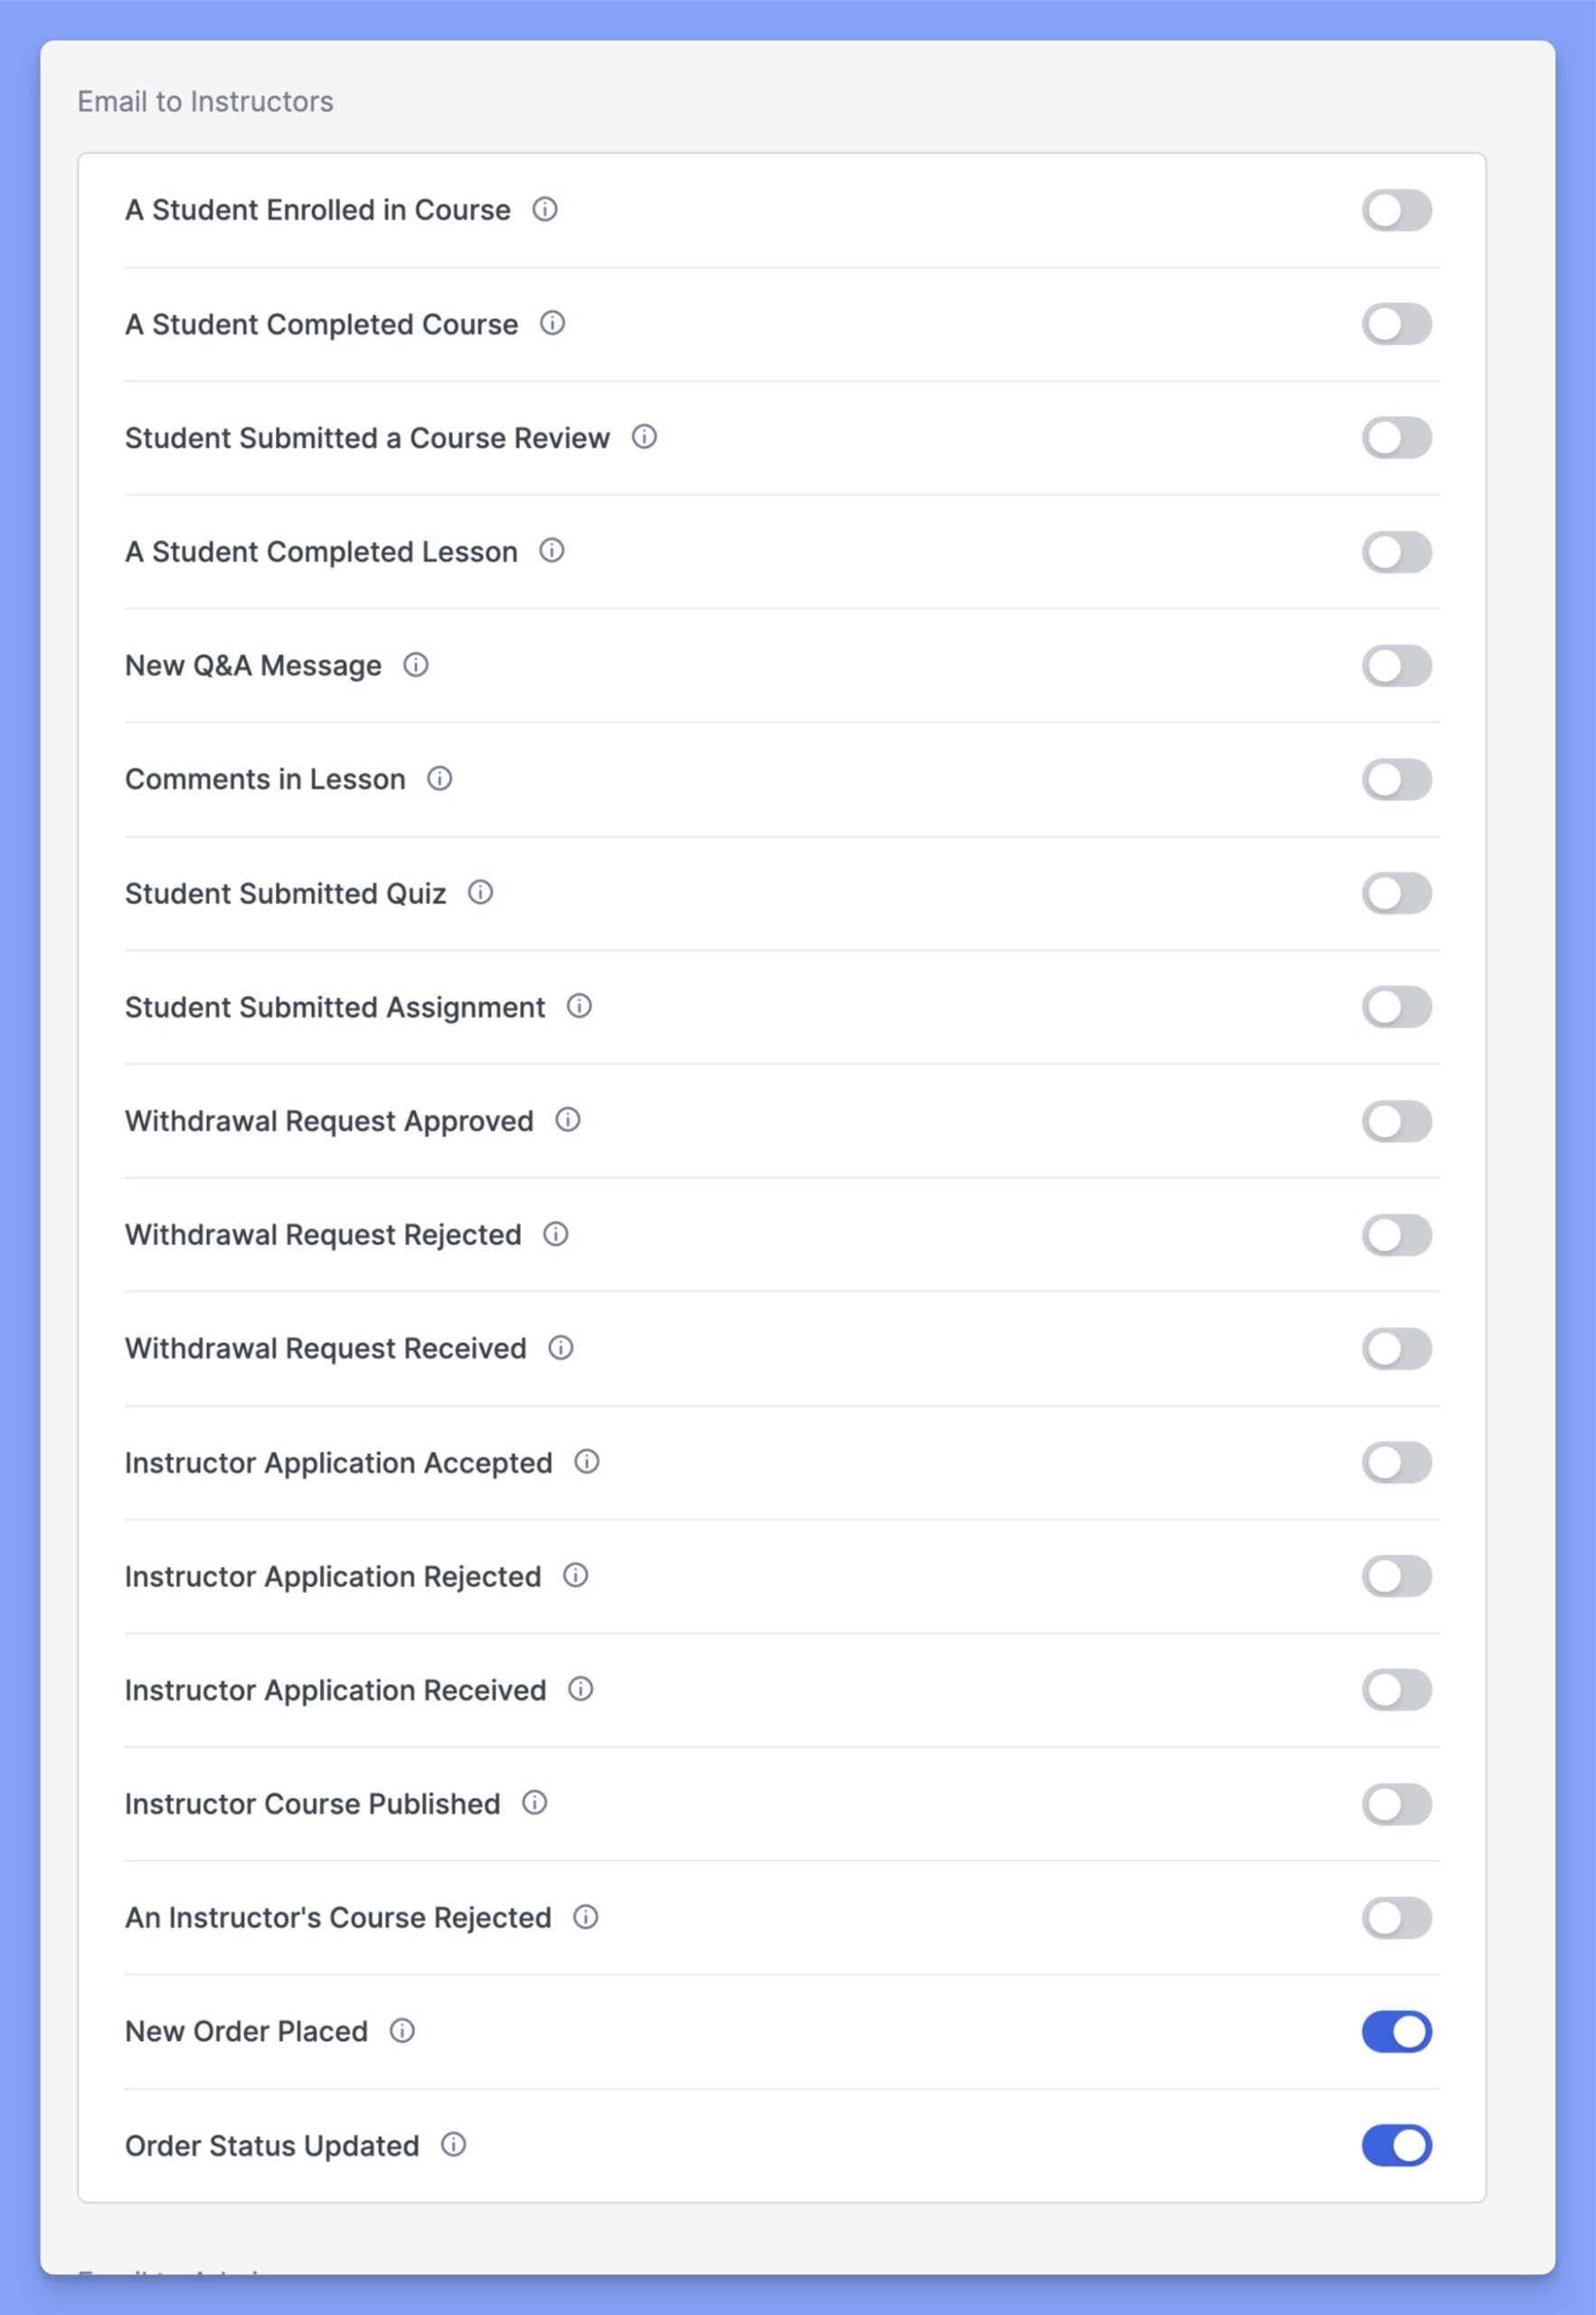
Here’s the list of the available email triggers for the instructors:
- A Student Enrolled in Course
- A Student Completed Course
- Student Submitted a Course Review
- A Student Completed Lesson
- New Q&A Message
- Email Notification for Comments in Lesson
- Student Submitted Quiz
- Student Submitted Assignment
- Withdrawal Request Approved
- Withdrawal Request Rejected
- Withdrawal Request Received
- Instructor Application Accepted
- Instructor Application Rejected
- Instructor Application Received
- Instructor Course Published
- An Instructor’s Course Rejected
- New Order Placed
- Order Status Updated
Admin Email Triggers
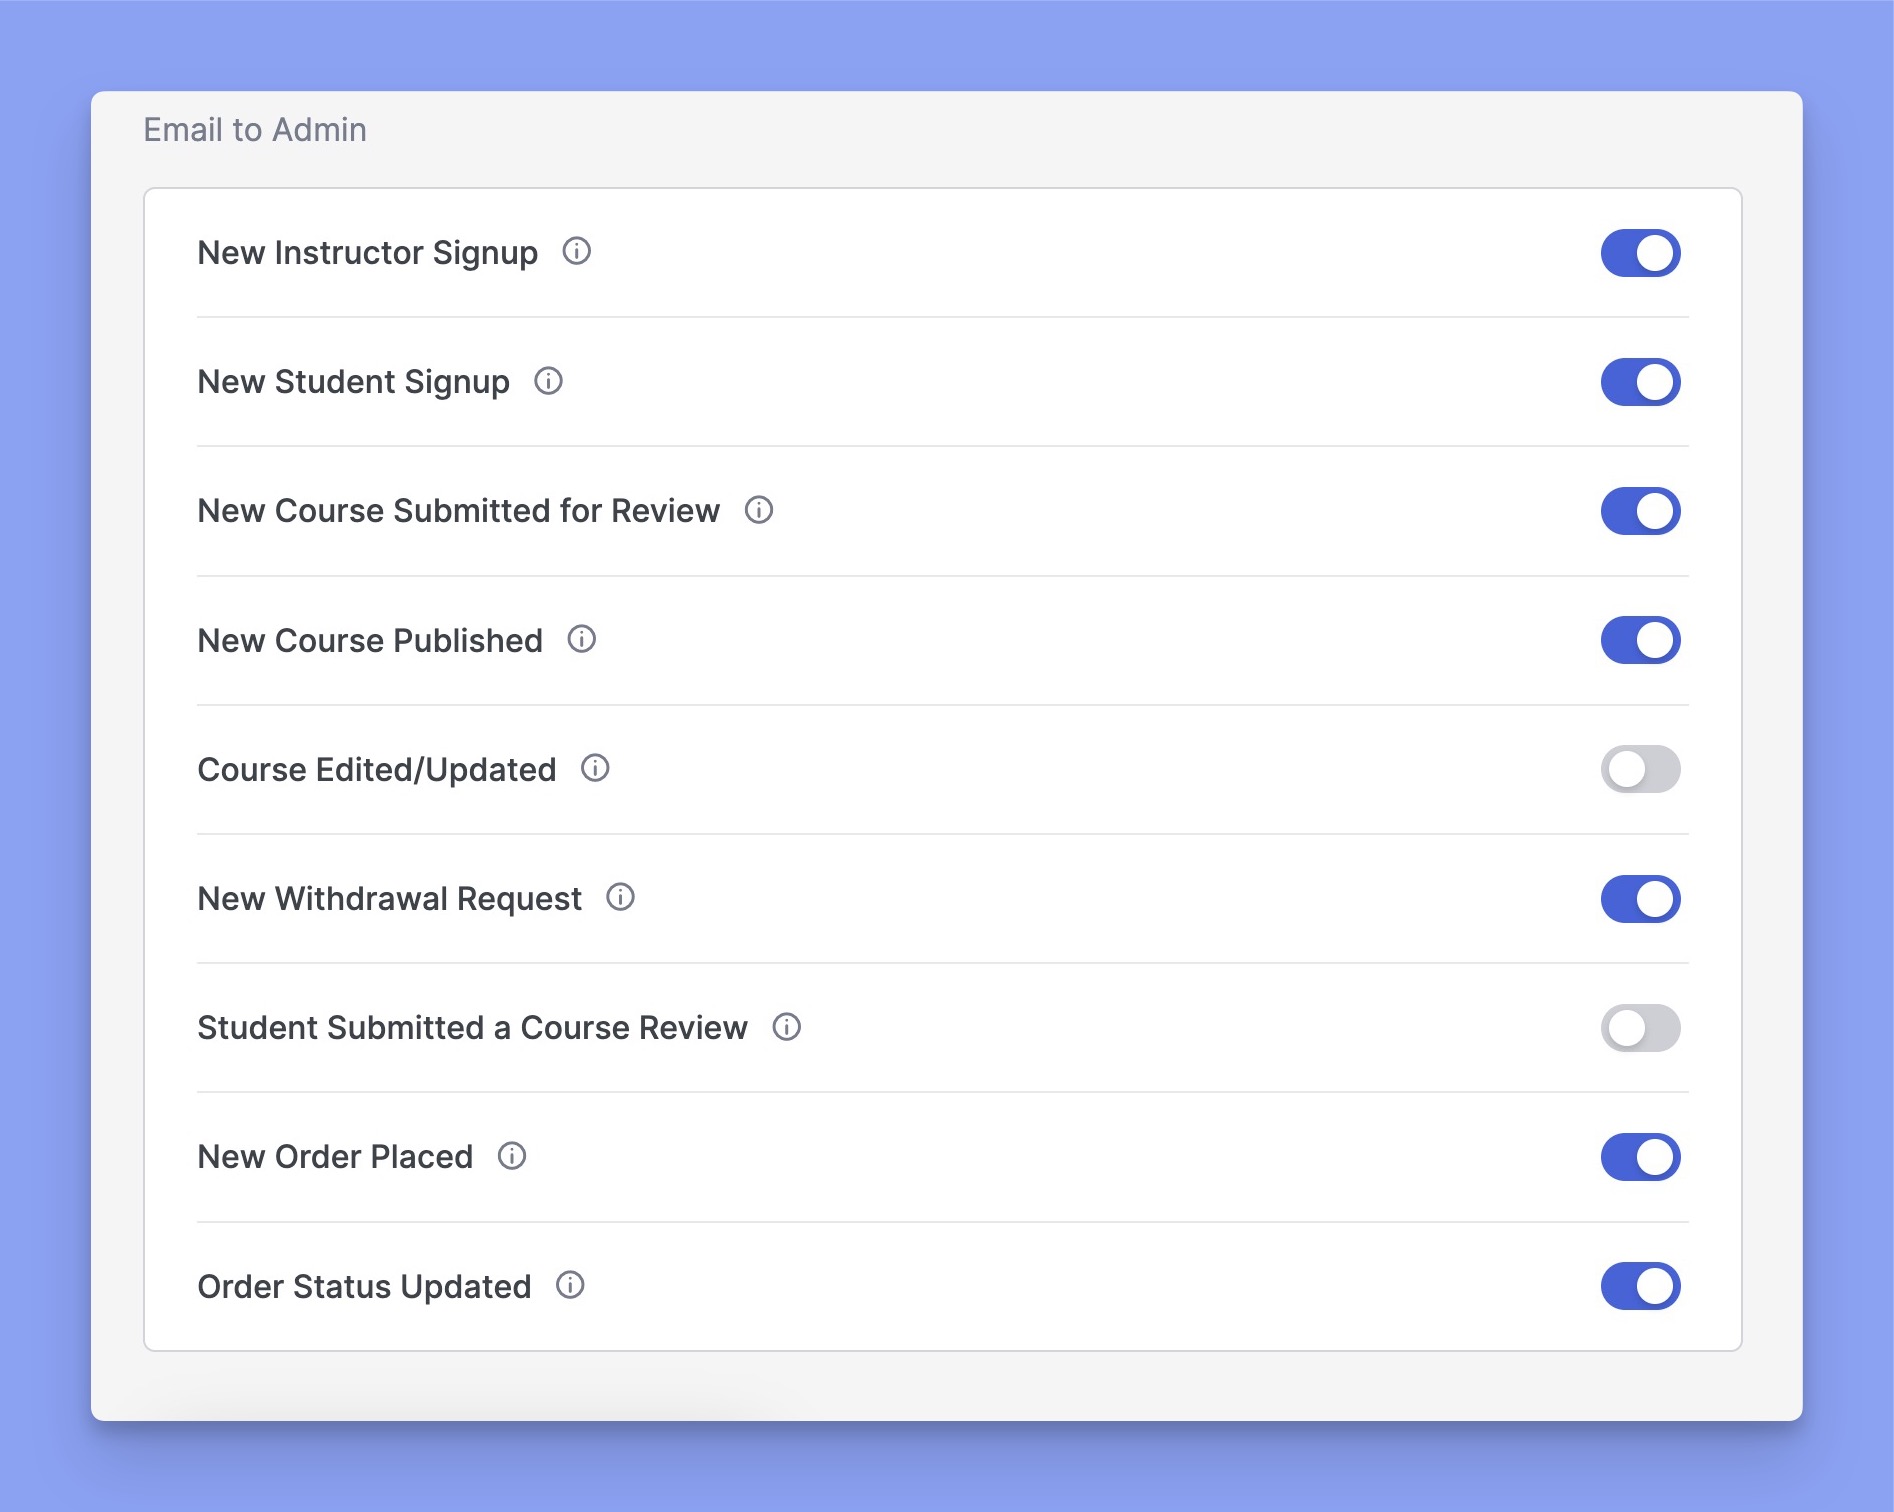
Here’s the list of the available email triggers for the admin:
- New Instructor Signup
- New Student Signup
- New Course Submitted for Review
- New Course Published
- Course Edited/Updated
- New Withdrawal Request
- Student Submitted a Course Review
- New Order Placed
- Order Status Updated
Email Cron Settings
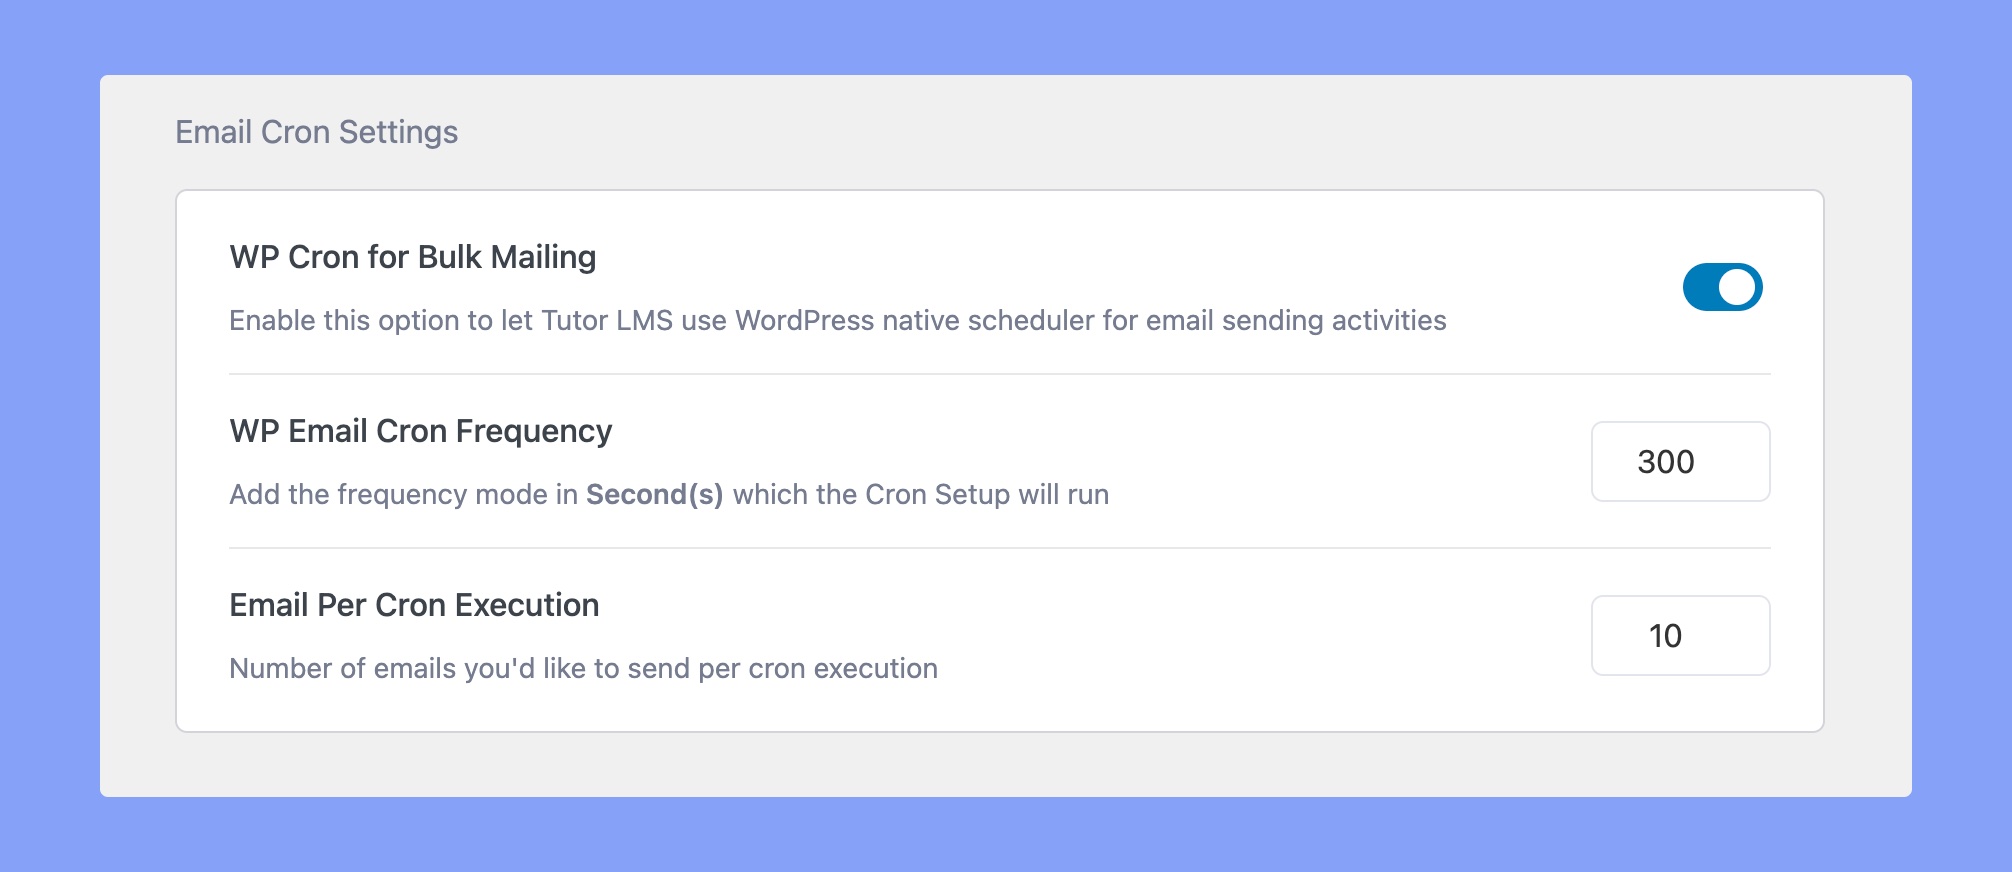
- WP Cron for Bulk Mailing: Enable this option to let Tutor LMS use the WordPress native scheduler for email-sending activities. Enabling this is essential for sending email notifications.
- WP Email Cron Frequency: Add the frequency mode in seconds (s) in which the Cron Setup will run. (Example: 5 Mins = 300 Seconds)
- Email Per Cron Execution: Set the number of emails you’d like to send per cron execution.
