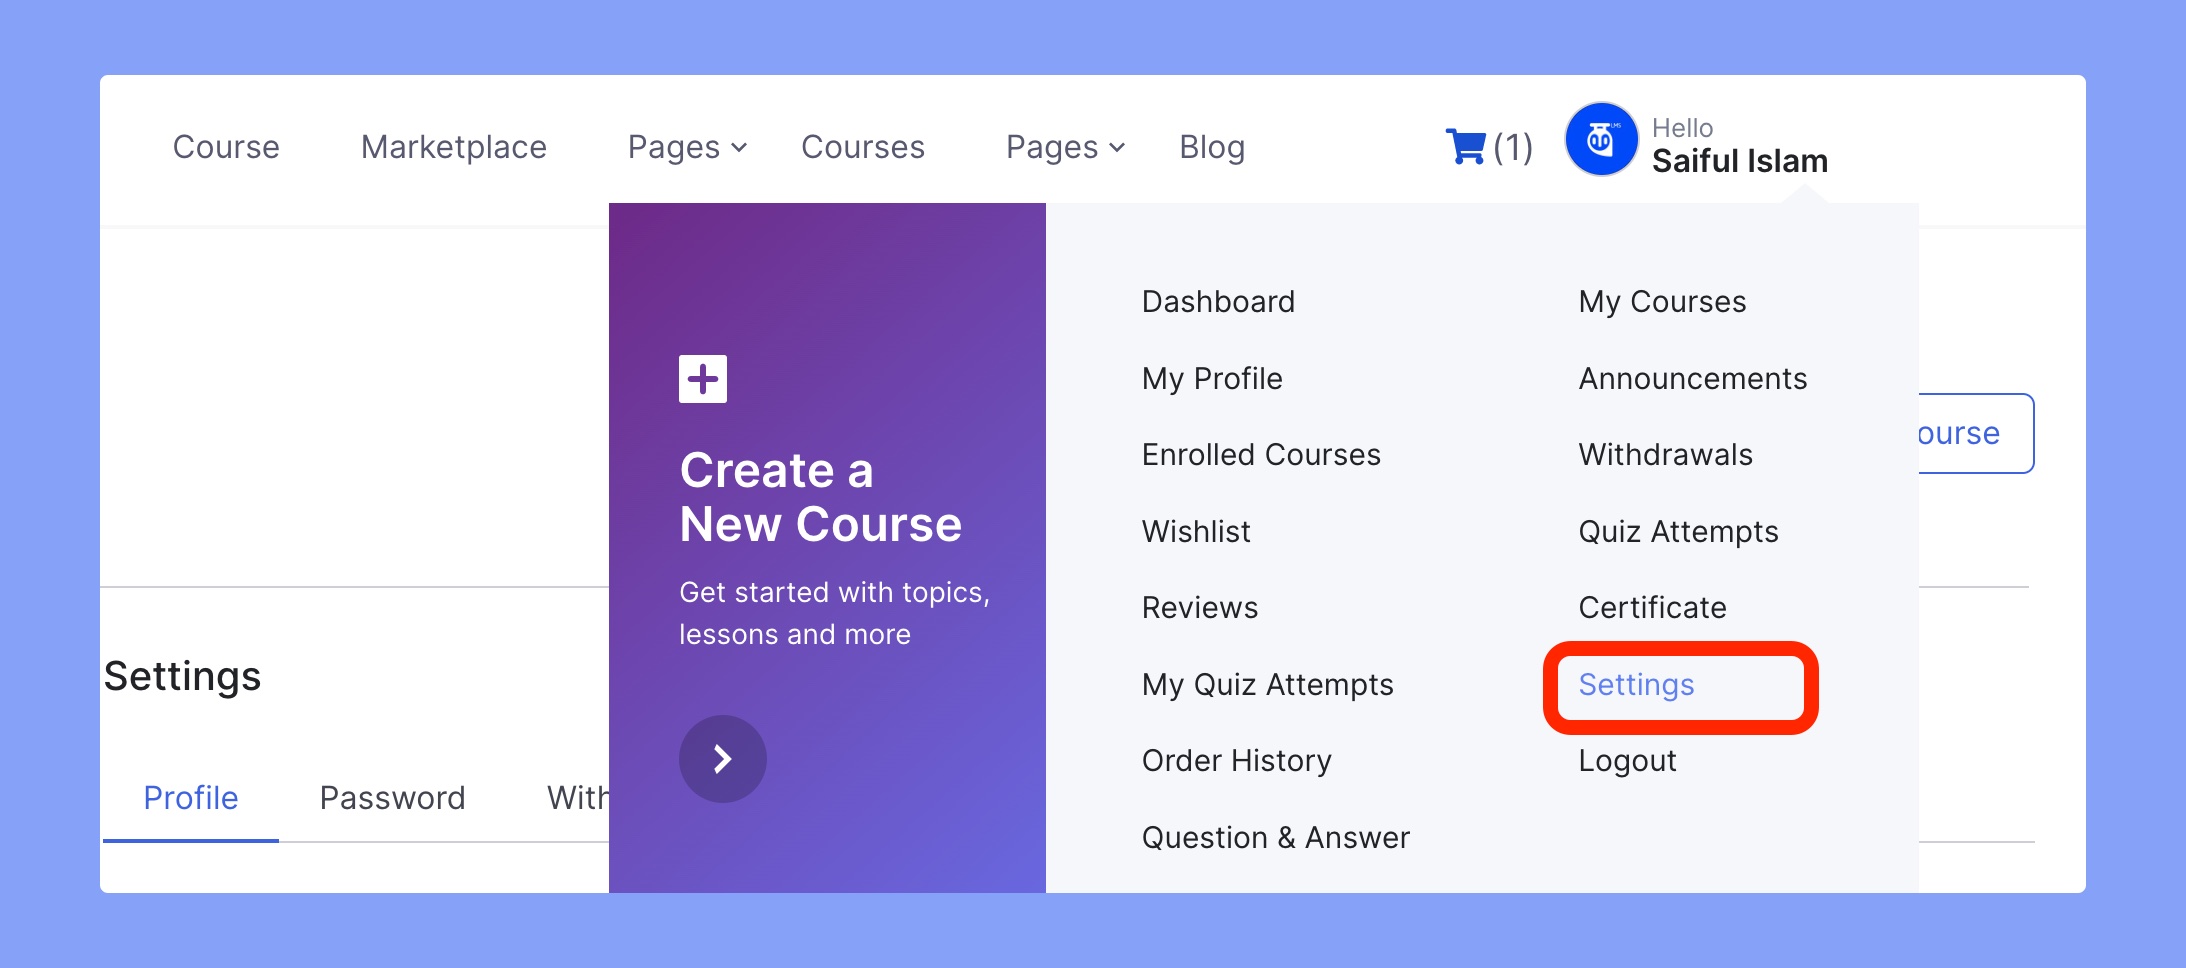
Instructors have complete control to customize their profile dashboard from the frontend dashboard. In order to access the profile settings, you have to hover on the Navbar Profile Icon and then select Settings (Frontend dashboard → Settings) from there.
Profile
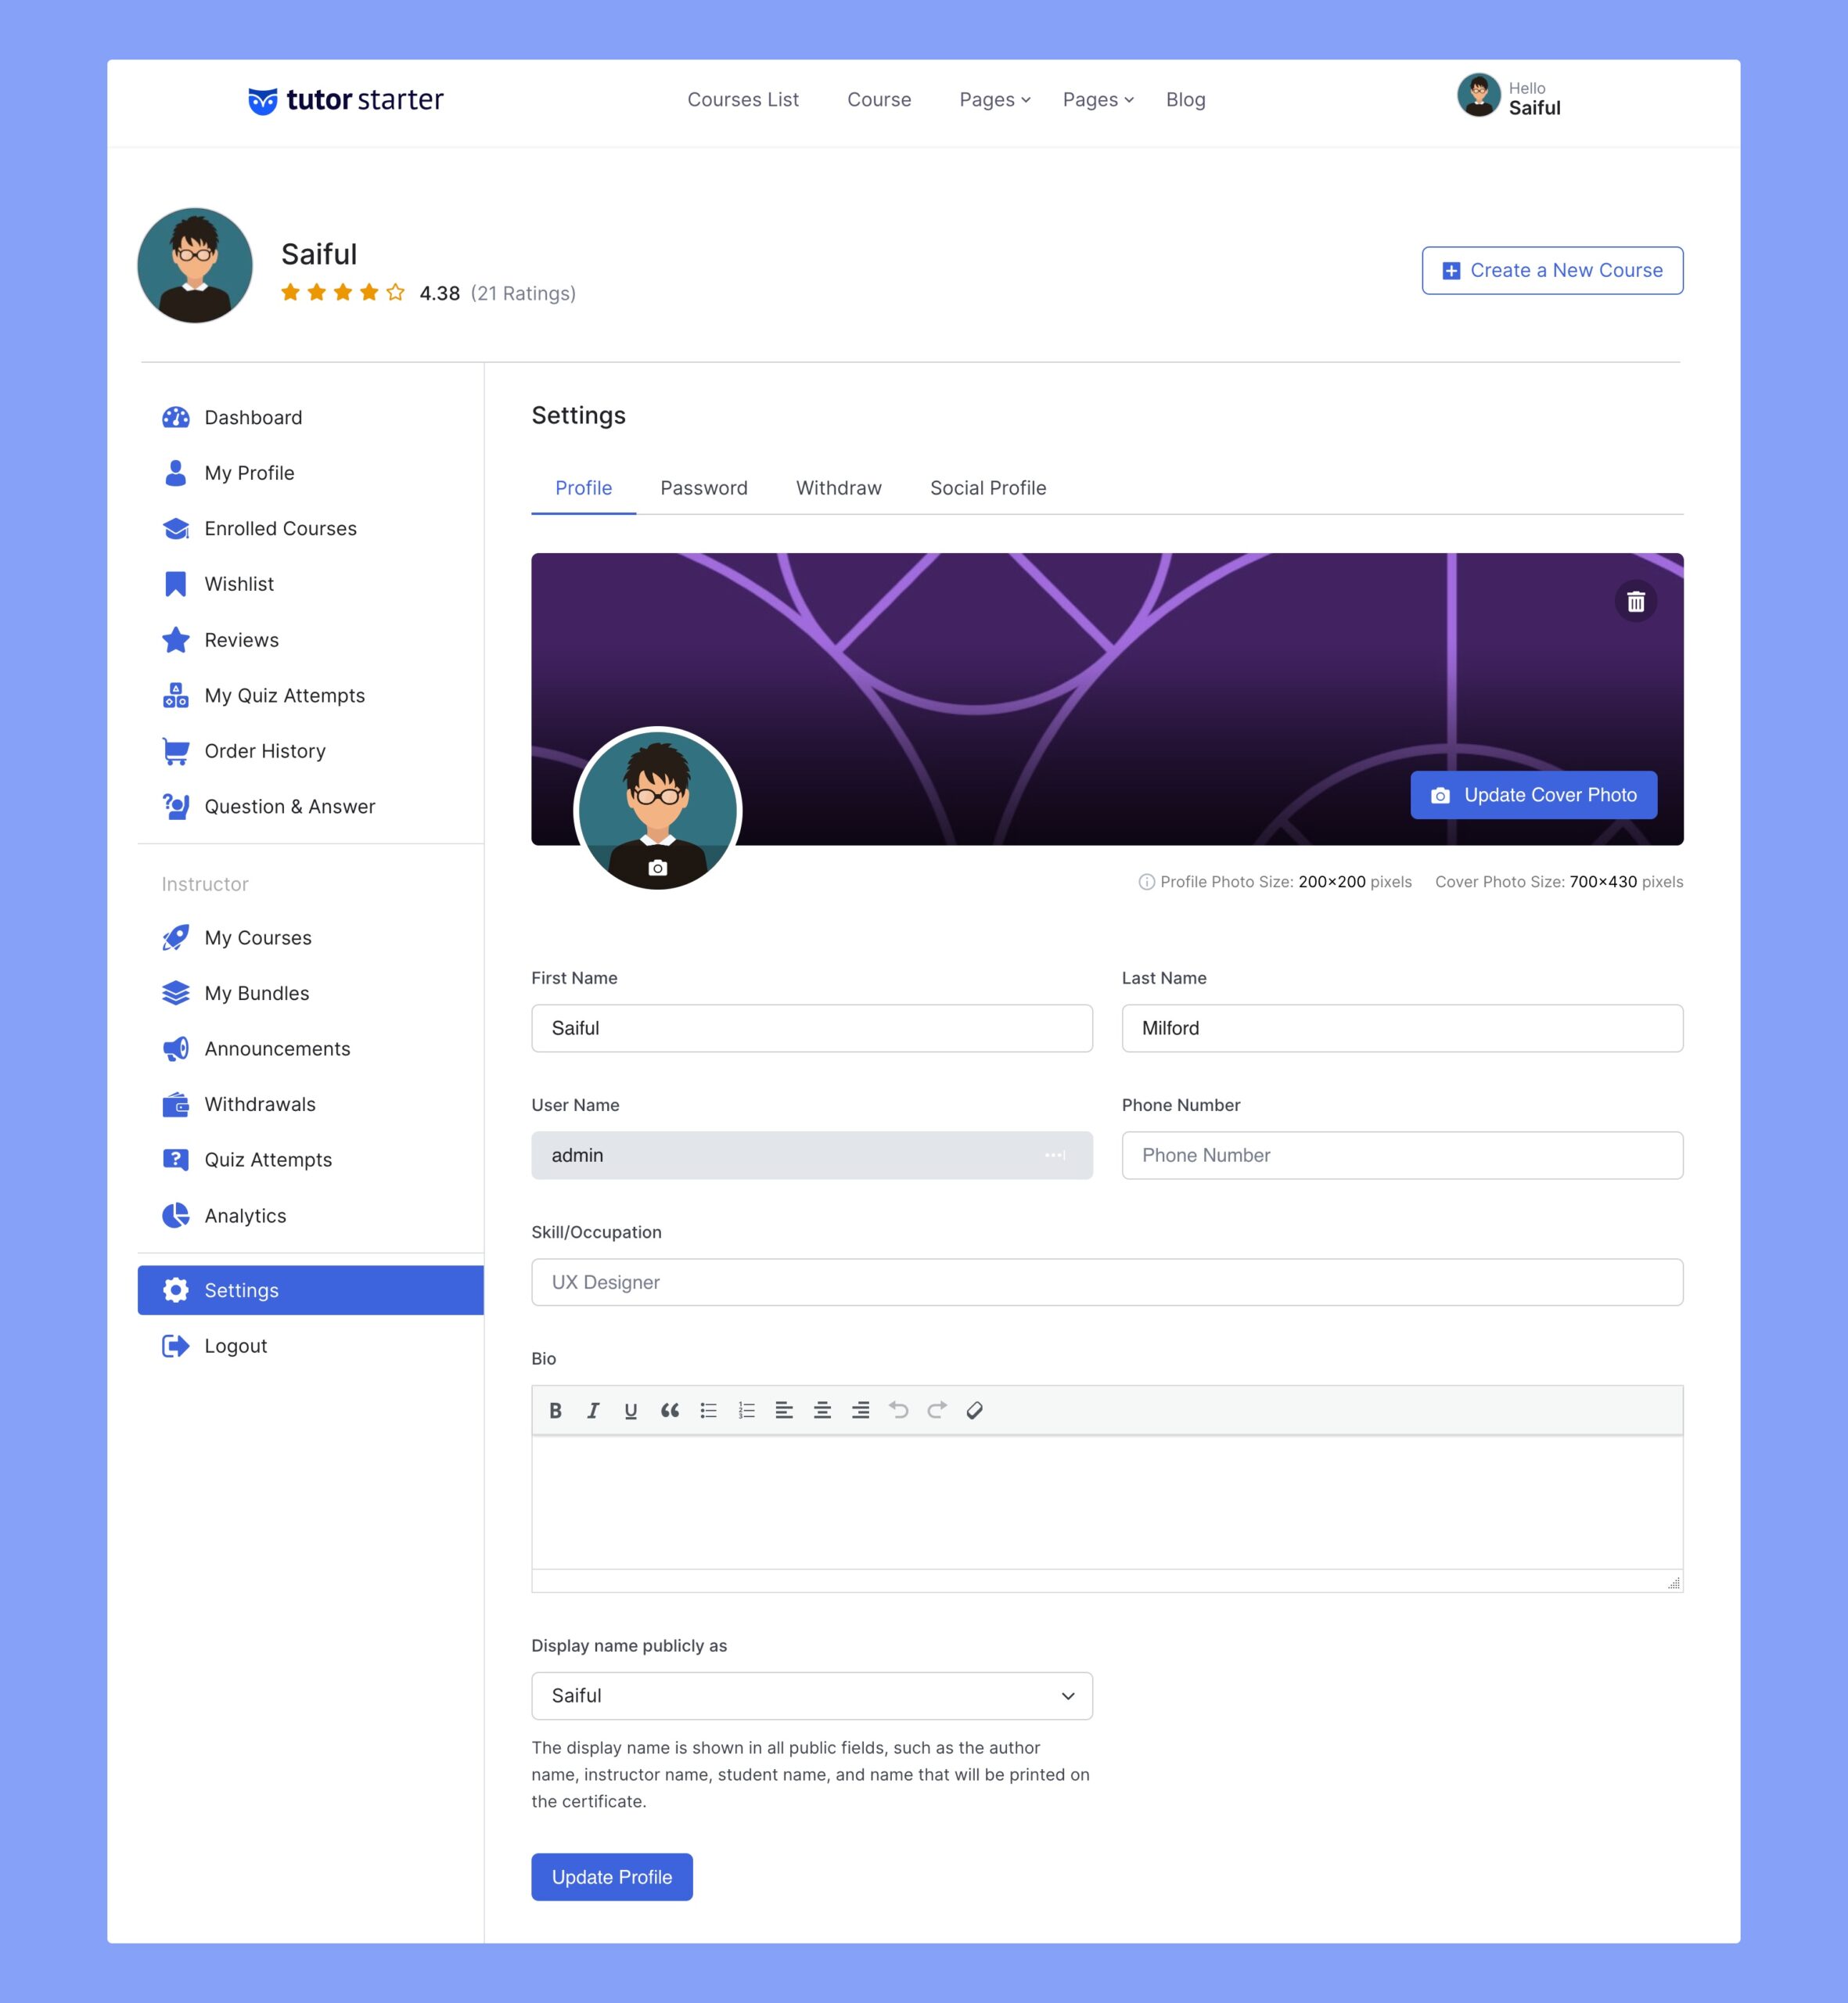
Here, you’ll find fields for the following information which you can change to your heart’s content:
Public Cover Picture: Upload a Cover Photo for your profile that will be seen by other users when they visit it. Reccomended size is 700 X 430 pixels.
Profile Picture: Upload a Profile Picture to help make your profile more identifiable. A Profile Picture’s size should be maximum 200 X 200 pixels.
First Name: Define your first name in this field.
Last Name: Set your last name in this field.
User Name: This is where you’ll be able to see your user name. This is the only field that is not editable from here.
Phone Number: Set a phone number that others can use to contact you.
Skill/Occupation: Add your skill or occupation in this field.
Bio: Your bio is a short summary that defines your persona and teaching approach. You can share information about your qualifications, experience, and capabilities, showcase your certifications, and more. Utilize the WP Editor to format and style your text to create a compelling bio.
Display name publicly as: The display name is shown in all public fields, such as the author name, instructor name, student name, and name that will be printed on the certificate. You can set anything from the username, first name, last name, full name, etc.
Certificate Signature: Set a signature that you want to show on the certificate that you distribute to the students. There are some general guidelines that you must abide by while uploading the image of the signature.
- Signature image size: 700×430 pixels;
- Supported file formats and guidelines: jpg, jpeg, gif, or png, and add no text on the image.
Password
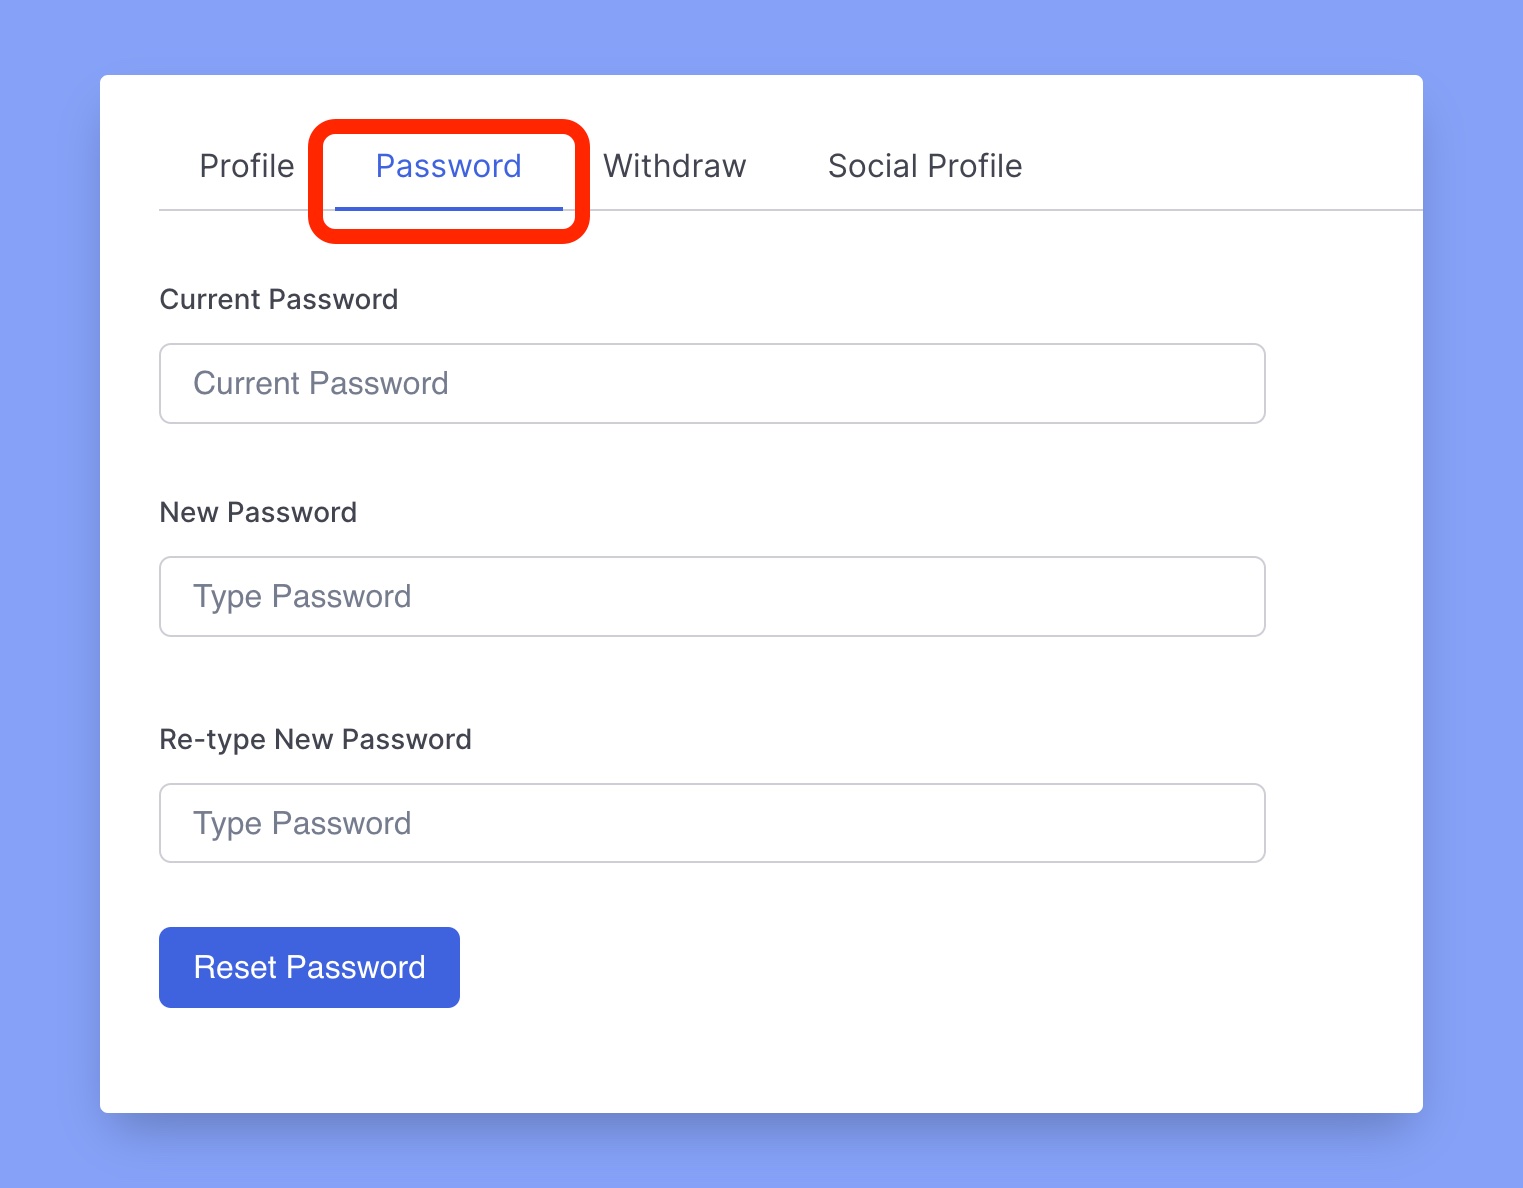
Instructors can change their profile password from this page. Here, instructors’ have to input only three values:
Current Password: Enter your current login password.
New Password: Enter the new password.
Re-type New Password: Re-type the new password.
Withdraw
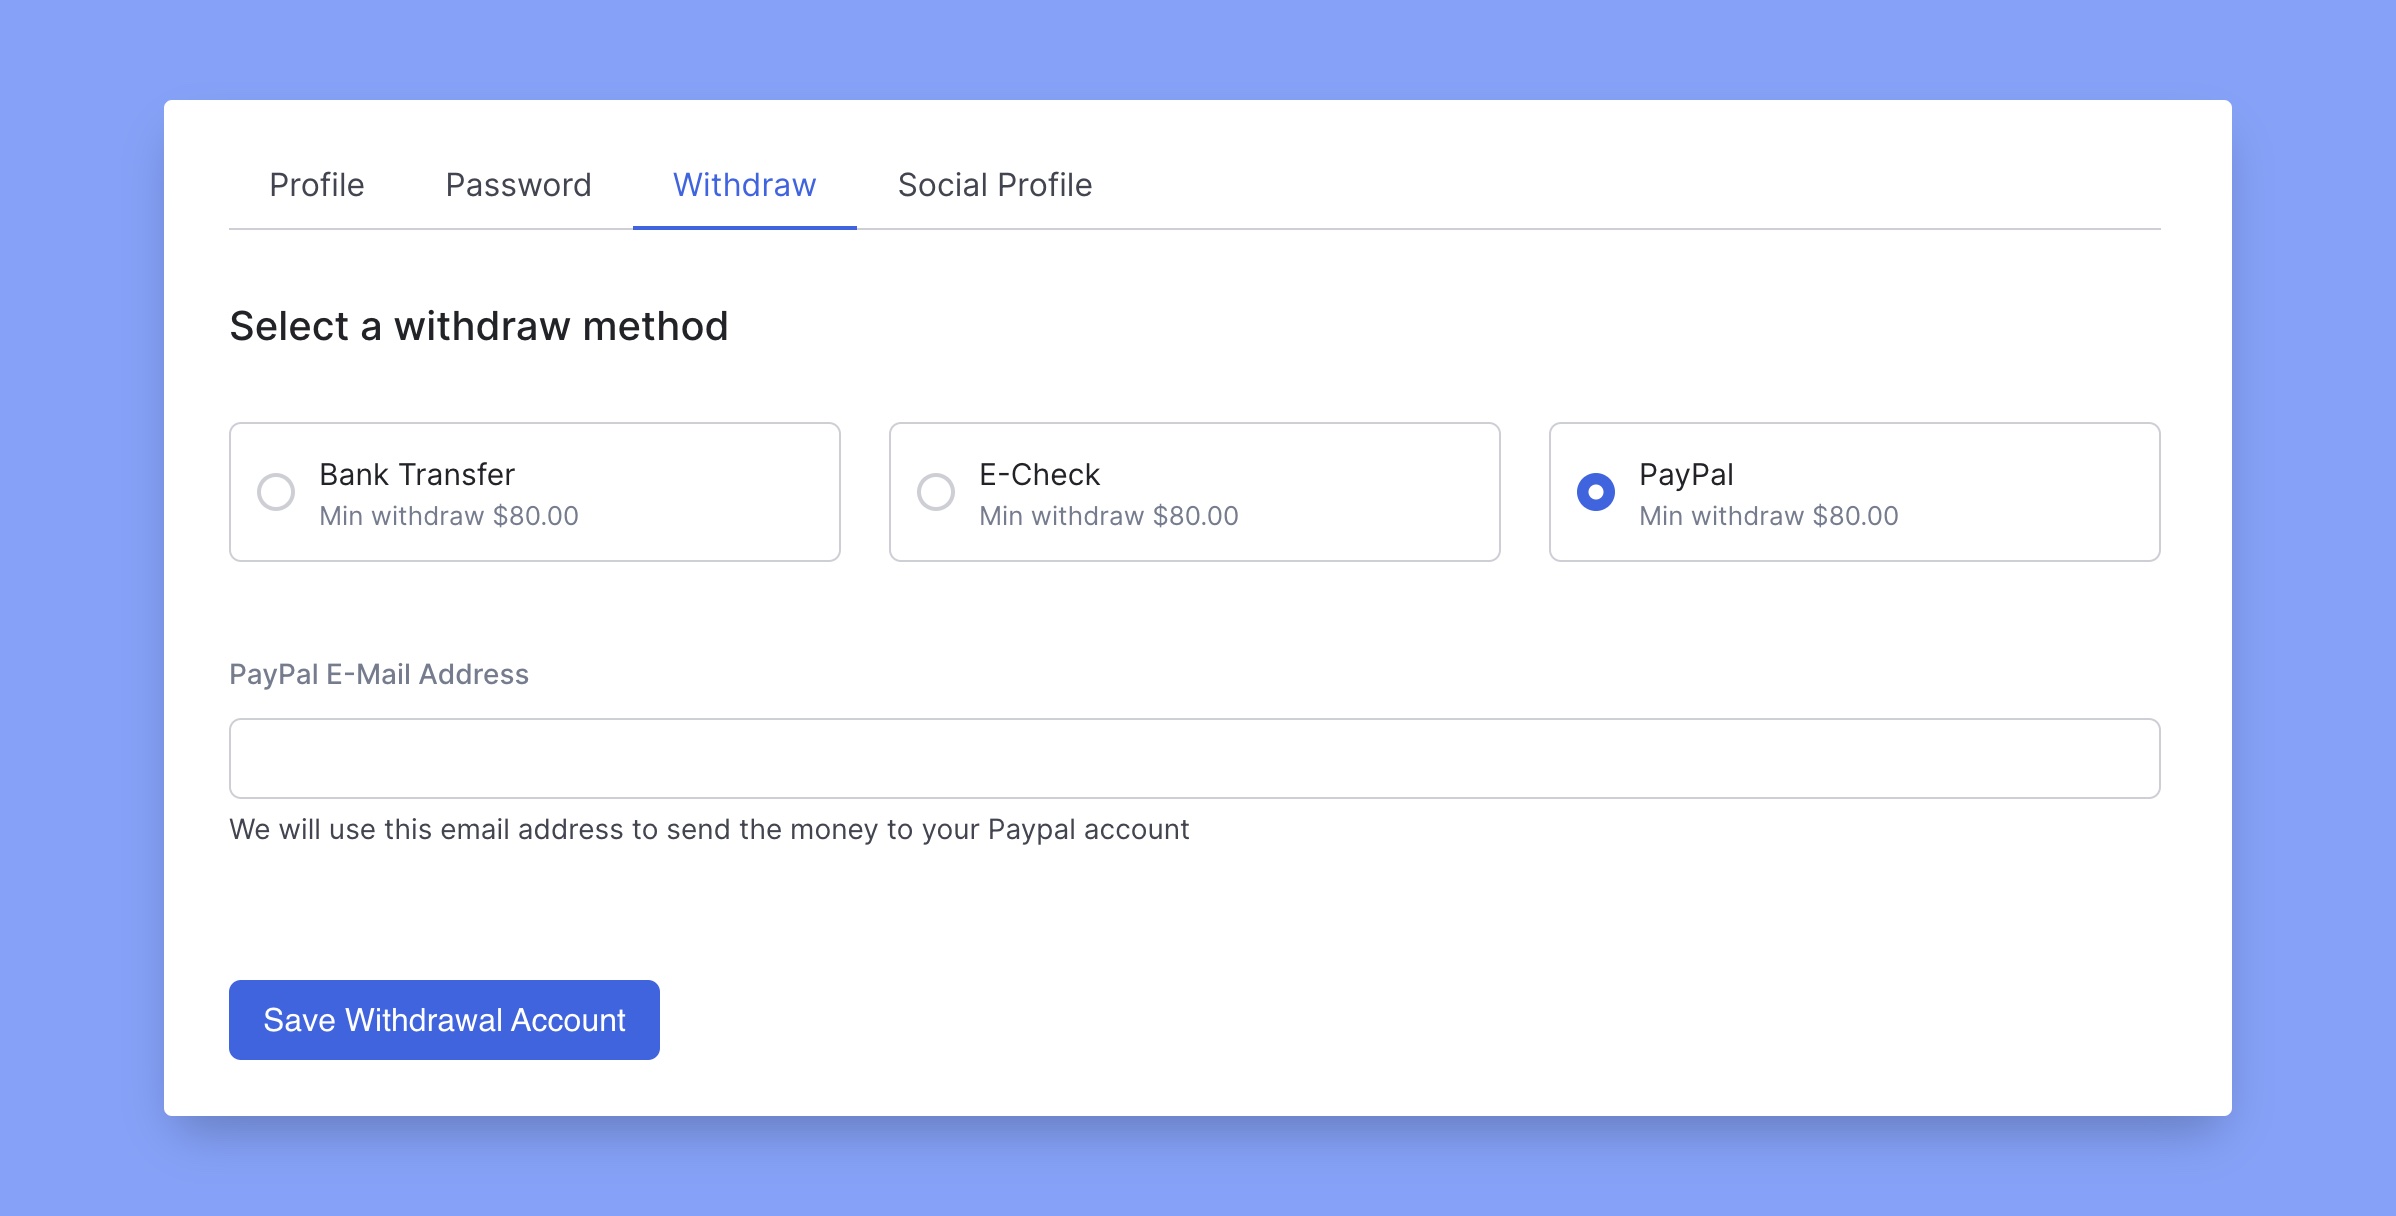
Instructors can choose their preferred withdrawal method from this tab. However, only the admin can choose which withdrawal method will be available for the instructors. Tutor LMS supports three different money withdrawal methods. These are:
Bank Transfer: Instructors have to enter your Account Name, Account Number, Bank Name, IBAN, and the BIC/SWIFT code to receive money via the direct Bank Transfer method.
E-Check: Instructors have to enter their physical address if they want to get the E-Check delivered to their address.
PayPal: Enter the Email Address that is connected to your PayPal account in order to receive money on your PayPal account.
Social Profile
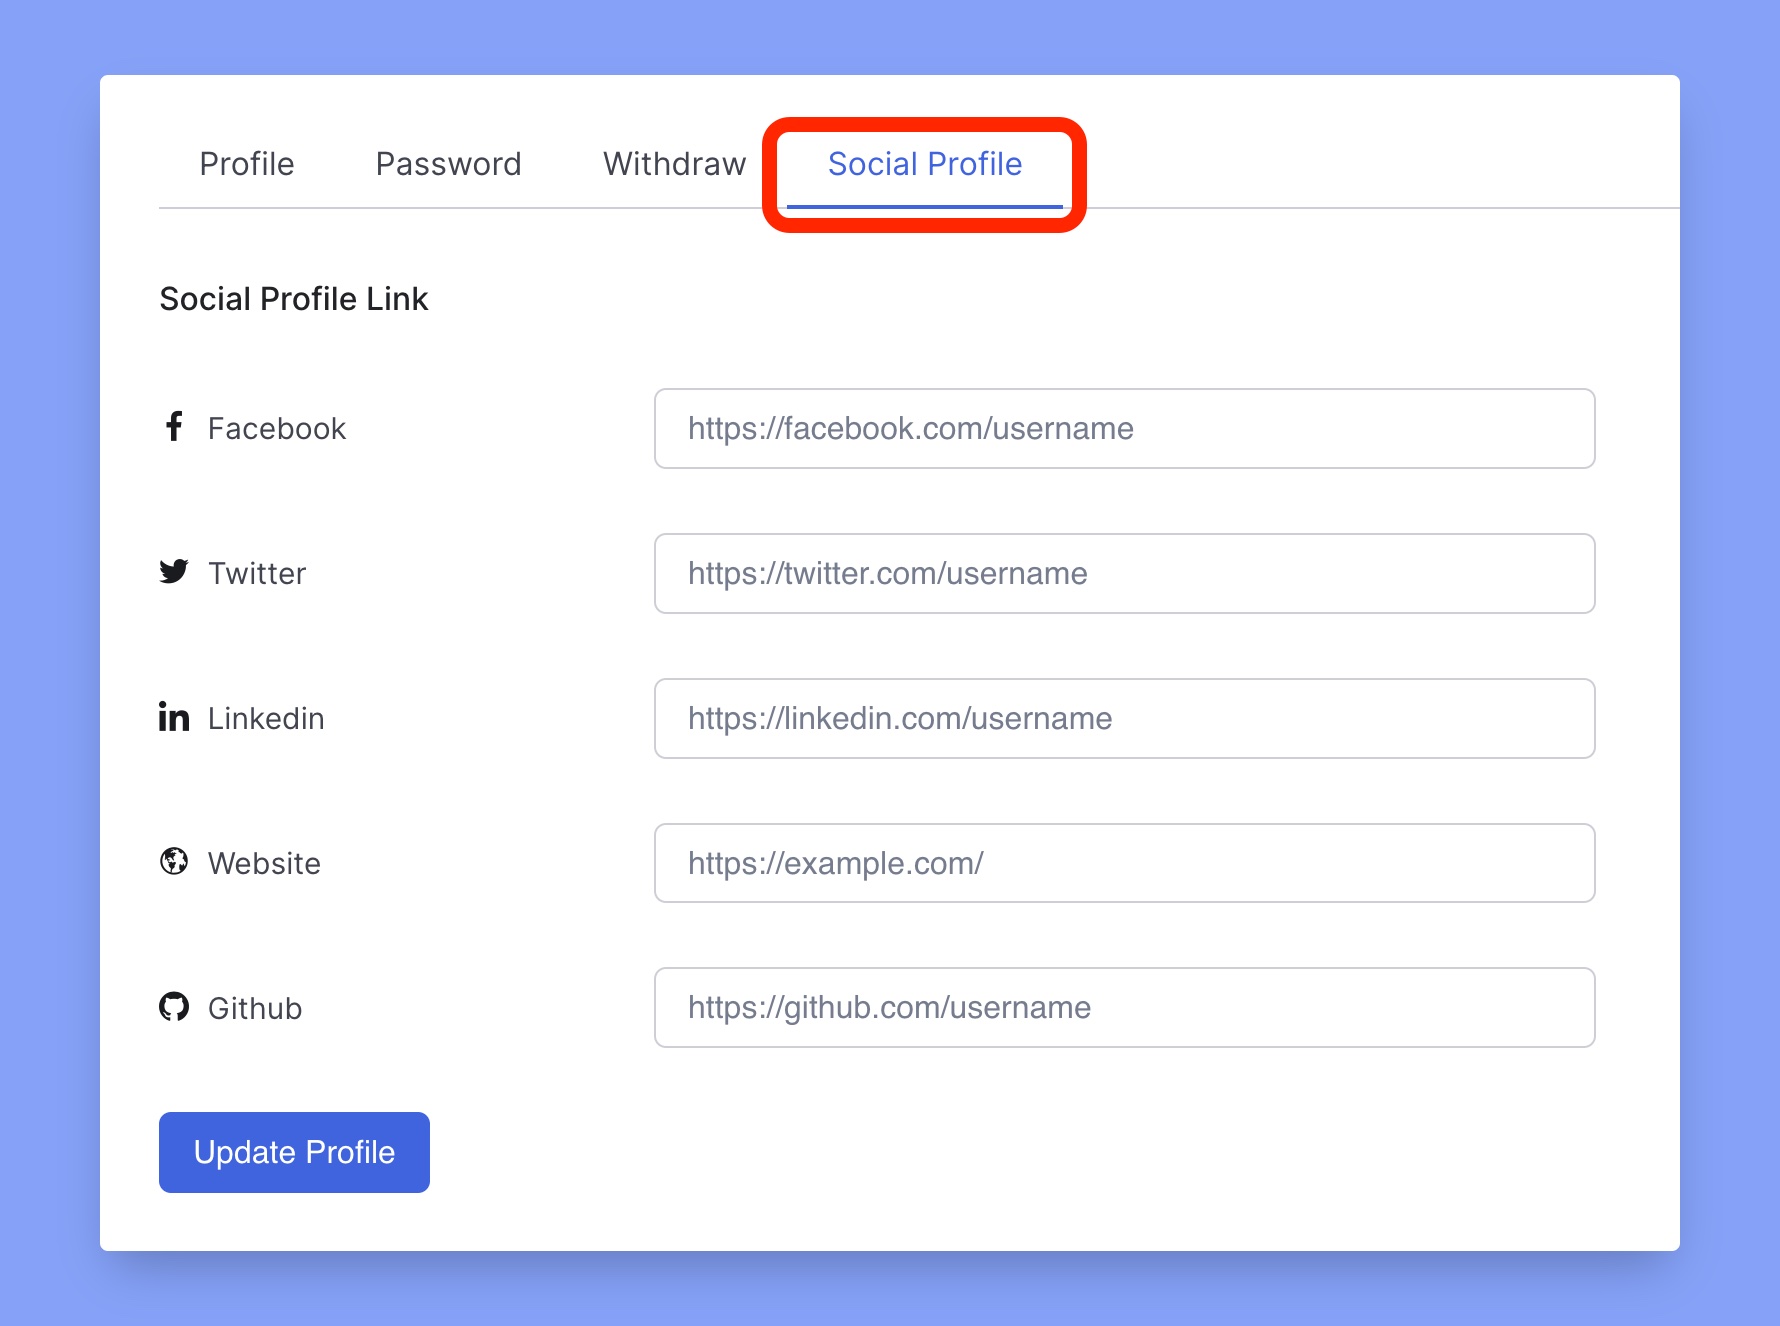
Connect with your colleagues and peers by sharing your social media handles from this section.
Facebook URL: Connect with people socially by sharing the Facebook social media link handle.
Twitter URL: Share your twitter handle in your public profile to connect with people.
LinkedIn URL: Linkedin can help you professionally to connect with the right audience. And to find the right people to publicly share your Linkedin profile link on your public profile page.
Website URL: Set the website where people can find you. Once you add it to your profile it will show up in the public profile of your instructors and students.
GitHub URL: Share your github profile link to connect with people available there.
