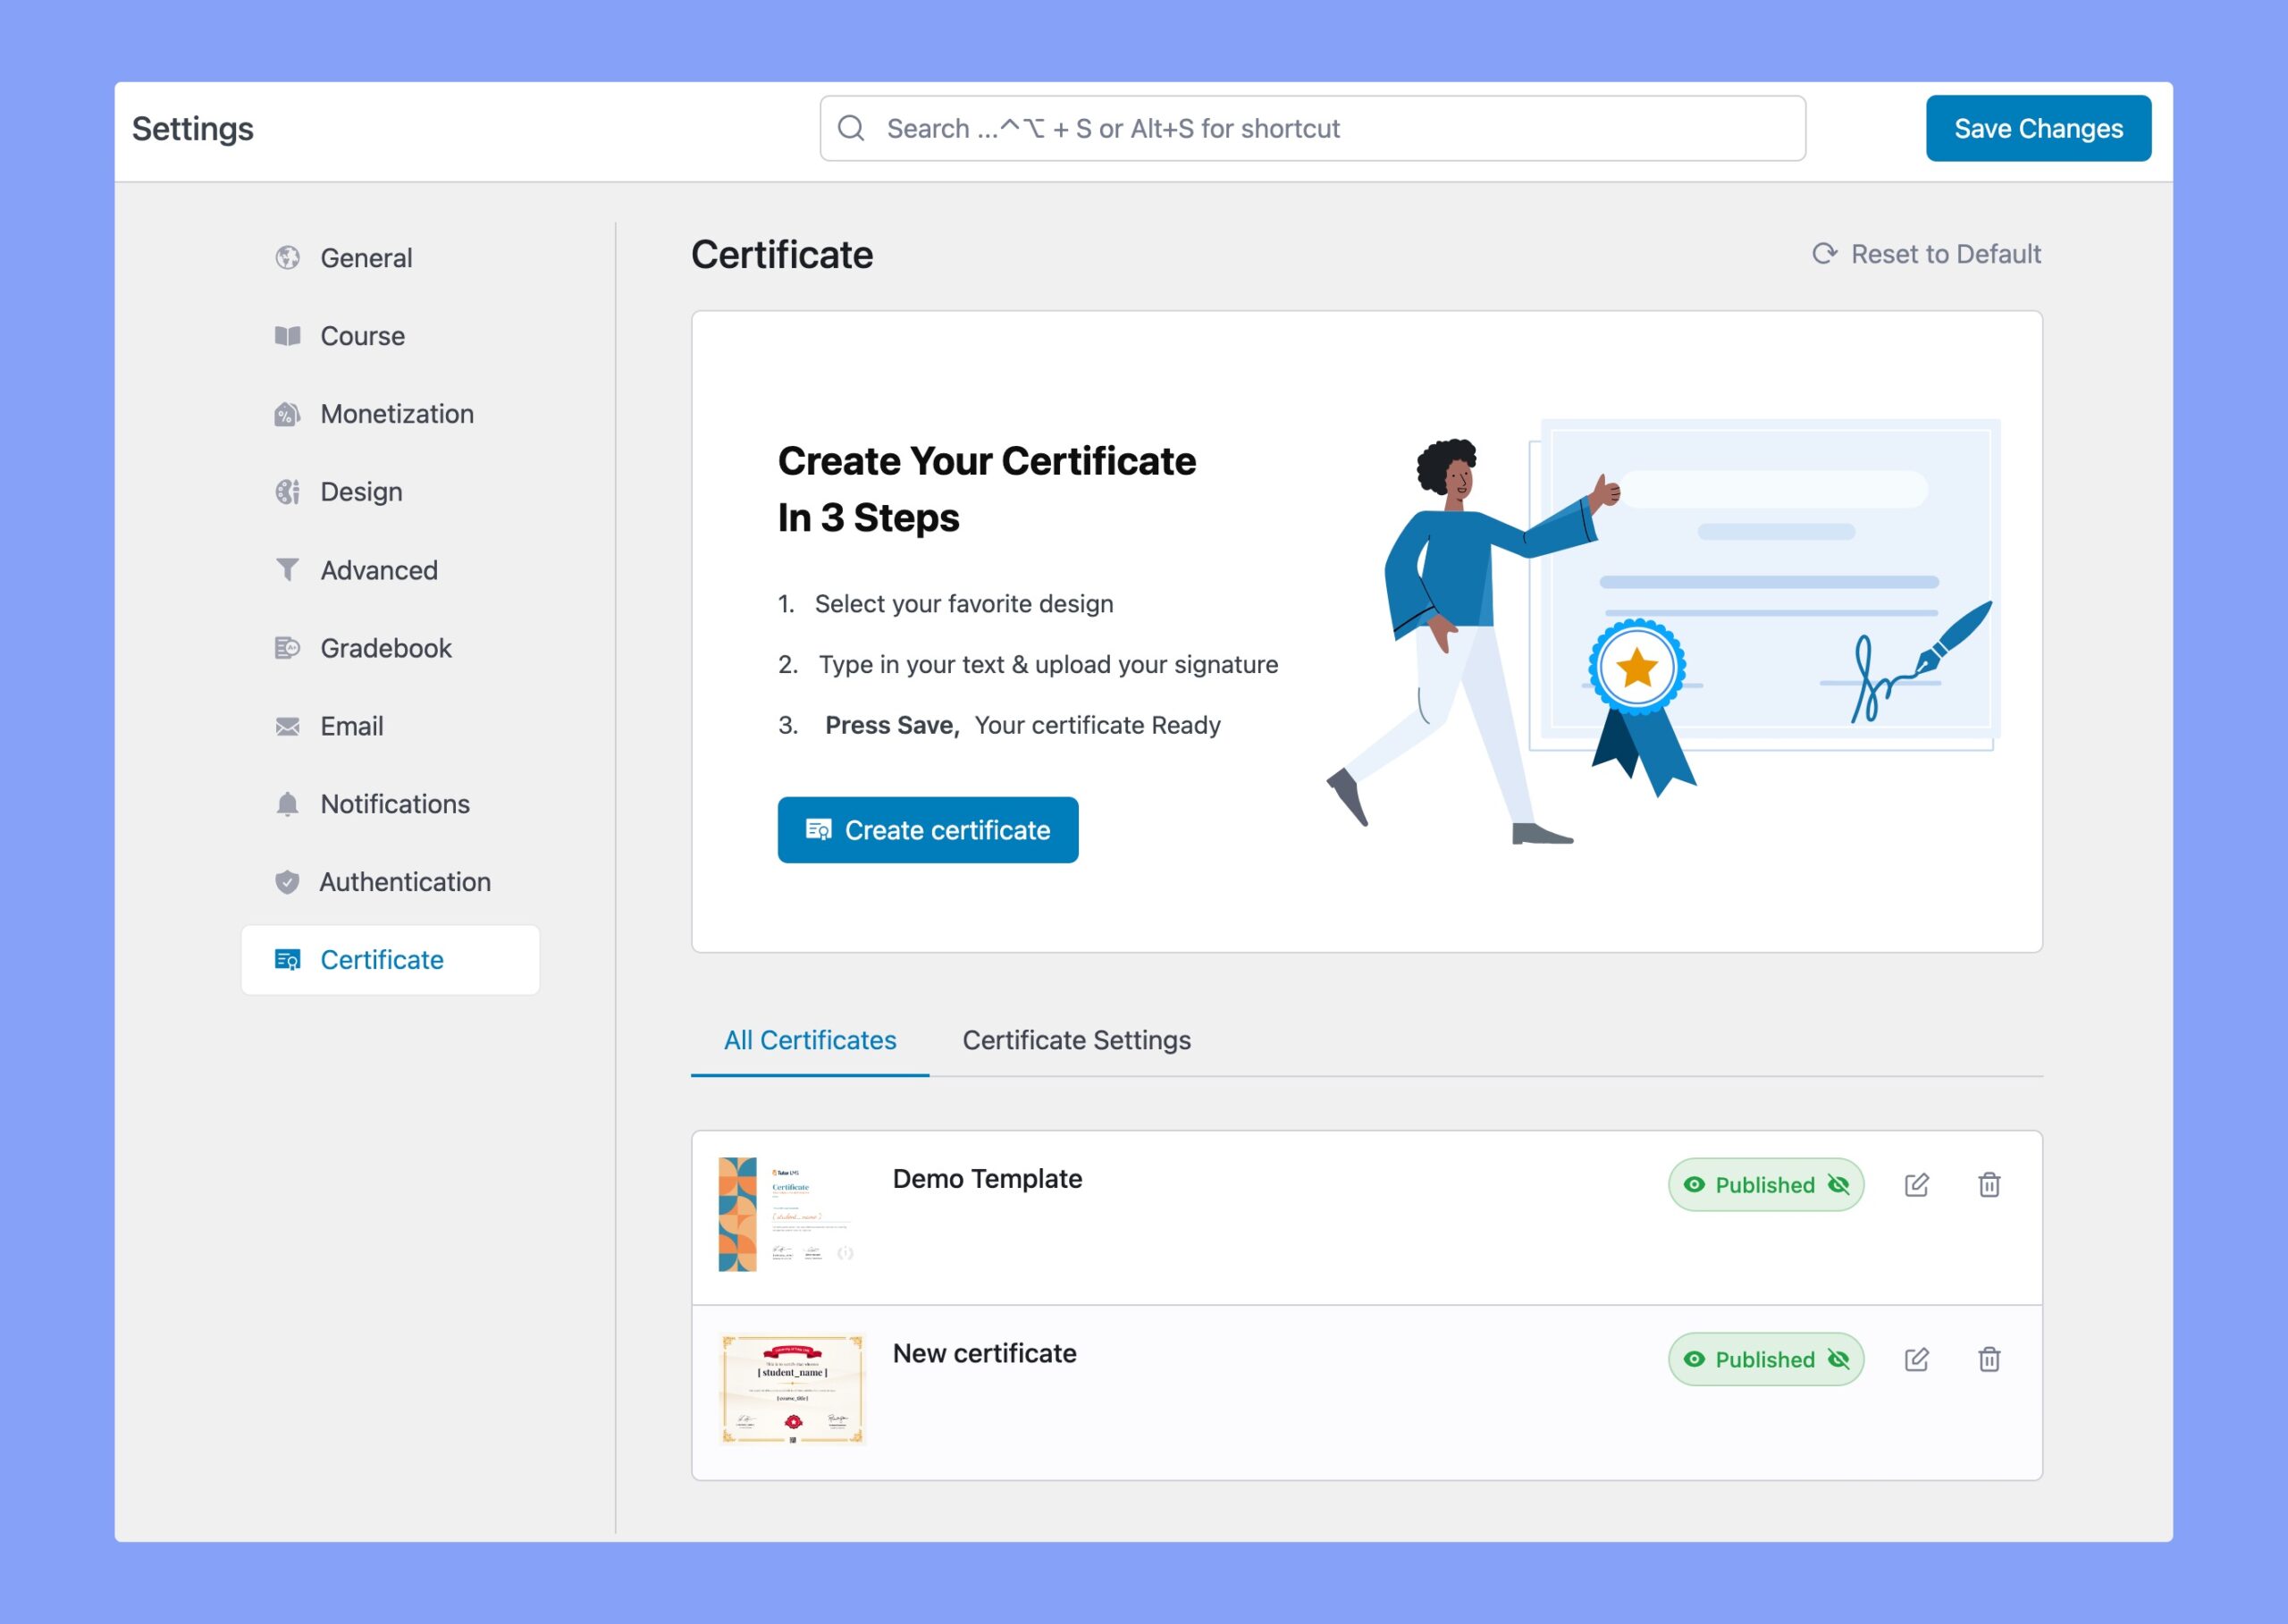
Tutor LMS’s certificate builder comes with premade certificate templates that are easy to customize and specially made with non-designers in mind.
To get started, go to the Tutor LMS backend dashboard, navigate to Tutor LMS Pro > Settings > Certificate and click on the Create certificate button.

This will take you to a window shown as below.

Select Category and Template: Select a category or the relevant categories and the templates of the similar niches will show up. Hover over your preferred template and click on Use This Template.

This will take you to the editor interface.
Elements
On the Elements tab – all the course-related information like Course name, Student name, Instructor name, Point, Grade, Time, Duration, Verification ID is dynamic and will be automatically derived from the course you’re creating the certificate for.

Here, you can create stunning text combinations by using the Tutor LMS Certificate Builder’s text holder and choosing among a pool of beautiful Fonts. Set your own Font Weights, Font Size, Type Spacing, and Line Height.

Using the Signature element you can upload signatures for the instructor. You’ll also find elements to display course duration and completion time.

Media
In the Media tab, you can upload images, logos, or use images from Unsplash and customize the certificate to reflect your brand. Click on the image to set the position, transparency level, and more.

Library
From the Library tab, you can add different shapes, illustrations, badges, borders, frames, and watermarks.

Backdrops
In the Backdrops tab, you can customize colors with the preset color palettes, add backgrounds by choosing from various images, and patterns.

Certificate Size Configuration
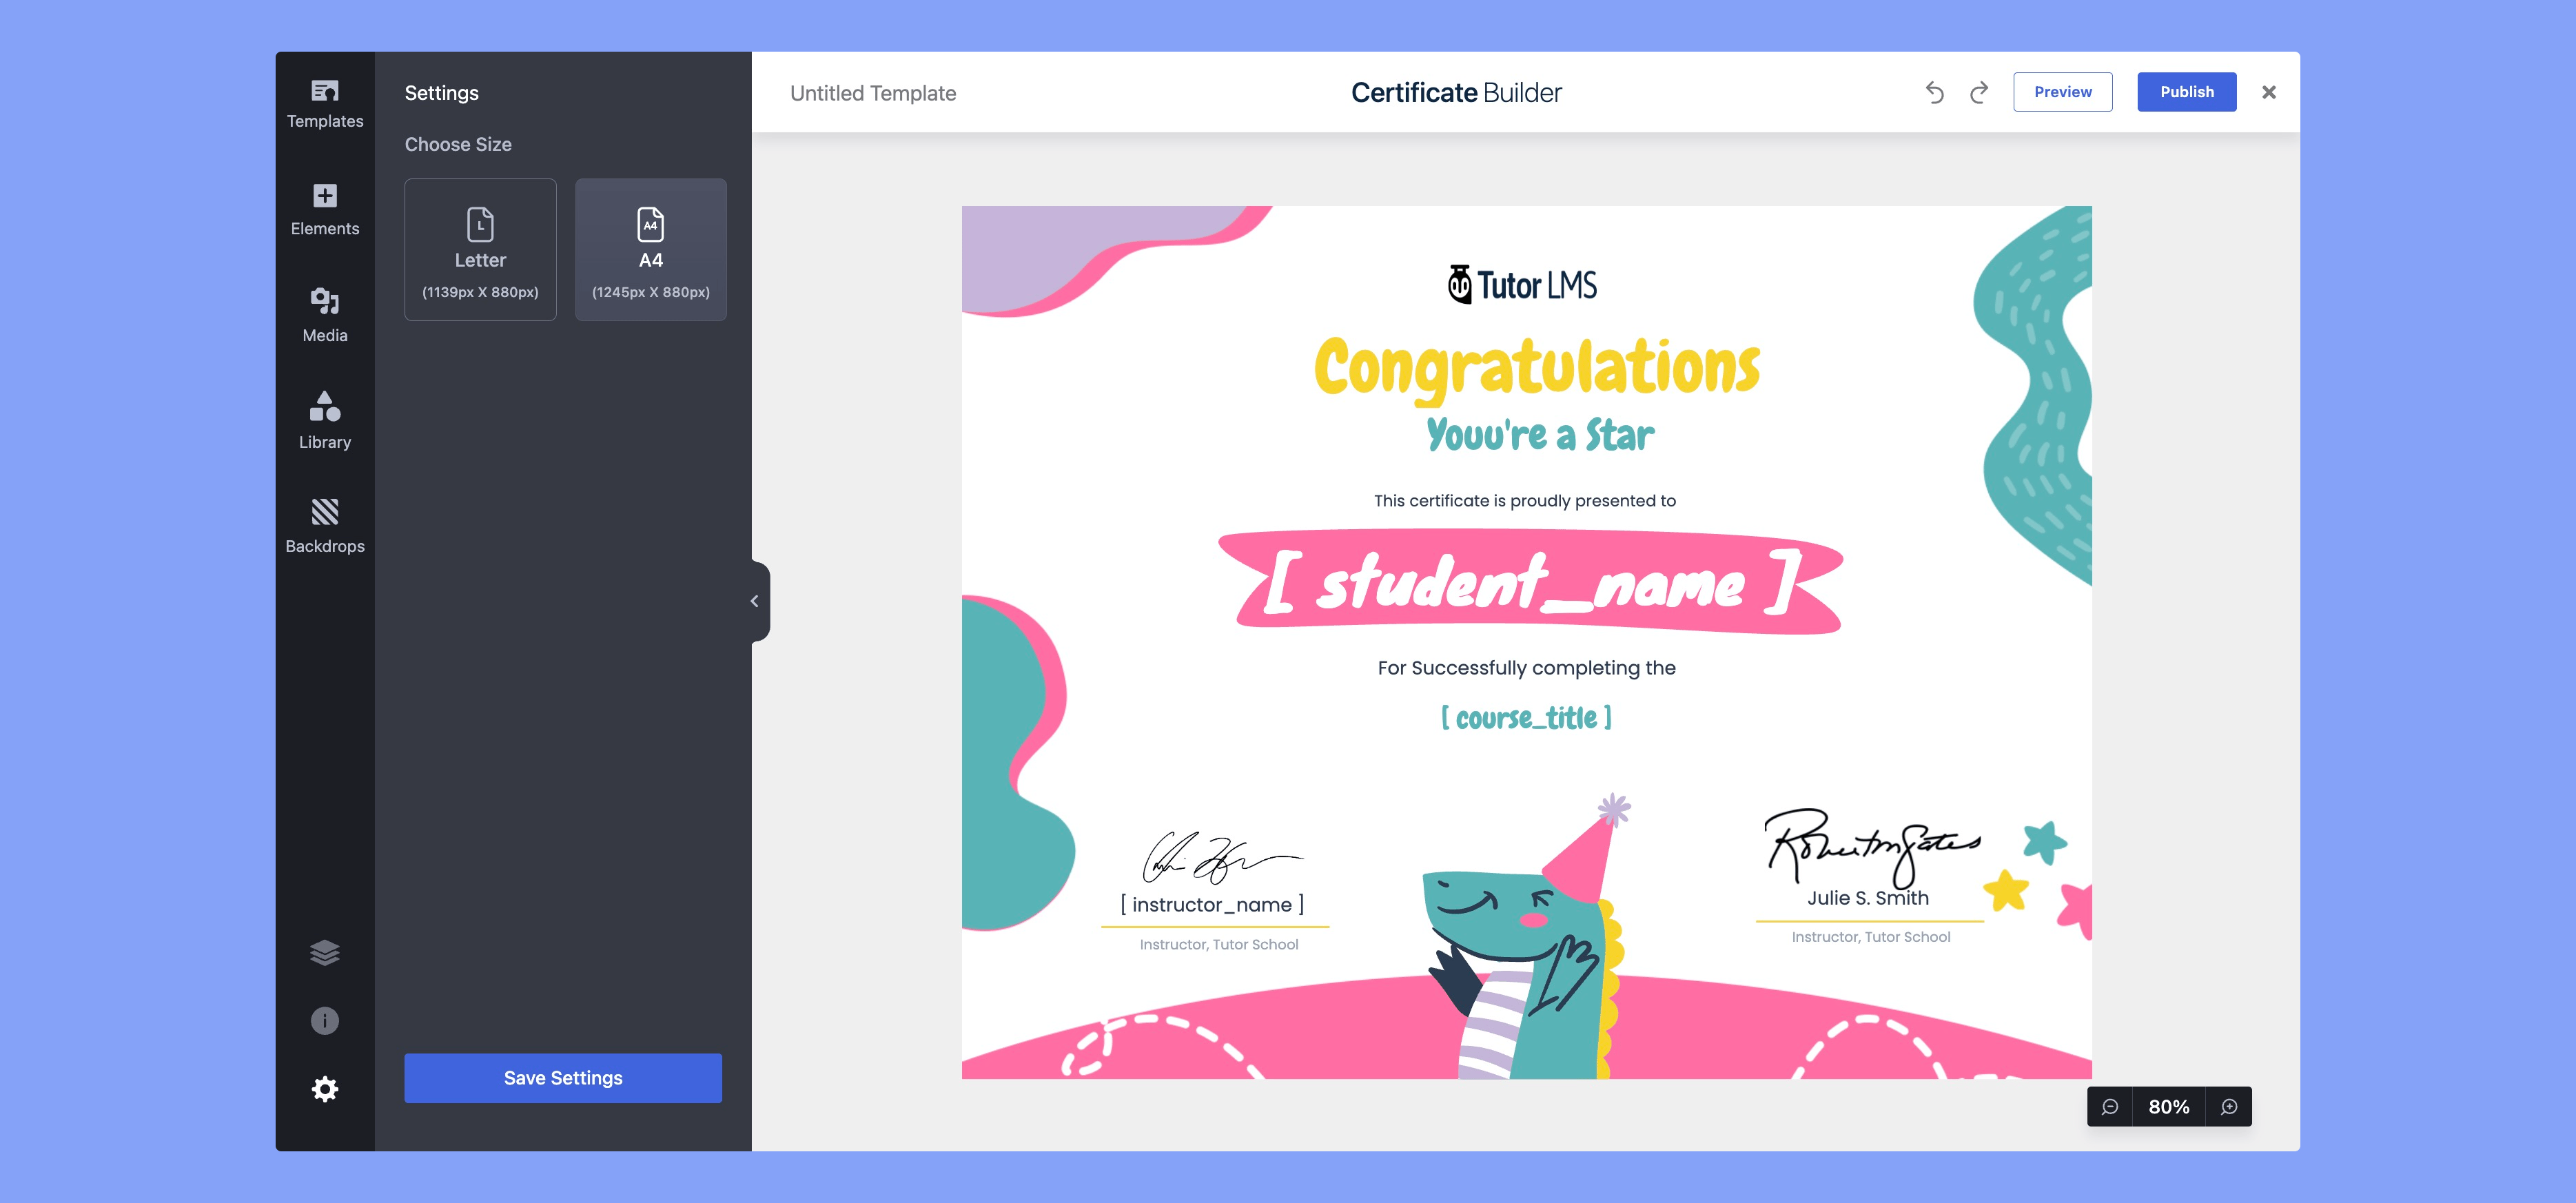
Tutor LMS Certificate Builder gives you the flexibility to choose the size of your certificates when designing them. This ensures your certificates meet printing and design standards, whether you’re targeting global learners or localized formats.
How to Set Certificate Size

- On the left-hand sidebar, locate the Settings panel.
- Under Choose Size, select from the available formats:
- Letter (1139px × 880px) – Commonly used in the United States and Canada.
- A4 (1245px × 880px) – Standard size for most other regions internationally.
- Letter (1139px × 880px) – Commonly used in the United States and Canada.
- Click Save Settings to apply your chosen size.
