Paddle is a powerful payment gateway designed for selling digital products and subscriptions globally. With built-in tax handling, fraud prevention, and multi-currency support, Paddle simplifies transactions for online course platforms like Tutor LMS.
It supports credit/debit cards, PayPal, multiple localized payment methods, etc, to ensure a seamless checkout experience for students worldwide. Check the Supported Countries and Supported Currencies sections on their website for the latest updates.
Adding Paddle as a Payment Option
Follow the steps below to add the Paddle payment gateway to your Tutor LMS website:
- Log in to your Tutor LMS WordPress Dashboard.
- Navigate to Tutor LMS Pro > Settings > Monetization > Payment Methods.
- Click on the Add New Gateway button.
- From the list of available payment methods, select Paddle and click the Install button.
Once installed, Paddle will appear as one of your payment options on the Payment Methods page.
Configuring Paddle Integration
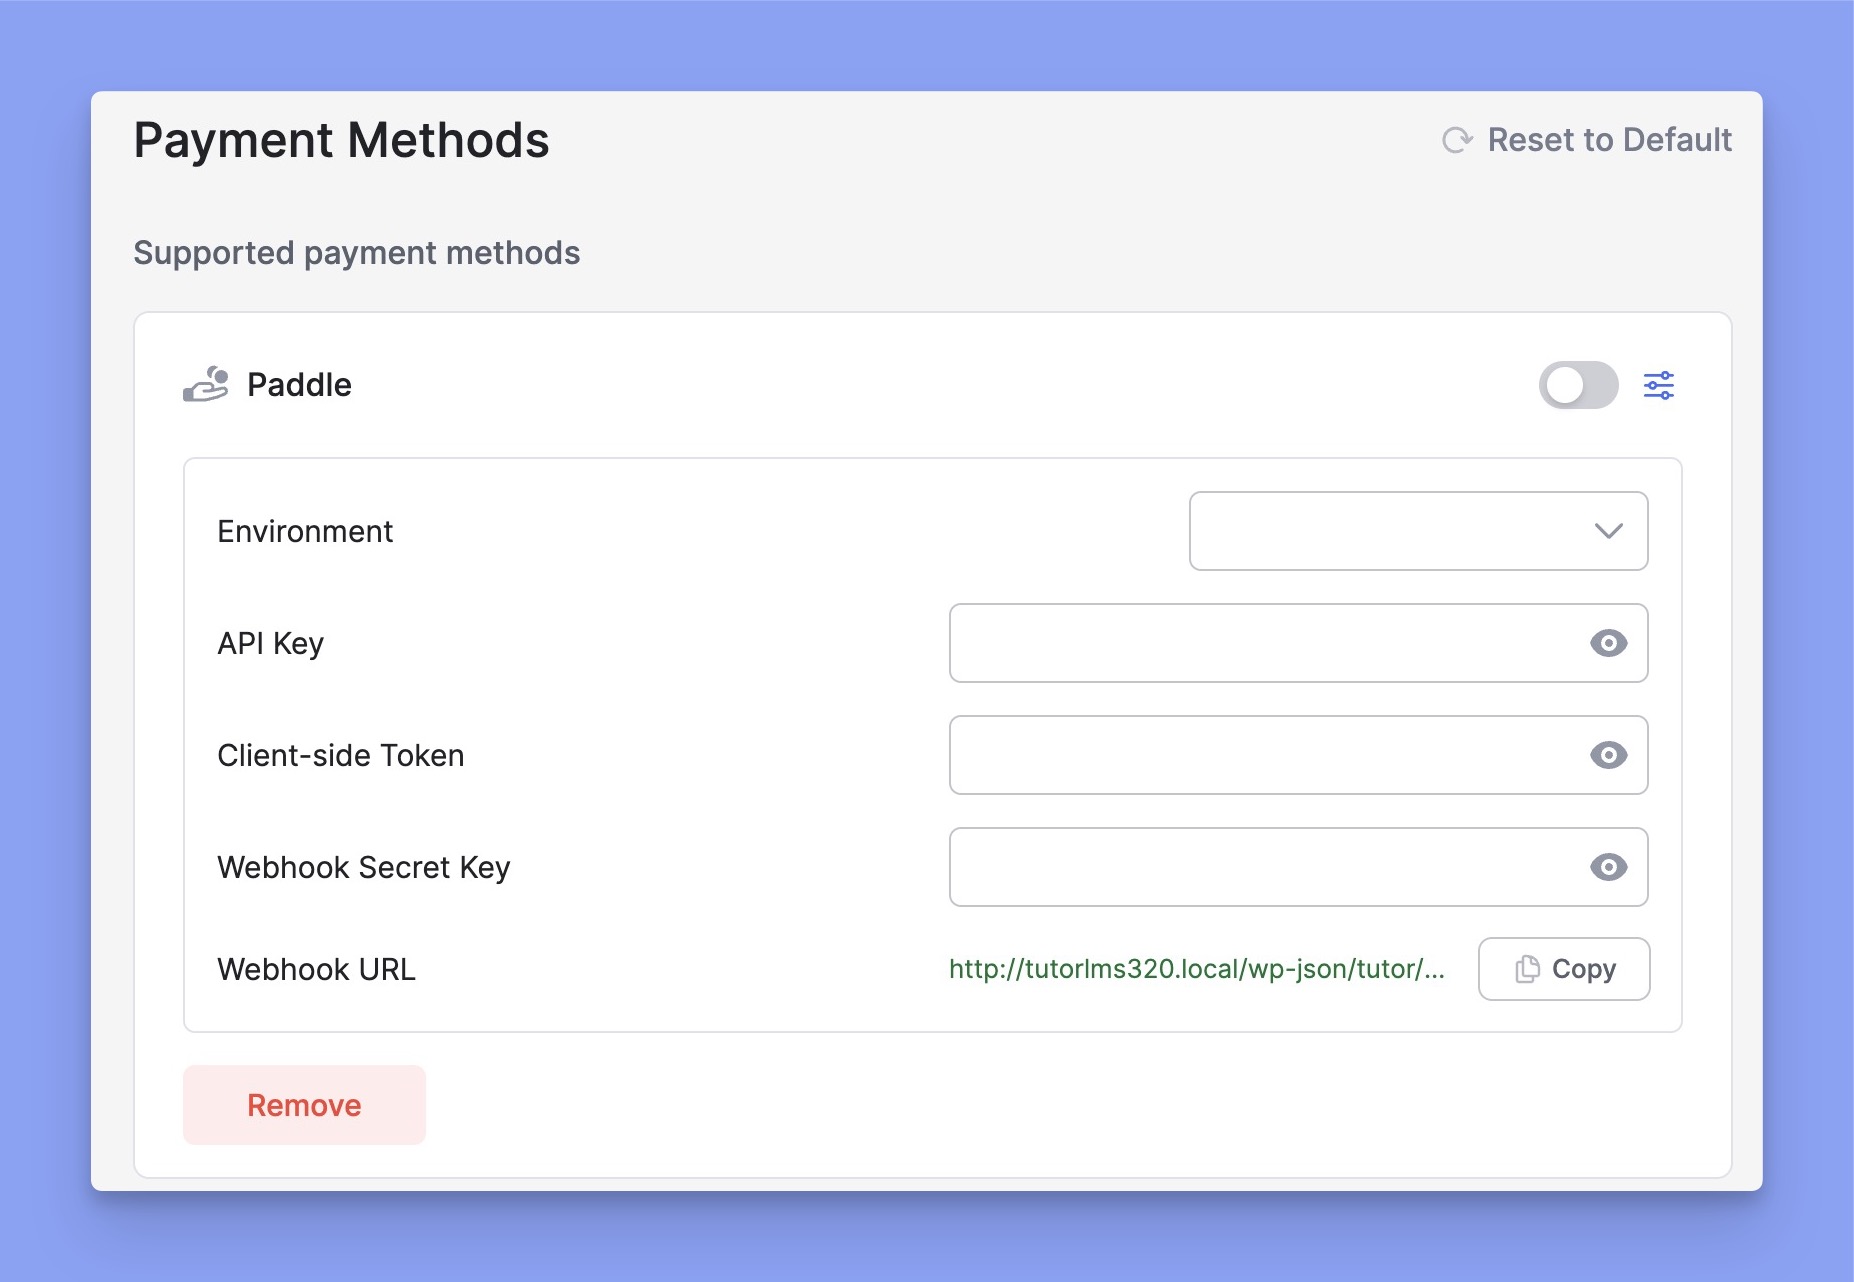
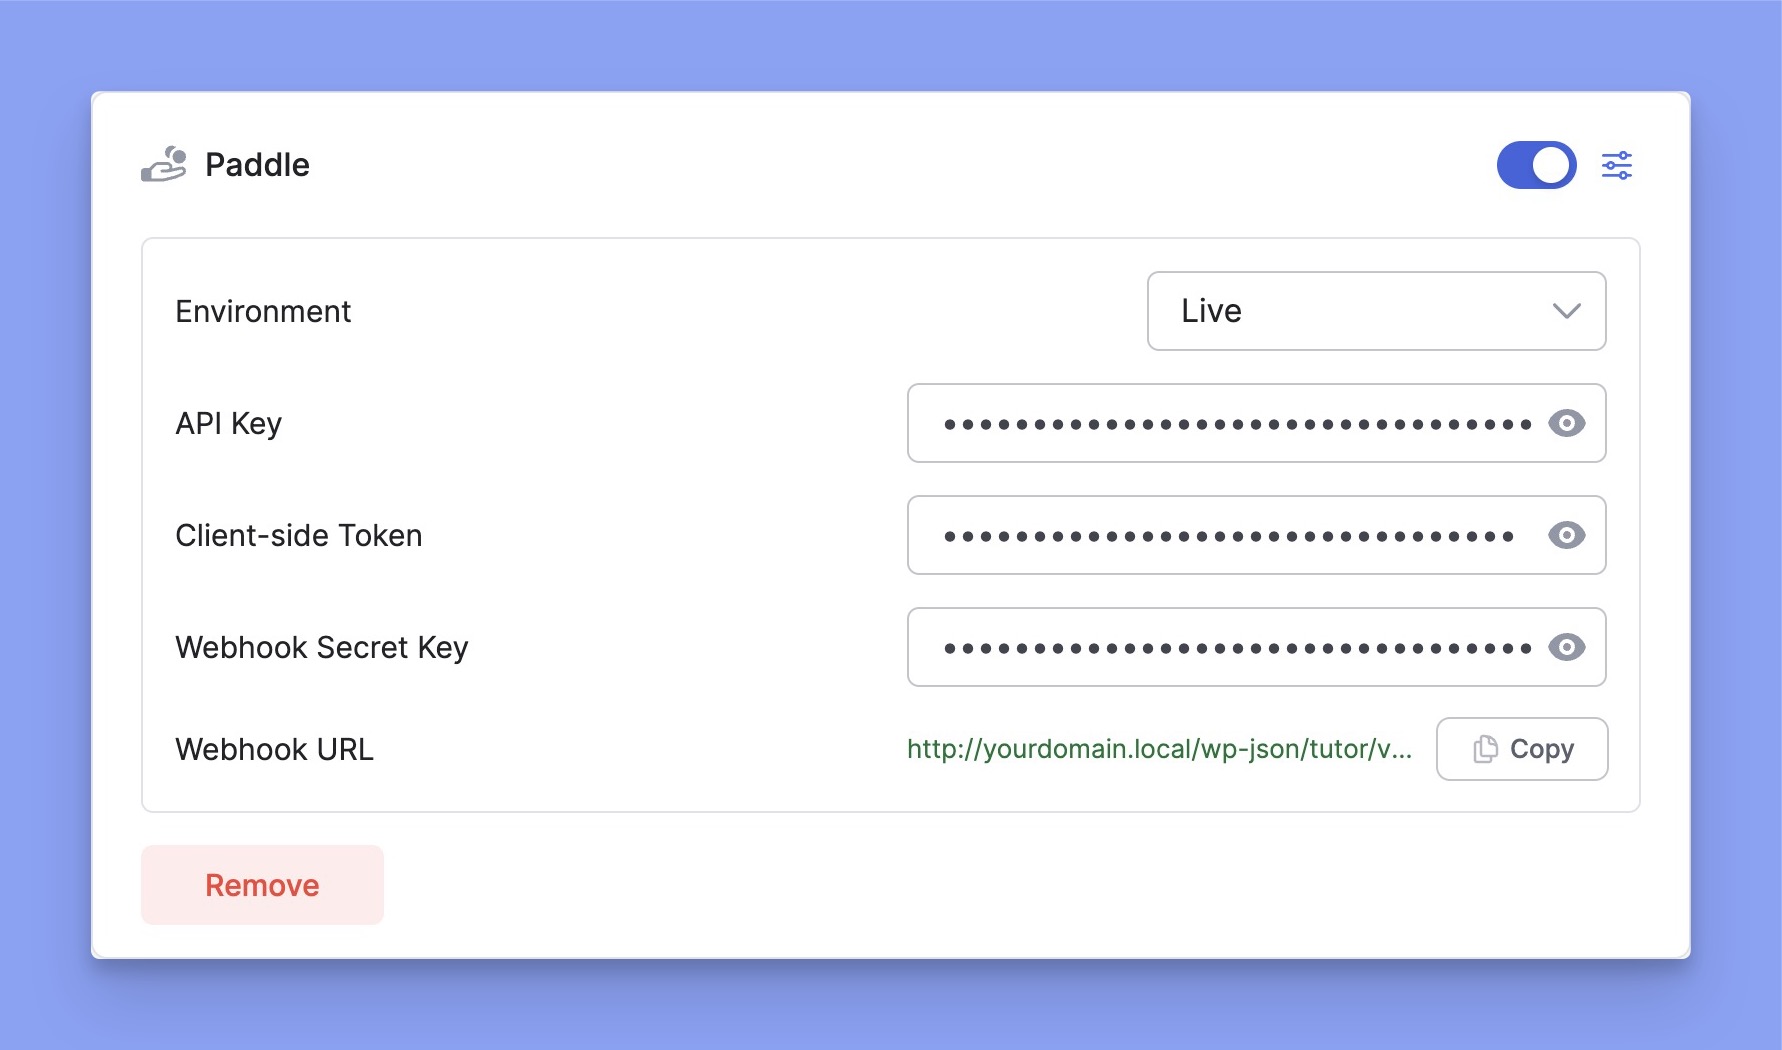
In the Payment Methods section, toggle the switch to enable Paddle for checkout. Then, click the Setup icon next to Paddle to expand the settings. Here, you can select the Environment and enter your Paddle credentials. It includes API Key, Client-side Token, and Webhook Secret Key.
How to get Paddle’s Credentials?
You’ll need Paddle’s credentials to integrate it with Tutor LMS. If you don’t have an existing Paddle account, you must create a new account first. Then log in to your account and collect your credentials. Here is the step-by-step process to get Paddle’s credentials:
Step 1: Generate API Keys
- Log in to your Paddle dashboard.
- Navigate to Paddle Dashboard > Developer Tools > Authentication. There, you will get a default API key from Paddle.
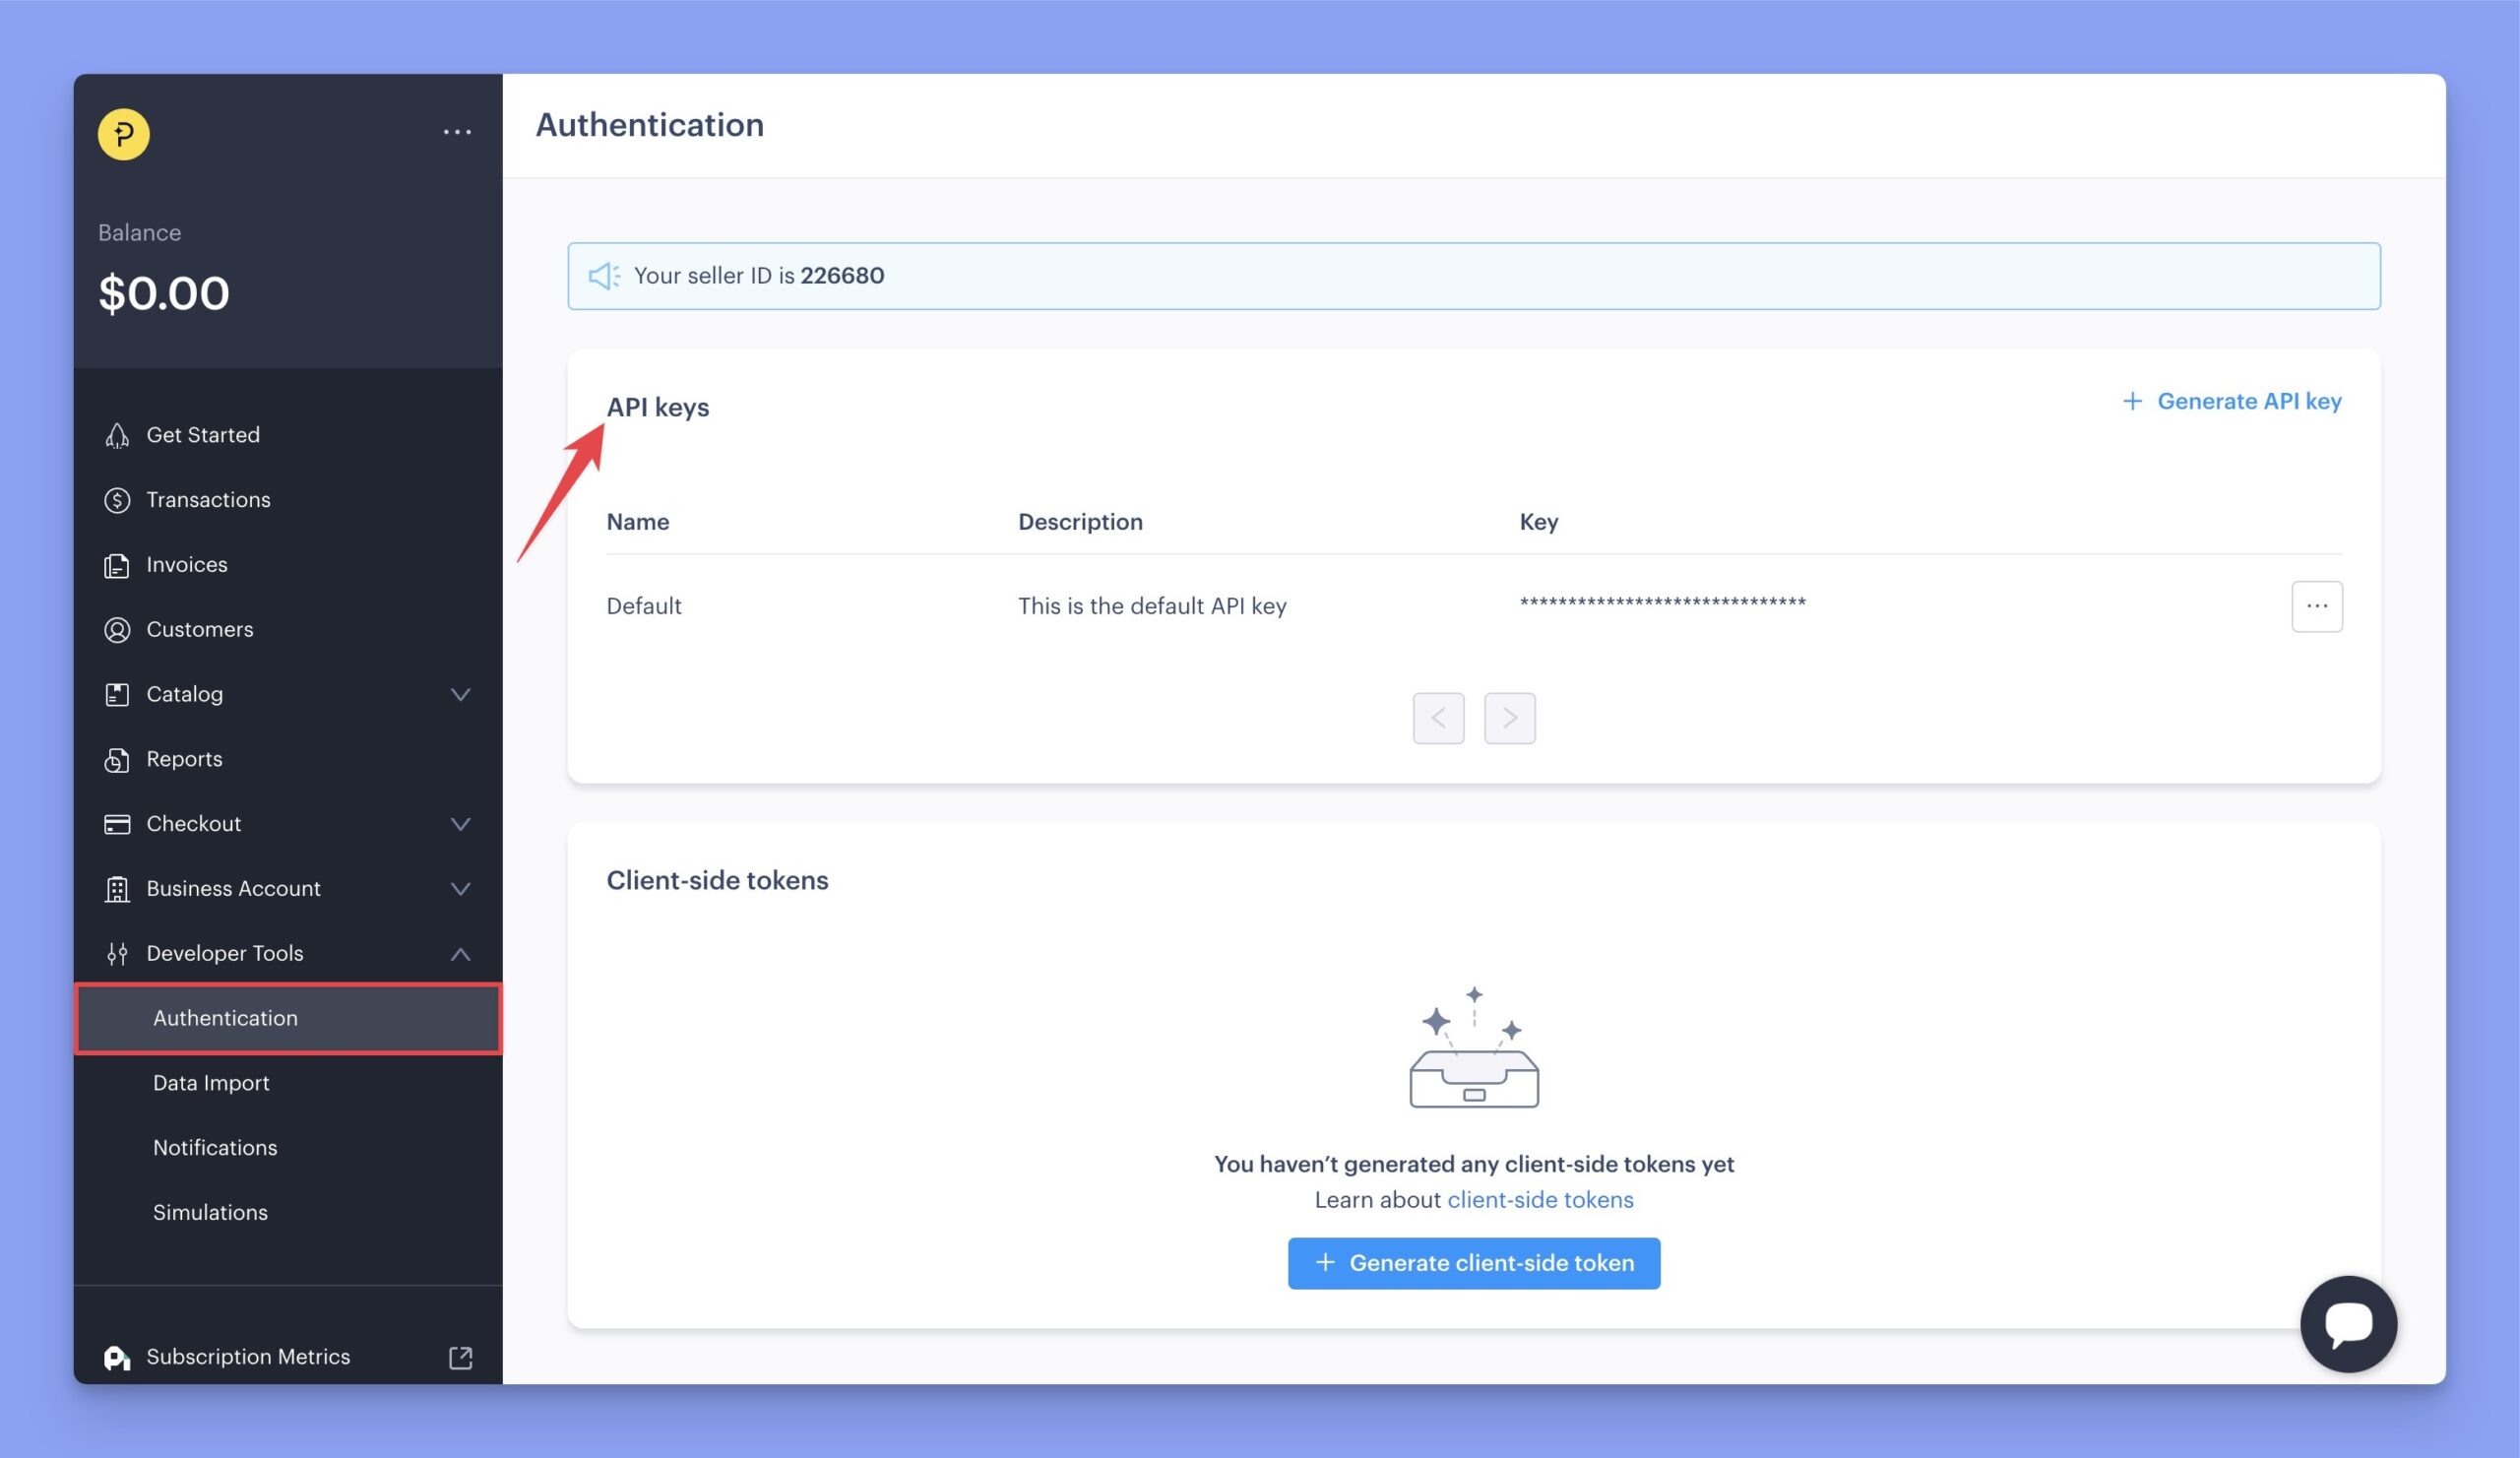
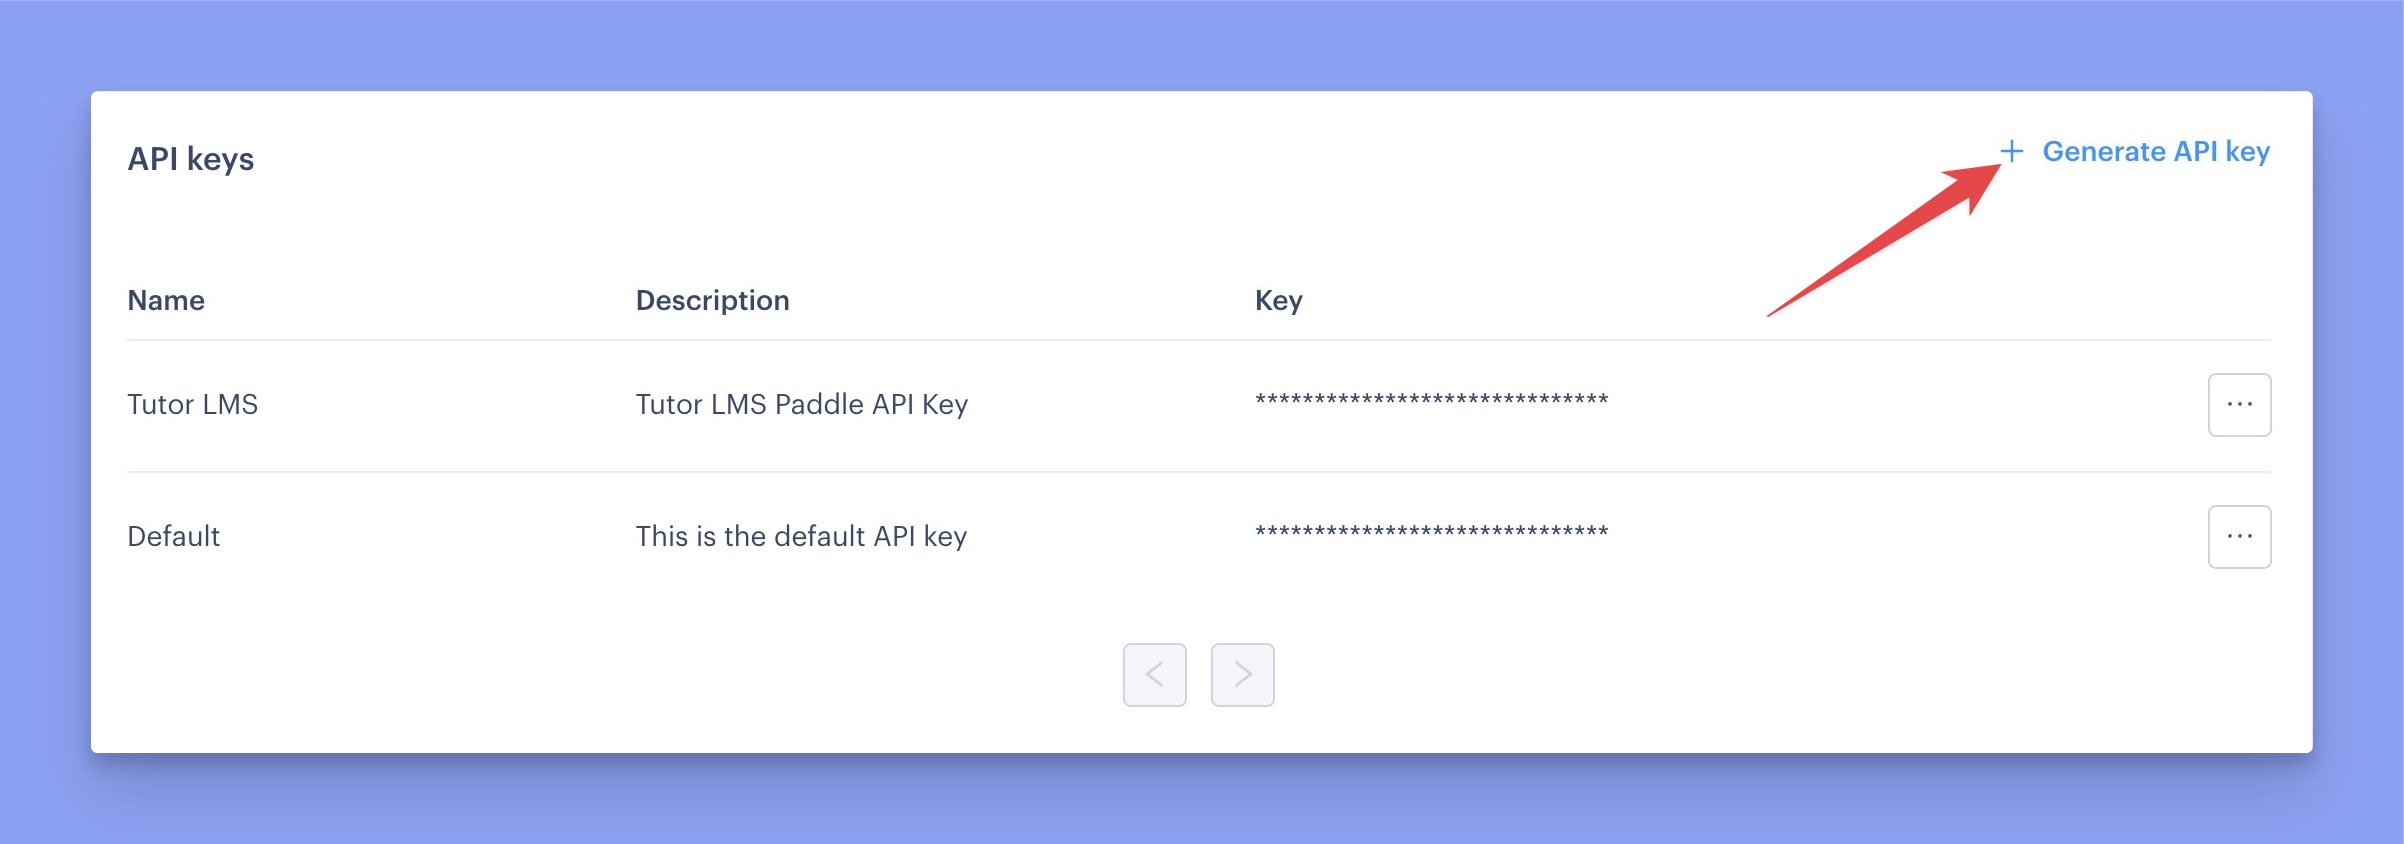
You can generate a new API key from the “Generate API Key” button.
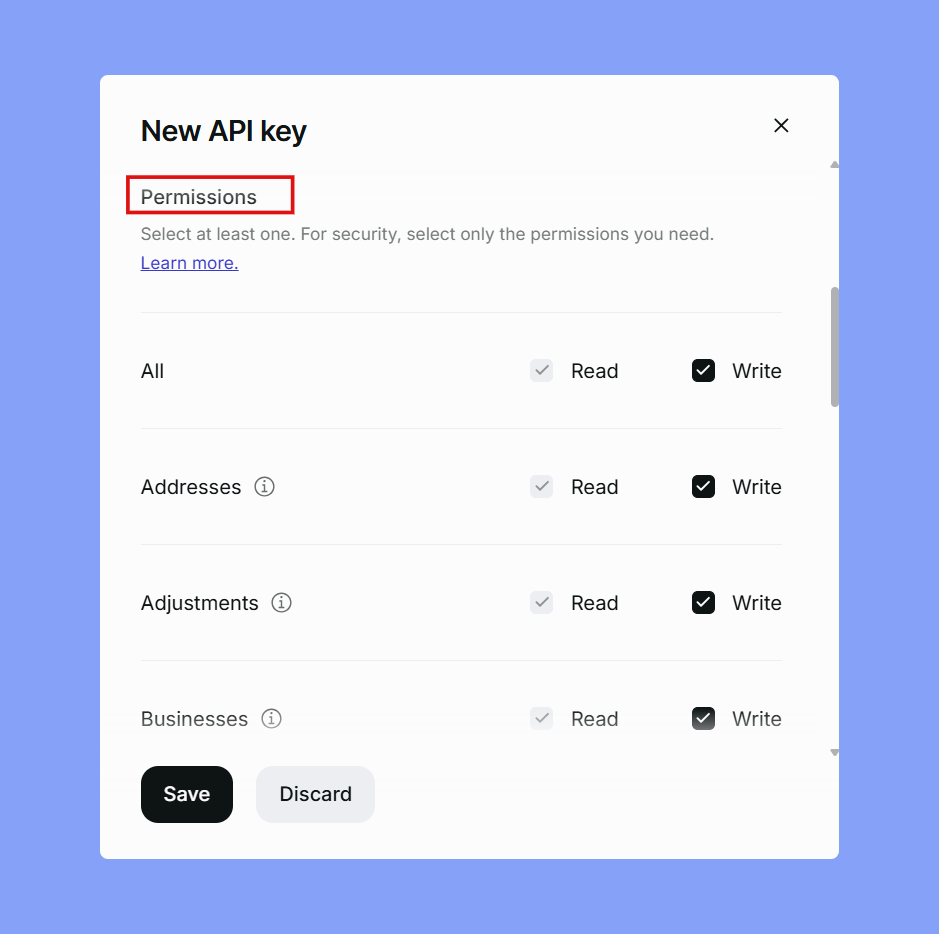
To generate an API key, you need to provide the API Key Name, Description, Expiry Date, and select the appropriate permissions. Please choose the specific permissions you want to grant through this API key.
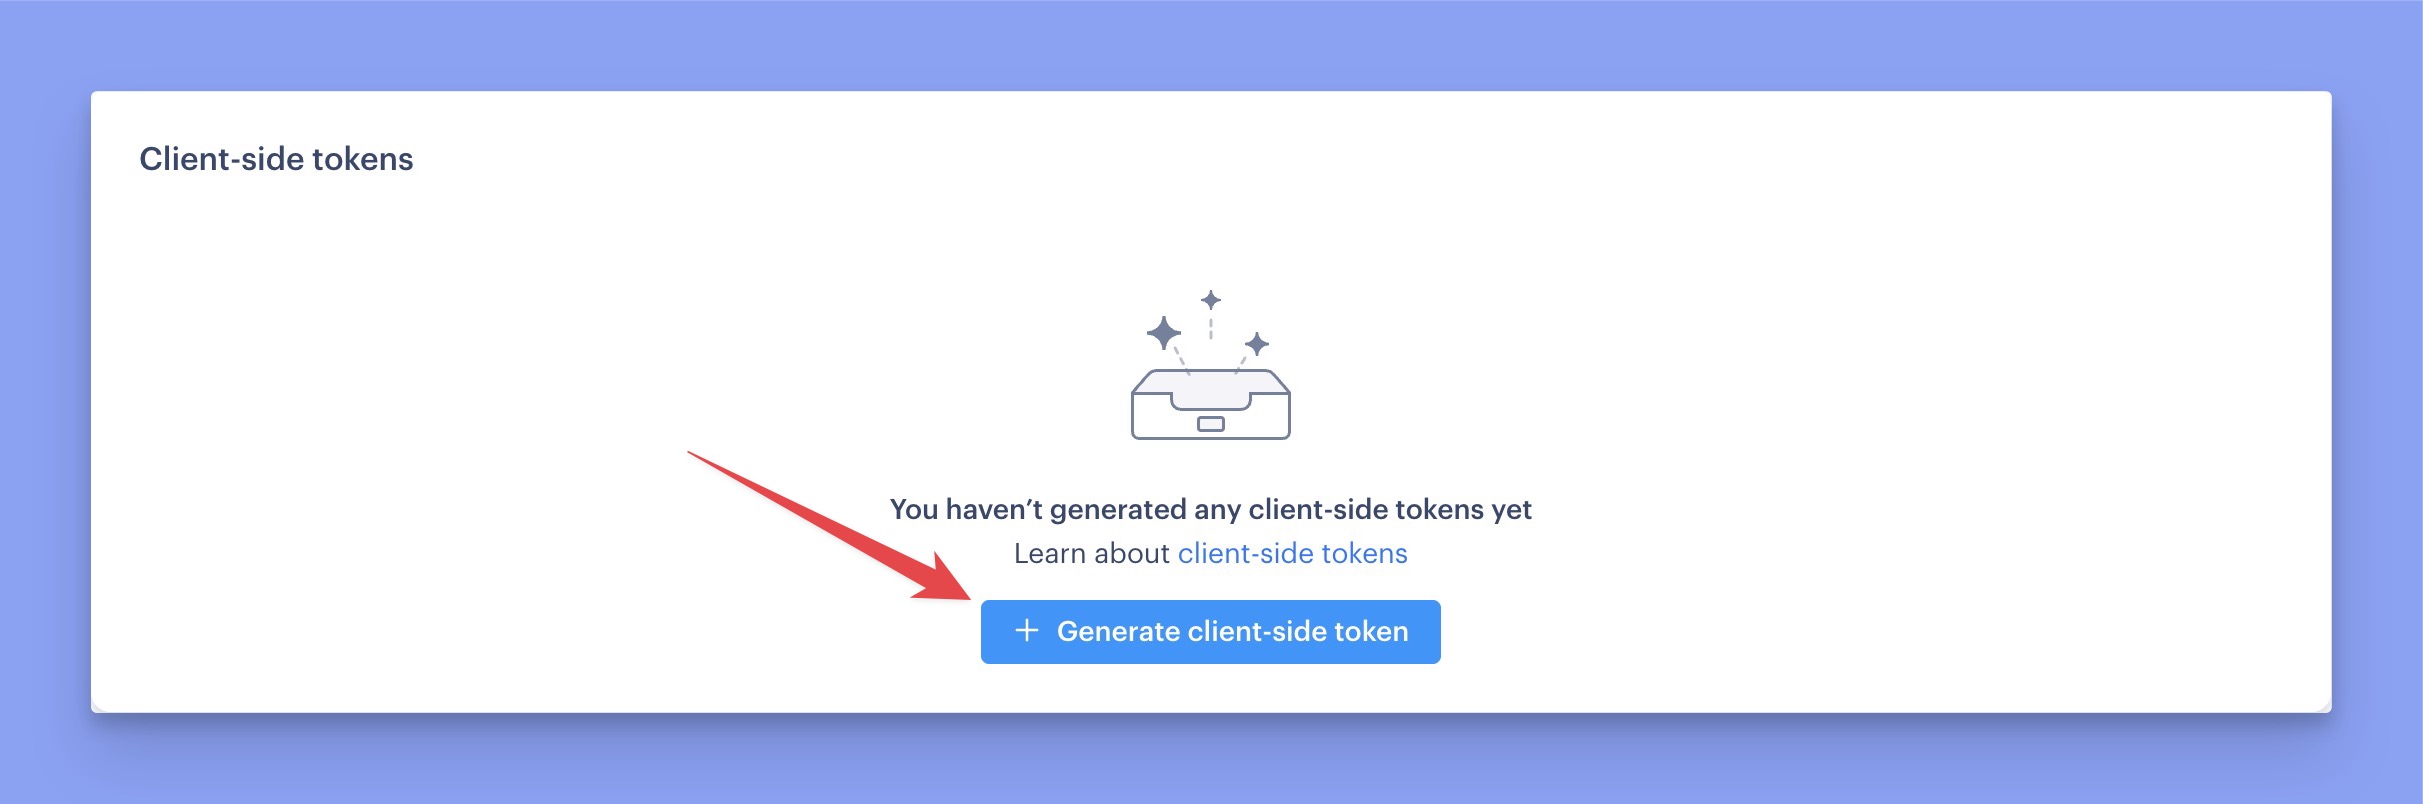
Step 2: Generate Client-side Token
Similar to generating the API key, you’ll also need to generate a client-side token. Just click the “Generate client-side token” button, enter a token name and description, and you’re done — your unique client-side token will be ready.
Step 3: Set up Instant Notification System (INS)
Now you have to set up the webhook to get payment-related notifications. It is required for order processing and automatic renewals. Here is the process of configuring INS:
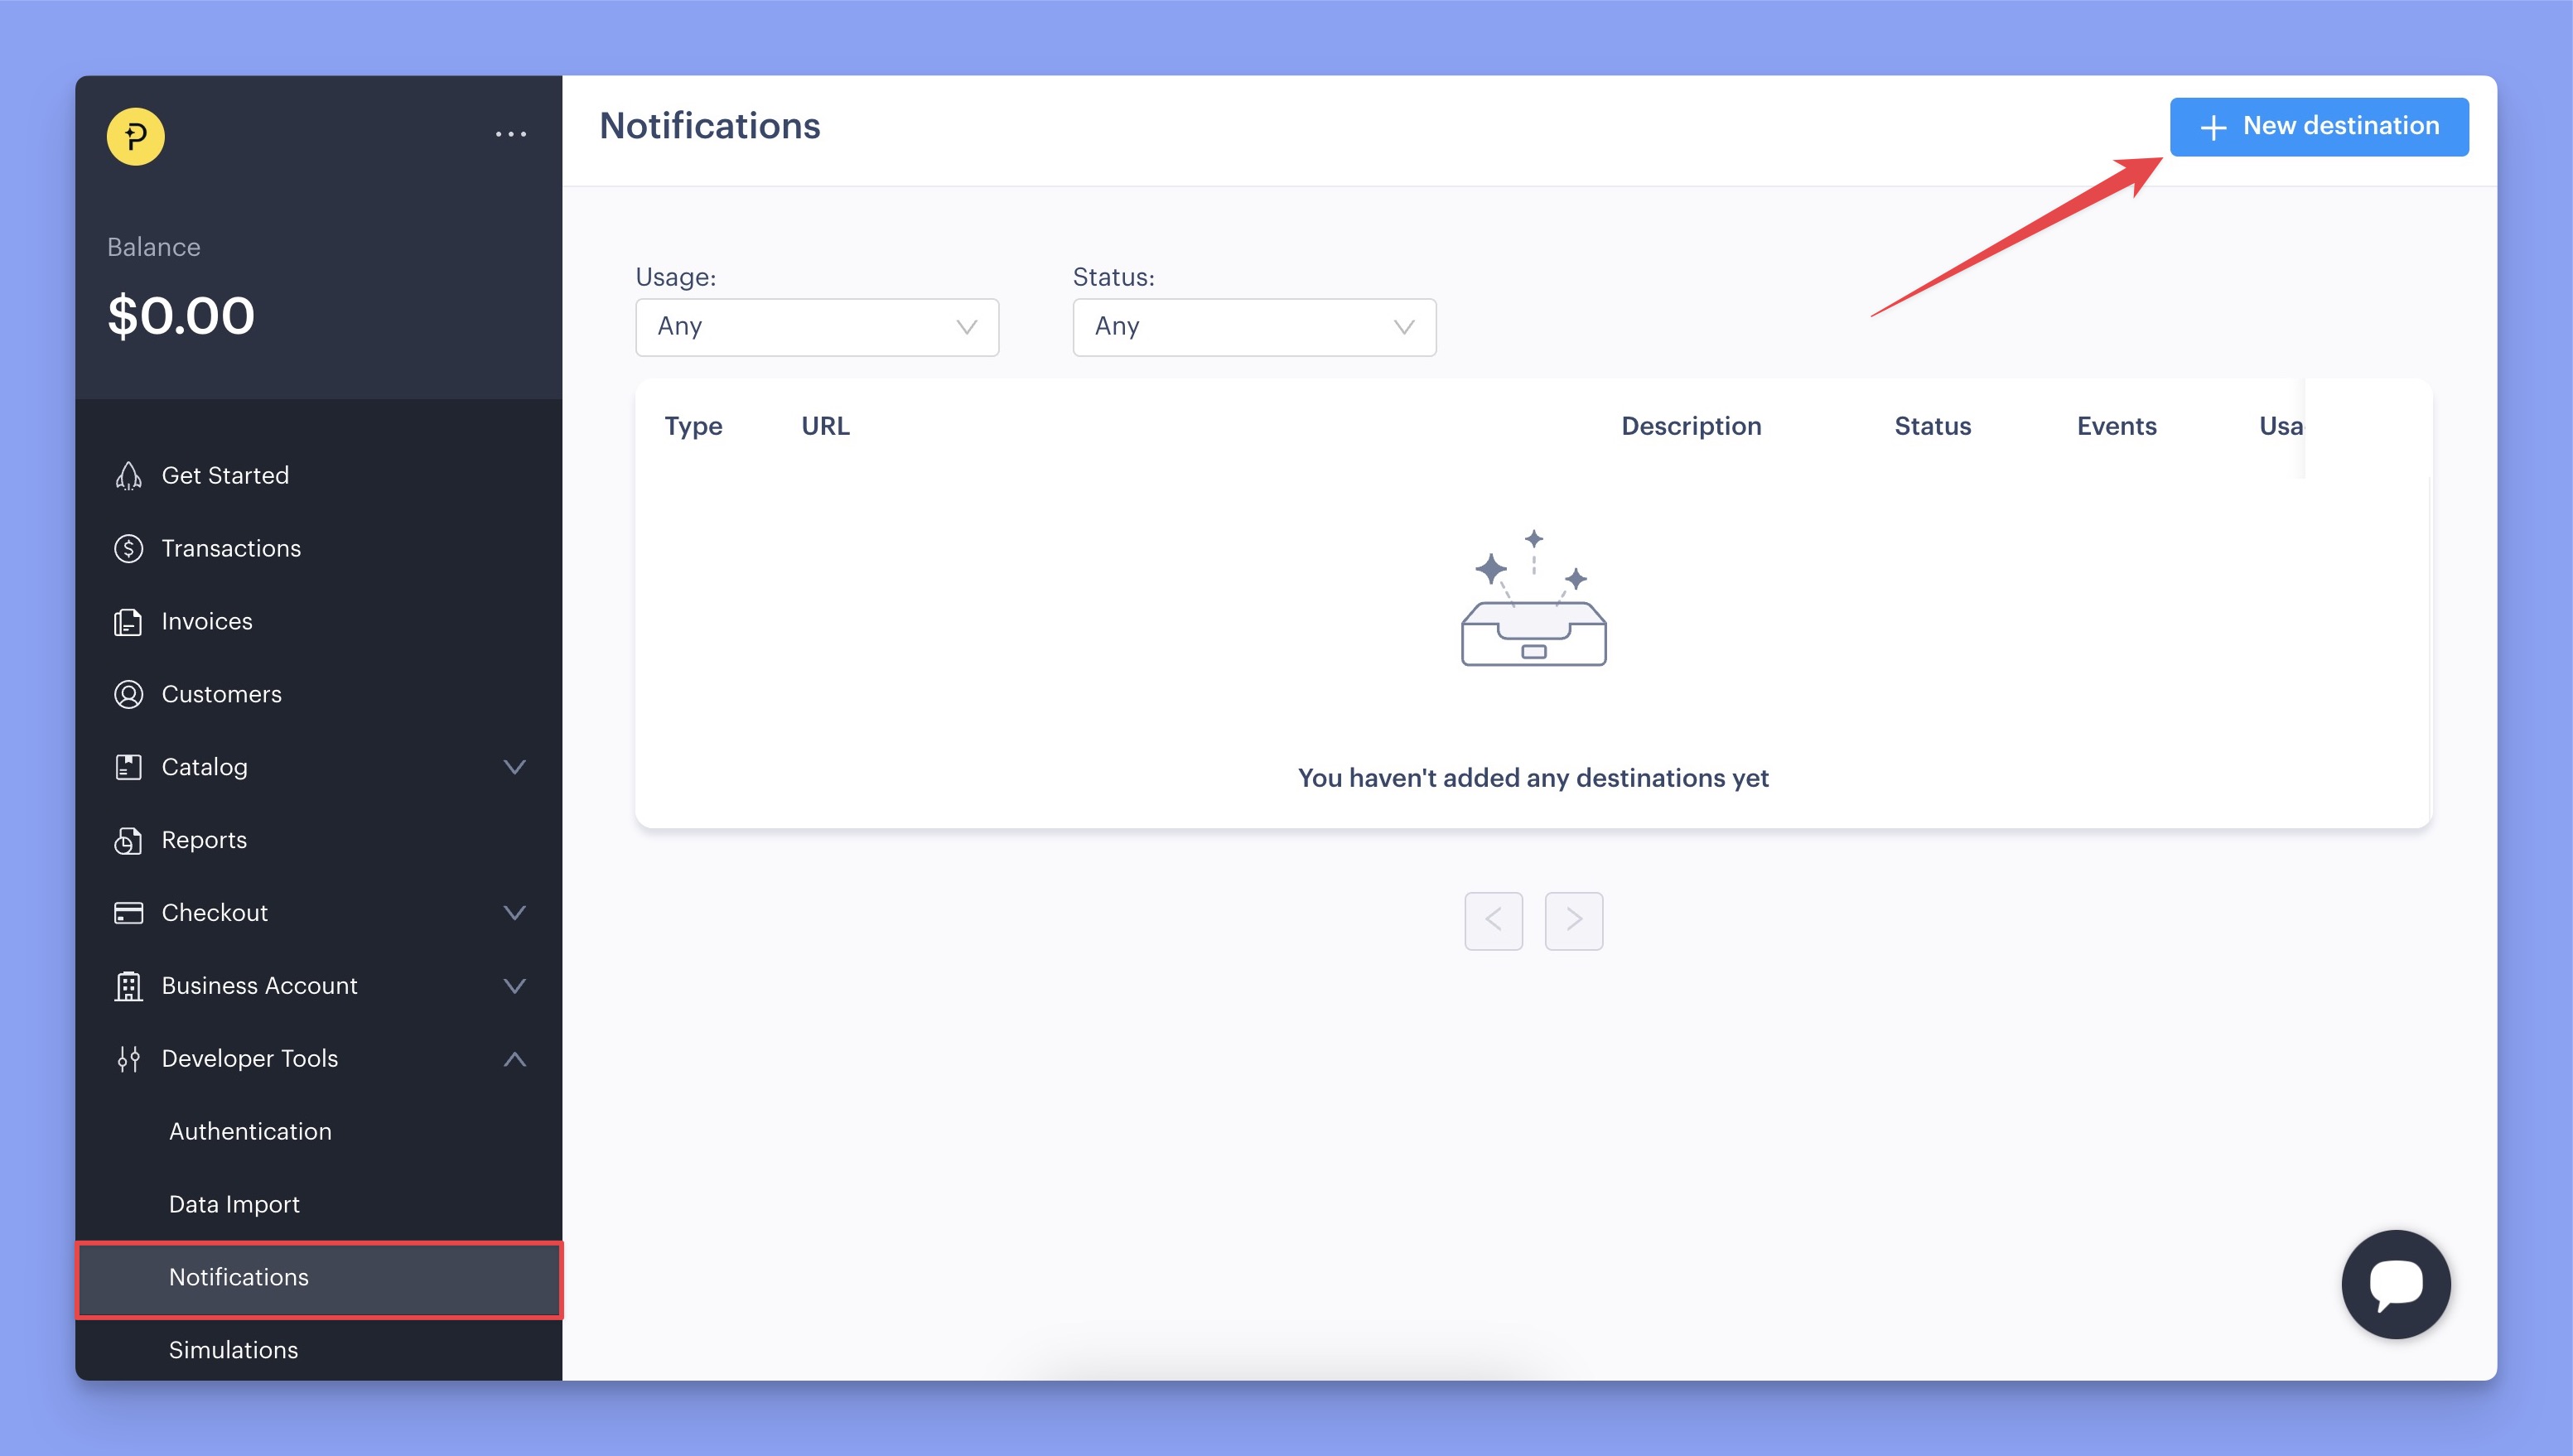
- Navigate to Paddle Dashboard > Developer Tools > Notifications.
- Click on the New Destination button.
- Now, enter the description and select Webhook as the Notification type. Then, copy the Webhook URL from the Tutor LMS plugin settings and paste it into the URL field. Then select the API version 1 and Usage type as Platform only.
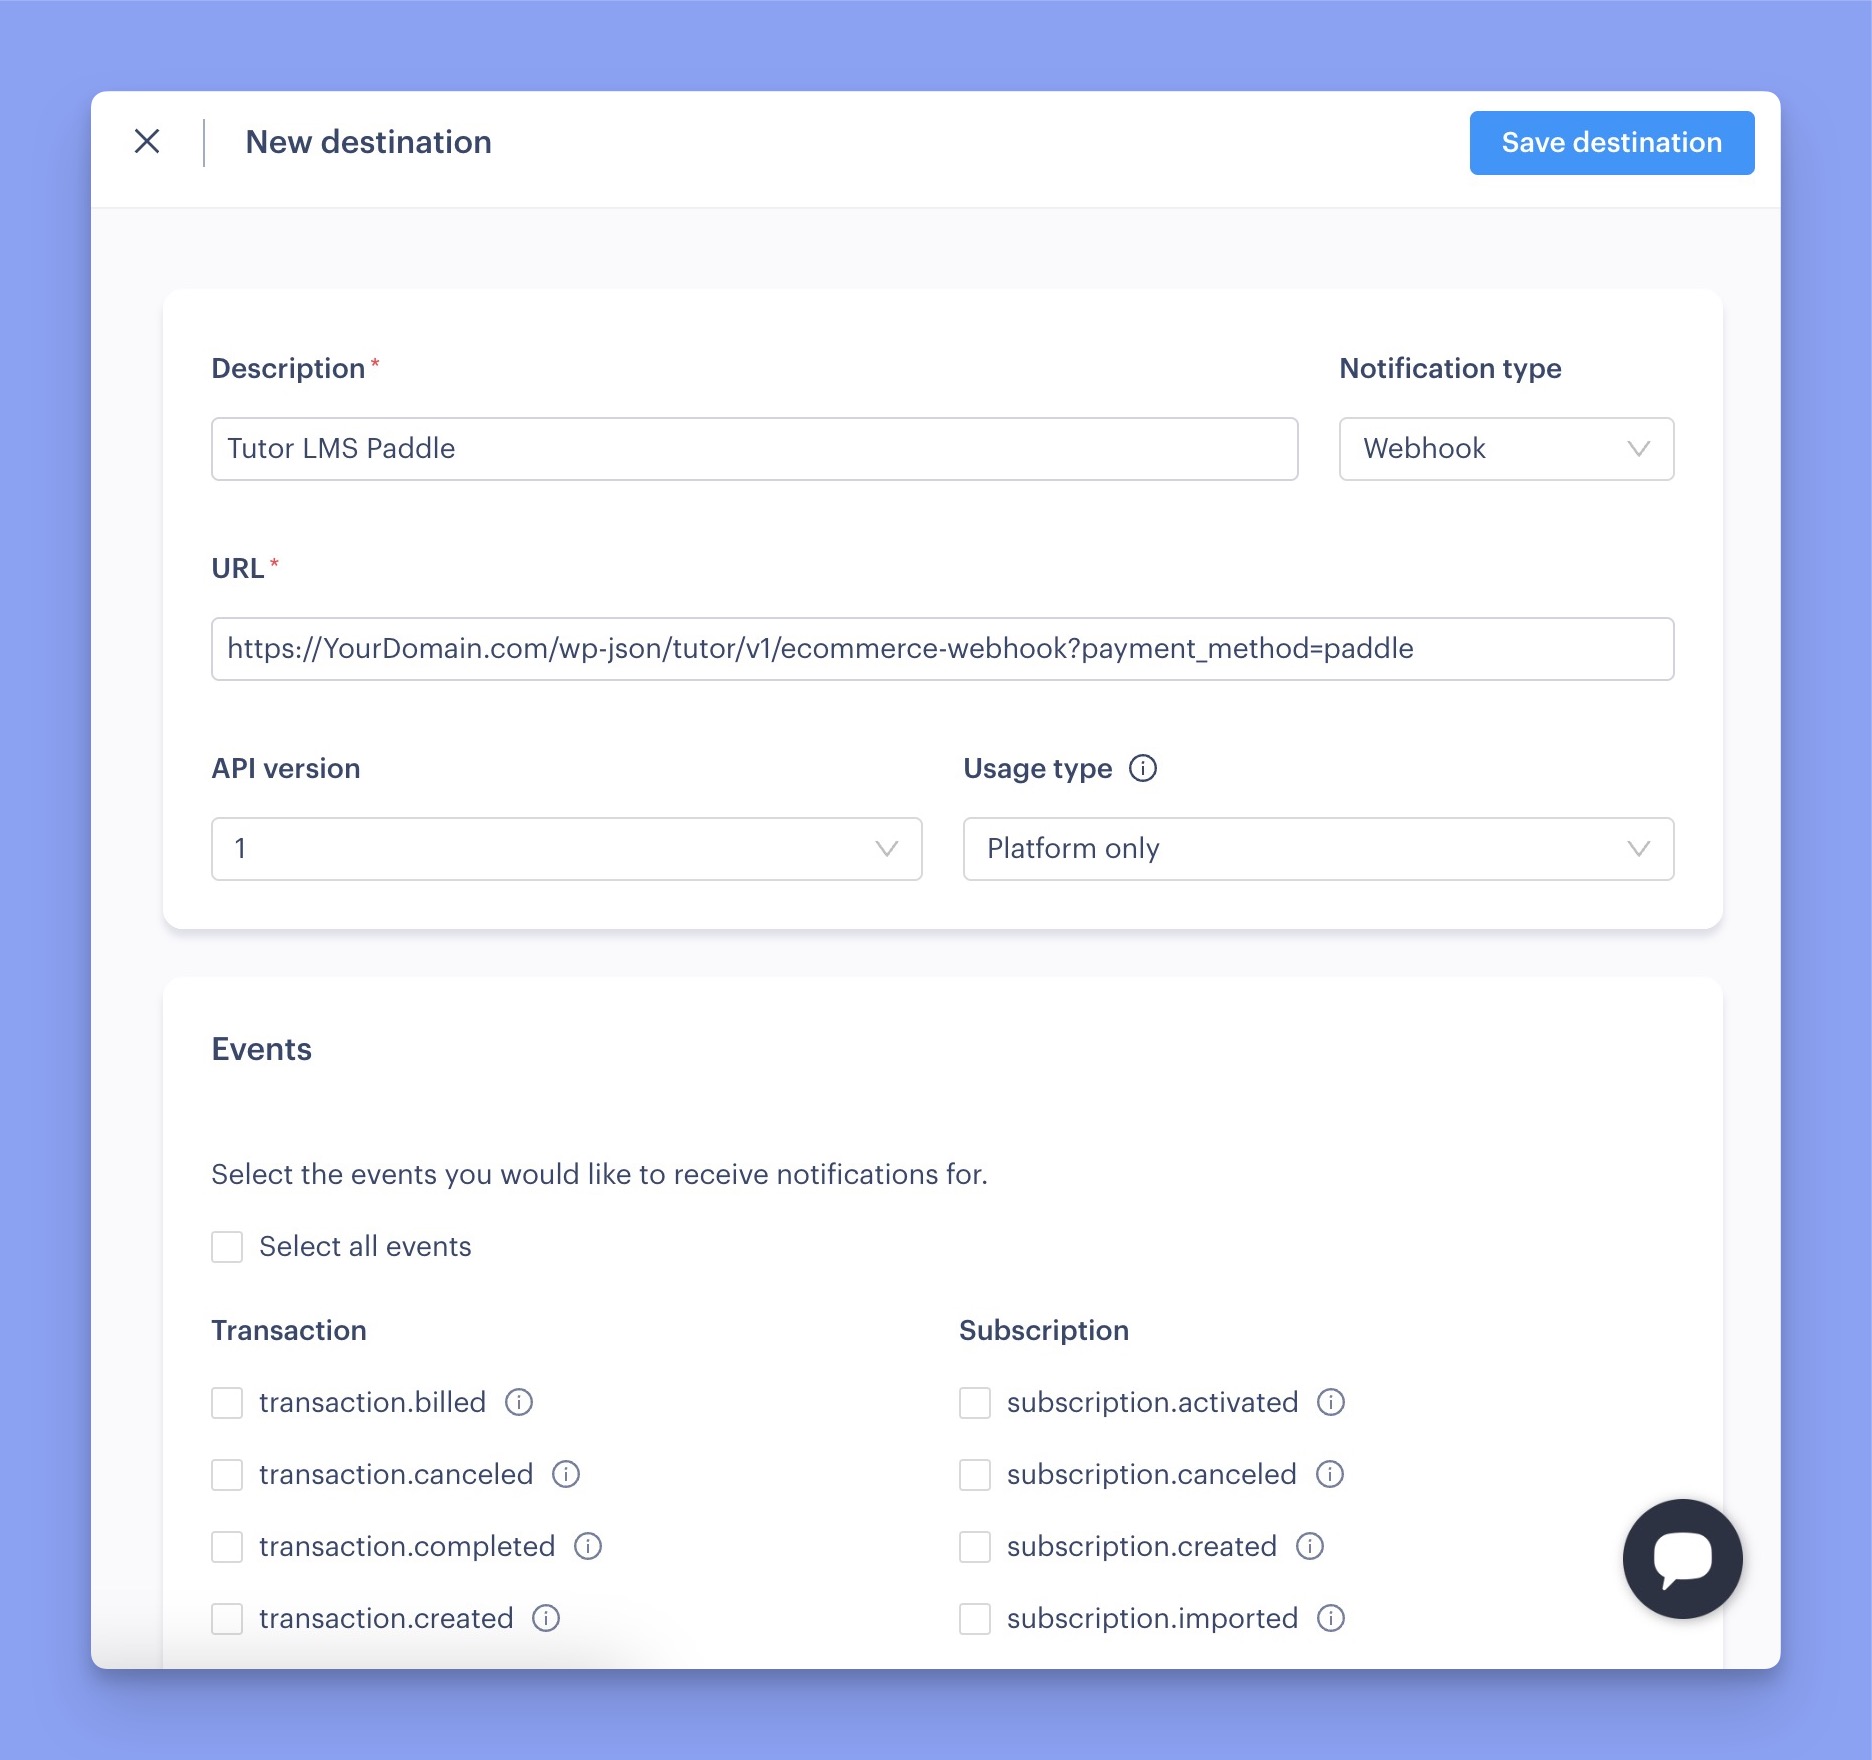
- Up next, you need to select the appropriate events for which you want to be notified. However, it’s mandatory to select the following events for Tutor LMS:
- Transaction.completed
- Adjustment.created
- Adjustment.updated
- Then, click on the Save Destination button.
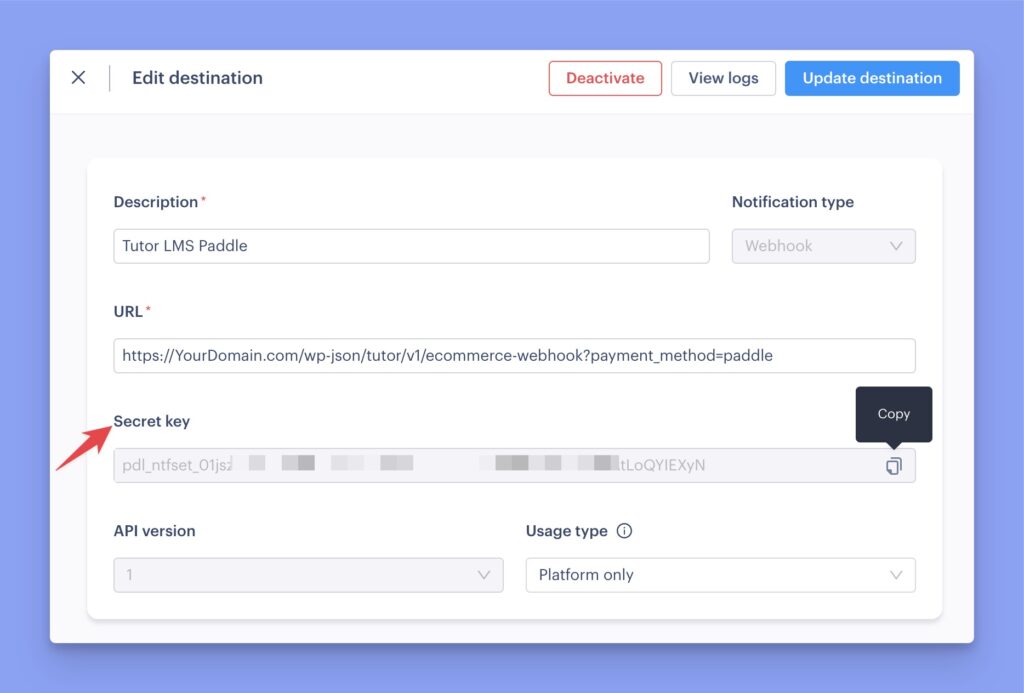
Finally, find your new destination, click the three-dot menu, and select Edit Destination. There, you will get a new field titled “Secret key”. You need to copy this key and paste it into Tutor LMS’s Webhook Secret Key field.
Step 4: Approve Your Website Domain
To use Paddle checkout and use the Inline Checkout feature, you must first approve your domain. Without domain approval, you won’t be able to process transactions directly on your website.
To do so, navigate to the Paddle Dashboard > Checkout > Website Approval. From this page, you can add a new domain for verification.

In the input field, enter your domain or subdomain URL without the http:// prefix or any trailing slashes. For example:
✅ themeum.com
✅ docs.themeum.com
❌ https://themeum.com/
Finally, click Submit for Approval button to complete the process.
Step 4: Set the Default Payment Link
In the final step, you have to set the default payment link.You can do it by navigating to Paddle Dashboard > Checkout > Checkout Settings. Then scroll down a little bit, and you’ll get the payment link input field in the Checkout settings page.
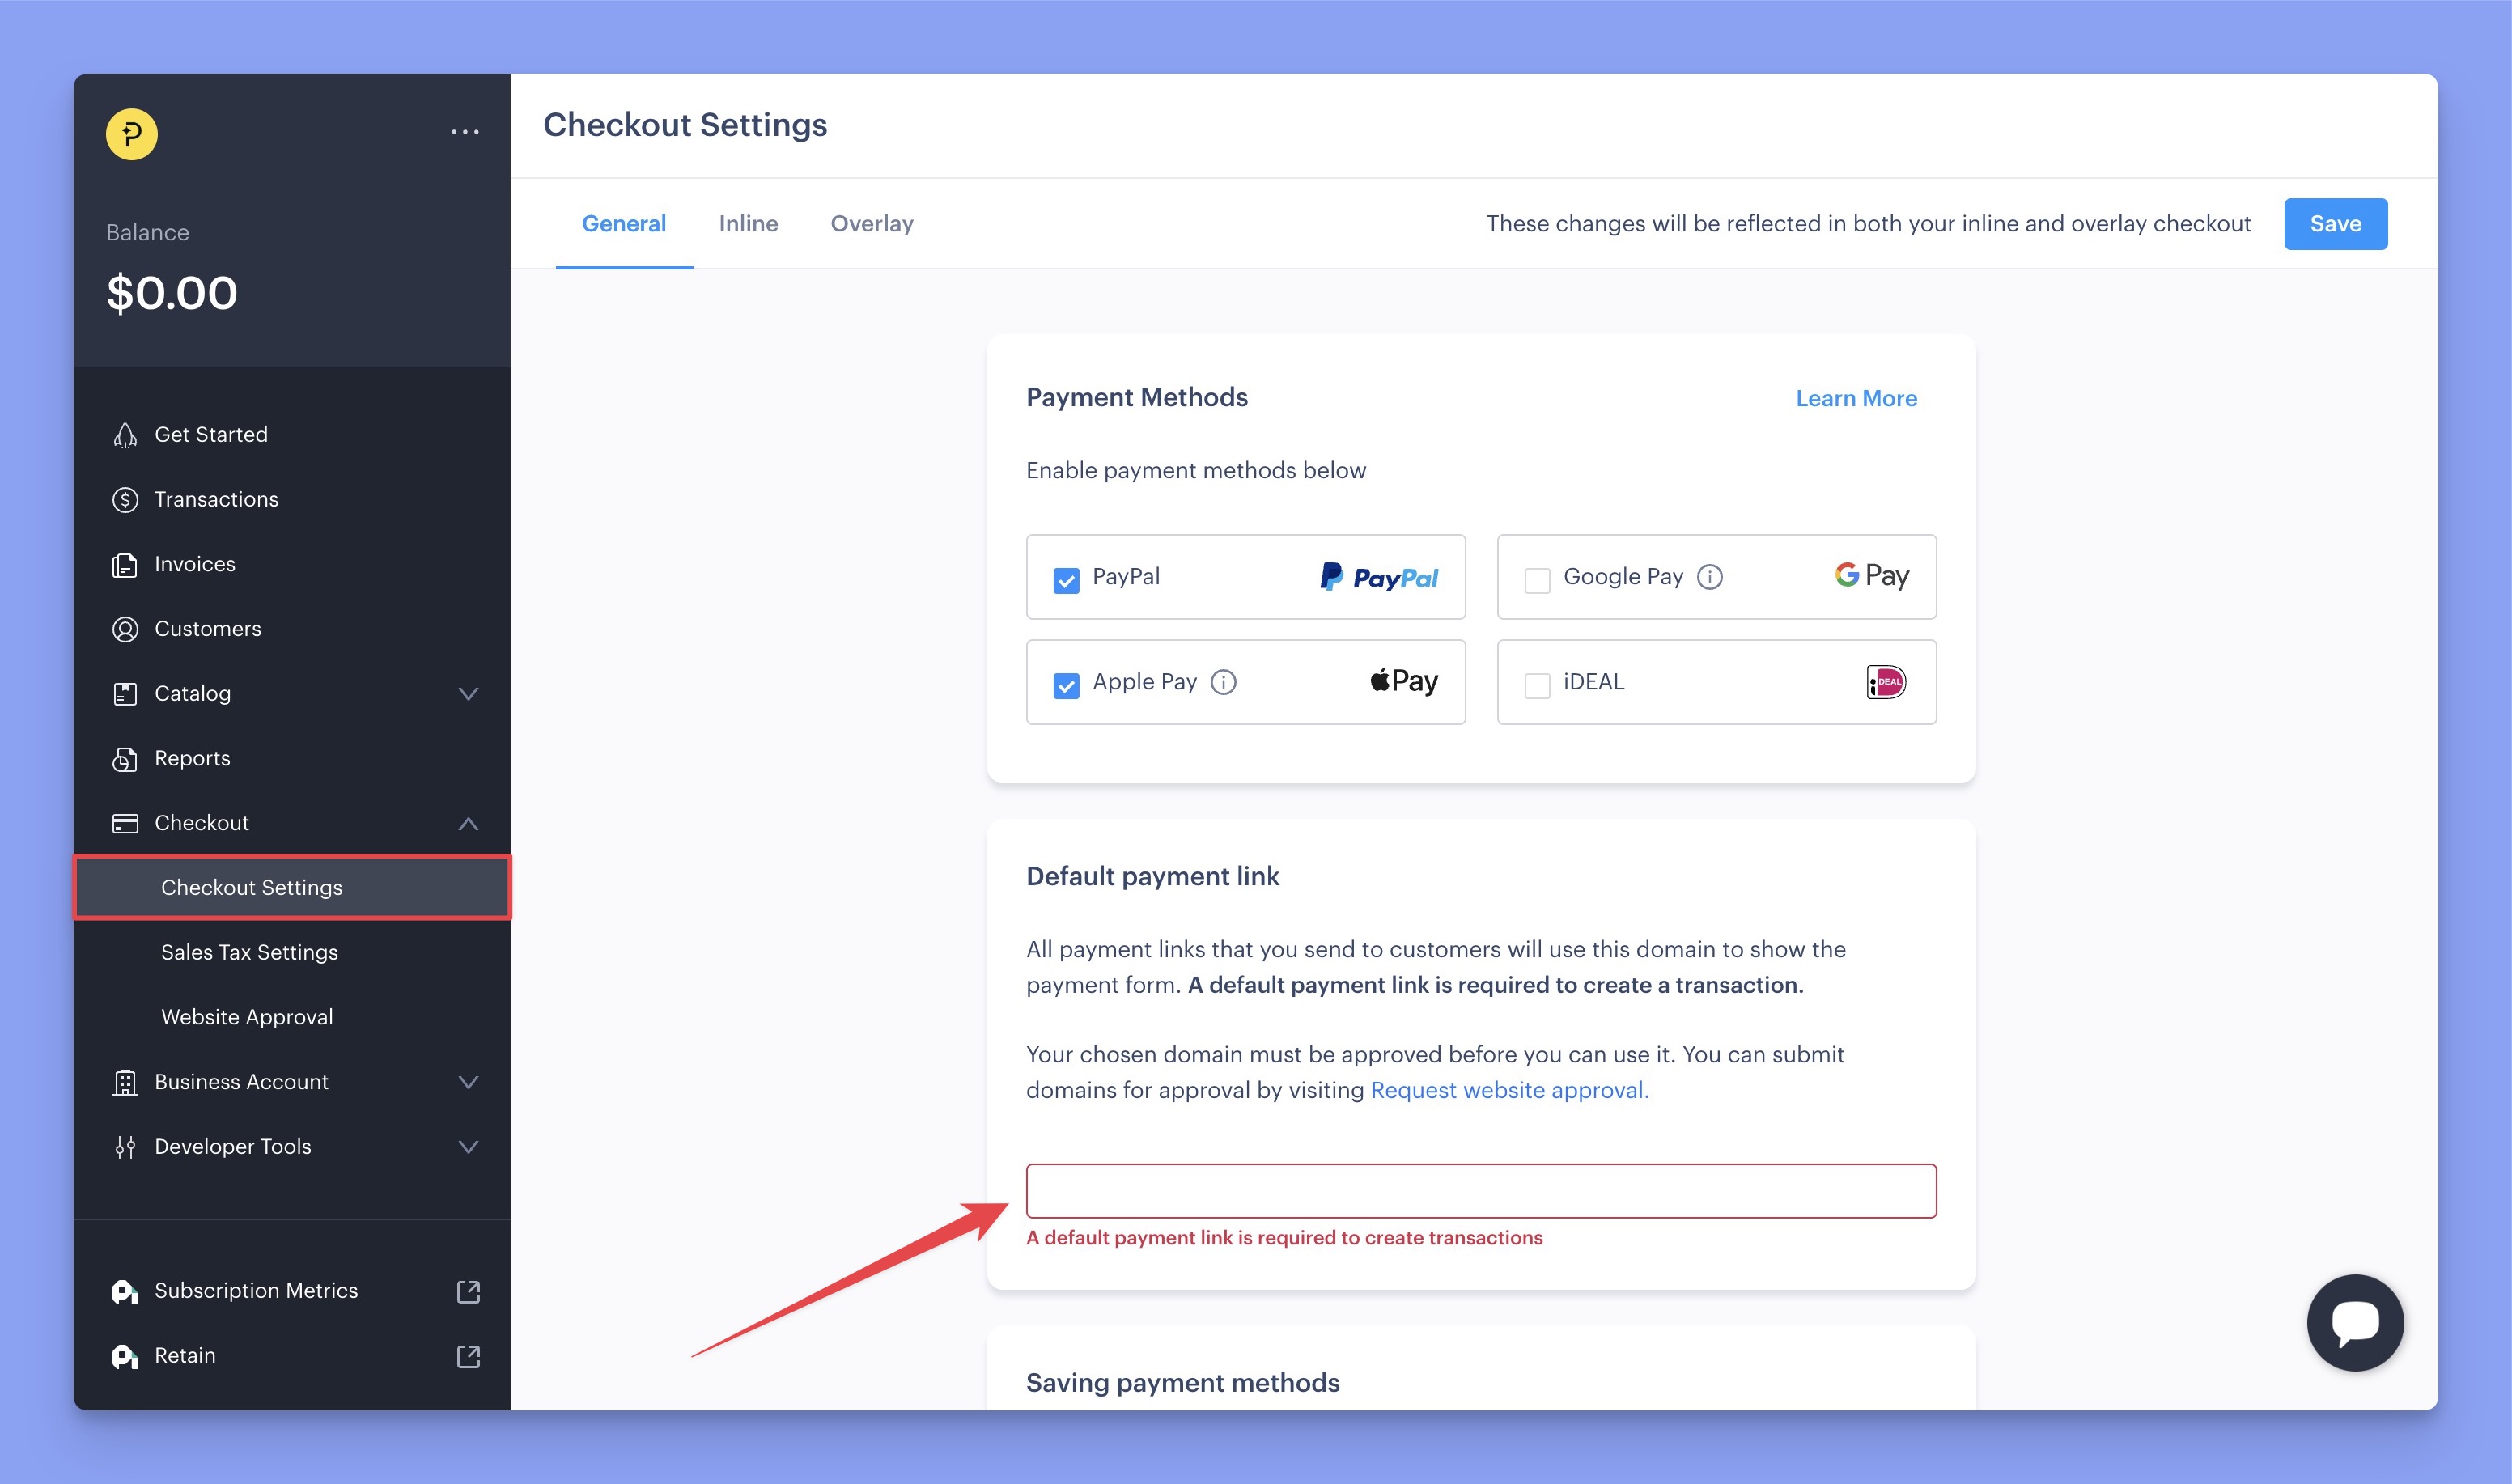
Then input your website URL here and save changes.
Configuring Paddle Settings in Tutor LMS
Now, navigate to the Paddle configuration section and follow the steps below:
- Choose between Sandbox or Live Environment, depending on whether you want to process real transactions or run test payments.
- Input the Paddle API Key and Client-side token by collecting them from the Paddle Authentication page.
- Then, input the Webhook Secret Key by collecting it from the Paddle Notification page.
- Finally, click Save Changes to finalize your Paddle integration.
You’re done! Paddle is now ready to handle payments securely from your students.