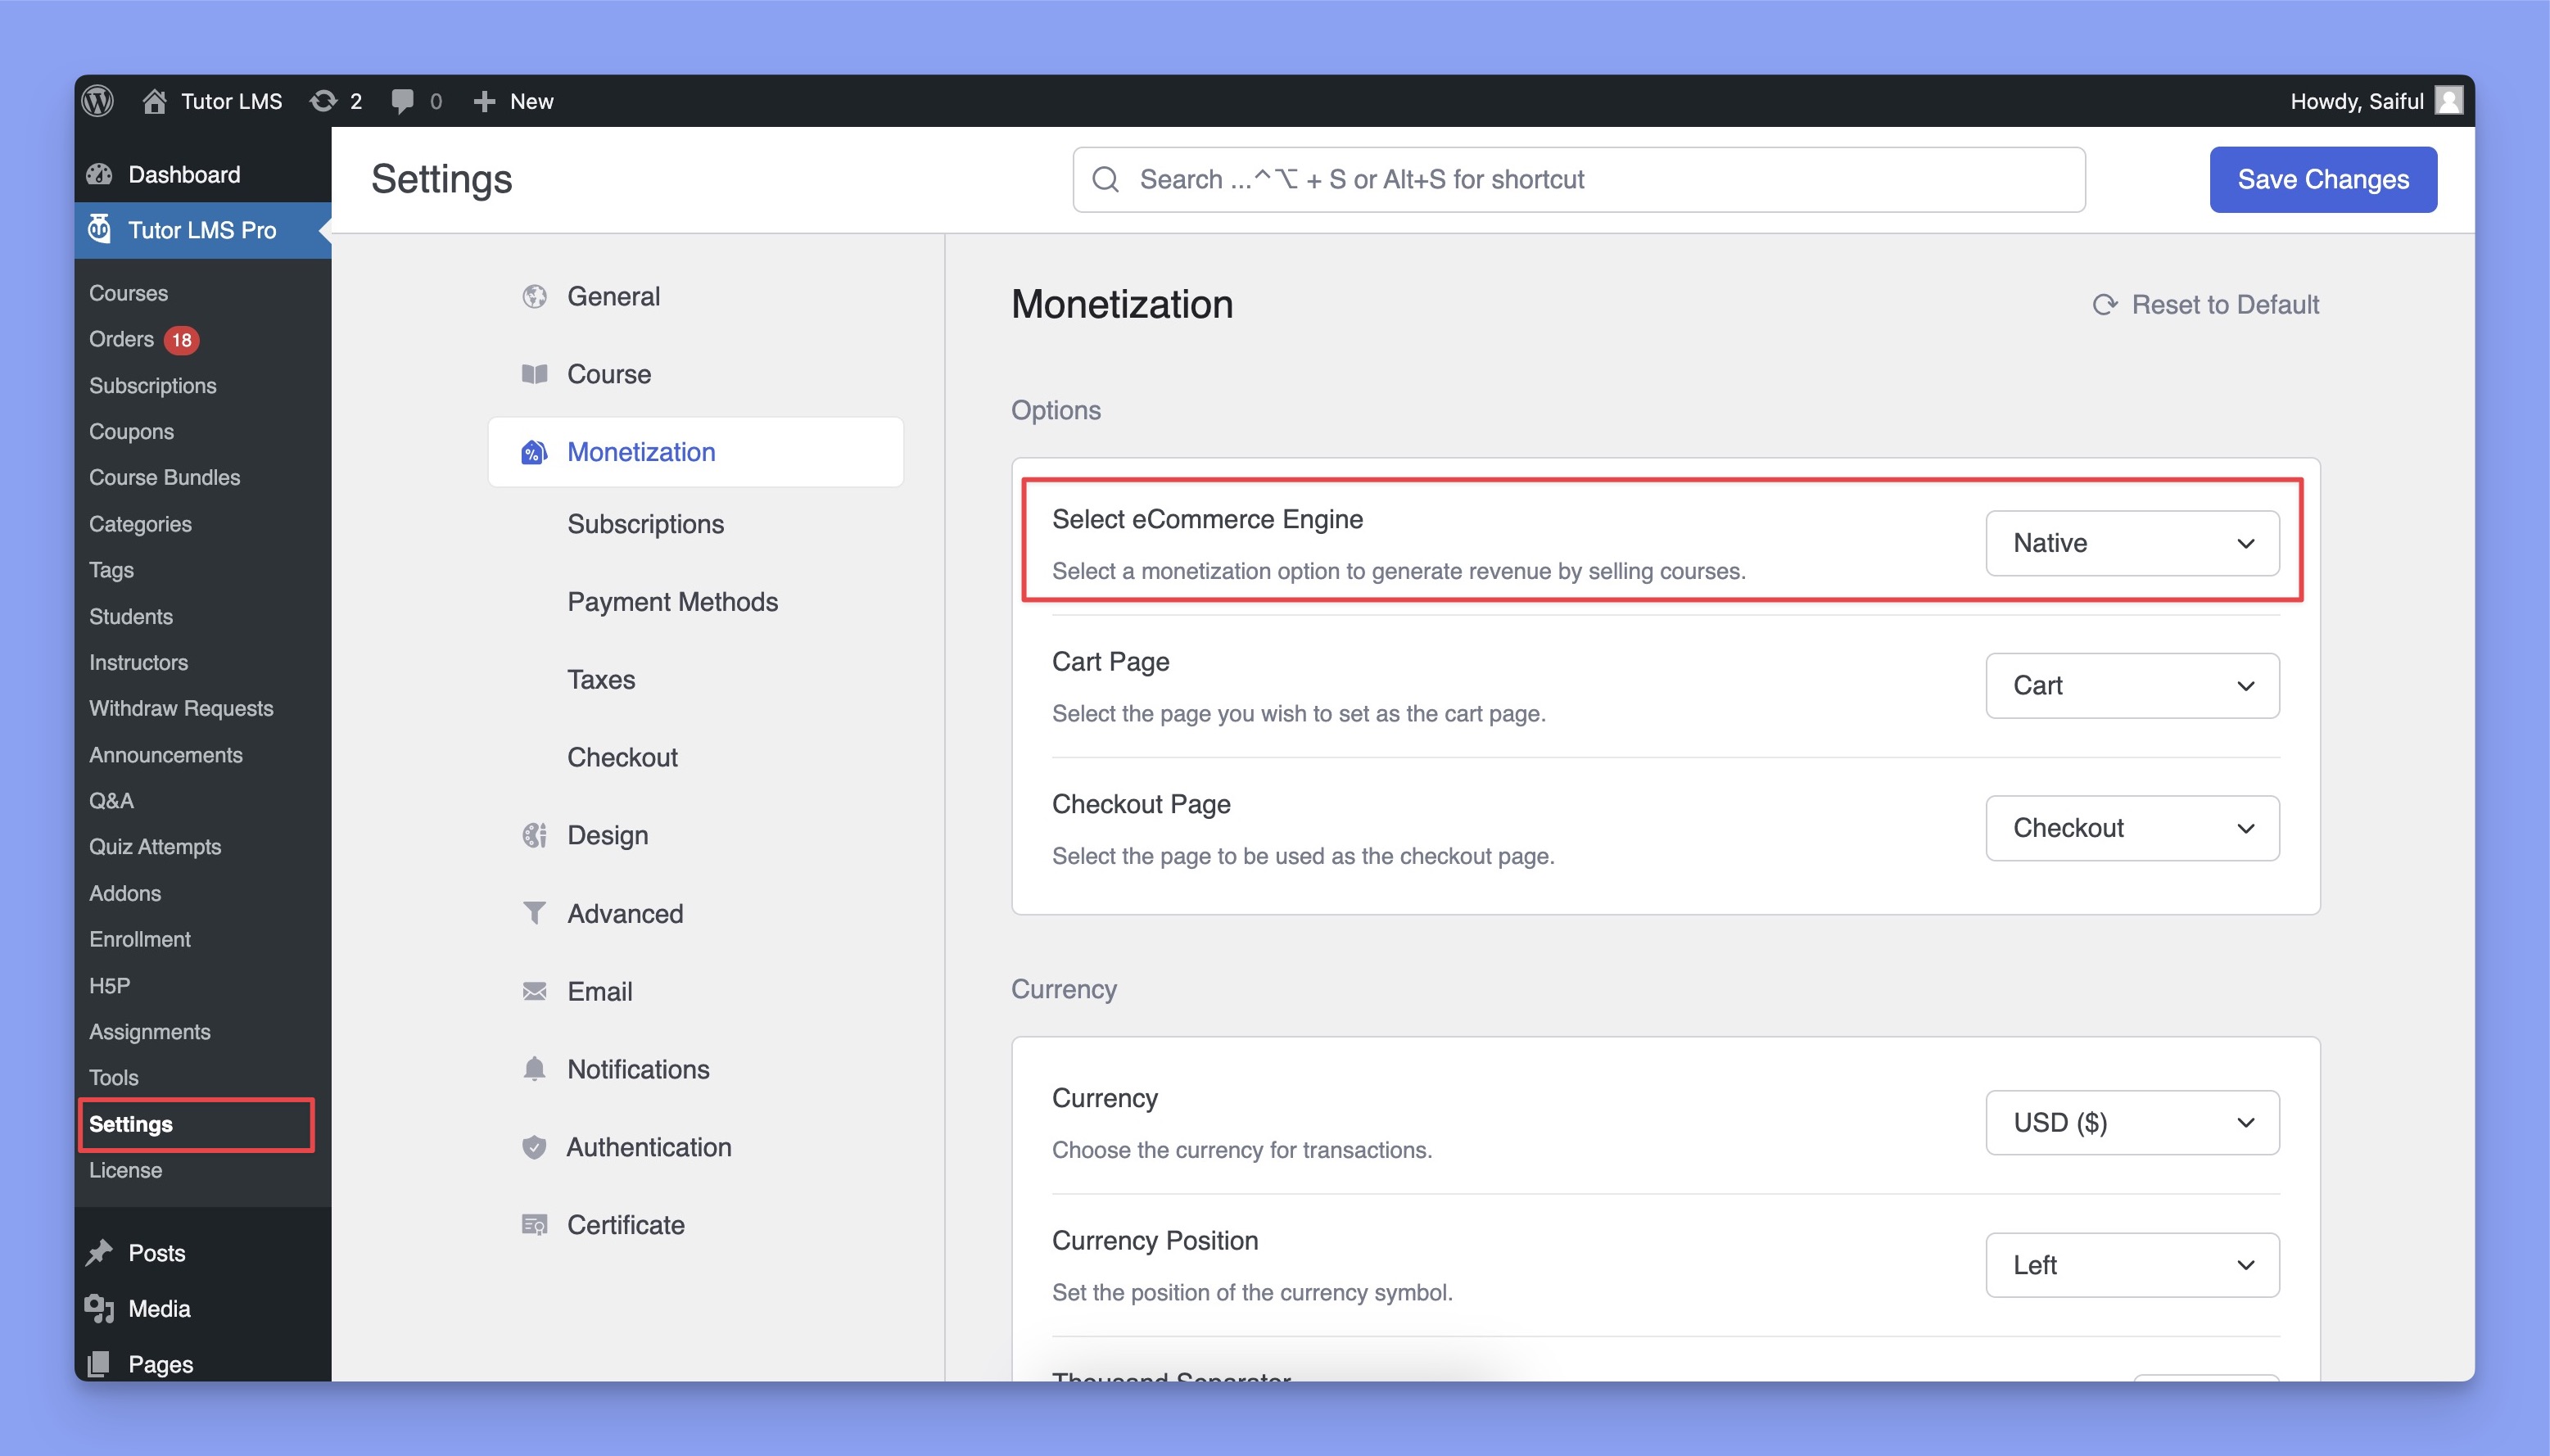
Navigate to Tutor LMS > Settings > Monetization > Select eCommerce Engine and select Native from the dropdown to enable Tutor LMS native eCommerce.
Note: When switching from third-party eCommerce engines to Tutor LMS Native eCommerce please make sure to regenerate Tutor LMS pages. Navigate to Tutor LMS > Tools > Tutor Pages and click Re-Generate Tutor Pages.
Options

Select eCommerce Engine:
- Choose the system to handle course sales. Selecting “Native” enables Tutor LMS’s built-in eCommerce features.
Cart Page:
- Select the page where users will view their cart. This page is typically named “Cart” or “Shopping Cart.”
Make sure this page is created and published in WordPress.
Checkout Page:
- Select the page for processing transactions and finalizing purchases. This page should be set up as “Checkout” or similar in WordPress.
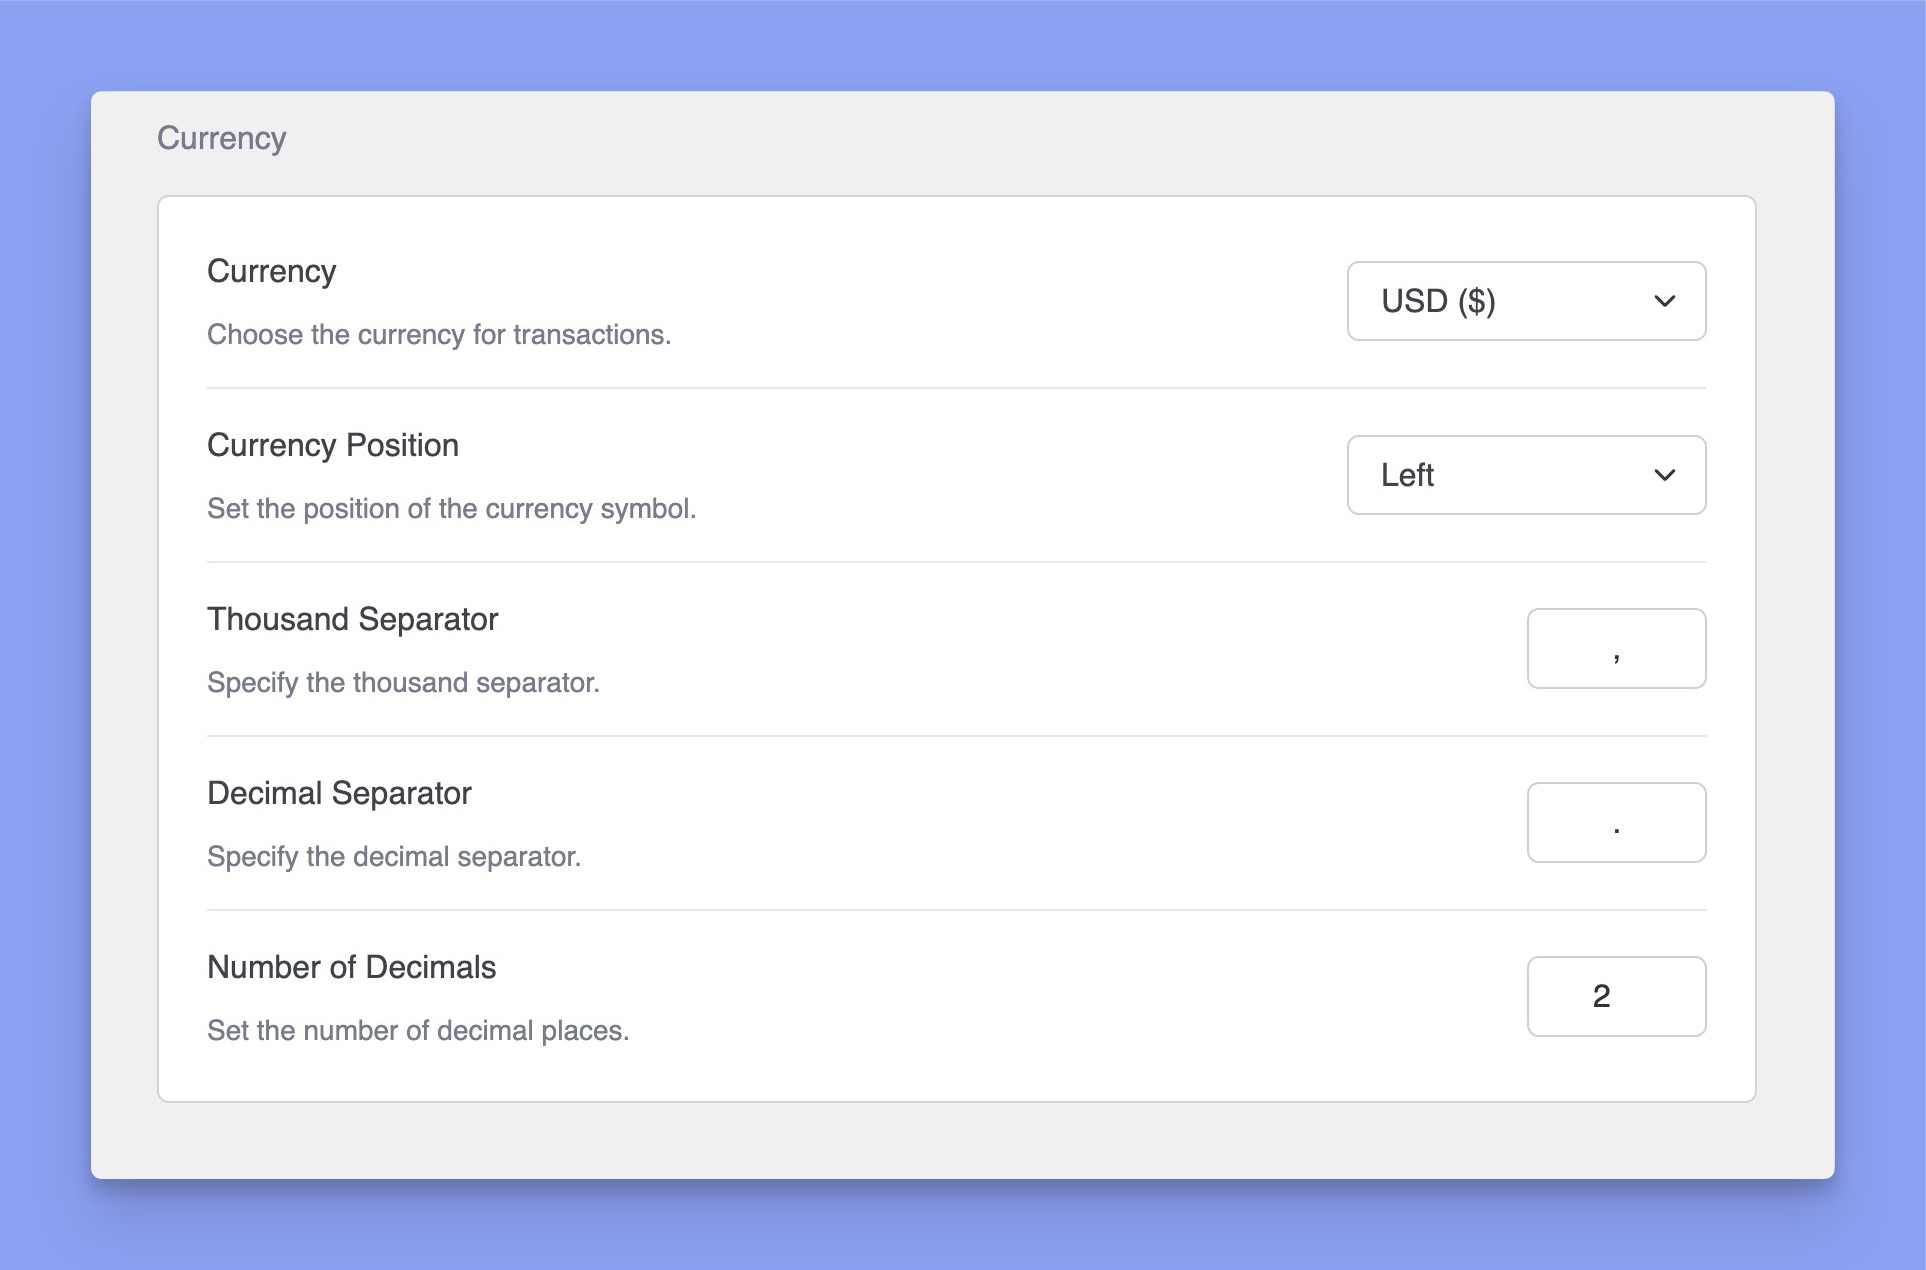
Currency

Currency Symbol:
- Choose the currency symbol to display for transactions (e.g., USD for United States Dollar).
Currency Position:
Set the position of the currency symbol relative to the price. You can set it to:
- Left: Symbol appears to the left of the price (e.g., $100).
- Right: Symbol appears to the right (e.g., 100$).
Thousand Separator:
- Define the character to use as a separator for thousands.
Decimal Separator:
- Define the character to use as a separator for decimals.
Number of Decimals:
- Set the number of decimal places displayed in prices.
Checkout

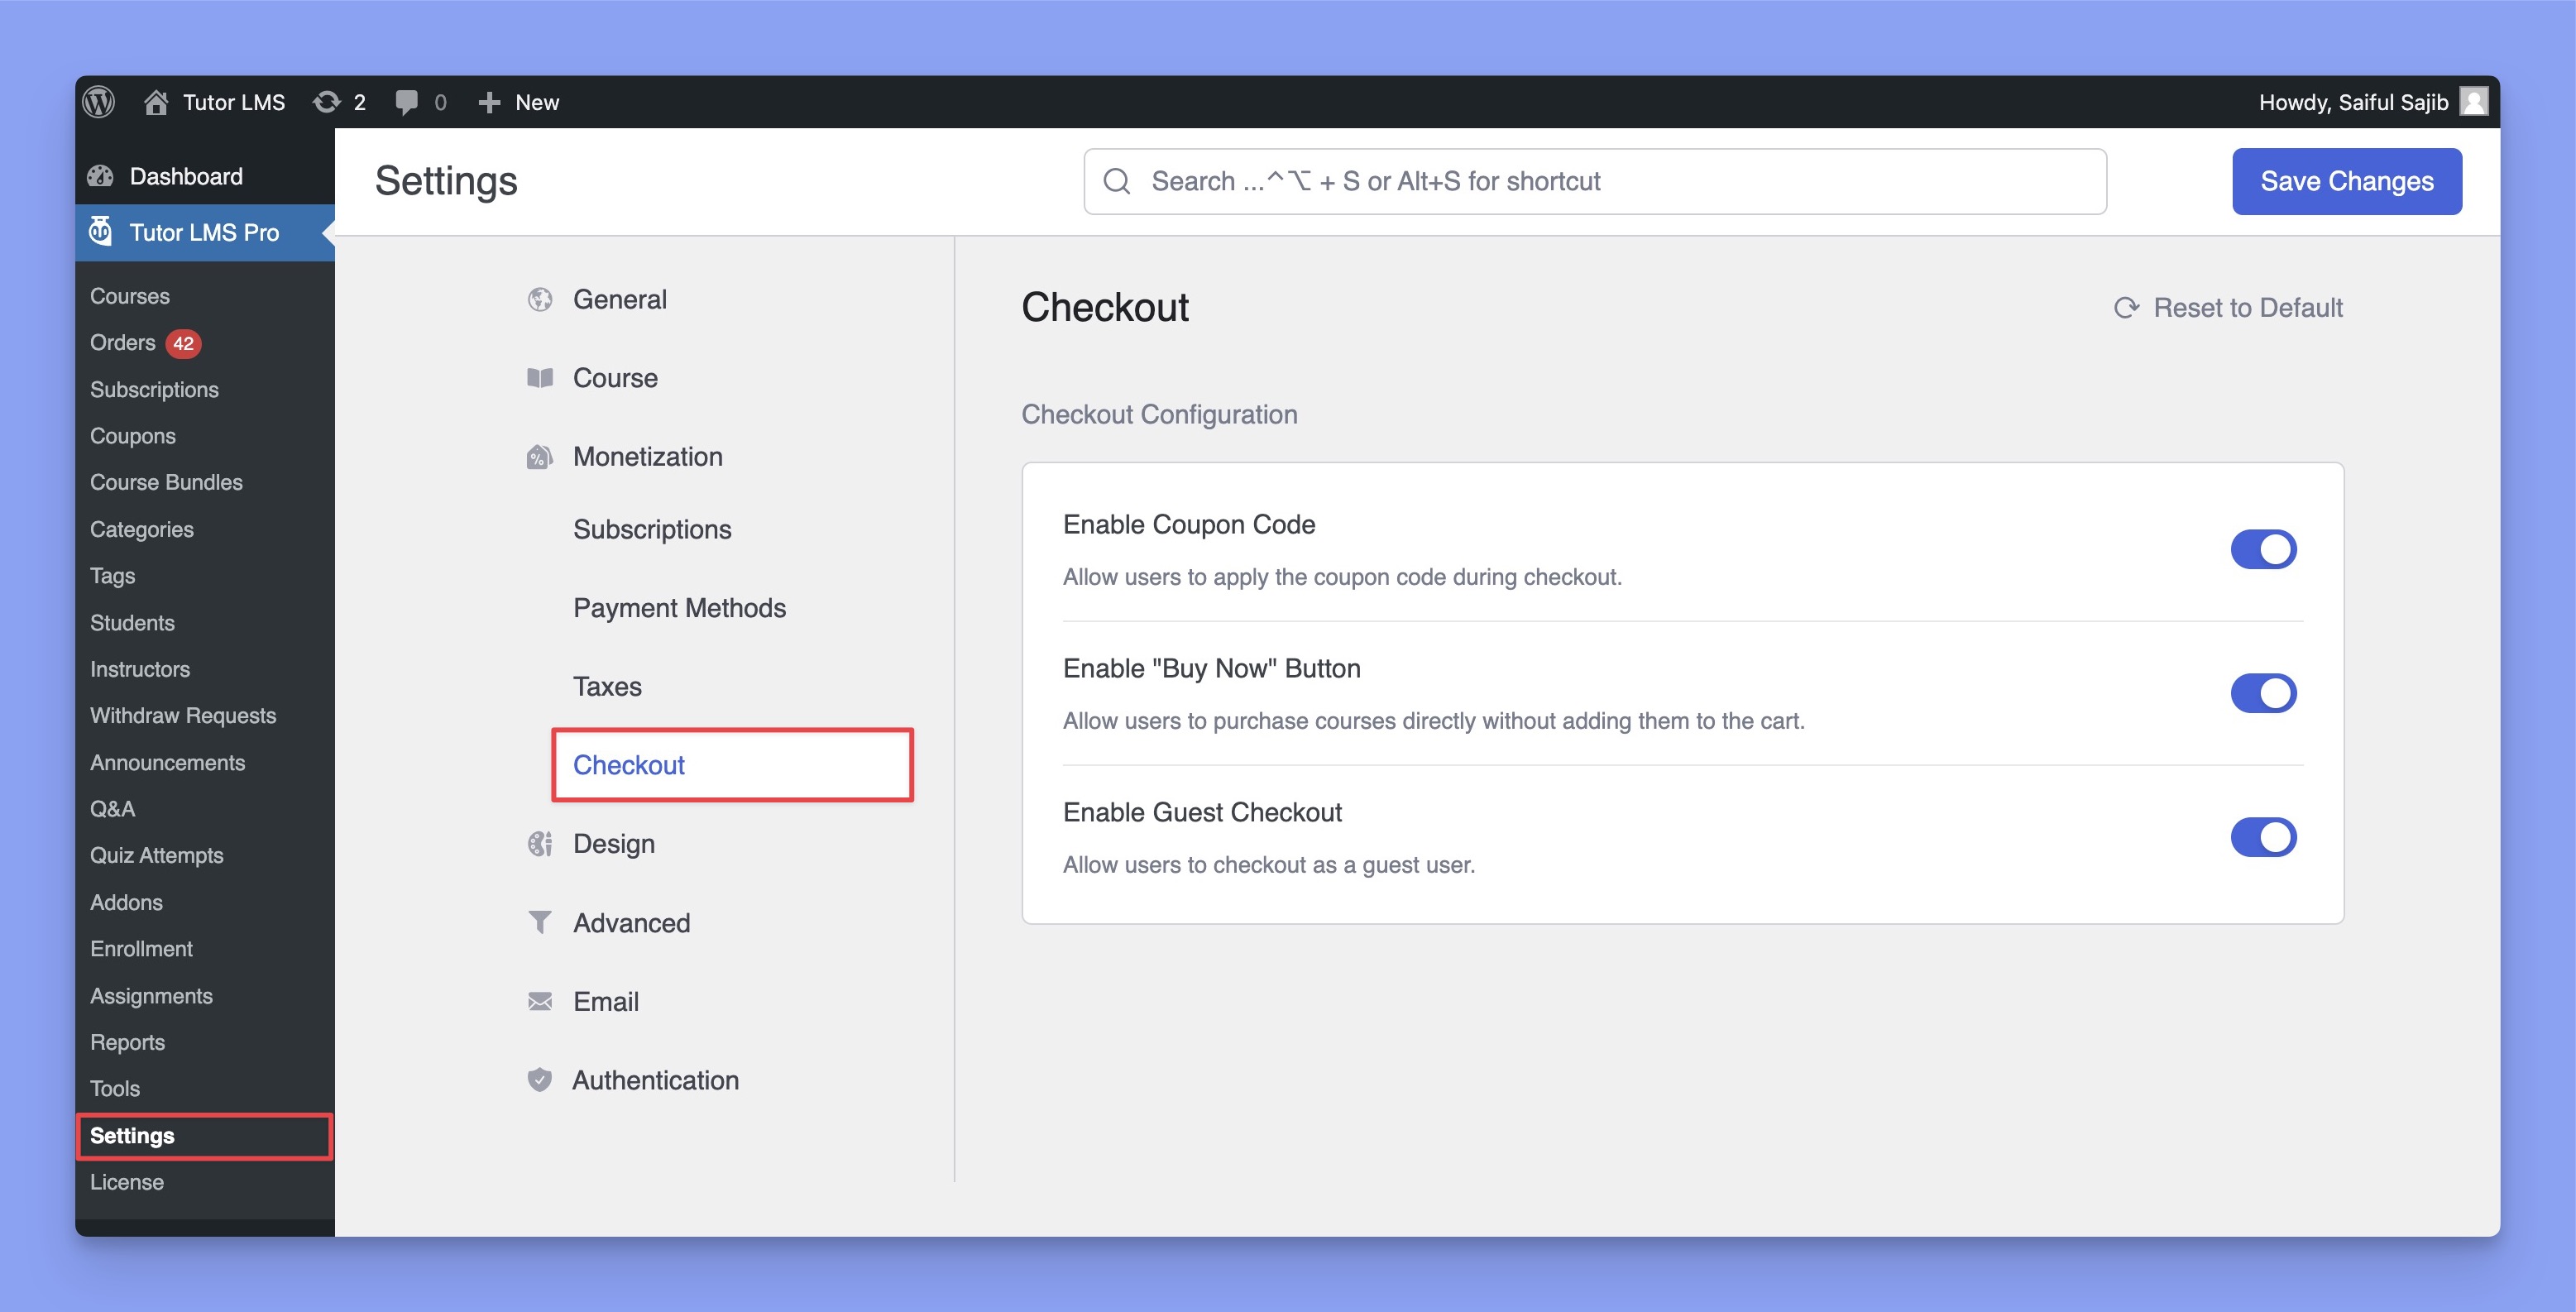
The checkout tab under monetization lets you configure the checkout experience for learners on your site.
Accessing Checkout Settings
To configure checkout settings:
- Navigate to Settings from the sidebar.
- Under Monetization, click on Checkout.
Checkout Options
- Enable Coupon Code
- Allows users to apply coupon codes during checkout.
- When enabled, customers can manually enter a discount code or apply a coupon before completing their purchase.
- Enable “Buy Now” Button
- Allow instant course purchases with the “Buy Now” button by skipping the cart.
- Enable Guest Checkout
- Allows users to complete their purchase without creating an account.
- When enabled, customers can checkout as guest users without signing up.
Native eCommerce Capabilities
While the settings mentioned above help you get started, Native eCommerce supports many popular payment gateways. Additionally, you can also configure regional taxes and discounts with coupon codes straight from Tutor LMS.
For a complete guide to these advanced settings, explore the sections below:
- Payment Gateways: Multiple popular gateways and manual payment setup supported
- Taxes Configuration: Set regional or country-wide tax rates
- Coupon Management: Configure custom coupon codes or automatic discounts
