The process to set up the Easy Digital Downloads plugin is pretty similar to how one would set up WooCommerce. In order to use this plugin as your eCommerce engine, the first thing you need to do is have EDD installed and activated on your LMS site.
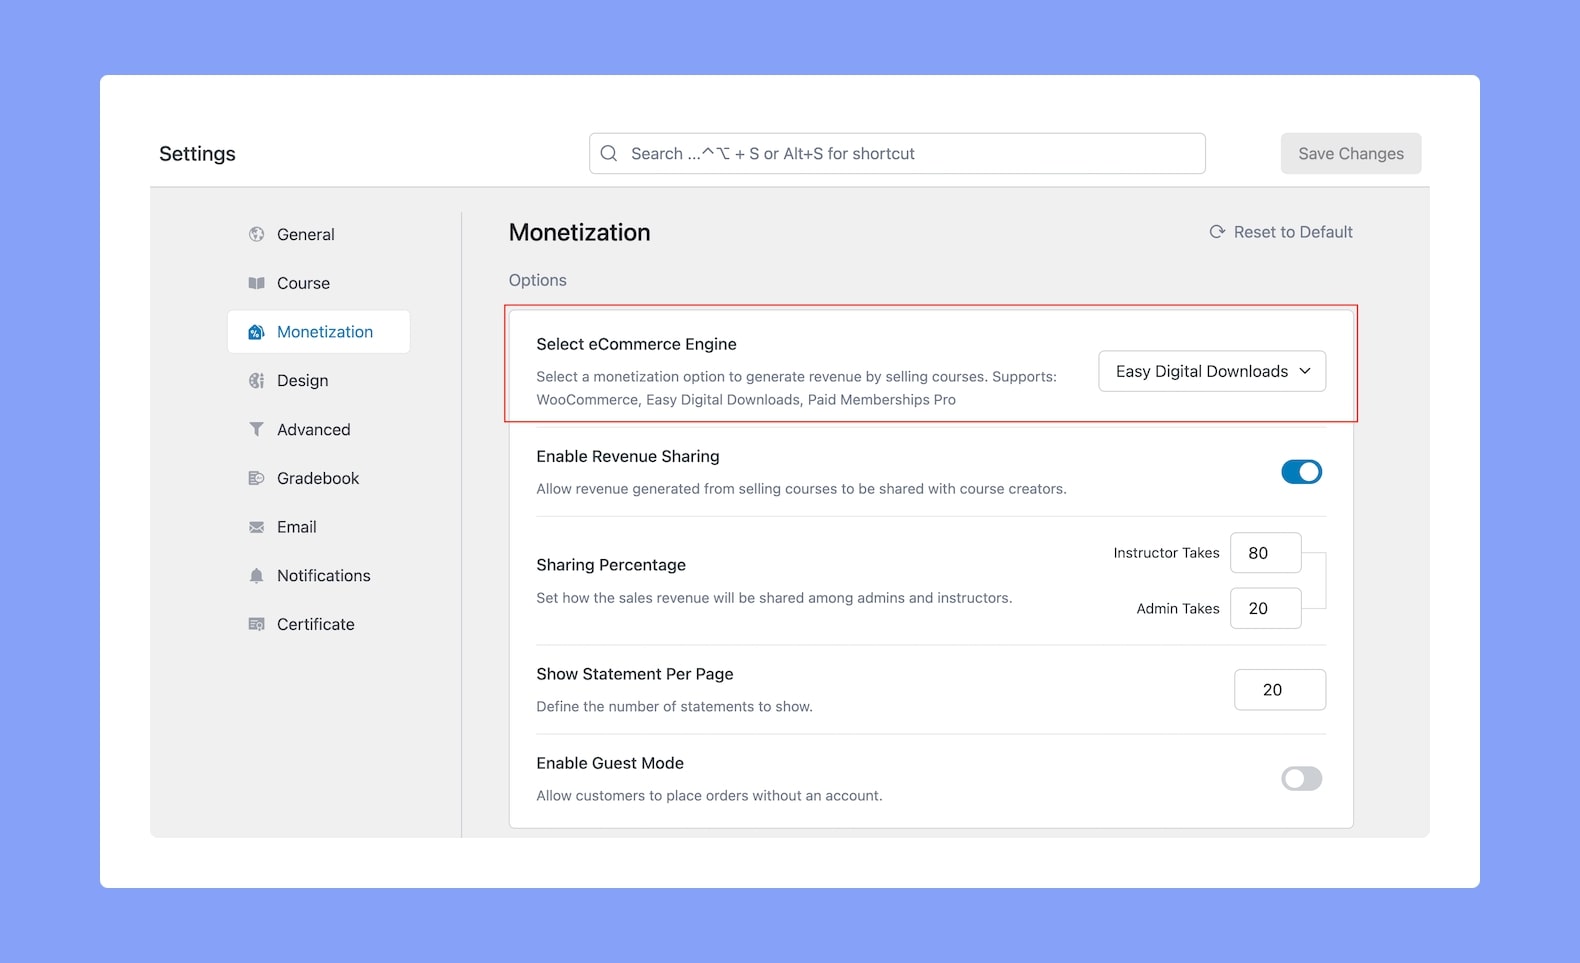
Then you need to enable the plugin by going to WP Admin > Tutor LMS > Settings > Monetization and selecting Easy Digital Downloads as your eCommerce Engine.

Making a Course Paid
Now that your plugin is enabled, it’s time to make your courses paid. Simply follow the steps discussed below to do so.
Creating a Download
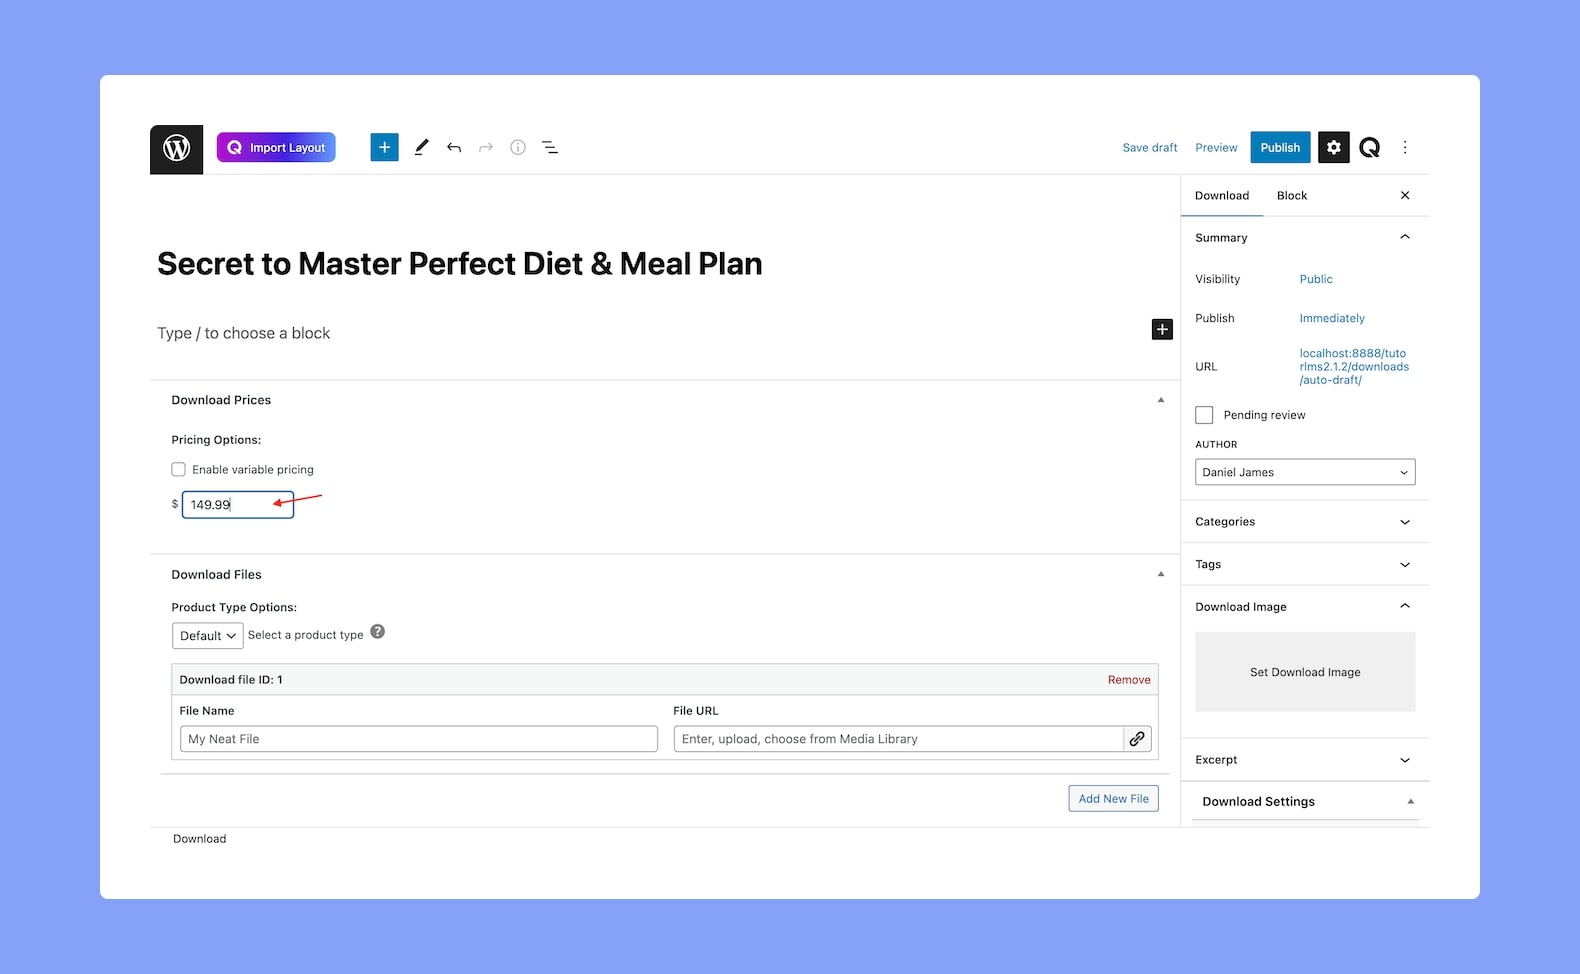
Alright, the first step is to create a Download (basically a product) which we can then link to a Course. To do this, go to WP Admin > Downloads and click on Add New.

On the Downloads Creation Panel, give the new Download a Name and set its Price. To make things simpler, we recommend you name the Download after the course you’ll be linking it to. Once that’s done, hit publish to finish off.
Linking a Download to a Course
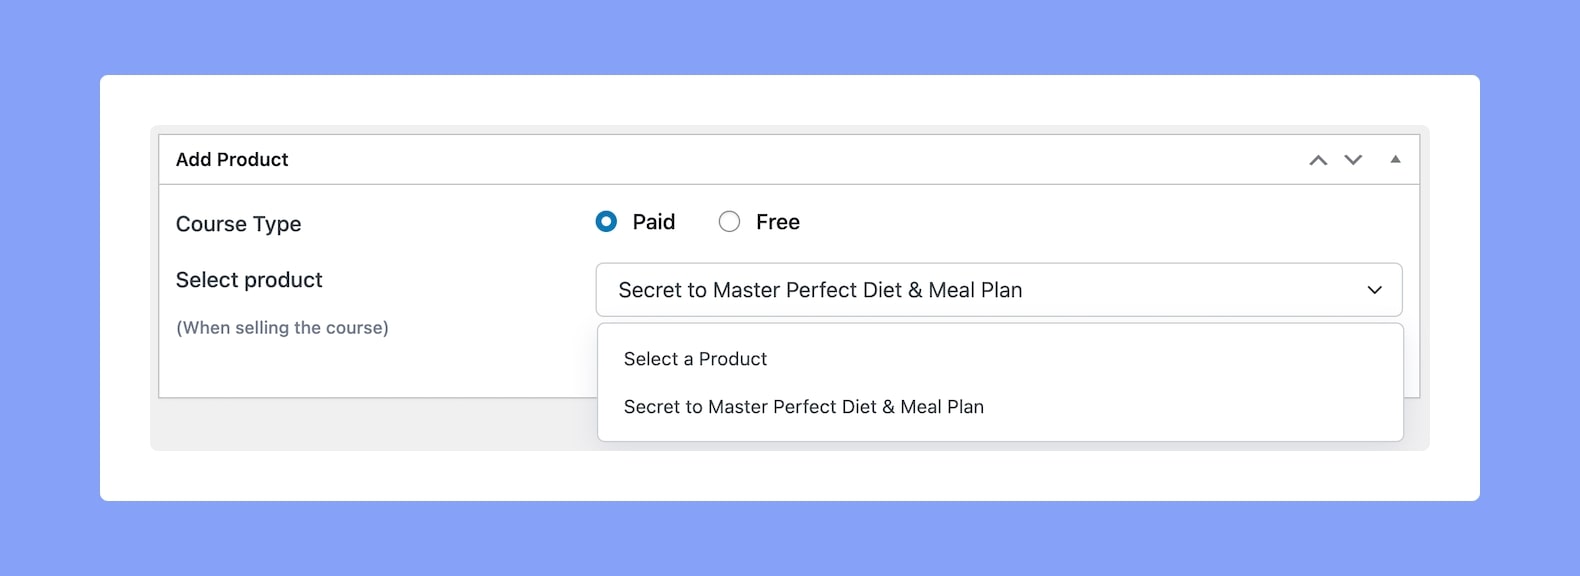
Now it’s time to visit the course you want to make paid. On the course creation page, scroll down to a new section called Add Product.

Here, set its Course Type as Paid, and from the following dropdown list select the Download that you just created. Finish off by clicking on Publish/Update and you’re done!
Setting Up the Payment Gateway

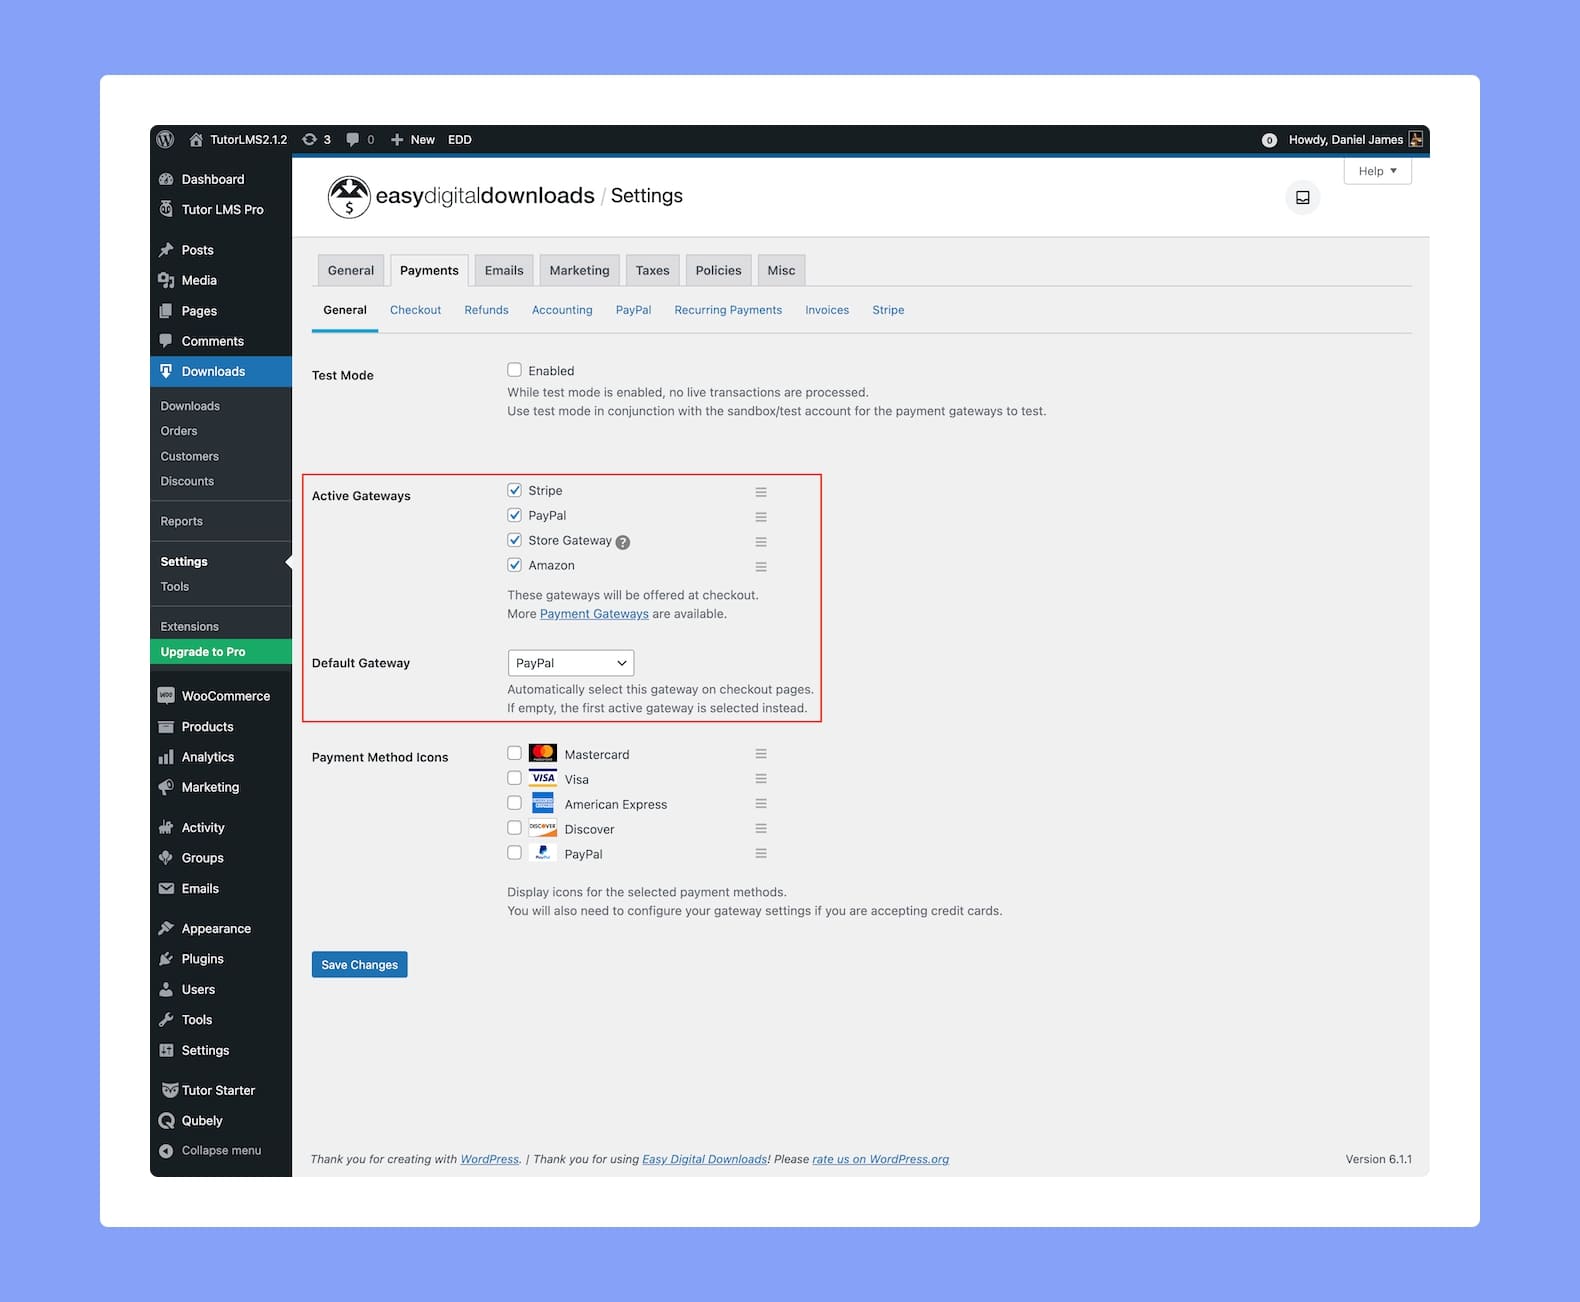
The last step before users can buy your courses is to set up the EDD Payment Gateway. So head over to WP Admin > Downloads > Settings > Payments (tab). Finally, under Active Gateways, select which Payment Methods you want to enable and hit Save Changes.
And that’s it! Now you’re all set to sell your courses in this way and users can even add them to their wishlist to buy later.
