The Material Element is designed to dynamically display course learning resources such as:
- Video Lessons
- Quizzes
- Assignments
- Live Class Links (Zoom or Google Meet, if enabled)
This element gives learners a clear preview of the course content before enrollment, helping them understand what they’ll be learning and how.
Where to Use
Place this element on Course Detail pages—ideally within the curriculum section—so users can see all materials organized by topic.
How to Use
To properly fetch and display course materials using the Material element, you must nest it inside two levels of collections. Follow this step-by-step guide:
Step 1: Create a Collection for Topics
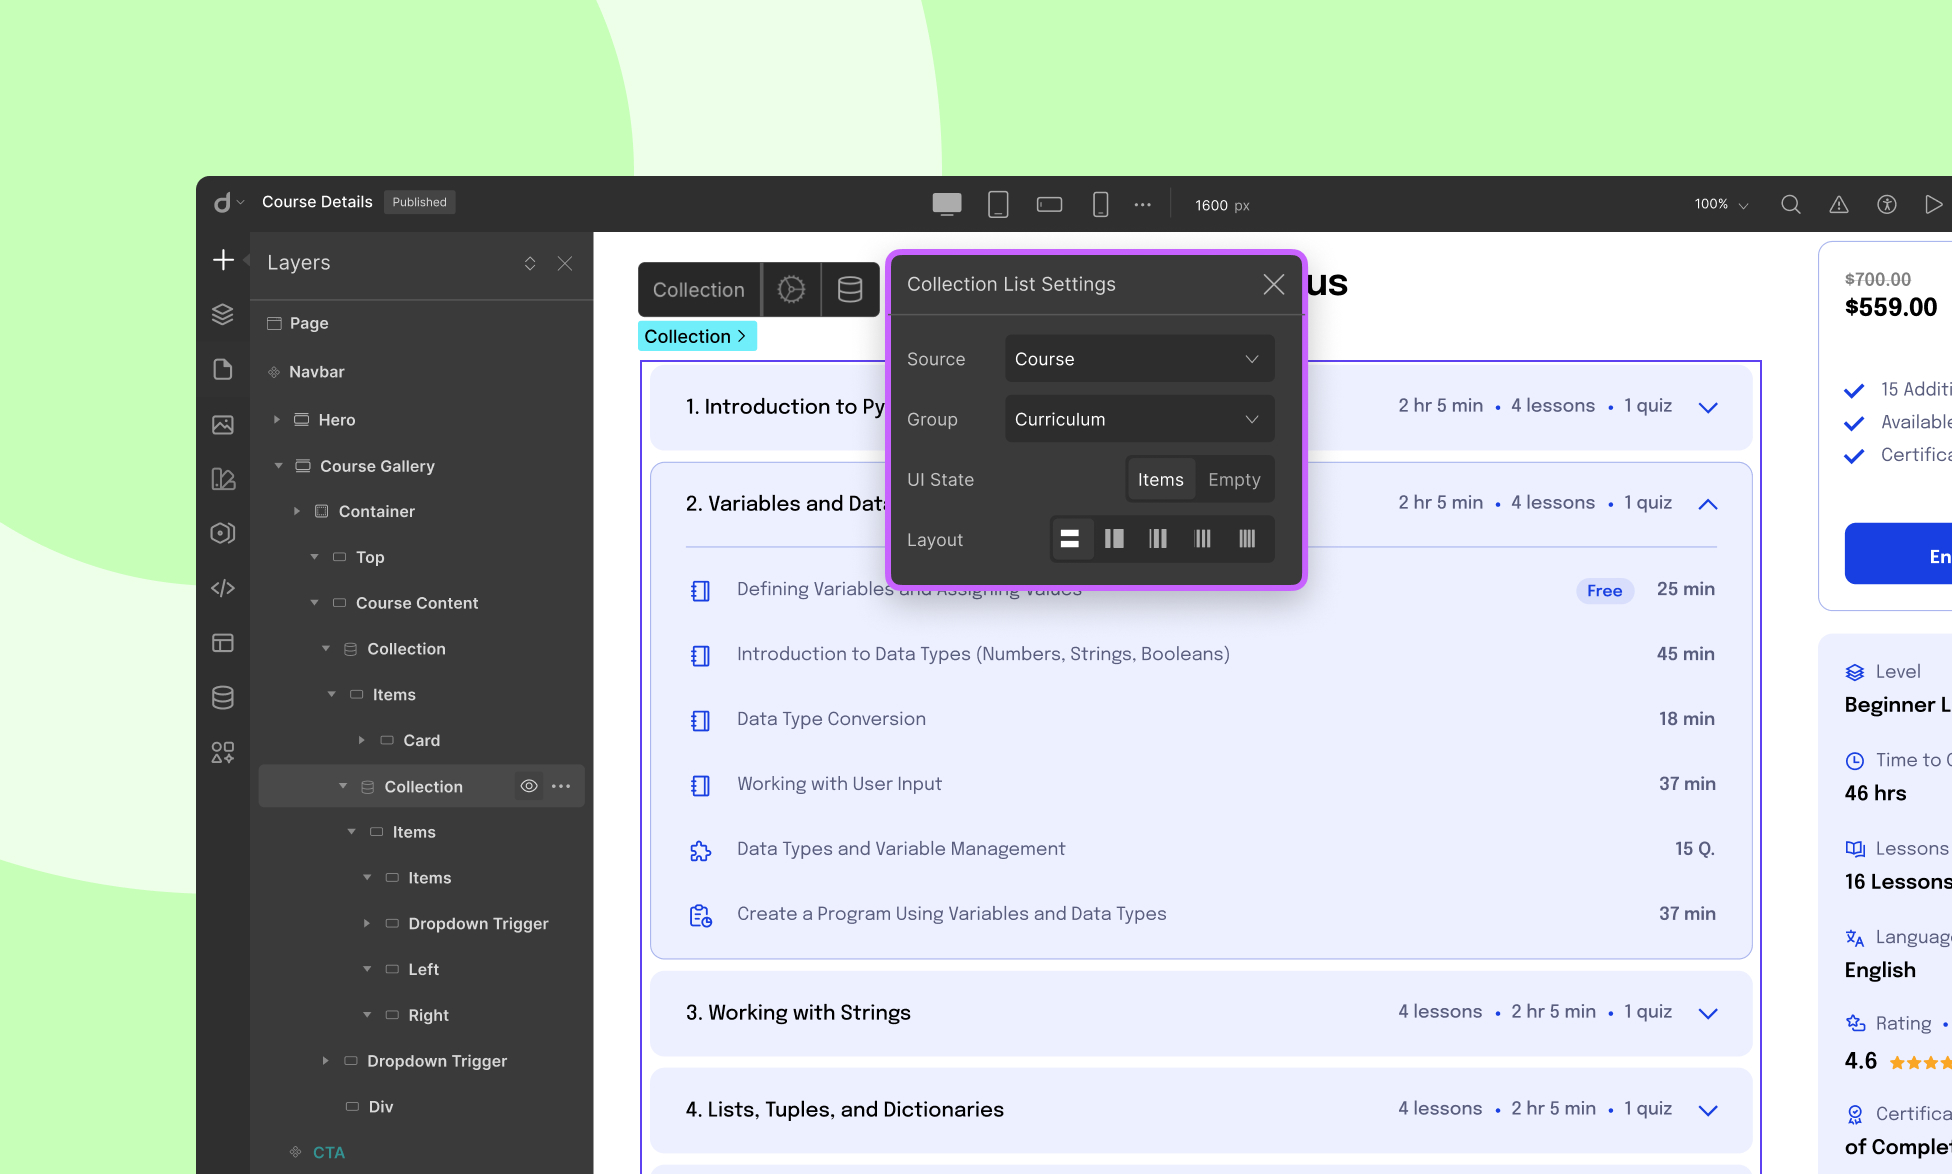
- From the Insert Panel, drag a Collection into your layout.
- Go to the Collection Source settings.
- Set the Source to Curriculum. This will loop through the topics inside the course curriculum.
Step 2: Nest a Collection for Materials
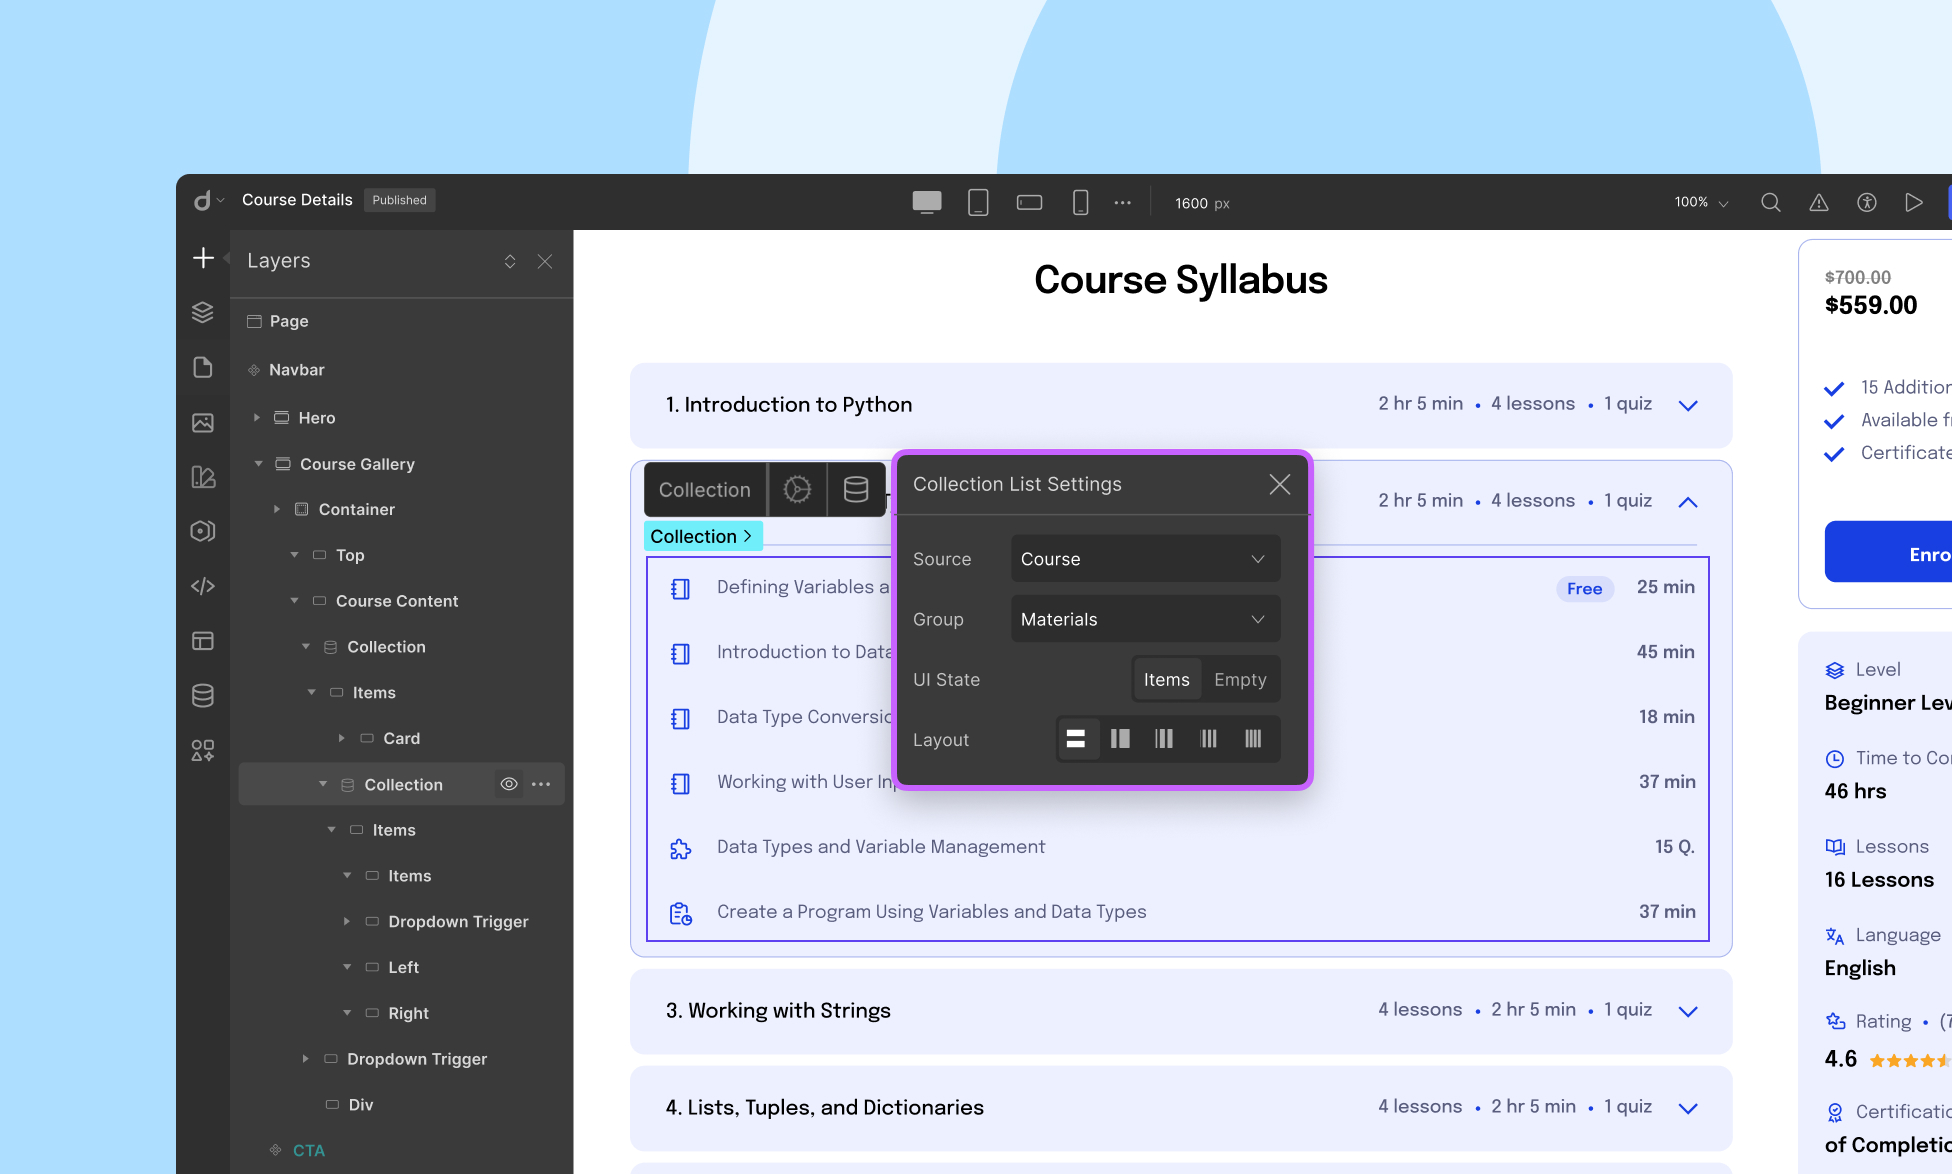
- Inside the Curriculum collection, insert another Collection.
- Set this nested collection’s Source to Material. This will let you pull the learning materials (video, quiz, assignment, etc.) under each topic.
Step 3: Add the Material Element
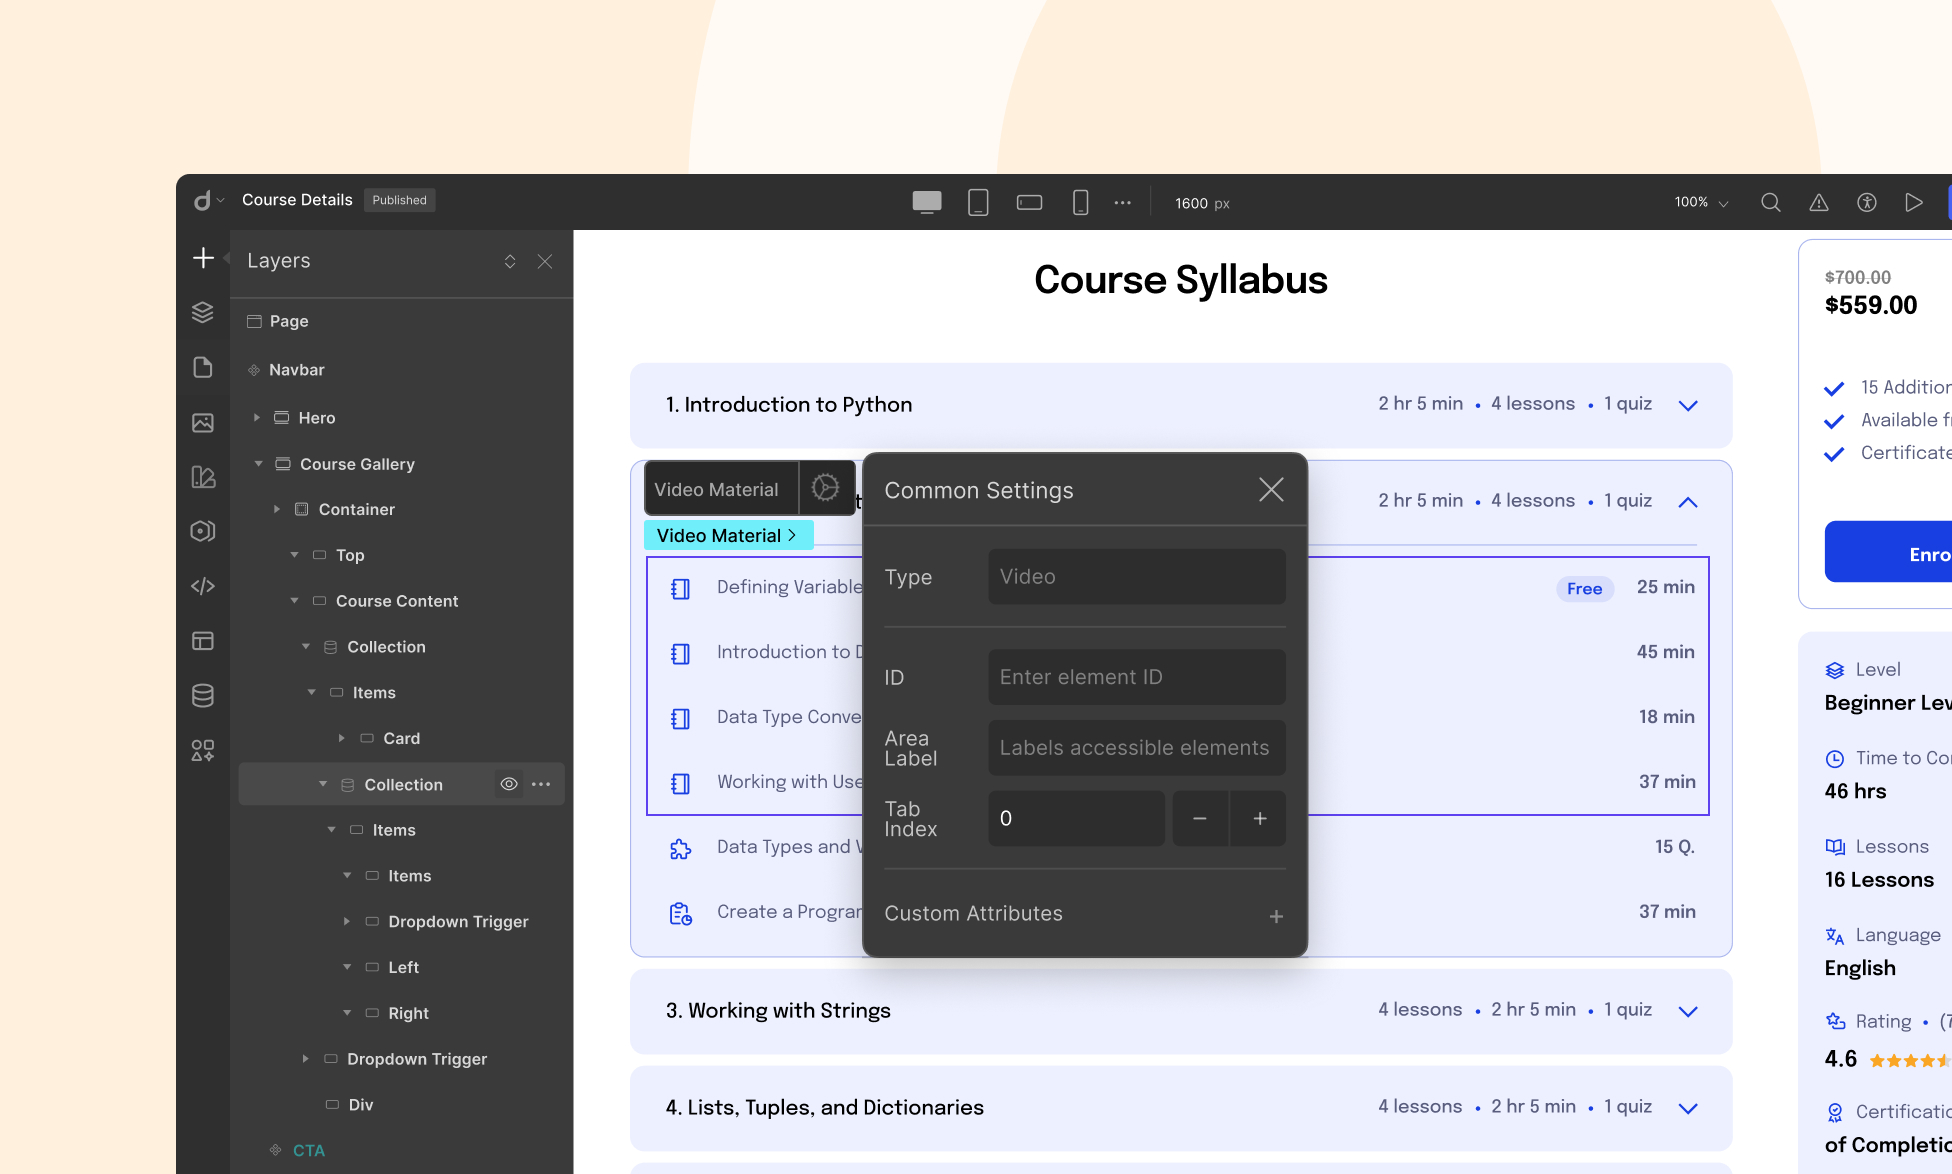
- Drag the Material Element into the nested Material collection.
- Select the Material element, and from the element settings, choose the Material Type:
- Video
- Quiz
- Assignment
- Zoom / Google Meet
💡 Note: You need to add multiple Material elements for each type
Styling Tips
- Use dropdowns, tabs, or accordion layouts (via native Droip elements) to organize topics and their materials visually.
- Customize each Material item’s typography, color, or icons depending on the content type to improve scannability.
- Use visibility conditions if you want to show or hide certain materials for specific user roles or enrollment states.