Add interactive course-related buttons that change dynamically based on user status and course settings.
Pre-defined Action States
Since user states (logged in/out, enrolled, completed, etc.) vary from course to course, Droip handles this dynamically using pre-defined action states.
- Enroll Now: For users not enrolled in the course
- Add to Cart: For users who want to save courses
- View Cart: To redirect to the course cart
- Start Learning: For enrolled users who haven’t started yet
- Continue Learning: For enrolled users in progress
- Complete Course: Once all lessons are completed
- Retake Course: If the course is completed, and retake is allowed
- View Certificate: After course completion (if enabled)
Where to Use
Place the Course Action element on:
- Course Detail Pages – to encourage enrollment or course progression
- Course Index Pages – to allow users to quickly add courses to their cart or wishlist
How to Use
- Add the Element: Drag the Course Action element into your layout.
- Choose an Action Type
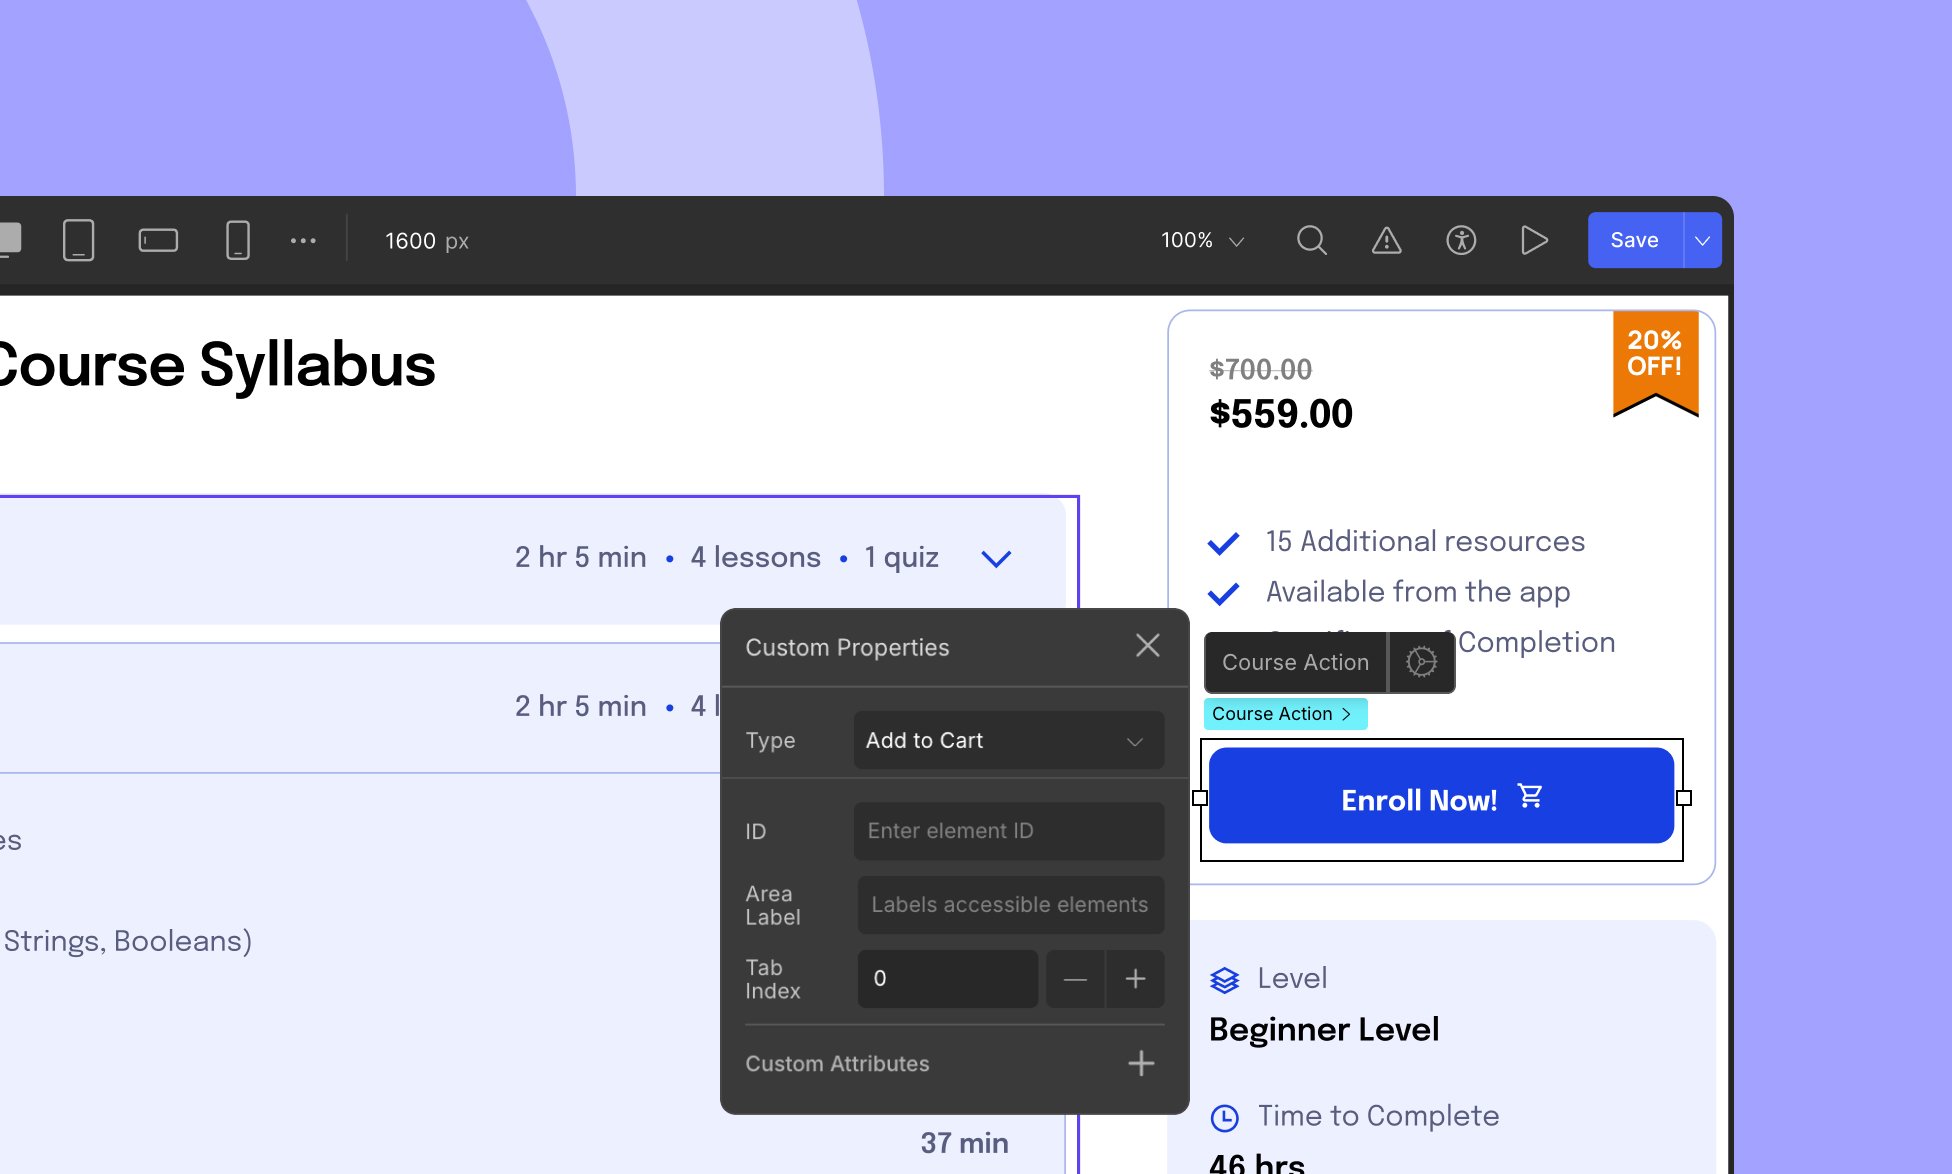
Select the element, go to the Custom Properties panel, and choose an action like Add to Cart or Add to Wishlist.
- Customize States
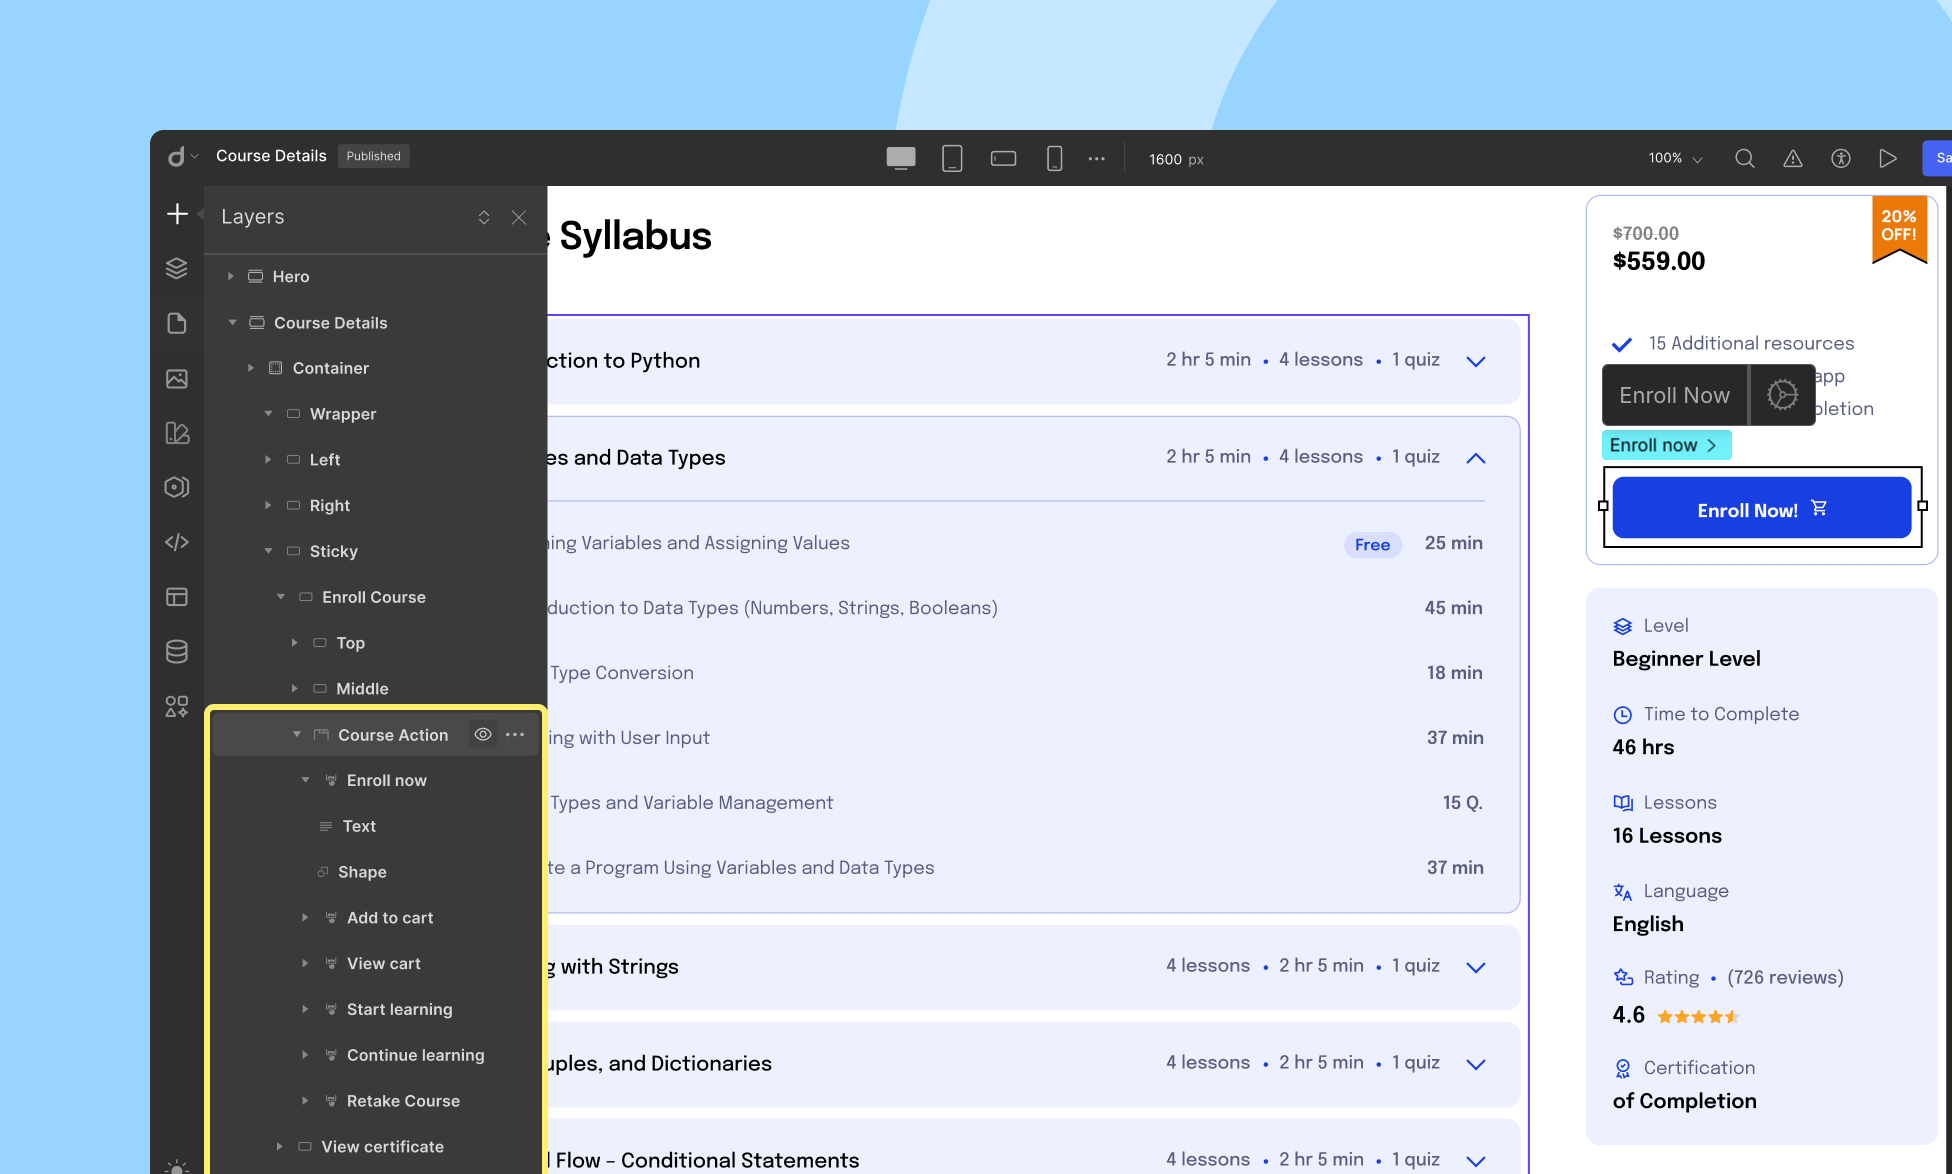
In the Layers Panel, you’ll see child elements representing each possible action state. Customize each state independently — change styles, labels, or icons based on your design.
💡 Keep in Mind
- These buttons are fully context-aware — no manual setup needed.
- You can style each state independently without breaking functionality.
- Ideal for creating personalized, user-responsive course interfaces.