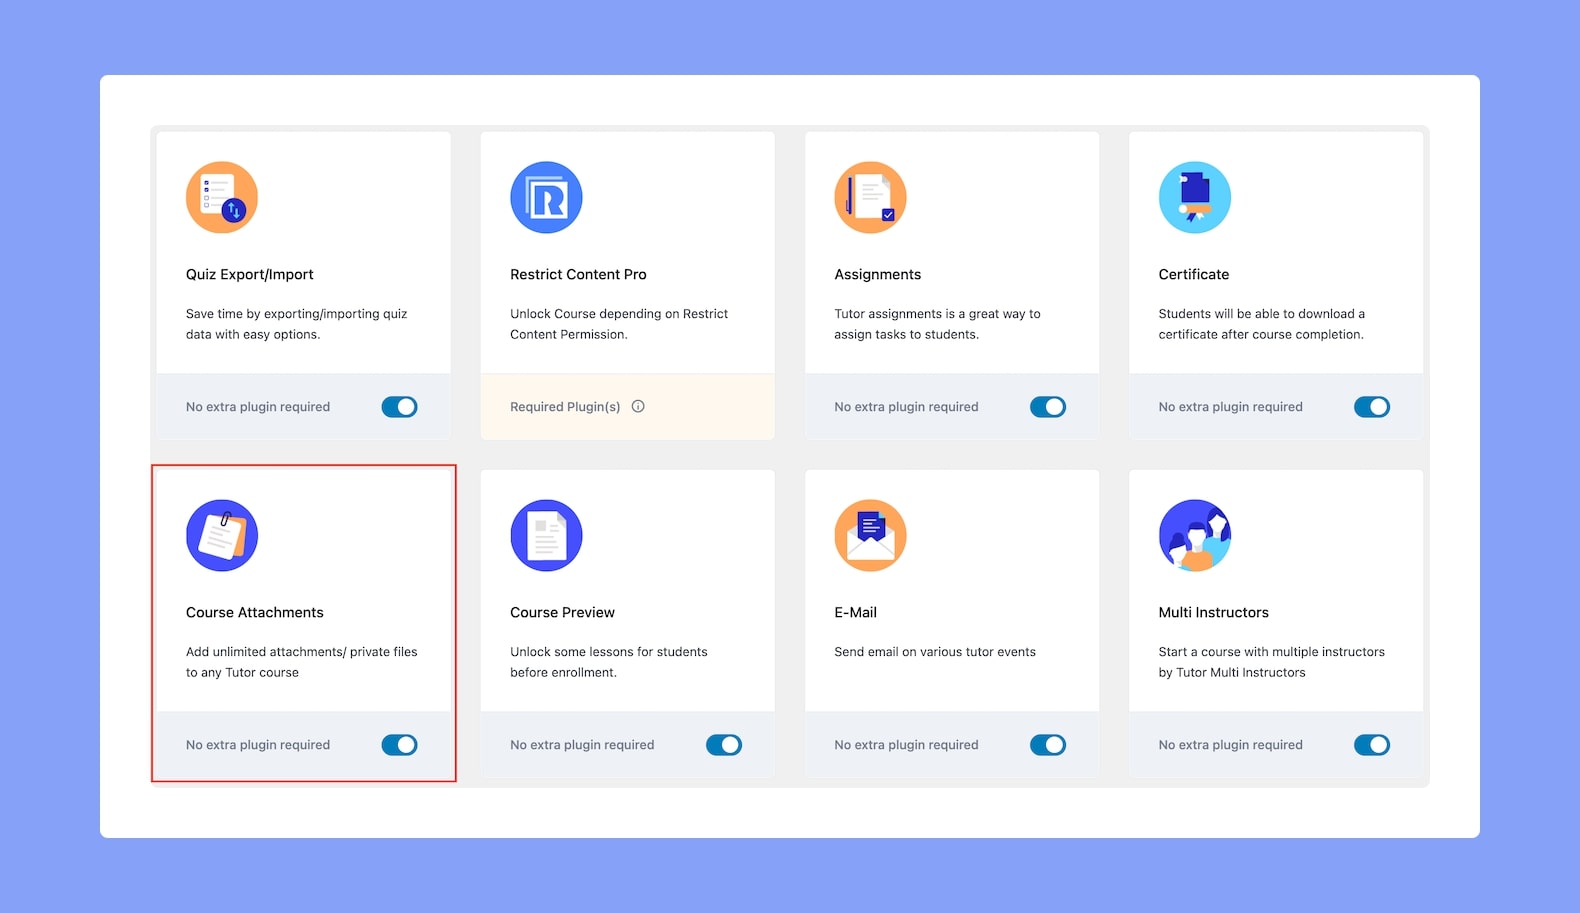
The Course Attachments addon lets you upload attachments to a Course. Any file format that is supported by WordPress can be uploaded after activating this addon.

To get started with this feature, go to WP Admin > Tutor LMS Pro > Addons and enable Course Attachments.
Uploading Course Attachments
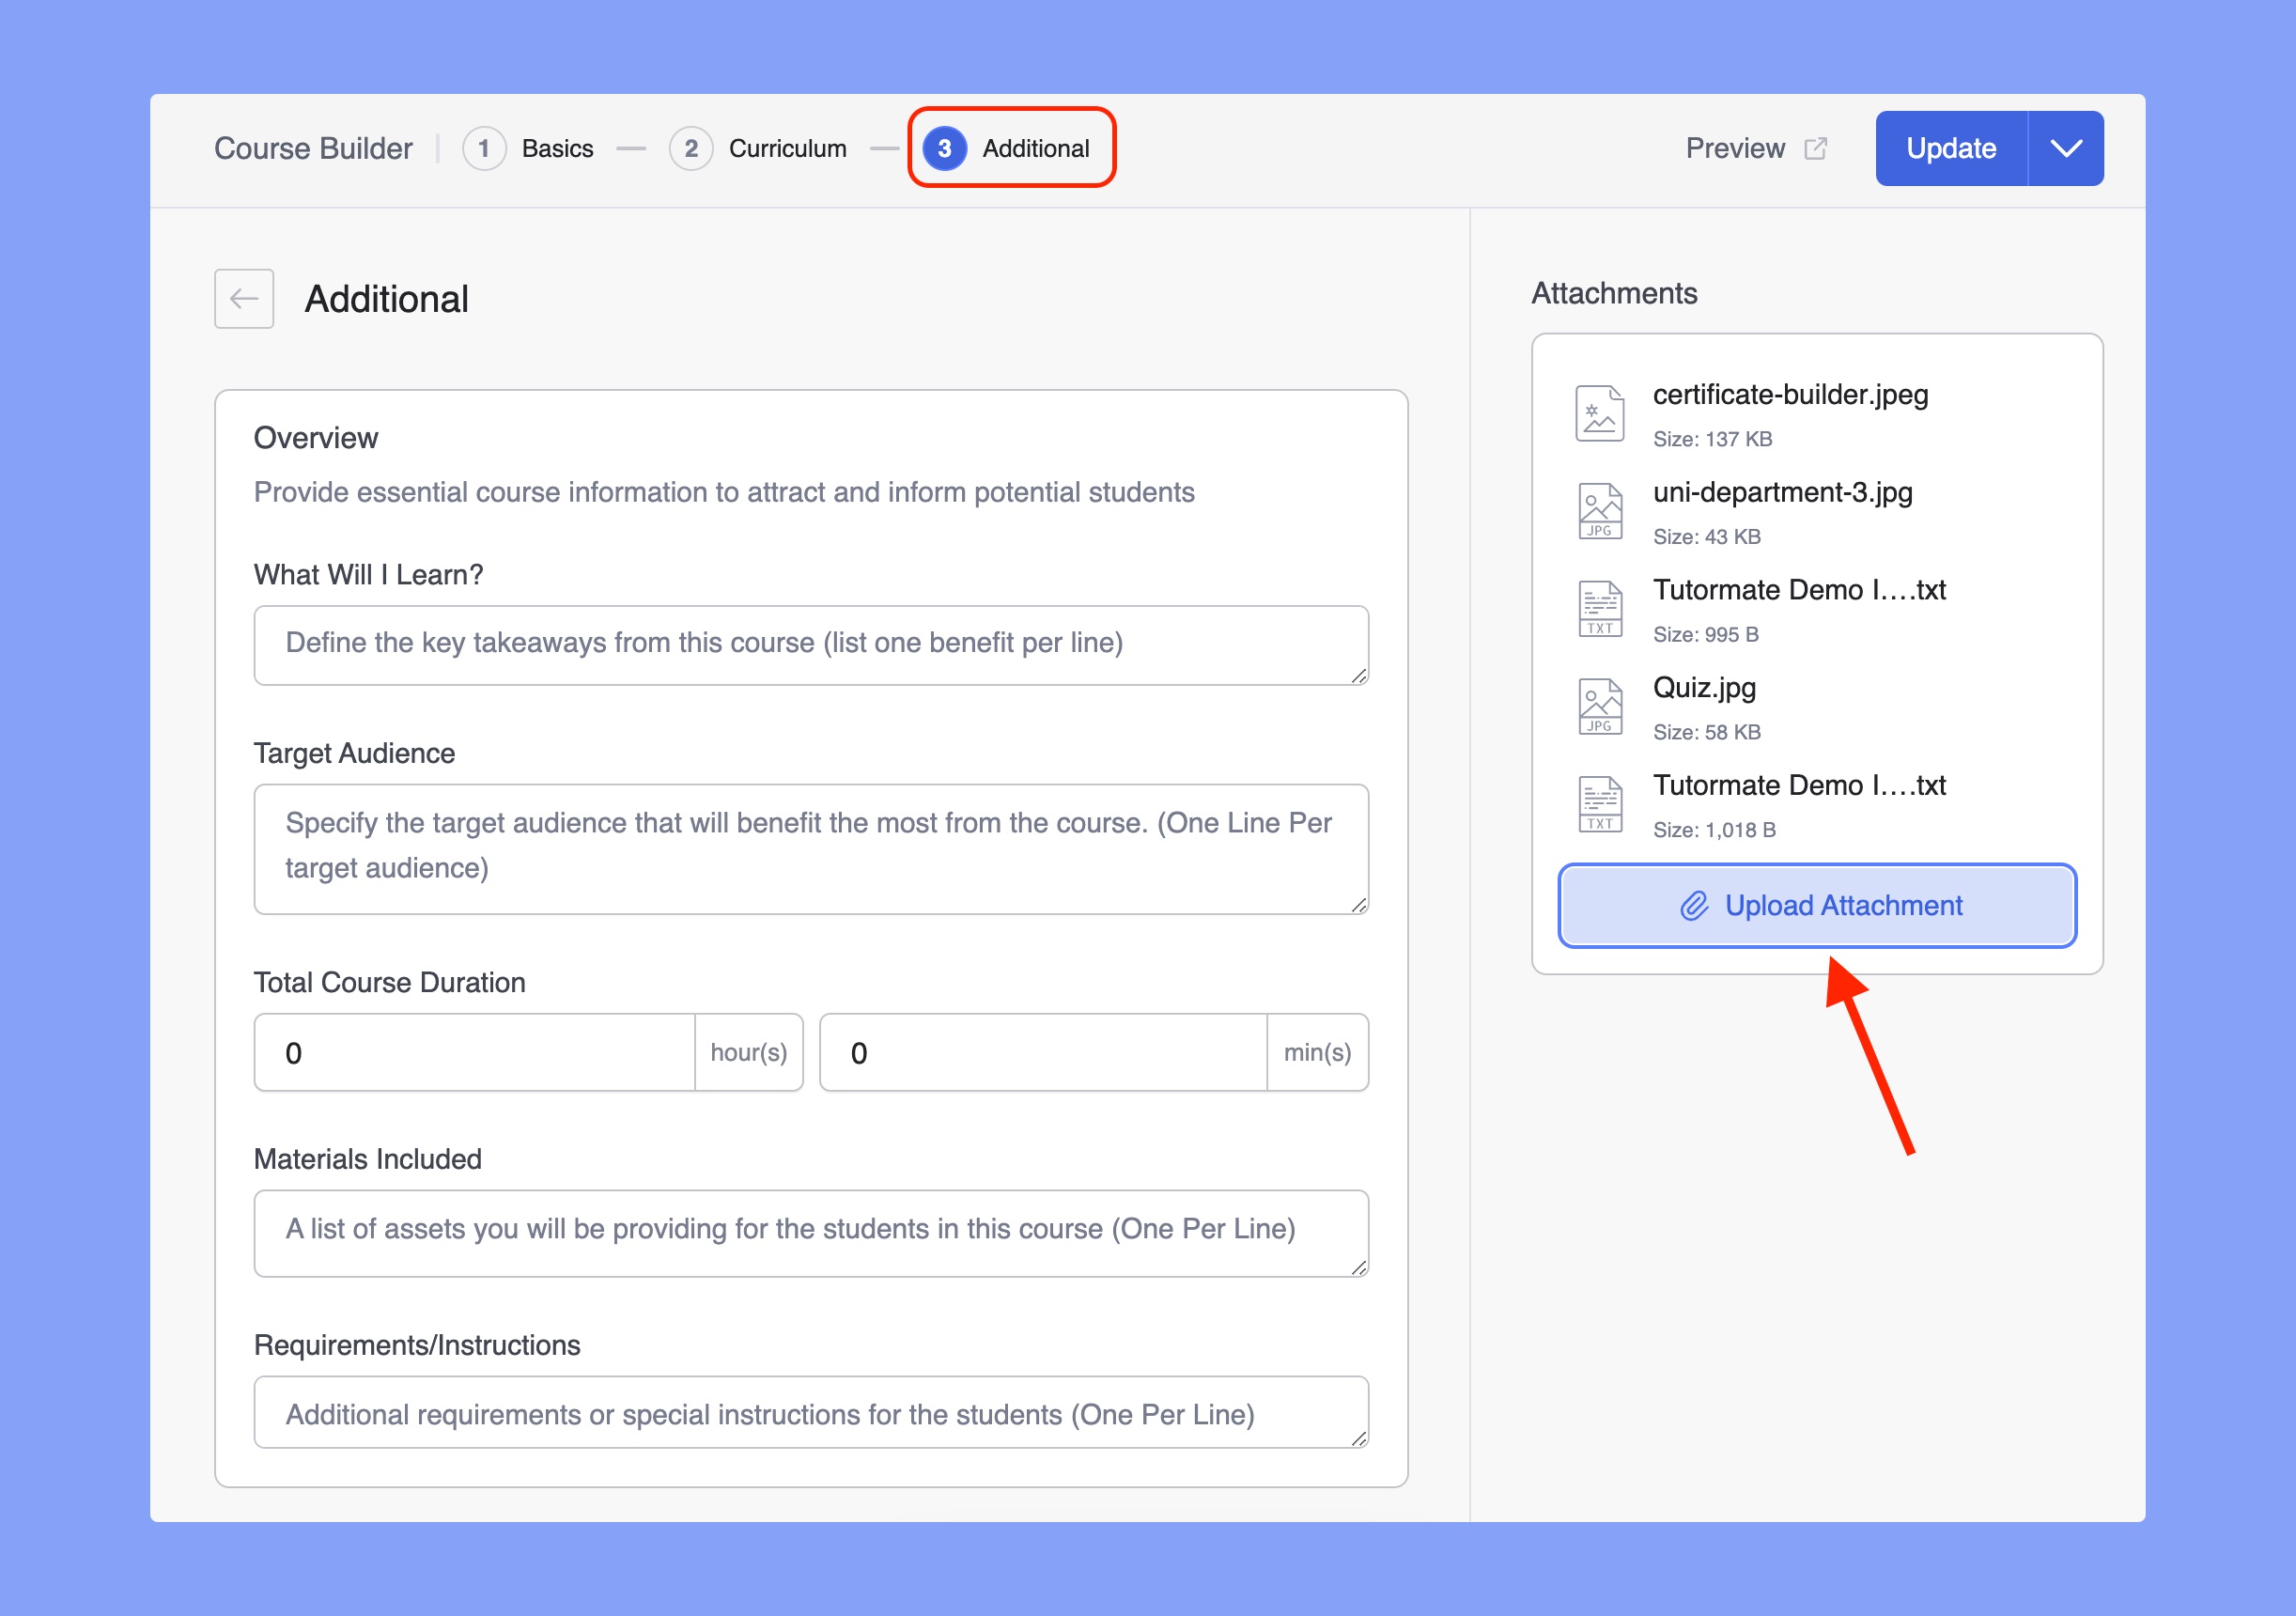
Now that you’ve enabled the addon, visit any course of your choice in edit mode (or create a new course). Then, navigate to the Additional tab of the course builder. You’ll get the “Attachments” section in the right sidebar.

Here, simply click on the Upload Attachments button and select the files you want to upload. After finishing the file selection, Update your course.
It’ll look something like the image shown above. You can also remove a file by clicking on the X icon. Once that’s done, finish off by clicking on the Update button on the course editor.

Once uploaded, students enrolled in the course can access it from the Course Details Page under the Resources tab.
