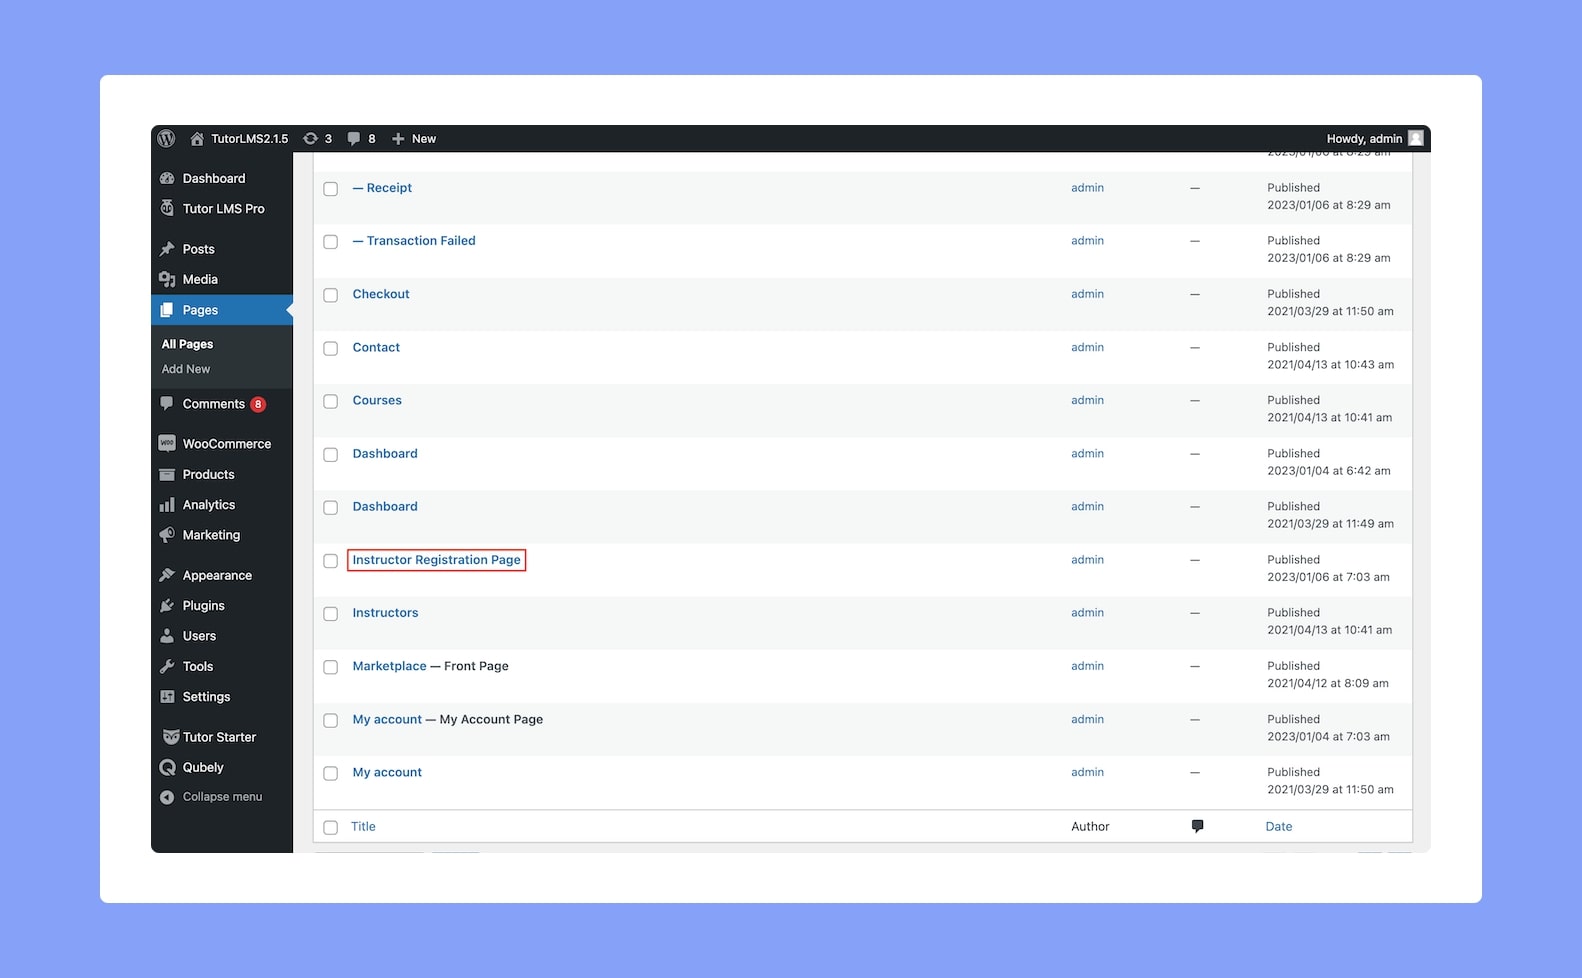
The process of becoming an instructor in Tutor is almost the same as becoming a student.
For this, you can either use the default Instructor Registration Page provided by Tutor LMS (which you’ll find listed in WP Admin > Pages) or create your own.
Creating The Instructor Registration Page
Creating a new registration page for instructors is like creating a typical WordPress page but please keep in mind that doing so is totally optional since you have already been provided with a default Instructor Registration Page upon installation.
Now to start, you need to first go to Dashboard > Pages > Add New. Then, it’s time to add your registration page content.
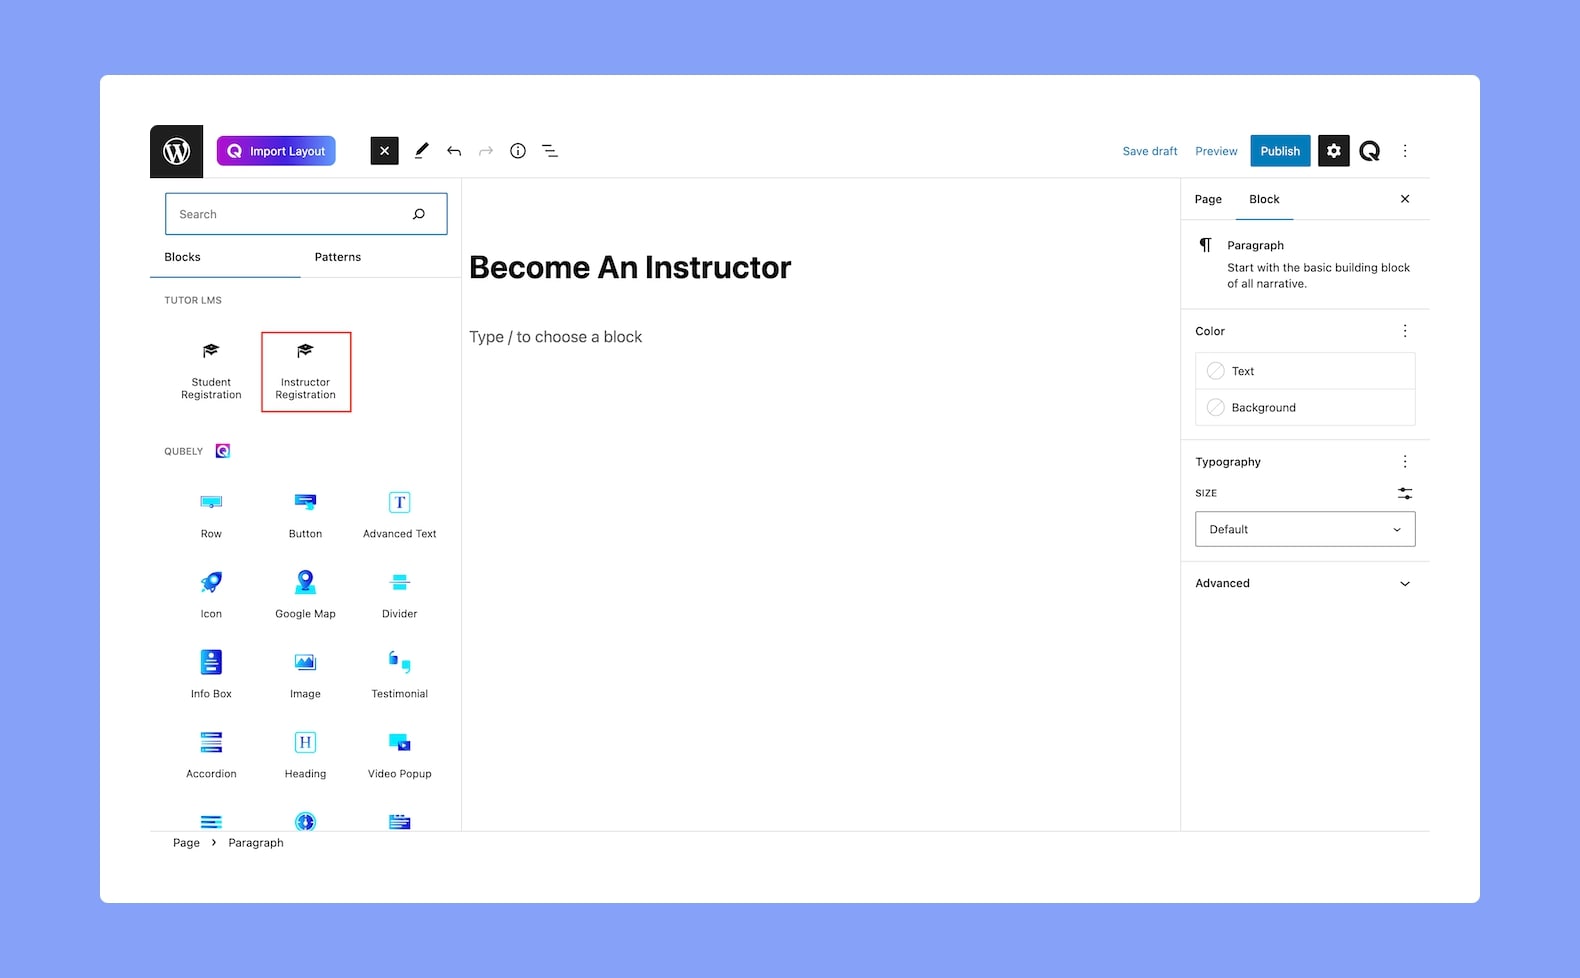
An easy way to do this is by opening the Gutenberg Blocks Panel and using the Instructor Registration Form block from the Tutor LMS section. After adding this, you can add more content to the page if you wish to. Once you’re satisfied with your page, click on Publish.
Assigning the Instructor Registration page
Once you have your Instructor Registration Page ready (using either method), it’s time to assign this registration page.
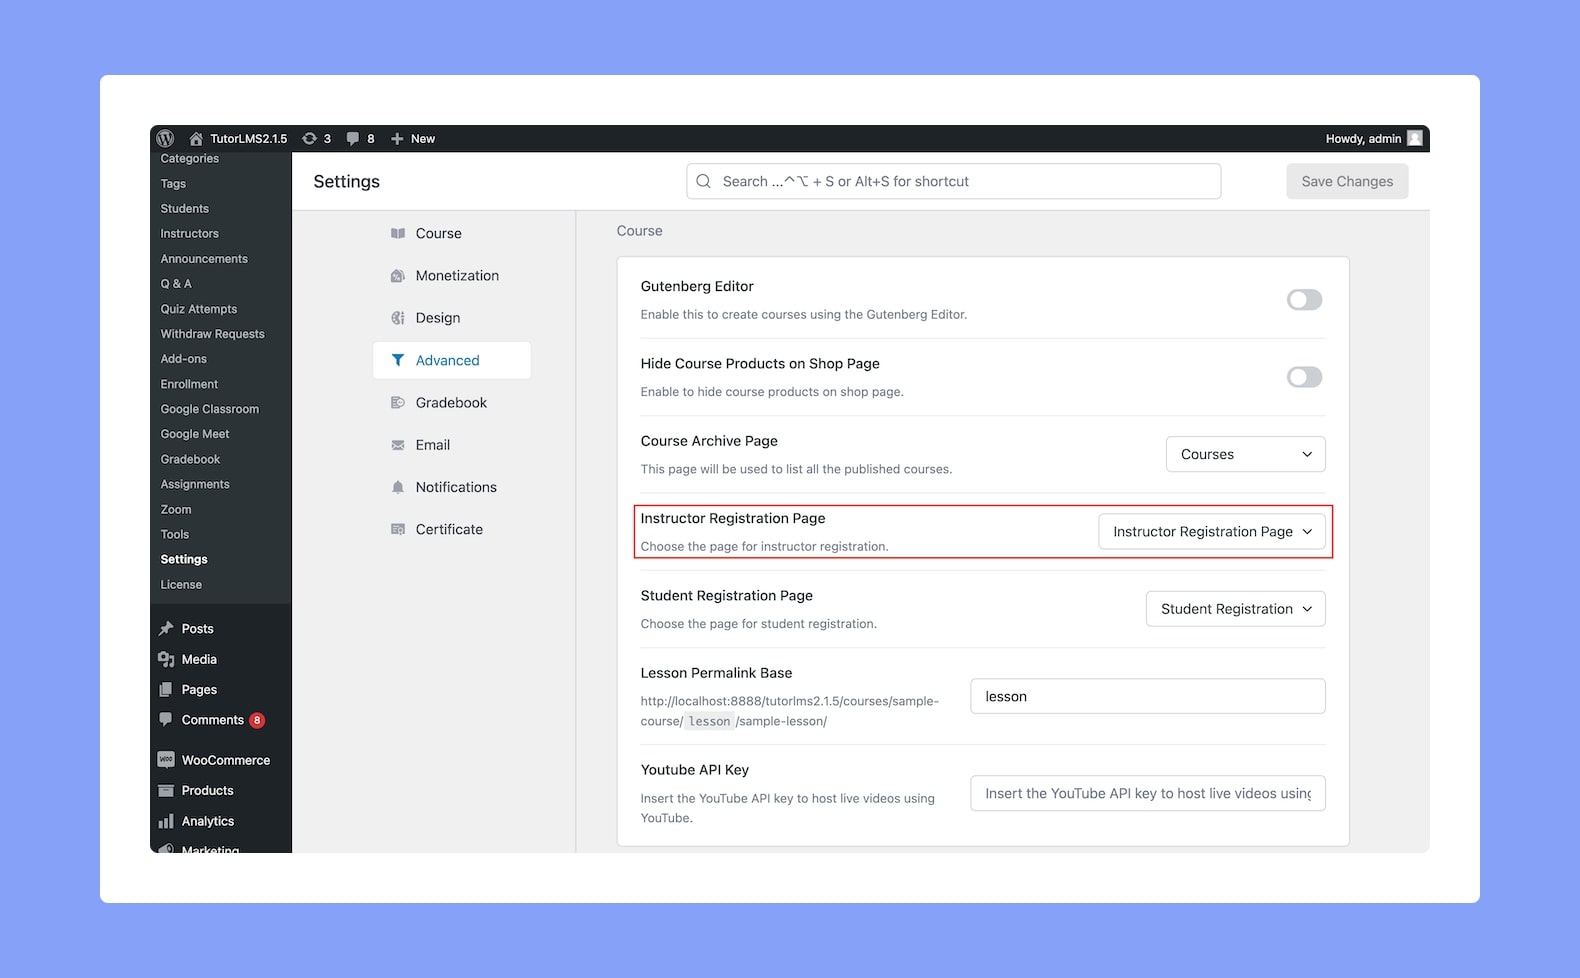
To do so, go to WP Admin > Tutor LMS > Settings > Advanced and assign the Instructor Register Page by choosing an option from the dropdown list. Then, hit the Save Changes button before exiting.
Adding The Registration Page To The Main Menu
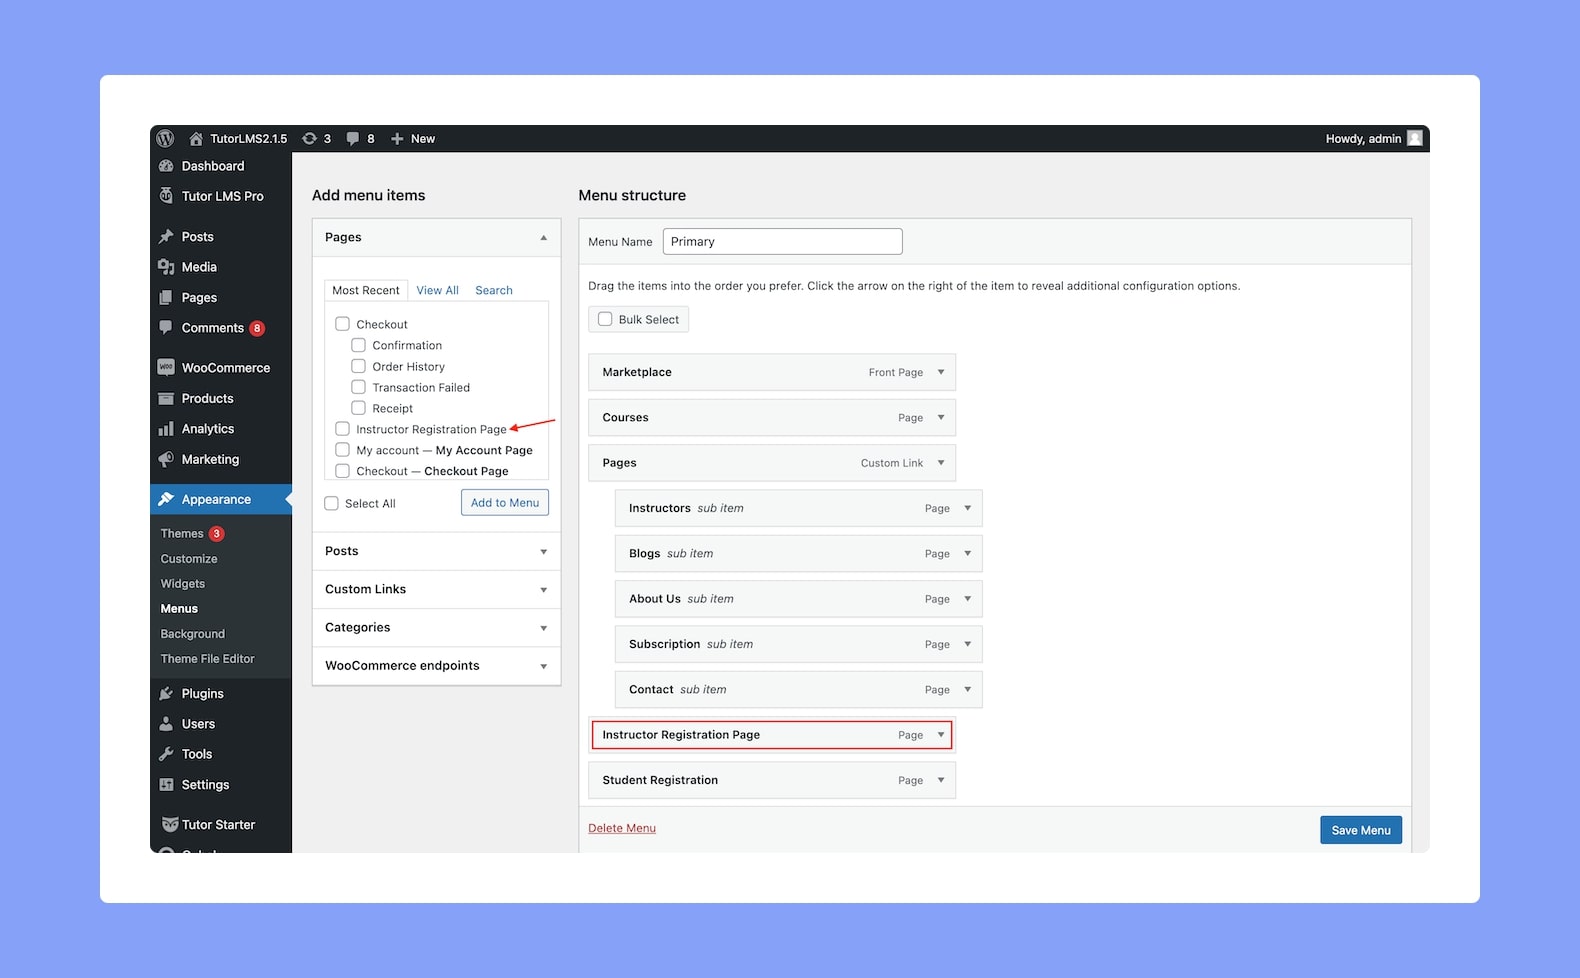
Now it’s time to add this page to the main menu so that it is accessible to visitors on the frontend. To do this, you first need to Select/Create your primary menu from WP Admin > Appearance > Menus and then do the following:
- Select the Instructor Registration Page from the Pages section.
- Click on Add to Menu button, this will add the page to the menu.
- Hit the Save Menu button to save your changes.
Registering Instructors
Now instructors can register in two ways. Let’s go over what these methods are.
Method 1: Registered Users
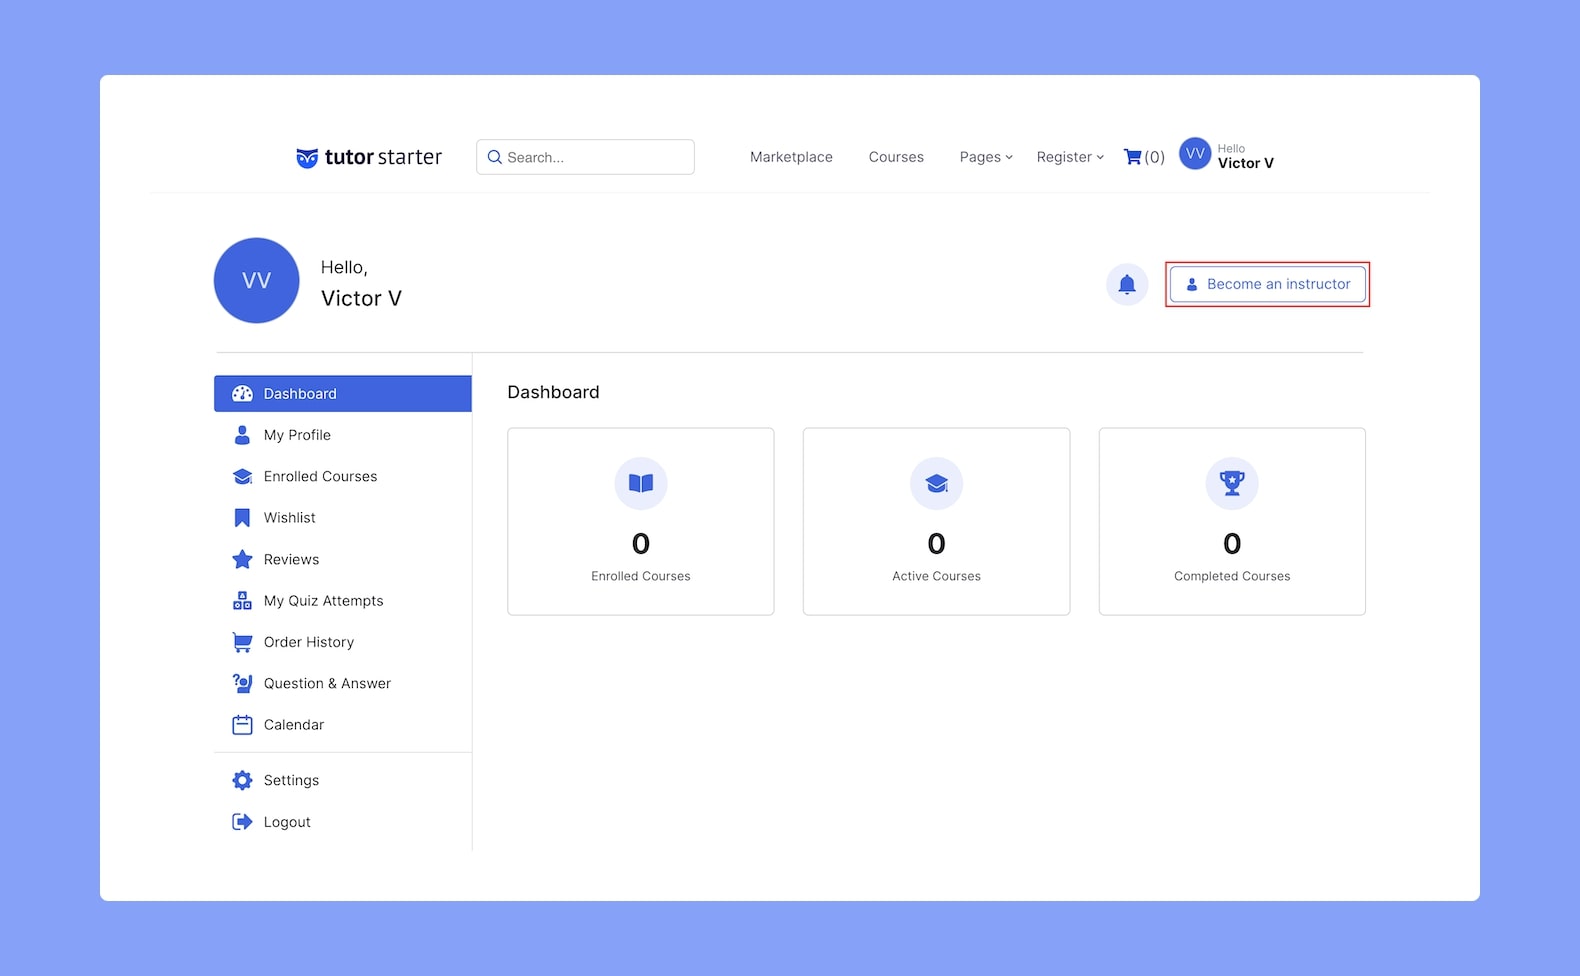
Registered Users (i.e. Students) can request to register as instructors by going to their Frontend Dashboard and clicking on the Become An Instructor button.

This will take them to a new window asking if they want to apply to become an instructor. Once they click on Apply Now, the request will be sent to the Admin right away for approval.
If they approve the request, the user will successfully become an instructor and they’ll be able to login and start creating courses and teaching right away.
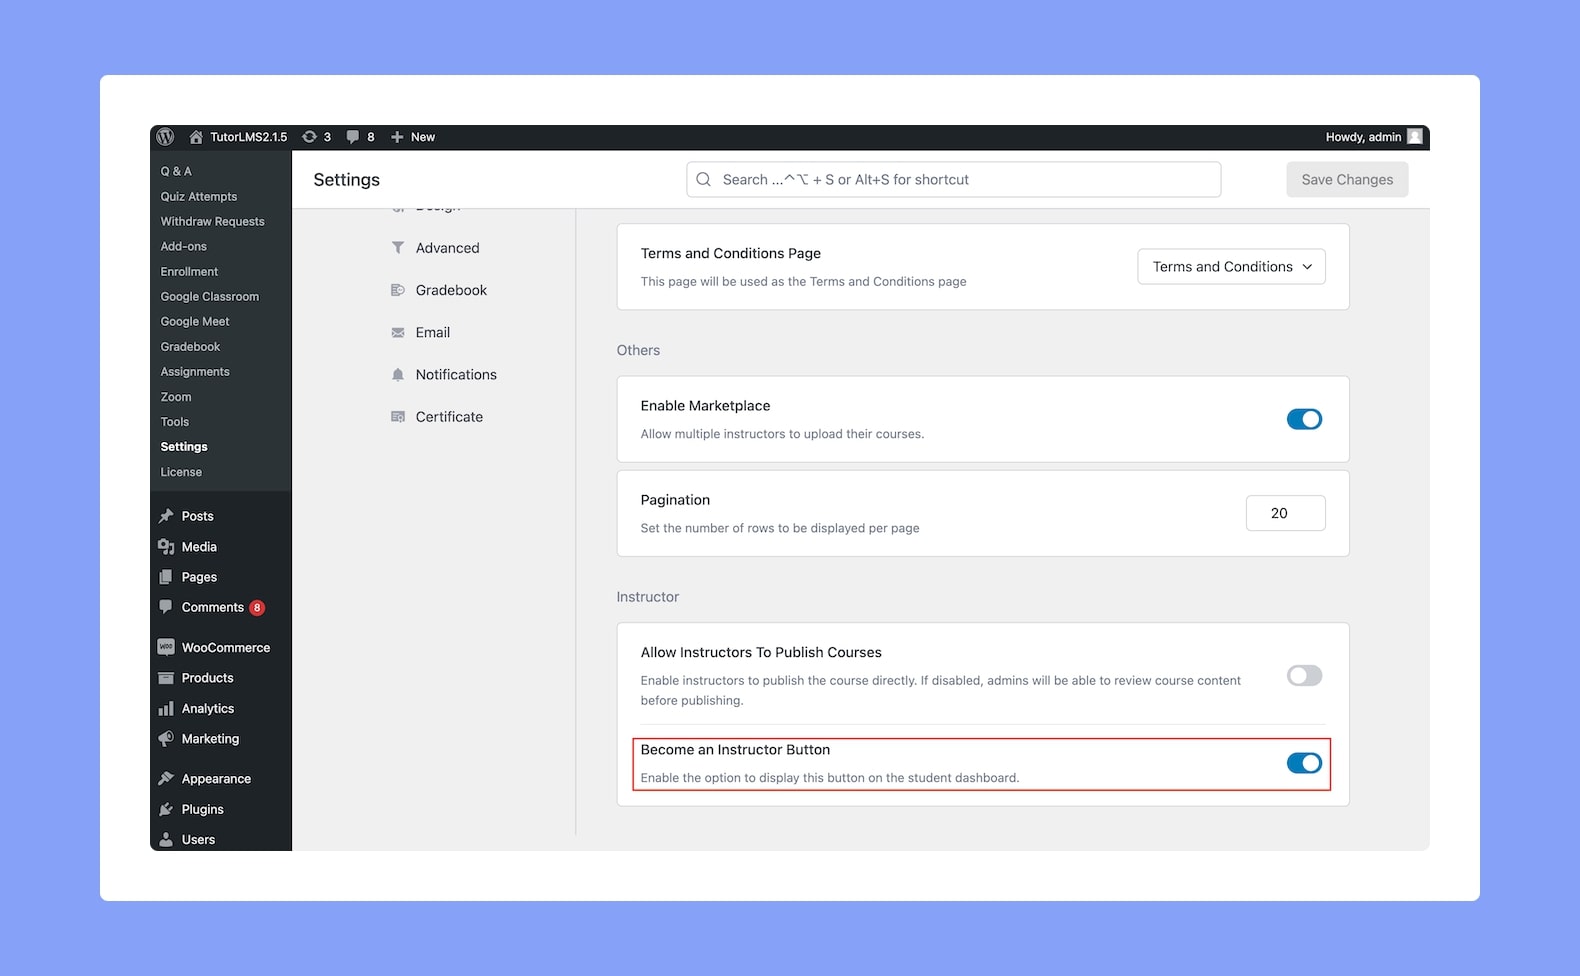
After sending the application, on the Frontend Dashboard instead of the button you will see a message like “Your Application is pending as of Application Date” until it is approved or rejected.
Method 2: Unregistered Users
Unregistered users won’t be able to access the dashboard so in this case the links in the main menu come in handy.
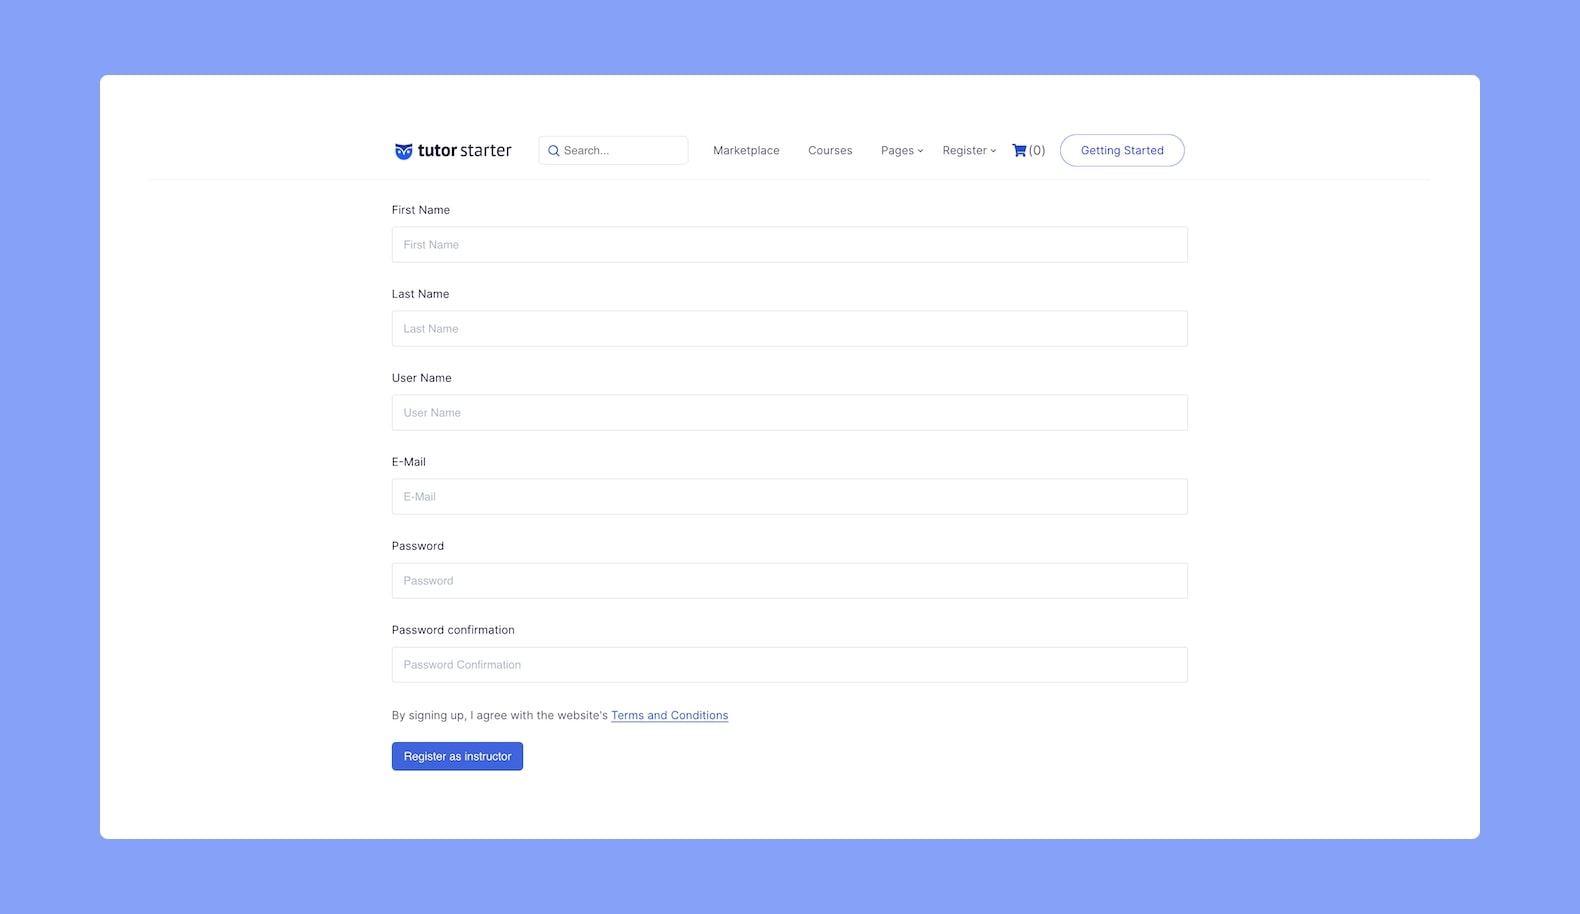
By visiting the home page and clicking on the Instructor Registration Page they can access the form. There they can fill in all of the necessary details and hit submit to apply for their request.
Admins will get notified of this application and if it’s approved, the user will be able to login as an Instructor, create courses, and start teaching.
Approving/Rejecting Instructor Application
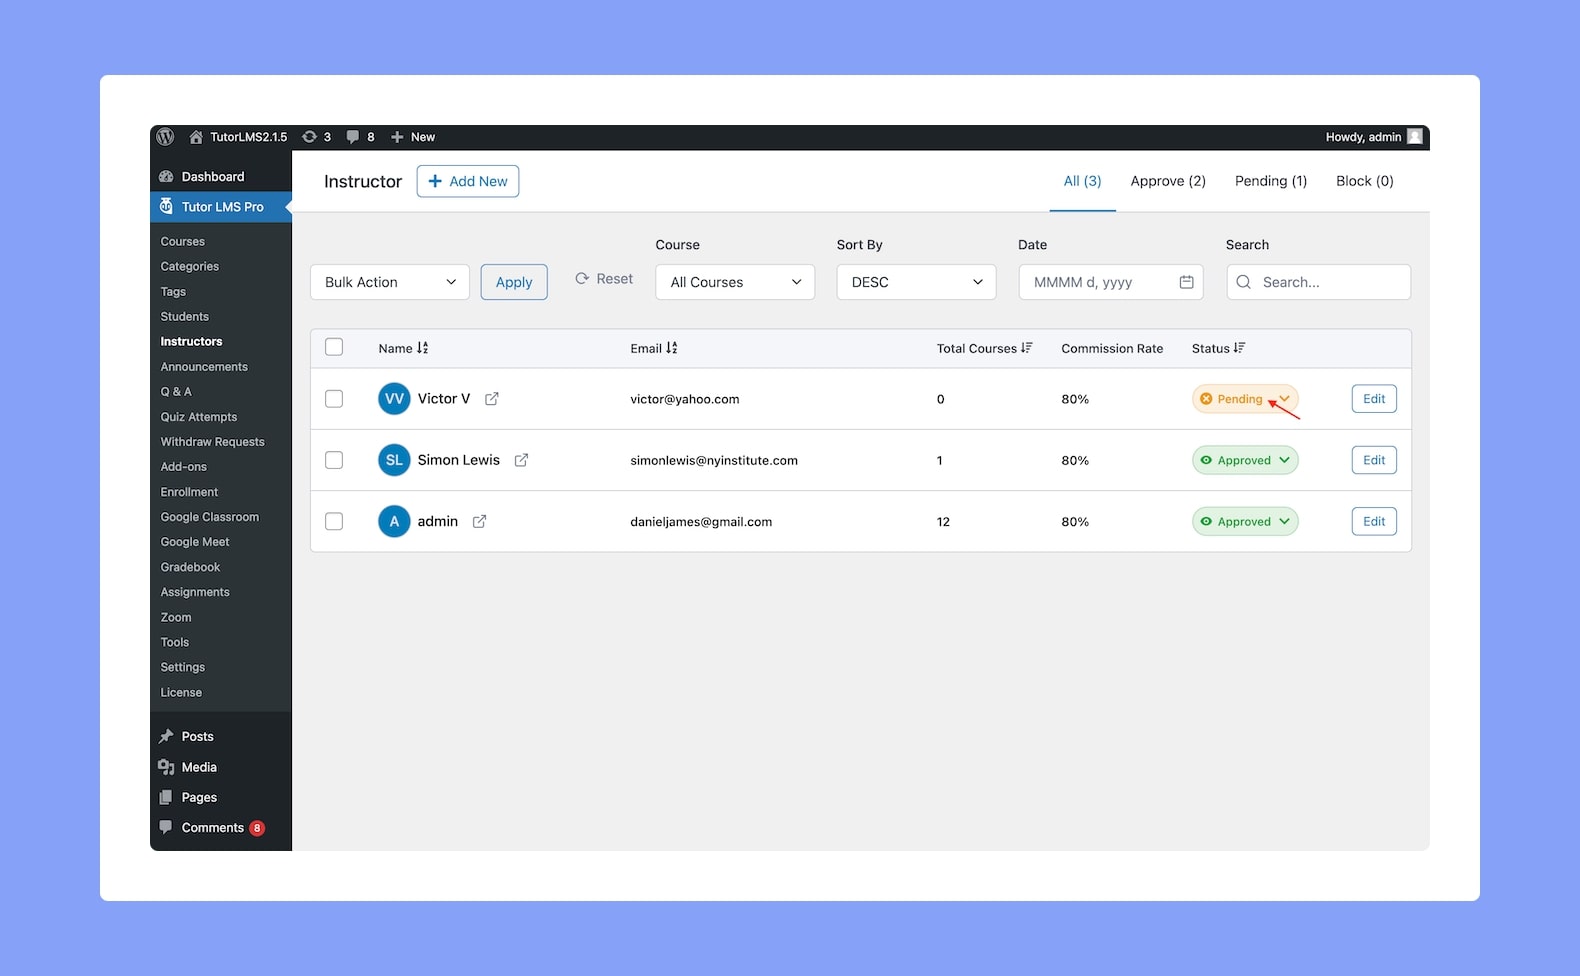
Once an Instructor Application is sent, admins will then be able to decide whether to approve or reject this request. They’ll be able to do this from WP Admin > Tutor LMS > Instructors.
