The “Additional” section in the Course Builder allows you to provide valuable supplementary information and resources for your course. This section offers a variety of fields to enrich your course presentation and provide essential details to potential learners.
Here are the types of information you can add in this section:
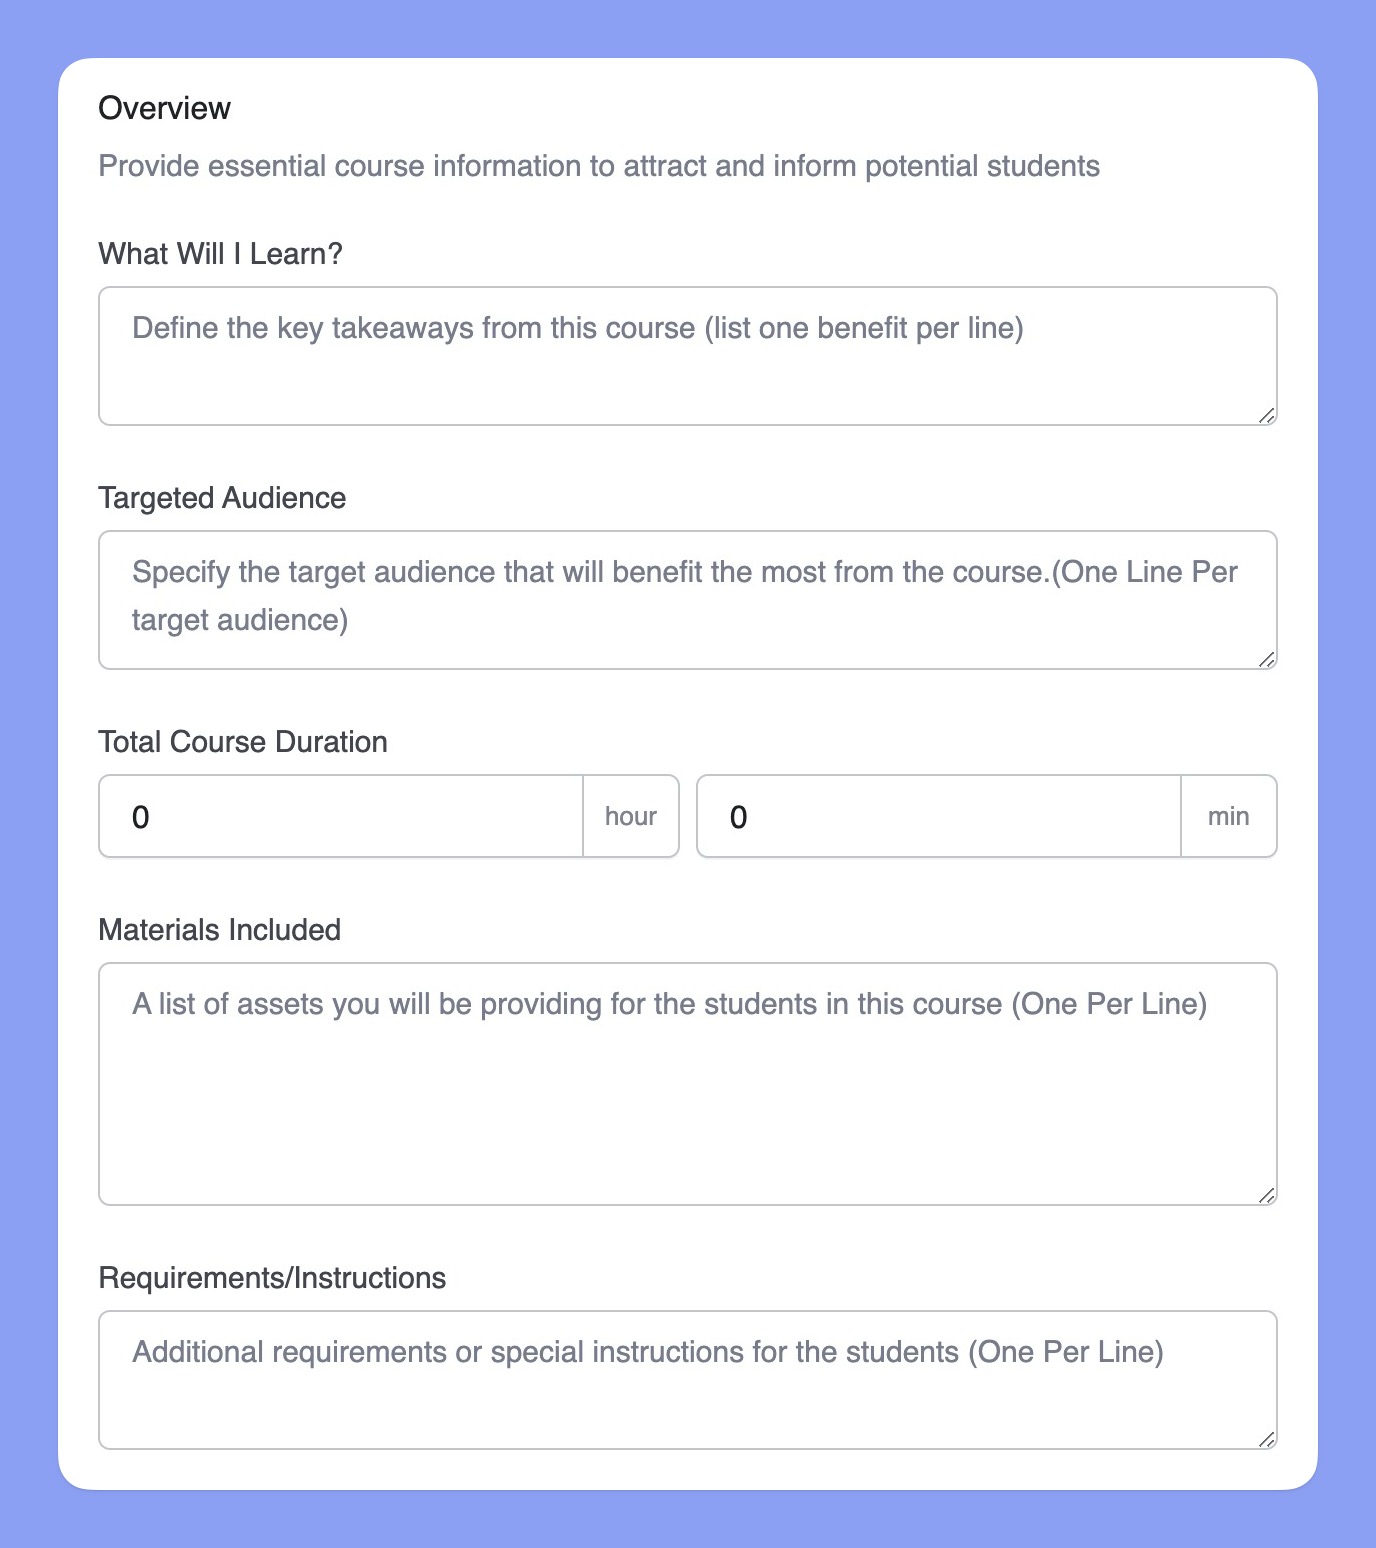
Overview:
- “What Will I Learn?”: Key takeaways and learning outcomes students can expect.
- Target audience: The intended audience for your course.
- Total course duration: An estimate of the time required to complete the course.
- Materials included: A list of resources or materials provided to students.
- Requirements/Instructions: Any prerequisites or special instructions for the course.
Course Prerequisites: Any courses that must be completed before enrolling.
Attachments: Supplementary files related to the course, such as a syllabus or welcome letter.
Schedule Live Class: Integration with live classes or webinars using platforms like Zoom or Google Meet. (requires Google Meet and or Zoom add-on to be enabled).
Certificate: Choose a certificate template or your own custom certificate to be awarded upon course completion. (Requires “Certificate” add-on to be enabled)
What Will I Learn?
Clearly define the key benefits and learning outcomes students can expect to gain from your course in the “What Will I Learn?” field. Using bullet points or a similar format can improve readability and clarity.
Targeted Audience
Specify the intended audience for your course in the “Targeted Audience” field. This helps potential students determine if the course aligns with their needs and goals.
Total Course Duration
Provide an estimated duration for your course in the “Total Course Duration” field. This gives students an idea of the time commitment required to complete the course. The duration is specified in hours and minutes.
Materials Included
List any materials or resources that students will receive as part of the course in the “Materials Included” field. This could include downloadable resources, templates, access to communities, or any other supplementary materials.
Requirements/Instructions
Use the “Requirements/Instructions” field to specify any prerequisites or special instructions for the course. This might include software requirements, recommended reading, or any other information that students need to know before enrolling.
Course Prerequisites
The “Course Prerequisites” section allows you to specify any prerequisite courses that students must complete before they can enroll in the current course. This ensures that students have the necessary foundational knowledge and skills before moving on to more advanced topics.
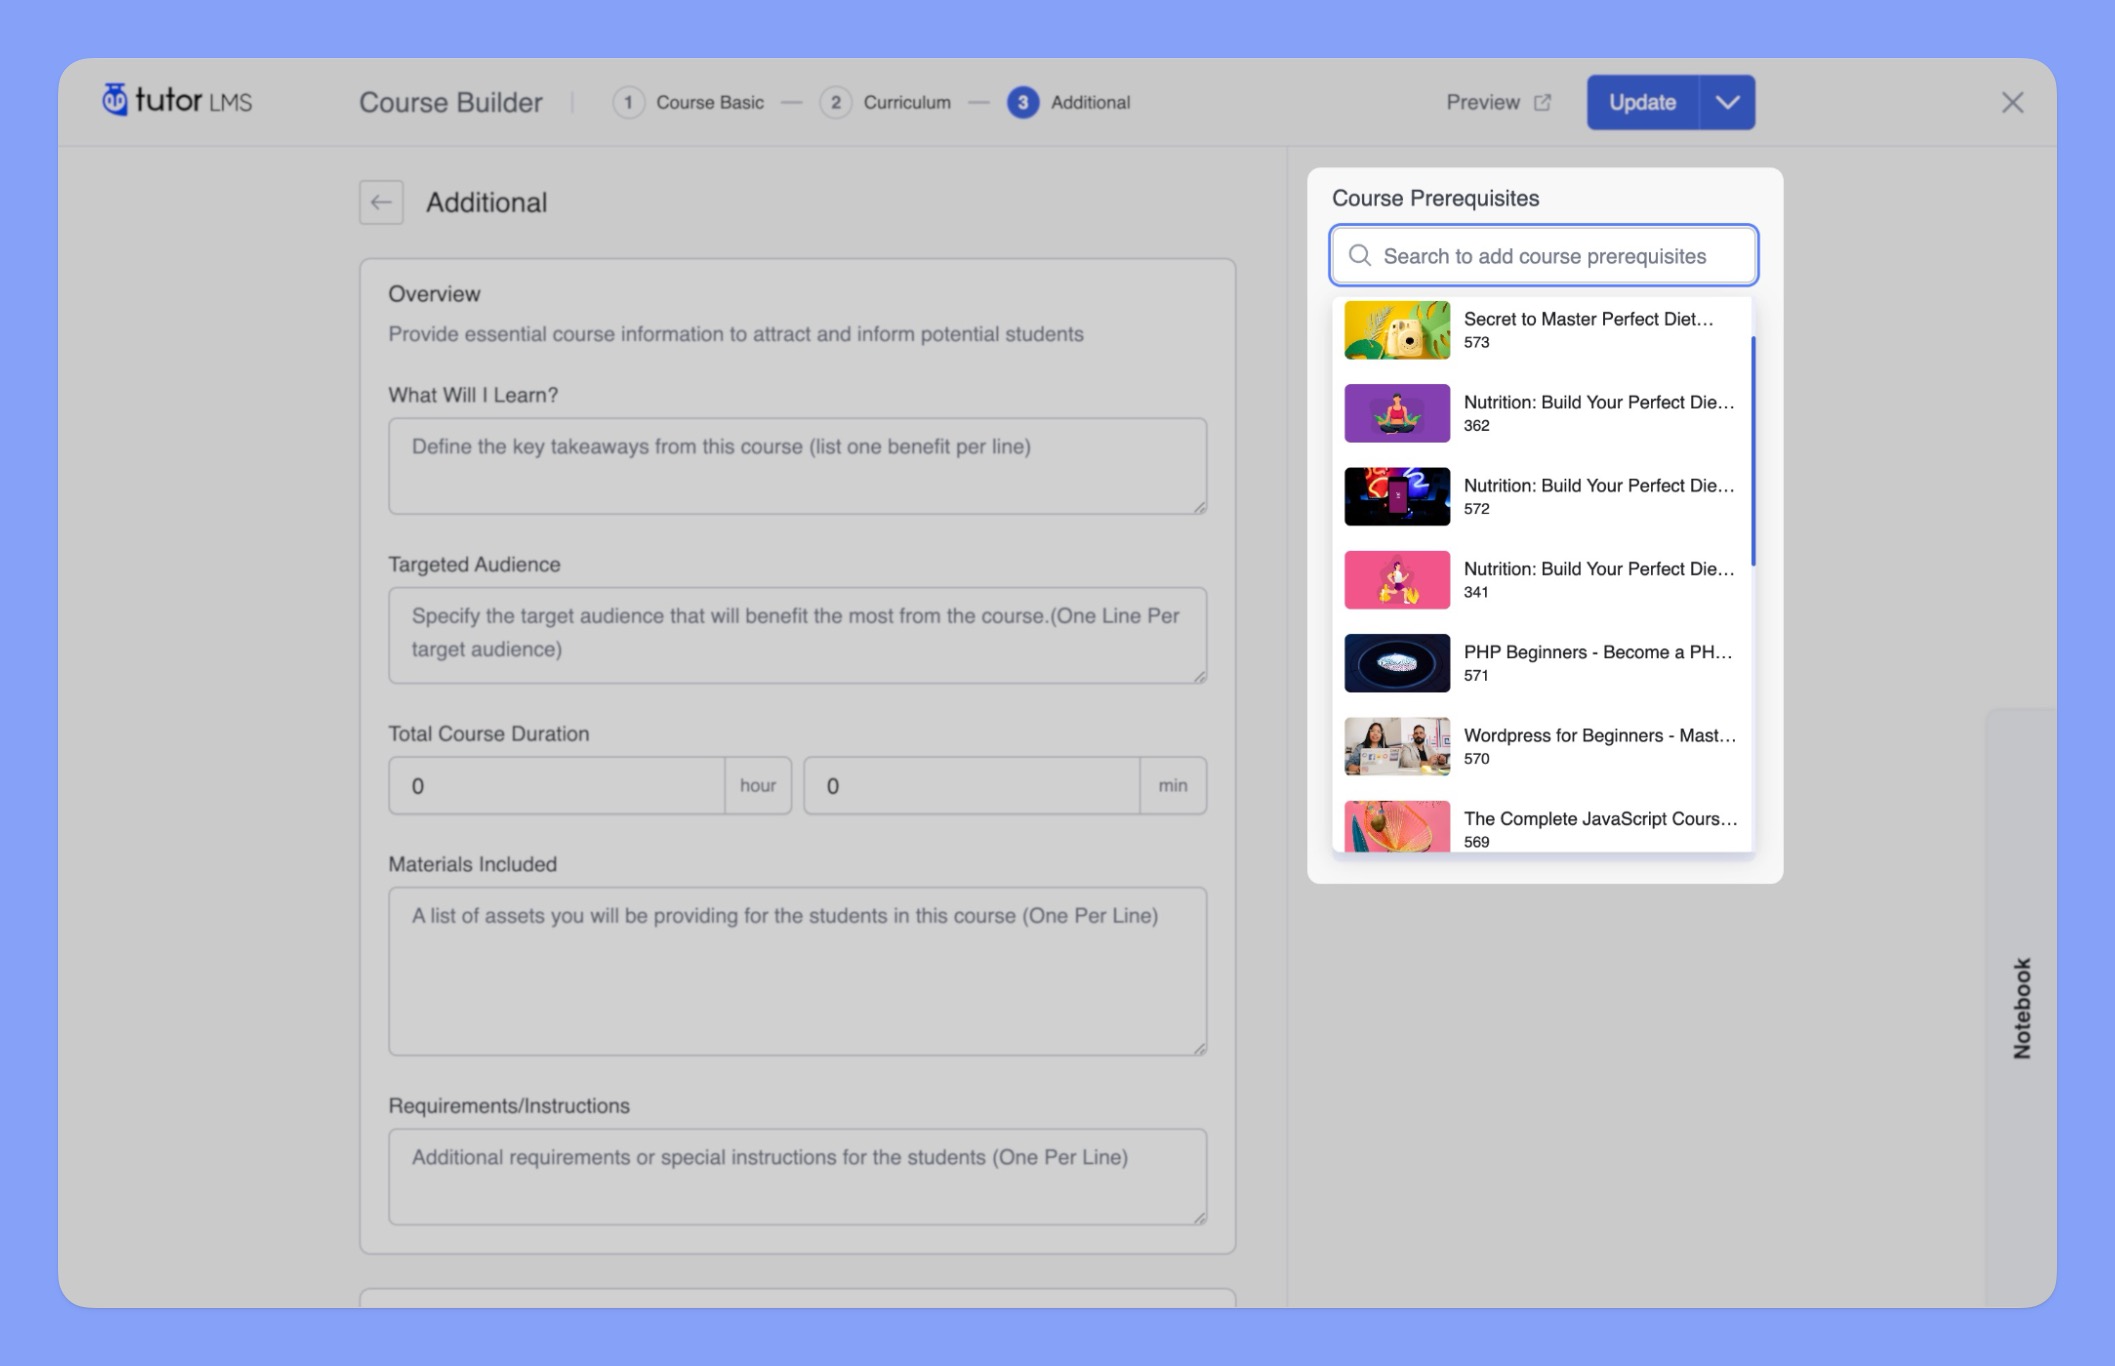
To add a prerequisite course:
- Start typing the name of the prerequisite course in the search bar. A list of matching courses will appear.
- Select the desired course from the list. The selected course will appear in the “Course Prerequisites” section.
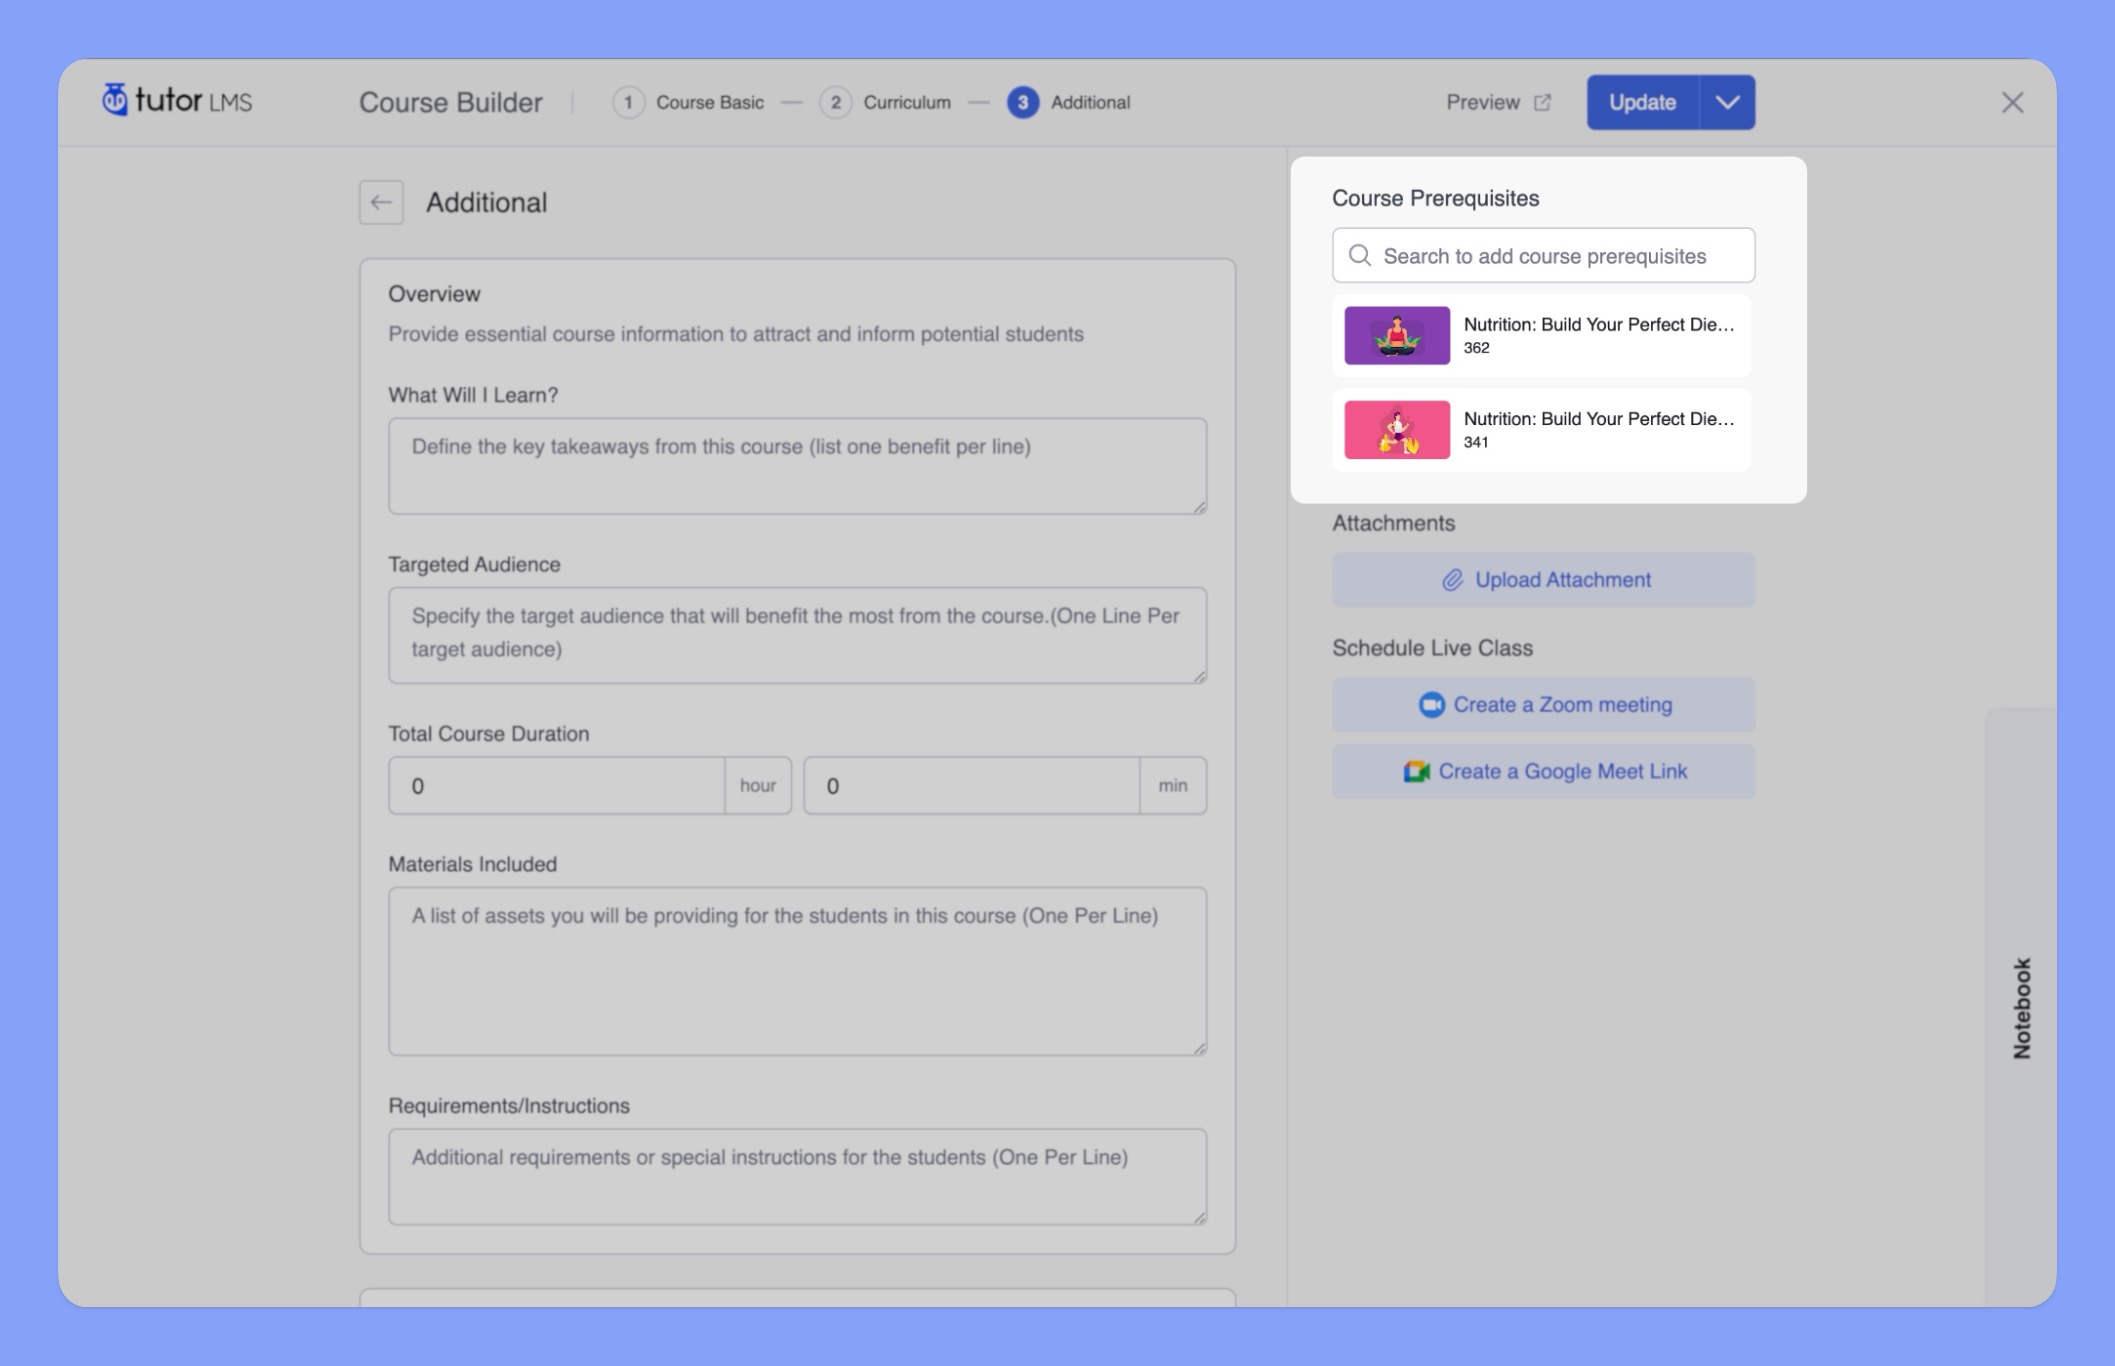
You can add multiple prerequisite courses as needed. Students will need to complete all specified prerequisite courses before they can enroll in the current course.
📝 Note: This feature requires the Course Prerequisites add-on to be enabled. You can activate this add-on in your WordPress dashboard under “Tutor LMS Pro > Add-ons.” For step-by-step instructions on setting prerequisites, refer to our dedicated Course Prerequisites documentation within the Tutor LMS knowledge base.
Attachments
The “Attachments” section allows you to provide students with supplementary files and resources that enhance their learning experience. These files can complement your course content and offer additional support for students.
To upload an attachment:
- Click the “Upload Attachment” button.
- Select the file from your computer that you want to upload.
- The file will appear in the “Attachments” section with its file size and type.
You can upload various types of files, including:
- Documents: PDFs, Word documents, spreadsheets, presentations.
- Images: JPGs, PNGs, GIFs.
- Audio: MP3s, WAVs.
- Video: MP4s, MOVs.
- Archives: ZIP files, RAR files.
You can upload multiple files to provide a comprehensive set of resources for your students.
📝 Note: To use this feature, ensure that the “Course Attachments” add-on is enabled. You can activate this add-on in your WordPress dashboard under “Tutor LMS Pro > Add-ons.” For more information on managing course attachments, consult our dedicated Course Attachments documentation in the Tutor LMS knowledge base.
Schedule Live Classes
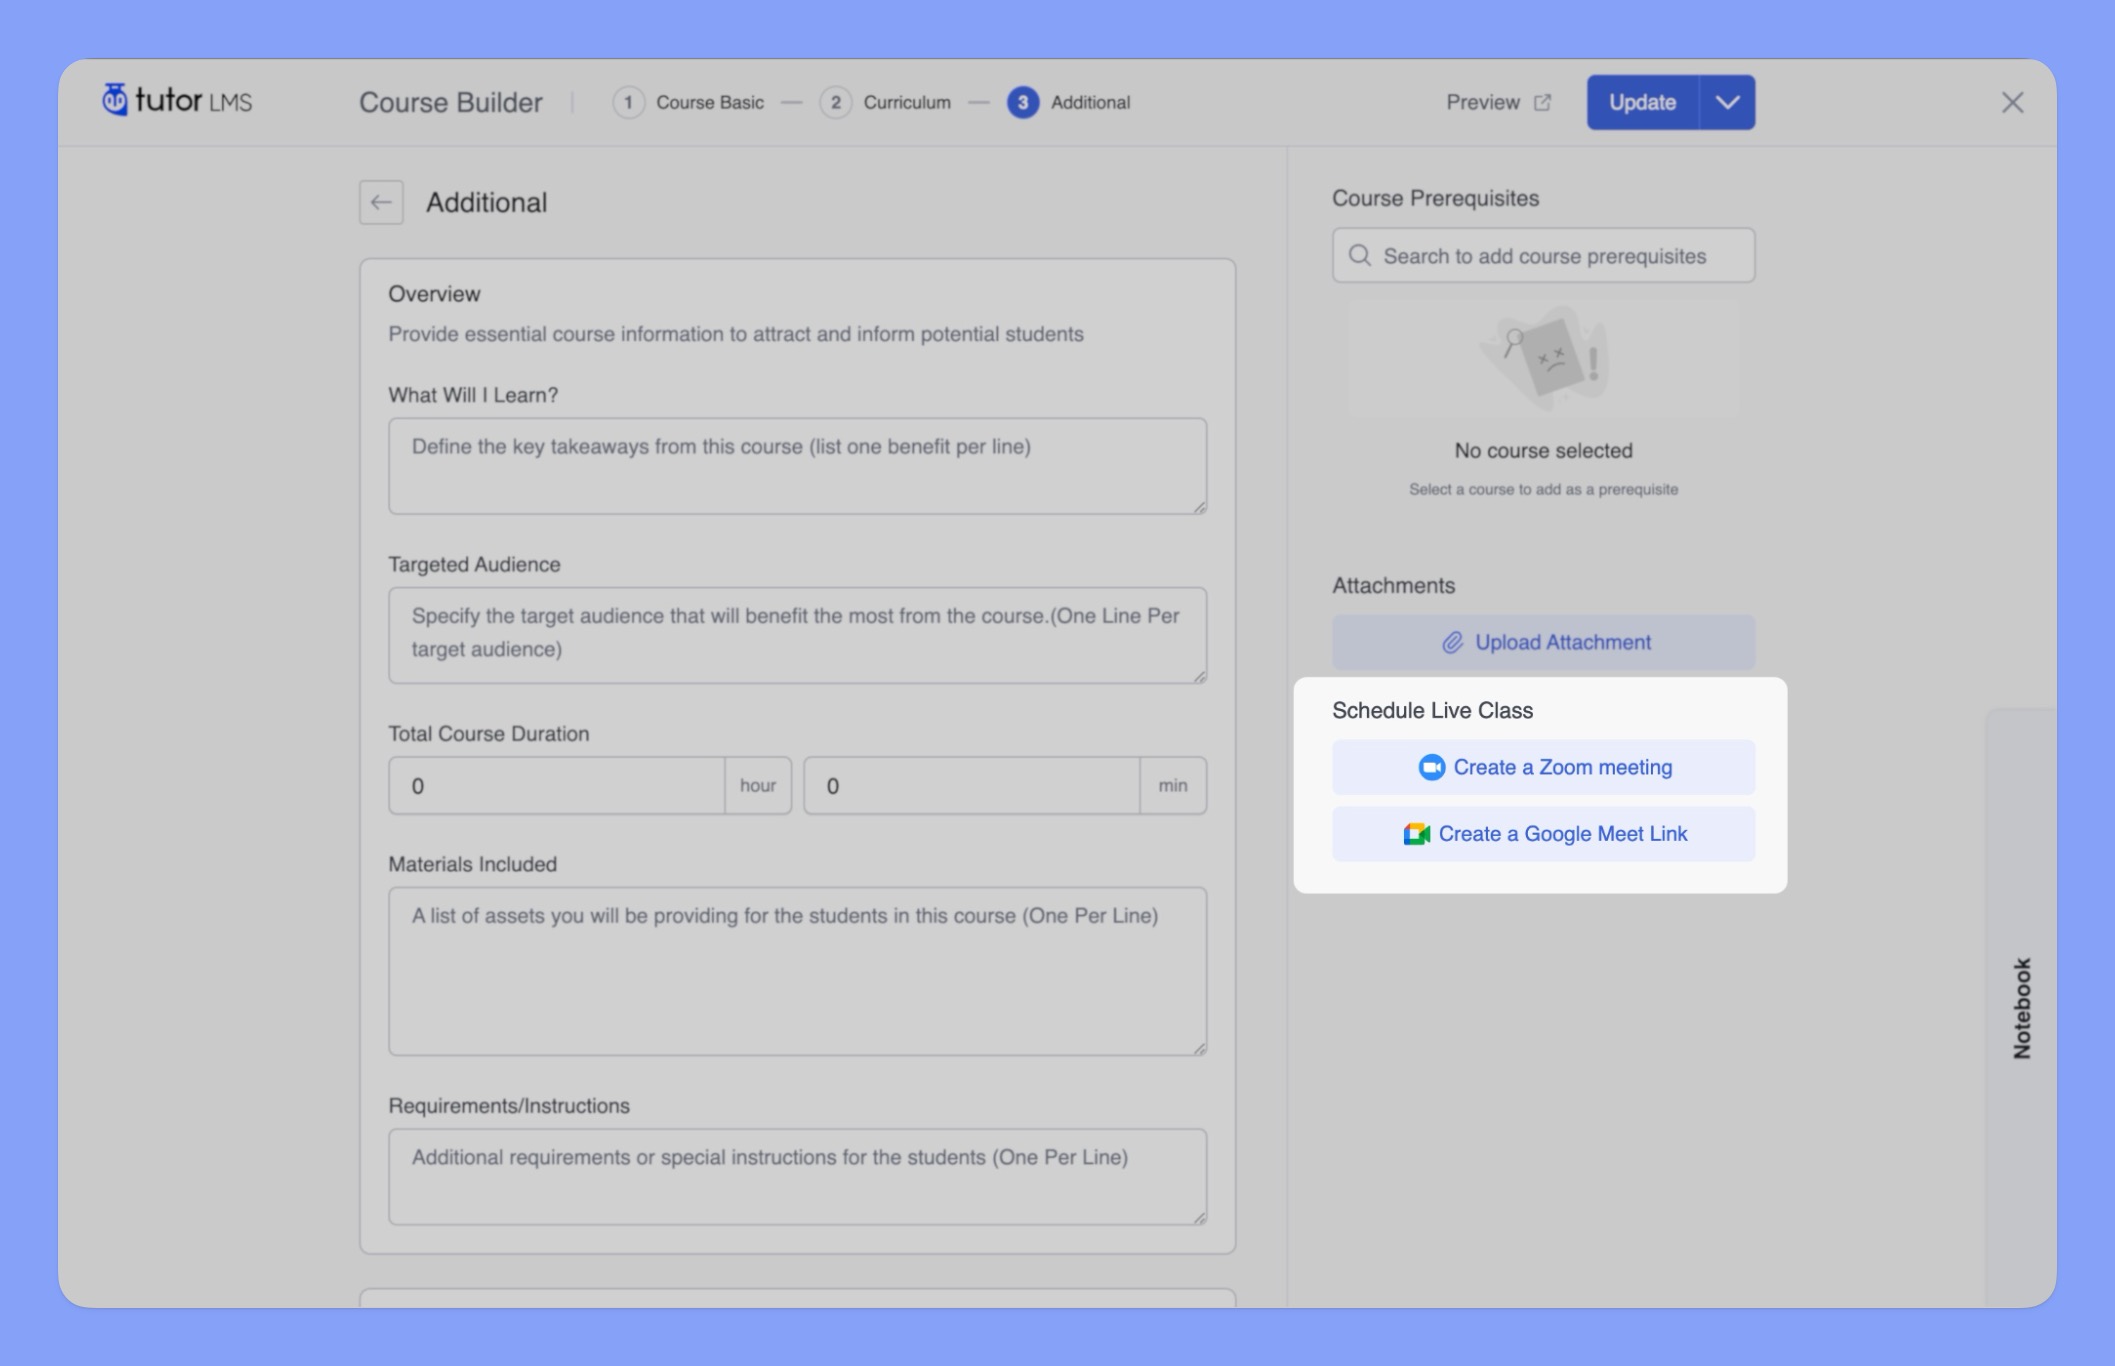
The “Schedule Live Class” section allows you to seamlessly incorporate live online sessions into your Tutor LMS courses.
📝 Note: To utilize this feature, you need to enable either the Google Meet or Zoom add-on. You can activate these add-ons in your WordPress dashboard by navigating to Tutor LMS Pro > Add-ons.
Convenience of In-Course Scheduling
The “Schedule Live Class” section allows you to integrate live classes into your course, directly within the Course Builder. This eliminates the need for external scheduling tools.
Dedicated Integration Guides
For detailed instructions on how to integrate Google Meet and Zoom with Tutor LMS, please refer to the dedicated documentation:
Certificates
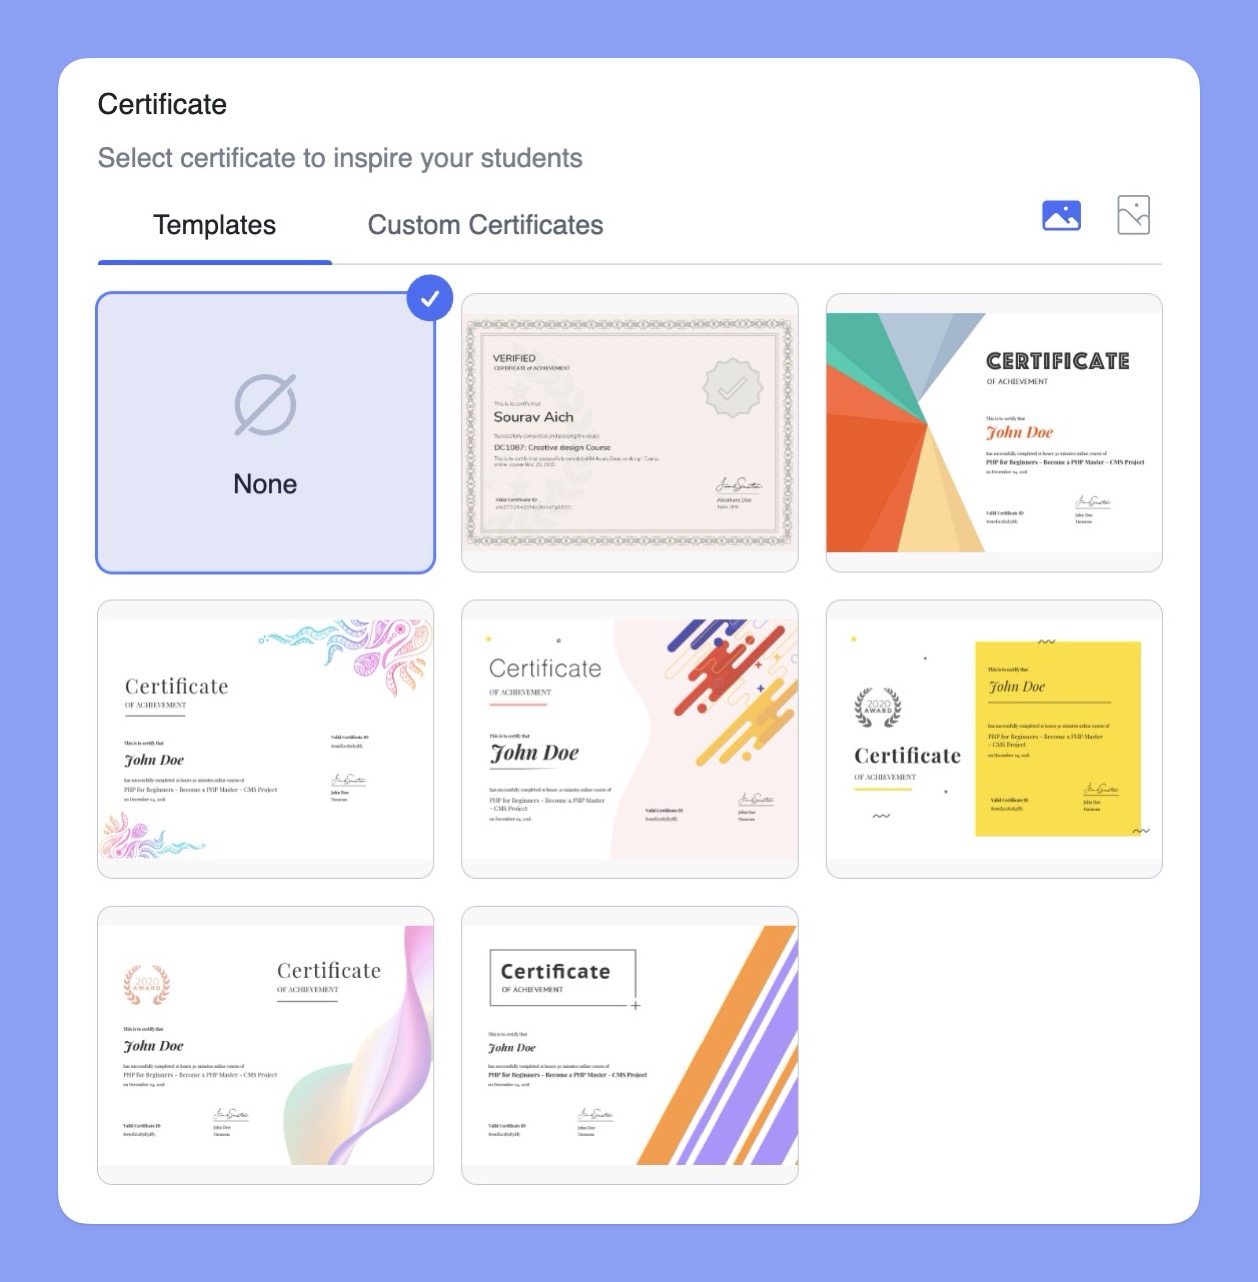
The “Certificate” section allows you to award certificates to students who successfully complete your course. This provides tangible recognition of their achievement and can enhance motivation.
📝 Note: This is a Pro feature that requires the “Certificate” add-on to be enabled. You can activate this add-on in your WordPress dashboard under “Tutor LMS Pro > Add-ons.” For a comprehensive guide to using certificates, explore our dedicated Certificate documentation in the Tutor LMS knowledge base.
Choosing a Certificate Template
Tutor LMS offers a wide selection of professionally designed certificate templates. To choose a template:
- Click on the “Templates” tab. This will display the available templates.
- To see how a certificate template will look, hover your cursor over it and click the “Preview” button.
- Select the template that best suits your course and brand. The selected template will be highlighted with a blue checkmark.
Certificate Layout
You can also choose the layout for your certificate:
- Landscape: A horizontal orientation.
- Portrait: A vertical orientation.
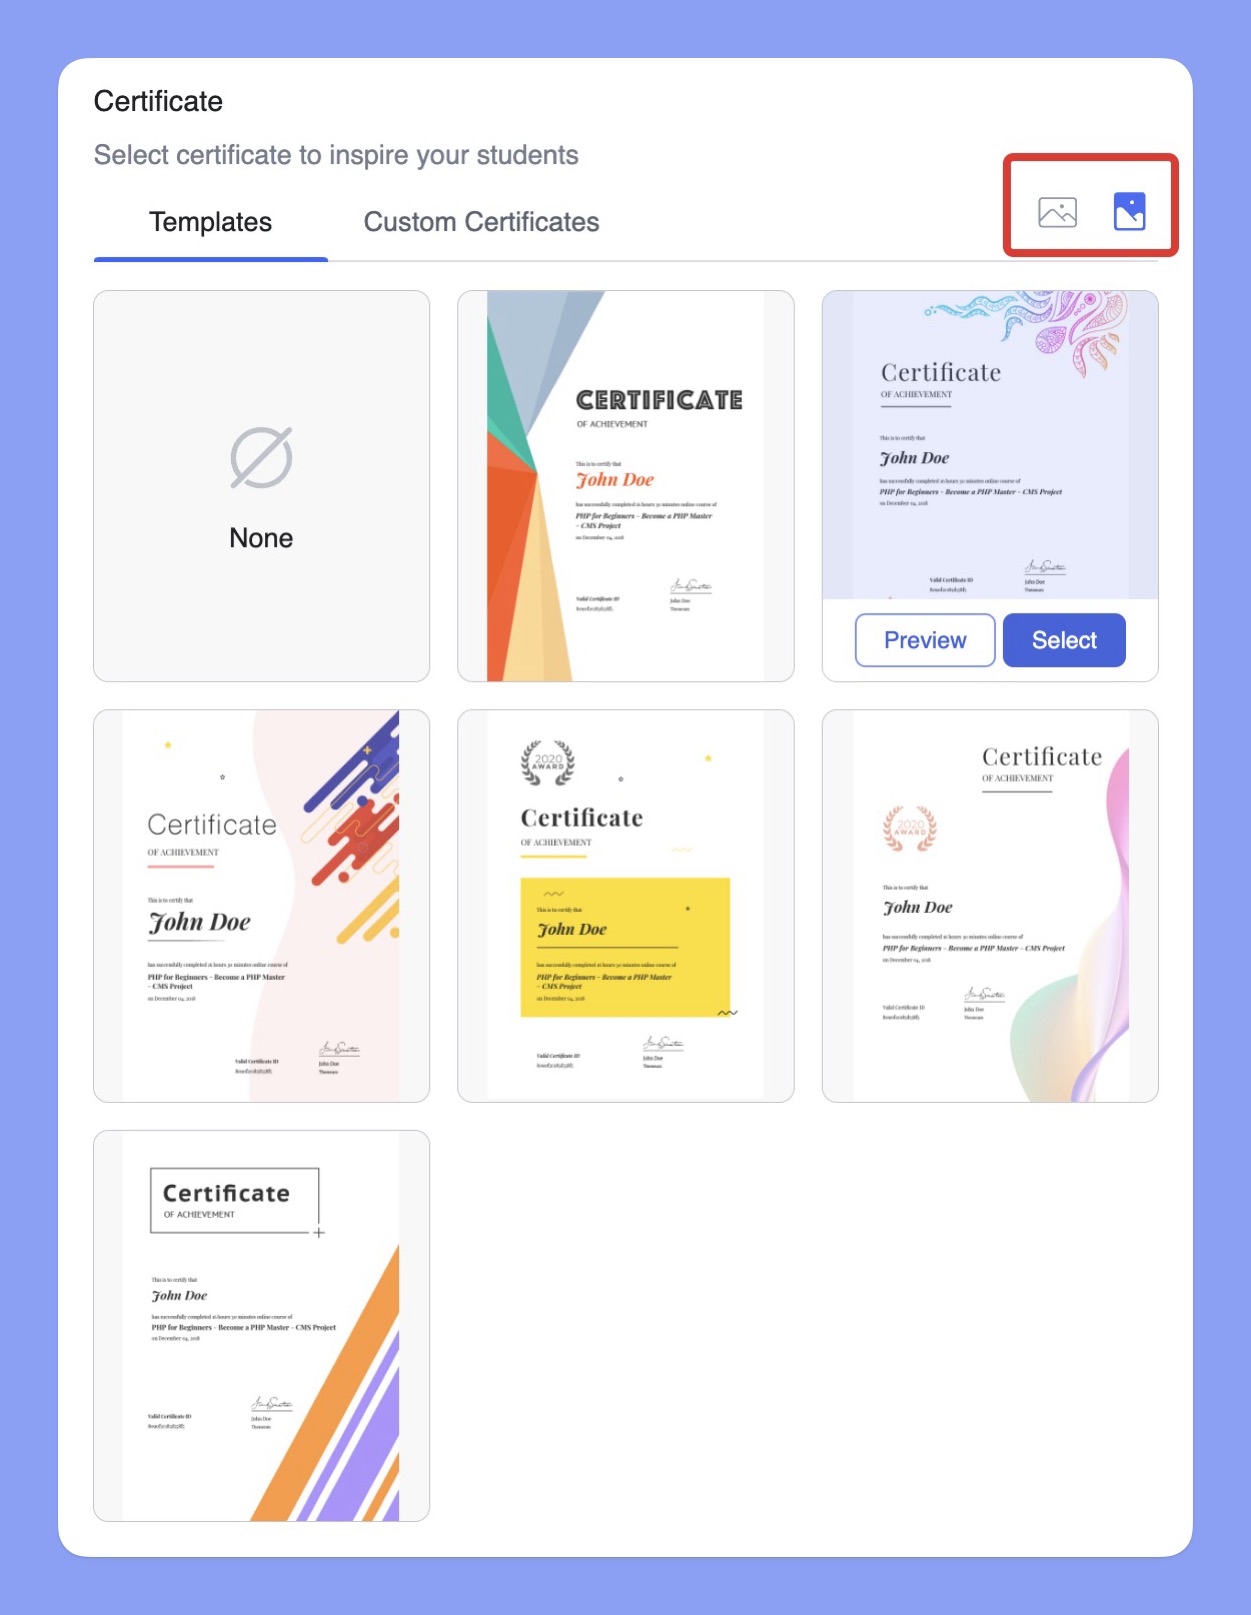
Custom Certificates
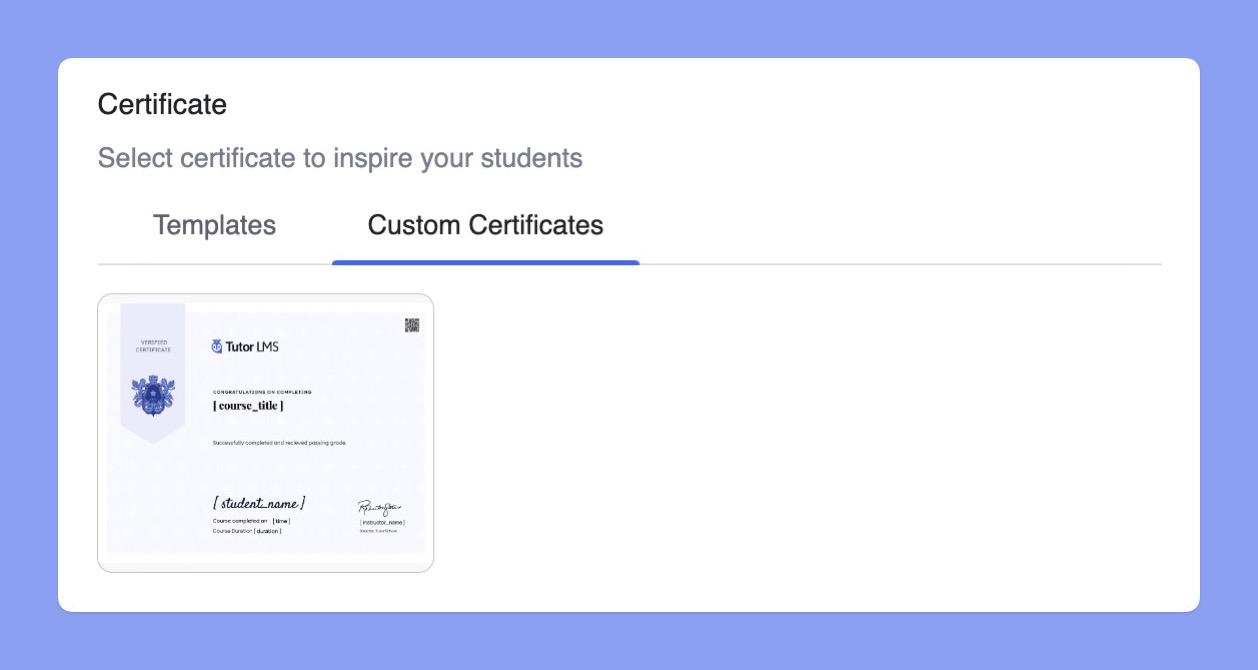
For further customization, you can create a unique certificate that aligns with your brand identity using the Tutor LMS Certificate Builder. This powerful tool gives you full control over the design and content of your certificates.
📝 Note: The Certificate Builder requires a separate plugin to be installed. You can find the installation instructions in our dedicated Certificate Builder documentation.
