Adding the Theme
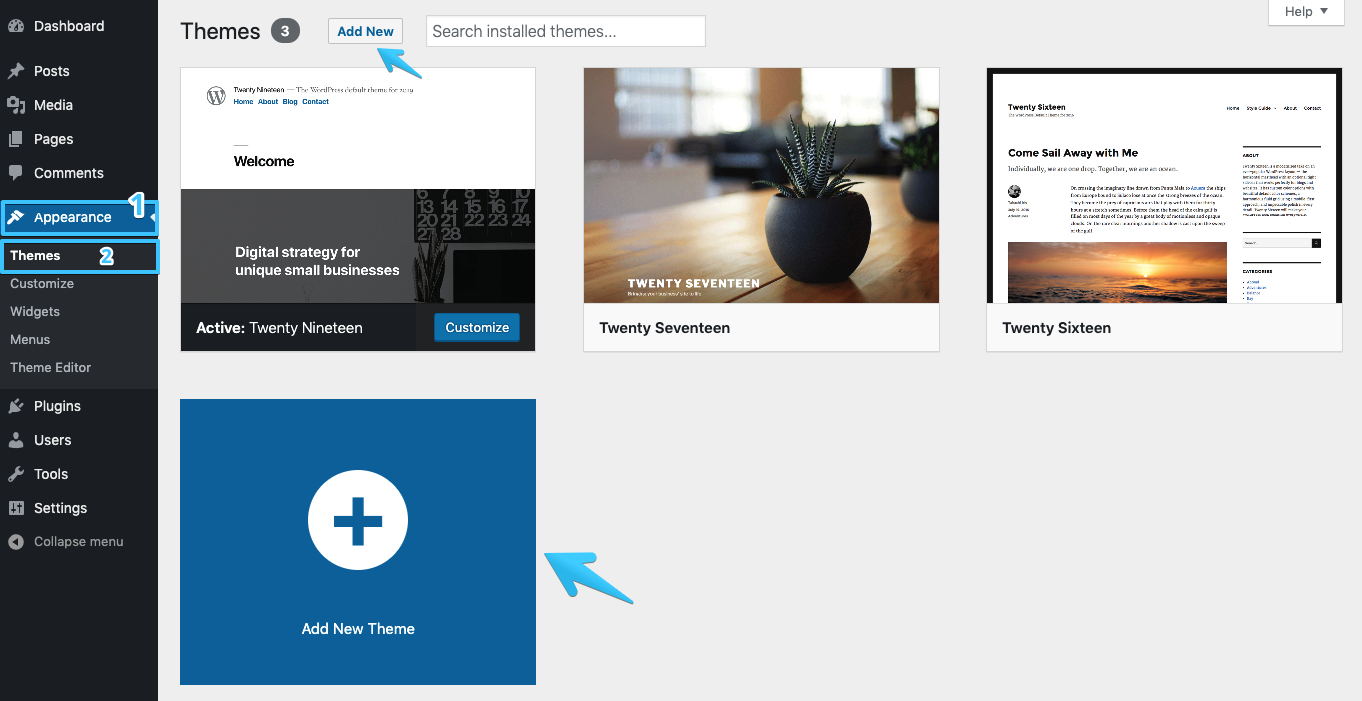
Step 1: Login to your site as an admin user. Then go to Dashboard > Appearance > Themes.
Step 2: click on the Themes under appearance.
Step 3: Then click on Add New button.
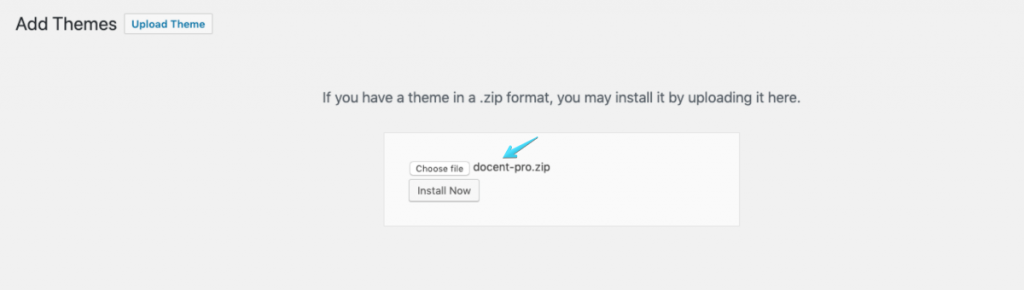
Step 4: Click the Upload Theme link on the next page.

Step 5: Unzip the zip file you just downloaded for Docent theme. Once it is done, you’ll see multiple folders. Then click on the Browse button (shown in the above picture) and choose docent.zip from the Theme Pack folder.
Note: you need to unzip the theme file that you just downloaded from the themeum.com website to uncover all the necessary files.
Step 6: Now click on the Install Now button and wait until the installation is complete.
After successful installation of the theme click on the Activate button and enjoy the theme features. After activating, this theme will be used for the whole site instead of the default WordPress theme.
Adding License
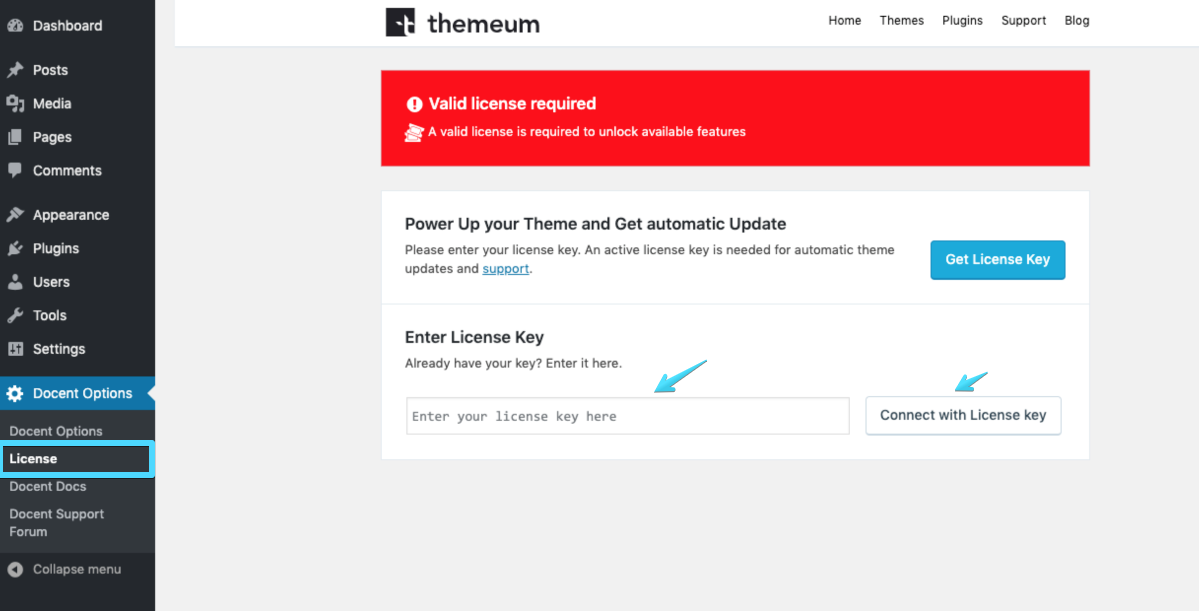
Upon purchasing the theme from Themeum website you were given a license key to use with this theme. Insert the key, go to Dashboard > Docent Options > License.
Essential Plugins and Installation
For using all features of Docent, you need to install and activate all required plugins. All essential plugins are included in the Docent theme. Just after activating the theme, you would see a notification that asks you to install the required plugins for this theme. Click on “Begin installing plugins” and wait until all required plugins are installed.
Essential plugins are the following:
- Tutor LMS
- Docent Pro Core
- Docent Pro Demo Importer
- Qubely – Blocks
- MailChimp
- WooCommerce
You can also install the above essential plugins in 2 easy steps.
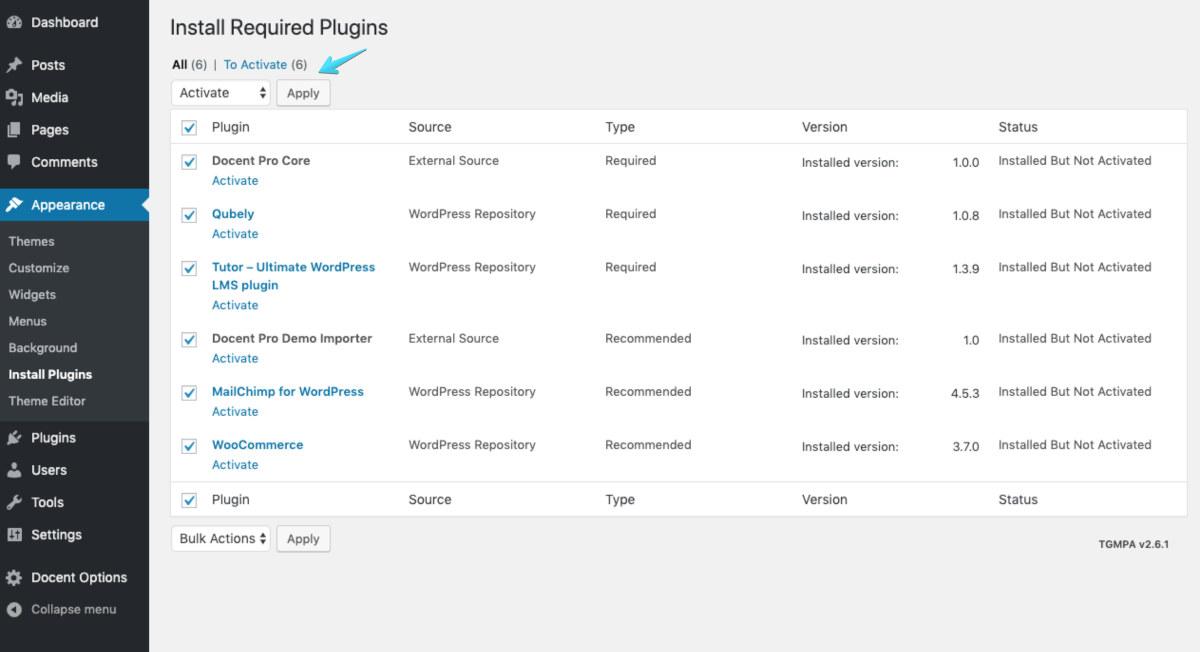
Step 1: Go to Dashboard > Appearance > Install Plugins Menu
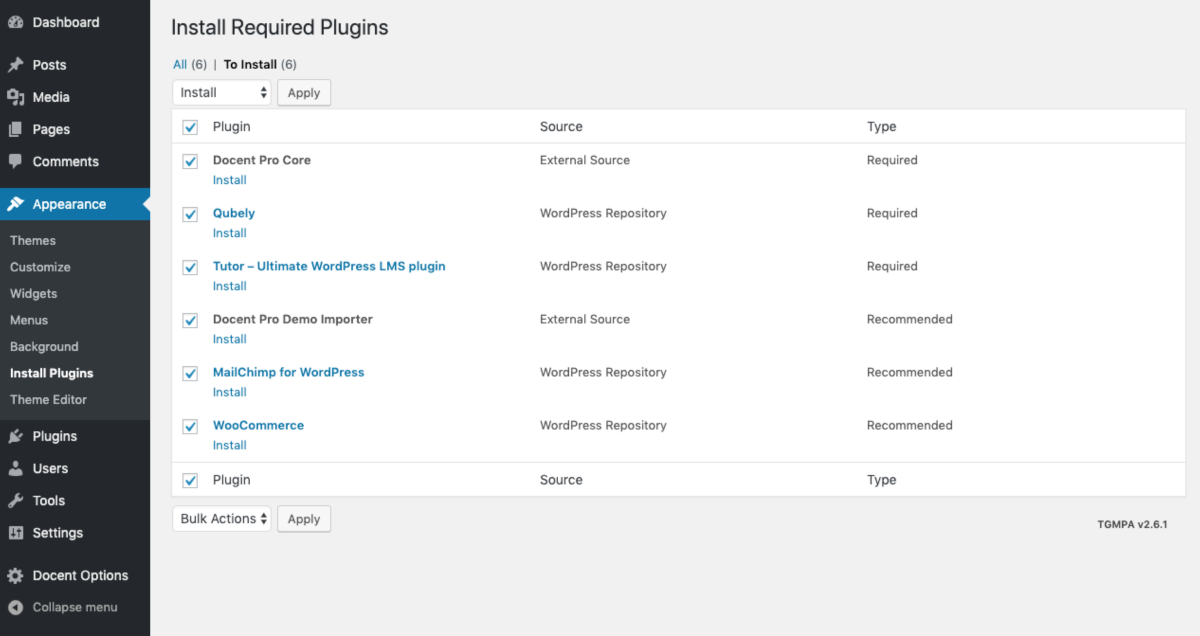
Note: In case any of the plugins fail to install automatically, you can manually install them. The plugin zip files are in the “unzip_first_docent_pro_bundle > Plugin” folder.
Step 2: Then click on the Activate link under each plugin title and enjoy these plugins.
Recommended Plugins
- Docent Pro Core: The Docent Core is a required plugin. It has all the core features and settings of the theme, like the post type, all custom shortcodes, widgets etc.
- Tutor LMS: Docent theme is powered by the highly advanced Tutor LMS plugin, all features related to building an education platform is powered by the plugin.
- Qubely – Blocks: Qubely – Blocks is a necessary and required plugin. It comes with highly customizable Gutenberg blocks, that allows you to create a complete website with a lot of customization options and has over 20 amazing blocks.
- Docent Pro Demo Importer: It is advised to import the demo content to understand the theme functionalities properly. Please note: demo content is there only for demonstration purpose.
- WooCommerce: It is required to use the WooCommerce plugin in order to provide purchase and order management functionality.
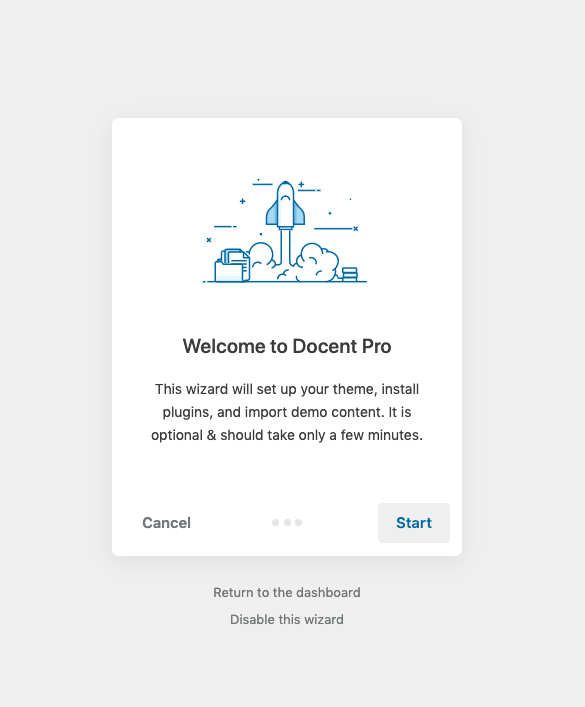
Easy Setup Wizard
Importing data on Docent is very simple. Go to the Dashboard and select Docent Pro Setup from the
wp-admin → Appearance → Docent Pro Setup
You’ll have all the data imported & necessary plugins installed automatically once it’s complete.
Please note: Demo contents are only for experimental purposes. You can just use the demo layout by editing the texts, images, and others.
If you’ve already used the Docent Pro Setup, then you no longer need to import demo manually. In case you don’t like to use the Docent Pro Setup option, then you can follow the next section to import data manually.
Import Demo Manually
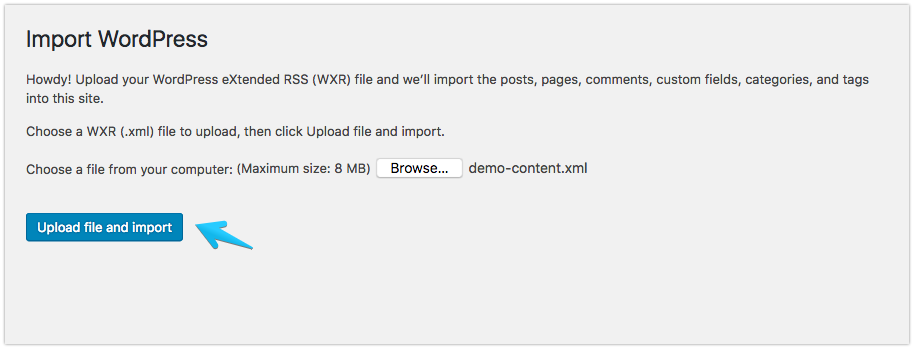
Import Sample Data: If you want to go with the demo data which is available on the theme, then you’d need to import the sample data. To import the sample data manually, first, go to the left sidebar (Dashboard), then choose Tools > Import > WordPress > “Install Now” (from the list), once you’ve clicked “Install Now” you’ll see the button changed to “Run Importer” click on it now. Then you will see the “Import WordPress” option which allows you to upload a .xml file from the Demo Content folder (file name: demo-content.xml) found inside the extracted folder that you get from the download theme package (a zip file).
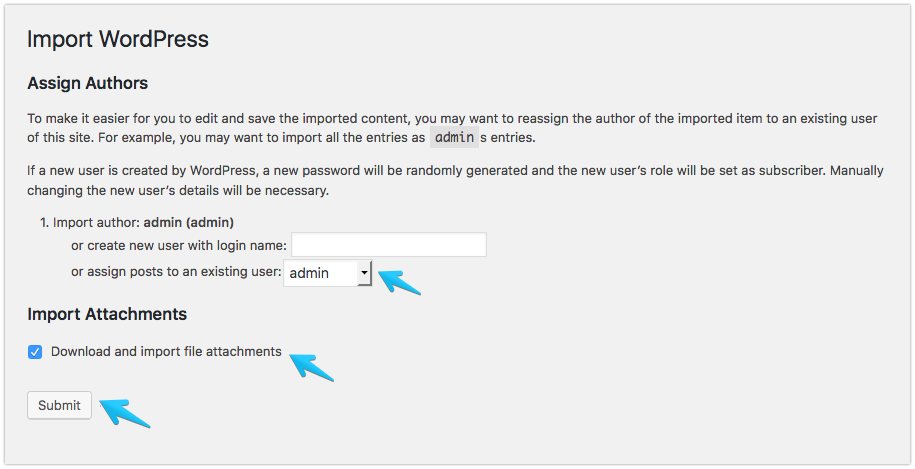
Once you imported the demo-content, you’ll be presented with another screen where you’d need to select the user and checkmark download attachment, then finally click “Submit”. Check out the following screenshot.
N.B: Upon importing demo manually you need to set up the following things.
Menu Settings
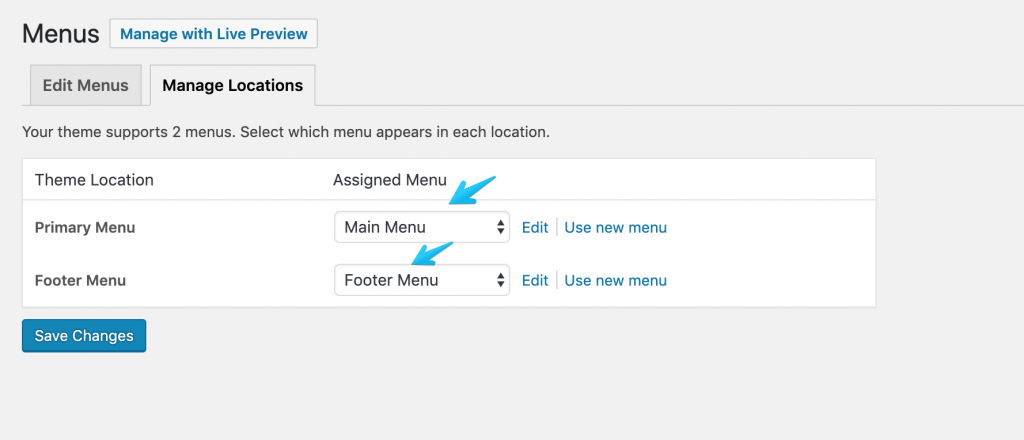
It’s an important part of the Docent theme Installation process. First, you need to set your menu for the Primary Menu location. Go to Dashboard > Appearance > Menus, then click on Manage Locations and select/create your menu for the Primary Menu location. You can follow the below screenshot.
Set Static Home Page (Required)
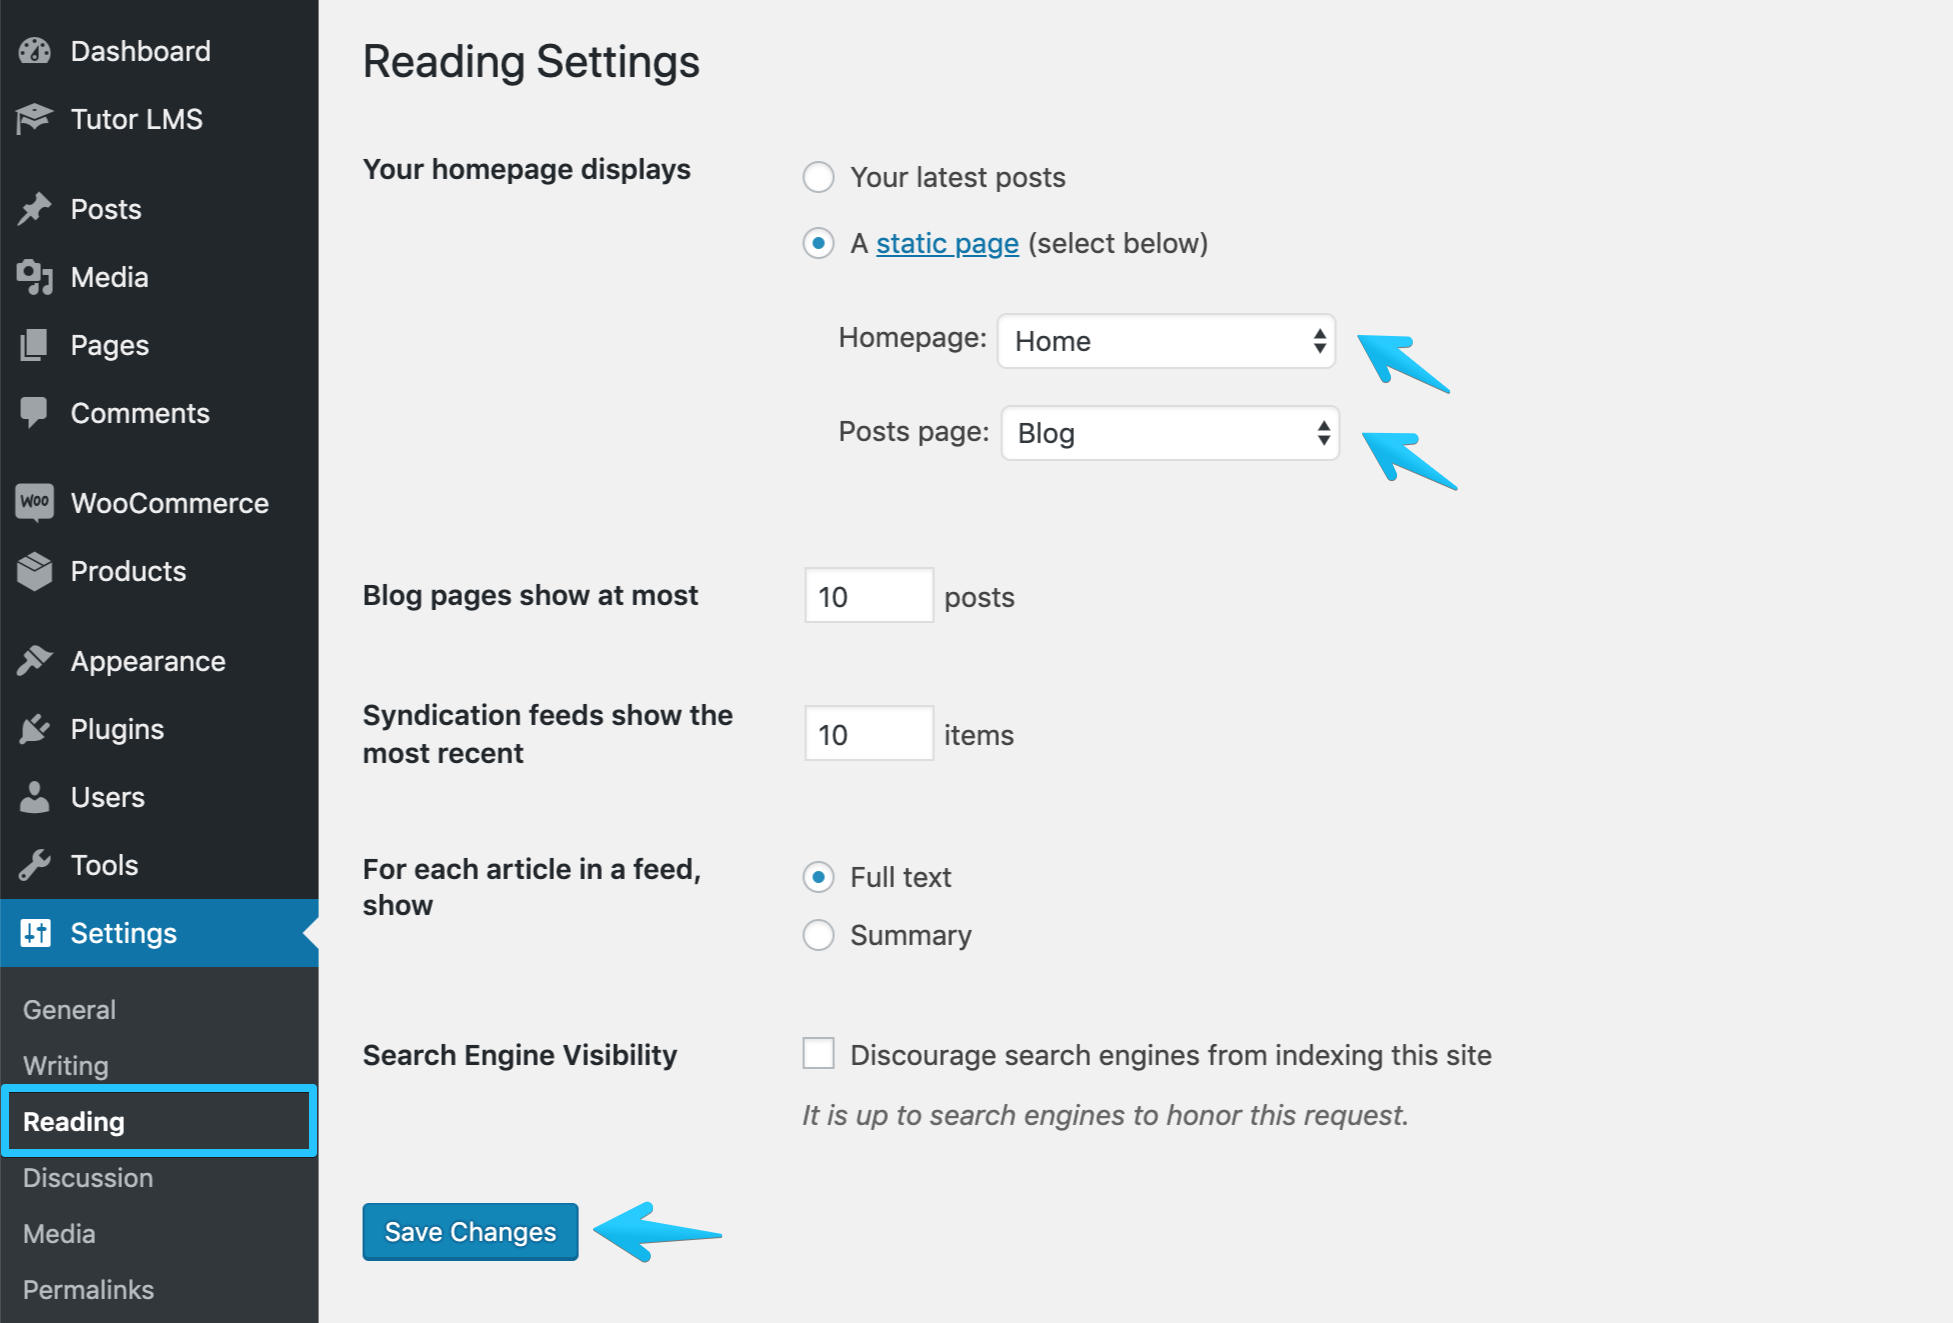
WordPress shows the latest blog posts by default on the front page. If you want to make it look like the demo Docent site, then you need to set a static Home Page. To do so, navigate to Dashboard > Settings > Reading. On that page, choose “A static page” from the “Your homepage displays” section. From the drop-down menu, select the page Home for Homepage and the page Blog for the Posts page.
Setup Permalink (Required)
Make sure to configure the permalink structure. By default, WordPress generates web URLs having question marks and lots of numbers in them; however, WordPress offers you the ability to create a custom URL structure for your permalinks and archives. This can improve the readability, usability, and forward-compatibility of your links.
From WP admin panel go to the following path Settings > Permalink then select “Post name” (or any other depending on your choice) as the permalink structure for your WordPress site.
Widgets Settings Import
Import Widget Setting Data: If you want to use the demo site widget settings on your website, we recommend to install and activate “Widget Settings Importer/Exporter” (found under Tools section) plugin which gives you the ability to import the demo widget settings, saved as a .json or .wie file type. The import will not overwrite any data currently within the sidebars but will increase the number of widgets.
Choose Tools > Widgets Setting Import then select data-widgets.wie file from Widget Data folder (found inside the Docent theme package you’ve downloaded). Then click on “Import Widgets” Button.
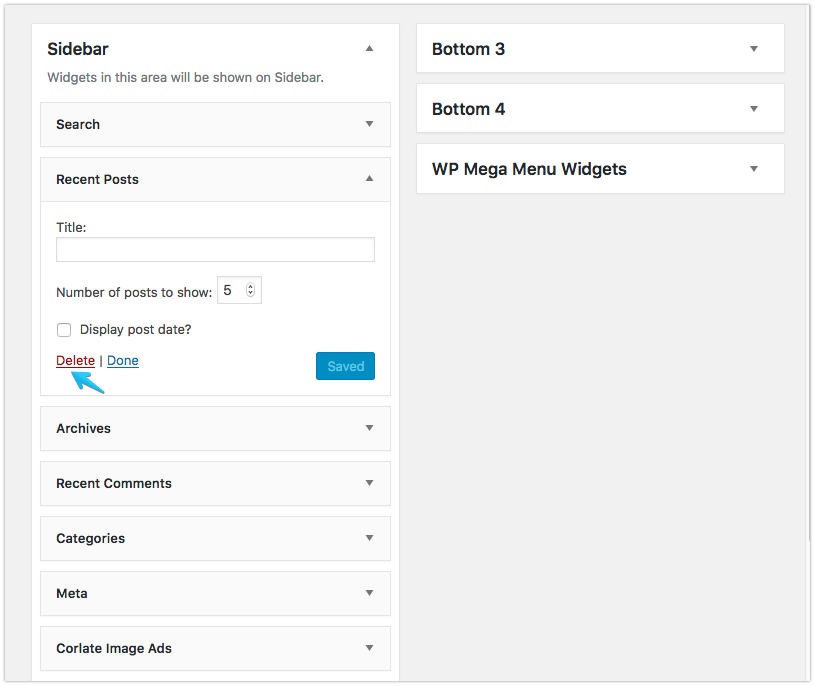
If you want to remove any of the widgets, go to Dashboard > Appearance > Widgets. Select your desired widget and click Delete.
Qubely – Blocks
Since Docent comes with Qubely – Blocks, you’ll see it is showing on the left sidebar. If you want to configure the settings in your own way, you can go to the WordPress Dashboard > Qubely Options. Following is the explanation of all the functions.
Post Type: You need to choose which type of content you will be editing with WP Page Builder. The types you’ll be selecting from here will allow the WP Page Builder to have editing accessibility.
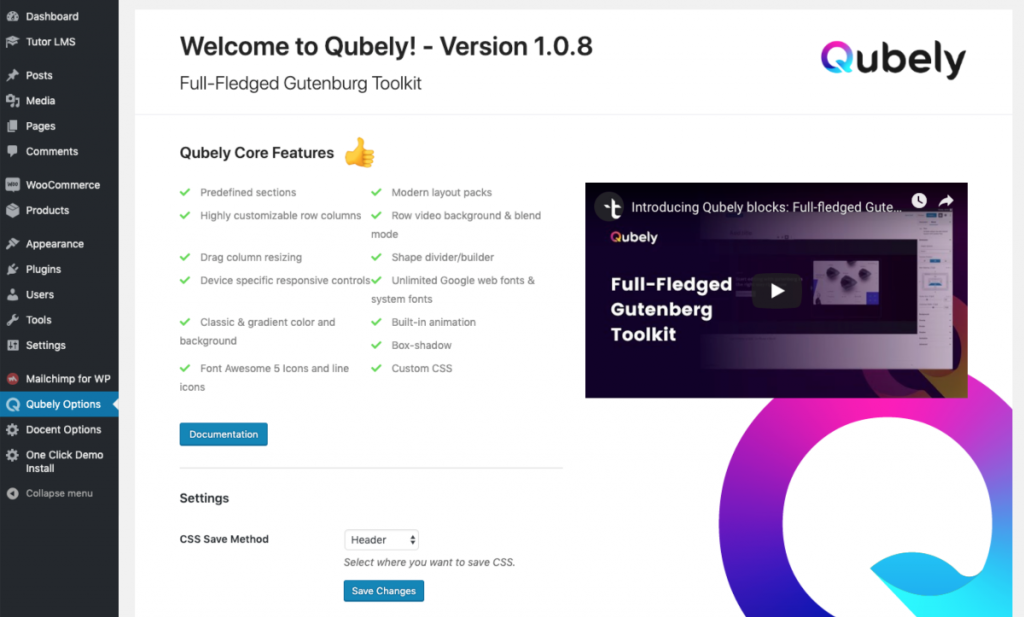
CSS Save Method: Since Qubely is all about design, it will be creating CSS code whenever you make any change. So to define the CSS saving method, go to Dashboard > Qubely Options > CSS Save Method.
- Header: Selecting the Header option will save the CSS code internally in the head tag.
- File System: To save your CSS code in an external style sheet, use this option.
And don’t forget to hit “Save Changes” if you ever made any change to the settings otherwise it will not work.
Please note, Qubely – Blocks is an independent plugin, and more detail regarding this is available on a separate area of documentation.