The free version of WP Crowdfunding includes the core features and functions to use all the features properly. So it is mandatory to download and install the core plugin from WordPress.org. The process of installing WP Crowdfunding is the same as all other WordPress plugins. For a further guideline, chose any of the following methods.
1. Installing the Core Plugin
It’s very easy to install the free version of WP Crowdfunding. The free version is available on the WordPress.org plugins directory. You can install WP Crowdfunding from your WordPress dashboard as well, in order to do that:
- Go to your WordPress Dashboard panel
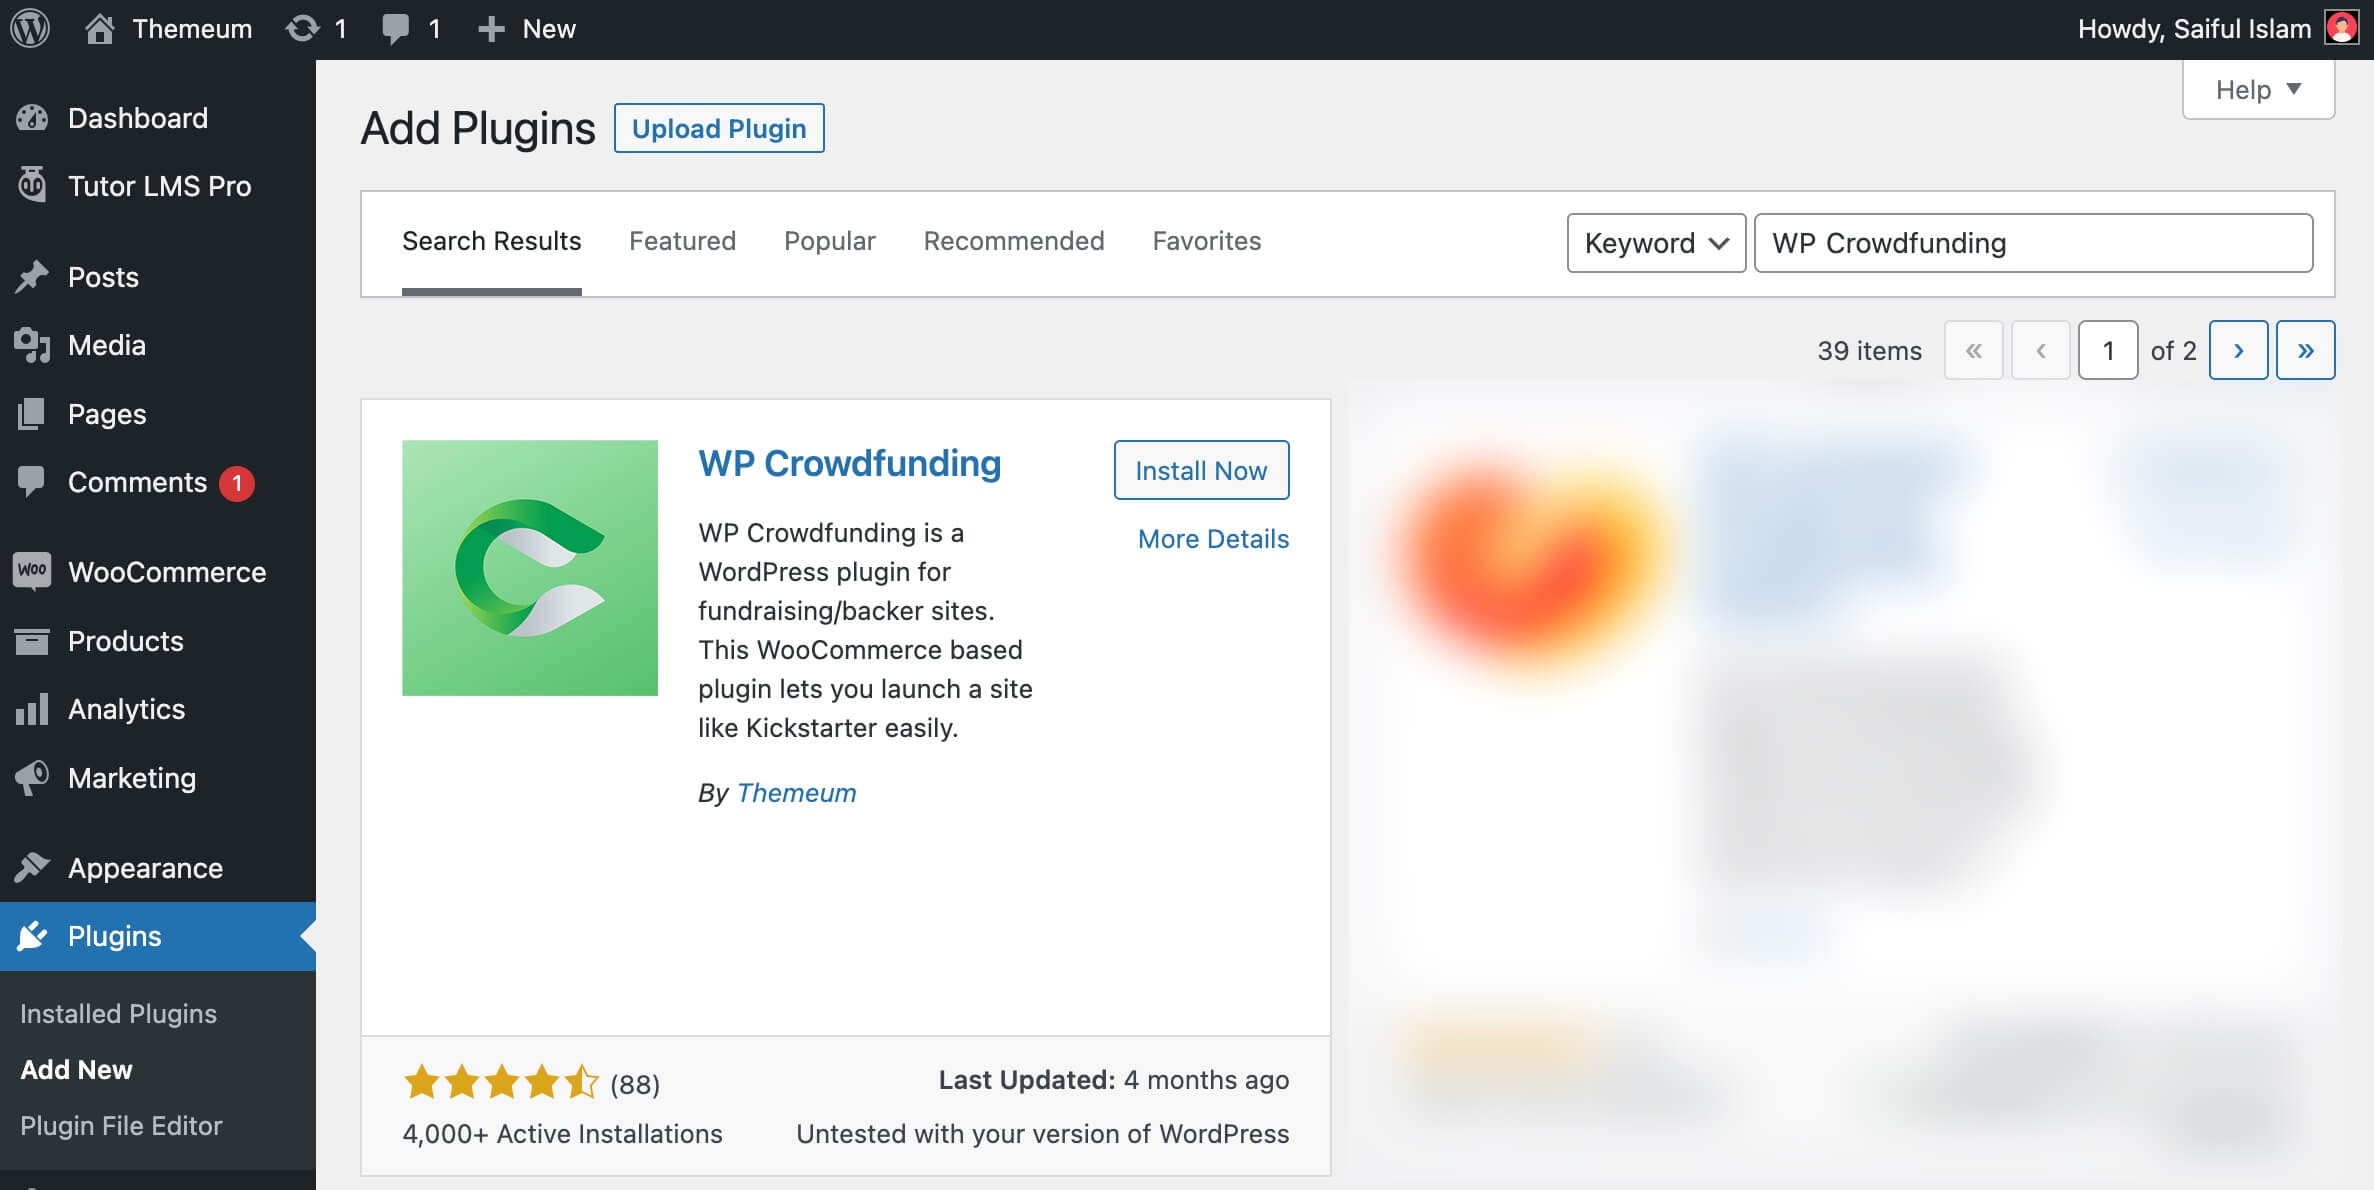
- Navigate to Plugins > Add New and type in “WP Crowdfunding” in the search box
- Find WP Crowdfunding from the list and hit “Install Now“ button.

- Once installed, click on the Activate button to activate the plugin.
After you install and activate WP Crowdfunding, your site dashboard will show a notification to install WooCommerce (if not already installed) for using WP Crowdfunding. Since it’s a WooCommerce-dependent plugin, it is required to have both of them installed on your site.
Go ahead and install WooCommerce. By the way, you need to configure WooCommerce for selling digital products only.
If you have never used WooCommerce plugin before, you can read the official documentation here. There is also a video tutorial about installing WooCommerce. Here it is:
2. Installing the Pro Version
You can purchase the premium version of WP Crowdfunding from the official website. Once you have purchased the product, you can download it from your WP Crowdfunding dashboard. After you have downloaded the compressed file of WP Crowdfunding Pro, follow the steps below-
- Login to your WordPress dashboard
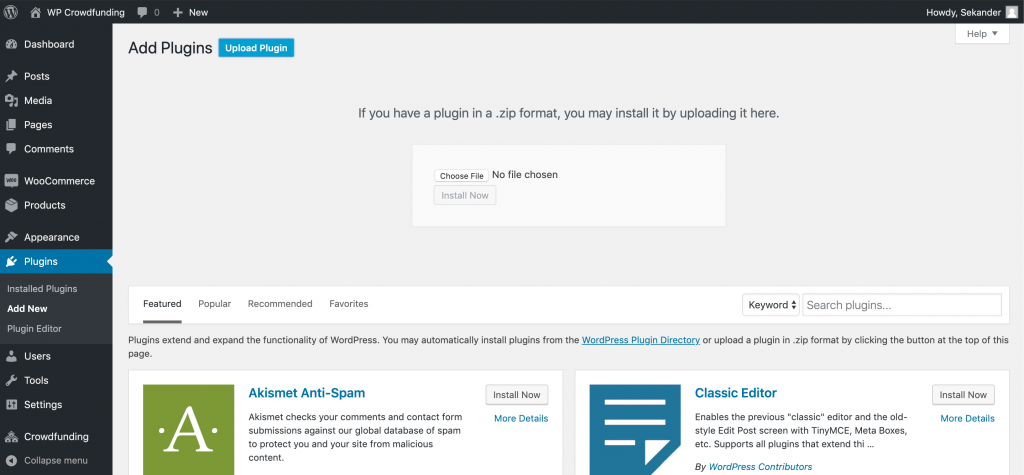
- Navigate to Plugins > Add New Plugin

- On the top, you will see “Upload Plugin” button, click on it.
- Now you’ll get an upload form. Choose the ZIP file from your computer by clicking on “Choose File” or just drag and drop it over the button, then click on “Install Now“.
- After the file is done uploading, click on the “Activate” button.
Congratulations! The installation process is complete!
