Qubely’s Form Builder can be connected to Mailchimp. This integration feature can be used to collect leads and email addresses for newsletter subscriptions and more.
To do so, we have to follow the next few steps, please follow along as it’s a multi-step process which relies on your compliance:
- Sign up at Mailchimp: To use this feature, you must have a verified account at Mailchimp first.
- Create a list. This is a list of all the contacts. Lists are a great way of organizing multiple sources of leads. You can use several lists and connect them to different forms and such. Each form you create on your website will be connected to only one list.
- Create an API key. This key will allow the connection between Qubely forms and the Mailchimp list.
- Add the API key to the WP Admin > Qubely > Settings > MailChimp API Key field.
- After that, you can head to Mailchimp again to change or edit your forms.
- In MailChimp, you can navigate to Audience > Signup Forms > Form Builder to customize your existing form.
- You can add more fields to the existing form to make sure you have what you need and name them correctly.
- After you’re done with that, head over to your WordPress website, and start by adding a Form Builder block.
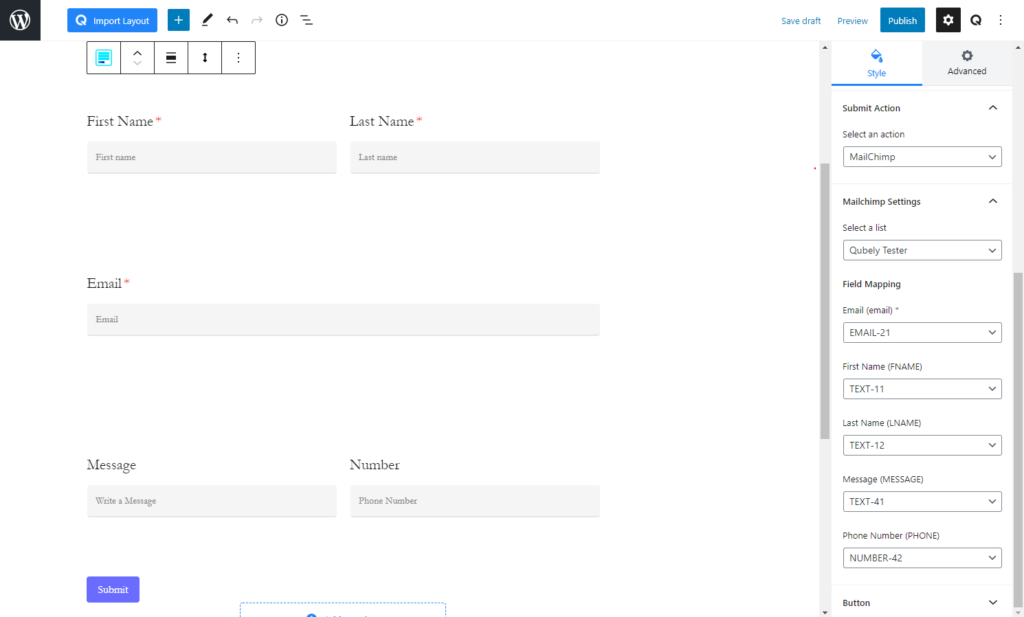
- From the “Submit Action” option in block settings, select MailChimp, MailChimp settings will now appear. From here, you can start field mapping.
- Select the Mailchimp list you want to connect this form to, and all the required fields from that form we created in Step 6 will appear.
- Then make sure you connect each field to the correct one and label them appropriately. For example, email should connect to email, first name to first name, phone number to phone number, and so on. The form builder’s fields are systematically named to give you a clear idea of what they are. They are named in the format (fieldType)-xy where x is the row number and y is the column number. Therefore, if a field is named email-32, then it means the field is an email field on the 3rd row and 2nd column of the form builder. You can also add custom field names by clicking on each field.
- To make sure you have connected the forms, you can double check in the Form Builder page on Step 6. Fields that are unassigned will be marked as “Hidden”
- After that, publish this page or post and you can start testing by submitting data to the form from the frontend. If the data is correctly captured and appears in the MailChimp list, then you have successfully connected your WordPress website to the Mailchimp list. Make sure to test out if the correct data is being saved to the correct column of the list.